Have You Ever Built A Bookcase From Scratch?
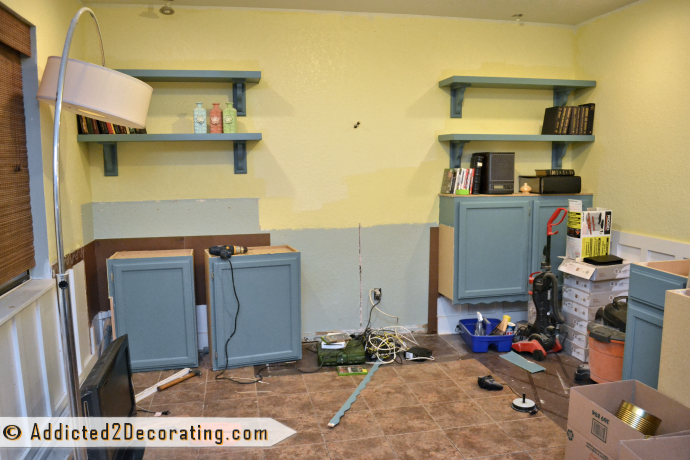
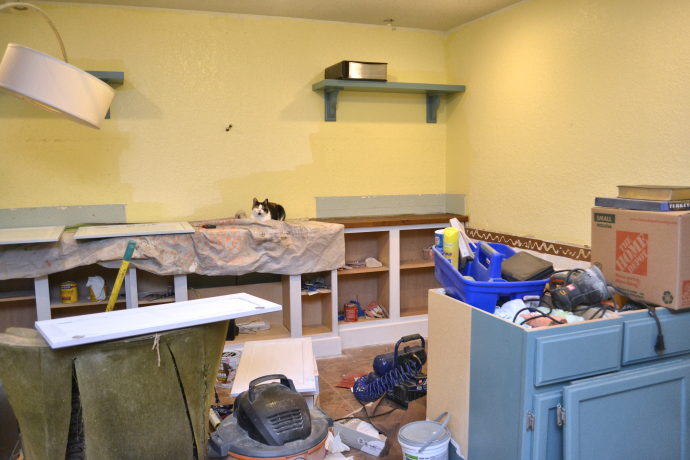
Things are moving right along with my cabinet/bookshelf wall! I don’t have pictures for you yet, because as far as clutter goes, the room has gone from bad to worse. There’s literally just one pathway from the front door to the bookcase wall, with a small area for me to work. (I can’t wait to be in a house and have more room to spread out while working on projects!!!)
So with things going so well with the base cabinets, I’ve started thinking about the bookshelves. The chance of me finding cheap, ready-made bookshelves in just the right dimensions to use as the “base” for my design is…well…exactly zero percent. So I’ll be building those from scratch. I’ve built similar things before, but never a bookshelf per se. While I’m a bit nervous about it, I can’t imagine it being that difficult! But even though I think I know how to do it, it’s still good to see how others have done it.
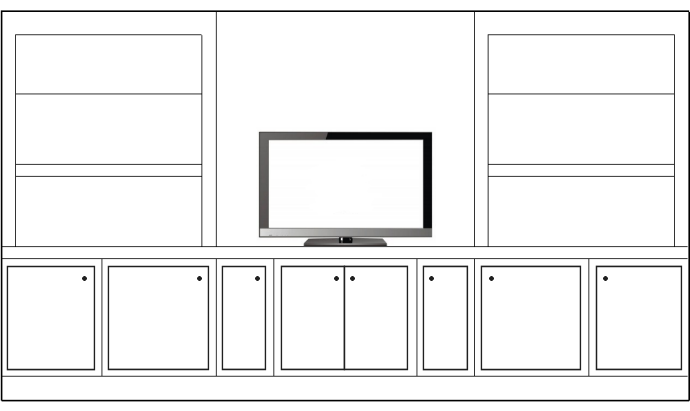
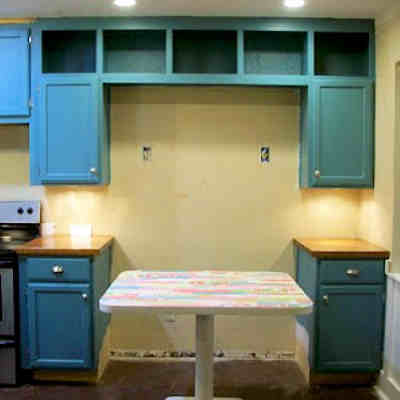
First of all, check out what I found over at Thrifty Decor Chick. This is almost exactly the concept I’m going for (Sarah also used upper stock cabinets as base cabinets), except that mine will have an open area in the middle for a t.v.
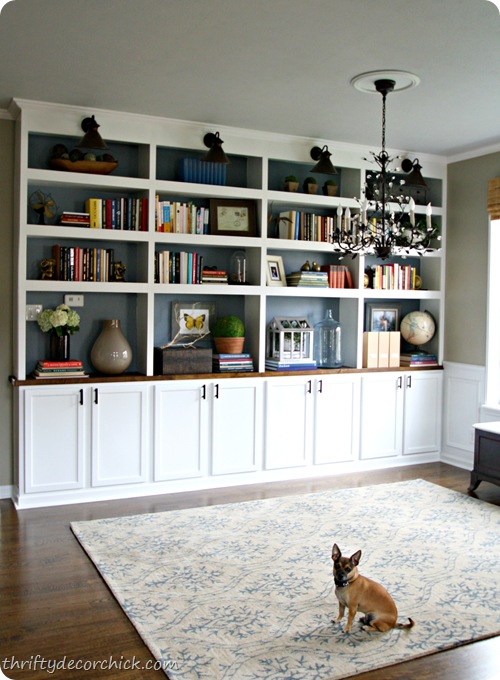
Naturally I was anxious to see how she did it. You can see the basic concept here. I’ve built things using that method before (one large box, with small strips of wood attached as shelf support), but I think I’m going to go a different route this time.
The concept I have in mind is more like building a series of individual boxes, and then stacking them and trimming them out. I know that I’ve seen people use this method before, but after searching and searching, I couldn’t find a simple, straightforward tutorial on how to build bookcases like that.
The closest I found was Sandra’s master executive closet. If you watch the video, you’ll see that at one point on the left side of the closet, she lifts and stacks a separate box on top of the big lower box.
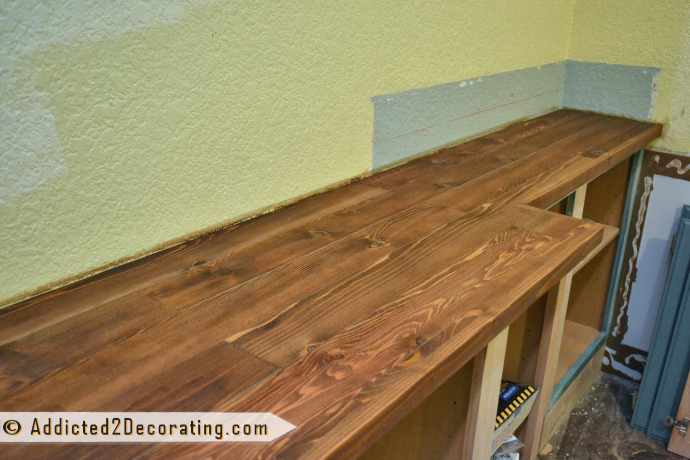
One reason for going with the individual box method is that I’ll be building the bookcases out of MDF (it’s cheaper than cabinet-grade plywood, and smoother for painting), and MDF is heavy!! And since I work on my projects by myself, I really don’t think I could lift a big, heavy, bulky MDF bookcase almost 40 inches off the ground all by myself. So I’ll need to build and stack in sections instead.
I really think it’ll work, but it just seems strange that I couldn’t find any tutorials on using that method. Is there some reason (that’s not apparent to me) that it won’t work? If you’ve built a bookcase that way, I’d love to know your thoughts!

Addicted 2 Decorating is where I share my DIY and decorating journey as I remodel and decorate the 1948 fixer upper that my husband, Matt, and I bought in 2013. Matt has M.S. and is unable to do physical work, so I do the majority of the work on the house by myself. You can learn more about me here.
Hey Kristi, I just built a couple of bookcases, a “fireplace” was added in between them. The ones Sarah built were a good inspiration for me. I didn’t use base cabinets, simple 12″ lengths of plywood. I had lots of rookie mistakes but heck, they were done and I’m happy with the end result! Here is the link for the reveal.
We are eventually going to build a wall of cabinets/bookshelves along the far wall in our nursery. But that’s still a ways away. Kelly has the plans/ideas for how to do it, so I couldn’t give you any advice!
Oh.Em.Gee. That closet!!!!!!! The only thing I can think of regarding building boxes and stacking them (if I understand you correctly) is that you will have to do lots of wood filler and caulk on the open sides where the television will go to cover the seams….if you mean build a small box, stack one on top so that the top of the first box is the shelf for the next level? I’m sort of a visual person so I can’t quite envision what you mean… 😉
Isn’t that closet amazing?!
I do think you’re understanding my vision. And I have been thinking of what to do with the side seams. I’ve come up with two different options. First, I could trim it out similar to how Kevin and Layla did the guest bathroom in their old house: http://theletteredcottage.net/bath-reno/ And of course, the trim cover the seams.
The second option would be to purchase that really thin plywood that they sell in the stock cabinet section of Home Depot that is made to cover the particle board sides of stock cabinets. That way, from the outside, it would just look like one solid bookcase.
I’m not sure which one I’m leaning towards though.
Family Handyman had a feature on a closet system that used individual boxes stacked and fastened together that might be an inspiration for what you have in mind, although it was made of plywood: http://www.familyhandyman.com/DIY-Projects/Home-Organization/Closet-Organizers/organization–the-closet/View-All
Yes! That’s almost exactly the process that I’m thinking! But I’d like mine to have a solid backing, rather than just a slat at the top and a slat at the bottom. And of course, mine would be stacked one directly on top of the other, and then the front trimmed out so that it looks like one piece, rather than several individual boxes.
Thank you!! I searched and searched and couldn’t find anything like that!!
Kristi, I don’t know the width or height of the cabinets you want, but I found stock bookcases at Walmart and Big Lots for about $15. The dimensions are 29″ Wide, 31″ high and 12″ deep, with two adjustable shelves. The have a cheap back, but you could put a thin sheet of plywood on the wall and attach the bookcase to it. They come in white and black (the white ones wouldn’t have to be painted?). They are not MDF, but a sturdy substance. There is a kick plate at the bottom, but of course they are not trimmed out. Once you trim them out they would probably look great. I use them in my office. Easy Peasy! However you do it, it’ll turn out great, I’m sure!
Hey Kristi! You totally got this one girl! Can’t wait to see the awesomeness! Ana
I know I’ve seen them build bookcases on HGTV several times using the box method. Maybe if you go to their website and type in what you’re looking for they will have directinos/tutorial for you. Good luck!
My husband has built them and does a great job. It’s all very mysterious to me, but I love the results!
fFound this on Pinterest, using ready-made Ikea bookcases; perhaps you could use some of these techniques: http://www.centsationalgirl.com/2011/11/from-billys-to-built-ins/
If I didn’t need a very specific, non-standard size, I’d definitely go with store-bought bookcases. But there’s no way I’ll find the exact size I need…unfortunately.
A bookcase is a box with shelves installed. Do you want- fixed or adjustable shelves?
Fixed shelves are simpler but you must make sure the shelves are the right height for your books or display items. The Kreg jig makes the work go quickly. Their website should have plans for a simple bookshelf.
Adjustable shelves can be made with shelf pegs and a series of holes drilled in the sides or with metal shelf standards. They are metal strips that are inserted into routed slots on the sides. They require small metal clips that lock into the slots to hold the shelves in place. You can find the pegs and standards at most Home Depots or Lowes.
Also, remember that the shelves should not be longer than 30 inches to prevent the shelf from sagging.
I bought 8 bookcases 11 years ago from Shelving Exchange. They are 37 inches wide and 46-1/2 inches tall. They look like the regular heavy heavy duty steel library cases. You can adjust the shelves to the height you desire. The reason I went steel was that my house flooded and my bookcases messed up/ These are taupe color and cost me $35 each. They are bolted to the wall. They don’t sag,warp,or fall down. They are perfect.
Forget the Kreg jig for your boxes…get SPAX Screws (same one Sandra from Sawdustgirl uses)!! http://www.spax.us/
No pre drilling makes the job go fast!! I have used them and they are amazing! Home Depot carries them. By the way MDF weights a ton. You may want to check out Ikea Billy Bookcases and make up the difference with trim. I priced out making from scratch vs Ikea Billy’s and Ikea won hands down!
Thanks for the tip about the screws!
I can assure you, there’s no way I’d find a ready made bookcase with the exact measurements I need. I wish! 🙂 Sure would be easier!
For your book cases check out ana white. She may have just the plan your looking for. Whatever you do kristi I’m sure will be great! Your pretty creative.
My husband and I built a bookcase/media cabinet back around Christmas http://decoratordust.blogspot.com/2013/01/so-ive-started-off-new-year-with-some.
We built from scratch, but I love the idea of taking builder grade cabinets and customizing them to your needs. We modified plans from Anna White for our cabinet, but it really meets our needs! We’ve got a end table done with leftovers, and plan on doing a coffee table this summer (several other projects in front of the coffee table!) 🙂 I’m trying to do pieces that will work well in any home, as we’ll be buying next year.
I think a need to look for a home where I can copy that closet, lol!!!
Love your ideas and work! I think many years ago there was a book about building furniture out of plywood (pre MDF days). It had a bunch of what they called- custom designed to fit your space- boxed storage areas. Look in the dinosaur aged books at the library or maybe a used book store. I sympathize , seems we need a table saw, router, plainer, 2 men and several boys, etc to do anything these days. Oh, (and from my experience) when you get a bigger space, some how we spread stuff out enough, we still only have a path when working. lol. Best of luck
Have you considered building them the “regular” way and then hiring someone(s) to help you put them in place? Your condo complex is near the Baylor campus isn’t it? Gotta be someone in your complex or on campus who could help. Surely if you feed them (takeout) they will come. 😉 Hey, it’s a thought.
I am late getting to the news this morning. I know you are near Waco. Did you suffer any damage from the fertilizer plant explosion? We are anxious to hear from you.
Wow, I am just in love with that closet – I guess that means I am going to be the most annoying wife ever by showing it to my hubs again and again 😉
Sounds like what you’re planning is very close to what we built in our tiny 525 sq ft beach condo. We used upper kitchen cabinets as the base and then built up from there. One challenge that we faced was that the wall we built our bookcases on held a 6′ long baseboard heater which could not be relocated. We solved that problem by adding a mesh vent that allows the heat to escape. If you’re interested, you can see the post here: http://worthingcourt.blogspot.com/2012/06/new-bookcases-are-finished.html
(Hope your comment form allows links!)
After looking at a few of the blog posts on your blog,
I truly appreciate your technique of blogging.
I added it to my bookmark website list and will be checking back soon. Please visit my web
site as well and tell me what you think.