I Actually Bought My Studio Cabinets! (Here’s What I Bought, And Here’s The Plan)
I finally made the purchase. I actually clicked the button, made the payment, and completed the order. The cabinets for my studio will be delivered on April 19th. Eeeeekkk!! I’m so excited to finally have that done!
I’ve been putting this off for so long because I just couldn’t seem to make up my mind on exactly what I wanted. I had pretty much set my mind on having white cabinets, but I just couldn’t make that final commitment. I felt like I was settling. I started really paying attention as I’d scroll Instagram, and it became obvious that cabinets that are painted a color always make me stop and look. But I scroll right past white cabinets. I just simply have no interest in them. They may be practical, but they’re just not me.
So I was having a really hard time with the fact that this is my studio, and yet, I was trying to make myself get excited about white cabinets. This is the one room in the entire house that’s all mine. Matt literally has no say (and wants no say) in what I do in my studio. In the rest of the house, I have color. Lots of color. I have teal kitchen cabinets. I have a coral-orange bathroom vanity (that will eventually be more pink than coral). And yet, for my own space, the one space that I don’t have to share with Matt, I was planning to use white cabinets?
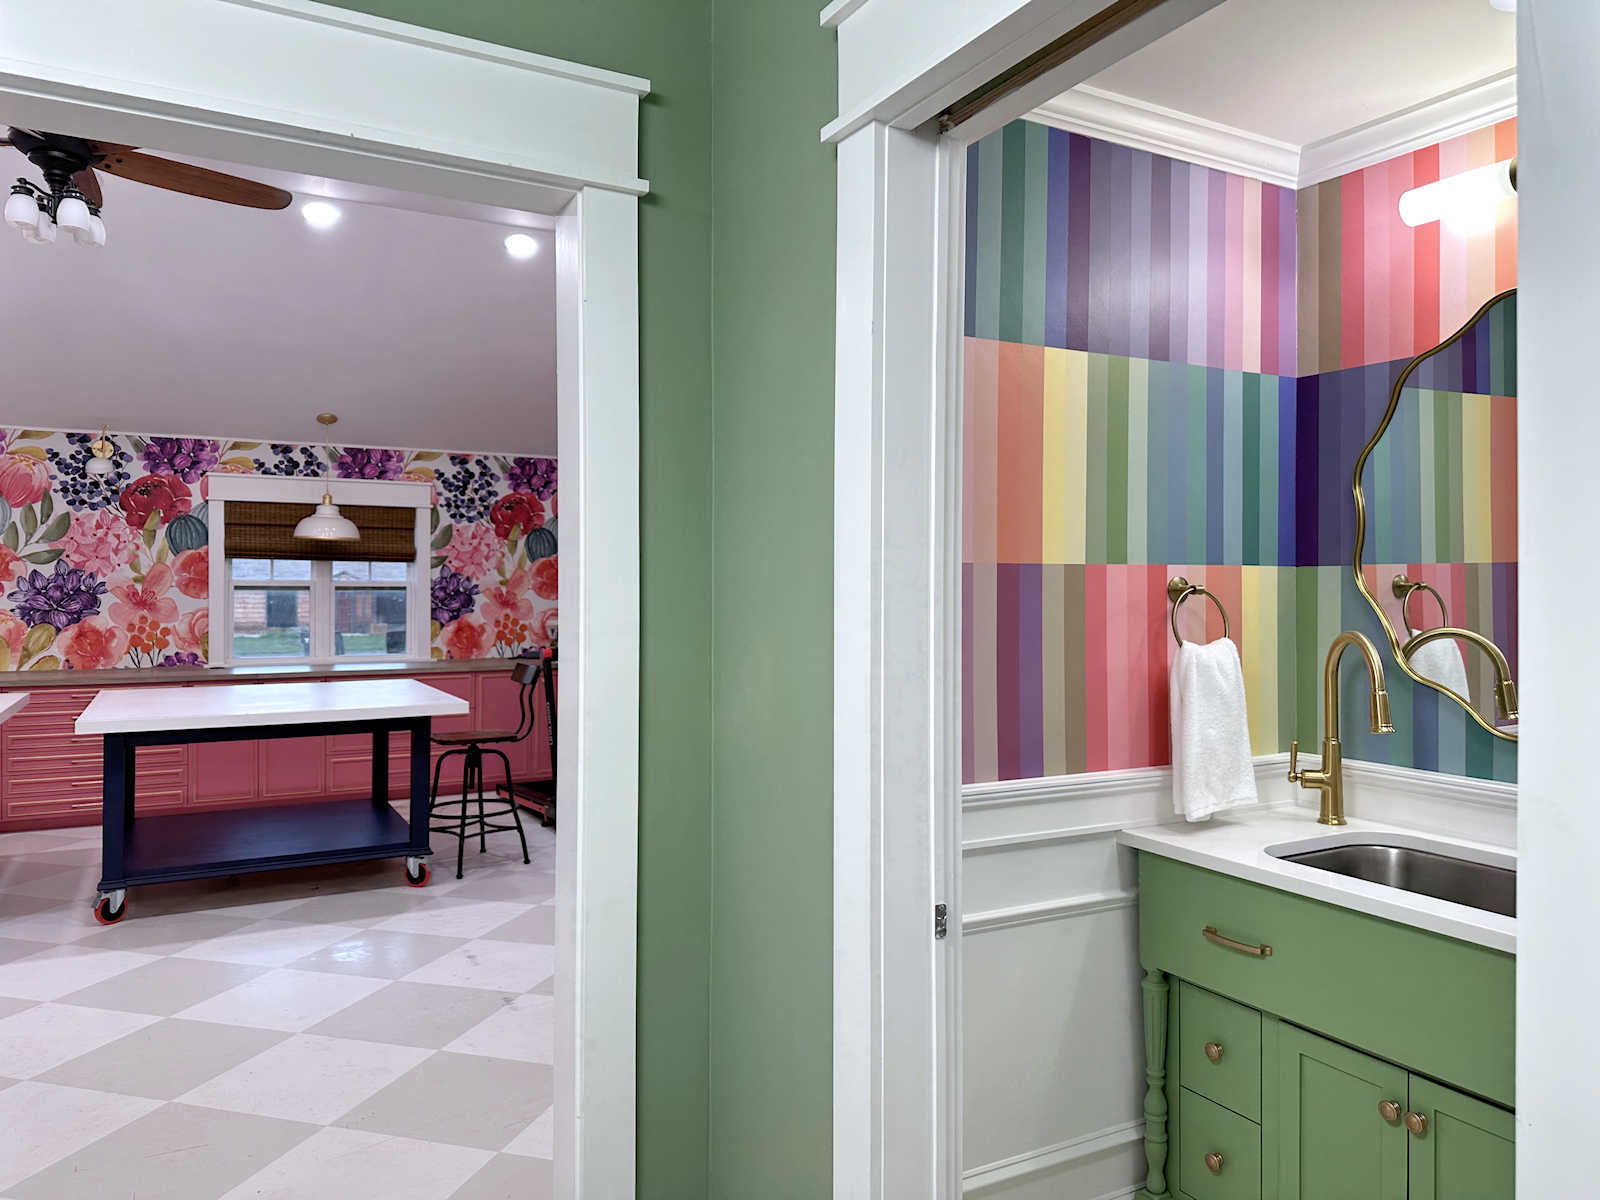
No. I just couldn’t get past that hurdle. I couldn’t make myself do it. And when I saw this photo of Lux Skin Lab from StudioTen25 on Instagram, I knew for a fact that I wanted a color on my cabinets.
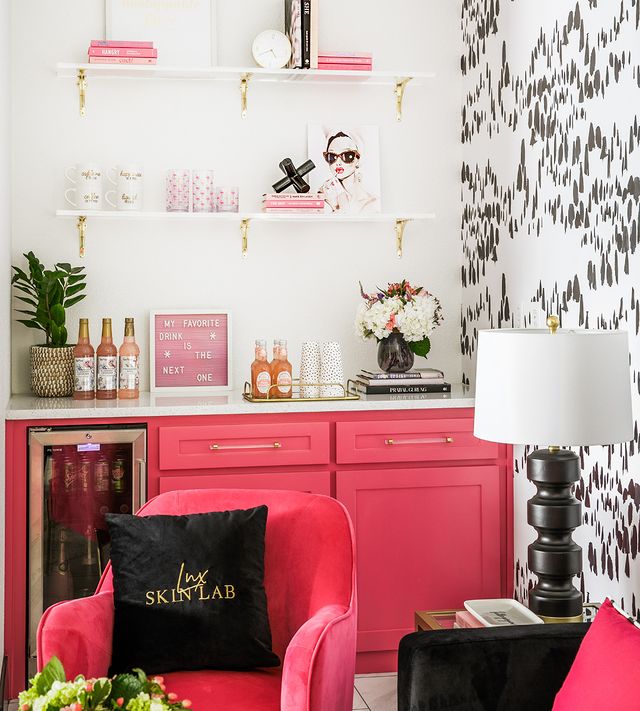
It’s not that I want hot pink cabinets in my studio. Let me reiterate, I don’t want hot pink cabinets. But after seeing that photo, it was settled in my mind. There will be no white cabinets in my studio. White walls? Yes. White cabinets? Nope.
In the meantime, I was talking to my mom about my cabinet conundrum, and she asked me how I was planning on using these desk areas on the main wall.

After all, I already have two large worktables that each measure five feet square. I can use them separately, or I can push them together and have a work table that measures 5 feet by 10 feet. And then I have a separate desk in the “office” area of the room. Do I really need two more desk areas on this main wall?
No. No, I do not. So we both agreed that I’d benefit more from wall-to-wall lower storage instead of limited storage and two more desk areas. That’s a whole lot of storage! And with all of that closed storage across the lower section of the entire width of that almost-20-foot wall, that meant that I could go back to my original idea of having open bookcases on the two upper sections.
So with all of that in mind, I continued to keep my eyes peeled any time I’d scroll Instagram. And then I saw it. The perfect inspiration. Take a look at this blue built-in bookcase with gold accents from Kristie McGowan.

I love everything about that, from the color to the molding detail on the doors to the detail on the frame around the open shelves to the gold detail.
With that inspiration in mind, I was finally ready to head back to the IKEA website and make my selections. I don’t know if I’ll be adding molding in that exact design, but I will be adding molding in a design inspired by that on Kristie McGowan’s built-ins. That meant that I could go with the Veddinge white cabinet doors that I had originally selected and then talked myself out of. The Veddinge white doors and drawer fronts are just plain and flat, so I can easily dress them up with molding.
So let me show you what I ended up ordering for the office wall. First, here’s a reminder of what that wall looks like…

These cabinets will go on the wall behind the desk, and the upper sections will go on either side of the window.
All of the cabinets I ordered are IKEA’s Sektion kitchen cabinets, and the doors and drawer fronts are the Veddinge white. Here’s how the cabinets will be arranged on that wall…
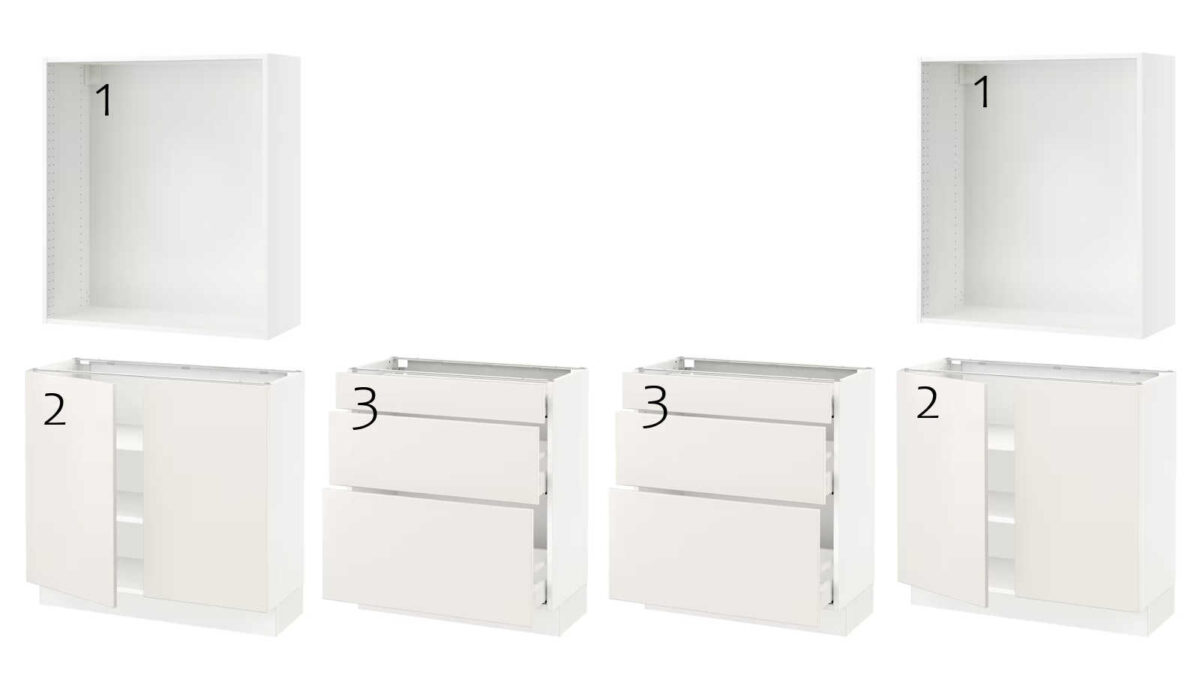
And those cabinets are:
- Cabinet frames with no doors (36x15x40) for the upper outside sections,
- Base cabinets with doors and shelves (36x15x30) for the lower outside sections, and
- Base cabinets with three drawers (30x14x30) for the inside section under the window.
This will be a combo of ready-made and DIY because this combo alone on the outer sections won’t be tall enough, and they were out of the 20-inch-high upper cabinets. That’s no big deal since those sections are just simple boxes, which I can build very quickly and easily myself. I could have built the #1 pieces myself as well, but since these come with all of the holes for adjustable shelving already drilled, it’s so much easier to just buy theirs than to make my own, especially since they sell them for such a reasonable price.
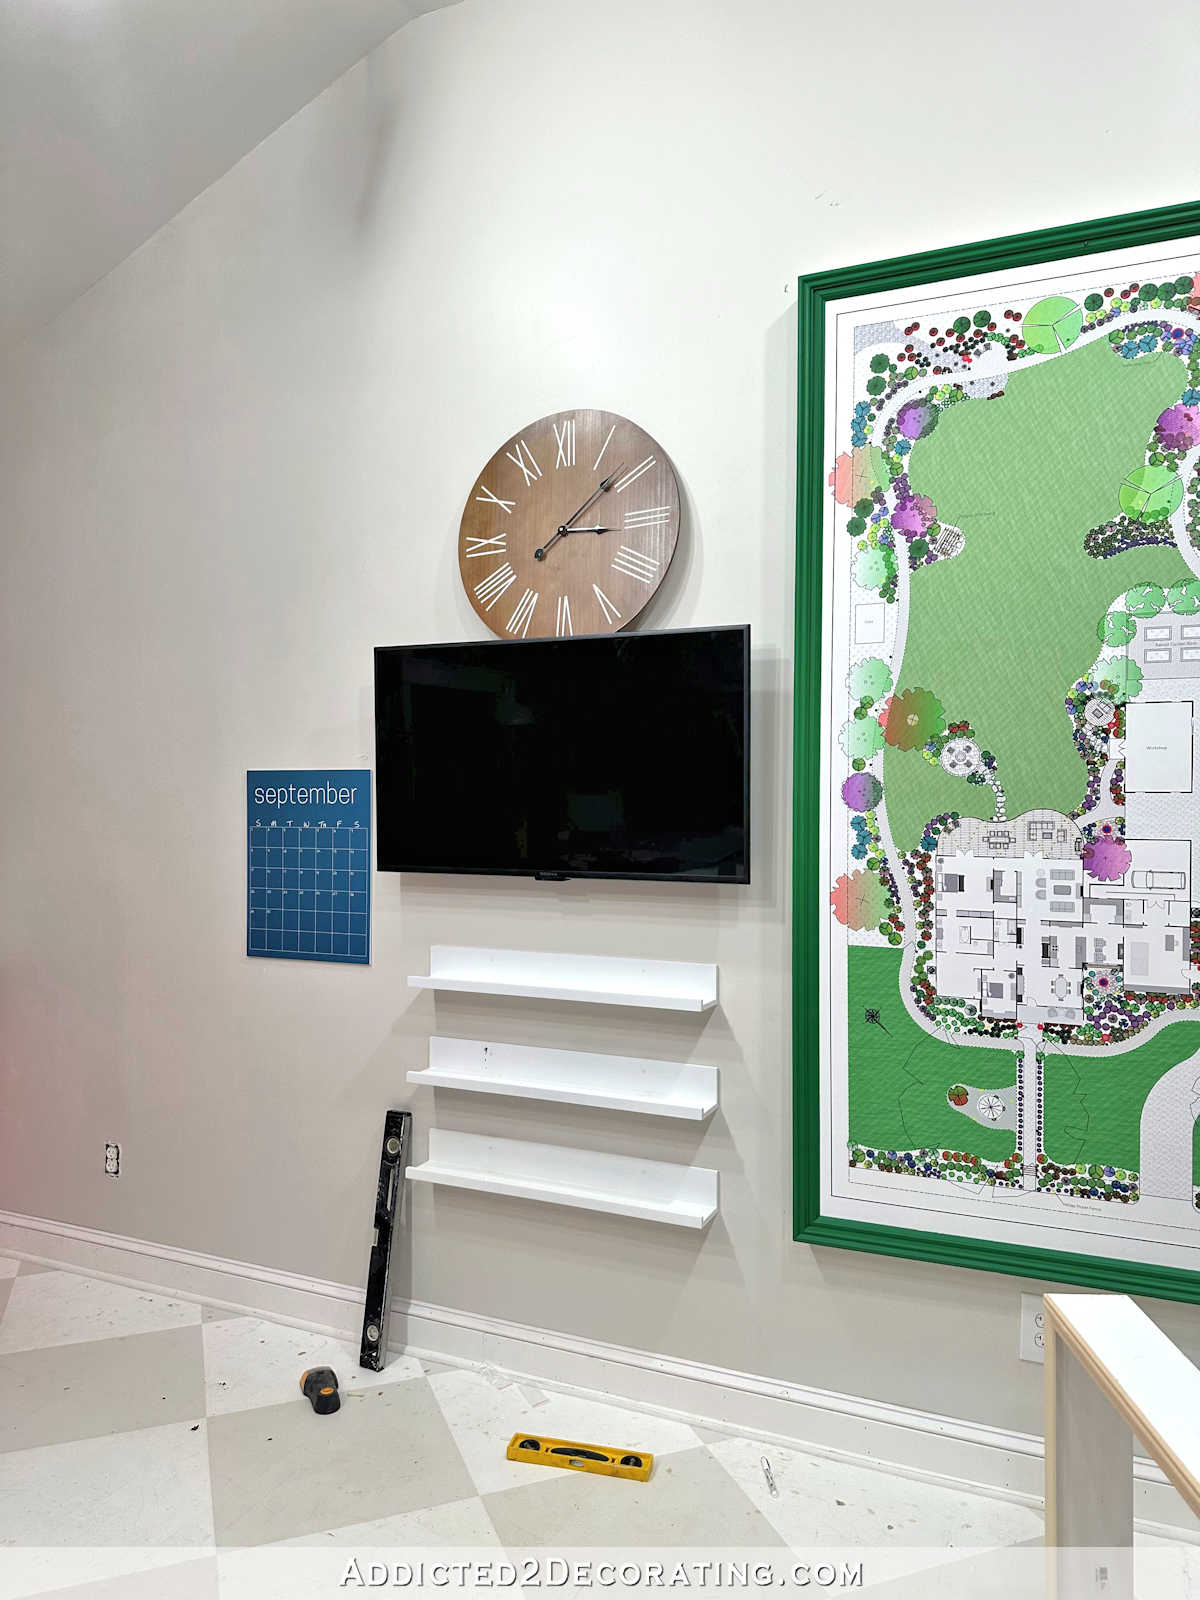
Now on to the main wall of the room. Here’s a reminder of how it looks right now…
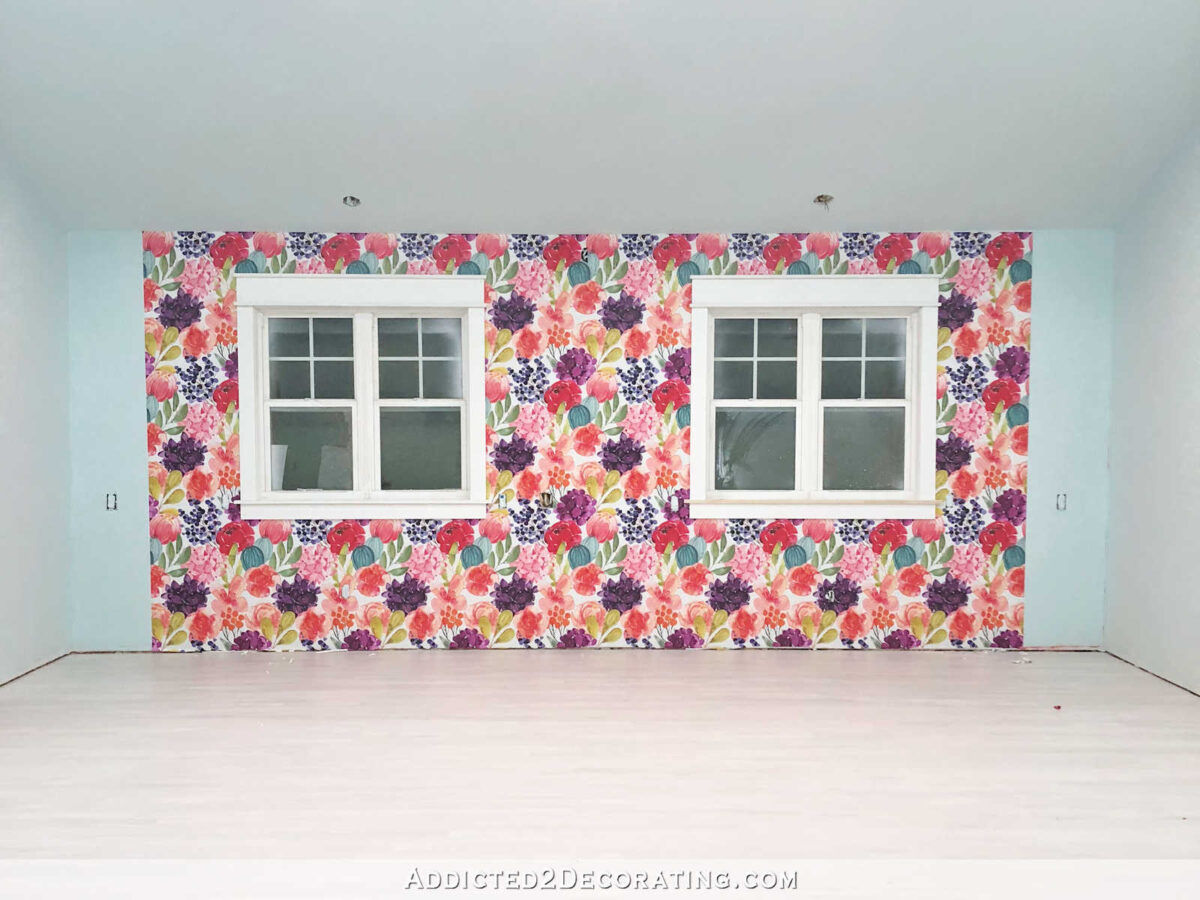
The wallpaper is going to be redone, and since I’m using open bookcases on the top outer sections, the wallpaper will be visible the entire 20-foot span of the wall. In other words, where the inspiration bookcase from Kristie McGowan has mirror on the back of the bookcases, I’ll be continuing the wallpaper on the backs of the open bookcases. At least that’s the plan for now. So this wall will have tall sections on each end, and then the rest will be lower cabinets all the way across.
Here’s how the cabinets for this wall will be arranged…
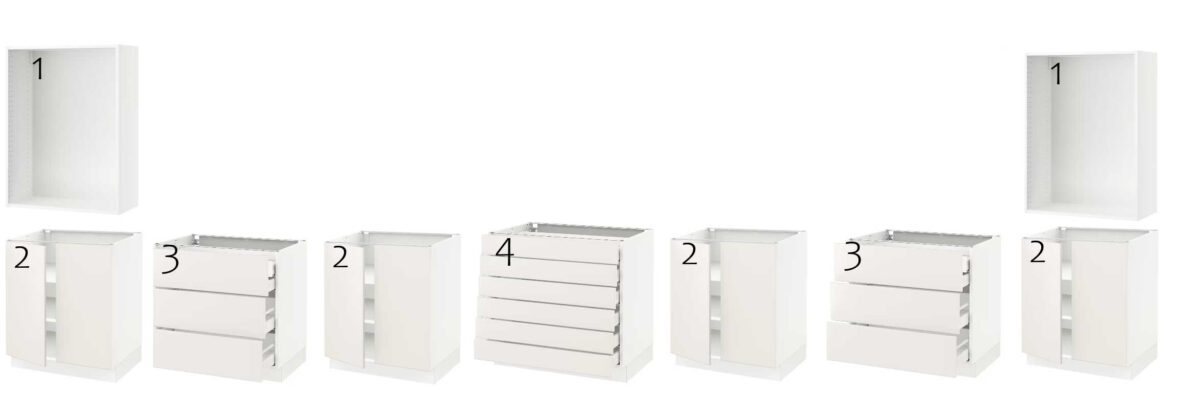
And those cabinets are:
- Upper cabinet frame with no doors (30x15x40),
- Base cabinet with doors and three shelves (30x24x30),
- Base cabinet with four drawers and three fronts (36x24x30), and
- Base cabinet with six drawers (36x24x30)
In total, including tax and delivery, the cabinets came to $4,259.64. I know I could have saved quite a bit by building them myself from scratch, but the time savings alone is well worth the price. And there will still be a whole lot for me to do! All of the basic, boring, time-consuming stuff will already be done for me — building the cabinet boxes, building the drawers, etc. But as you can see, there will be a lot of DIYing left for me to do in order to turn these plain cabinets into something resembling the inspiration built-ins. But that’s the fun part!
I’m so excited to get started on this!! They’ll be delivered on April 19th, so I need to get busy on the studio floor!

Addicted 2 Decorating is where I share my DIY and decorating journey as I remodel and decorate the 1948 fixer upper that my husband, Matt, and I bought in 2013. Matt has M.S. and is unable to do physical work, so I do the majority of the work on the house by myself. You can learn more about me here.

Glad you decided to streamline this project! I predict you will now be able to finish by your desired date and still have a life in between!
Nice cabinets and wise decision to nix additional desk space.
Practically speaking, heavy duty dust is going to prevail in this space. It is a work space, as I understand it. Now I don’t know how much time or effort you like to spend housecleaning but if the accumulation of the inevitable layers of dust will not be a concern, then more power to ya to add custom touches. The more ledges, moldings and the like there will be the more there will be to dust, wipe, and wash.
Function over form? or Form over function?
I want to reiterate that this is not a room where I’ll be using power tools like saws and sanders. Those will still be used outside until I have the opportunity to build a separate woodworking workshop in our back yard. This room is for the “clean” projects, like artwork, sewing, etc., as well as my office area.
I think a lot of people have forgotten (or didn’t know) that this will be an office/soft goods workroom – a space for creativity, not construction! Glad you are going with ready made that you can customize. Time saved is what you need, since it’s been so long since starting this space. While you wait for them to arrive, you can lock down your design for the fronts and purchase your paints, trim, etc. So you can hit the floor when they arrive!
I think a lot of people have forgotten (or didn’t know) that this will be an office/soft goods workroom – a space for creativity, not construction! Glad you are going with ready made that you can customize. Time saved is what you need, since it’s been so long since starting this space. While you wait for them to arrive, you can lock down your design for the fronts and purchase your paints, trim, etc. So you can hit the floor when they arrive! As for the floor, I would keep it very simple, since as you said, you are likely to spill paint or do damage in some other way. And a simple design will be easier to redo if needed.
Have you given any thought to buying a building? They are really inexpensive, and you can put whatever you like in them. They are even customizable! I’m getting one that will be delivered to my lot and includes free shipping and set up. Then, all I will need to do is figure out where to put the electrical outlets, etc.
That’s probably what I’ll end up doing as well. There are so many great options out there!
Haha, as someone who goes by “DustandDoghair” I like the way you think.
We’re doing some reno now and it’s dust city in our house from all the sanding and wall breaking that’s happening.
So you raise a good point… fwiw, Kristi, my brother installed a vac system in his workshop and finds it a huge help. Might be something to consider while you’re still planning!
The design looks super, btw!
Wait, what is happening with the floors?
I’m going to paint them. They have darkened, and they’re not a light and bright anymore. And I got some water damage on an area, so it needs to be redone anyway. And finally, since this room will be used for art projects and there will inevitably be paint and other things dripped on the floor, I want a finish that is easily touched up. The obvious solution to me was paint. More details here:
https://www.addicted2decorating.com/my-studio-floor-decision-im-going-to-paint-the-whole-thing.html
Good for you that you made the decision, clicked YES and went for it. I know how long it takes to get to where you are finally pulling the trigger on the sale. I have been seeing a whole bunch of shellac priming of IKEA cabinets to get them ready for paint lately and it seems to be the best way to go if you’re wanting to modify them with a custom color. CONGRATULATIONS! This is a huge step toward finishing that space. ONTO THE FUN STUFF!
Great plan. I do wonder about putting wallpaper on the backs of the bookshelves. If you are storing lots of things on them, then you won’t see the paper. If you are using them more to decorate, then the decor would get swallowed by the paper.
Deciding is always so difficult but once the decision is made, I get excited! I get the idea you are this way too. Congratulations on taking this step forward!! I’m sure April 19th feels like it’s a ways a way but it will be here before you know it!
Looking forward to seeing what you do with the floor!
I see a lot of you tubers recommending Beyond Paint for cabinets. Personally I haven’t used it, but it looks like it would be more durable than regular cabinet paint. They say you don’t have to prime, but I am the kind of girl that believes ( it’s all in the prep) for a durable and lasting finish.
WOW…congratulations on that big decision, and some of the other thoughts and decisions you are making/planning. That is going to be a large and exciting project, and a inside project so weather won’t bother you for sure. I know what ever you do, it will be an awesome new space for you to enjoy for many years, and create in. Hopefully you will be sharing some of your projects so we can learn and make some too! I’m very excited for you.
LOL … I knew those white cabinets would not last (grin)! This plan sounds much more like you. It will be beautiful. We are as anxious to see you get started as you are. It’s always fun to watch your creative side.
If you want to paint the cabinets I have a recommendation for you. Debi’s Design Diary DIY Paint is a clay based paint that only has 7 ingredients, no VOCs and is amazing. No primer needed. It sticks to everything. I’m painting my refrigerator with it and no primer needed. Order on the internet.
What a fabulous choice – all those drawers will make your organising so much easier! I love the idea of having all that space for my material and stuff (but I don’t have the room to put anything similar in terms of cabinets…) so I’m thrilled to enjoy them via your blog and your posts 🙂 I am looking forward to following how you are going to make them pretty, because that might be something I wanna copy for my (very bland) Ikea kitchen cabinets. So happy for you (and us) that this is going to get started. Have a lovely Easter time!
I’m excited you have ordered your cabinets and can’t wait to see the finished studio. My only suggestion is to consider not papering the back of your shelving units on your wallpaper wall. Imagine what a pain it would be to remove it should you get tired of your wallpaper choice. You would be working in a confined space taking the paper off. If you go that direction I suggest finding a non wallpaper glue option to apply it to the back of the book shelf. It would look papered but you could easily remove it if you decide to go a different direction in the future.
This looks great! Now my wheels are turning for how I can transform my creating space! Thanks for the inspo!