Mom’s Kitchen — All Of The Prep Work That Will Pay Off Huge In The End
We’re officially at the stage of the kitchen project that feels like it will never end, with all of the priming, wood filling, sanding, and caulking. I’ve also had to add quite a bit of new trim.
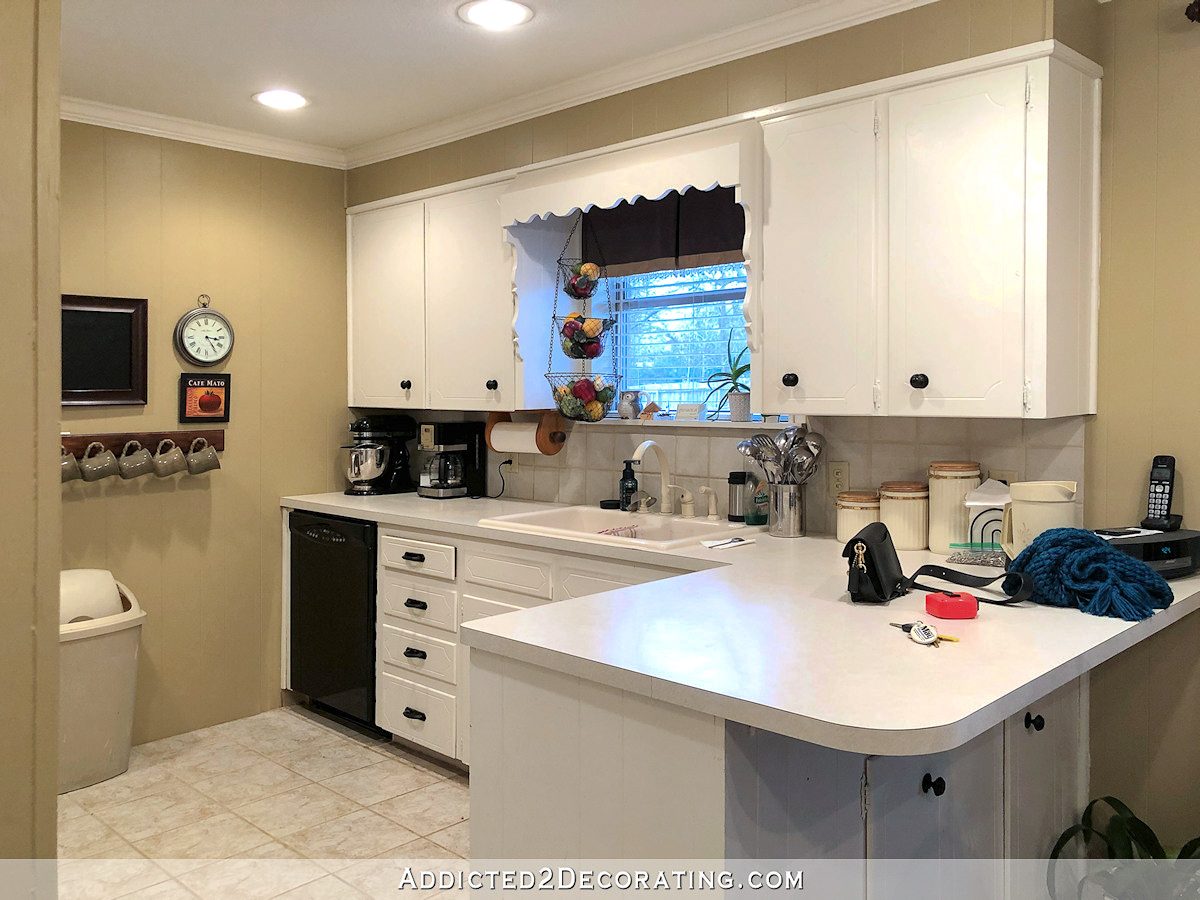
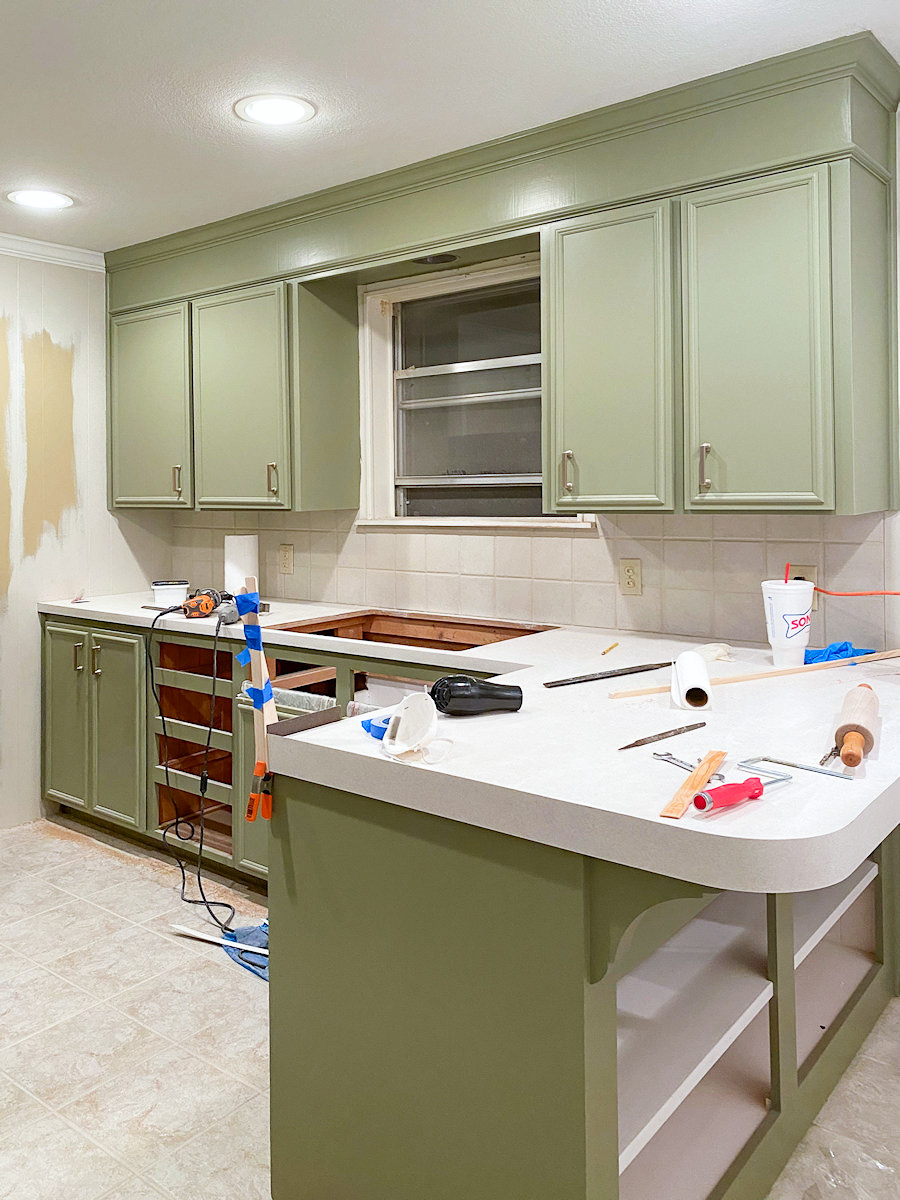
My mom’s house was built in the 60’s, and the kitchen cabinets are original to the house. The cabinet boxes were fine, and we wanted to keep costs low, so we kept the boxes and just made new cabinet doors.
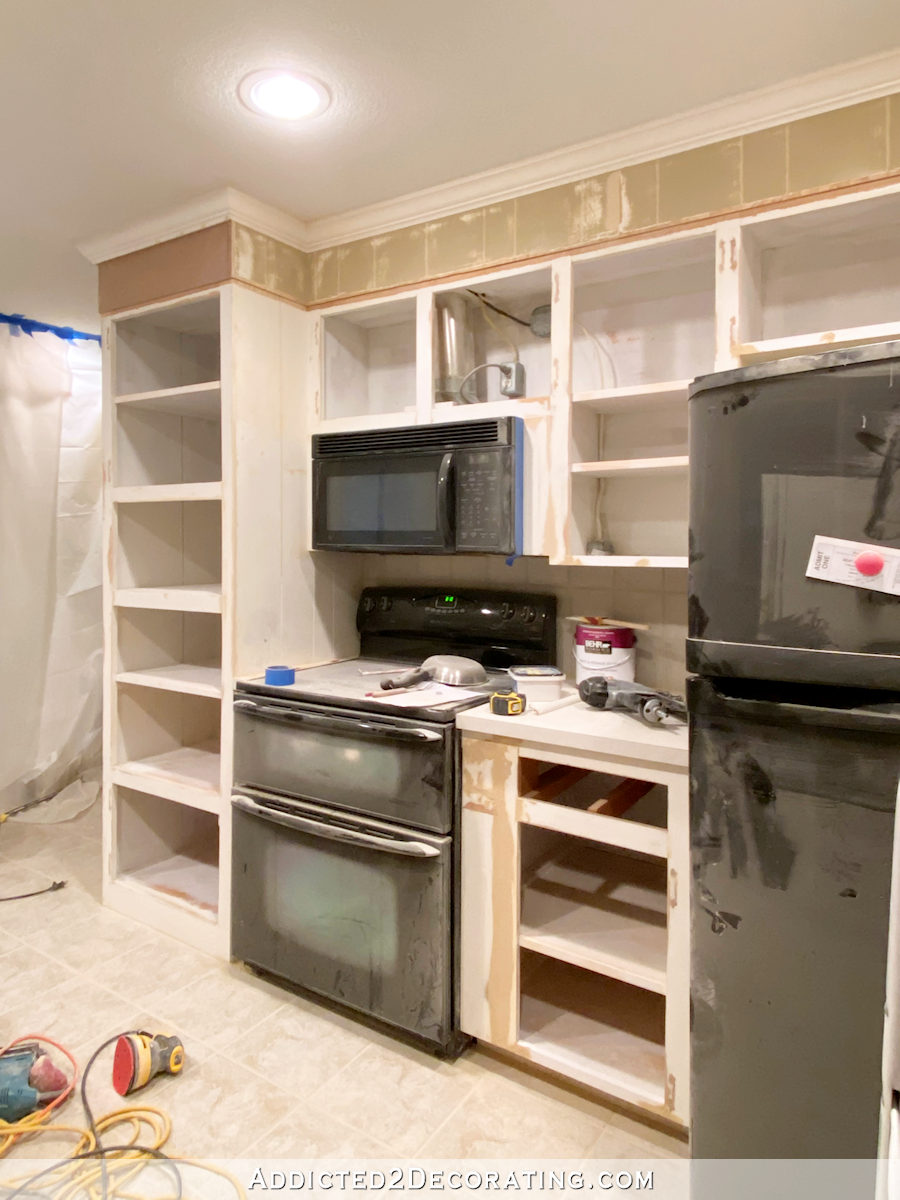
But the decades of use showed on some parts of the cabinets. For example, the edges of the shelves were a little beaten up. It showed much more before we primed, but you can still see that they’re a little rough here…
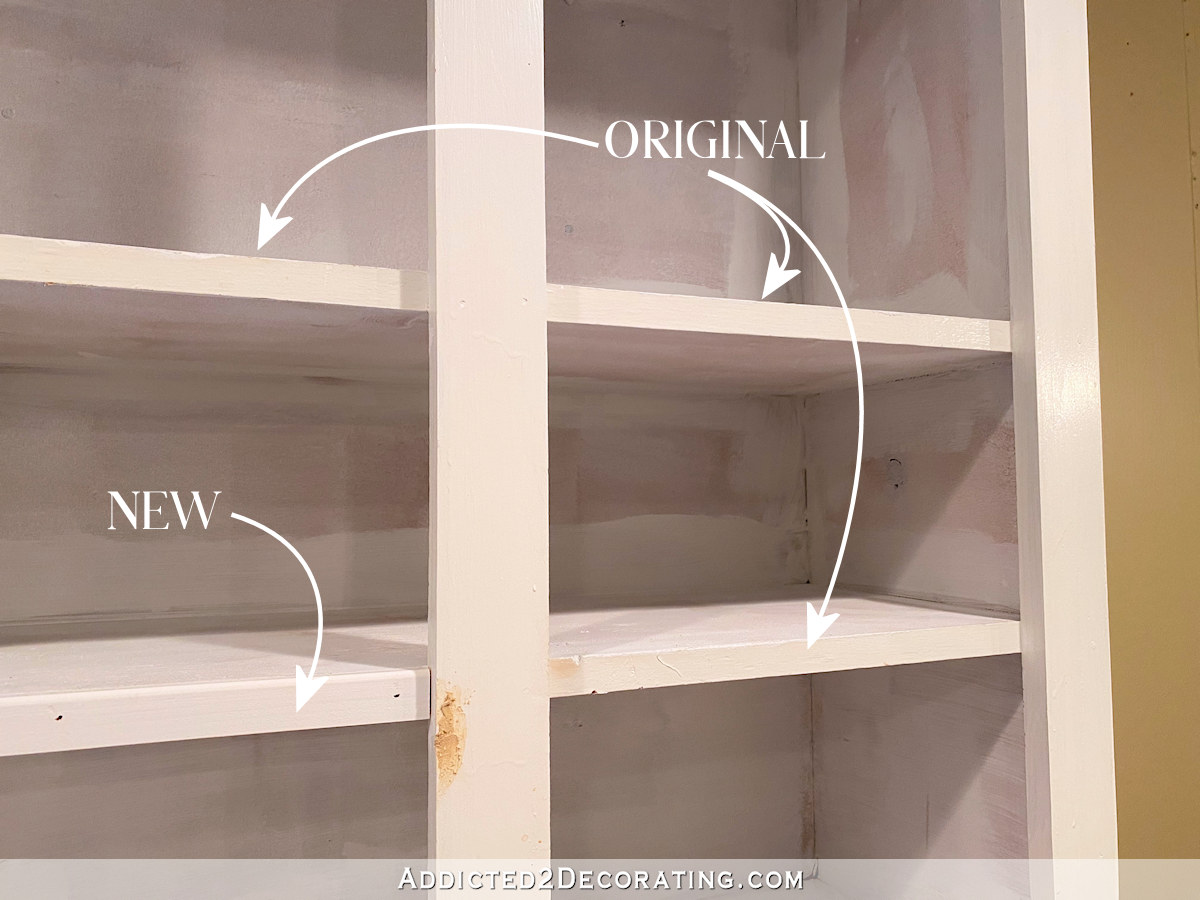
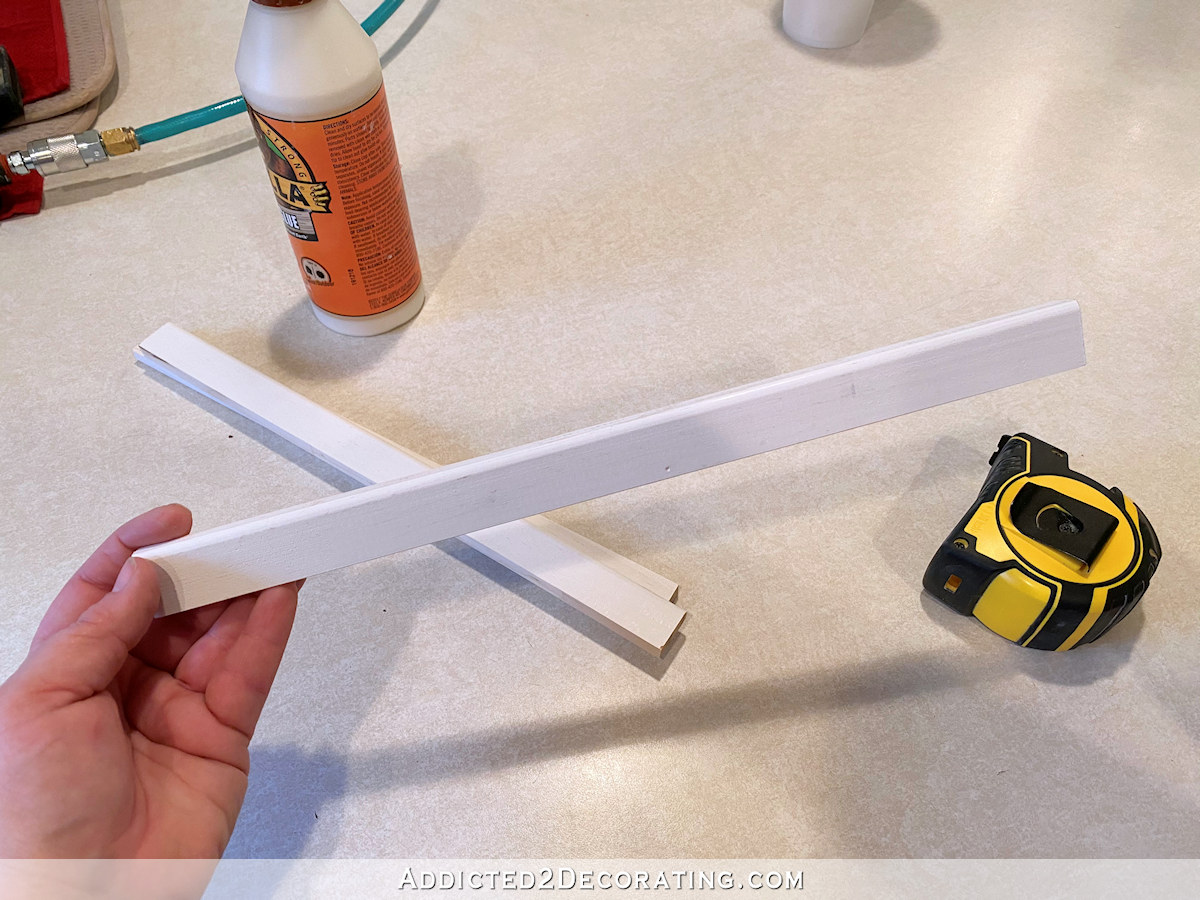
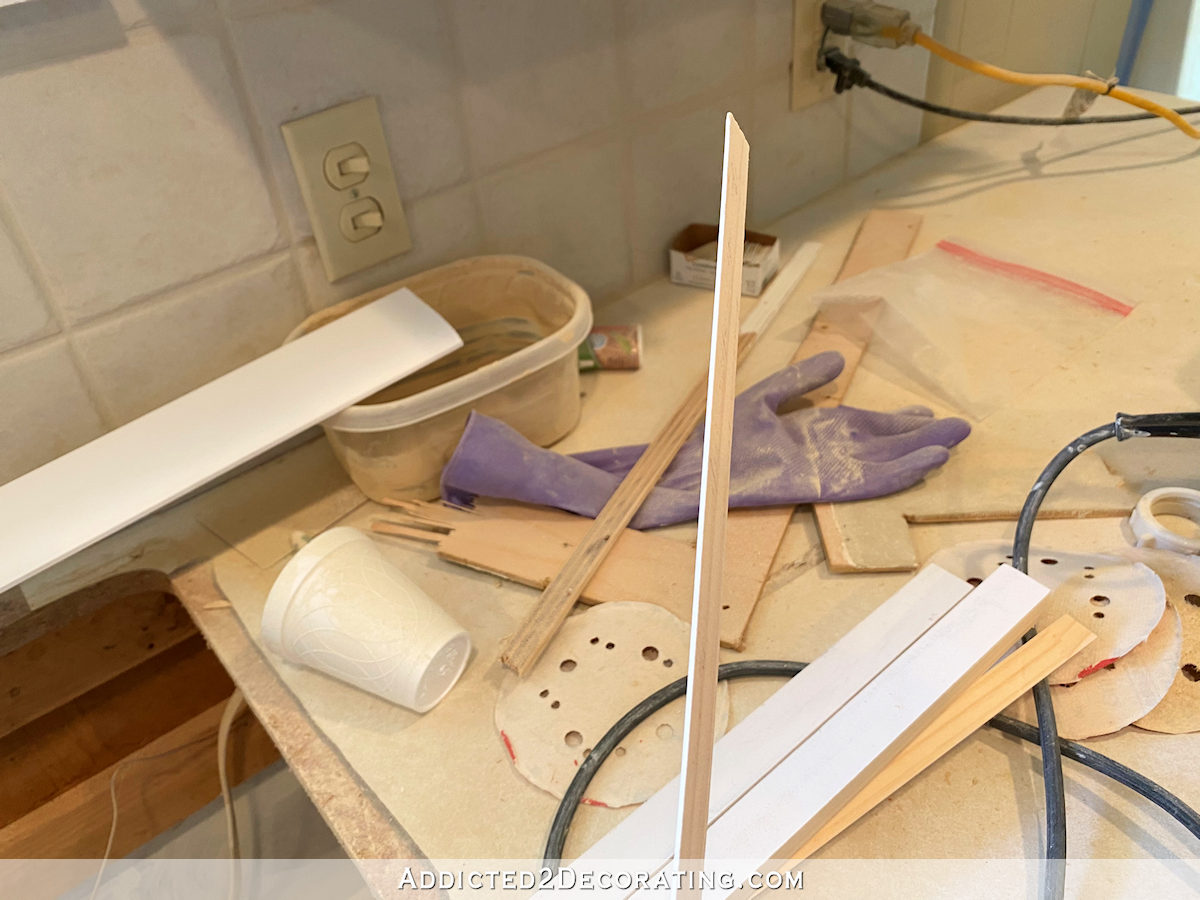
So I cut strips of this thin 1/4-inch wood (lattice, maybe?) to reface the edges of the shelves. These strips were 1 1/2 inches wide, and I used my table saw to rip them down to one inch, and then attached them to the edges of the shelves with wood glue and 18-gauge 5/8-inch nails.
It seems like a little thing, but those fresh, new edges really breathed some new life into those old shelves. I also used some wood filler that I thinned just a little bit with water to fill the grain on the shelves, because while the builders did a great job in building the cabinets, they used some of the roughest wood ever. Wood filling the grain and then sanding it smooth made a world of difference.
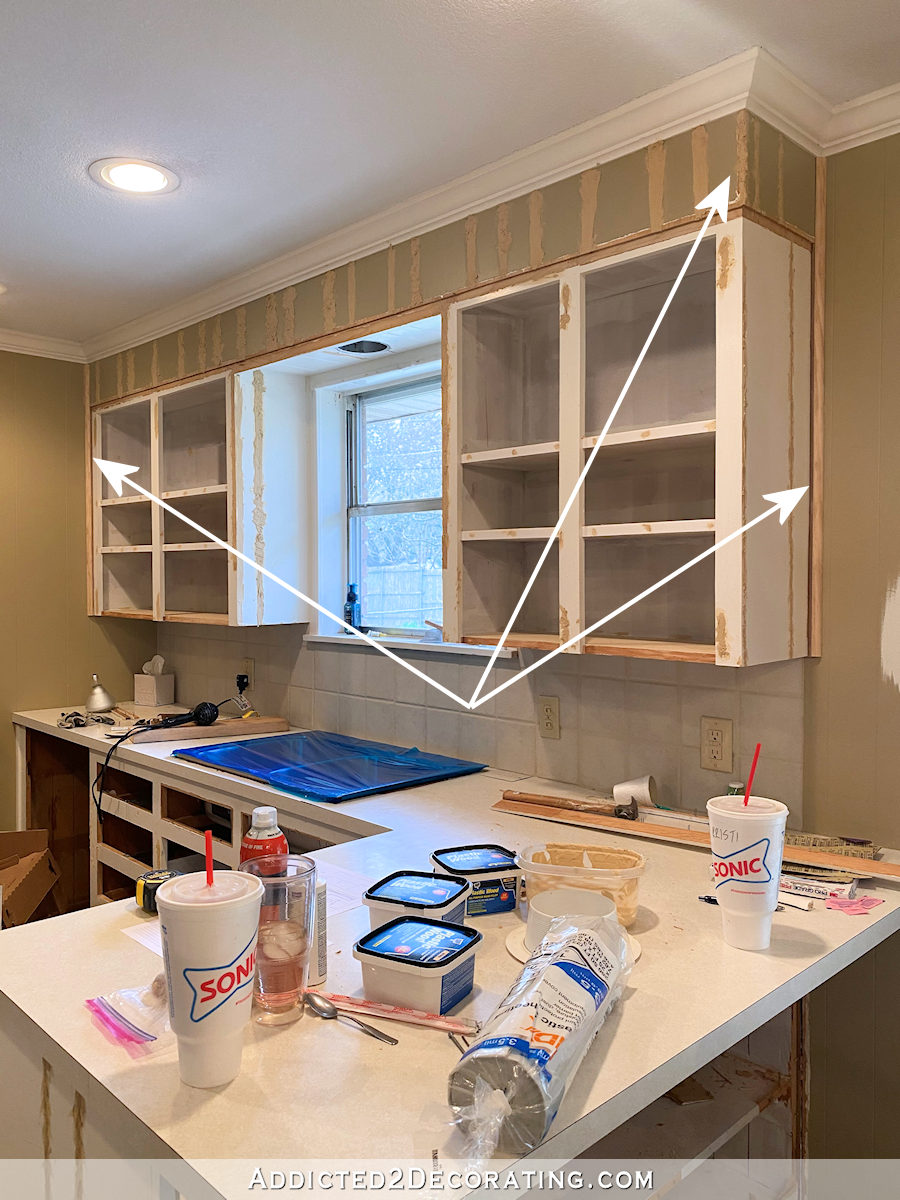
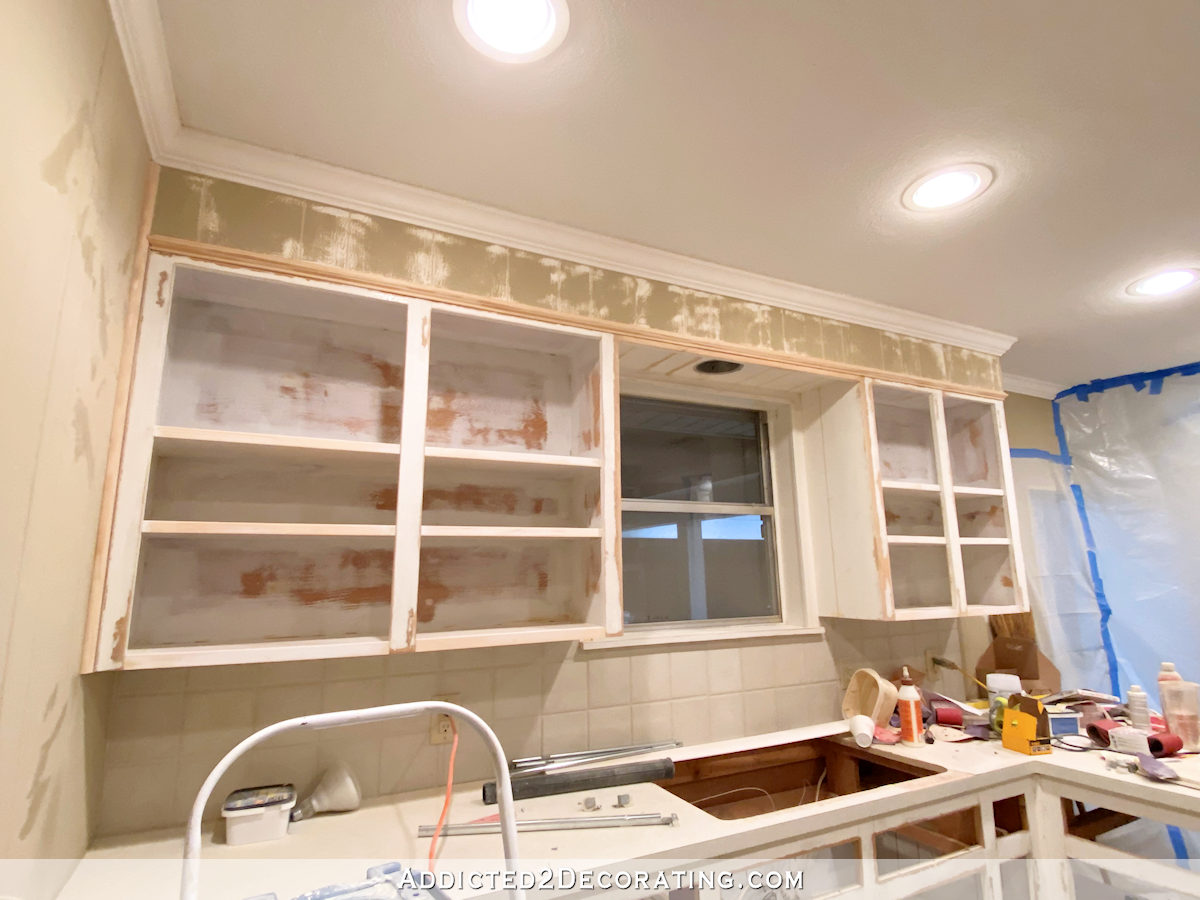
And speaking of wood filler, I decided that we needed to fill the grooves in the paneling on all of the areas that will be painted the green cabinet color to distinguish these areas from the walls. That took quite a bit of wood filler! I’m pretty sure we used a full 32-ounce container of wood filler just on filling the grooves in the paneling. 😀

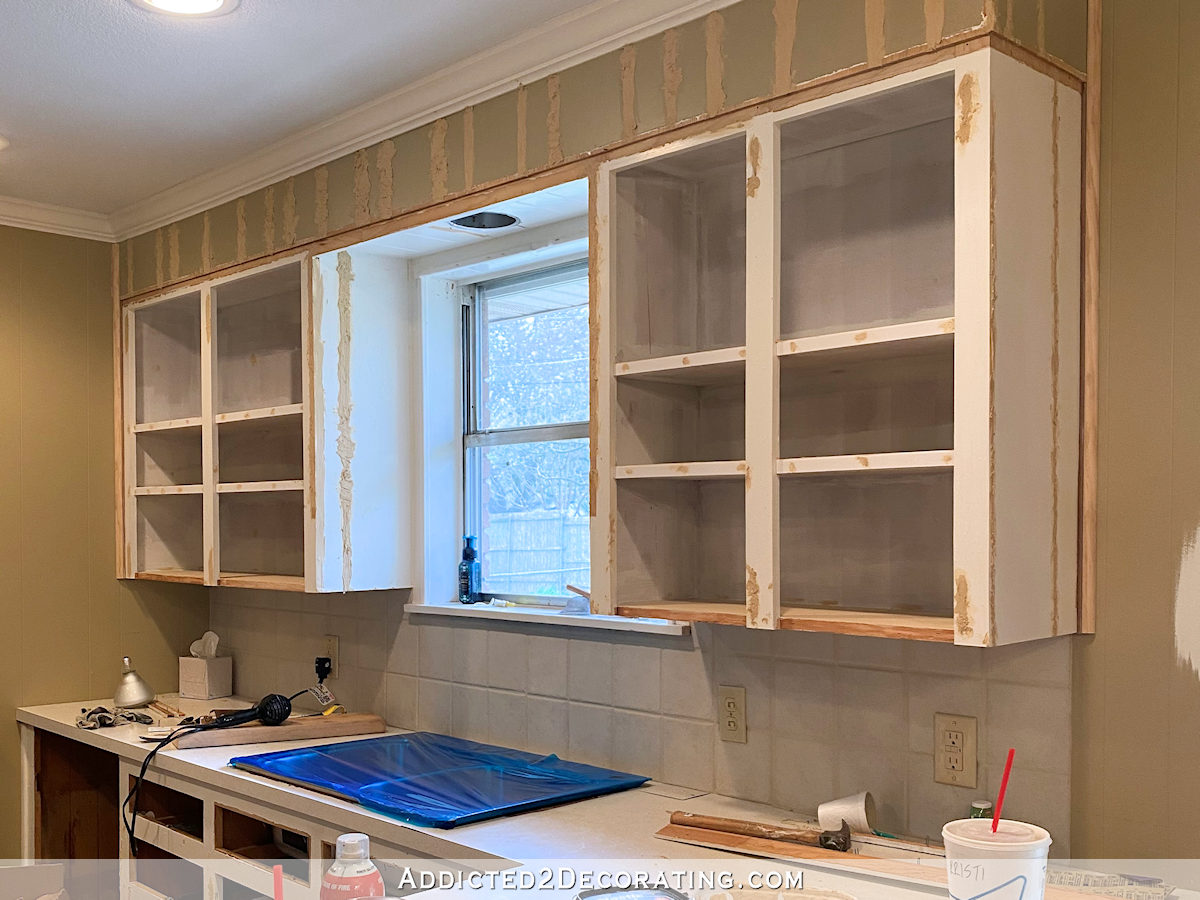
It took a while to get all of those grooves filled and sanded, but it wasn’t difficult at all, although this top section in the window area was definitely more challenging.
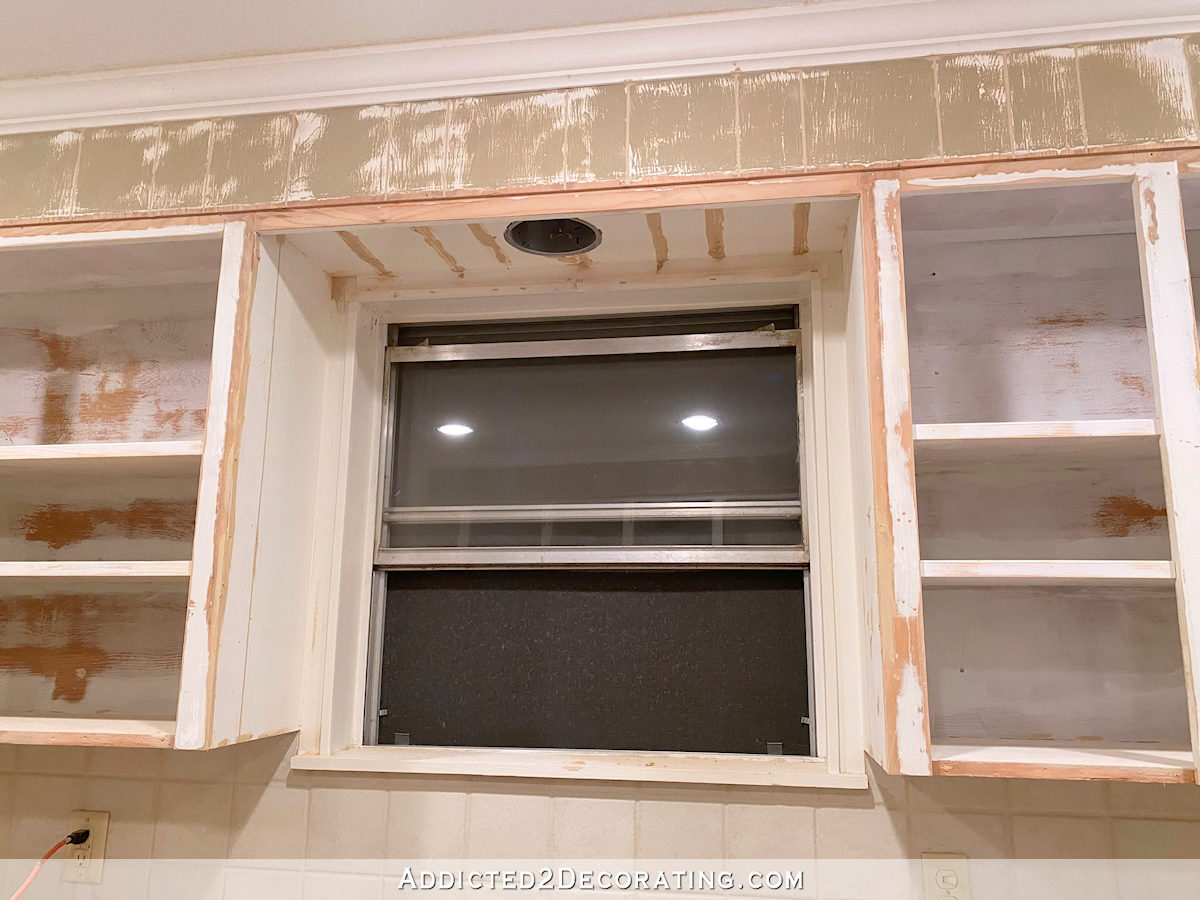
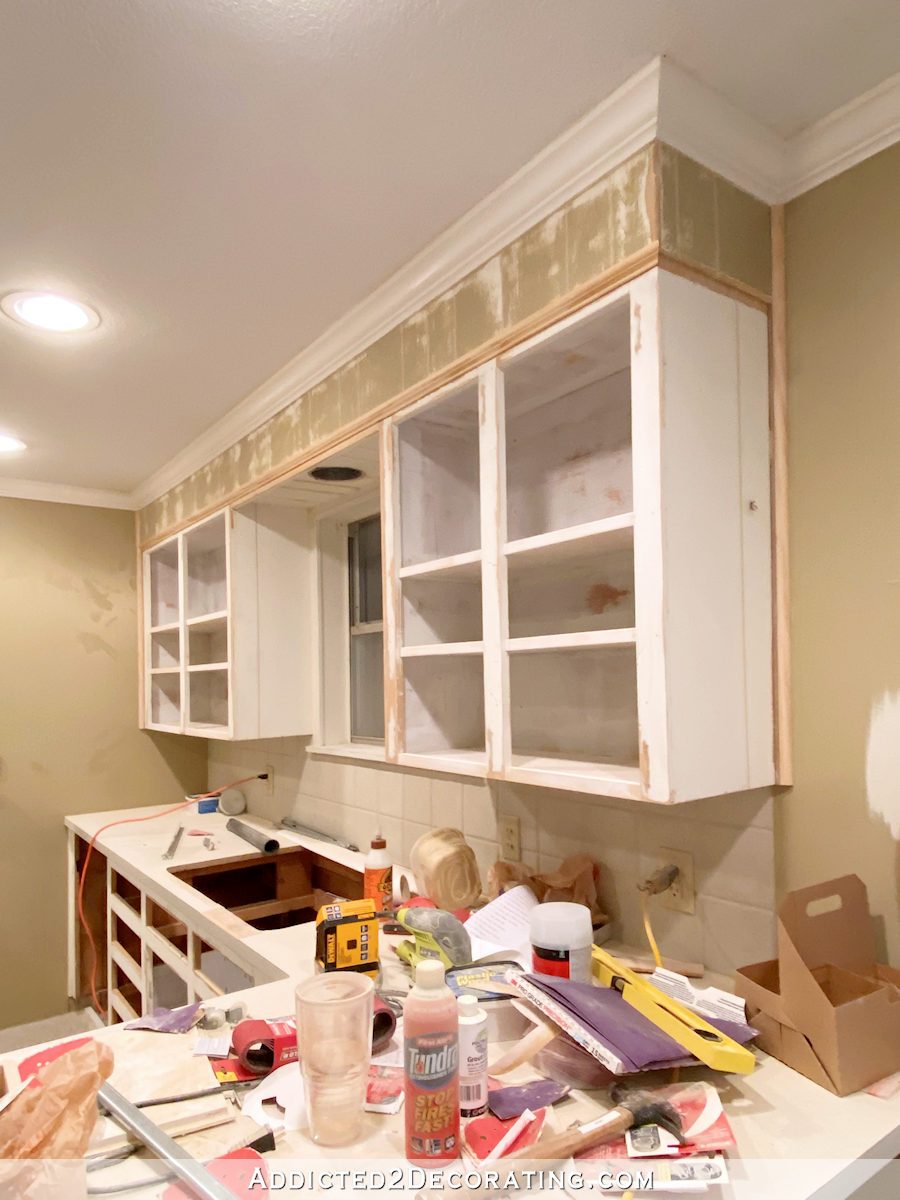
We also removed quite a bit of the original trim and reworked those areas. The original upper cabinets had vertical trim that was pieced together on the inside corners at both ends of the cabinets where the cabinets meet the walls, and also had the standard paneling corner trim on the outside corners on the paneling that was above the cabinets.
So I added new quarter round that went all the way from top to bottom on the areas where the cabinets meet the walls. And then on that one outside corner on the upper paneling, instead of using a new piece of that outside corner paneling trim, I just used wood filler to form a nice corner that didn’t need trim.
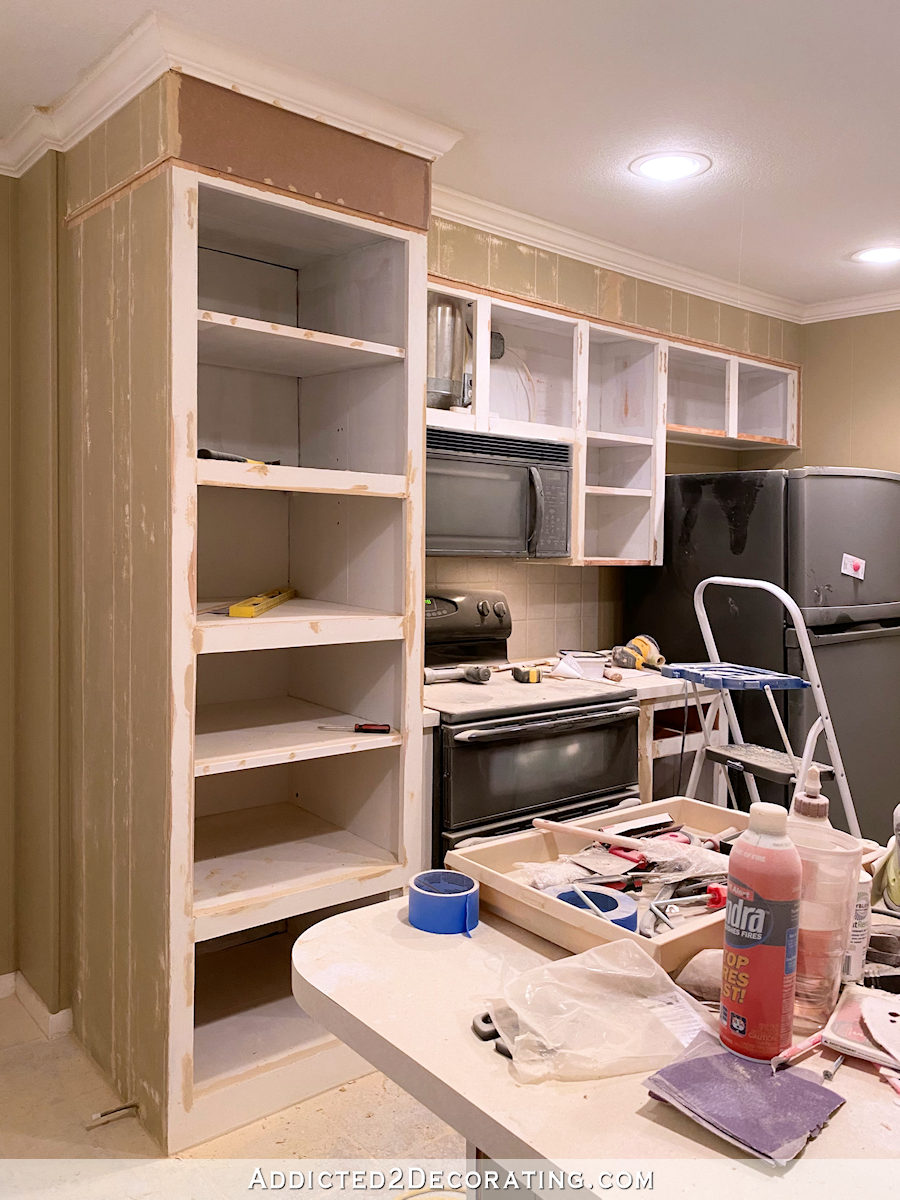
The paneling on this area needed to be completely replaced…

At one time, the kitchen had double wall ovens in this area, and those required a vent at the top. I just removed that 1/4-inch piece of paneling and replaced it with 1/4-inch MDF. Then I used wood filler on those outside corners as well, so that they wouldn’t require that outside corner paneling trim either.
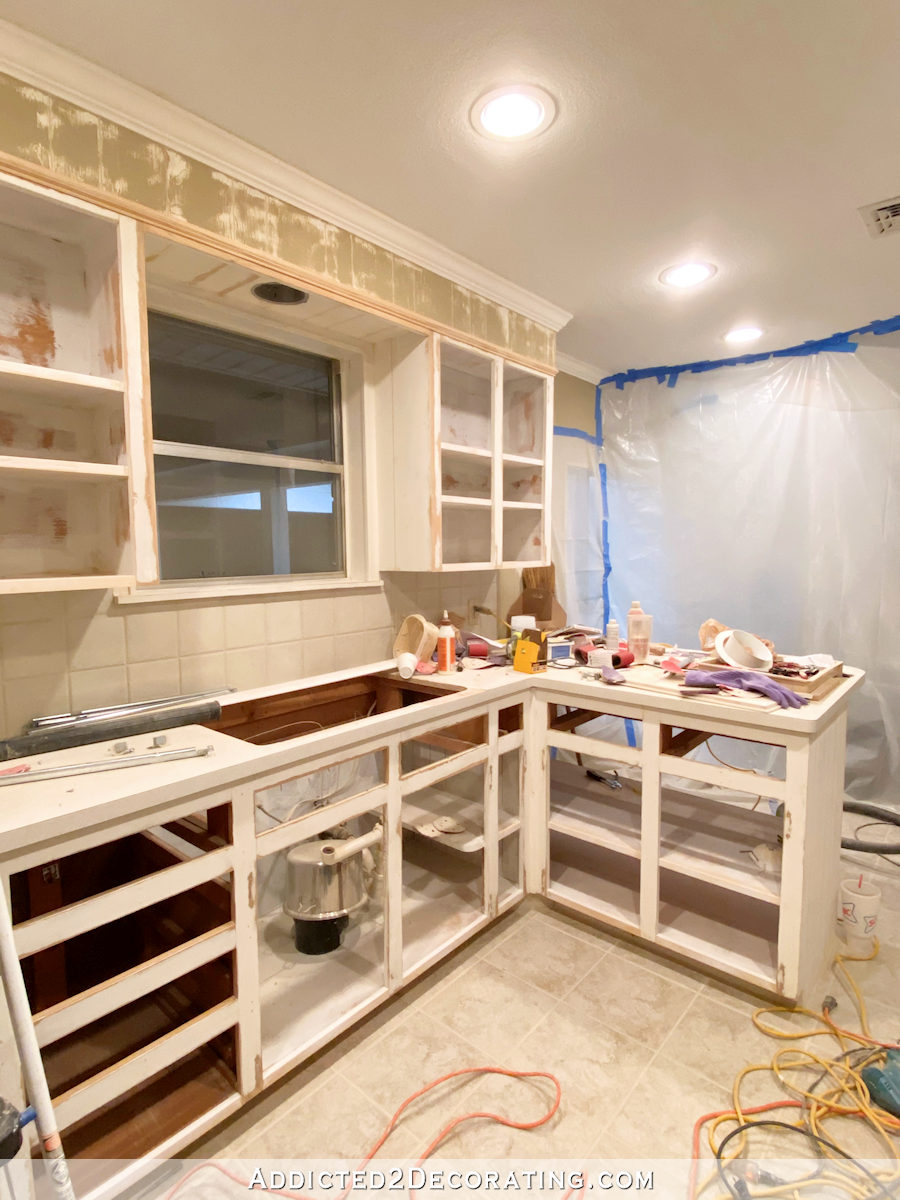
I also had to rework the bottom shelves on the cabinets. The original doors went all the way down to the bottom of the cabinet boxes, and they were that old style that is partial inset and partial overlay. That meant that the edge on the bottom shelves of each cabinet was inset, which wouldn’t work for the partial overlay cabinet doors I made.
So I had to remove the 1/4-inch piece that was attached to each of the bottom shelves, and replace those with thicker pieces. I used 1″ x 2″ pre-primed lumber, which is actually 3/4″ thick and 1.5″ wide. I ripped those down to one inch wide and attached them with 16-gauge 1.5-inch nails.
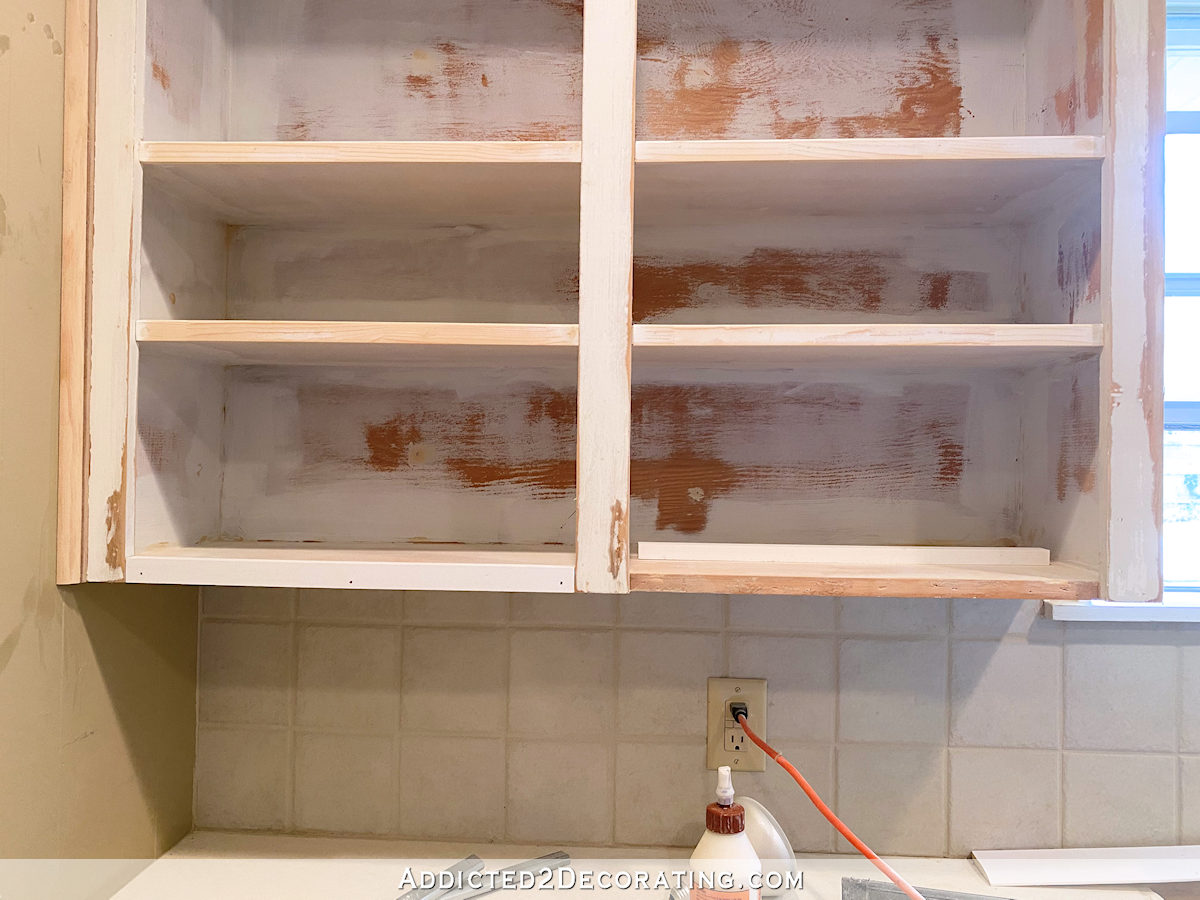
Evidently old 1-inch lumber was a bit thicker than the new stuff, so I had to use my table saw to cut some thin slices of lumber to use a spacers behind the new strips so that the faces of the new strips would be flush with the original face pieces.
That worked perfectly, and once everything was wood filled and sanded, it looked great.
Well, maybe not great. 😀 But it WILL look great once it’s painted!
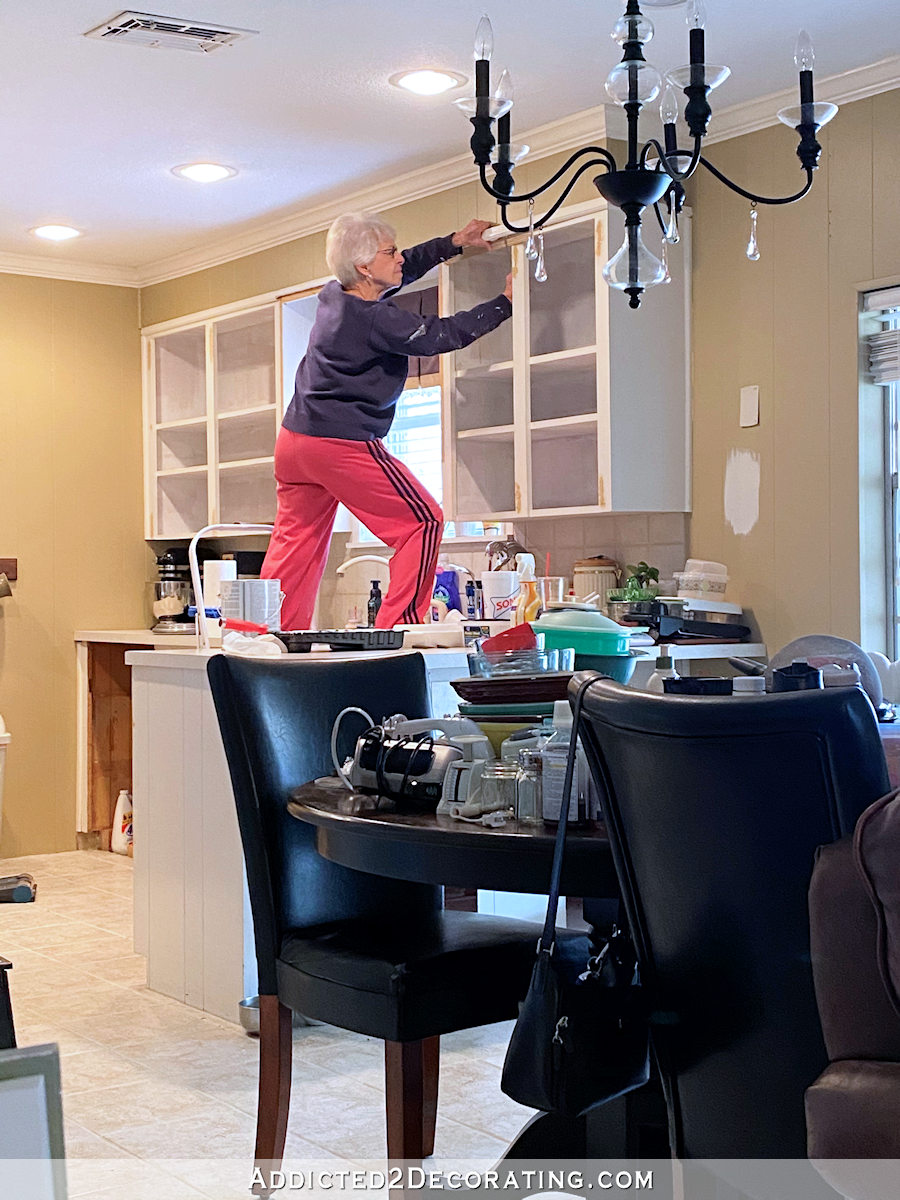
And finally, the area where the paneling meets the cabinets needed new trim. I didn’t quite get that finished, so that’s where I’ll start today. But I did get the one main piece attached on the window/sink wall.

It’s definitely looking rough in its current partially primed, partially wood filled, all sanded state, but it already looks so much better to me! Here’s the original…
And the current…
I think we’re still about a day away from painting. I still need to add that top trim piece to this entire side of the kitchen…
And then we have a bit more wood filling and sanding to do. And caulking. And priming all of the new trim pieces that aren’t primed yet. And then sanding those pieces.
But it’s getting there! I’m really hoping that by the end of today, this kitchen will be ready for paint.
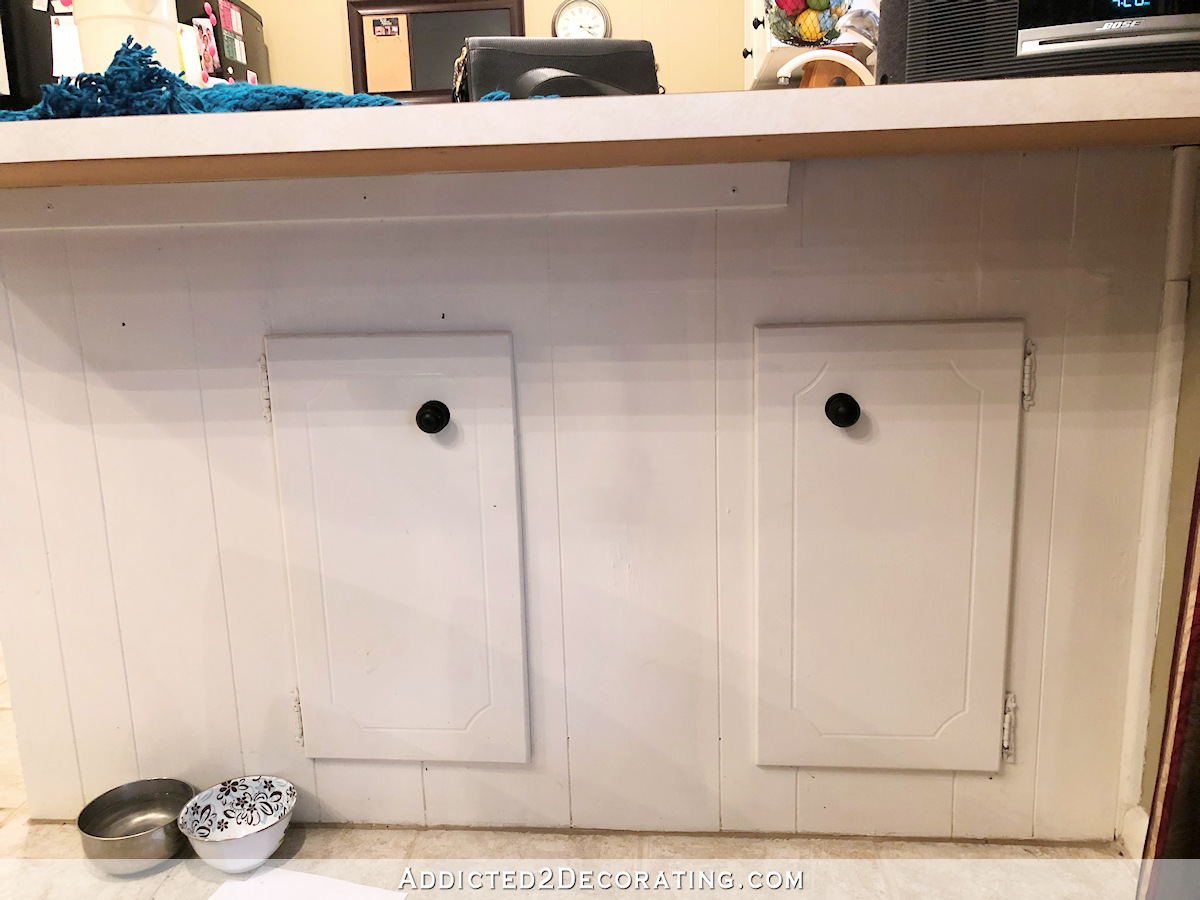
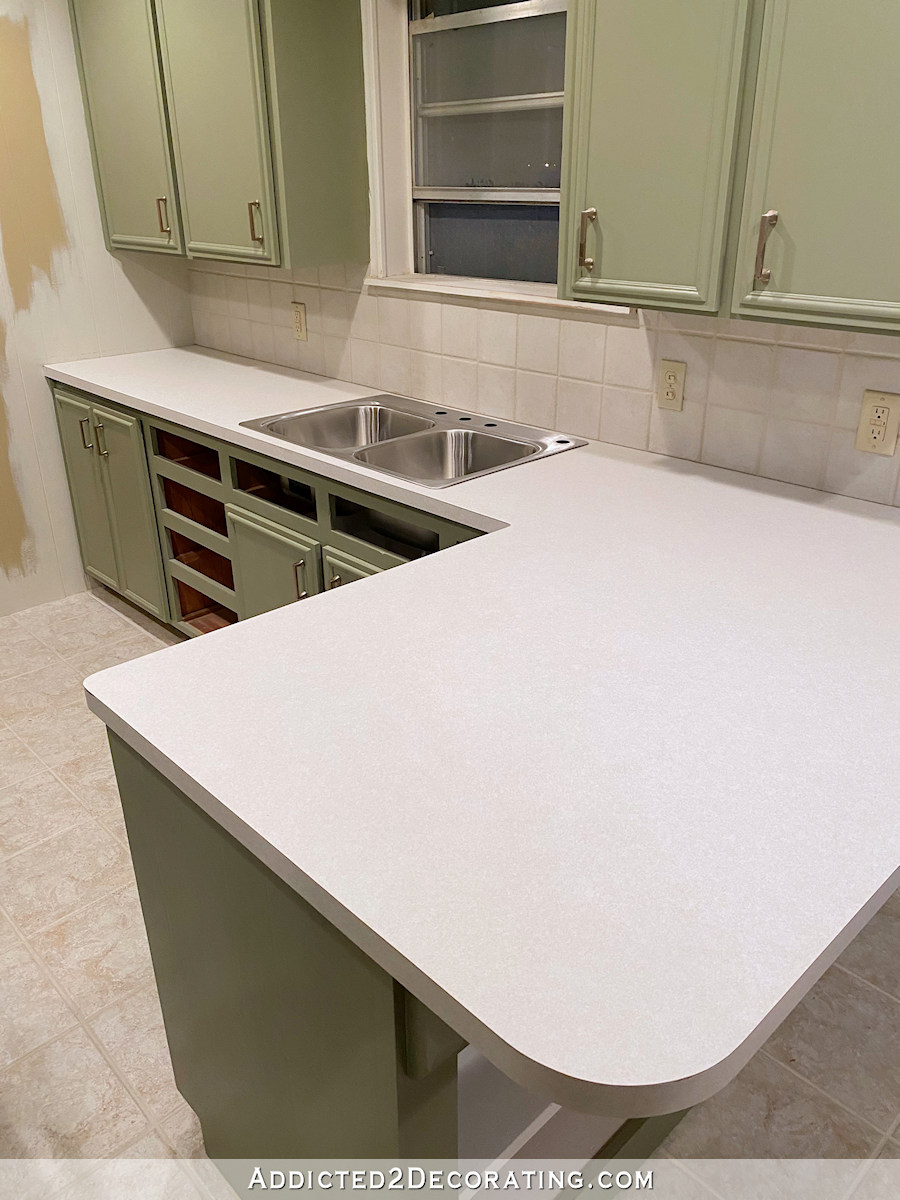
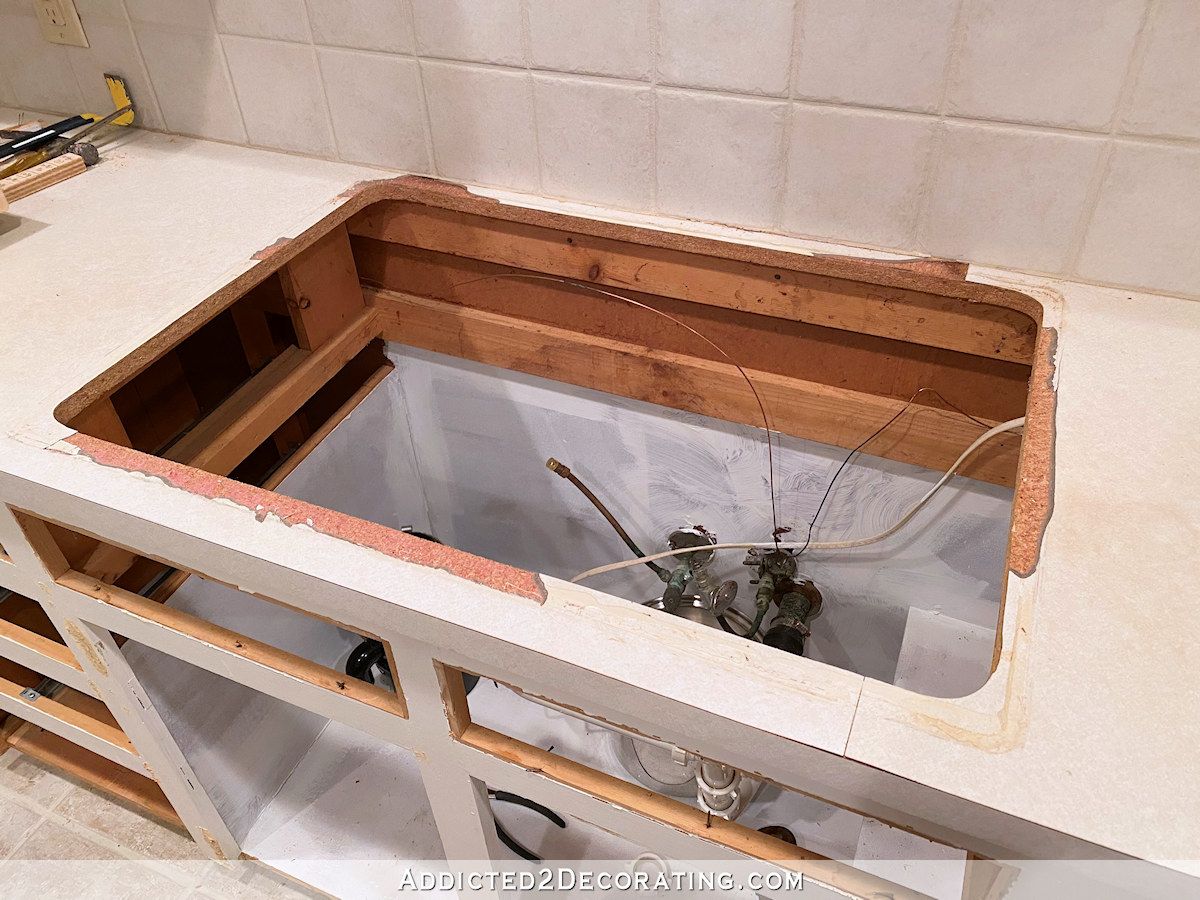
There are two big areas that still need work before we’re ready for paint. The first is the back side of the peninsula. This area originally had no doors. Then many years ago, when the double wall ovens were removed and a range was added, my mom lost two lower cabinets in the space needed for the new range. So my dad cut these openings in the back of the peninsula and added the two doors.
I’m going to completely rebuild the back side so that there are two sets of double doors, so my mom and niece removed everything from the back of the peninsula, and it now looks like this…
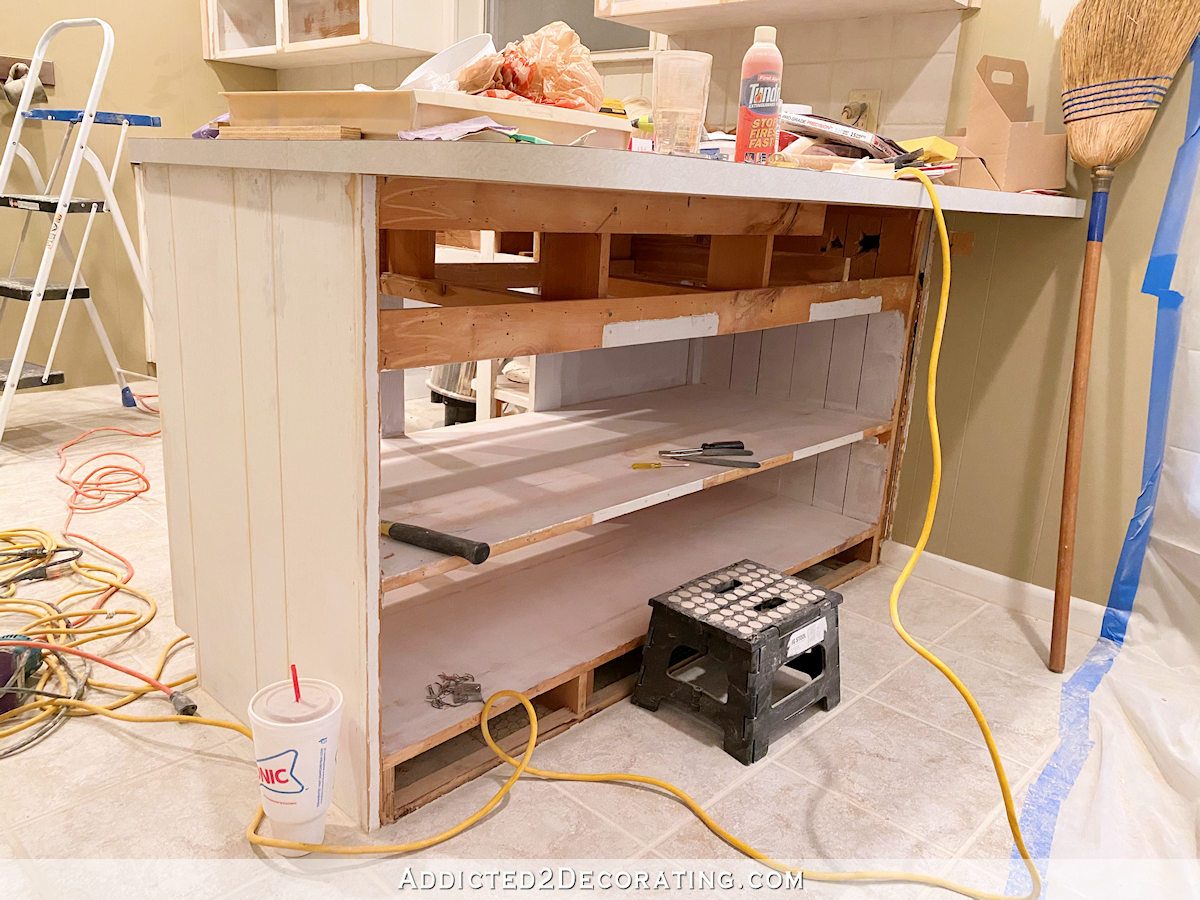
I’m still not completely sure what my plan is for that back side. 😀 This is one of those projects that I’ll make up as I go along.
I also need to turn this dishwasher space into a cabinet…
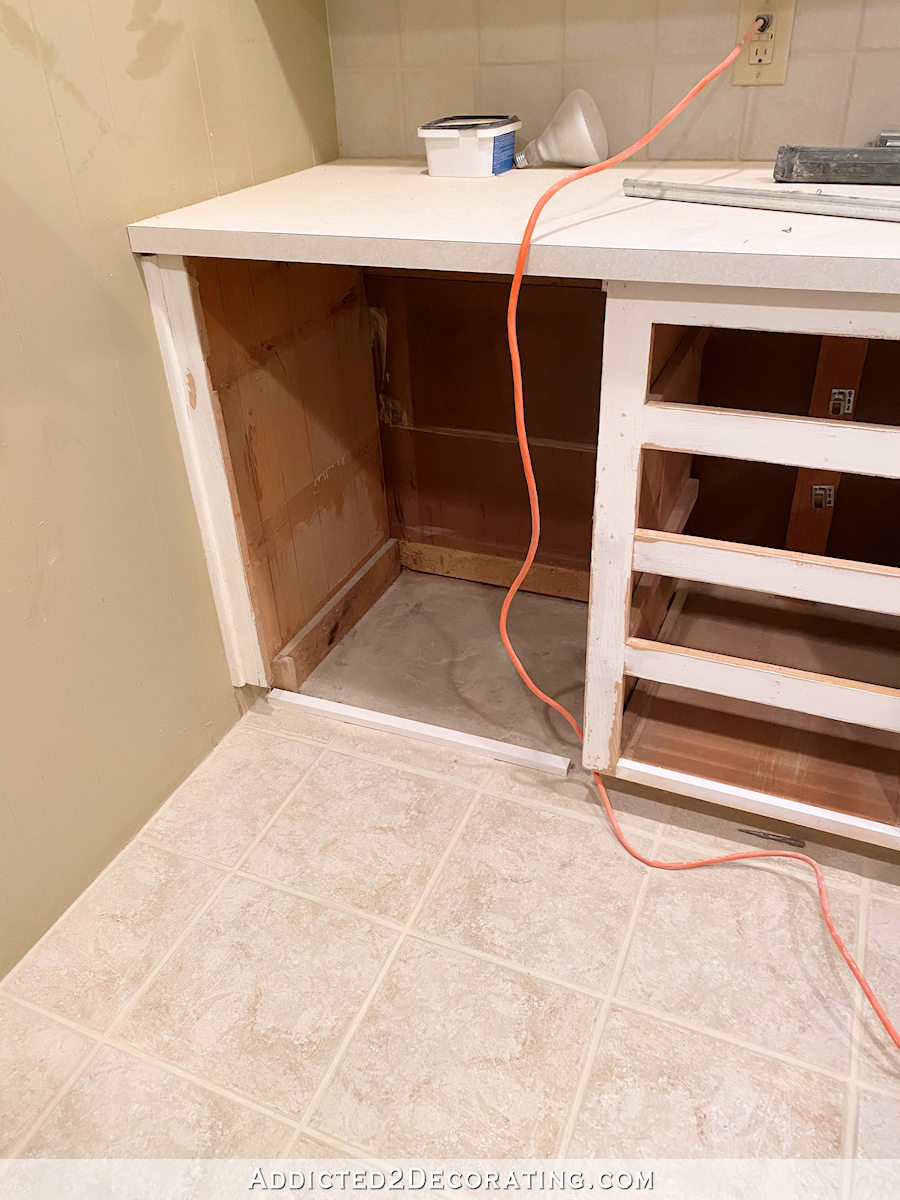
That requires nothing more than adding bracing at the bottom, along with a plywood shelf, a face frame piece, and a toekick. It’s as simple as that! Then once it’s primed and sanded inside, it’ll look just like the rest of the cabinets.
So that’s the current status of the kitchen. The wood filling and sanding is my favorite part of the process, and while I don’t love caulking, I do love how all of this prep work makes such a huge difference in the final outcome. Once we get these cabinets painted, we’ll be able to see how all of this work in the middle makes such a huge difference.
I’m hoping that I’ll have some actual painted cabinets to show y’all on Monday!

Addicted 2 Decorating is where I share my DIY and decorating journey as I remodel and decorate the 1948 fixer upper that my husband, Matt, and I bought in 2013. Matt has M.S. and is unable to do physical work, so I do the majority of the work on the house by myself. You can learn more about me here.
“The wood filling and sanding is my favorite part of the process.” You are one in a million!
Unfortunately international travel is out right now – otherwise I would invite Kristi for a visit to Canada. I’ve got all kinds of trim that needs a bit of work.
you’ve have given me courage to tackle my own kitchen reading your blog and seeing the changes you’ve done so far with your mothers kitchen. I added slide out shelves in one cabinet and on the other side the this cabinet I want to make something to hold trays and baking sheets. Your mother is lucky to have you. You two make a good team your whole family for that matter you work together. Can’t wait to see the finished kitchen.
Wow. I am just in awe of all the details you work to get so right. You always do the job the way it should be done. You are truly an amazing woman!
You are so talented! Can’t wait to see the completed kitchen, it’s going to be beautiful!
What would think of adding adding three deep full-extension pull-out drawers in the dishwasher area?
I love lower pull-out drawers as opposed to lower cabinets with doors.
Pullouts are so much better than getting down on the knees and having reaching into lower cabinets.
Pull-outs, with no front doors, would be The Bomb on the back of the peninsula, too.
This! So convenient for pots/pans/etc.
On the peninsula- my mom’s 60’s house has this same layout and she just did a cabinet door on the very end, where it’s harder to access that corner space. She already has access to the main space on the other side, so additional doors on the seating side was somewhat redundant.
My new kitchen has drawers instead of lower cabinets. I love it. And I honestly think I can fit more in the drawers. Or maybe I can just find what I need easier. Drawers and pull outs
would be a plus for someone your mom’s age. Speaking from experience of course.
I agree about the drawers. We just remodeled our kitchen. We put mostly drawers in where there used to be cabinets with doors. We have pullouts on the bottom of those. The kitchen is so much more user friendly. I don’t have to get down on the floor to find something in the back of those despicable cabinets!
Have you considered pull out drawers in that long cabinet. It will help Mom.
I agree with Micki’s comment! Anything that helps your Mom use her kitchen fully and allows her to “age in place” is a great idea. Well done, Kristi, I love seeing what you’re doing!
I am just amazed how you stay motivated. If you could bottle and sell that you’d be rich!
“I used my table saw to rip them down to one inch” – You’re so badass! I love it! 🤟💪👊
wished we could see what tools she uses. I want a table saw but don’t know whether to get a portable or a basic table saw. Have any guidance? I’m just a DIY-er and have no connections to any company if that’s what’s keeping her from listing tool brands.
My new kitchen has drawers instead of lower cabinets. I love it. And I honestly think I can fit more in the drawers. Or maybe I can just find what I need easier. Drawers and pull outs
would be a plus for someone your mom’s age. Speaking from experience of course.
Your blog is a blessed diversion. Thanks! Looking forward to Monday 👍🏻
What type woodfiller do you use? I have not found one that works for me? Thanks. I am always impressed with your vision and how hard you work.
You are being way more thorough than I would be, but then I would have just taken out the cabinets and started with new ones! I imagine it’s much harder to retro the existing ones. I would have pulled off the paneling and replaced it with flat luan also, because I hate filling and sanding! I like Sheilabird’s comment for the peninsula door too. I doubt your Mom needs to access those cabinets from both sides, so you may as well just add the one door by the wall for the corner area.
It’s going to look fabulous! You are the bomb, girl!
Hi Kristy, Fabulous job! I have a silly question, why is there a need for quarter round at the inside corners? Also, what’s the difference between the different cabinet door styles?
Prep work☹️ I hate it but it’s necessary for a professional looking job. My favorite is cutting in when painting. No painters tape for me😀 It’s going to be so pretty when finished. You’re lucky to have such a great mom.
Are you doing a garbage can pullout where the dishwasher goes? It would be better than the can sitting in the middle of the room . It will ruin all your pretty🙁
This is great and I can totally see the foundational work creating a polished, up to date space in the end! Attention to detail is so important and you are hitting all the right details. Kudos.
I had that scalloped trim in front of the kitchen window in my old house. I wanted it gone……. but never knew what to do. Now that it’s no longer my problem, I see what you did and love it.
Greetings from Ecuador, Kristi. I’m writing this a long way from home as I sit on the bed in my hotel room and marvel at this description of the steps you are taking. I am always impressed by what you do, of course, but also by your gift of precisely explaining what you do. You instill courage in others to undertake lots of projects they otherwise might not attempt. I am happy to be a member of your fan club. Kudos to you, your Mom, Matt, and others who help along the way.
You have done so much work and it all looks great. I love reading your blog.
These are wonderful family togetherness times you will treasure later on. I wish I had a daughter willing to help me like that. That being said you now have me spending more time on woodworking projects we are tackling by filling things I would have never bothered with before. The end results are so much nicer that way.