Moving & Reframing My Bathroom Door (Plus, My Door Design Decision)
I have a moved, newly framed bathroom door! And while it was quite a bit of effort for just a few inches of space, it was definitely well worth it.
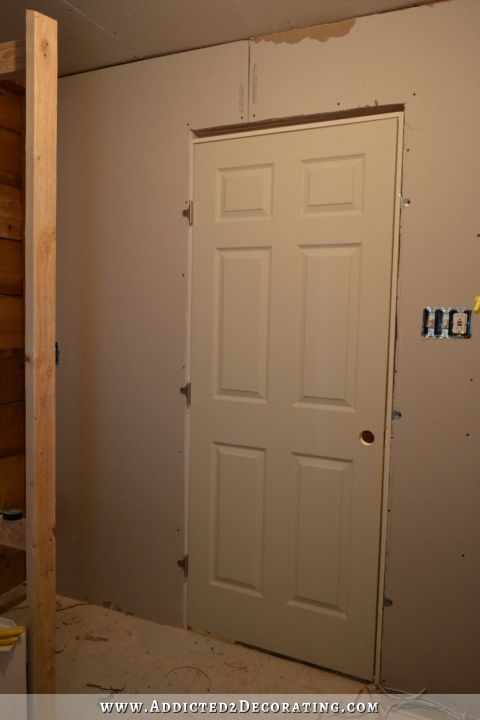
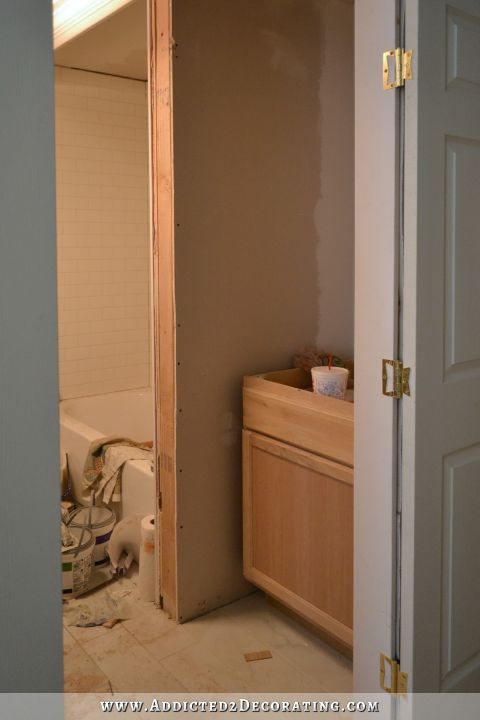
Here’s the door, and the door framing, that I started out with. I’ve been a bit surprised by the way in which all of the doors in this house are framed. It doesn’t matter if it’s a load-bearing wall or a non-load-bearing wall, all of the doorways seem to be framed exactly the same…
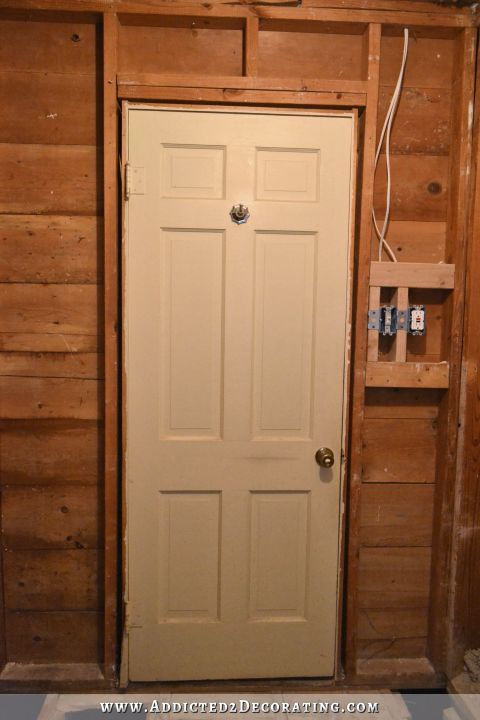
The problem with that framing is that this particular wall is a load-bearing wall, and yet there’s nothing load-bearing about that header above the door. Perhaps they didn’t think it was needed because the door isn’t very wide. Or maybe load-bearing headers for doorways just weren’t standard building practice in the late 40’s. Who knows? The way it was done has certainly stood the test of time, but I wanted to reframe it correctly for a load-bearing wall.
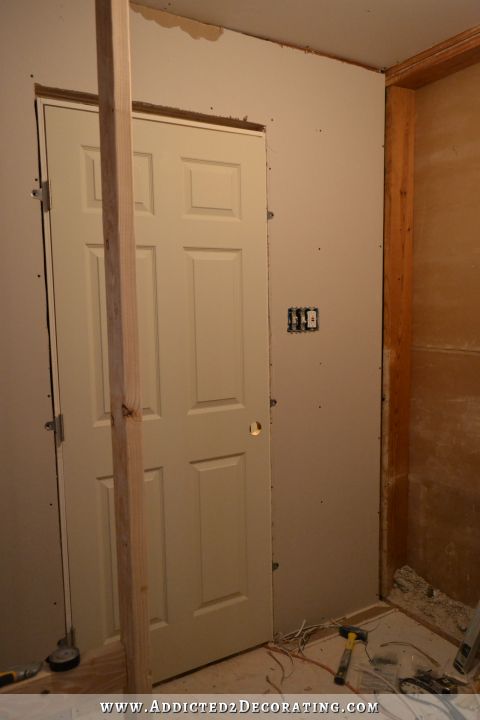
I started by removing the door and frame. Then I removed the header and cripple stud above the door. This allowed me to extend the base plate and add two new studs to frame the new doorway.
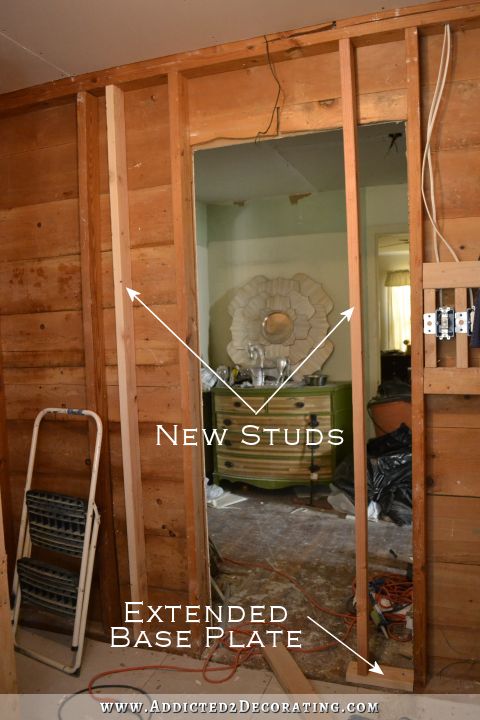
With those in place, I removed the one extra old stud, and cut away the extra shiplap with my reciprocating saw.
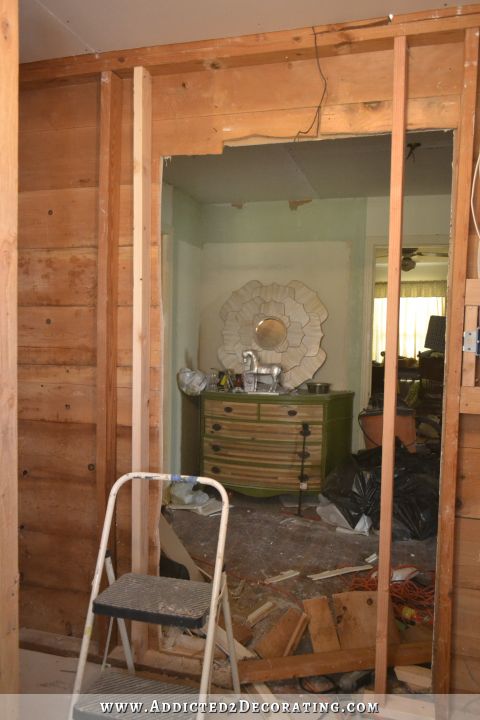
Again, the only reason I felt comfortable doing things this way is because that wall has had an open, unsupported doorway for over 65 years, and has remained standing. If I were cutting a new doorway into a load-bearing wall, I’d use this method of supporting the ceiling joists on each side of the wall during construction.
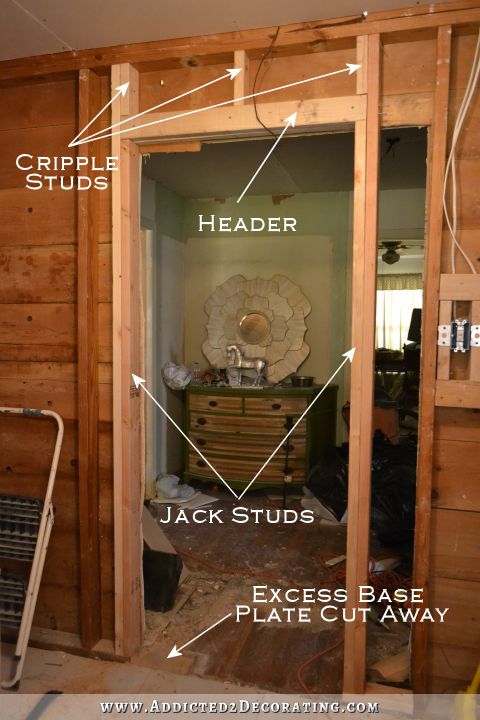
To finish out the framing, I added the jack studs to the king studs (the king studs are the first two studs I added that extend the full height of the wall). On top of the jack studs, I added the header. This consisted of two 2 x 4 pieces of lumber with a 1/2-inch piece of plywood sandwiched in between, and all of them glued and screwed together. Instead of installing them flat, like on the original framing (where you can see the edges of both of the 2 x 4 pieces), I installed upright standing on edge. Headers are installed so that the wide sides of the boards are facing the room, rather than the wide sides of the boards facing the ceiling and the floor like on the original framing. And then on top of the header, I installed three cripple studs. Now this doorway is properly supported. I had a contractor tell me the size header needed for this opening, and then I verified that information using the table on this website. According to that table, a 2 x 4 header in a single story home can support a doorway up to 3 feet 6 inches wide.
Side note: That wire hanging down above the door is an old, dead thermostat wire that got caught in my drywall. There’s no danger there. It just needed to be pulled back into the attic.
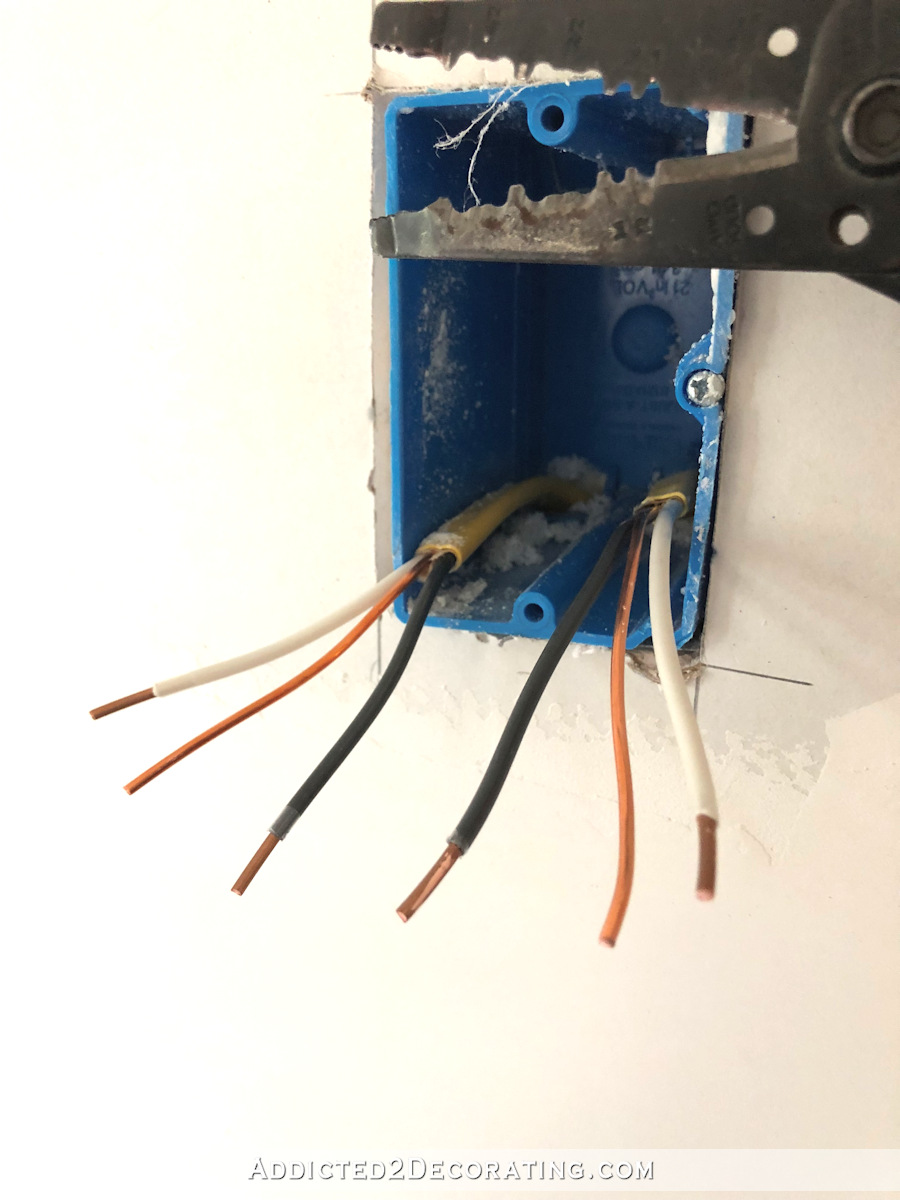
After the new doorway was framed, I spent a while rewiring the existing switch and outlet, and running a bit of new wiring. Since the door was moved, the old light switch and outlet positions were too far over, so they needed to be moved closer to the new doorway. I also added a switch for an exhaust fan (this bathroom has never had one), and I also added an outlet way over in the left corner. I put the two switches and one GFCI outlet into a three-gang box to tidy up the appearance a bit. I have no idea why I previously used two individual single-gang boxes for wiring the switch and outlet that were right next to each other.
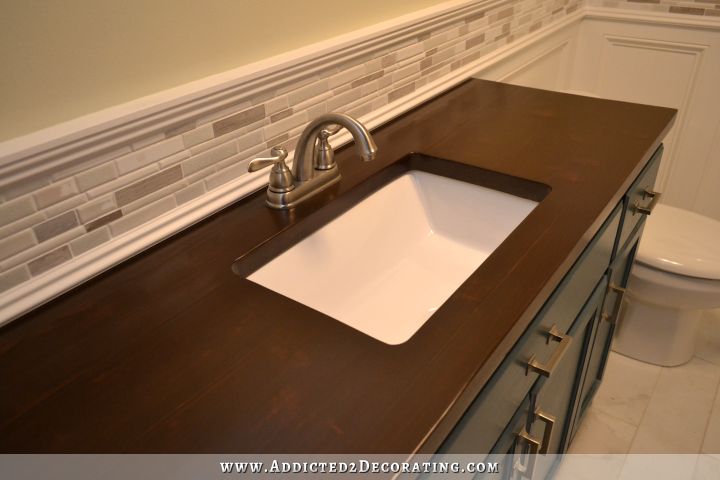
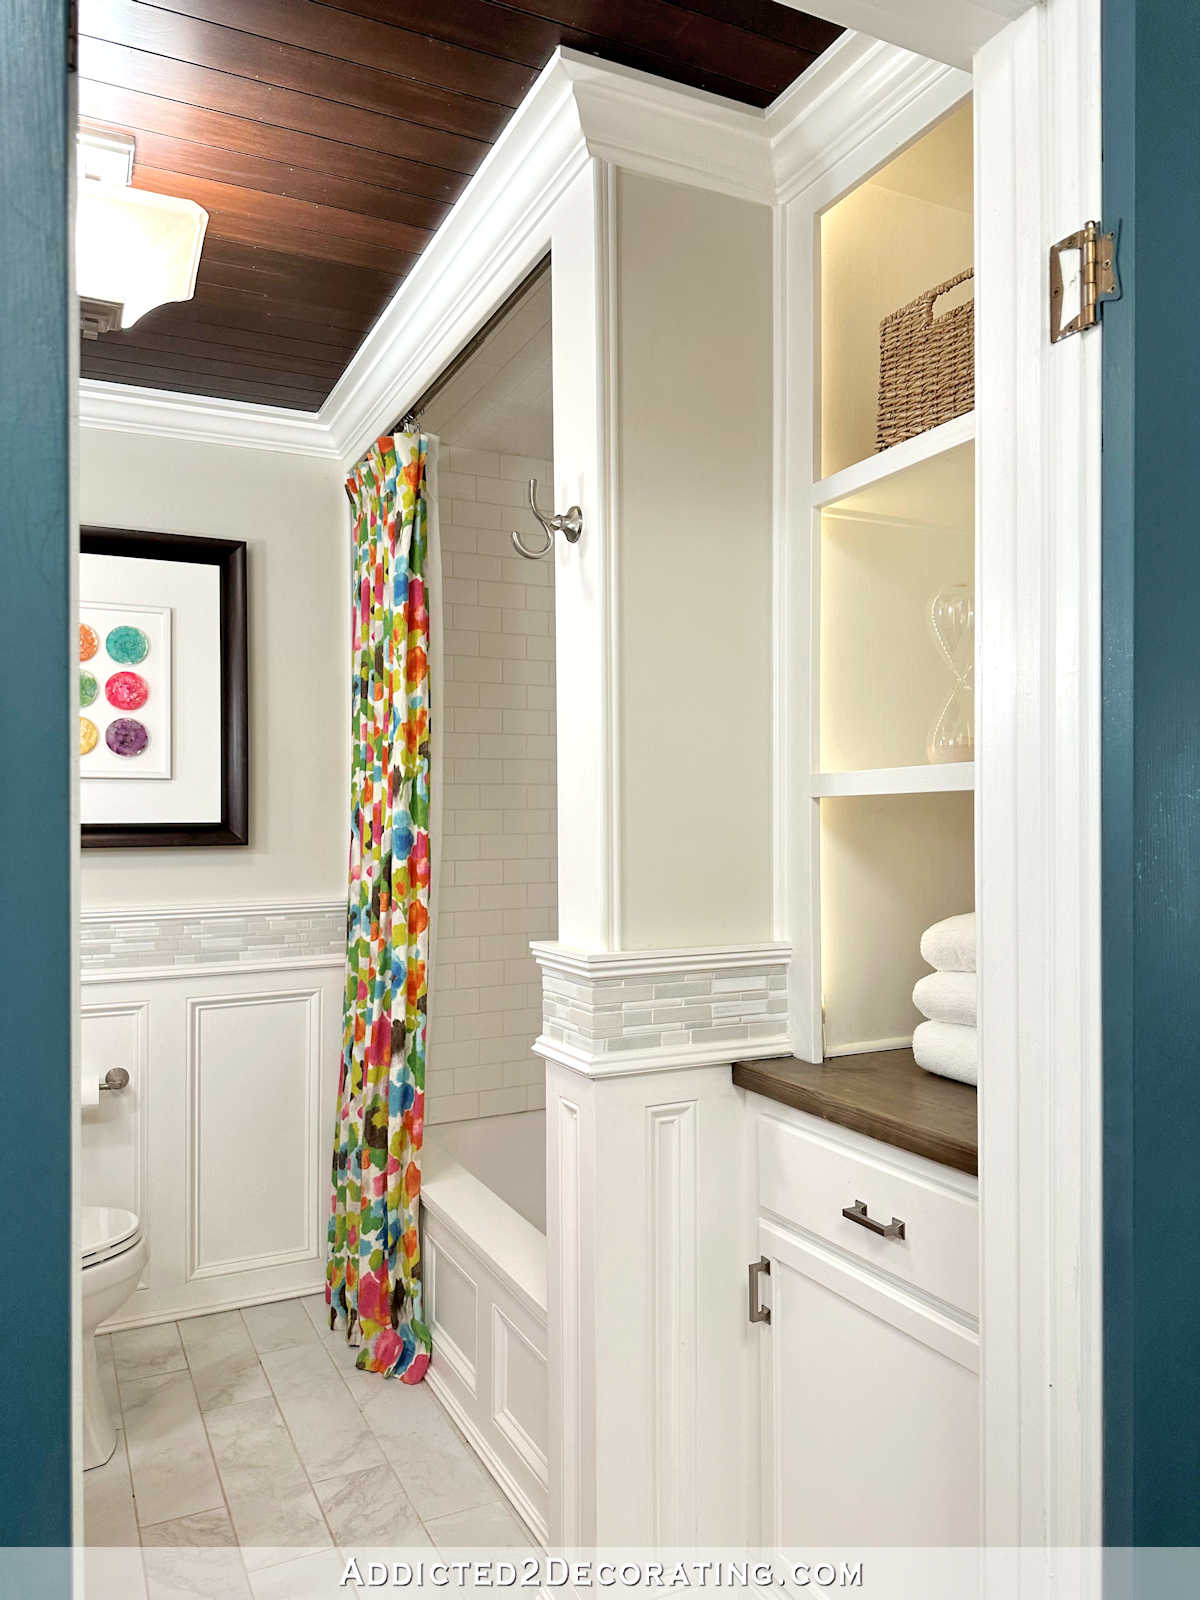
And finally, I installed my door. Are you shocked to see a regular six-panel door there? 🙂 I decided to with the no glass option, and I’ll customize these doors at a later date to look like option #2 in this post. In the meantime, I just wanted something that will look nice and finished.
But let me tell you about installing the door. Remember a while back when I wrote about my tips from a novice on how to install a door? Well, scratch that. Scratch all of it. All you need to do is purchase a box of The Quick Door Hanger hardware, watch their video, and you’ll have your new door installed in about 15 minutes. I can’t believe I ever spent the time and frustration on using the door shim method when these things were available right there in Home Depot.
You just screw six of these brackets onto your door frame, put the door into the opening, and screw them to the wall.

Okay, there’s a bit more to it than that, but not much! Seriously, watch the video at the link above, and see for yourself. If you’re still using the shim method to install doors, you’ll be amazed.
So now that the door is moved, the space between the vanity wall and the door is 25 inches — plenty of room for a standard depth bathroom vanity.
Things are moving right along! And they can’t happen quick enough for me. I’m generally not one to be bothered by construction mess since I’m a pretty messy person by nature anyway. (I blame it on my creative mind. 🙂 ) But I can tell you that this particular mess is really starting to get to me, probably because it involves a continual stream of construction debris, drywall dust, sawdust, and tools strewn about in the hallway, an area that we use countless times each day, rather than a mess strewn about a seldom visited side room. It’s starting to affect my mood, and that’s not pleasant for me or for Matt. And of course, the mess in the hall is causing him frustration as well since it limits his freedom to get around.
So I’m trying to get it done as quickly as possible without getting so tired that I injure myself. Actually, it’s too late for that. When I was installing the drywall on the ceiling, I was having to hammer a support board on the joist above the bathtub. My ladder wouldn’t reach far enough, and I’m only five feet tall, so I was having to hammer over my head. Plus the angle was very awkward, requiring me to hammer at an awkward side-to-side angle using my left (non-dominant) hand. My arm was getting so tired, and my already pathetic, left-handed hammering was getting worse and worse with each swing. With one final swing, the hammer glanced off of the nail, and headed right towards my forehead. I ended up with a pretty good sized knot on my forehead right above my eyebrow…from hitting myself in the head with a hammer!! I wanted to laugh at my stupidity, and cry in pain, all at the same time. It’s a good thing I was using my left hand instead of my right hand, because I would have knocked myself out cold if I had been using my right hand. 😀
DIY is such an adventure! 🙂

Addicted 2 Decorating is where I share my DIY and decorating journey as I remodel and decorate the 1948 fixer upper that my husband, Matt, and I bought in 2013. Matt has M.S. and is unable to do physical work, so I do the majority of the work on the house by myself. You can learn more about me here.

Look at you go! Wow, door moving, drywall, AND electrical — Please don’t be offended when I tell you quite honestly that, you are my dream woman! 🙂 (and I’m a girl!) LOL
Seriously though – We ladies ALL look up to you, and can hope to aspire to be just a quarter of the DIY’er that you are! I love that you show each and every step of how to get things done. YOU are simply not afraid of tackling any jobs anymore!!! You give us all hope and change that we can appreciate!
YOU ROCK Kristi!
Totally agree!
You ARE amazing!! I look forward to reading your blog every day. You inspire me. And today you actually cracked me up! Made me recall the time I was painting and left a hammer on top of a 6 ft ladder (God only knows why I needed the hammer–I was PAINTING!!). Naturally, I forgot it was up there when I went to move the ladder, and BAM!! Maxwell’s silver hammer came down upon my head!! I saw stars! These days I’d rather read about DIY than actually DO it! lol…
your a woman why isnt your man doing this work for you or you wear the pants in your home lol?
Holy crap, that cannot be a real comment. Did I enter some time travel portal to the 1950s? I personally do this stuff because I ENJOY IT. But no, “my man” doesn’t do the work FOR me, for one, because I don’t need him to, and also because he’s disabled and in a wheelchair. Unbelievable.
Hey, I am on my way out the door but have to say this…how the hell do you know what to call all that stuff? I fell like I am reading something from a master carpenter. You are amazeballs!!!Blessings
It’s called “research”. If you ask Mr. Google “how to frame a door in a load-bearing wall” it gives you pages and pages of links. When you click on them you find both how to do it and the specific terminology. Then you just have to remember them.
@Dawn, now you have gone and burst my bubble! Here I thought Kristi knew all of this stuff from doing it for so many years! This means we can all be just like her….all we have to do is google it……yeah, right. It would never occur to me to diminish someone’s God given talents by suggesting that all you have to do is GOOGLE it. Blessings dear.
Where did you see diminishing of Kristi’s talents in dawn’s comment? Nobody knows the terminology from doing DIY; one learns it from books, internet, or other people. Kristi has mentioned numerous times that she had watched videos on youtube before starting some of the projects.
It was never my intention to diminish Kristi’s talent, creativity, and productivity. She knows a lot of stuff and, by tackling new and different projects she learns new things which I appreciate being shared to her readers. I was merely observing that the way a DIY-er learns so many different things is done by research on internet. My husband, I, or both of us together have successfully tackled many renovation aspects in our house: flooring, walls, drywall, insulation, electric circuits, exterior drainage & foundation insulation, tiling, carpentry, upholstery, fixing appliances, fencing, roofing, painting, changing/fixing faucets and sanitary appliances and so on. The ABC I’ve learned from renovation shows such as “Holmes on homes”, that basically taught me that the beautiful “make-up” that is the hardwood floor or tile has to be applied on a sturdy, plain sub-floor or wall. For doing these properly I’ve done A LOT of research on internet, compared processes, products, reviews, etc, and therefore I learned a lot of these terms.
I really do just do a lot of reading, watching videos, etc. 🙂 The funny thing is that when I had that contractor come over to my house to give me direction on removing the kitchen wall and installing the load-bearing header, I had already done lots of research on it, so I knew the basic process. I kept using these terms “king stud” and “jack stud”, etc, and he would just look at me with a puzzled look on his face. When I explained what I was talking about, he said something like, “Oh, I’ve never heard those terms! I didn’t know what they were called. I just know how to do it.” 😀
God Bless you Mary Ann. Missing ya on Kristis blog.
I’m so excited to see the finished product! This is timely info for me as we just bought a house and our master bedroom doesn’t have a door. We have 10 foot ceilings and all the other doors in the house are very old, big and heavy. I’m not even sure where I will find a door to match our other 100 year old doors.
You rock — everytime I start a project, I have to pre plan how many fingers I am going to injure. You are in the major league when you injure your forehead. I love your blog.
Oh my gosh! We have 10+ doors left to install on our whole house renovation. My husband is going to be sending you a bouquet of roses. I just ordered 10 from Home Depot and we’ll be hanging doors asap. He hates shimming!
Thank you for the info.
Just curious…how are you coming long on your “weight loss journey”?
I keep forgetting to write an update. 🙁 I’m down 40.5 pounds total.
Whoa. That’s amazing.
Your SPEED amazes me most of all! I just spent 4 hours struggling to finish just one section on my back deck. I did all but one small section and ended up exhausted and my craftsmanship is NOWHERE NEAR your level! Girl, you are GOOD!!!
Wow!!!…Wonder woman you are!…You just amaze me, and only 5 ft. tall…I always look forward to your daily up dates…Can’t wait to see the finished bathroom. Please be careful nothing is worth a broken body!…Haha!!…Many blessing to you and Matt,
A few random comments:
#1: Thank you for the tip on hanging doors! The videos are amazing.
#2: There are many awful things in this world, but drywall dust is among the worst. It is so awful. I am the same way: when I have drywall dust in my house, I am very, very cranky.
#3: I’m really sorry you hurt yourself and really glad you’re ok, but I laughed out loud when I read that you hit yourself in the head with a hammer.
Keep going! You’re doing awesome.
You constantly amaze me with your knowledge and skills. I love reading your blog and seeing the work you do on your house. You are awesome!
woot woot – solid door
You rock! After reading what you are doing, it makes me want to try harder.
I LIKE YOU!!! I love your creativity and “can do” attitude and watching all your ideas come to life! I love reading your blog every night before bed!! Thanks for sharing all your projects! By the way, my husband and I copied your plans and built a wood top out of cedar fencing for our bathroom sink and love it. We plan to try a few of your other projects as well (plank walls in the bathrooms and build our own fireplace!!) Thanks again!
Sincerely, Kris
Pearland, Texas
Like your door, like the suggestions on how to hang a door, and like your descriptions of how to do framing. Now, would you do something about hitting yourself with a hammer? Don’t like that at all! Be careful.
Hi Kristi, thank you for your blog, I think what you are doing is amazing! You are so inspiring and have motivated me to attempt several projects in my own home. Keep up your awesome work and be good to yourself, no more hammer hits!
Kristi, I have no idea how you are able to accomplish the things you do. Major kudos to you. You are an inspiration to women everywhere!
I somehow missed seeing that you had won the DIY contest over at Not Just a Housewife. I had to do major research to find out that you had won. Somehow it wasn’t announced on a regular post there. I had been looking for two weeks and finally found out through her Linky Party. I haven’t seen you tell us about it either. Maybe I just missed it. Anyway, CONGRATULATIONS! Never was there a more deserved win.
Congratulations on your win, Kristi! {I may have voted for you more than once, from my various e-mail accounts *shifty eyes*} What a great prize, too, both are something you can really use! There was some really great competition, but clearly you deserved the win!
Congratulations on a well-deserved win!
I think your solid door was a wise decision.
I can’t believe how quickly you get things done. It takes me ages just to make a decision.
Kristi,
I would love to see a picture from hall looking into bathroom. Perhaps even a comparison pic just to see the difference you made. Hope that’s not too much to ask. You are amazing!!!! Love following along on your journey!!
Kristi I look forward to your blog every day! You amaze me and inspire me and I love how you work randomly on your house as you feel inspired. Please keep blogging because reading your blog is one of my favorite parts of my day!
Amazing job! Sporting a sore spot on my forehead from pliers slipping off a nail I was pulling out yesterday. Had to laugh at myself through the tears!
Kristi, I too have been known to do a few crazy things like that and had to laugh at the same time telling myself how stupid I was.. I can recall a few. Hope your ok.. be careful lady..
LOVE YOUR BLOG…!!!
Wait… Hold up… You are going to take that regular 6 panel door and change it into a door like the one from your other post?! I’ve SO been waiting for something like this so I could change all of my builder grade ones! SUPER EXCITED!
I will, but I won’t be doing the design with the glass. I’ll be doing the other option, with one panel and two frames of decorative trim. It might be a while, though. That’s not high on my priority list right now. 🙂 First, I need to get the rest of the hallway doors installed, and then I’ll think about customizing them. 🙂
that’s awesome! that is exactly what I want to do with ours! I will patiently wait I guess 🙂 I’m sure glass would be pretty on some doors but I have a toddler so that probably wouldn’t turn out too well.
Well I have to give you lots ‘n lots of praise for what you have done and plan to do. I’m more of the “call-me-when-the-dust-settles-kinda-girl” and I’ll be right over with the pictures, lamps, pillows and graph paper. Have a happy valentine’s day …you are taking the day off, right?
Thanks for this post. Your pictures were a big help. A lot of instructions and videos that I found online just didn’t provide a clear picture and I need to see things. I moved a bathroom door in our 100+ yr old house (just a couple inches). Thanks again!