Bathroom Makeover Day 9 – How To Remove Wallpaper (Without Actually Removing Wallpaper)
As I promised yesterday, today I’m going to show you how to remove wallpaper from your life without actually removing the wallpaper from your walls. Yep, this is my alternative to stripping wallpaper, and I personally think it’s not only so much easier, but it’s also much faster…especially if you have two people working on the room!
I hate stripping wallpaper from walls. Absolutely hate it. Only once in my life have I had the pleasure of removing wallpaper from a room where the paper came off the walls in complete sheets. I kid you not, I had the wallpaper removed from that rather large bathroom in 15 minutes flat. But really, how often does that happen?
Generally, removing wallpaper includes hours of tedious peeling, scraping, spraying water, scraping some more, steaming, scraping…and on and on. And I don’t know about you, but generally when I’m done, I’m left with walls that need repair because whatever scraping tool I’ve used has left little gouges in the drywall. It’s just a huge mess.
So here are the four rather simple steps to take:
Step 1: Inspect and peel
Yes, you do have to do a bit of wallpaper peeling, but this is only the easy kind. Just inspect the walls to be sure that there aren’t any areas where the wallpaper is loose or peeling. If you find any such areas, just grab the loose piece and peel it right off the wall until you’re left with only paper that’s really stuck to the wall.
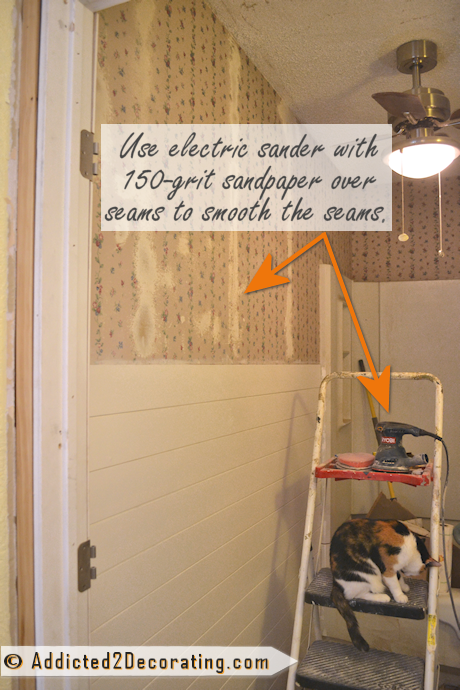
Step 2: Sand the seams
Next, use an electric sander with 150-grit sandpaper to just smooth out the seams. Also use it on any of the areas where you just peeled the paper. You don’t want to be left with any hard paper edges. Instead, you want the edges to be “feathered” so that they just smoothly blend right into the drywall.
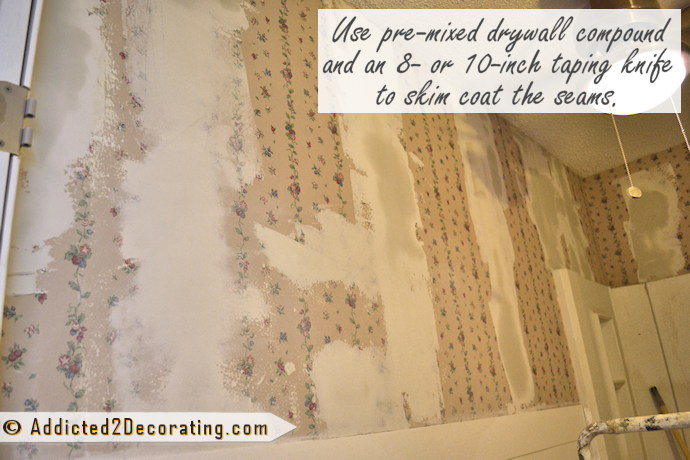
Step 3: Mud over the seams
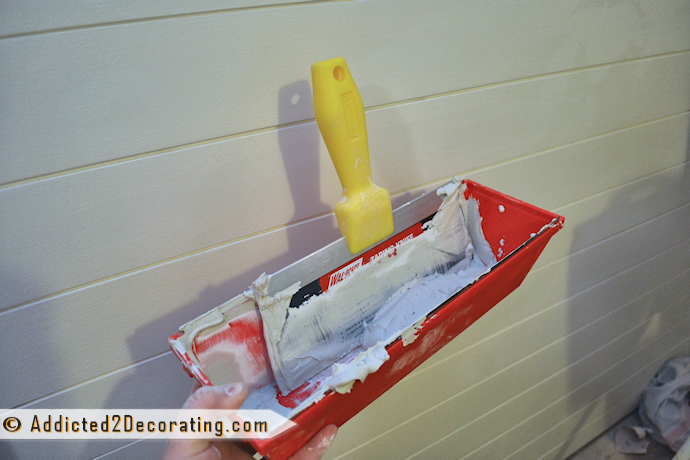
Next, use pre-mixed drywall mud and an 8- or 10-inch taping knife to mud over the seams.
Keep in mind, this is just a very thin skim coat, so it’ll dry very quickly, expecially if you set up a box fan to generate lots of air flow through the room. With fans set up, it should dry within a couple of hours.
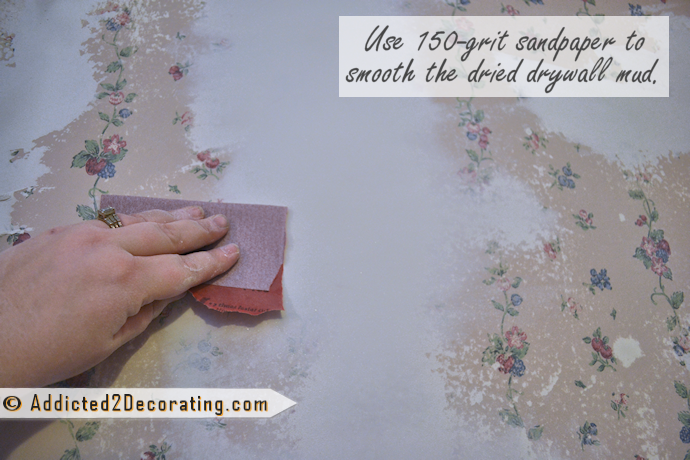
Step 4: Sand the dry drywall mud
Using a 150-grit sandpaper, sand the dry drywall mud until it’s smooth. Concentrate on the edges so that they’re perfectly smoothed into the wallpapered areas, but definitely go ahead and sand the whole thing just to be sure that all of the mud is perfectly smooth.
And that’s it! Four steps to removing wallpaper from your life without actually going through all of the tedious work of removing it from your walls.
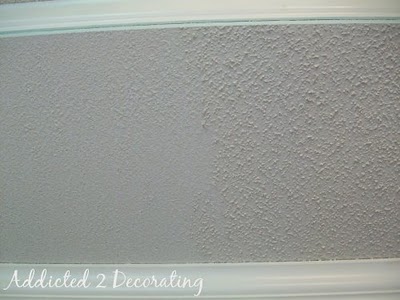
You’re left with smooth walls, and from there, you can do whatever you had planned. Want to texture them? They’re ready! Want to just paint them? They’re ready! (Although I’d suggest using an oil-based primer first.)
They’re definitely not pretty at this point, but that’s nothing that a coat of primer and paint can’t fix!
Now I did have to do a little drywall repair on the area where I removed the massive wall cabinet. Remember those three holes I punched in the wall? Those had to be fixed. So here’s a bonus…
How To Fix A Hole In Drywall…The Easy Way…
There are several ways to fix holes in drywall, but when it comes to stuff like that, I generally opt for the easy way, even if it costs a bit more money.
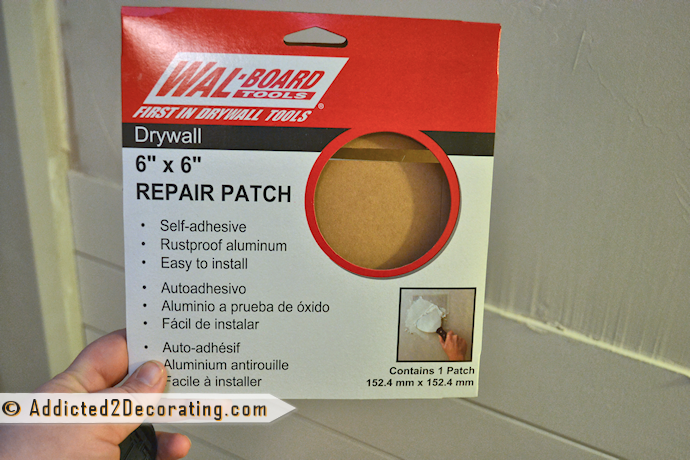
So I went to the home improvement store and picked up three of these drywall repair patches…
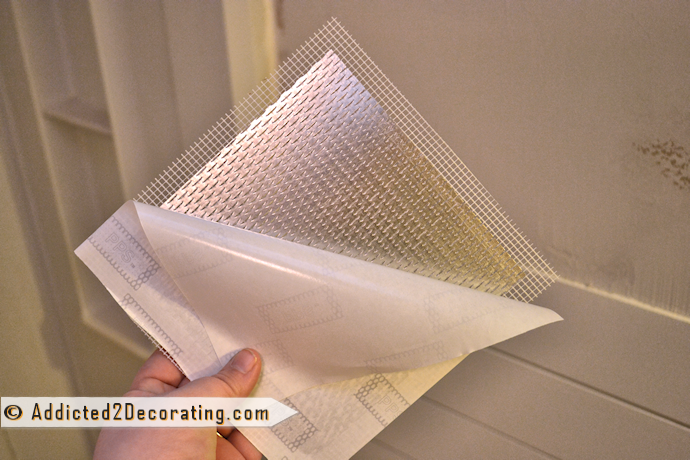
It’s a metal mesh with a piece of plastic mesh over it, and the back is adhesive. So obviously you have to remove the paper backing first…
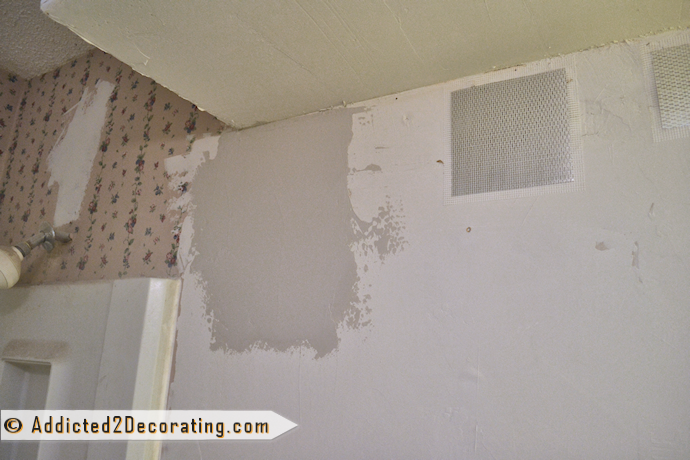
Then you just stick it to the wall right over the hole, and use your taping knife to put drywall mud right over it.
And after the mud is completely dry, just sand over it to smooth it out, and it’s done! Only you would know there was ever a hole there. Pretty easy stuff, right?
That’s where I’ll leave you for now. I’ll show you my finished walls on Monday. 🙂 Have a great weekend!
Addicted 2 Decorating is where I share my DIY and decorating journey as I remodel and decorate the 1948 fixer upper that my husband, Matt, and I bought in 2013. Matt has M.S. and is unable to do physical work, so I do the majority of the work on the house by myself. You can learn more about me here.



Great advice! When we moved into this house 13 years ago, there was wallpaper in almost every room. We stripped it all over the years and I hated it too! A couple rooms it was easy, but the rest was maddening, coming off in little tiny pieces, taking forever… If I ever move into another house with wallpaper, I’m remembering this!
This is a great idea and tutorial! Will it work if someone has already (badly) painted over the wallpaper? In our guest bath, which I’m going to work on soon, the previous owners painted over the wallpaper, but you can still see the seams. I wonder if this would work on those seams, too? Thanks!
Yeah! Perfect timing! I just got the call that my offer was accepted on a little house that has wallpaper in every stinkin’ room! I’ll be ready to take it on with your directions above!
It’s gonna be a long weekend, waiting to see your finished walls. Couldja hurry up? Huh? LOL
Fine. I can wait. (But only because I have to).
I have also peeled wallpaper off almost every wall in my house, but there is one part of my bathroom where wallpaper was put on bare drywall. I get mad when I look at it. It is so bad that a contractor friend told me I might be better off just replacing the drywall. I googled my brains out trying to find a better solution, and you may have just solved my problem.
Procrastination sometimes pays.
That is genius. I think stripping wallpaper is hell-on-earth! I can’t wait to see what you do with the wall. Will she texture or won’t she? Stay tuned….
I know that whatever you do, that nice bright color will look great with the white plank!
Love this. I need to go back over walls we painted over, and the seams popped up. (we were lazy) I figure someday when I am energetic, I will sand and do the drywall mud. In the meantime, we painted with flat white paint and it’s our bedroom so 90% of the time I’m in it, the lights are out anyway:) you rock!
Great tips. I sealed and textured over my wallpaper nightmare lol
I like your style! I have two bathrooms that desparately need something done to them and both are wallpapered. Ick. I will definately try it ‘your way’ because it’s waaaaaaaay easier than stripping the darn stuff. Can’t wait for your Monday post.
Looks great! Really moving along!!
Really you have great ideas and useful blog
Oh…thank you, thank you, thank you!!!! You just saved my fingers! I so can’t wait until Monday..I’m so excited to see it done!
Absolutely agree. Love this tute. People go nuts about painting over wallpaper, like it’s some kind of SIN. But if you think about it, what is drywall but mud between layers of paper. So, what’s another layer of paper? It just has to be properly prepared, as you’ve shown us.
If a wallpapered wall was properly primed, or “sized,” before it was papered, the wallpaper should come of easily, so it’s good to test, because it just might come off in sheets. If you’re lucky. Otherwise, Kristi to the rescue! Thank you.
Looking forward to our next installment.
I’d rather deal with the wallpaper than the irregularity of drywall mud applications and sanding- dry wall dust is the worst. To easily remove wallpaper, score the paper (using the tool meant for this purpose), then, using a bottle sprayer or a pump style sprayer, soak it with a solution of warm water and powder dish washer soap. Often the top layer will come off first, just do a second application. Use a plastic scraper to remove huge sections at a time. In the time it takes to apply the mud and waiting for it to dry the walls would be done using my method, including getting the water and paper pieces off the floor.
Haha! That’s funny…to each her own, I suppose. 🙂 I’d rather stick a fork in my eye than remove wallpaper. I’ve tried the water method MANY times, I always find that the paper layer of the drywall gets wet and soft, and is easily gouged by my scraping tool. So after hours of tedious scraping, I then have to spend at least a couple of hours doing drywall repair on the gouged areas.
One thing that I love about drywall mud is that once it’s dry, it’s the easiest thing in the world to sand. I find it almost cathartic to sand drywall mud just because it’s so easy, and I get a smooth finish with very little effort (unlike sanding primer on furniture). And on the occasions that I’ve had someone hold the ShopVac hose under the area where I’m sanding, I have found that the dust is minimal.
You can enjoy your spray bottle. I’ll take the drywall mud any day of the week. 😉
Perfect approach for walls primed BEFORE the paper is hung. Doesn’t work so smoothly if you find no priming was done when you start the removal process. Last small removal project I did (following YOUR method) ended up with bathroom walls so damaged that I finally did a faux stucco finish just to have something bearable.
BTW – faux stucco (joint compound with a little paint mixed in it) was a nifty cheap compromise for damaged wall fiasco in a small room – this was my first experiment with it so not as nice as I’d like. But if I encounter the same problems with the next THREE larger rooms that I have to strip will do a better job!
I have used those patching squares. Fabulous!
This is fantastic Kristi! Thanks for sharing such a detailed tutorial! I had a little studio in grad school and painted right over some textured wallapaper-I was so nervous but it turned out great!
Thanks for the tips! Just remember, if the wallpaper has any texture or raised pattern, it will still show through so this may not be the best idea if you have a textured paper. Smooth where the seam are but pattern elsewhere. Also – as a professional painter, be VERY careful if you use a “wallpaper scoring” tool – most people press too hard and damage the walls underneath and end up with score pattern all over that needs to be repaired…..just saying, thanks for all your info and inspiration! Love your blog!
Very good point, Ellen. This is only useful on the smooth wallpapers with no textured patterns.
Thankfully no wallpaper to remove, but I’ll remember this if the need ever arises! One of my cousins had her kitchen painted and the painter must have done something similar. He didn’t remove it and you would never have known it was there after!
I LUV your blog, I mean I really love reading everything you post! This post on wallpaper is something my husband I were just discussing and how to tackle it in our master bathroom. My question to you is how can I get the wallpaper down which was placed over textured walls??? The idiot before us in the house put wallpaper over a textured walls!!!! Do you think I could use your method posted?
Removing wallpaper is a nightmare, I too, will never do it again! This is a really useful post, thank you!
Every wall in this nearly 100 year old house has wallpaper on it….even the ceiling. My drywall guy does this method for me everytime I hire him. It works perfectly and I never have “hanging” wallpaper…even on the ceiling!
I think this idea is great for a short term fix, but something to consider is how it will look down the road. The wall paper will eventually bubble and/ or crack in areas. Once you have painted over it, it is much more difficult to remove.
It’s perfectly fine for long term. The wallpaper won’t bubble or crack if you’ve properly mudded the seams and sealed it with an oil-based primer.
It’s the drywall mud and the oil-based primer that make this method completely different from just grabbing a roller and painting over wallpaper with latex paint. That is a short term fix that causes major problems that will raise the seams. The method I’ve shown is permanent, and is used by many drywall and painting professionals.
It’s funny my clients don’t even realize they have wallpaper. When I tell them see the lines, they said I never noticed it. We’ve done this in the past and it’s a great solution but sometimes there’s too many layers and it needs to come off maybe not all but most. Which I hate and it’s messy and anytime that I don’t have to do it, I don’t and follow this method. Otherwise, you’re mudding for ever because you’ve taken off half of the wall when you removed the paper. Were doing a project in a few weeks and I ready told the client were doing way. Thanks for saying you’re using a oil base primer because that’s what you need to do. Pam I love seeing all that you do.
Though I have no wallpaper in my current home, I’m filing these tips for future reference. Thanks, Kristi, for the shortcut!
I love your makeovers! I do have one question about the drywall patch. I used a similar patch a few months ago, When I smoothed and sanded the patch started showing through so I had to stop sanding. But there’s an obvious raised “bump” in the wall where I mudded. Any idea what I did wrong?
Great tutorial! I had to do a process similar to this to the ceiling in our mudroom a couple years ago…but it was texturized wallpaper on the ceiling. I ended up having to peel off all the texture and then powersand the whole ceiling…it was a ridiculous mess! But it looks so much better now (even though some of the seams are still visible after mudding!)
Wall paper is never fun to remove. When I see it during a home inspection I almost cringe to think of the process to remove it.
Hi Kristi! I live in an older mobile home with the ugly “wallpaper-like” walls. It’s installed in sheets with moulding strips to join. I’m wondering if your method would work to repair this ugly stuff; it looks like it would. What do you think? Thanks in advance for your help. Love your site!
I think it would, but just keep in mind that in mobile homes, the wallpaper isn’t put up over regular drywall. They’re usually more like paneling boards, which is why there are moulding strips between them. If it were mine, I’d certainly try it, but I can’t guarantee that it would work out the same.
If the wall paper is fairly old and you were not the one who put it up, it’s best to test for asbestos prior to sanding. Asbestos was present in vinyl wall paper up to the mid- to late-70s I believe. Sanding asbestos vinyl wallpaper could be a disaster…
Great write up. I wish I would have had this information a few years ago when I stripped wallpaper in my house. That was the worst and I’ll never do that again! 🙂