Half Bath Progress — And Tackling The Most Dreaded Project
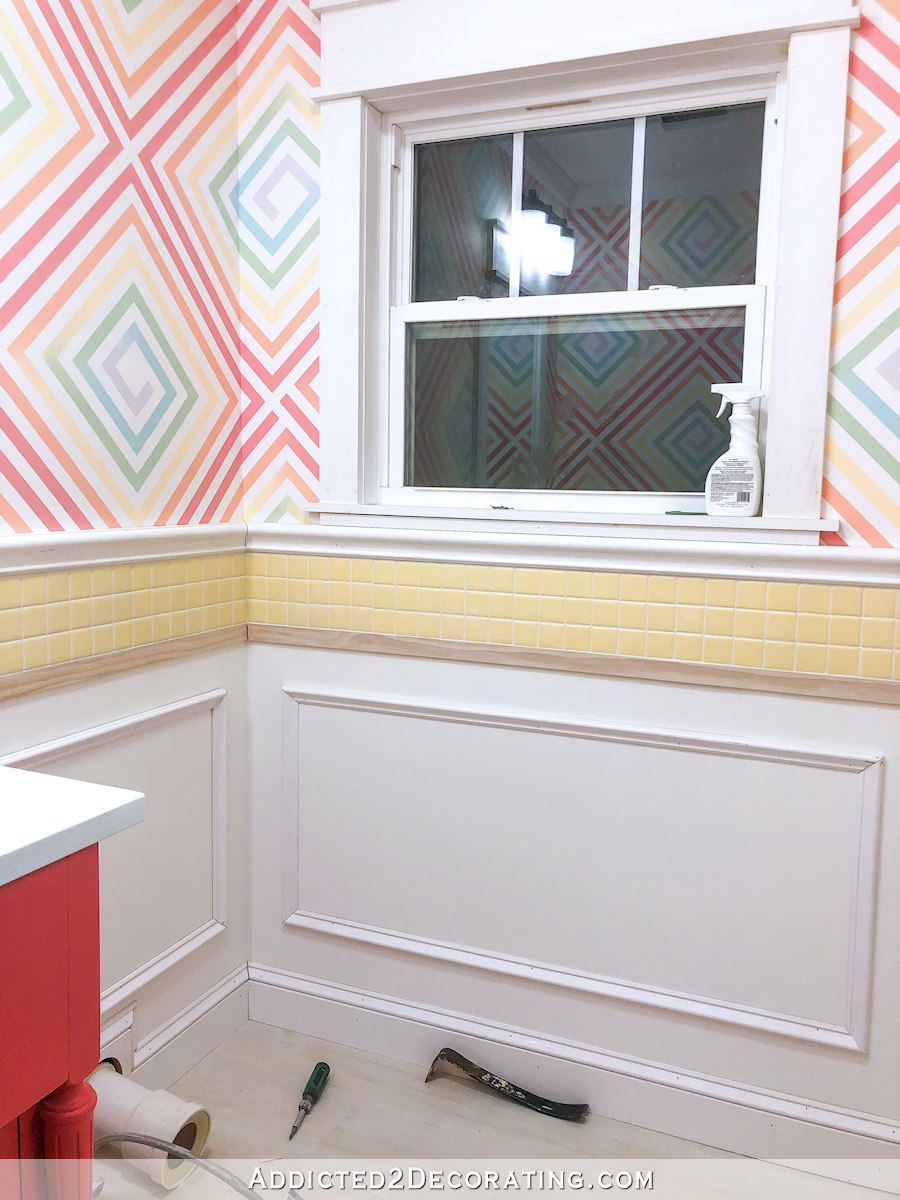
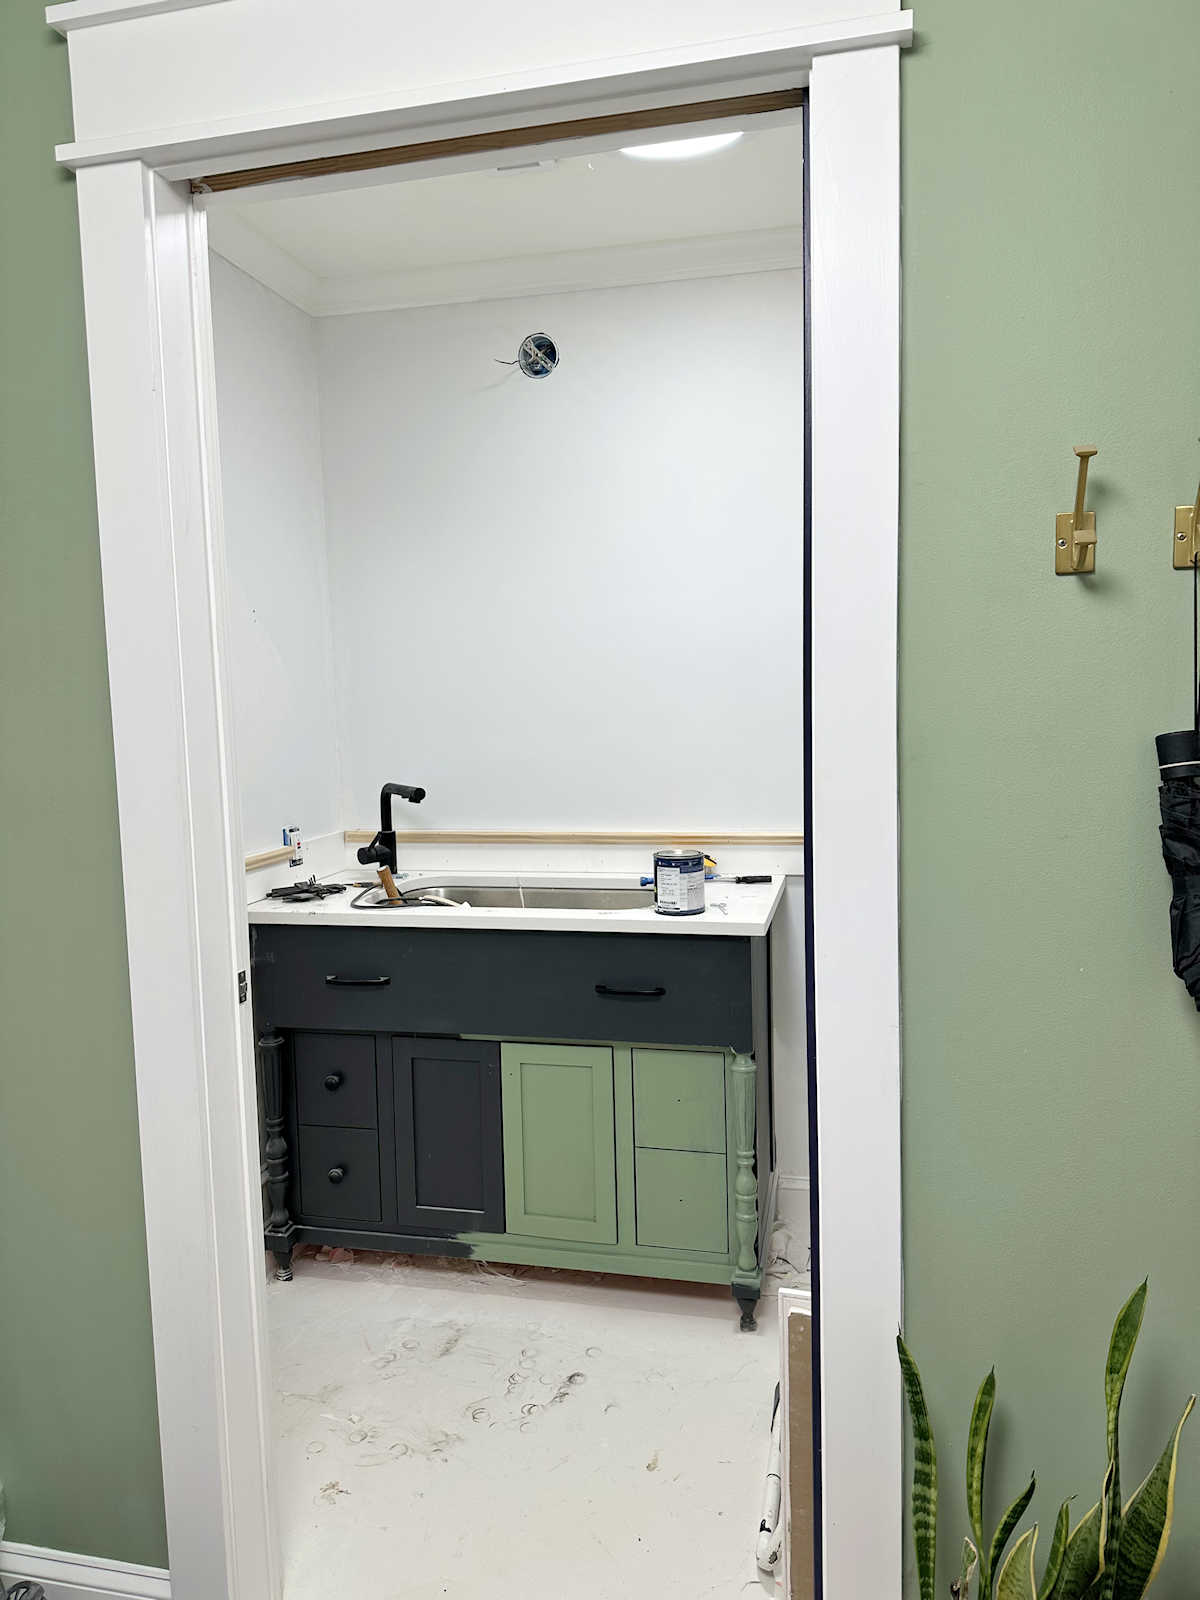
I finally had time this weekend to make some headway on the trim on the lower walls of the half bathroom. While I didn’t get it all installed (thanks to blog technical issues that devoured hours of my time…ugh!), I still managed to get most of the picture frame molding, baseboards, and base cap installed. I still need shoe molding on these walls before I can move on to wood filling, sanding and caulking.
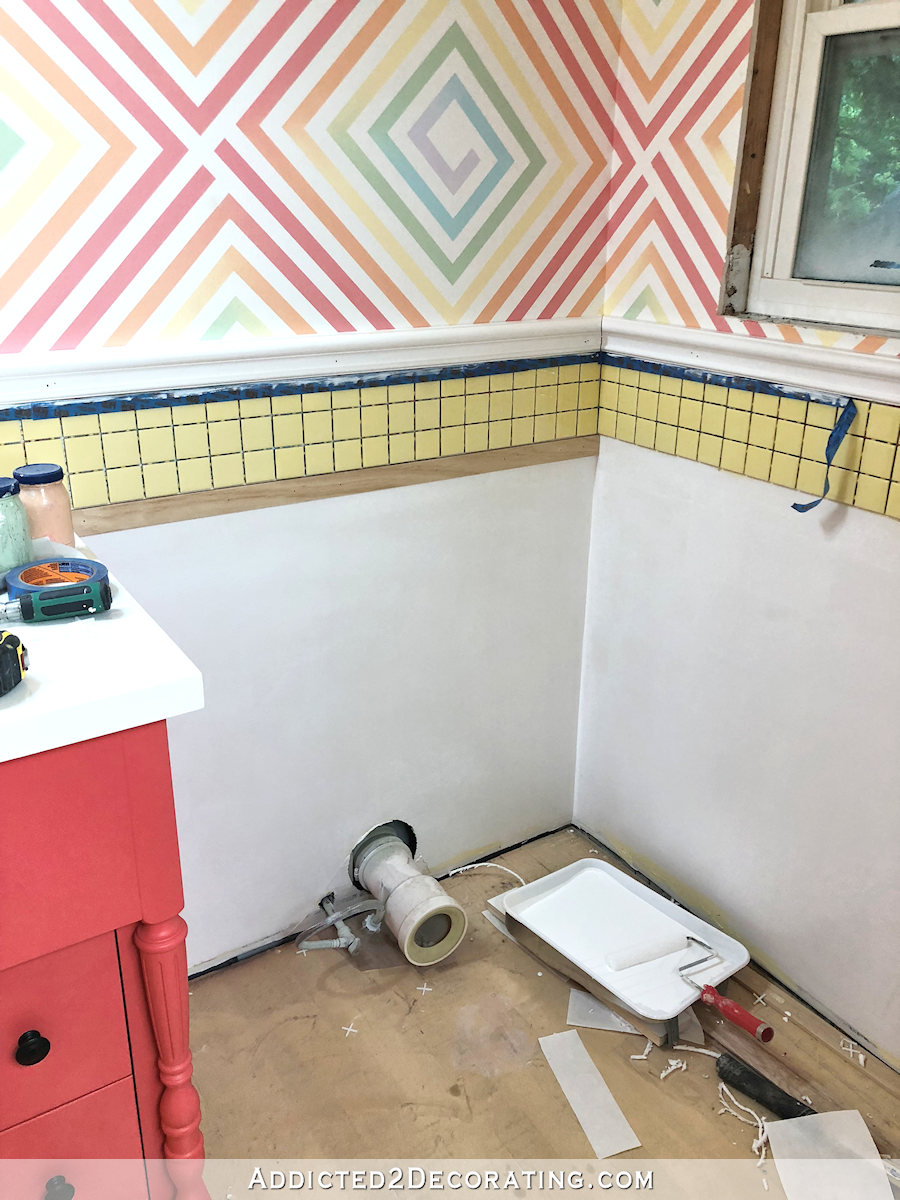
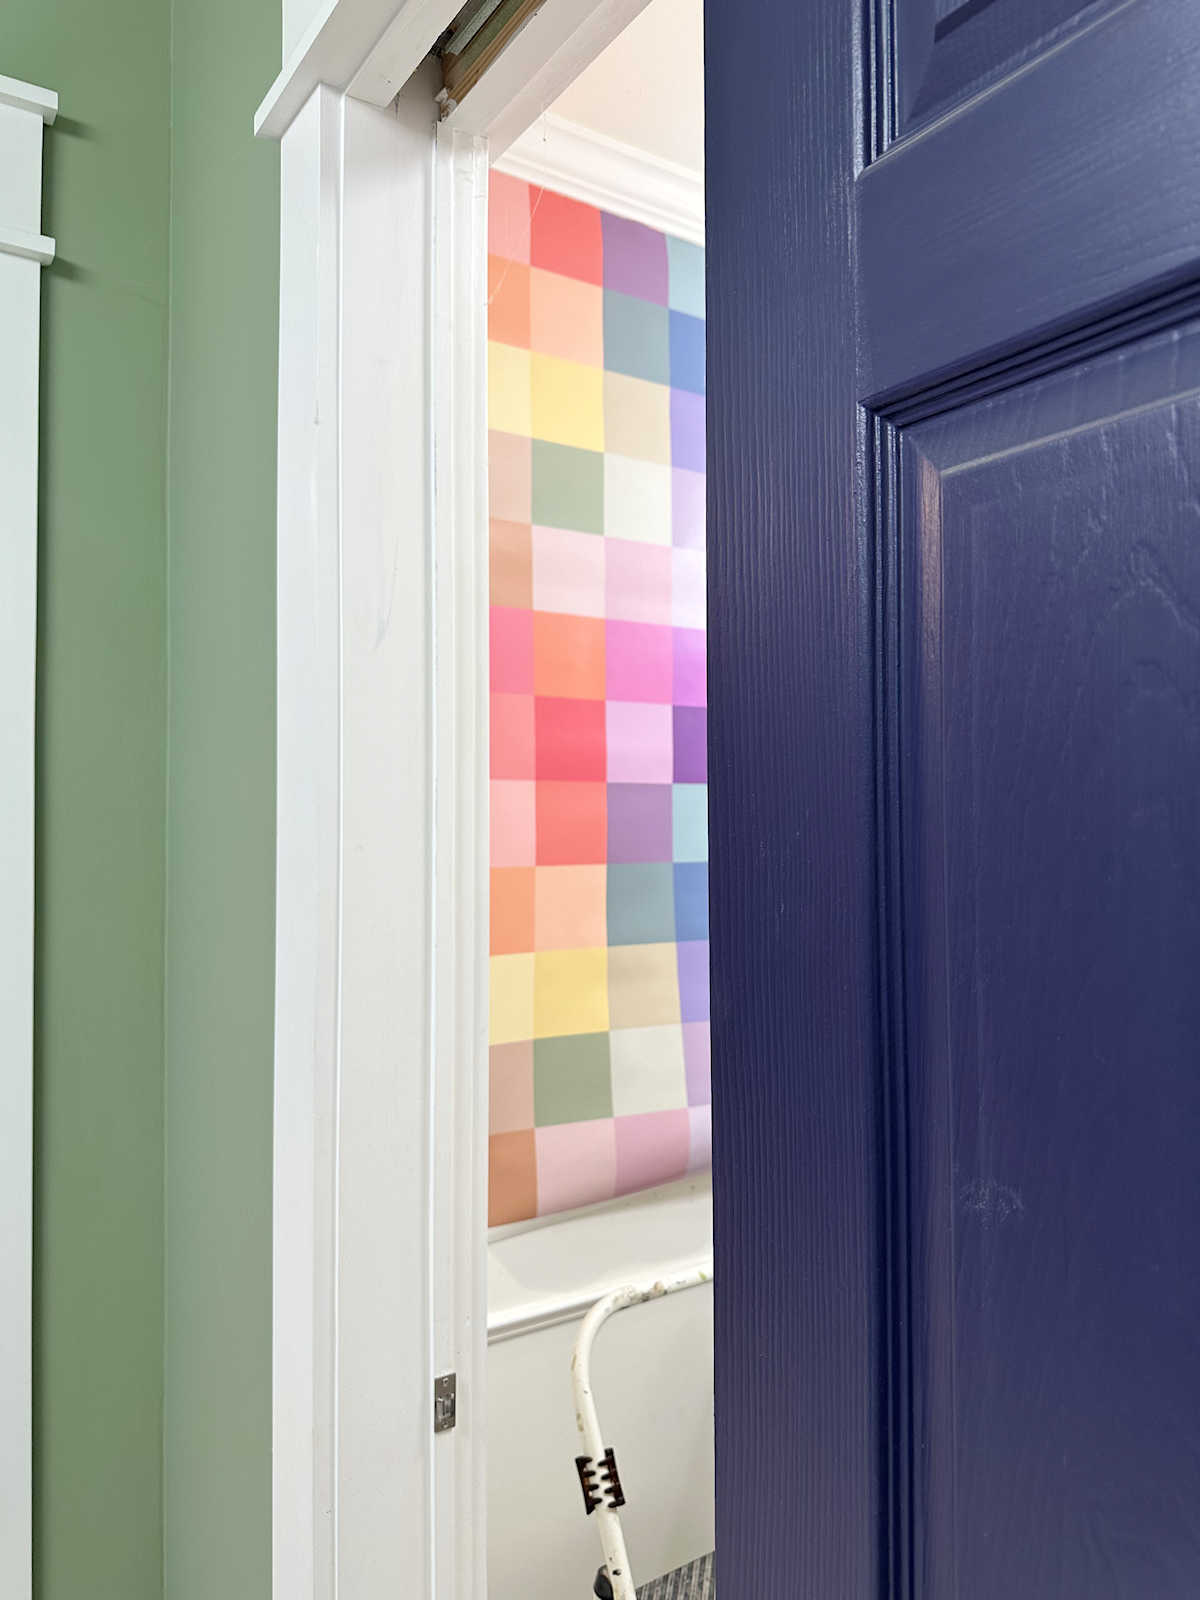
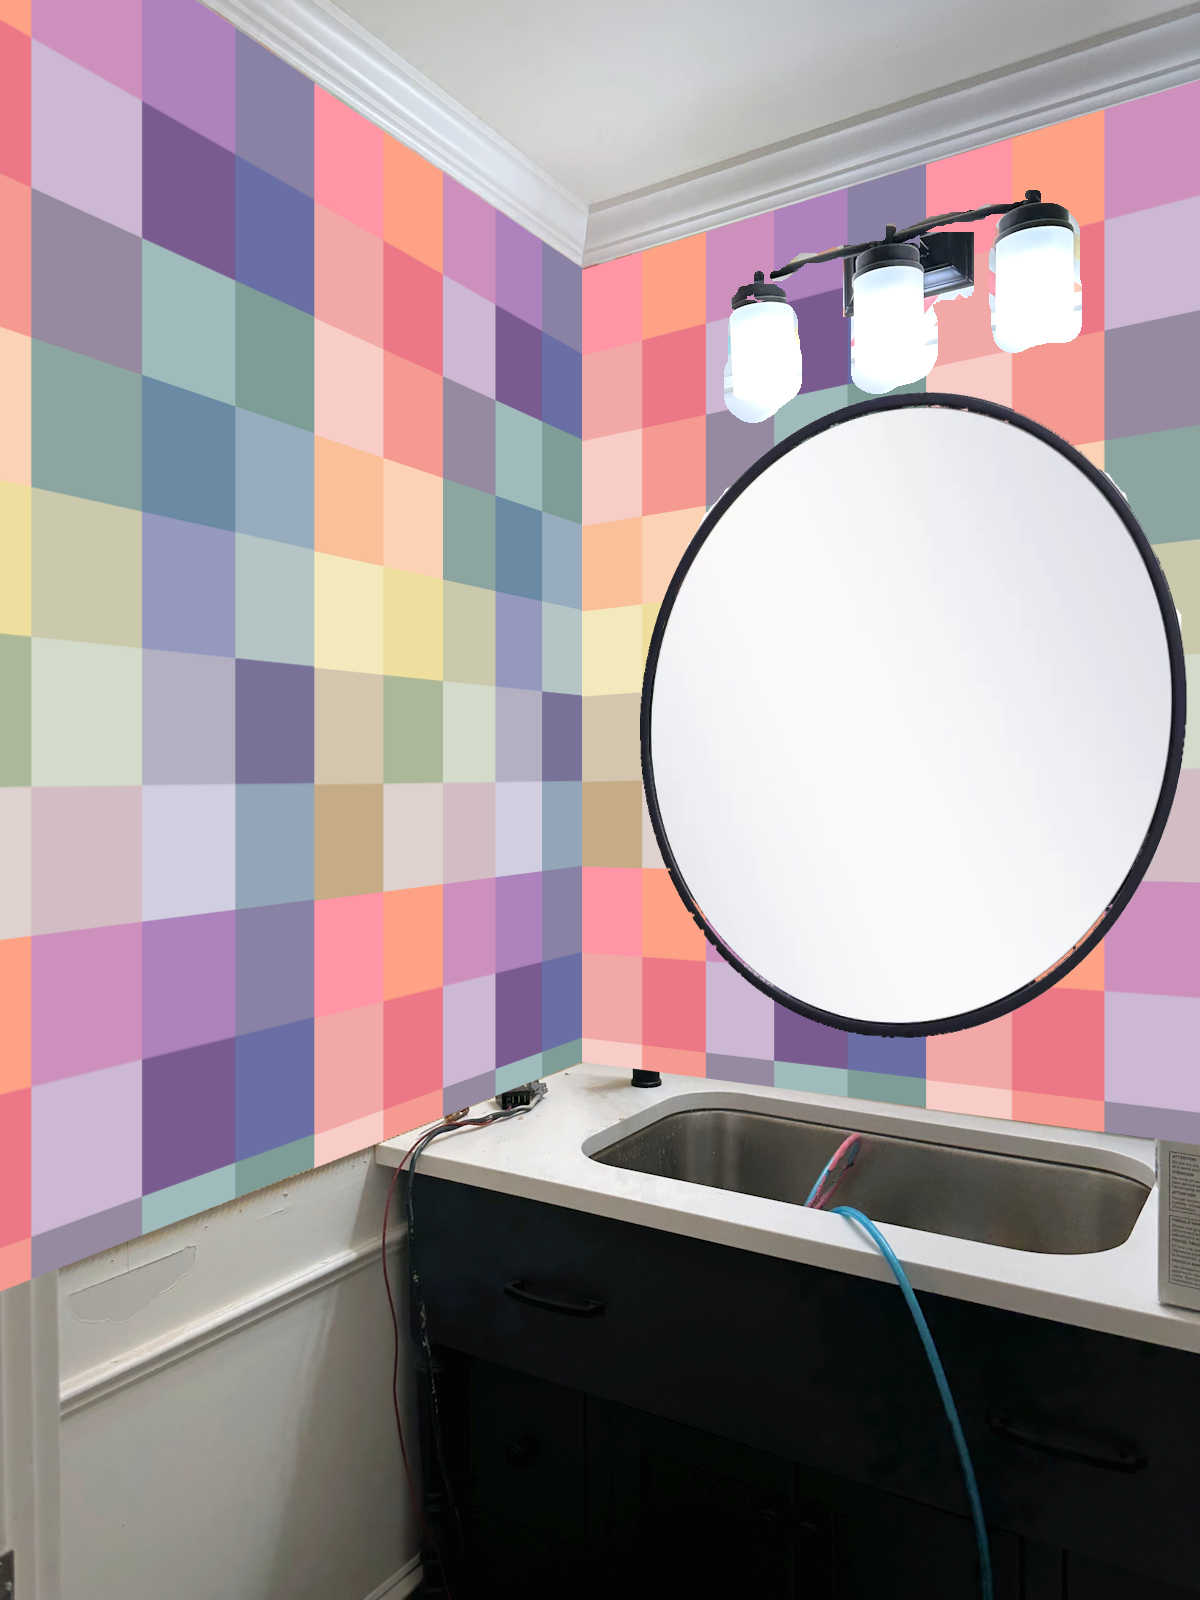
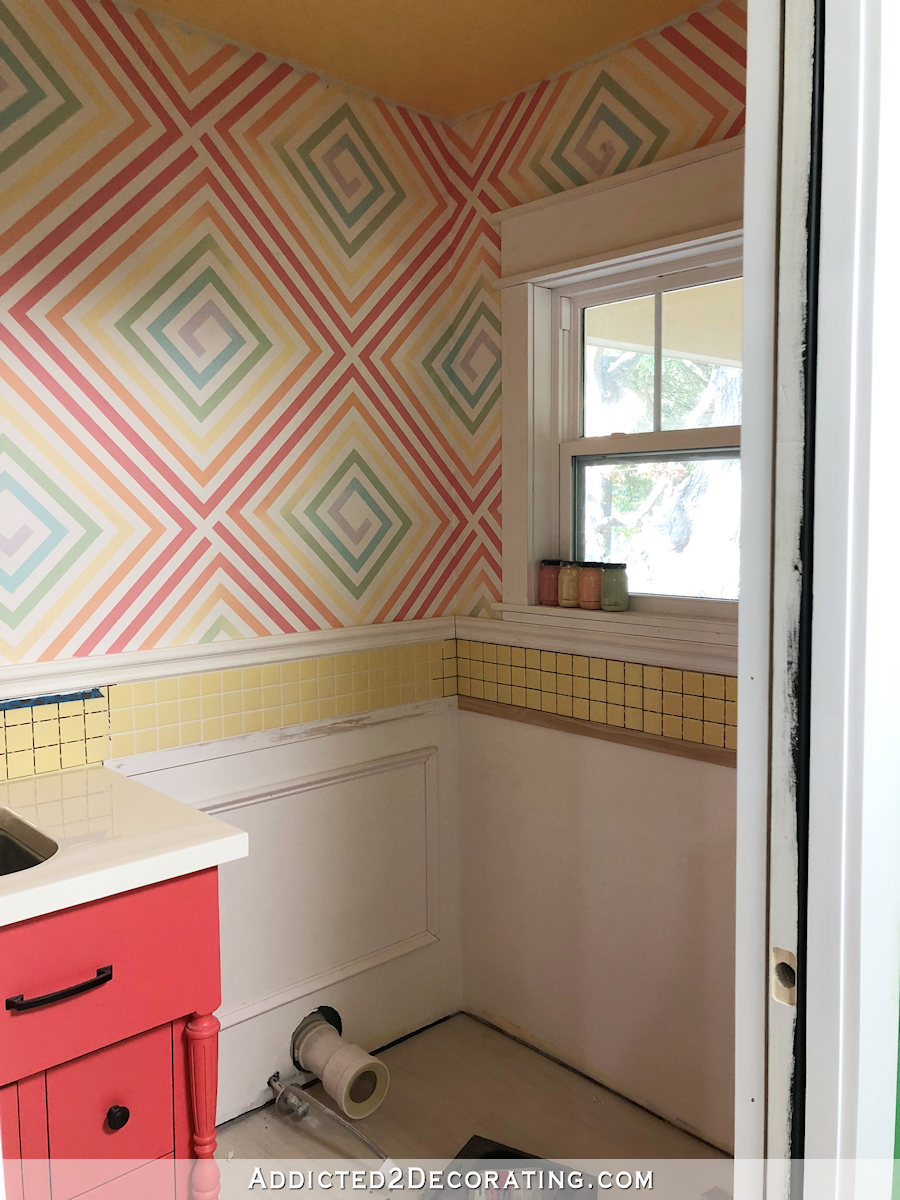
I know some of you were concerned about how underwhelming the lower walls were compared to the vibrant upper walls, and suggested that the lower walls might need color. This is how it looked before…

But I think that the addition of the trim helped to add some visual weight to the lower walls to balance what’s happening above the chair rail. And again, it still needs shoe molding, so that’ll add one more final detail at the floor.
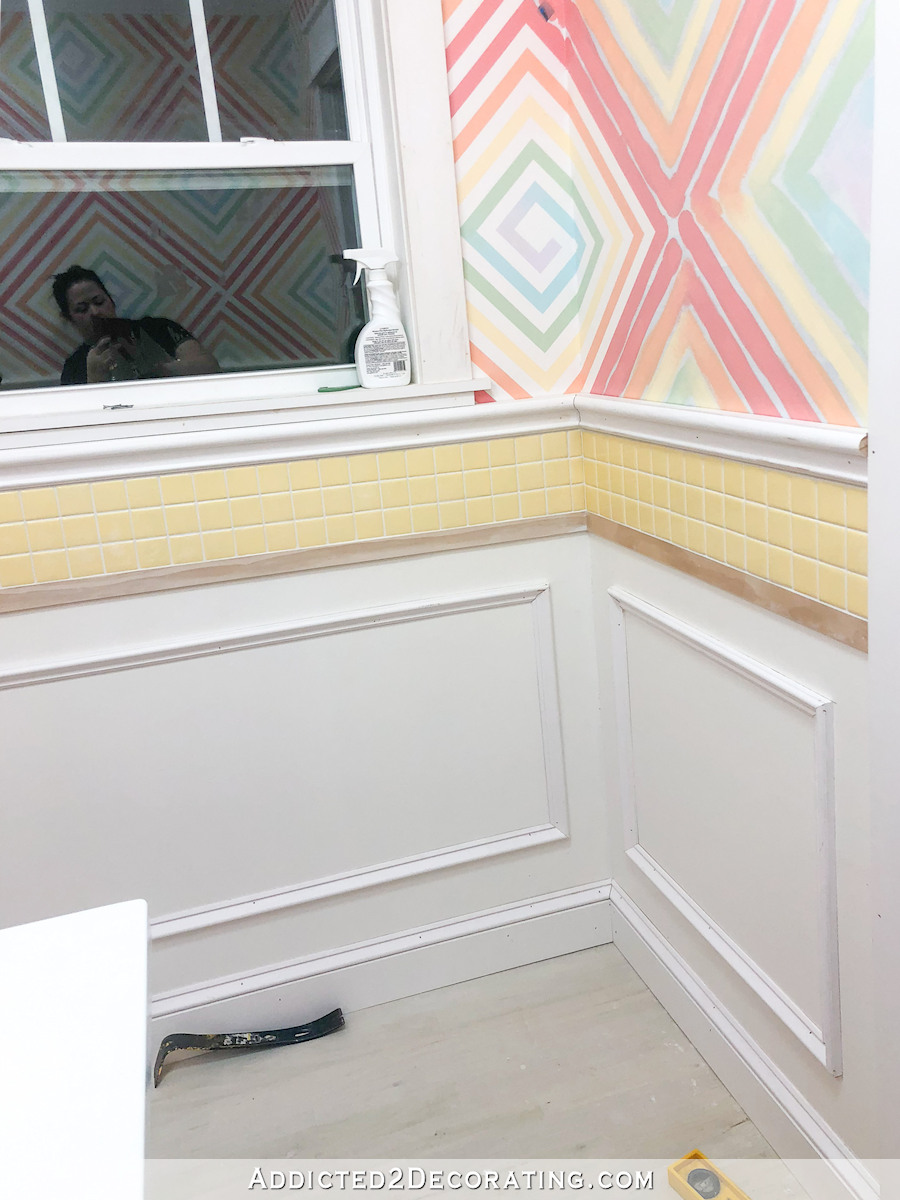
I wasn’t quite sure how to handle the wall under the window, but I ended up going with one large picture frame rather than breaking it up into two or three. I think multiple frames on that wall would have looked too busy. I really like how the one large frame looks.
But my achievement from this weekend that I’m the proudest of is that I finally tackled trimming around that awkward pipe where the toilet connects. I’ve been staring at this for a long time now…
…and absolutely dreading the thought of trimming around it. I had no idea how to tackle it, so after trying a couple of different ideas (and finding a couple of ways that absolutely did NOT work 😀 ), I finally landed on this solution…
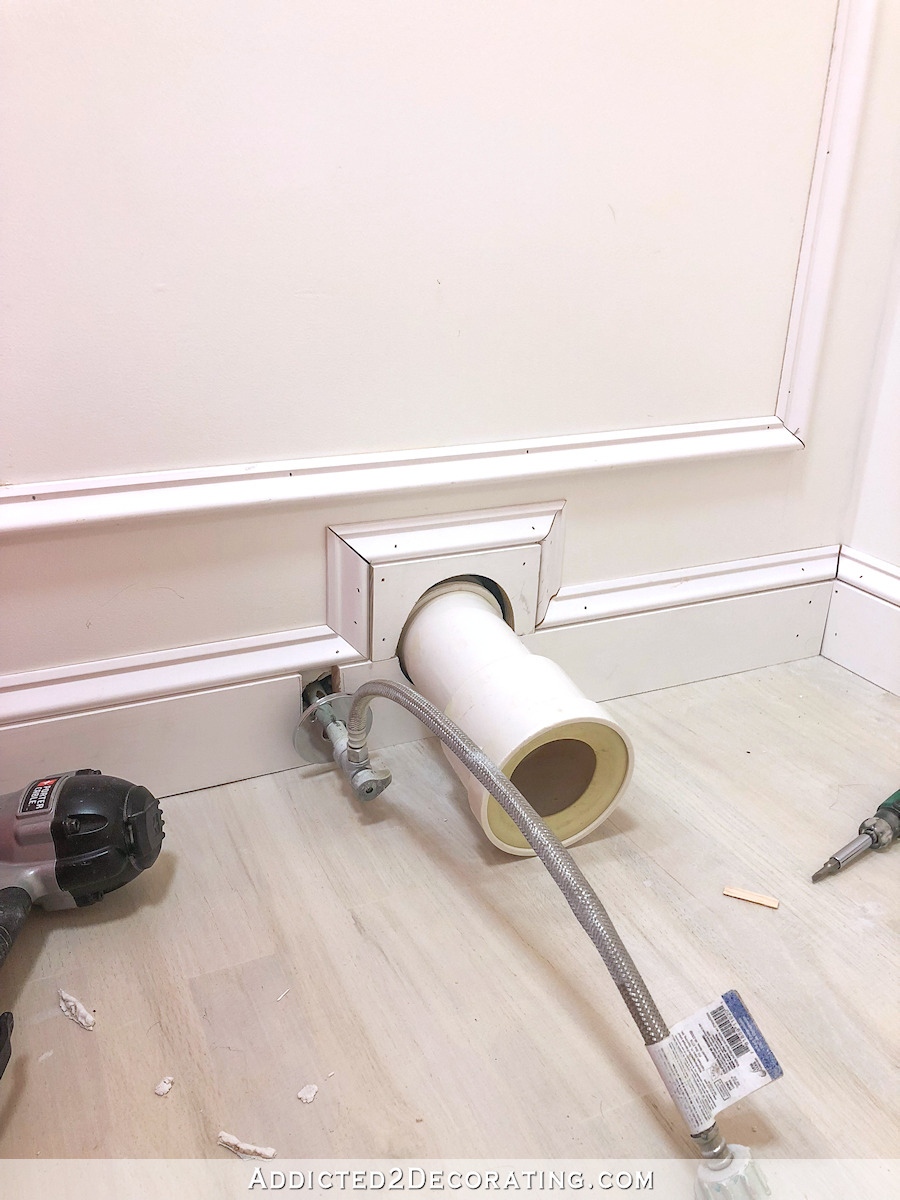
It’s not perfect, but it will look much better once it’s wood filled, sanded, caulked and painted. The base trim on that one wall took me forever, but I’m really happy with the final solution I came up with. I think it’ll look really nice once it’s all finished.
So from here on out, I’m just going to play it by ear. This might be the final “accountability post” that I do because the room is so close to being finished now, and any posts between now and the finished room would be terribly boring — wood filling and painting trim, painting a door. Y’all don’t need updates on those, and I’m so close to the finish line that I’m incredibly motivated to keep going. So hopefully in a couple of days, I’ll have a finished bathroom to show y’all!

Addicted 2 Decorating is where I share my DIY and decorating journey as I remodel and decorate the 1948 fixer upper that my husband, Matt, and I bought in 2013. Matt has M.S. and is unable to do physical work, so I do the majority of the work on the house by myself. You can learn more about me here.
Way to go!! You are doing an awesome job! It all looks spectacular!
Looks pretty perfect to me!
Awesomesauce!
Love the trim on the lower walls, and your solution for the toilet wall looks very nice. I’m looking forward to seeing the completed bathroom!
Yippee! Looking great. I agree that you’ve found a way that keeps you on track.
So great!!
Love the entire job you did – looking forward to the finished pictures.
Great solution for the pipe where the toilet connects. What a difference adding the molding makes. Love the geometric pattern on the wall so much. Wish you could make that pattern available as a stencil in your shop.
I have been thinking since last week about how to finish the toilet pipe. I could only think of those ceiling medallions you put up when hanging a ceiling fan to cover the hole. You could rout it out to a bigger hole if needed, it would be decorative and it would be round and they come in different sizes. Just the only thing that I could think of.
You have a lot going on in a small bathroom and people think the lower part is too plain? Why would you want to take the eye away from the upper walls and the vanity? The lower walls look great white and I think the yellow tile is a good transition to the white. The trim is all it needs and you’ve done that well. It seems to me that if the toilet is white, the surround should be white, unless you want to draw the eye to the toilet. (Tell me the toilet isn’t THAT amazing….) Not that you asked any of us, so do what makes you happy.
Agreed, white is a good choice. There’s a lot happening in this space, and the white will give a place for the eye to rest and allow the other standout features to shine.
Good lord! That pipe had to be a beast to trim around! And the finished product looks good to me!
I agree…looks absolutely fantastic! Great solution😁
The trim makes all the difference in the lower walls!
Incredible progress and decisions! Keep up the great work. I look forward to seeing the finished product.
I love the lower part with all the trim work. Sorry but the upper part is not for me. I’m much more a muted colour palette kind of gal. So happy for you that it’s almost done.
I really like the lower wall trim and I think your solution to that round toilet pipe thingy is a good solution. I am so excited to see this room completed as you are sooooo close!
I have been awaiting your solution to that pipe and shut-off with anticipation… it made my eyes cross trying to even think of a way to do it. Wow, you did not disappoint! Instead of trying to hide it, you made a feature of it. Which takes the eye away from the ugly pipes and focuses it on that beautiful moulding. You are such an inspiration, my friends don’t even ask anymore when I reference ‘Addicted 2 Decorating’. I talk about you that much!
Curious, do you run a bead of clear silicone along the bottom of the base board in bathrooms/kitchens/entries, as in nearly not there and definitely not visible?
My nephew is a project manager for a major commercial construction company, (think Targets, malls, etc) and he suggested I do so in my recent bathroom remodel. He says that is standard practice for them as keeps water, even condensation or dribbles from leaching back under trim or the big spills from getting into sheetrock. I gave it a whirl but had not heard of said practice, it seemed to make sense.
I do use caulk along the floor to seal that area, but since I always paint my trim white, I just use white caulk. I don’t use silicone caulk, though. I know it’s better for protecting against water, but it’s just not as convenient and easy to use. I just use the same Alex Fast Dry latex caulk that I use on all of my trim.
I’m loving your progress and especially how you trimmed out the pipe around the toilet. Sooo looking forward to you being able to finish this little bathroom so you can move on to bigger things!!!!
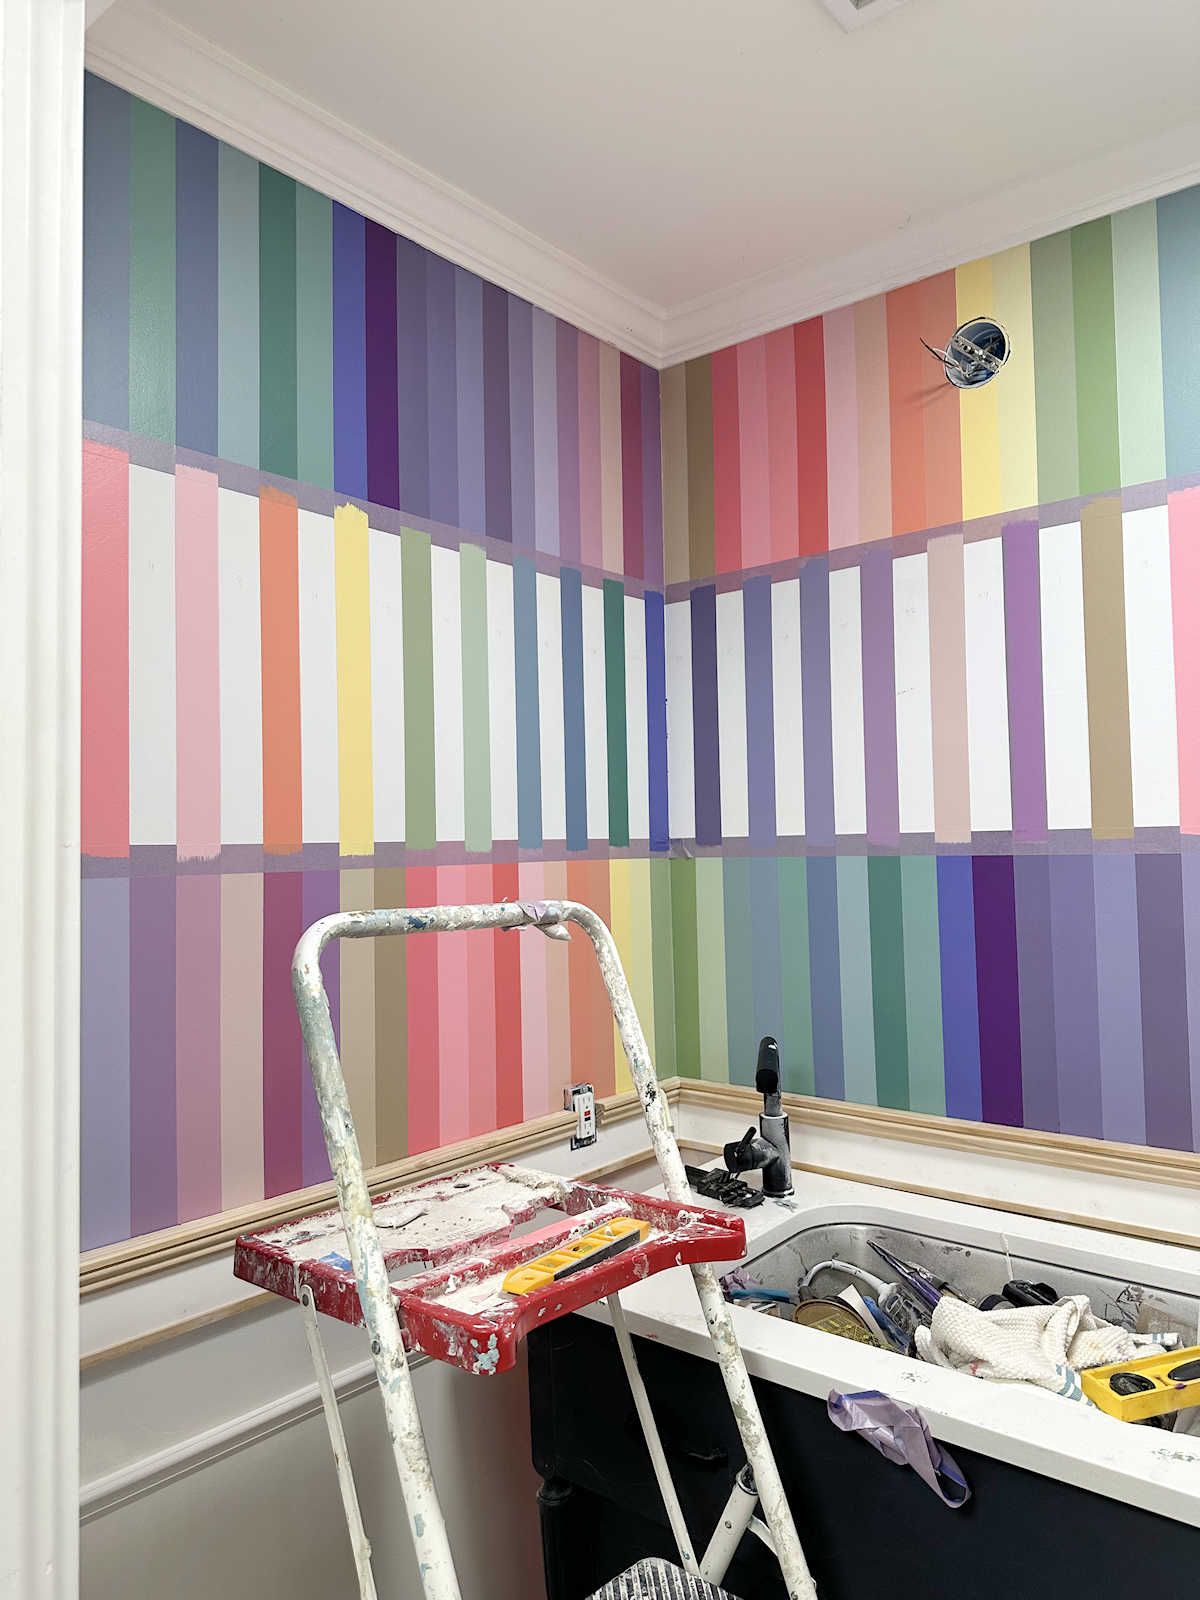
What did you figure out for matching the paint for the last wall? What kind of masking tape do you use? Are you concerned that it will stick at all having been there for a while?
By the way, I love this bathroom. Yellow is my favorite color but I LOVE color like you. This room makes me happy.
I’m still procrastinating on the wall. 🙂 I do hope to tackle it today, though. I use the blue tape. (3M, maybe?) I tried Frog Tape, but didn’t see any benefit for the higher price. The two seemed to work the same to me, and the blue is cheaper. I am concerned that it will be harder to get off after this time, but someone a few posts back gave me a tip to use a hair dryer to warm the tape up a bit before removing it. I’m going to give that a try!
I forgot, or maybe you didn’t say, that you were trimming out the lower walls. What a difference! And I was one of those thinking a color might be an idea. 😊 Very pretty.
Wow. A lot more fancy than I would have bothered to do! But it’s those details that show you are so much more artistic than I. Although it makes you crazy sometimes to think through the process, the outcome is over the top gorgeous! Bravo!
That looks freakin amazing! I don’t know how you do it.
OMG, YOU ROCK!! yes, all caps! you are just that amazing Kristi
It looks great.. I was just wondering what kind of toilet are you using that needs that kind of connection…? That’s pretty big.
See #6 on this post:
https://www.addicted2decorating.com/lessons-learned-my-tips-for-working-with-a-contractor.html