Pantry Progress — Slow and Steady
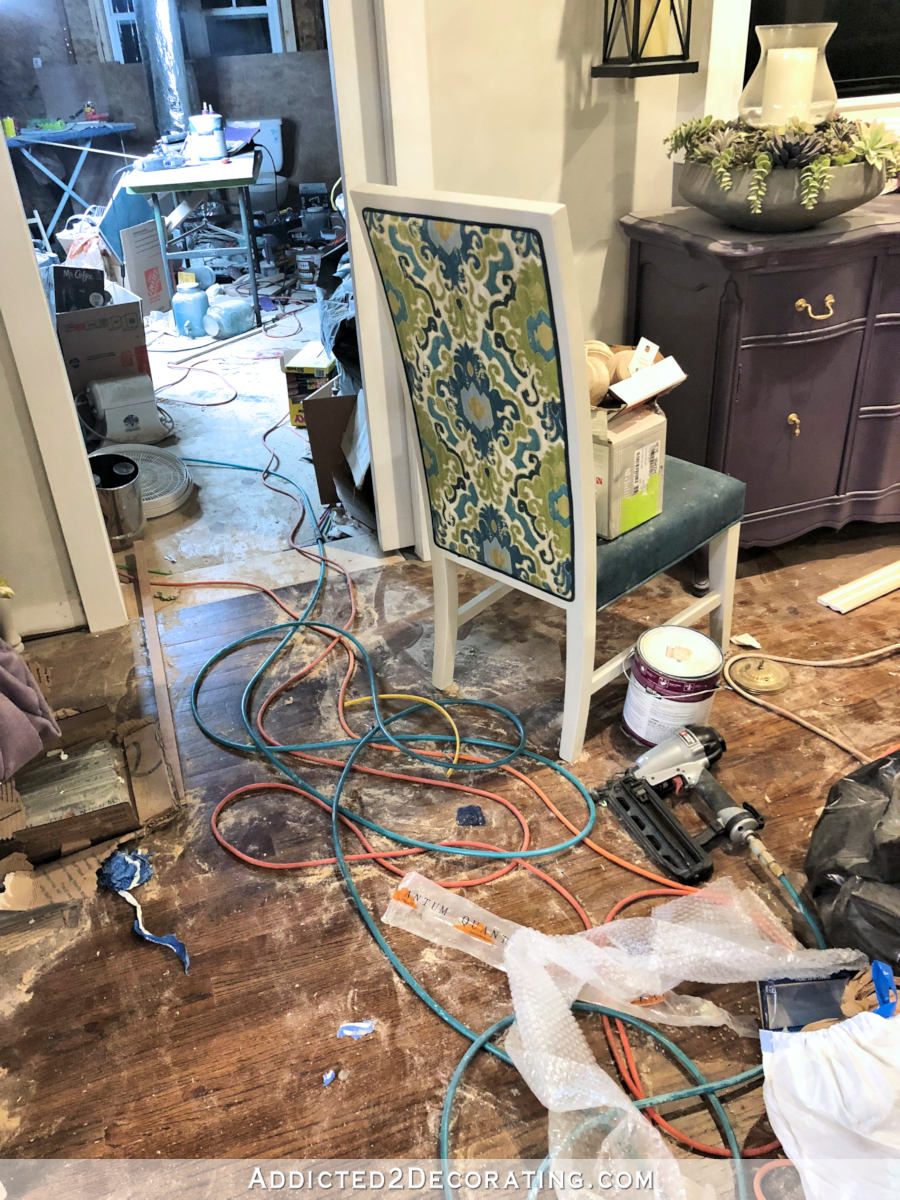
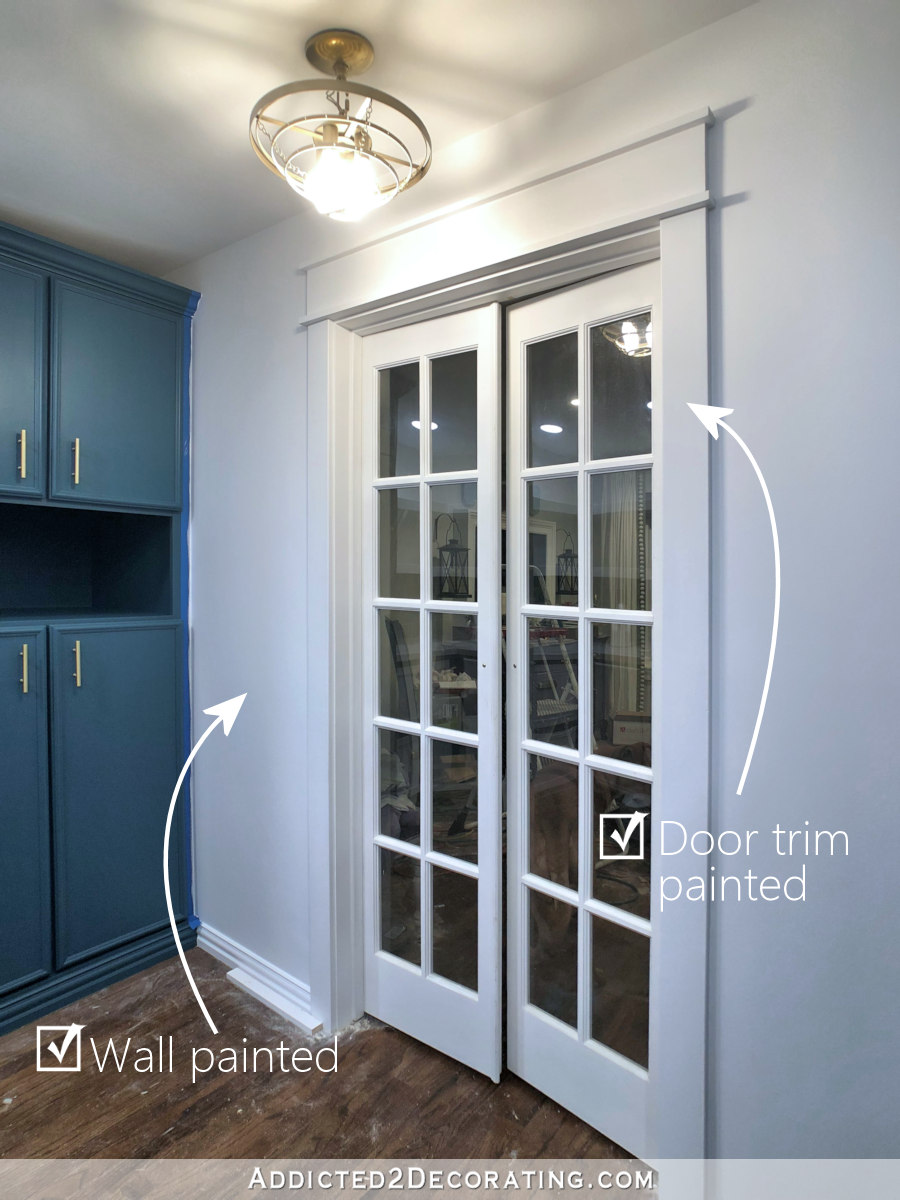
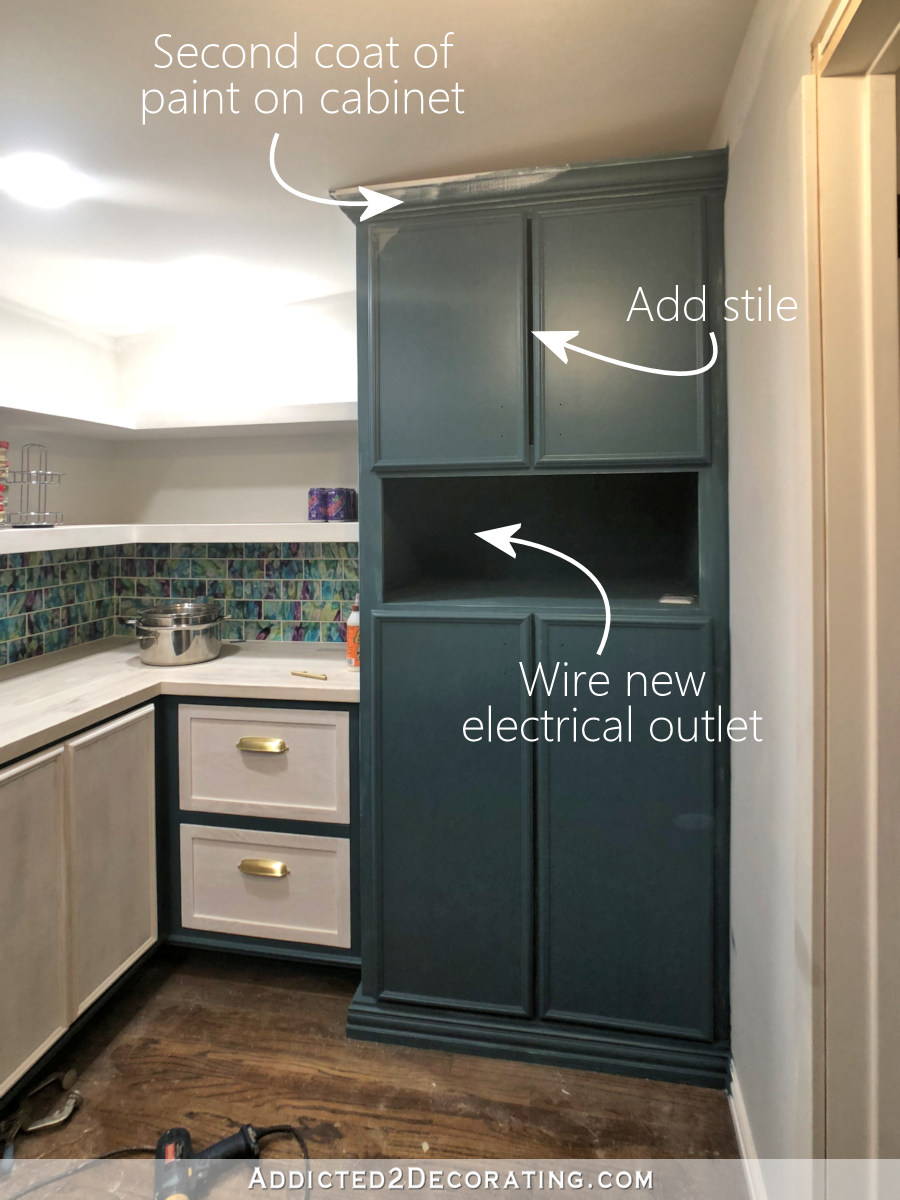
My pantry progress continues, but yesterday could be described as “slow and steady.” I thought things would go much faster since most of the items remaining on my list were painting, and I really enjoy painting. But I got a late start, started off slowly, and then couldn’t seem to pick up the pace at all for the rest of the day. But even with that, I did manage to get two more items crossed off of the list — installing and caulking the trim around the door, and painting the second coat on the tall cabinet on the right. Here’s a short video showing yesterday’s progress…
(Having trouble? Click here to watch on YouTube.)
The first thing I did yesterday was finish installing the trim around the door. Before I started all of the painting, I wanted to get all of the jobs done that would require any sanding, and I’m pretty sure this was the last one. So I got the rest of the trim installed, wood filled, sanded and caulked.

That door trim is now ready for paint.
And then I got the tall cabinet on the right finished. It needed another coat of paint (the crown moulding actually needed two more), so I got that painted, doors installed, and door pulls added.
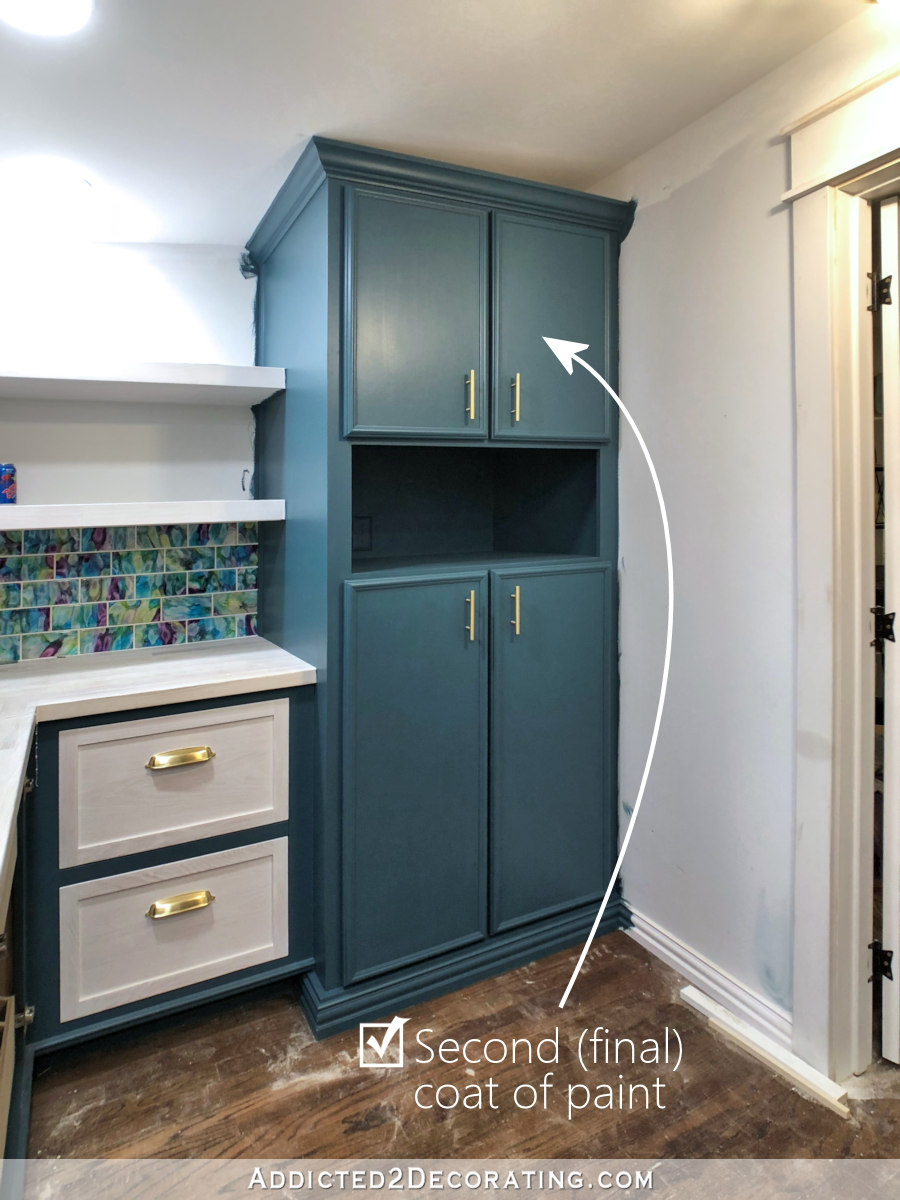
So that’s only two line items on my punch list, but I’m okay with that. As long as I continue moving forward and making progress, I’ll be pleased. With these two items crossed off, this is where things stand as of this morning…
Finish painting the edges of the ceilingDone!Add stile on top right cabinetDone!Add stile on cabinet above freezerDone!Add electrical outlet for microwaveDone!- Wire freezer outlet to breaker box
Paint second coat on right side cabinetDone!- Paint second coat on freezer cabinet
- Paint walls and shelves on back and side walls
- Paint window trim
- Install under-cabinet lighting
- Paint four cabinet doors
Finish building new drawer frontsDone!- Prime and paint drawer fronts
Build four more pull-out shelvesDone!- Clear coat all pull-out shelves and drawers
Install and caulk door trimDone!- Paint door trim
- Paint the wall around the door
- Re-install ceiling light
- Load in stuff and start using the pantry!
Twelve more things left, and eight involve a paint brush. This should be easy!
Update:
My pantry is finished! Want to see the entire project from start to finish? You can find every single post about the pantry build right here…
Or you can skip to the end and see how it turned out. Here’s a peek of the finished pantry…
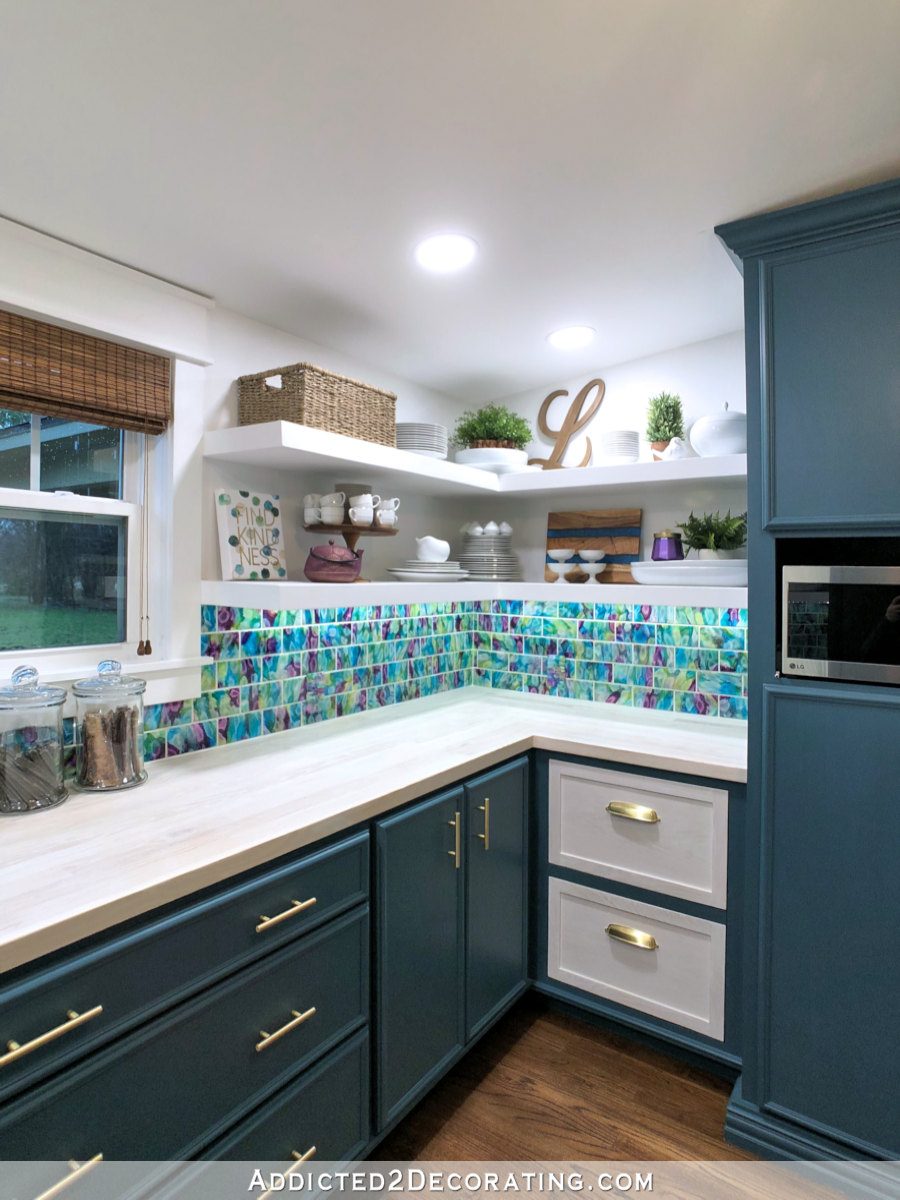
You can see more pictures on the before and after post right here…

Addicted 2 Decorating is where I share my DIY and decorating journey as I remodel and decorate the 1948 fixer upper that my husband, Matt, and I bought in 2013. Matt has M.S. and is unable to do physical work, so I do the majority of the work on the house by myself. You can learn more about me here.

That is so: “not your average pantry” . Just gorgeous! Waiting to see how you will put things on open shelves to keep the high, high style of it.
Well damn! Ain’t that looking pretty…. and I still admire those floors, even when they’re a bit dusty 😉
2 more lines crossed off your to do list? AWESOME!
It is in the putting one foot in front of the other that we move forward. Even if your progress is slower than you wanted, hoped or imagined you are still moving forward. Personally I think your pace is pretty dang good!
Just a few more days and the pantry will be behind you. Hang in there!
I have always admired the way you have trimmed around the doors and windows. Pantry is looking incredible. Keep trucking along.
Slow and steady can get it done!
But go ahead and wire your freezer outlet to breaker box. Once you get this done, you will have such a feeling of relief and can tackle the lights and painting without that hanging over your head. It will make the remaining projects go so much easier. 🙂
Here’s to a productive Monday for all of us!!!!
You’re doing it! Love the cabinet colors!
You’re doing great! No matter how small anything scratched off the list is progress. We’re behind you all the way…….in case you need a swift kick!! LOL. Keep up the good work!
Woo hoo–getting into the homestretch. Can’t wait to see it complete.
Keep marching! We are counting on seeing that loaded in/ready to use pantry before the new year. You do such beautiful work. Wish I had the guts to do all this.
Truly a dream pantry. I am so glad I’ll be able to keep coming back to refer to your posts. I appreciate the detail you include.
YAY!!! YOU ARE MAKING PROGRESS!! With each project completed it is more and more beautiful! Keep up the good work!
YAy! It is looking great! When does refinishing the floor (and all that dust!) fit in to your plan?
The floor won’t need to be refinished. Just vacuumed and mopped, with maybe a bit of spot cleaning to get some drywall mud off. 🙂
Have your brother or one of your small project handy men come over and wire that freezer! It’s ok that you are dreading that one, just pay someone else to do it! I have started doing that more and more lately. The sweet reward of a working freezer will be worth it. I am sure Matt would agree. 🙂
Forgot to say… it’s looking incredible! Woot woot!
Keep on truck’n, Kristi, no matter how much you want to do something more fun! It’s about this time in your projects you make excuses, so my kick in the pants for you is to complete this! You can do it and you are headed in the right direction.
Me, too! I also love, love, love your door trim. It is completely custom, without being busy. LOVE! SWOON!
Looks great now and will be AH-MAZ-ING when you’re done!
Just keep swimming, just keep swimming… 🙂
Every day it’s looking better and better and better. This is at least 2 levels above the average pantry project. It will be a little jewel to see when you and your guests catch a glimpse through the glass doors. I’m so impressed with your “final push” progress! Go girl!
What a wonderful Christmas treat! Kristy posting every day! You are making fabulous headway! I will always think of your pantry as a jewel box! The rich real and the jewel like back splash with the crystal chandelier! Just beautiful!
Sheila F.
That is A LOT to cover on a Sunday. You did not slow down yesterday, you flew ahead! Great job! It is amazing.
“Every day, in every way, your pantry is getting better and better!” Loving the progress and the daily reports! Keep on truckin’, Kristi!
It might not be finished yet, but it looks fabulous! I have a couple questions for you (can be answered later). What is the advantage of installing a stile in your cabinet vs a dust strip (so the gap doesn’t show? Also, I LOVE the cabinet feet in your kitchen and just purchased items to install, but are they hard to clean around? I have 4 long haired cats and wondered if pet hair gets caught behind the feet (now that you have 3 furbabies). You are an inspiration to all of us DIYers!!!
I’m not sure what you mean by “dust strip.” That’s not a term I’m familiar with. But as far as stile vs. no stile, it’s really just a matter of personal taste. I prefer the look of doors with a bit of separation to them, so that requires a stile. I’ve seen them were the stile is actually attached to one of the doors so that when the doors are open, there’s no stile in the way in the middle of the cabinet, but I didn’t want to go to the trouble since I think that cabinet is wide enough on either side to store just about anything I’d want to get up there.
The cabinet feet do make it a bit more time-consuming, but I find that if you have a vacuum attachment that will fit around and behind the feet, it makes it much easier.
You’re making wonderful progress! And I can’t get over how PRETTY your tile turned out. I’d just stare at that all day long….WOW! We’re all here cheering you on, good job.
Thanks for the frequent updates Kristi! I don’t know why, but it is emotionally fulfilling for me to see you get your projects done. Go figure.
So I forgot, but do you use latex caulk or silicone? I would think for a project like this that latex is easier to work with and to paint? Are there other substances that caluk can be made of?
I use latex caulk about 99% of the time. The only time I’d use silicone is if I’m caulking something outdoors, or caulking around a bathtub or sink. But I only ever use latex caulk on trim.
Thank you for the motivation! My to-do list this week isn’t even 1/10th as complex as yours and I had been putting it off, but now I’m saying WWKD? You’ve got this!!!
Great job on the door trim and the cabinet painting,…plus you got the stile and the outlet cover painte and sanded and taped the window trim! Woohoo! I think you accomplished alot! You don’t want to over do it and put yourself out of commission. Consistency is more important than intensity! Looking forward to your next post!
Please throw me a rag! I need to mop up the drool! I cannot wait to see it done and loaded in with everything. I have been looking for a design for my door frames but everything I’ve looked at in stores seemed very expensive. I have alot of mismatched frames due to owners remodeling over the yrs. I had decided that my style was Industrial Farmhouse but I wasn’t sure what went with that. Your door frame hit the sweet spot. What wood did you use? Pine? Fir? Birch? ??? I have plenty of saws and a big shop to work in so after Christmas, I am thinking about getting started! You are a bad influence Kristi!!! I could be sitting in the recliner with a good book & eating bon bons!
I used to use MDF boards for all of my trim because they are perfectly smooth (no knots) slightly rounded on the edges, and come pre-primed. But my Home Depot got rid of all MDF boards to make room for about 10 different types of shiplap. (Booooooo!!!!) So now I settle for pre-primed finger joint boards. I think they’re made of pine. Maybe fir. I’m not 100% sure. They require more sanding because the edges are so square and sharp that they can draw blood of you run your fingers over the edges too fast, and I have to search through them to make sure I’m not picking out boards that have noticeable knots. But they’re fine. I much prefer my MDF boards, but sadly, those aren’t an option anymore.
I guess you need to blame Joanna Gaines! She started the shiplap craze. Fortunately, I have a Lowe’s here and several lumber yards. Lowe’s tends to be expensive. Cutting the strips straight is my biggest worry. Need to cogitate on that. Probably use a metal straight edge & heavy duty clamps. What do you use? Or do you have a tablesaw?
Can you hire a cleaning crew? I think you deserve a break! And that would mentally free you up, too! ( At least it would me!)
BEAUTIFUL and INSPIRATIONAL!!!!!!!!
Hey, progress is progress, now get back to work! ;-))
Slow and steady wins the race, right? Good job plugging away. Yes, that is light you see at the end of the tunnel!
Keep the momentum going, Kristi. You can see the finish line now and that beautiful pantry will be making your life run smoothly with a place for everything and everything in its place. Now could you please motivate me?
Pantry is soooo beautiful and you are doing wonderful job. Keep up the daily progress. 😘
I am loving the progress and your updates it’s like getting to open one gift before Christmas. The door trim is making me swoon. I think how can I break it to my husband that we should change the trim on 13 doors. We already changed them a while ago but styles change. Can’t wait to see the completion. Your like the energizer bunny. One slow day is nothing. You accomplish more than most people.
When you’re feeling discouraged, think back to the beginning of this project and remember what a daunting task you were facing. Then stand in your pantry and look at the amazing progress you’ve made, and appreciate just how far you have come. You are SO CLOSE!! It looks so beautiful and has so many of your special touches, and it’ll make your life so much easier when it’s finished. Keep up this last push, and celebrate the new year with pride and satisfaction!
Aren’t you getting excited??I know I am. Can’t wait to see it all done.
Keep the momentum going Kristi, you´re nearly there and you are doing a truly fantastic job getting items checked off your Well done!!!!!