
My Finished Dining Room DIY Air-Dry Clay Flower Chandelier
My DIY air-dry clay flower chandelier that I made for our dining room is finished! And I’m so thrilled with how this one turned out. I kind of wish that I had saved the chandelier for last so that I could have pictures of it in a pretty room. Right now, it’s literally the only finished project in a dining room that’s still underway. But I was too excited to get to this project to wait.
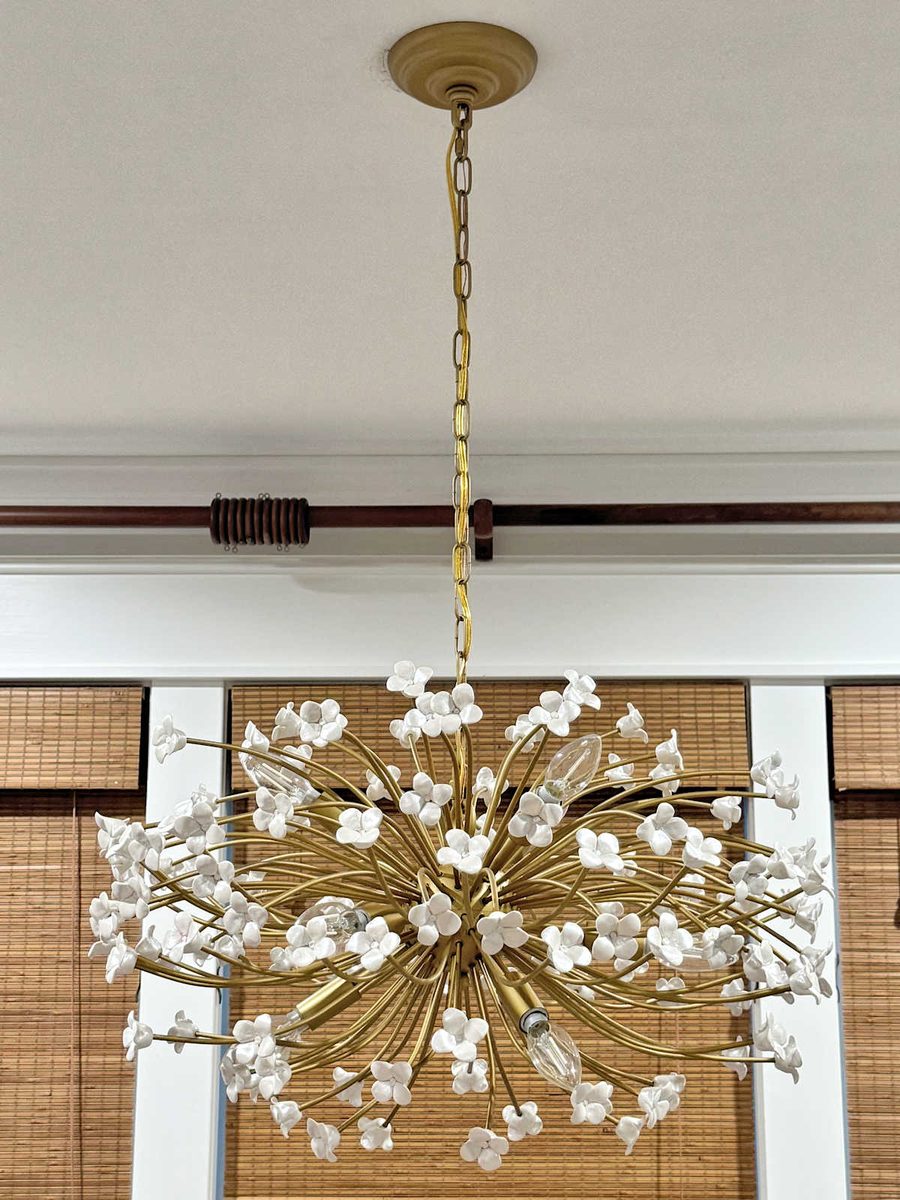
Here’s how my clay flower chandelier turned out…
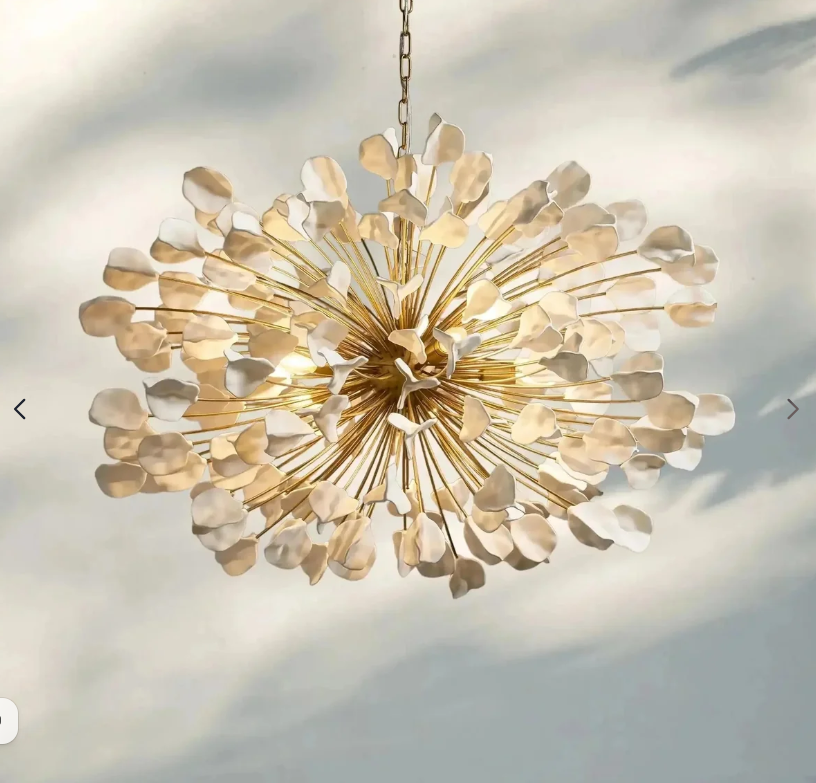
As a reminder, I was inspired by two different lights that I found online. The first one was this $2820 chandelier from Fovo Lighting that had leaves instead of flowers. I really liked the shape of this one…
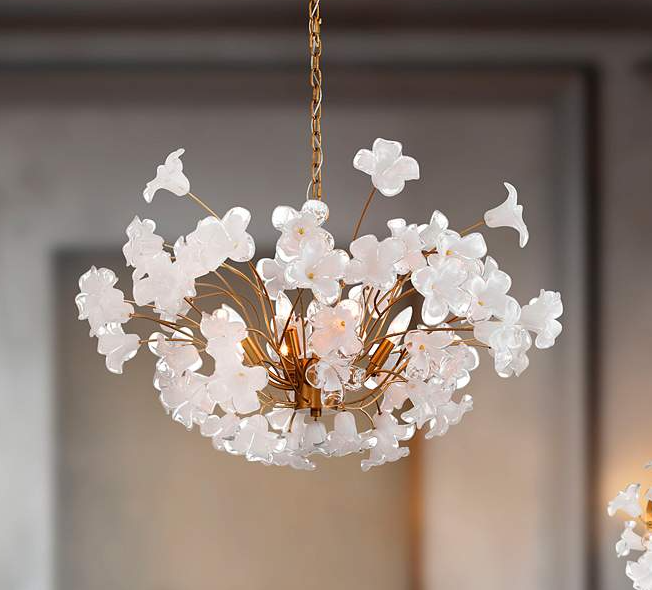
But I wanted to combine the shape of that chandelier with the flowers from this $2199 chandelier from Lamps Plus…
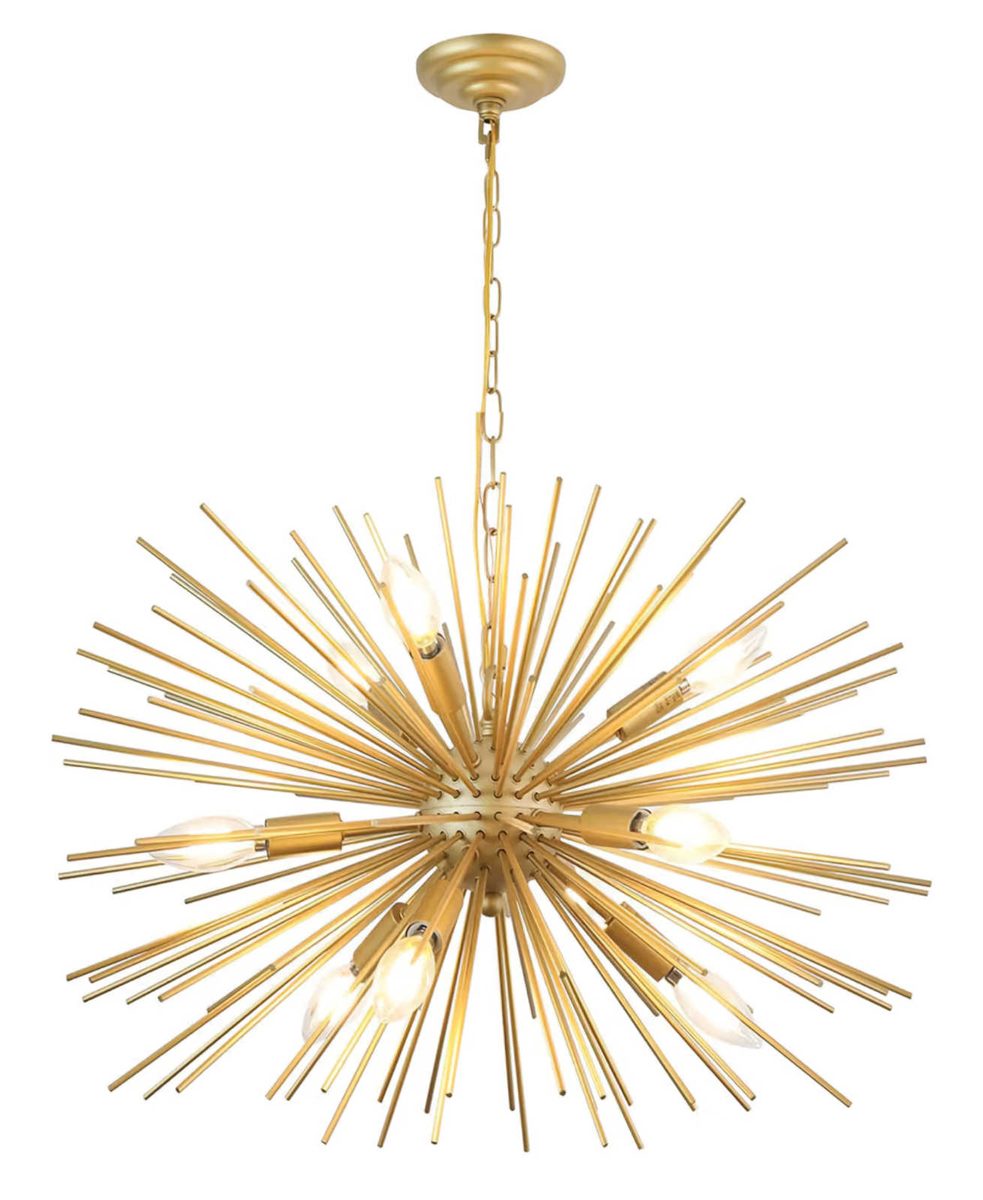
To make my chandelier, I started off with this 24-inch sputnik chandelier from Amazon (affiliate link).
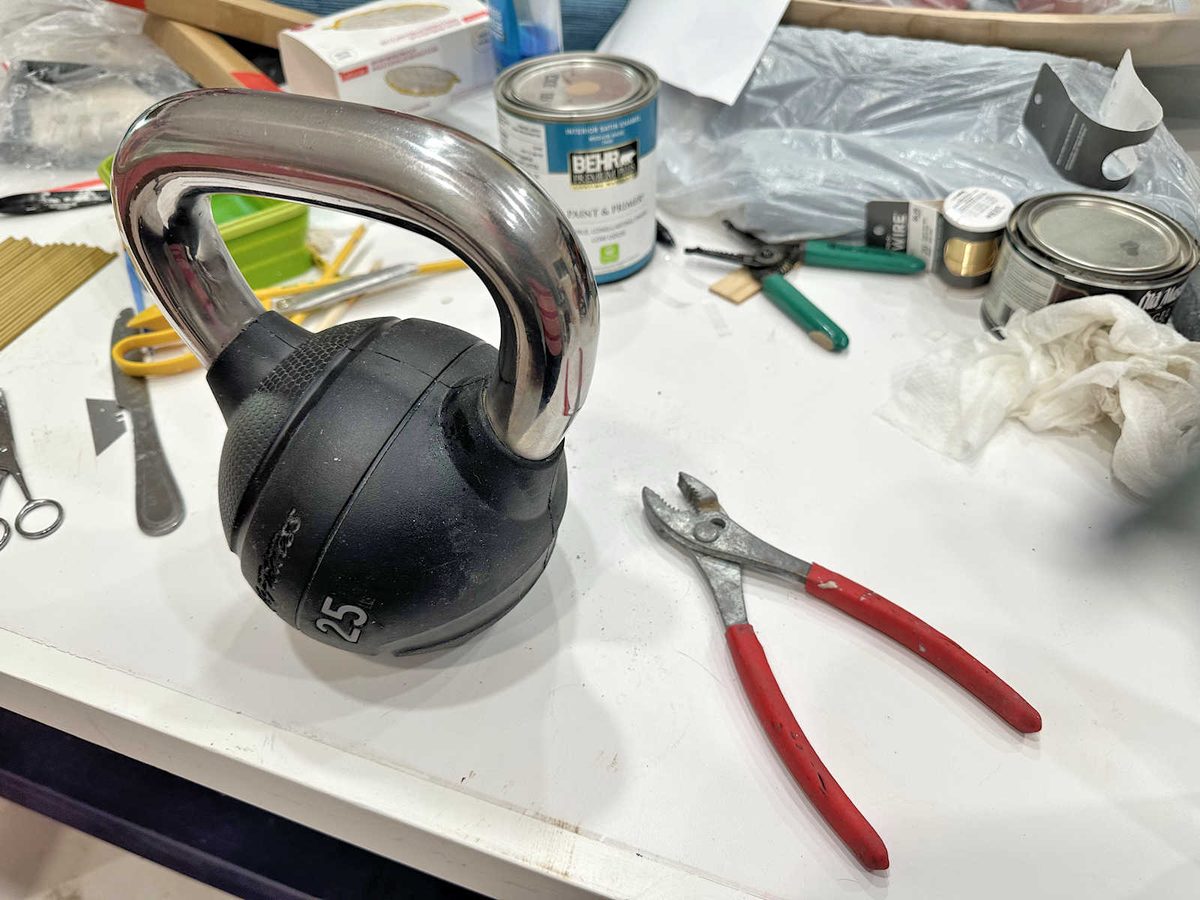
The first thing I had to do was bend the metal rods that came with the sputnik chandelier. So I used my 25-pound kettlebell, and holding one end of each rod with a pliers in my right hand, I grabbed the other end of the rod with my left hand and gently bent it around the kettlebell to form a gentle curve.
This is what they looked like with the curve…
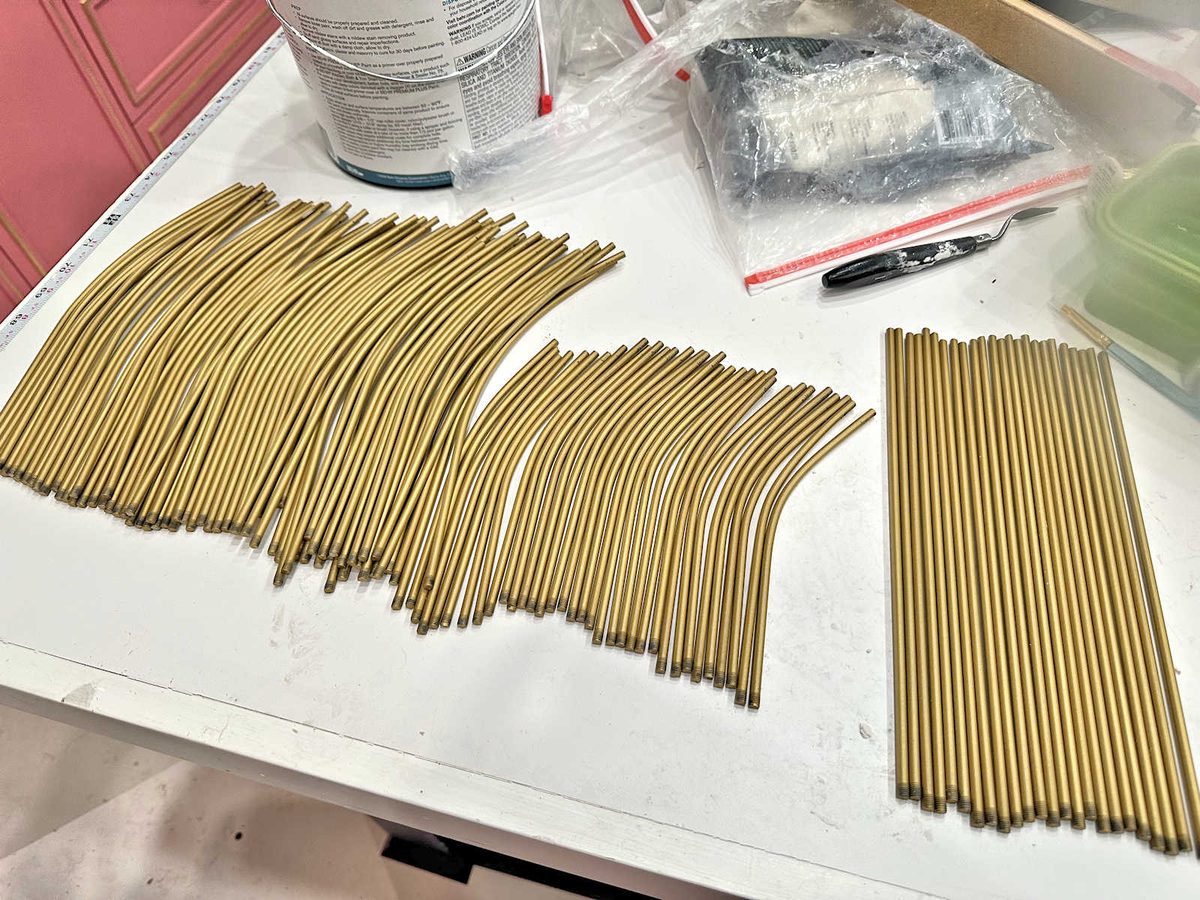
I decided to screw all of the metal rods into the light before I hung the light to make sure I had the shape right. This made installing the light a little more challenging, but it was much easier to screw all of these in without having to stand on a ladder since there are over 130 of them and this process alone took over an hour.
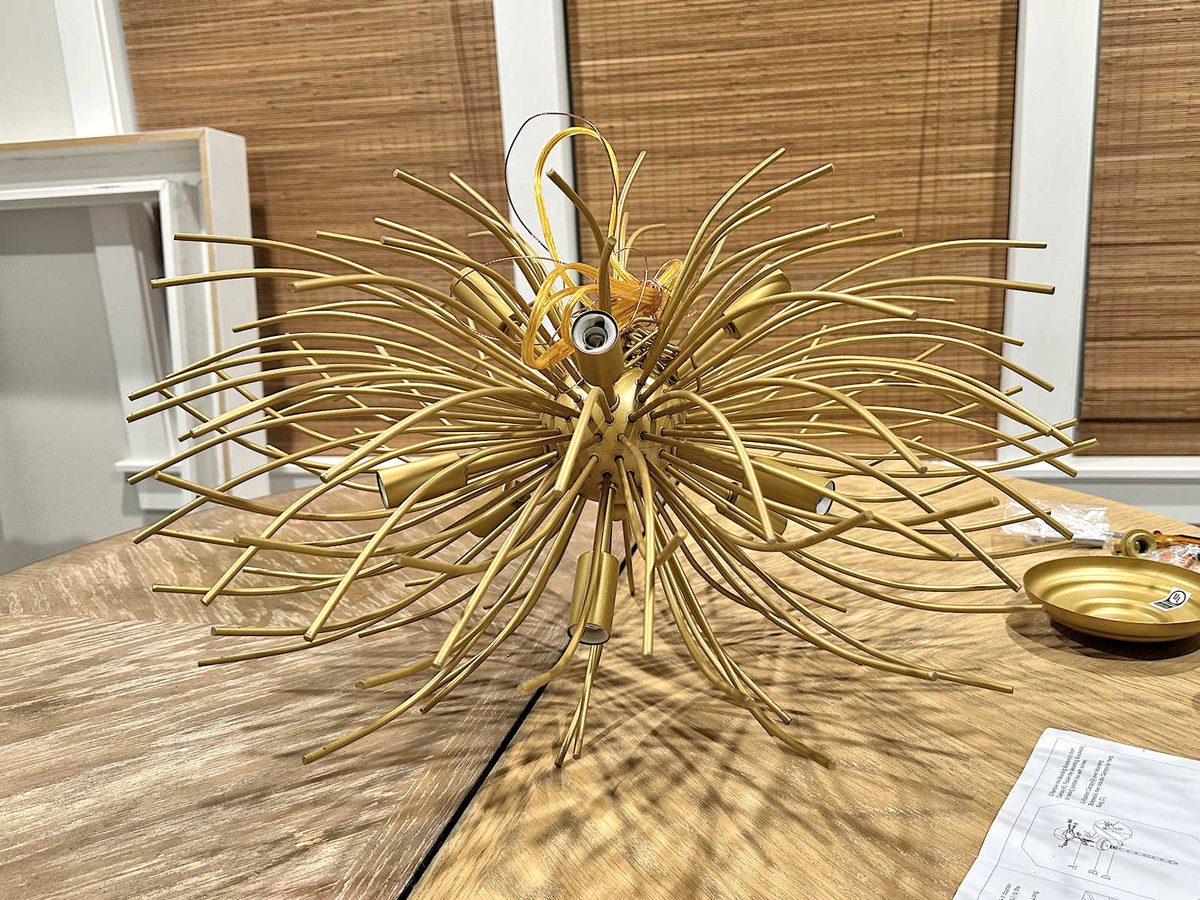
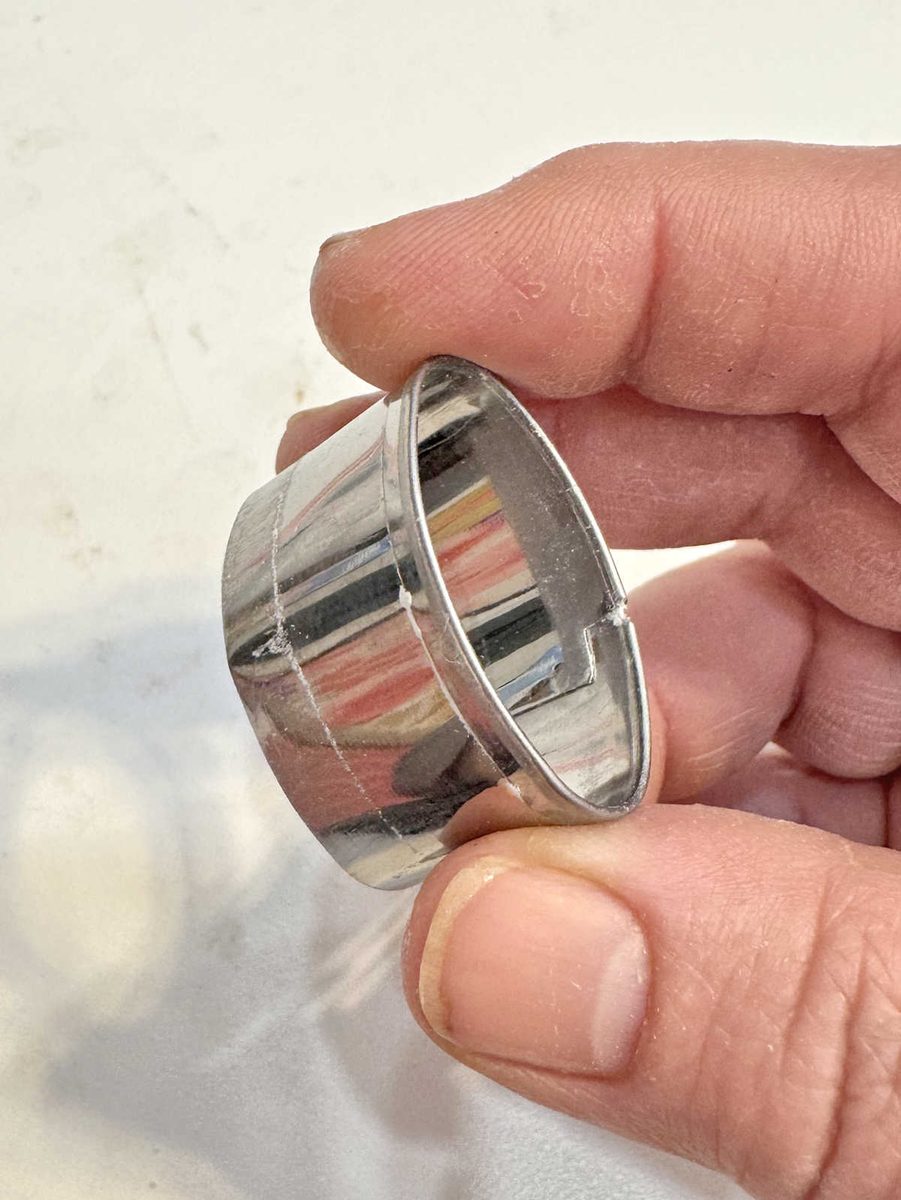
Once I had the shape of the chandelier right, I moved on to making the air-dry clay flowers. I needed a quick and easy way to make 135 flowers that were all the same size. I could have used a scale to weigh the clay to make sure all of them used the same amount of clay, but I found a much easier and faster way to do this. I had this set of oval metal clay cutters that I bought from Michael’s.
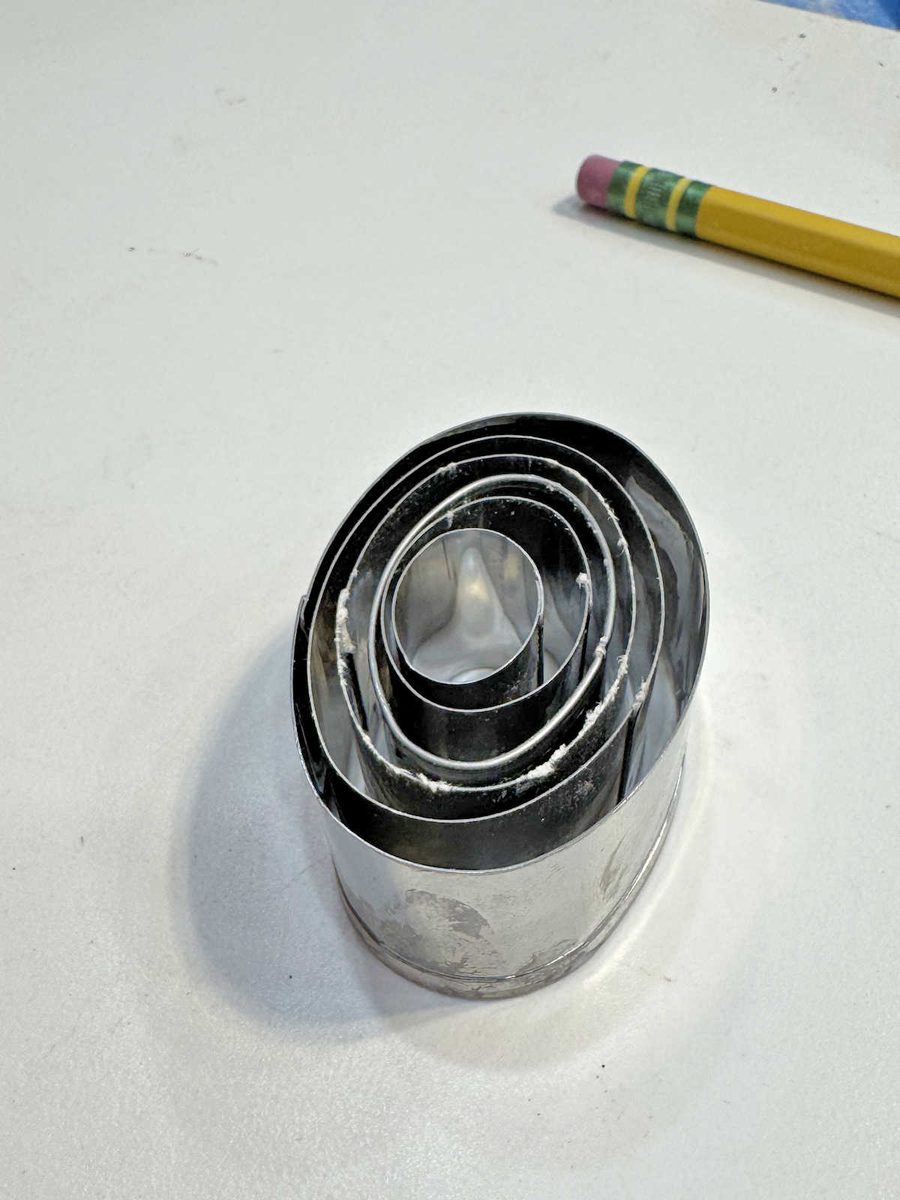
So I used the oval that was the third from the smallest…
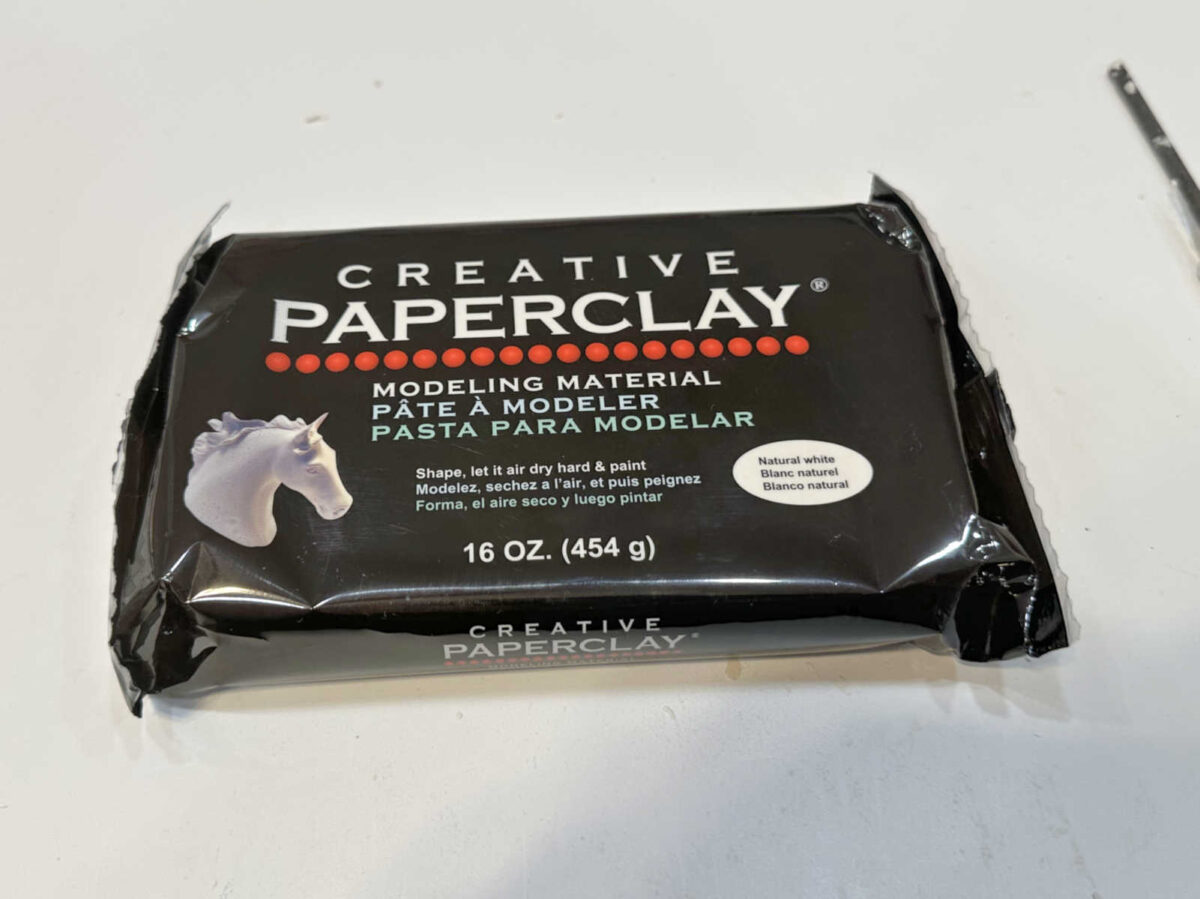
To make the flowers, I used my favorite air-dry clay. I originally tried using Craft Smart air dry clay from Michael’s, but that clay is too wet, too sticky, and doesn’t hold its shape before it dries. So I had to order this clay online and wait for it to arrive, but it was worth it. I find that this Creative Paperclay has the perfect consistency. It’s soft and easy to work with and shape, and once you’ve created something with it, it holds its shape. It also dries very hard and durable and it’s very easy to sand to a smooth finish.
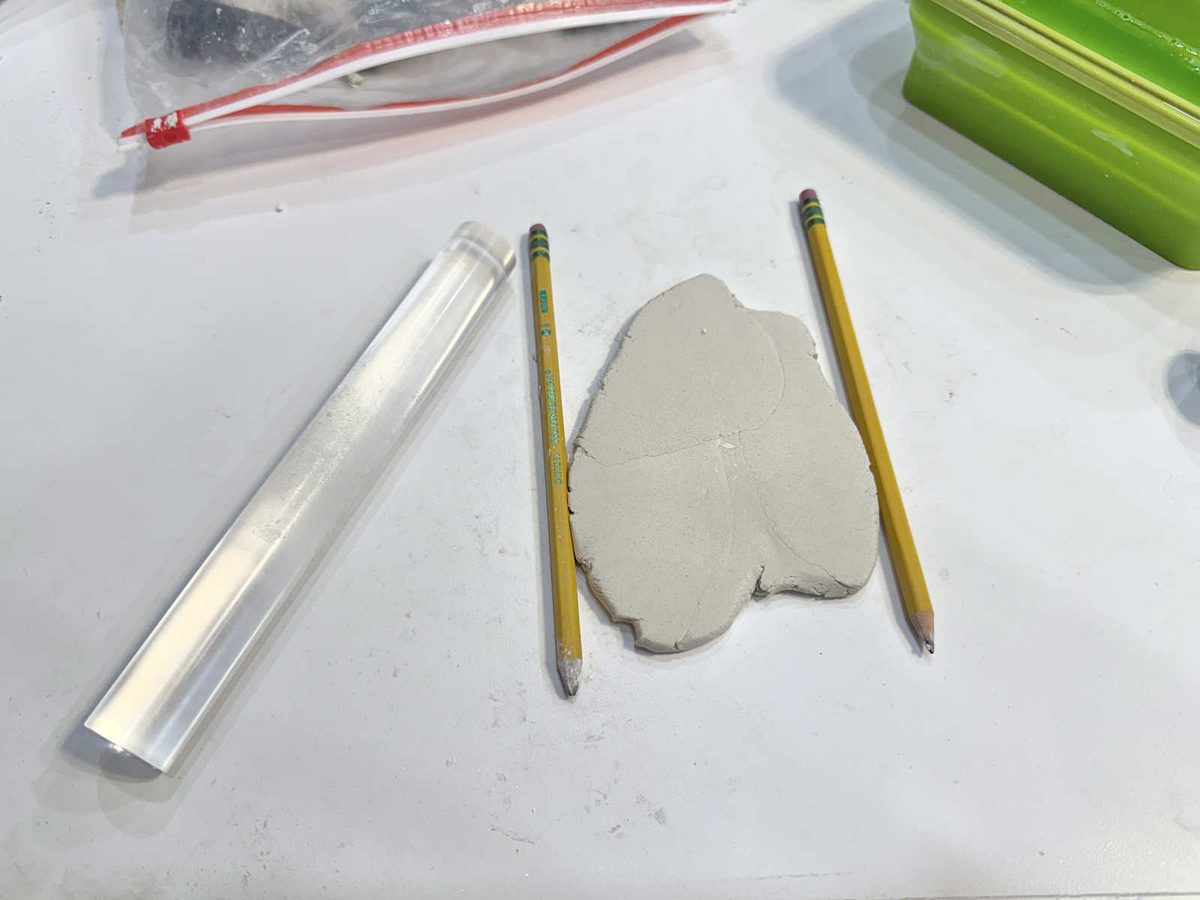
I rolled clay out between two pencils using my acrylic clay roller…
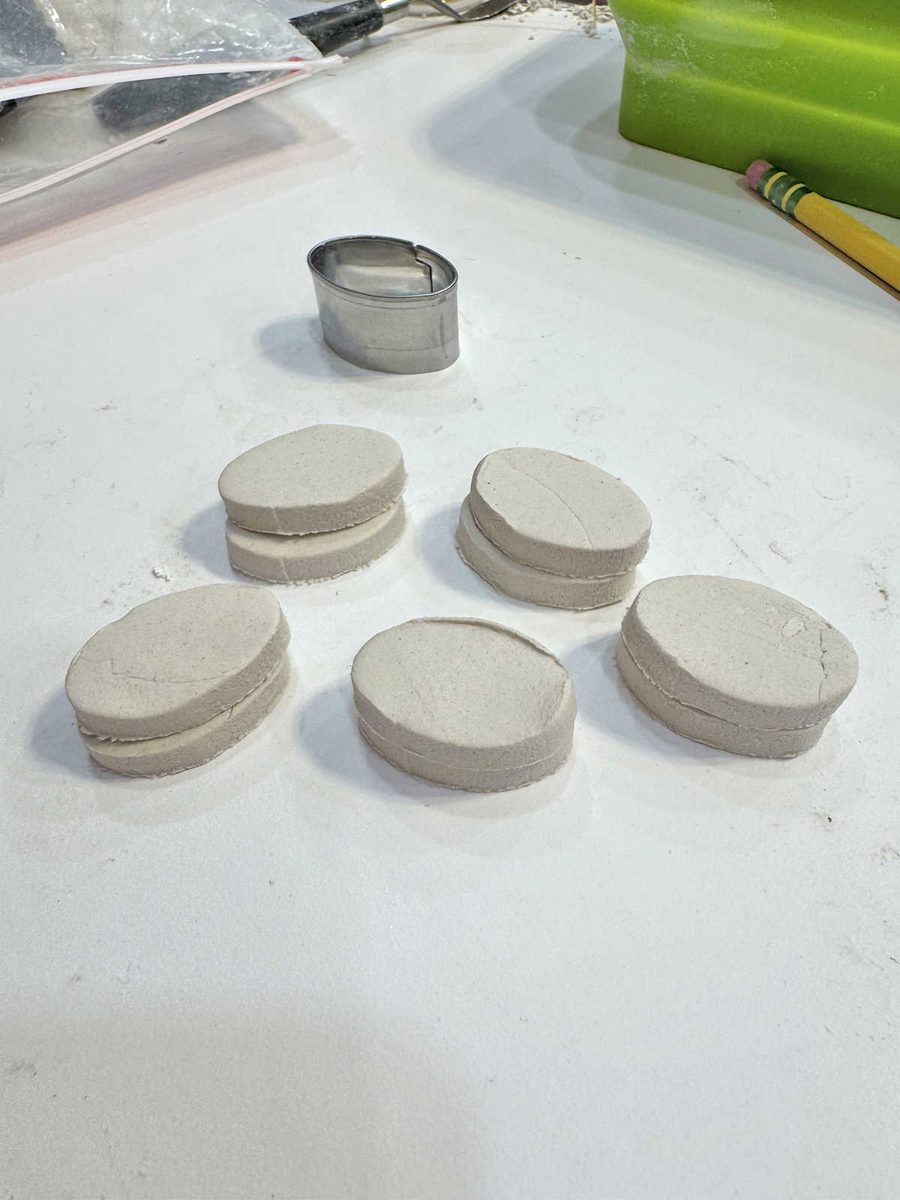
And then I cut as many ovals out of that clay as I could…
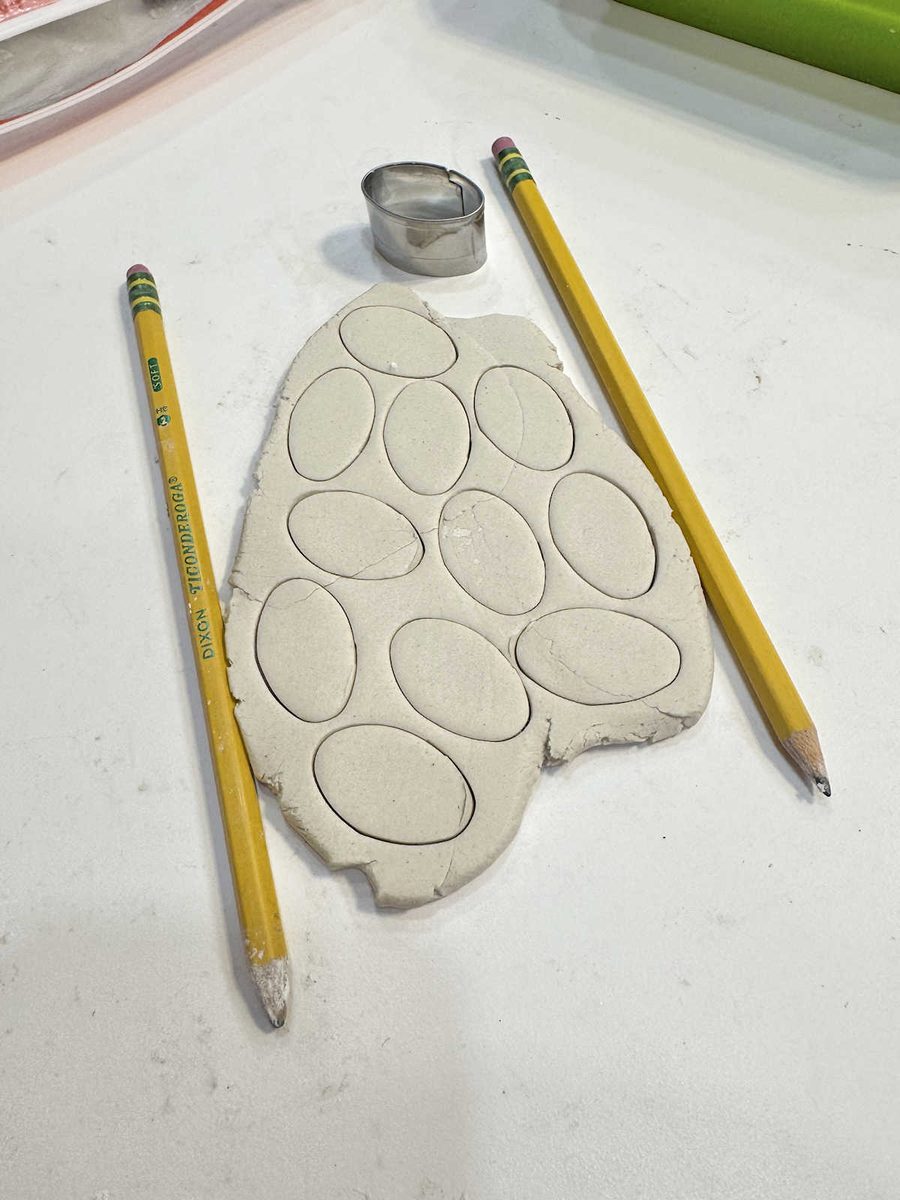
And then I used two ovals per flower. This assured that each flower used the same amount of clay and came out the same size.
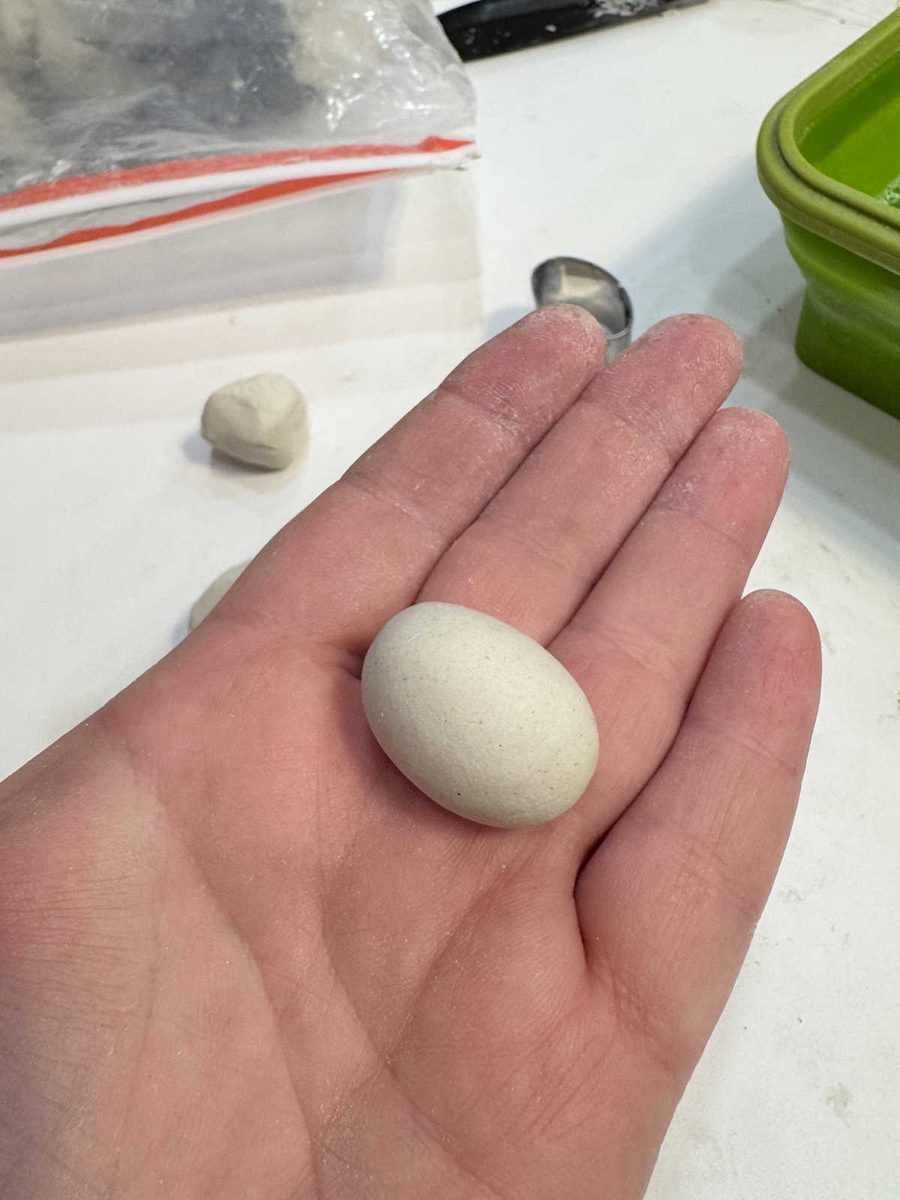
To make each flower, I started by rolling the clay into this smooth egg shape.
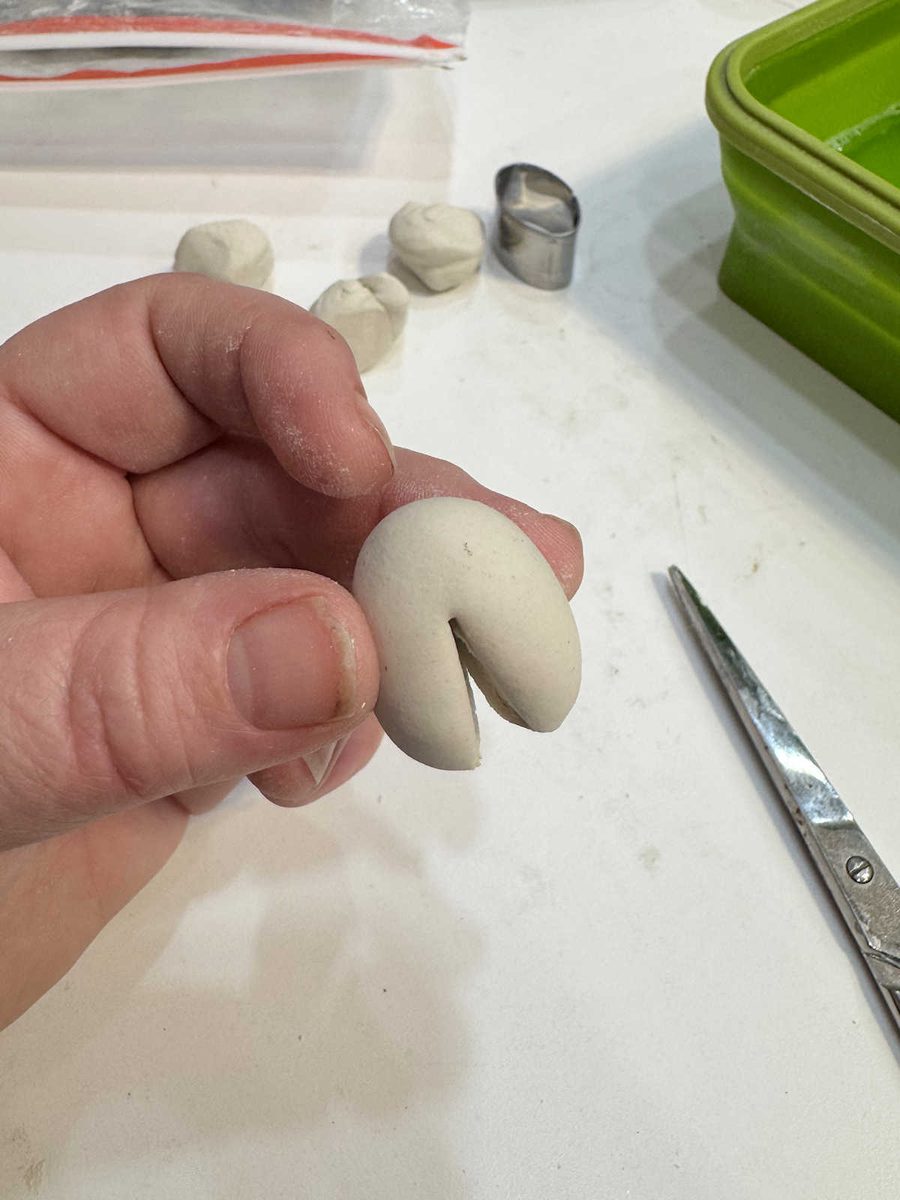
And then using a small pair of scissors, I cut about 1/3 of the way through the clay cutting it in half.
And then I cut each half in half again leaving me with four sections…
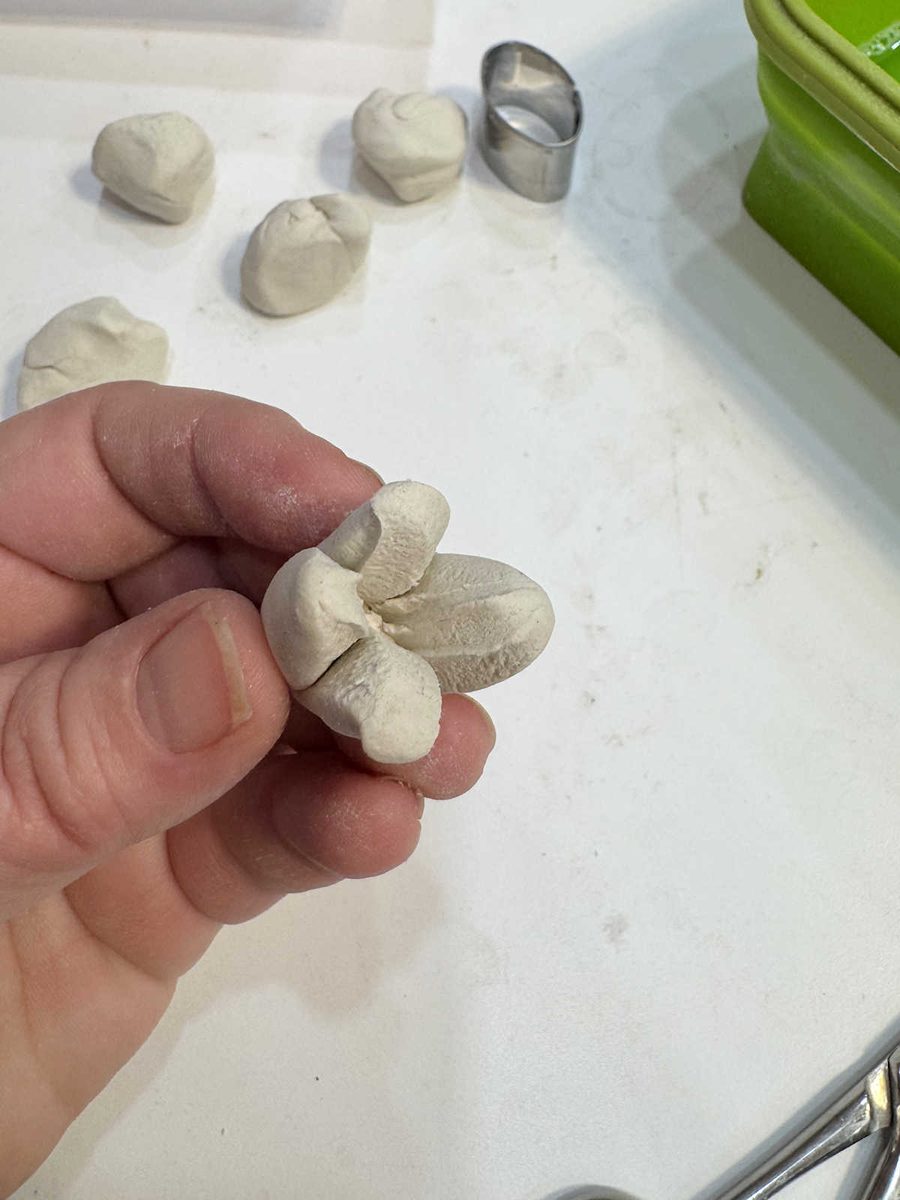
Then I dipped my fingers into water to which I had added some Dawn dishwashing liquid (I find this works better than plain water), and then used my fingers to press each section into a petal shape. Each petal was pretty rough at this point…
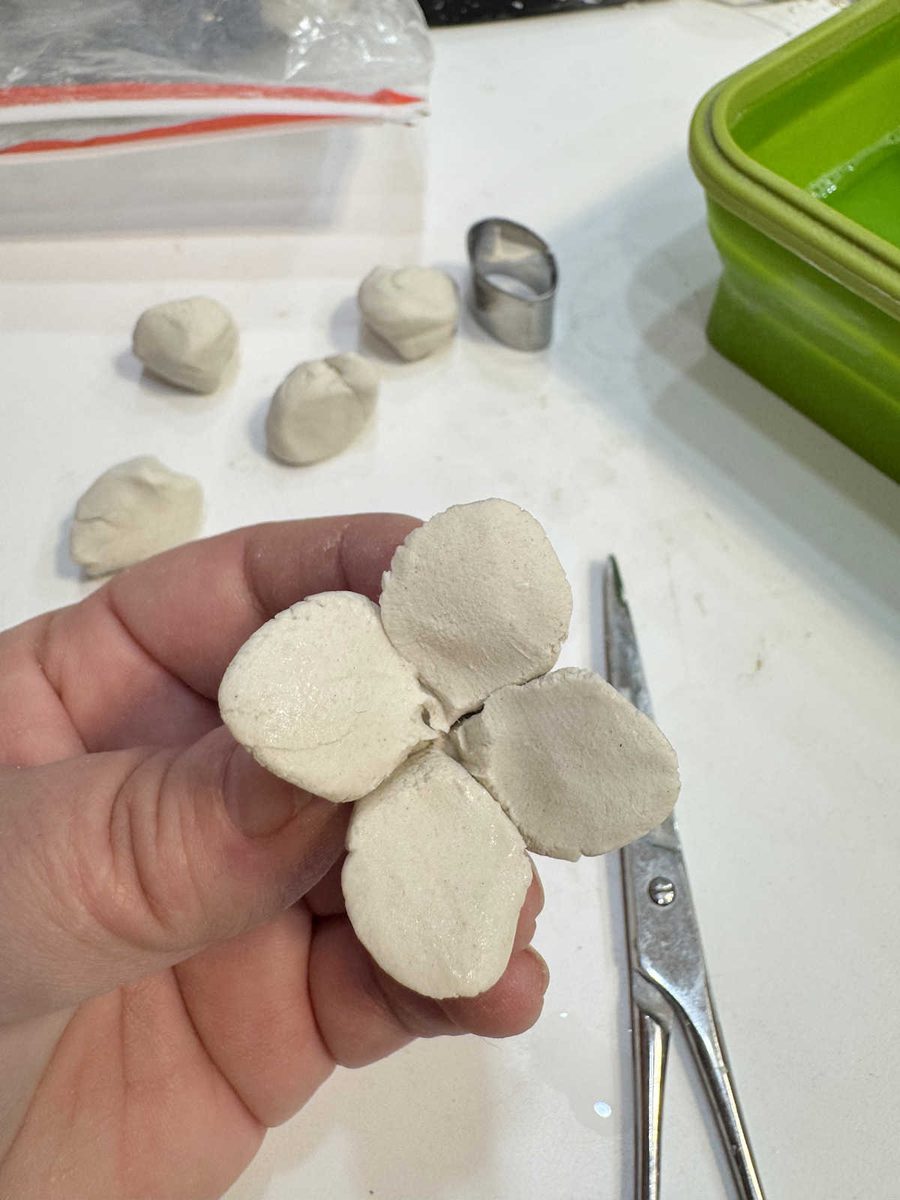
Then I used a small palette knife, dipped it in the water, and used it to smooth out each petal on top and around the edges.
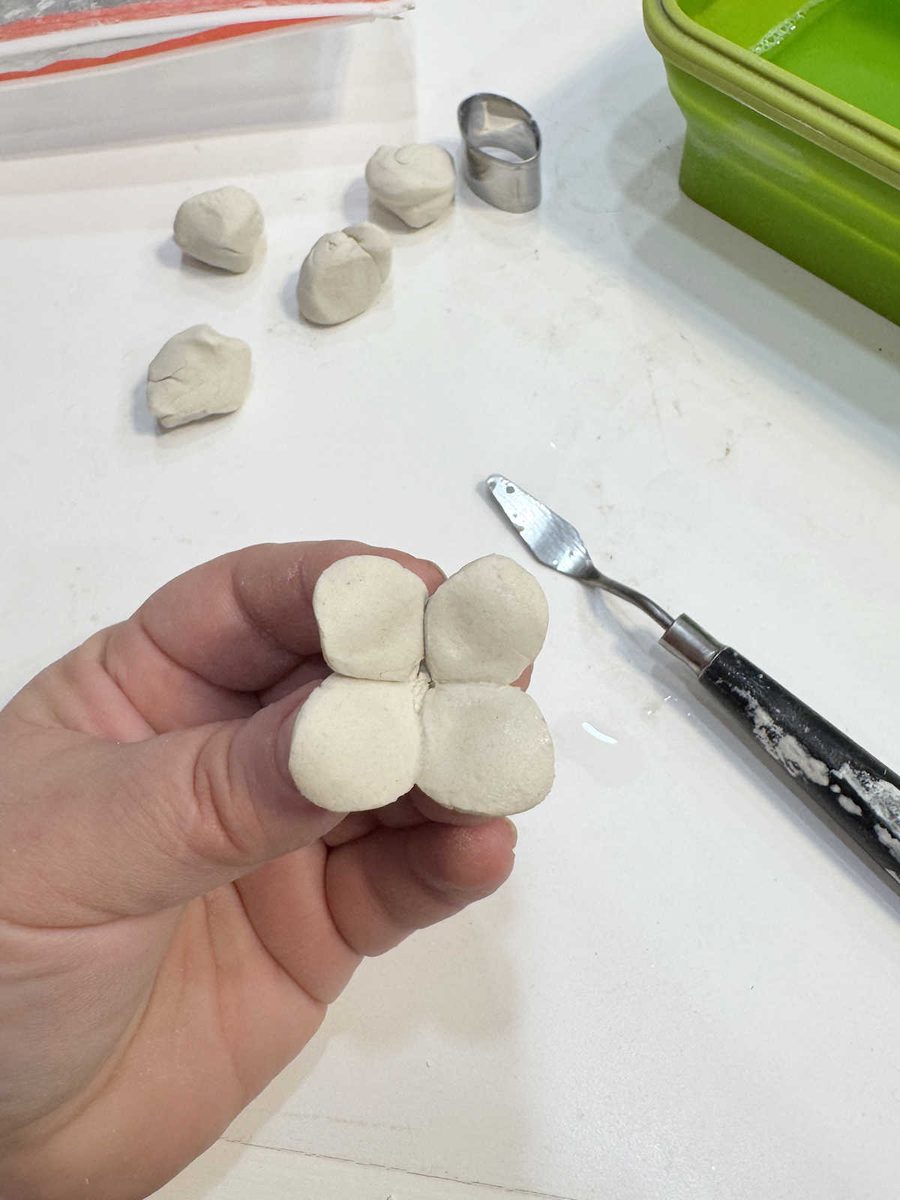
It was still a little rough at this point, but I wasn’t worried about that because, as I mentioned above, this clay, once it’s fully dry, sands to a beautiful, smooth finish with 220-grit sandpaper.
For the final touch, I used a tiny amount of clay, rolled it into a ball…
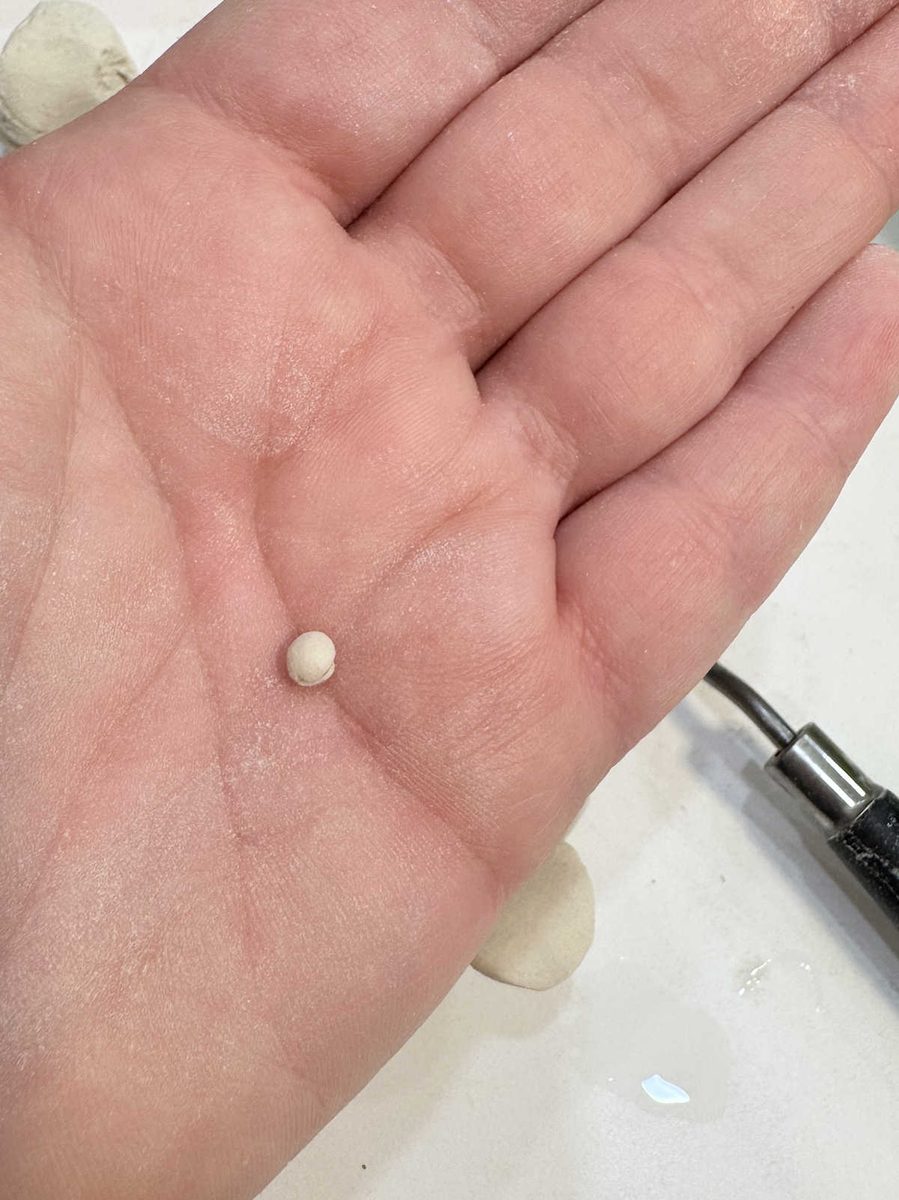
And pressed that into the center of the flower.
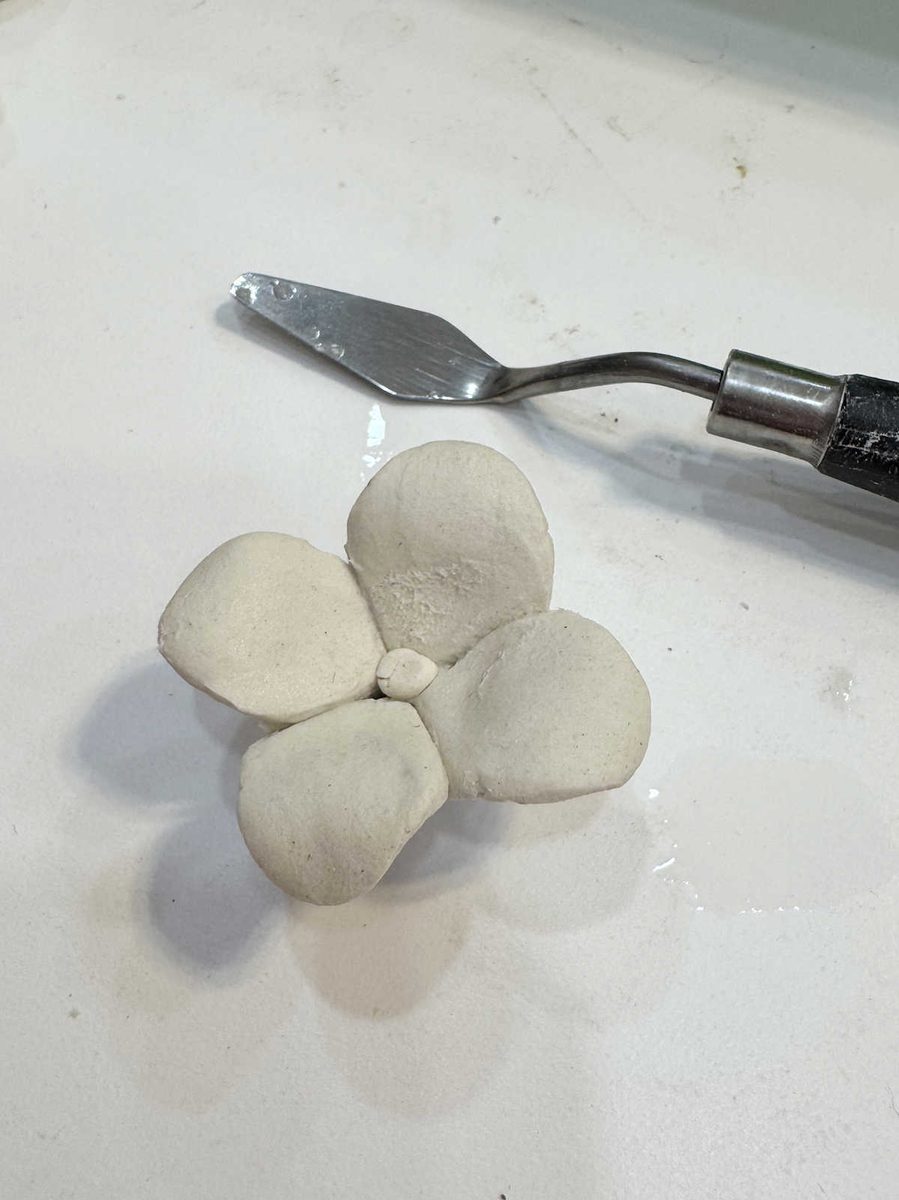
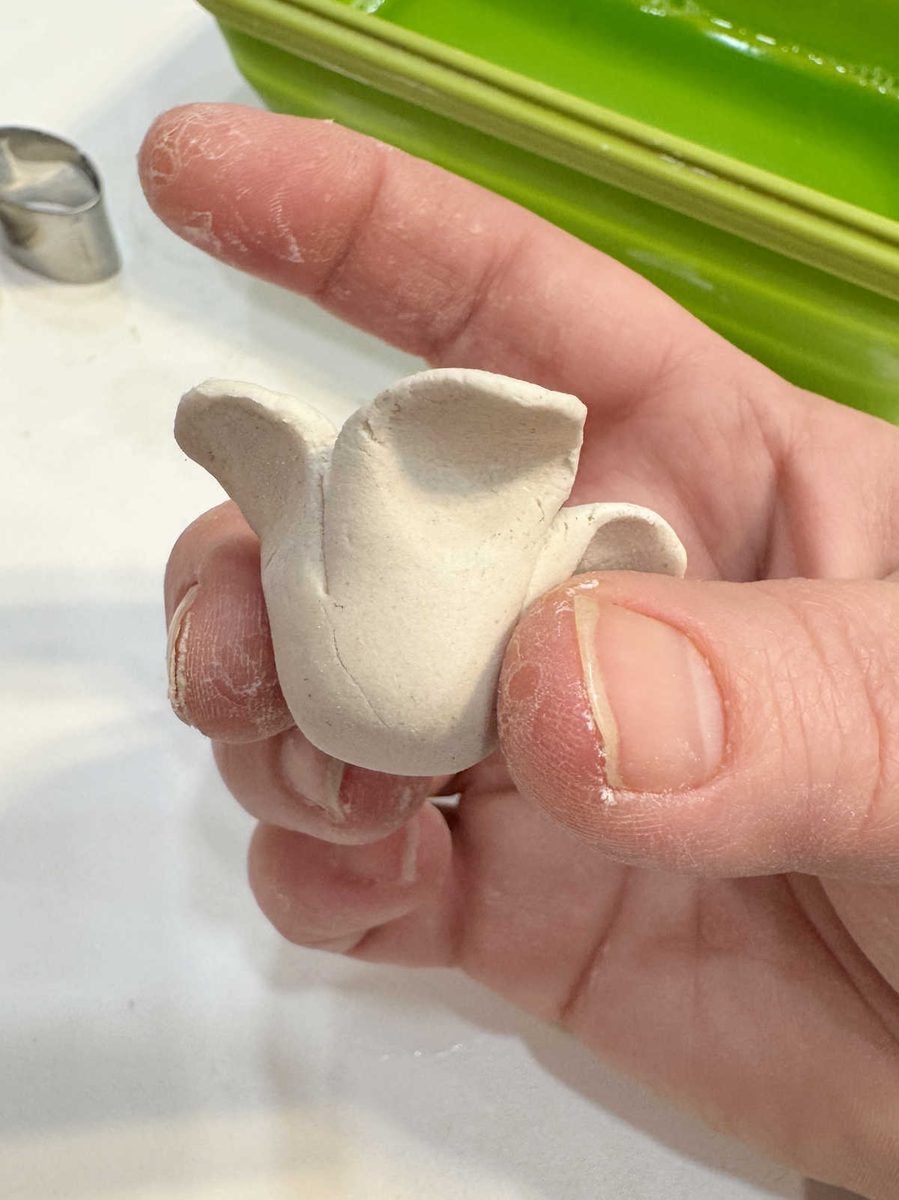
As I pressed that into the center of the flower, the pressure also created a bit of a flat bottom on the flower so that it would sit upright on its own. And then I made sure the petals were curved like I wanted them and placed it aside to dry.
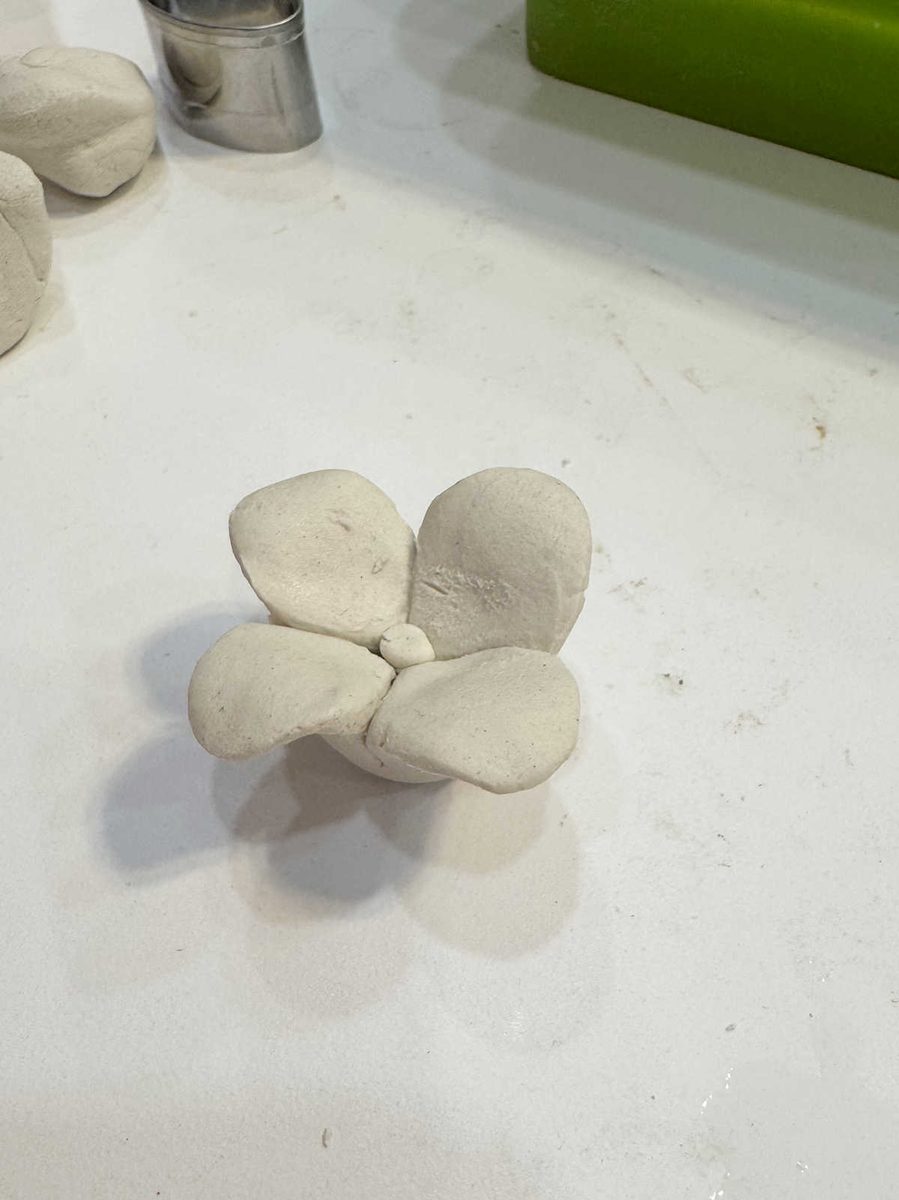
The flowers took about 24 hours to fully dry, and then I sanded each one with 220-grit sandpaper to remove any rough areas. Then I painted each one with this Artist’s Loft Iridescent Medium. I didn’t paint them or prime them first. I didn’t add this medium to any paint. I just used this medium all on its own.
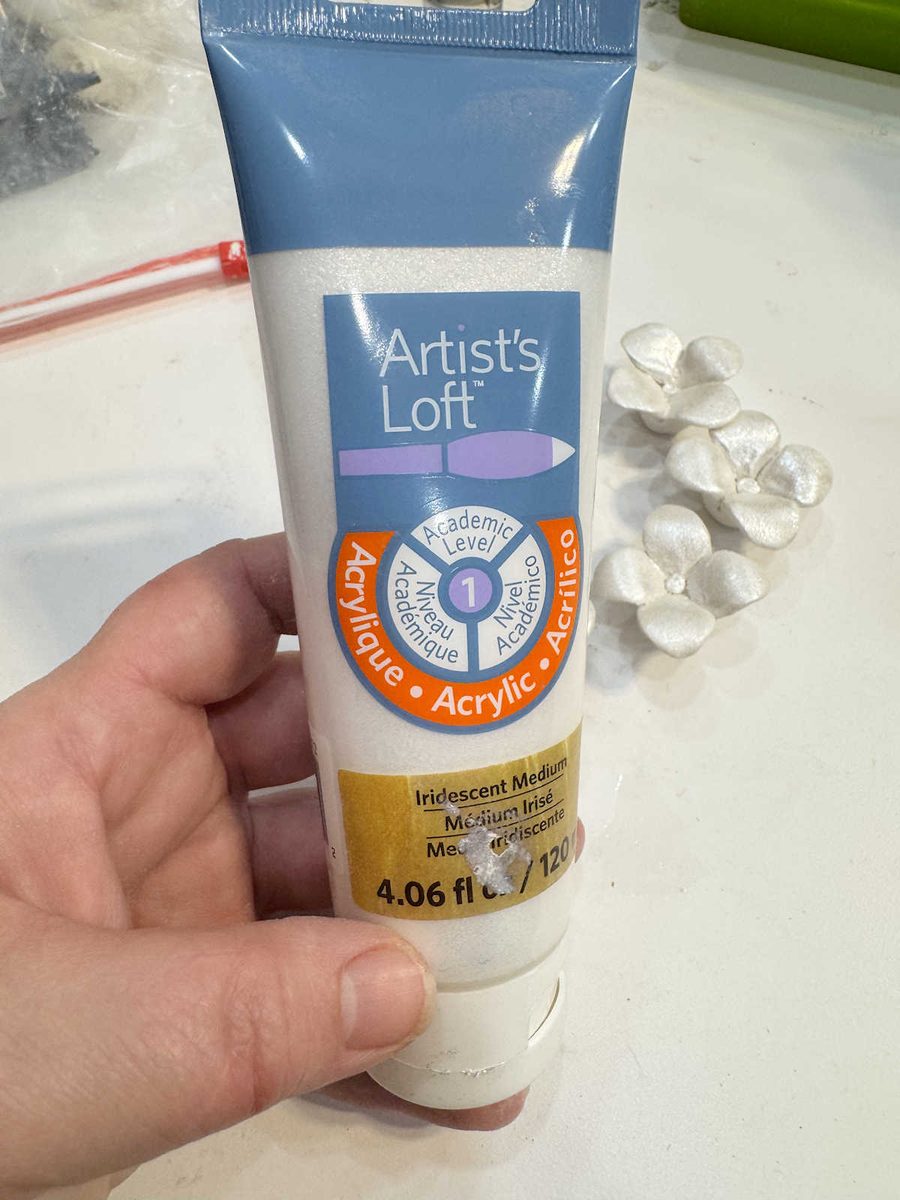
And this is what they looked like when they were dry…
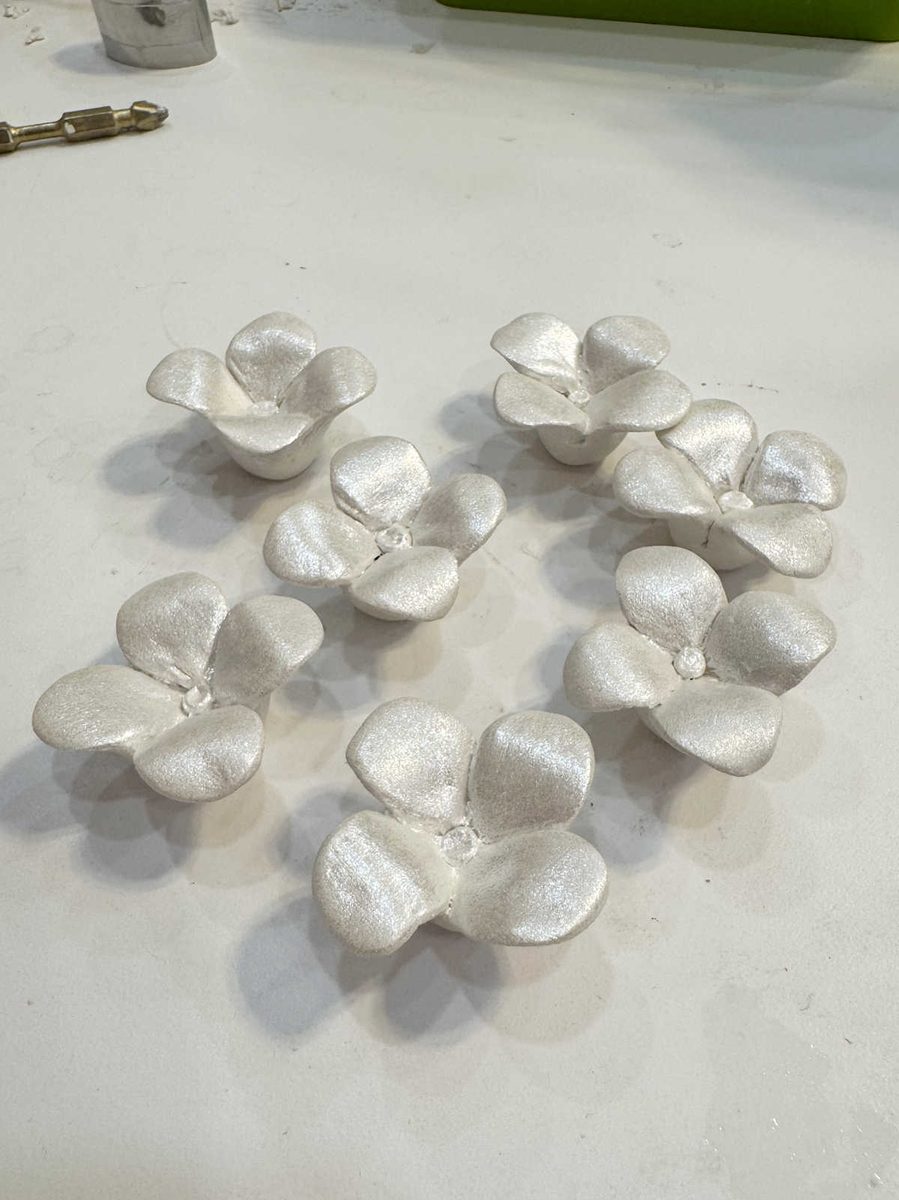
Before attaching them to the chandelier, I had to drill a hole in the bottom of each flower. I taped off my drill bit so that I would know how deep to drill each hole without accidentally drilling all the way through the flower.
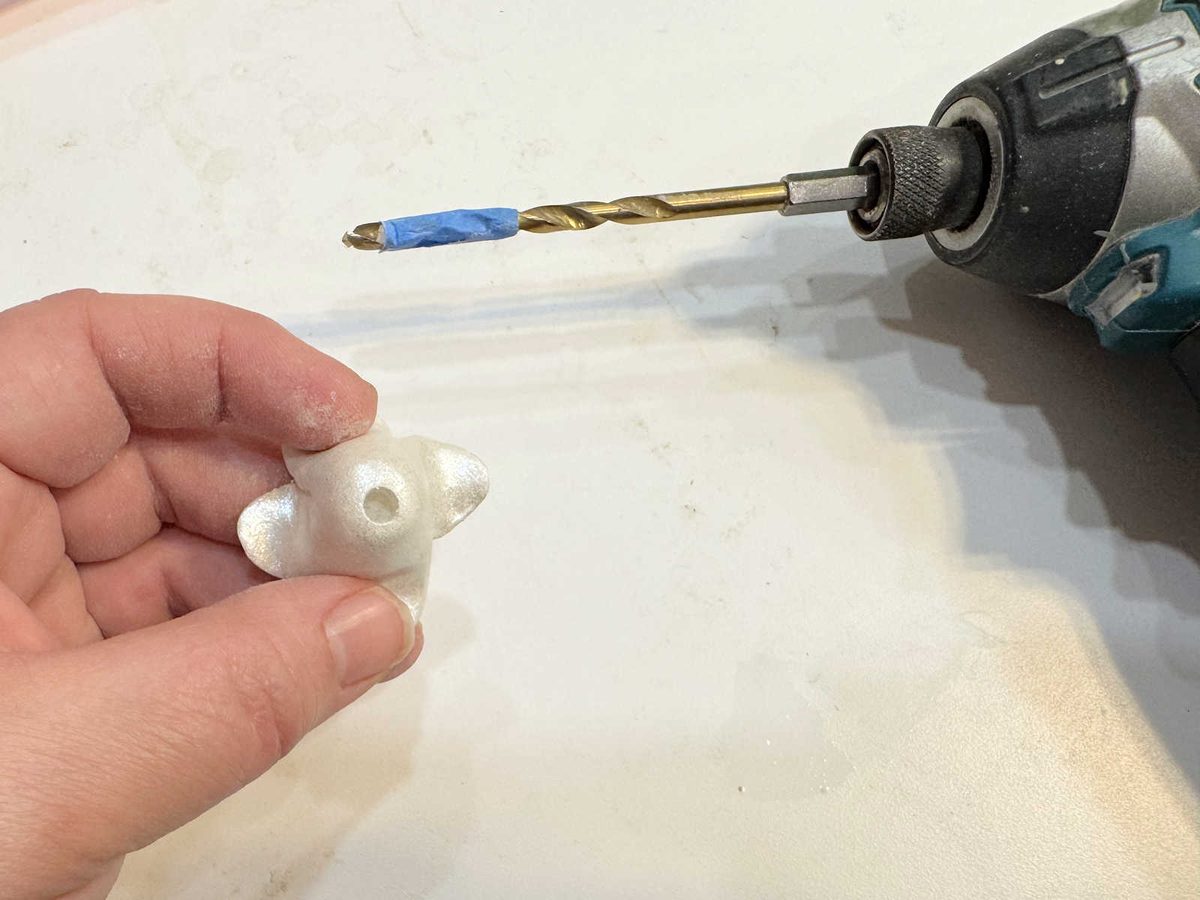
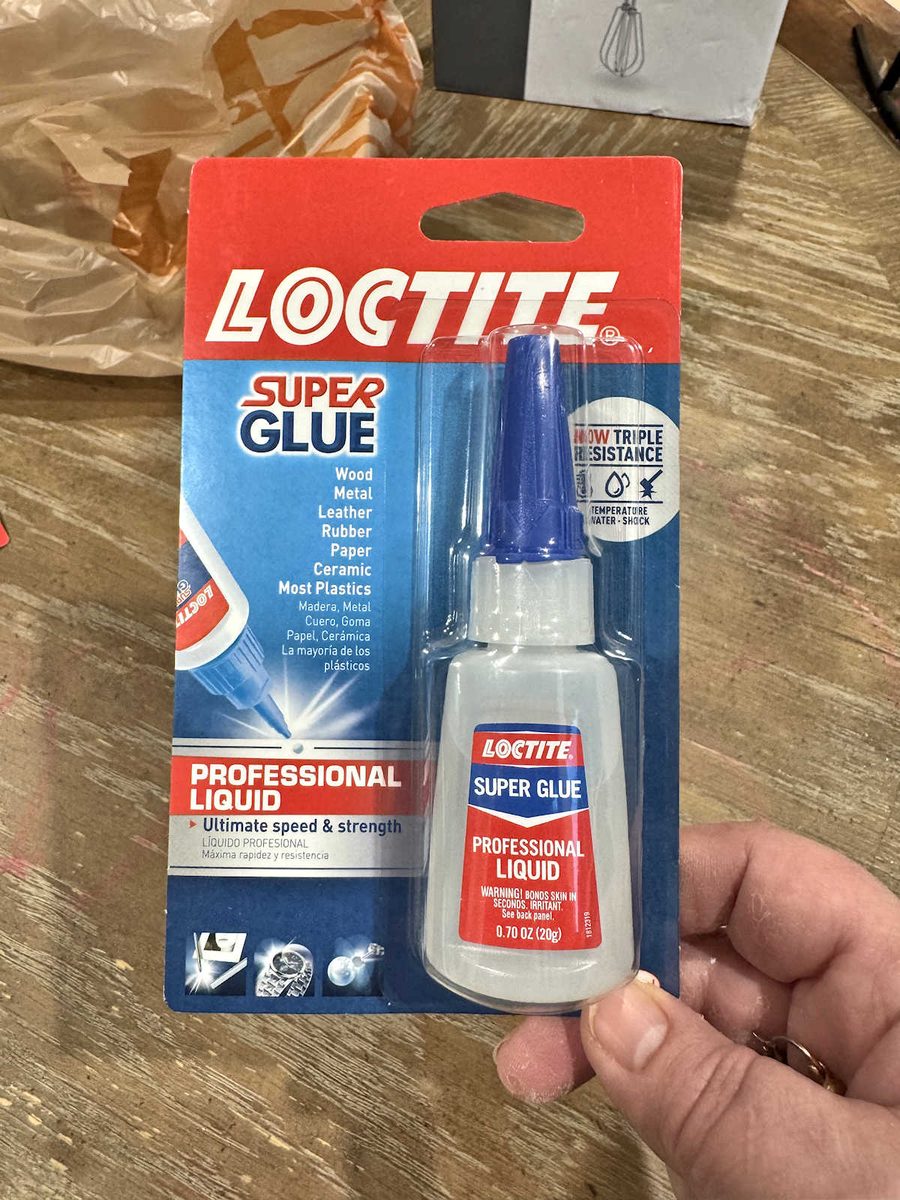
To attach the flowers to the chandelier, I initially tried hot glue. That was a mess. It dried way too fast for me to get the flower fully on the metal rod before the glue dried, and then part of it squished out and dried and would have been impossible to completely clean off to give a clean finish. It was a mess. So I ended up using this super glue, and it worked perfectly.
It took me about an hour to attach all of the flowers, but here’s the final result.
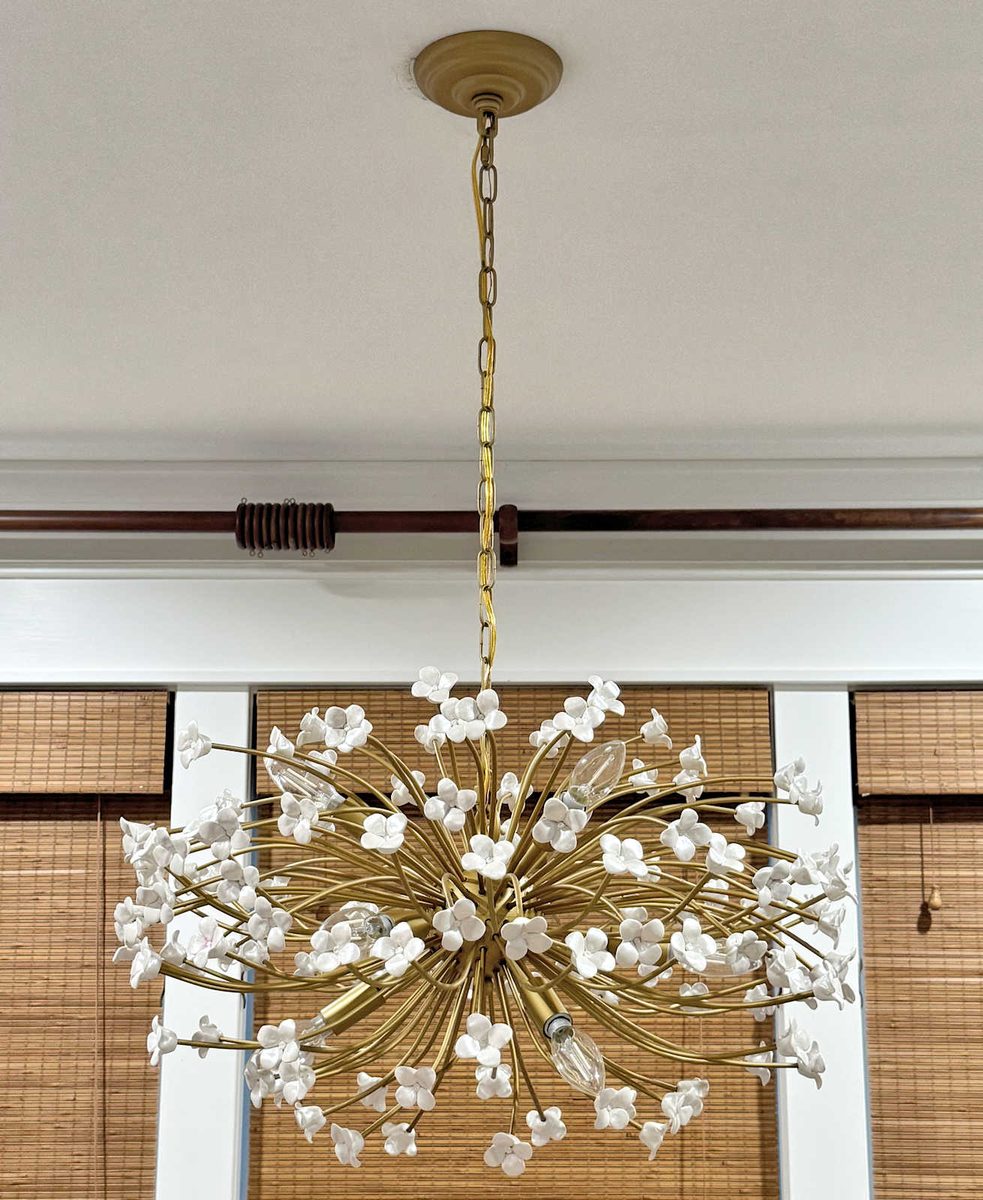
I’m so excited about how this light turned out. I think I like this one better than my walk-in closet chandelier, and that one took much longer to make!
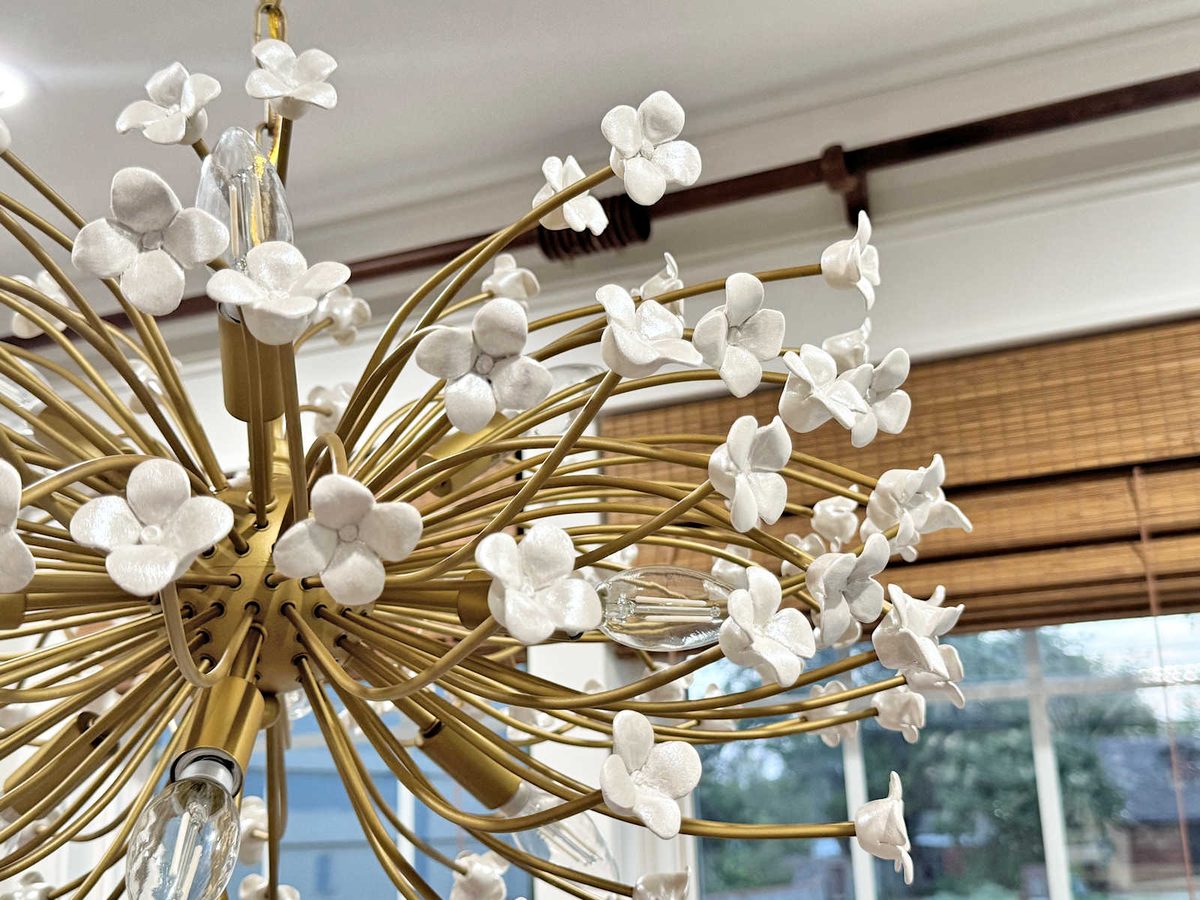
Mine isn’t quite as fancy as the inspiration chandelier, but mine also cost under $200 for my DIY version as opposed to the $1700 price of the inspiration chandelier.
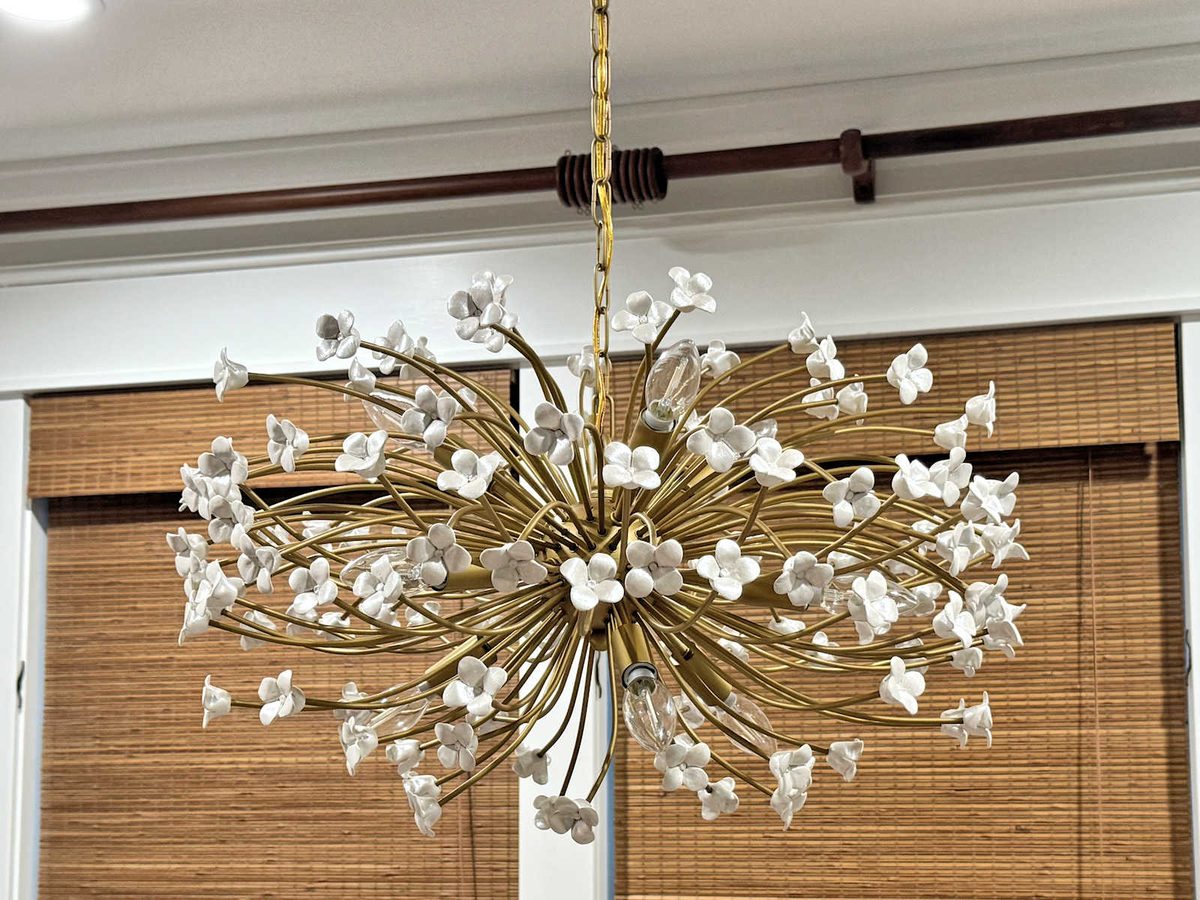
In all, it took three packages of the air dry clay to make all 135 flowers, but I only used about 1/3 of the third package. So I have some left over that I can use for another project. And there will be another project because I’ve learned that I absolutely love using this medium to create fun projects.
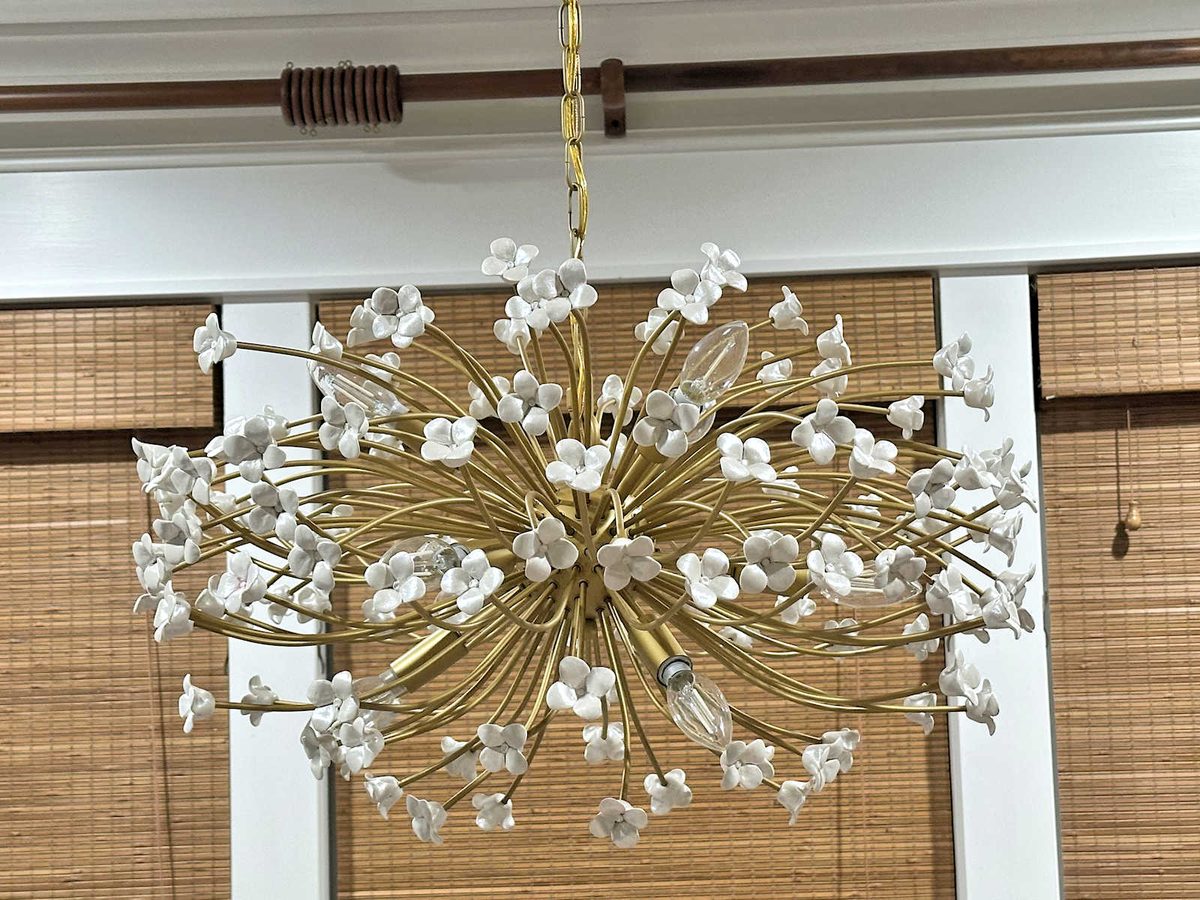
Here’s a final look at what I started out with, and what I turned it into.
I didn’t get any pictures with the light turned on because I need to get a dimmer switch for the light first. I bought 25-watt equivalent bulbs, but this is a NINE-bulb chandelier. So even with the 25-watt bulbs, it’s way too bright. Once I get the dimmer switch installed, I’ll get a picture of the light turned on. So those pictures will come later as I make more progress on this dining room.
This is the second chandelier I’ve made using air-dry clay flowers. If you missed the first one, you can see it here: DIY Flower Chandelier – Finished!
More About Our Breakfast Room
see all breakfast
room diy projects
read all breakfast
room blog posts

Addicted 2 Decorating is where I share my DIY and decorating journey as I remodel and decorate the 1948 fixer upper that my husband, Matt, and I bought in 2013. Matt has M.S. and is unable to do physical work, so I do the majority of the work on the house by myself. You can learn more about me here.
![Breakfast Room & Pantry Progress [Video]](https://www.addicted2decorating.com/wp-content/uploads/2016/08/breakfast-room-progress-August-2016.png)
Kristi, you are amazing! 🤩 I love everything that you do!
Oh my! A lot of work but clearly worth the effort. BTW, in the 60’s we lived in an apartment in L.A – it had a chandelier that looked exactly like the one you started with. We kids named it “Sputnik”. We thought it was the craziest light fixture we had ever seen 😂
It’s beautiful!
Well done!
You are a marvel🏆🎖️
👏👏👏. How did you get those bent metal rods to face the correct way once you screwed them in?? So much detail work—congratulations—I love it!
I just screwed them in until they were facing the right direction. They’re not all screwed in as tight as they will go, but they’re all screwed in as much as they need to be in order to stay put.
The chandelier looks beautiful! I didn’t know if you’d be able to bend the metal rods into soft curves and you nailed that. Have you decided on a bench to replicate? Are you going to work on a dining room project or the storage closet next?
You never cease to amaze me — beautiful!
oh WOW! That’s what I said when I opened the picture of the finished light and that’s what I’m saying now. oh WOW!! Bravo
I’ve been here since the plastic spoon mirror days, and I think this light is its more sophisticated cousin! What a beautiful art piece! I hope it brings you joy every time you turn it on!
This light is absolutely gorgeous!
Wow! The chandelier is stunning! 💖 I personally think it is much prettier than the inspiration. Great work Kristi! Love and blessings from NC 🙏🏻
You are AMAZING! The light is beautiful and elegant.👍🏻👍🏻👍🏻👍🏻👍🏻🩷🩷