No Time For Tears (Plus, A Small Bump In The Road)
It seems like there’s a point during every big project I undertake when I just need to take a break and have a good cry. I didn’t quite reach that point yesterday, but I came very close. And really, the only thing that kept me from doing that was my telling myself, “Kristi, there’s no time to waste on that! It won’t help any. Just keep going!”
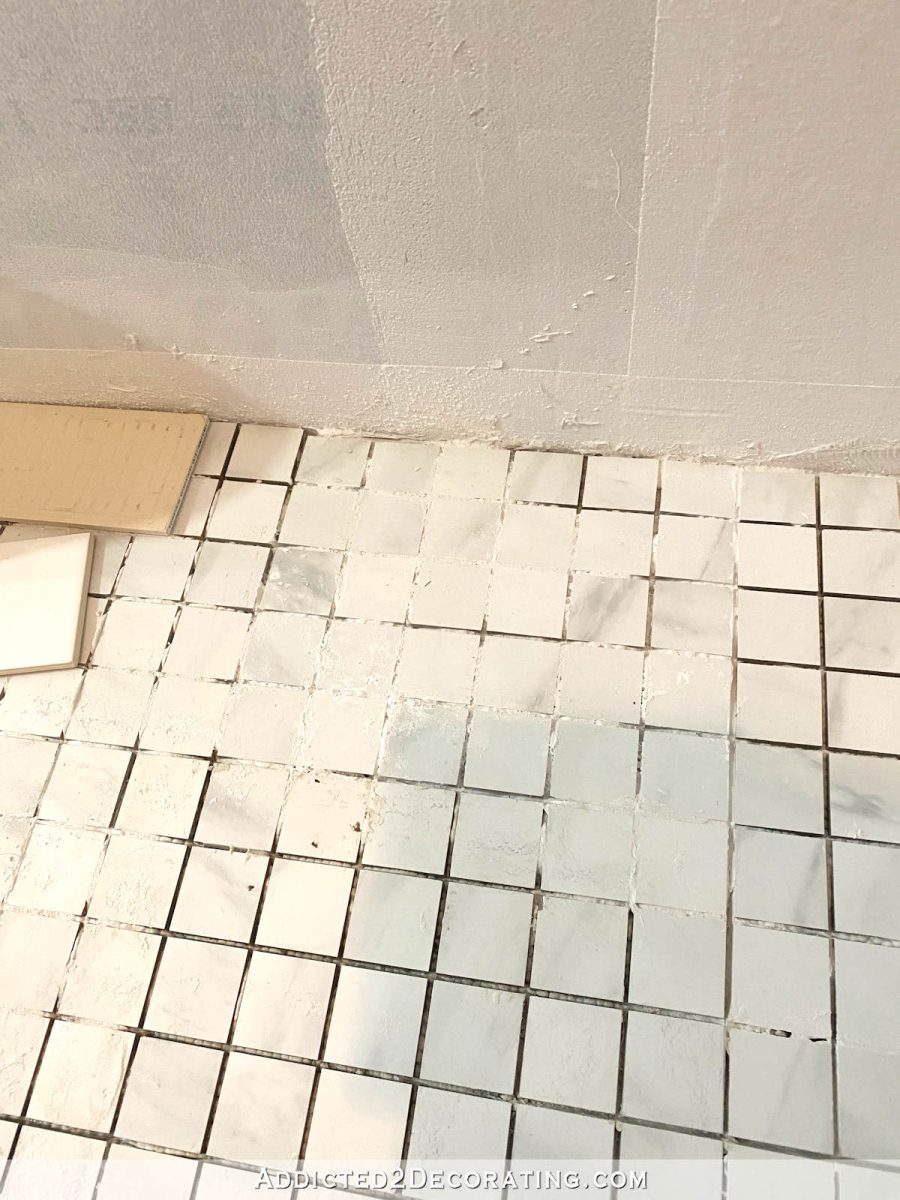
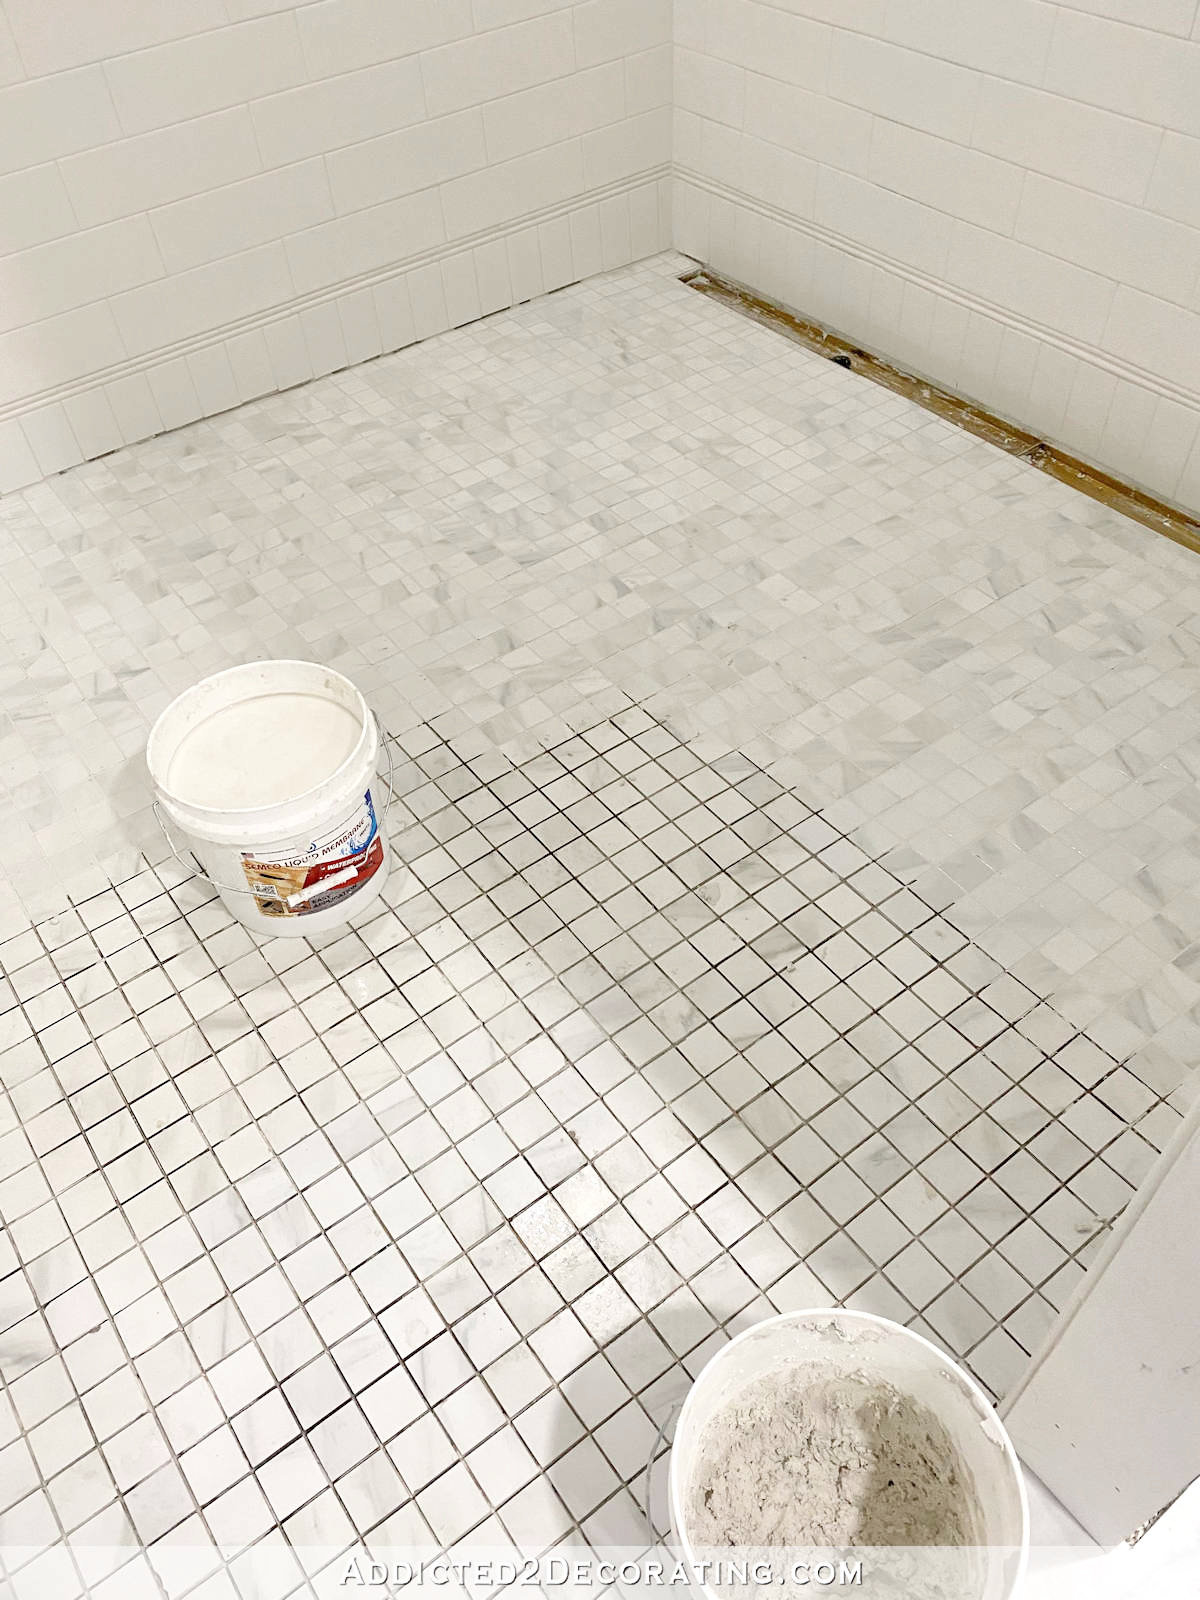
The project I worked on yesterday was cleaning up the tile in the shower to get it ready to grout. And let me tell you, there were places on that tile that were a complete mess, as you can see here…

That’s dried mortar. The mortar on the surface of the tiles was easy enough to remove. I used a big sponge to put a very liberal amount of soapy water onto those areas, and after giving it a few minutes to soak, the mortar scraped right off. That was simple enough.
The part that wasn’t so easy was removing the mortar from between the tiles.
It probably would have been much easier had I cleaned all of that up the day after I tiled (i.e., within that first 12 hours). But no, I waited a week. And the thing is that I knew I was creating a difficult job for myself, but my hands hurt too badly to care. I’d let Future Kristi deal with that.
Well, Future Kristi was Yesterday’s Kristi, and she was not a happy camper. It was such slow work that required the use of my Dremel Multi-Max. And even then, the mortar was so hard that it didn’t come out easily at all. I don’t even know how long I worked, and I managed to get all of the sloped floor cleaned up with clear grout lines.
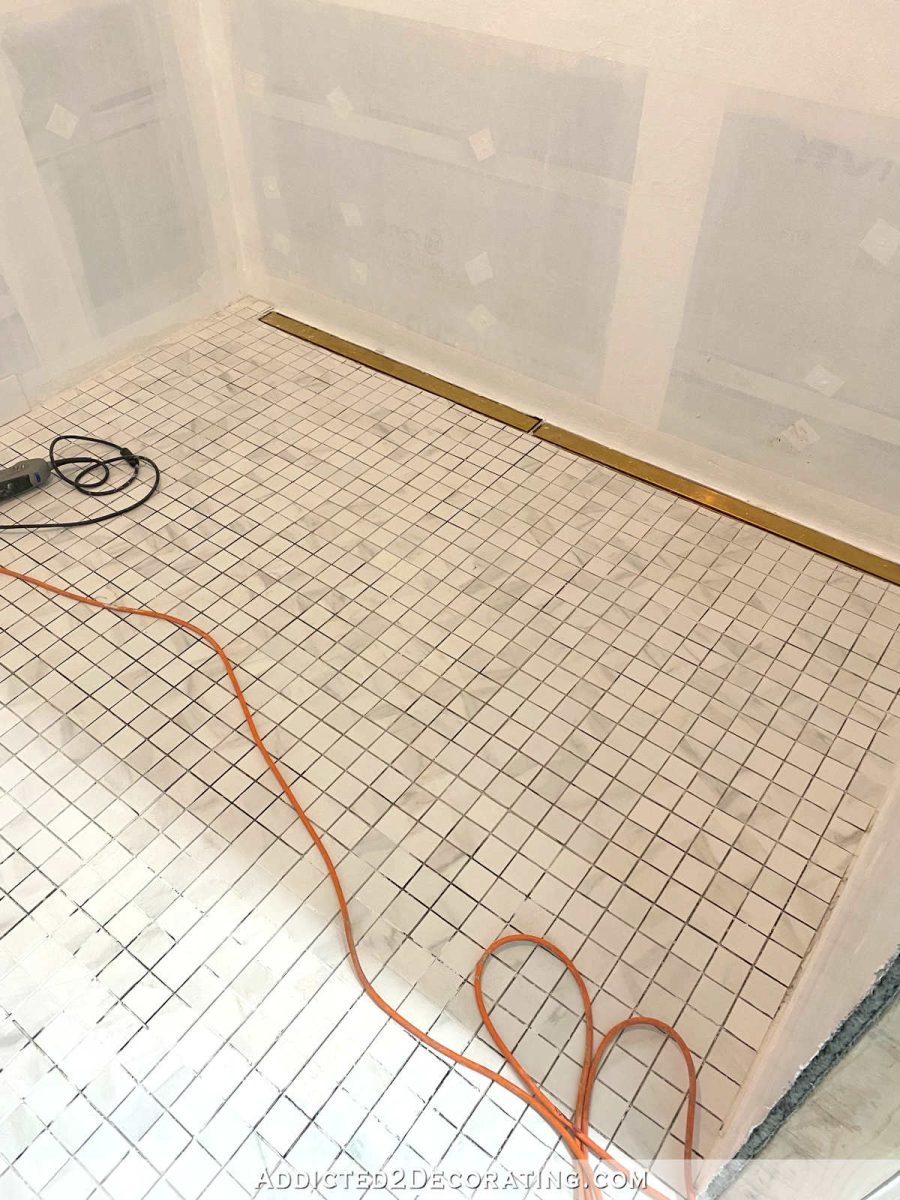
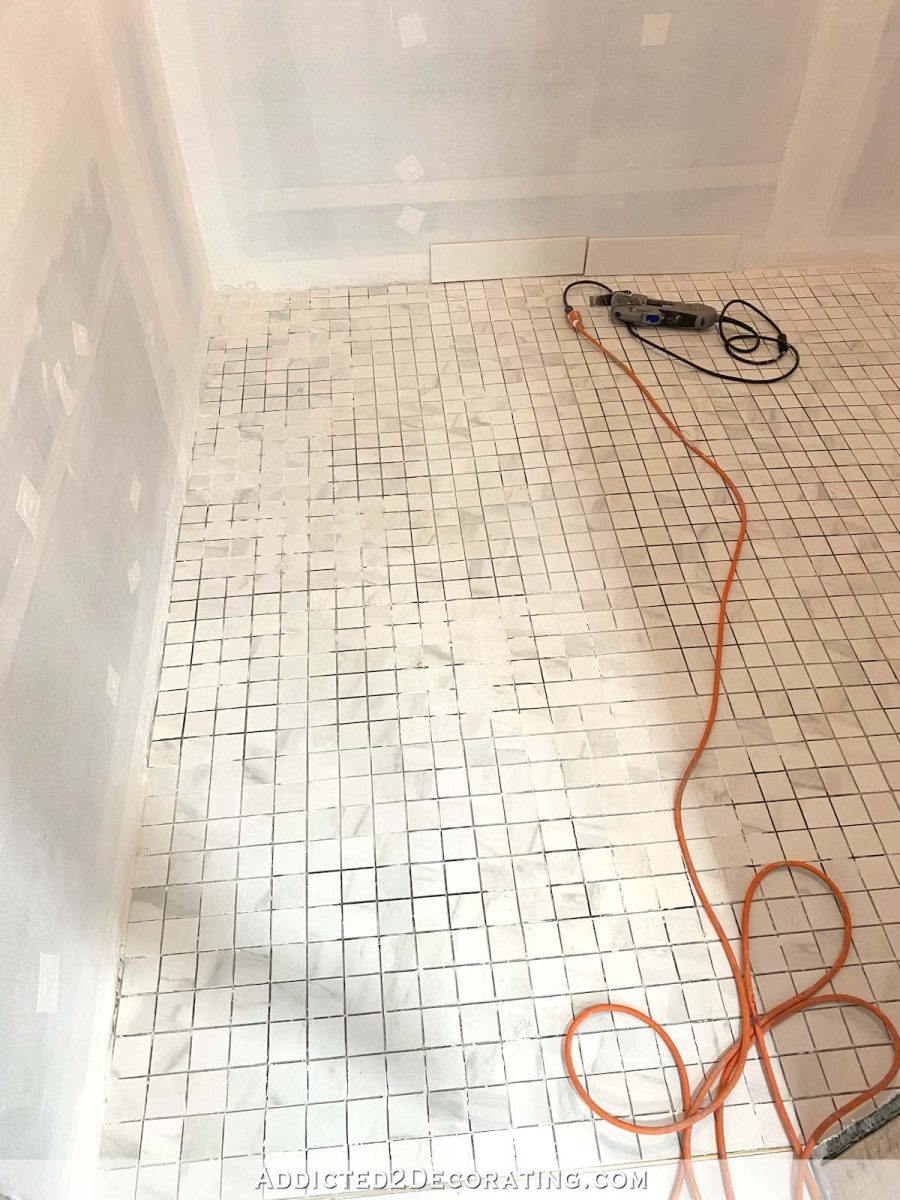
But as you can see, I still have a few more areas on the level part of the floor.
So learn from my mistake. Clean up those grout lines as soon as you can. The reason I didn’t do it as I installed the tiles is because every time I’d try to clear the grout lines, the tiles would move and shift. So I really did plan on letting the tiles dry for just a few hours, and then going back and clearing the grout lines. But then I didn’t. And then I procrastinated. And before I knew it, a week had passed. Yeah, don’t do that.
I also ran into another problem yesterday. During one of my breaks, I was scrolling Instagram and I came across a picture of a dog shower that had the same penny tile design that I had planned to use on the shower head wall of our shower, which is this wall in the shower.

By the way, I had someone ask where the drain was in the shower. Those long gold things on the floor are the drains. There are two of them. 🙂
Here’s the picture I came across on Instagram showing the same penny tile design I had planned to use…
Can you see that pretty little penny tile inset design? If you can’t see the picture above, you can see it on Instagram here.
While that’s the design I had planned on, I had wanted to use either three or five rows of penny tiles to create my design instead of just one. So I grabbed a sheet of the penny tile, cut it into strips of three rows, and tried to lay out the design.
It didn’t work.
I had seen pictures where others had used three or four rows of penny tiles to create boxes, Greek key designs, and other similar designs, so I couldn’t understand why I couldn’t get it to work. So I got online and looked up some of those designs, and I realized exactly why.
I’m not going to post those pictures in this blog post because I just have a rule that I will never post another person’s picture on my blog only to criticize it. And I wouldn’t really call this a criticism as much as it’s just a matter of personal taste and personal tolerance for imperfection.
But when you use penny tile to create any design that has 90-degree corners, the corners tend to be…well, not as clean and perfect as I would need them to be in my home. Other people have a much higher tolerance for imperfect corners, and I say more power to ’em. And from a distance, these designs look fantastic, which is why I had planned to do the same in our shower. But there’s no way I could look at those corners up close day after day. You can see what I mean here: black penny tile design on white subway tile and blue penny tile border set in glass tile.
So now I’m back to square one with coming up with a way to use the penny tile as an accent on that shower wall. I specifically want it to be only on that wall because I don’t want it visible when standing in the bathroom, so that means no horizontal stripes that go around the entire shower (which was my original idea). So it needs to be a design that’s just confined to the shower head wall. And I only bought 18 square feet for the whole bathroom (i.e., accent in the shower and accent on the wainscoting that goes around the bathroom). I can buy more if I really need to, but I’d rather not. I have a feeling I’ll need to, though. Ugh.
Any ideas?

Addicted 2 Decorating is where I share my DIY and decorating journey as I remodel and decorate the 1948 fixer upper that my husband, Matt, and I bought in 2013. Matt has M.S. and is unable to do physical work, so I do the majority of the work on the house by myself. You can learn more about me here.

Keep up the work! Your effort and eye for is what you need for your project. and you have an opportunity to not repeat it in the toilet area. Is there a way you’d like a hexagon border/shape vs square? You could get a crisper corners. A third square accent tile in the right size for the corners could be good, but only if it doesn’t seem like a bandaid, and a way to include a detail you like. Somehow a resin tile would seem an interesting custom idea, if it was durable enough in a wet area.
How about a thick vertical stripe from floor to ceiling? Maybe where the shower head is?
yeah! that’s a good idea. add some drama.
That’s what I was thinking 😊
Like the big stripe that will be behind the Swedish ladder.
I was thinking similar. I would do two narrow. One on either side of the shower head top to bottom. Or a stripe on each side of the wall where the corners meet top to bottom.
Agree!
What if you used a square tile for your corners instead of the penny tiles? Use the penny tiles for your “lines” but when you need to turn a corner, use a square piece of tile like a cut from your large floor tile or a matching clear glass tile or even your 2 inch shower tile. Depending on how many rows of penny tile you use for your line, you could do 4 of your shower tiles to make a square also. The cut off at each corner would at least look similar, some full circles, some half. Hope this makes sense! Your bathroom is absolutely dreamy!! So glad your hands healed!
Does your penny tile come with matching regular square tiles? If so you could use those in the corners similar to a corner block and then just use the penny tiles for the straight runs.
content://com.amazon.cloud9.FileProvider/images/screenshot/16349191861152104280675.jpg
Ugh we’re getting ready to do a tile job in our house and I hate cleaning up mortar and doing grout. So messy and so much water! I don’t fully comprehend the design you were hoping to make on the shower head wall but what about a vertical floor to ceiling stripe or stripes? you could eliminate corners that way. Another idea could be to use that gold shuster strip to outline your penny tile and create a more defined line around the pennies.
I love the idea of vertical stripes!!
Thank you so much for posting this concern. I’m looking at tile for my bathroom remodel and plan to use an accent tile. I will make certain I consider the corners as I narrow my choices.
Could you create a niche and use the penny tile in it? In my shower I had ‘bubbles’ in my niche only. I absolutely love it. They are beautiful, they are different sizes, some have a facet front, some are smooth etc. any way I think it is beautiful. The man that did it said that he thought it would look better to do each piece of tile separately because of just what you said…so I said okay to that. It is finished so pretty because they kind of remind you of bubbles just floating up. The grout actually makes the corners. When he placed them towards the corner he didn’t go right up to the corner so when he put the grout in, he was very careful to fill in the little are that went up to the other tile. I hope I have explained it so you can get a vision 😄
I’m so sorry! I’ve done things like that as well and paid the price. It’s not fun.
As far as the penny tile. Oh my!! I totally could not hand that “mess.” All that money and effort needs perfection.
You have been on my heart lately and I think of you daily when dealing with our master bath renovation with tile floor and new custom tile shower. So many details and, like you, I am very visual and, therefore, picky. Our shower floor is a crema marble hex tile with creamy grout that helps hide slight imperfections. Yours with penny tiles and contrasting grout is much more challenging. I’m sure you’ll find a beautiful solution! You’re are doing an amazing job – be sure to give yourself some grace through the process.
what about making your corners using a triangle of tiles instead of a strip?
Can’t you cut the penny tile in half and have a half circle so your right angles line up?
The half circle would fill in the open space where the tile is offset when you get to the right angle. Hard to describe, but hopefully this makes sense.
Until I saw these photos I had no idea that people mitred the corners. Why wouldn’t you just put one row down and then abut the other row against the side and go straight across? Then you can line up your new course with the bottom three lines of pennies on the down course. Seems too easy, there must be a reason why this can’t be done.
I was wondering the same. Seems like you could layer in the overlap. Maybe just too tough to size it properly with the field tile? I agree that the corners in the photos look amateurish. I’d return the pennies and find something that has corner pieces available. But I’m biased. Penny tiles give me anxiety because it’s so much grout to clean.
I’m not even close to your discerning eye, but you’re right: trying to do corners with round tiles is a recipe for disaster! Oh, Kristi…I hope you can push through your setbacks. Did the multilayer glove thing work?
Yes! It worked very well!! It totally saved my hands.
A few vertical stripes!
We did a floor to ceiling vertical stripe with mosaic tile in our shower inside and outside. Inside was on shower side walls and outside was between the two openings for the shower.
On the black penny tile pic, I think it may have been better to cut the edge penny tiles in half so it would make a cleaner 90 degree. It would also allow the other tile or gold border to butt up better. So if you used 4 rows the 1st and 4th row would be cut in half. I’m not sure how it would look though.
How about just framing out the shower head wall a few inches in from the side corners and down a few inches from the ceiling and floor? Whatever you decide it will be perfectly beautiful! When I can’t muster enough energy to even CLEAN my shower I’m going to try to think of you finishing the entire room, let alone the tile accent in the shower itself!
Oh, I definitely see what you mean about the corners. I do wonder if YOU were executing the blue tile in glass approach (mitering the corners) if it could look really crisp and neat. The idea of partial tiles meeting up does not bother me…but the wonky/wobbly corners definitely would. Sure glad you realized this potential pitfall before attempting execution! Could you still use the penny tiles, but instead of making a square border you just put in two parallel straight lines (of several rows of pennies) on the top and bottom?