Part 3 – DIY Flower Chandelier – I Have Flowers!
I’m still working on this closet chandelier project, and I’m very excited about how it’s going. Yesterday, I shared that I had some problems making the flowers because the clay I chose to you use stuck to everything it touched. It was impossible to roll out that clay and mold it or cut anything from it.
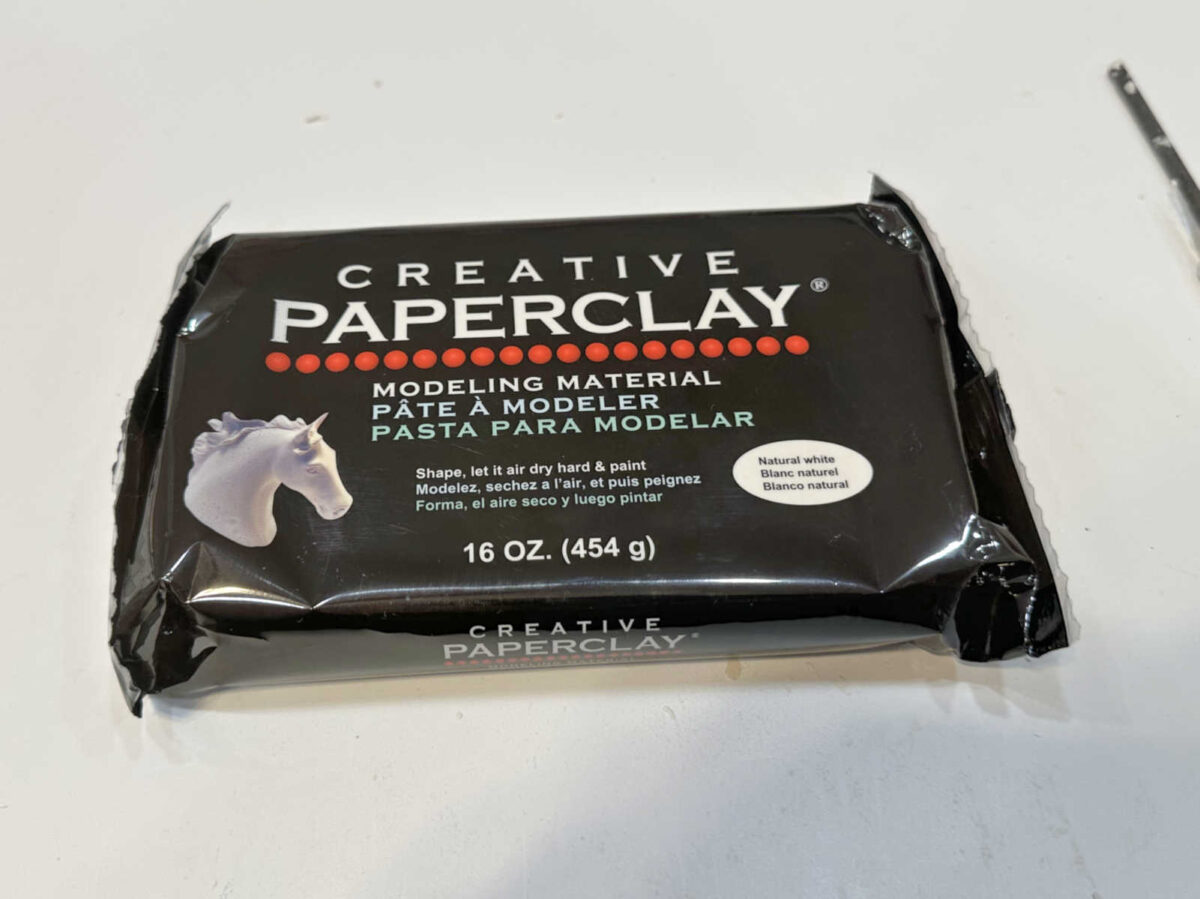
So I returned that clay and got this one. And this stuff is amazing!!
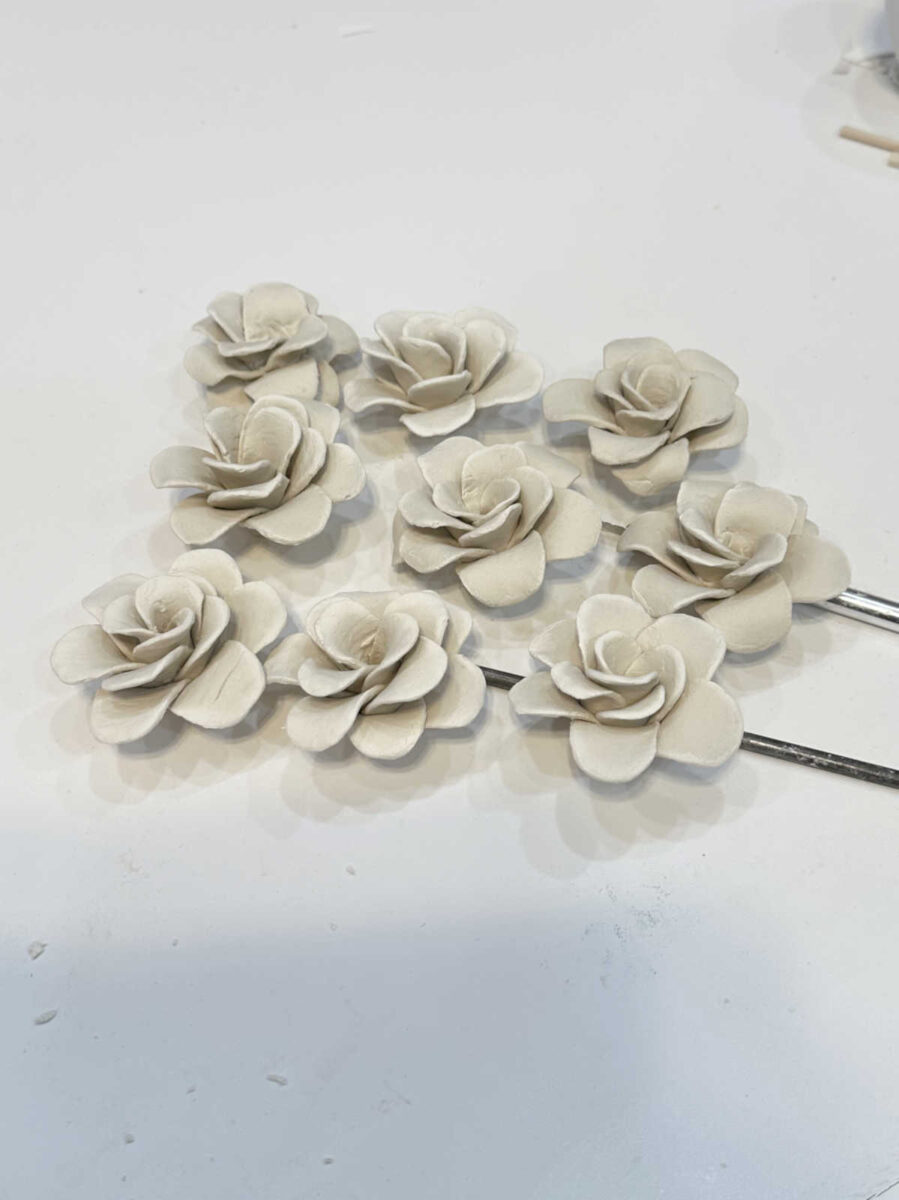
It took me a while to get my flower making technique down. I made a whole lot of flowers before I came up with the right size pattern for the petals, the right number of petals, the right overlap of the petals, etc. So by the time I went to bed last night, I only had nine of the 38 flowers that I need for the chandelier.
But at least it was a fun and relaxing day getting to play with clay. 😀 And now that I finally have a system and formula down, I’m hoping the rest will go much faster.
I’ll show you how I made the flowers, and then give you a peek at one of the flowers on the chandelier form.
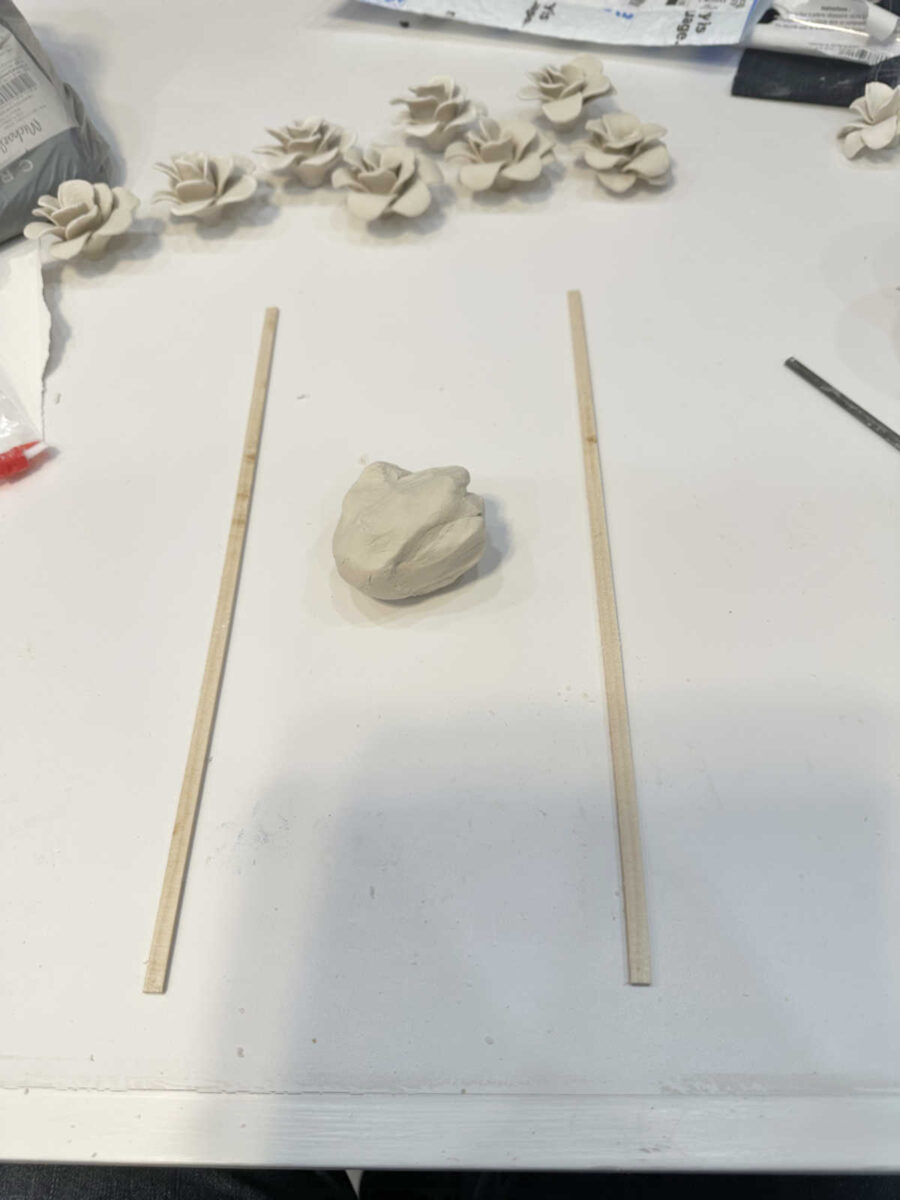
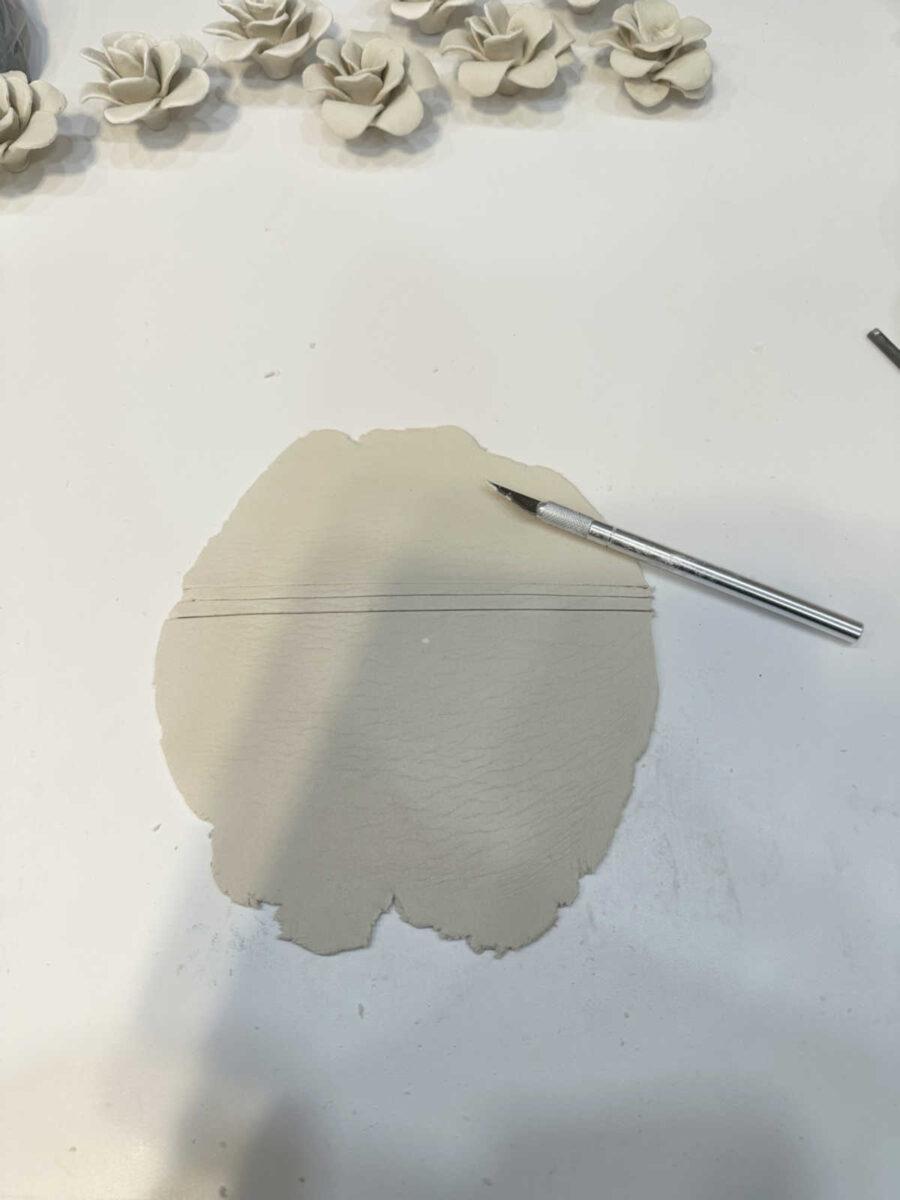
To roll out the clay uniformly from one flower to the next, I cut some scrap strips of 1/4″ wood to 1/8″ thick and used those as guides to roll out the clay.
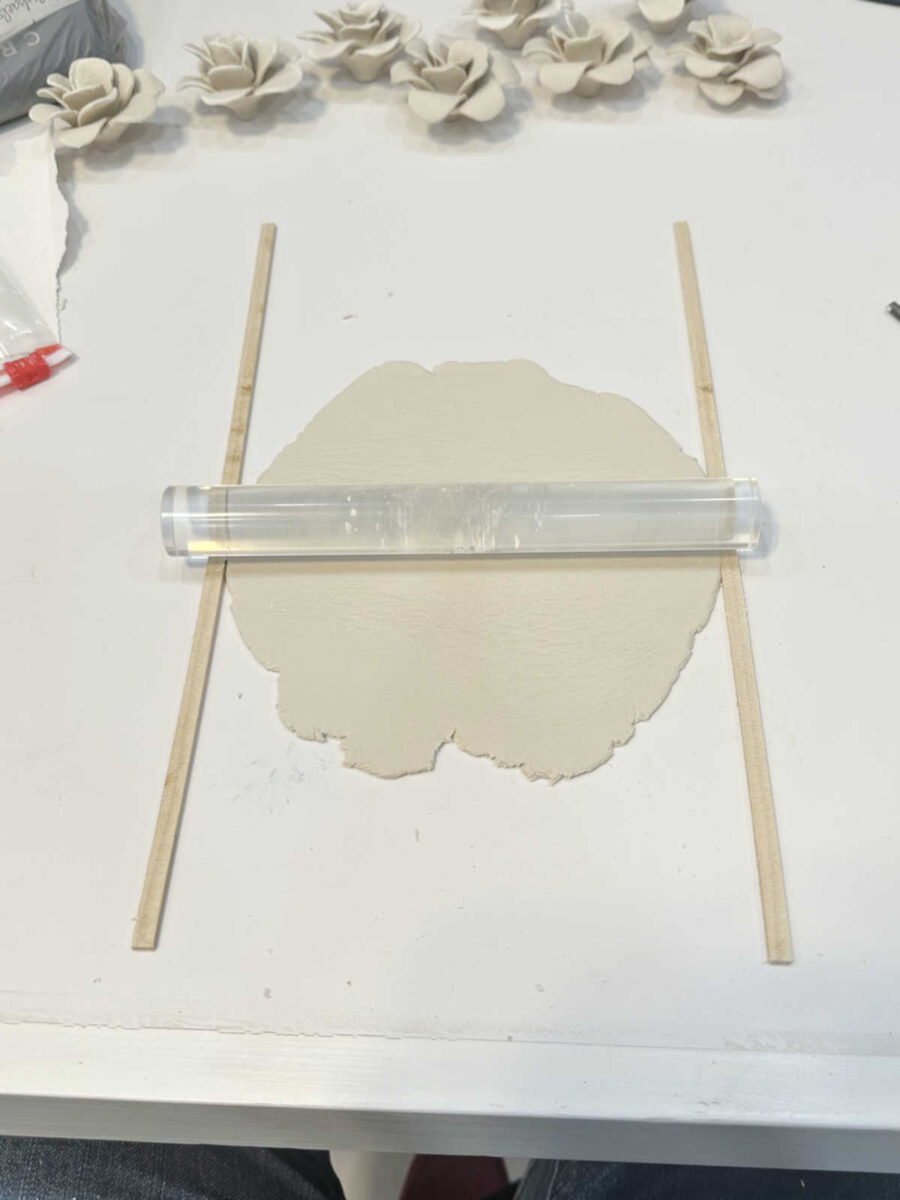
I bought this little acrylic roller to roll the clay, and it rested on the guides to make it uniform in thickness.
Then I used my X-acto knife and cut two thin strips out of the middle and set those strips aside.
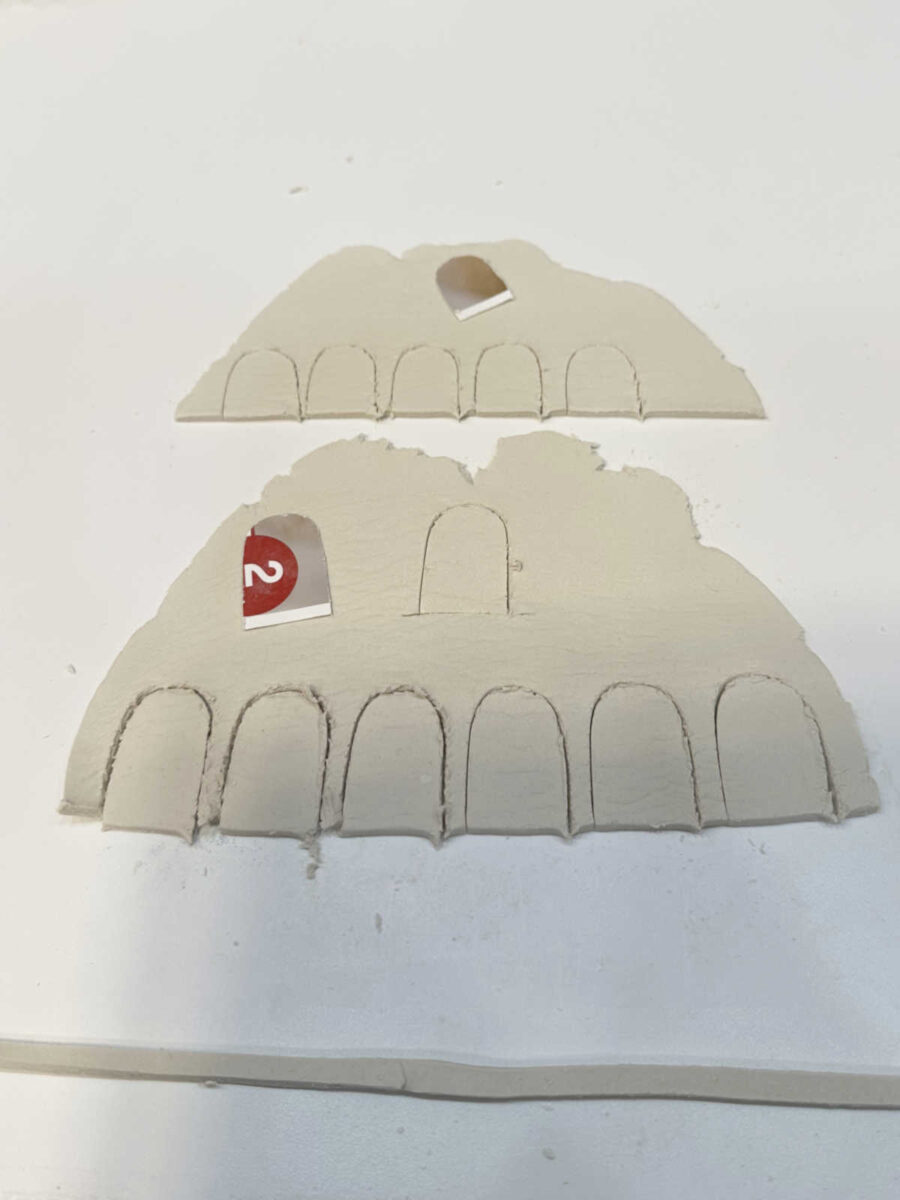
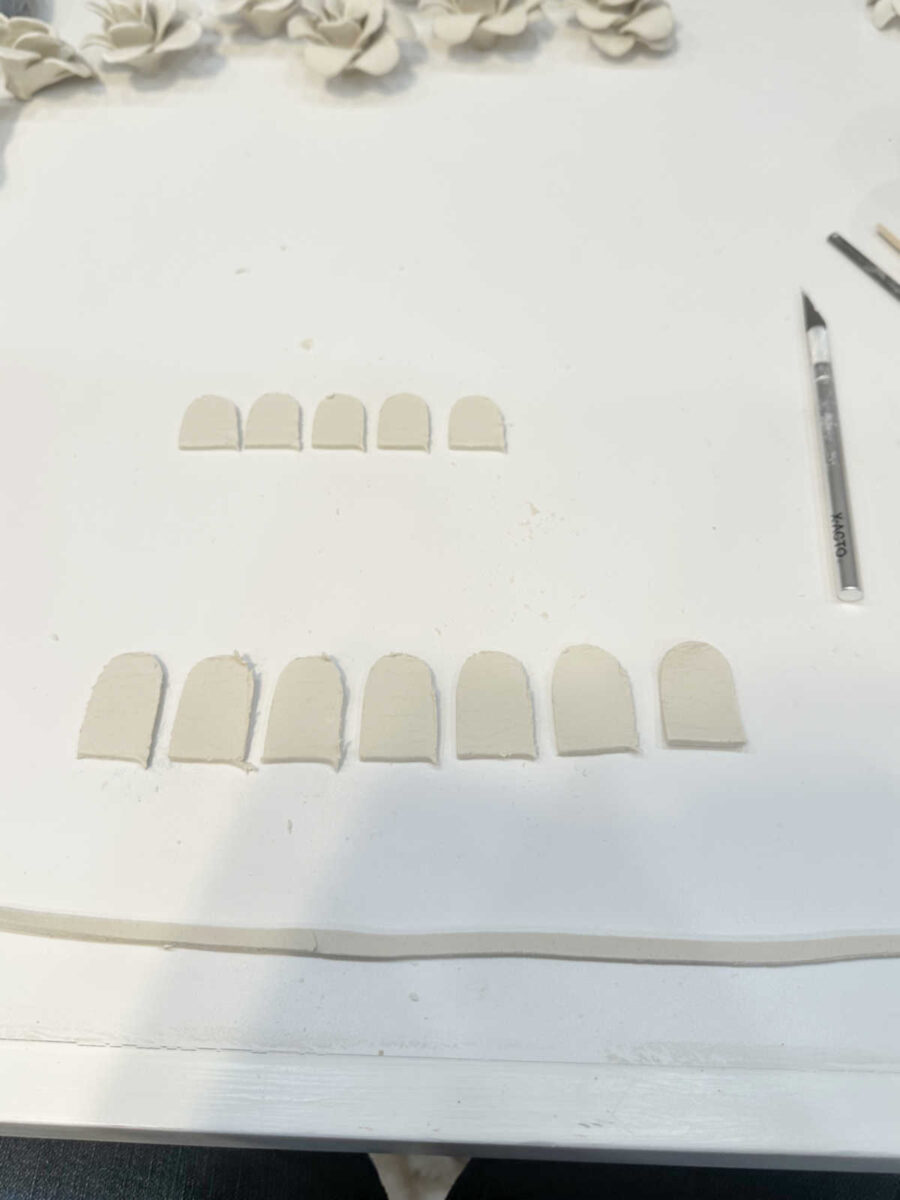
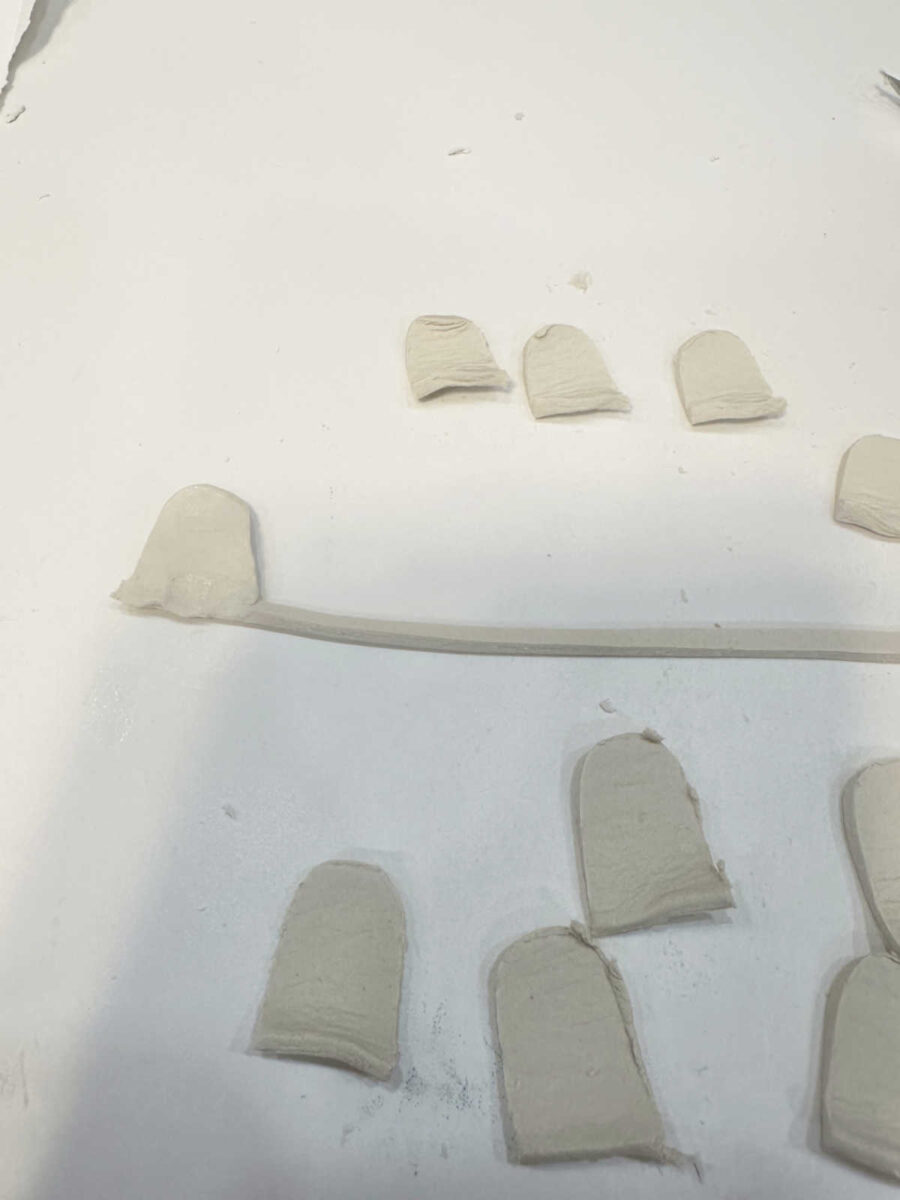
I used those straight cut edges to cut the petals. I had made patterns for my petals out of junk mail. I used two sizes of petals, and cut five of the small ones and seven of the large ones.
So each flower consists of five small petals, seven large petals, and one long strip of clay from the two strips that I had cut and pressed together.
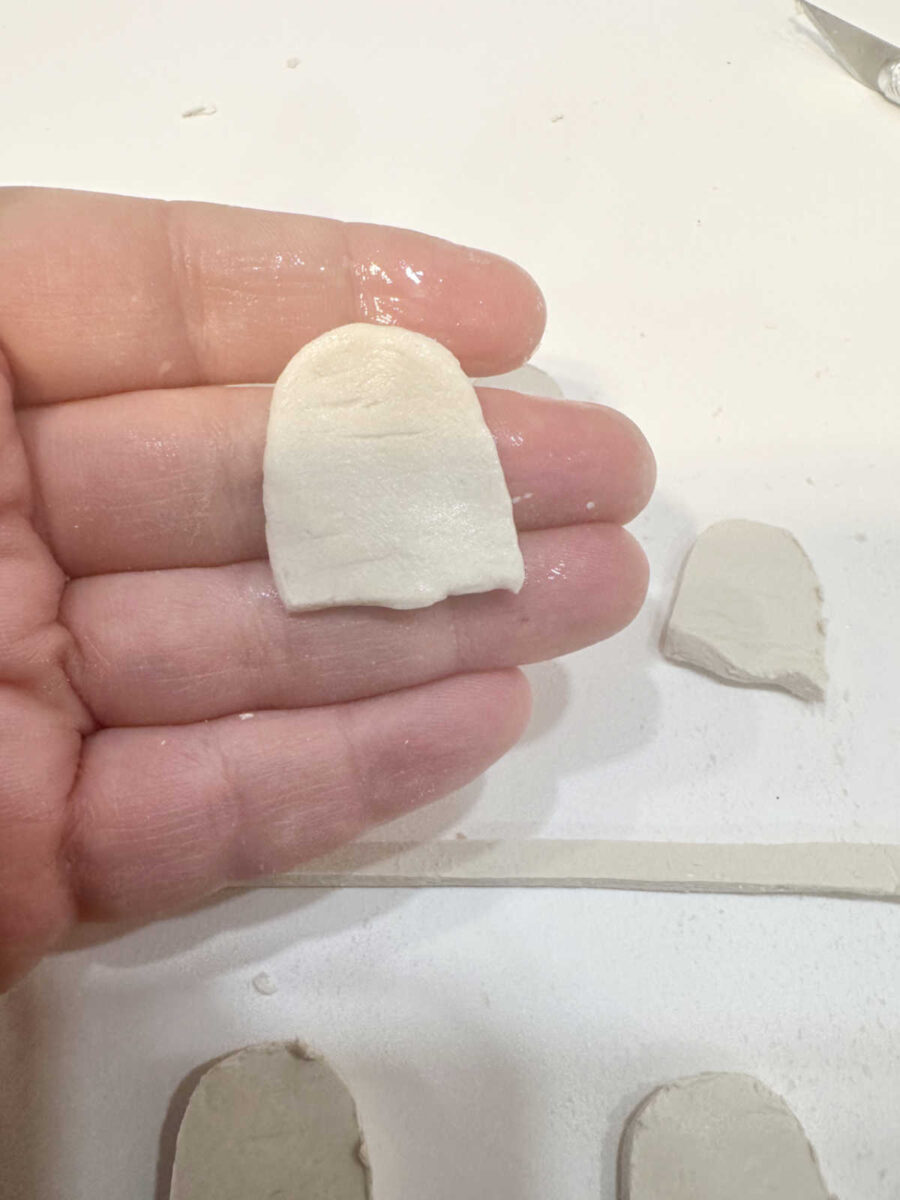
Next, I took each petals and squeezed around the edges to eliminate the cut marks, and then I used my finger, dipped in water, to round them off and smooth them out even more.
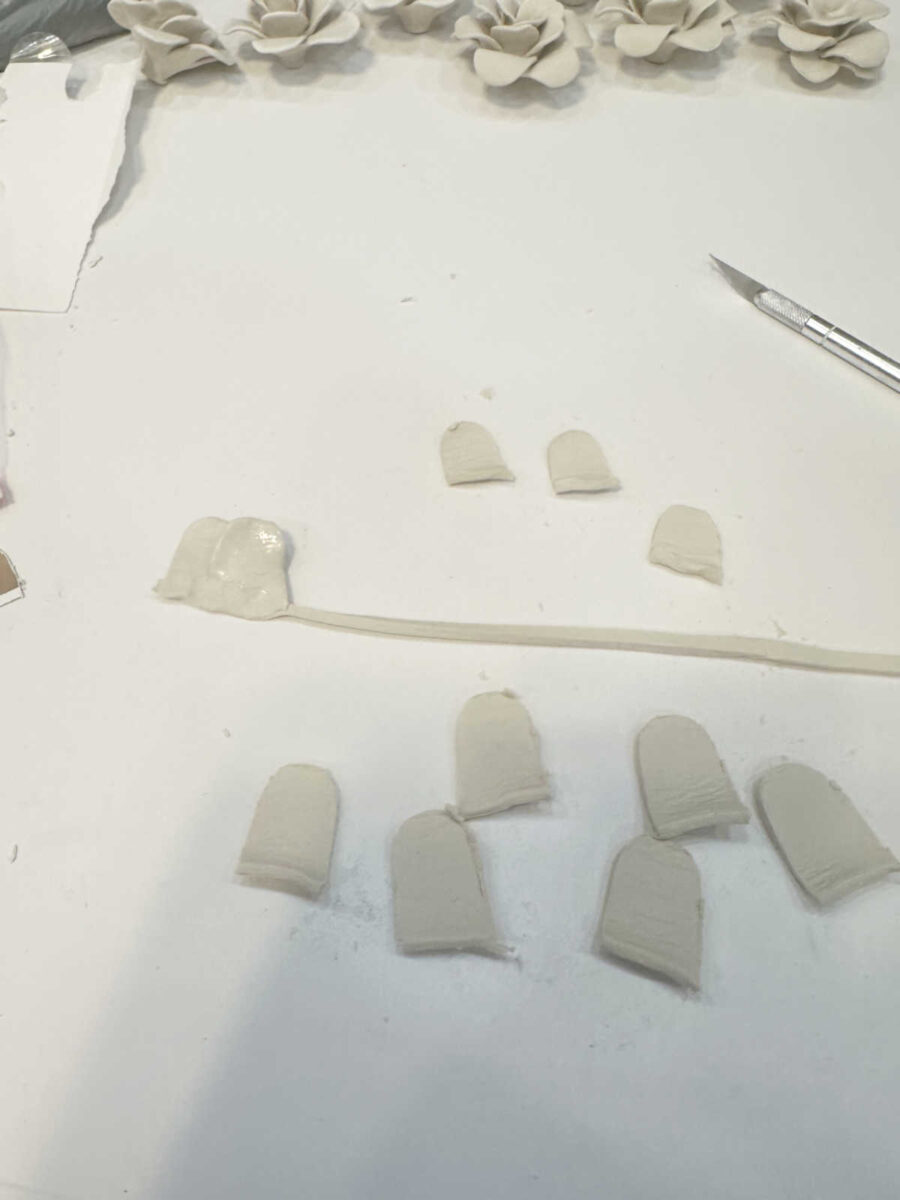
And then I pressed each petal into the strip of clay.
I continued doing that, overlapping the petals by half.
I did all of the small petals first…
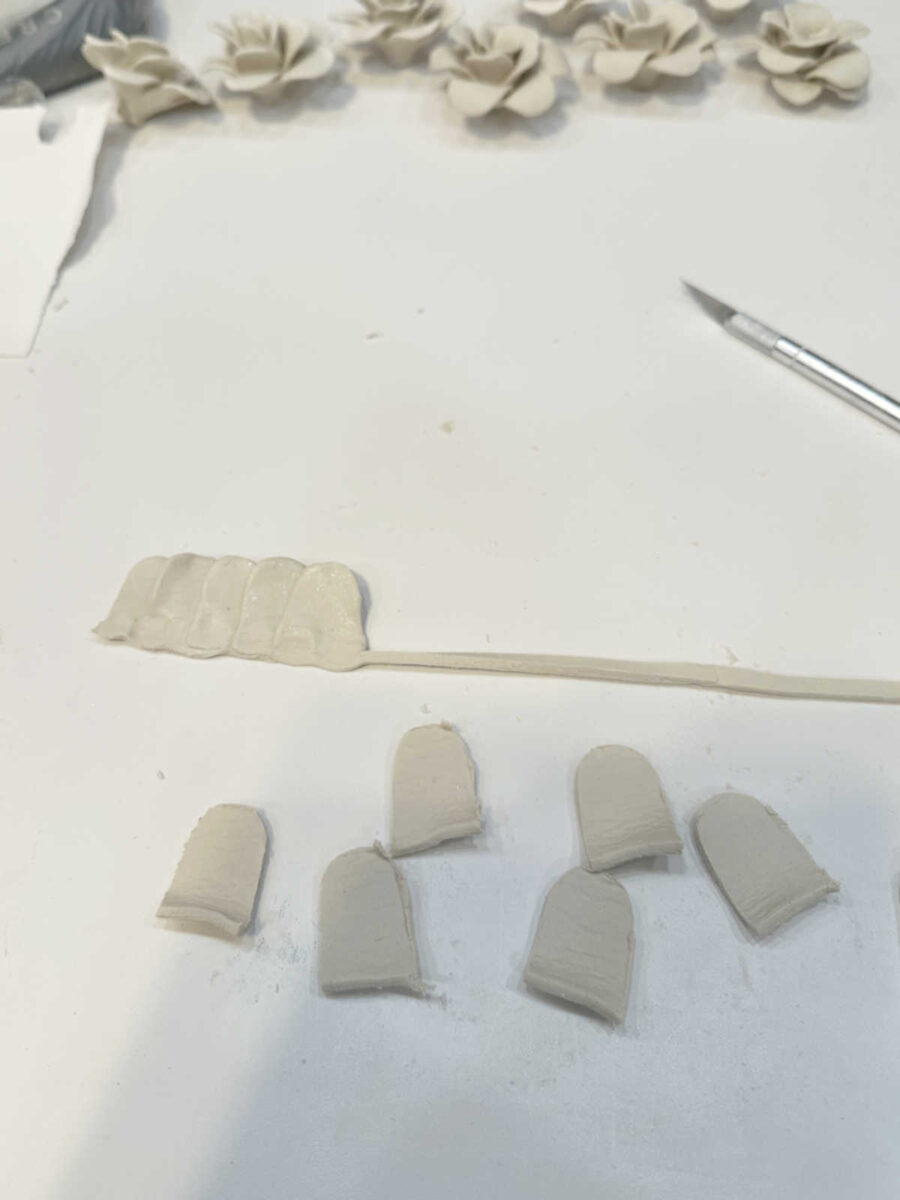
And then did the seven large petals, continuing to overlap them by half.
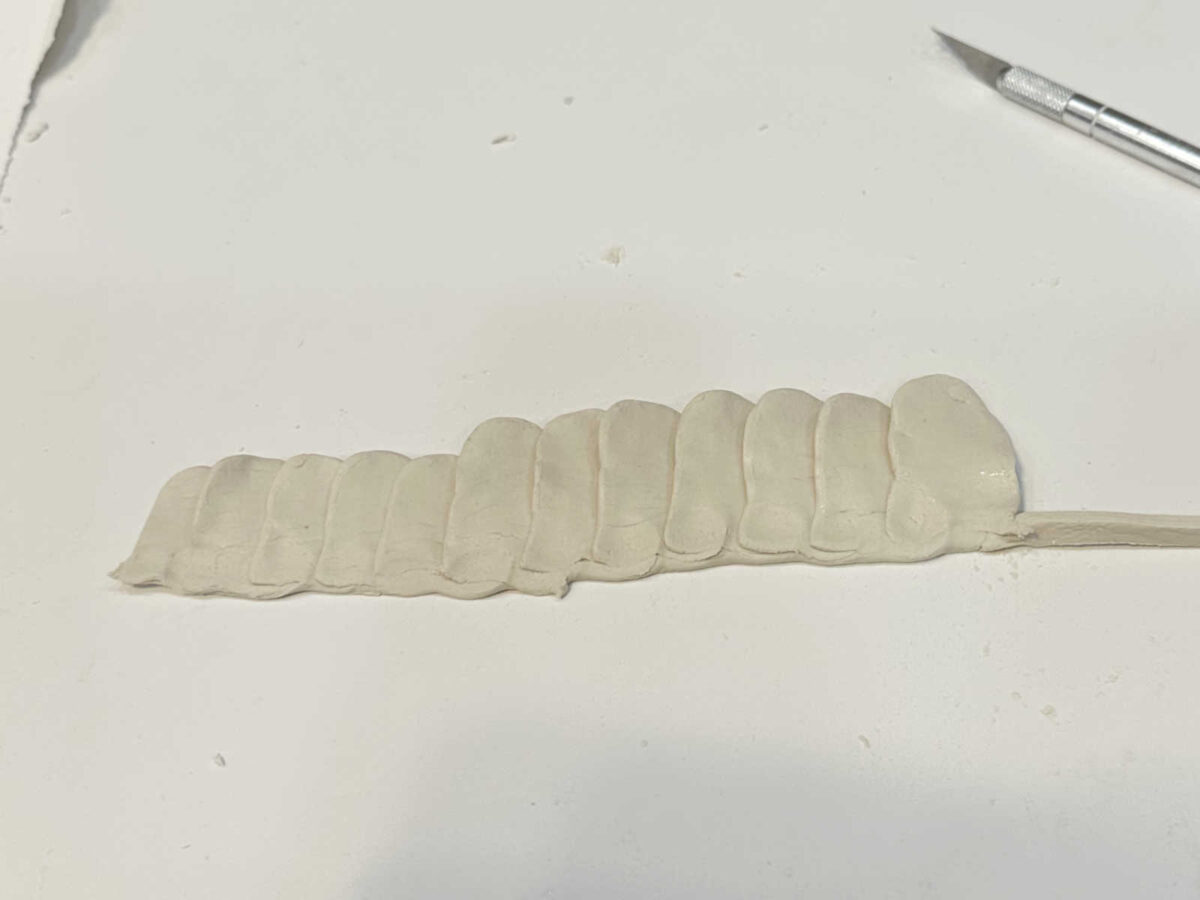
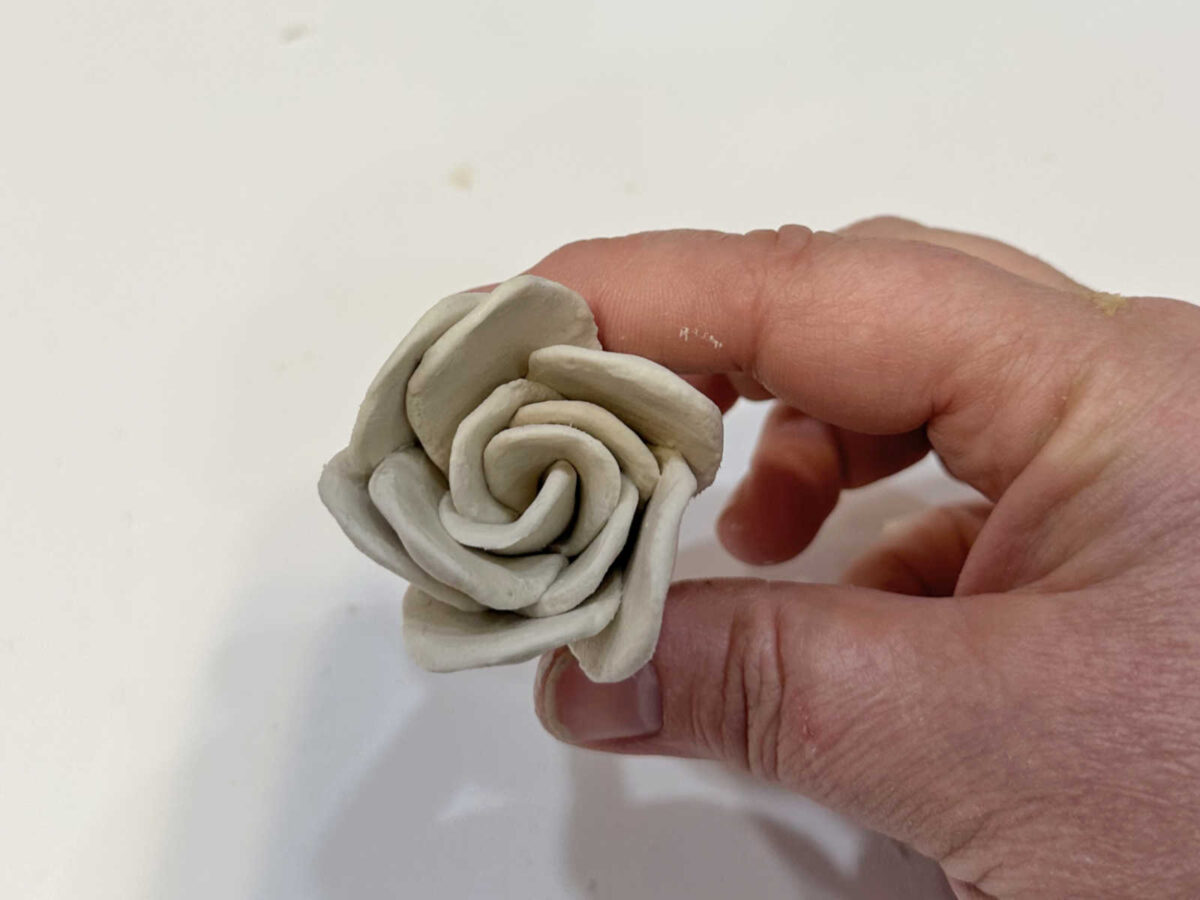
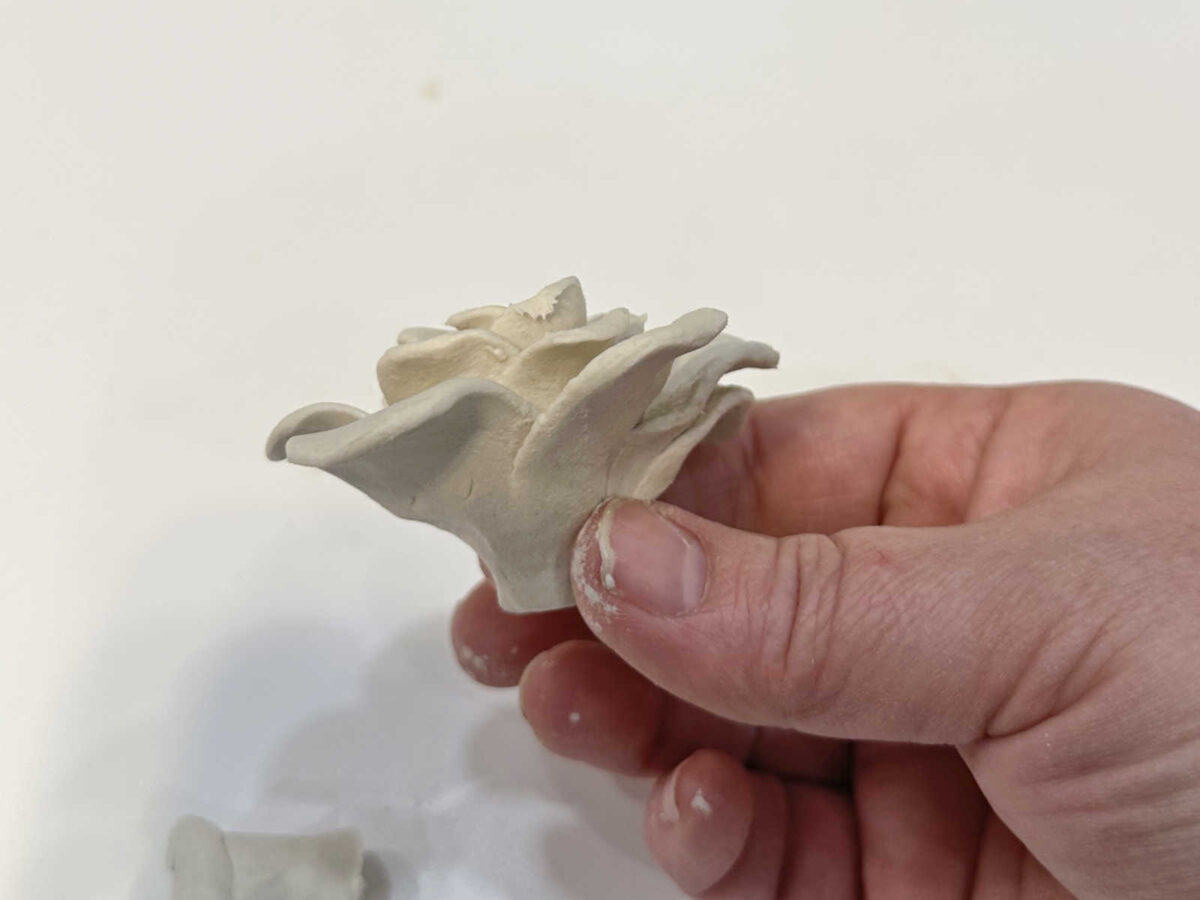
Once all of the petals were pressed onto the strip of clay, I cut away the excess strip, and then rolled up the petals, starting from the left side with the small petals, and continuing to roll them up until I had this…
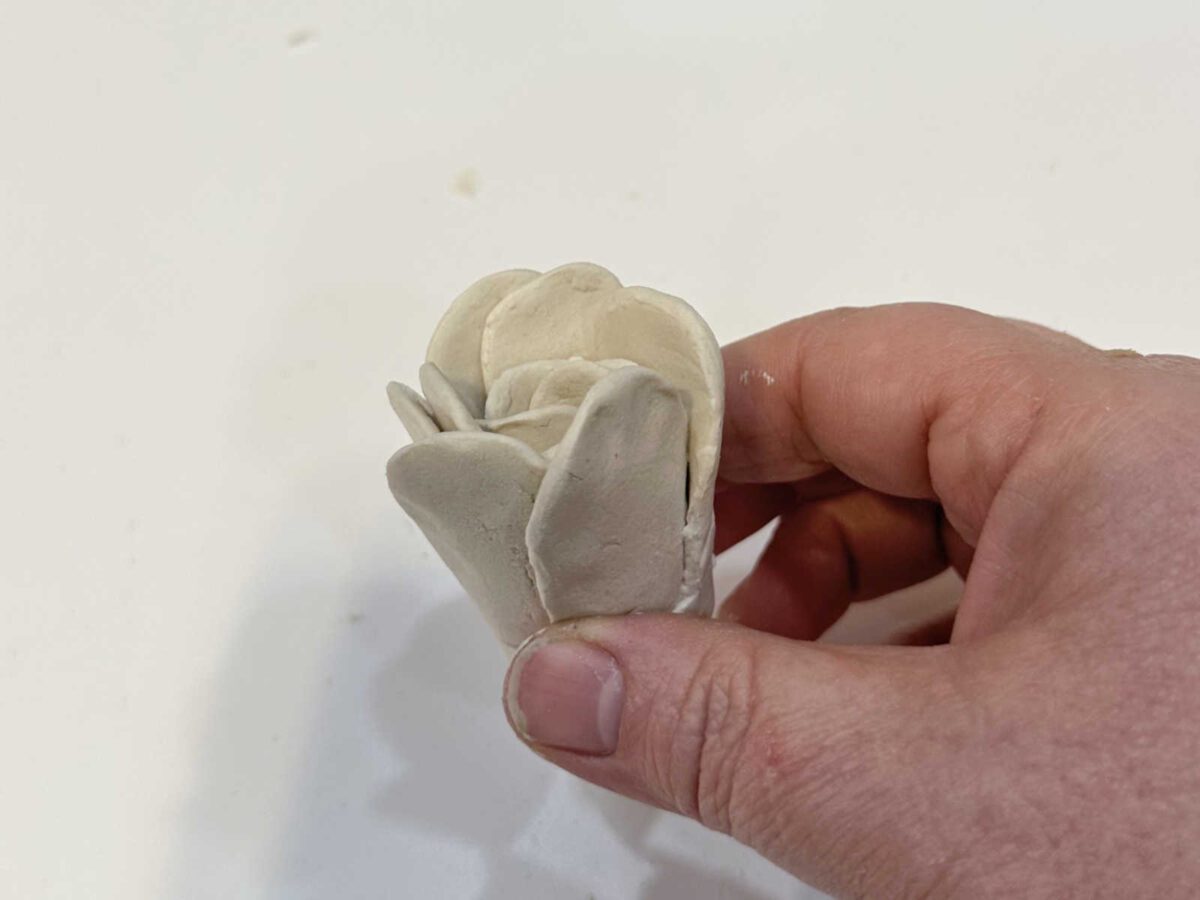
Here’s what it looked like from the top…
And here’s a side view…
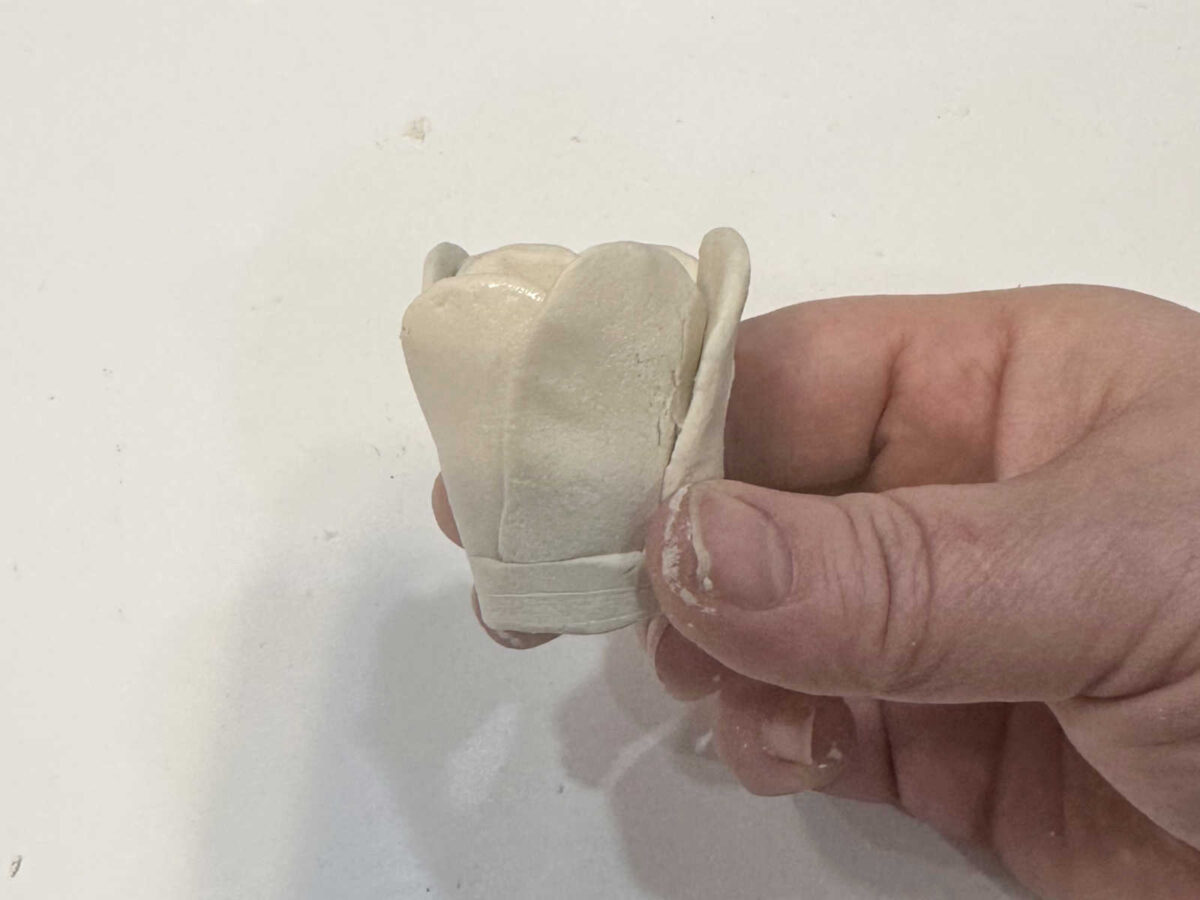
And then I just started squeezing the bottom area together to form more of a flower shape, while also working with the petals to bend them out and give the flower some shape.
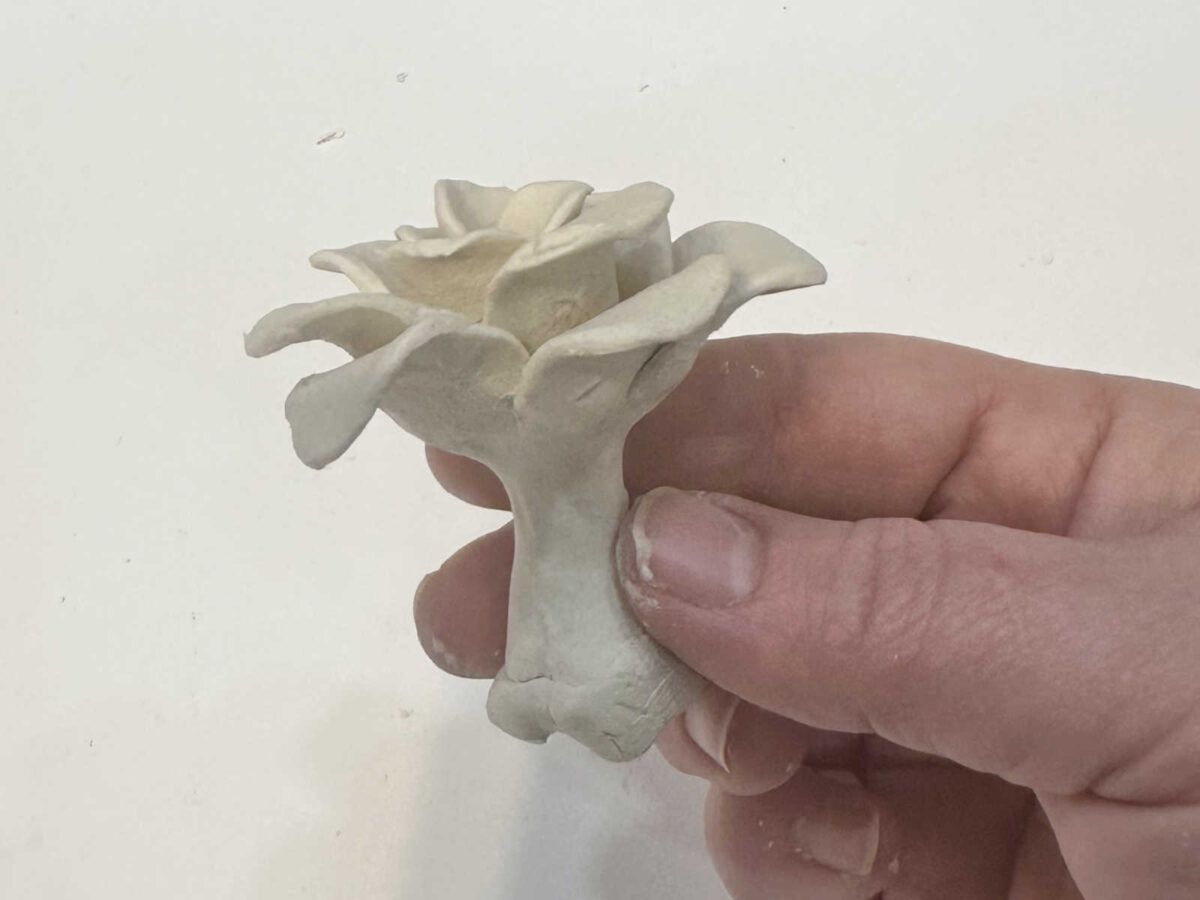
Once I had it how I wanted it, I cut off the excess clay at the bottom…
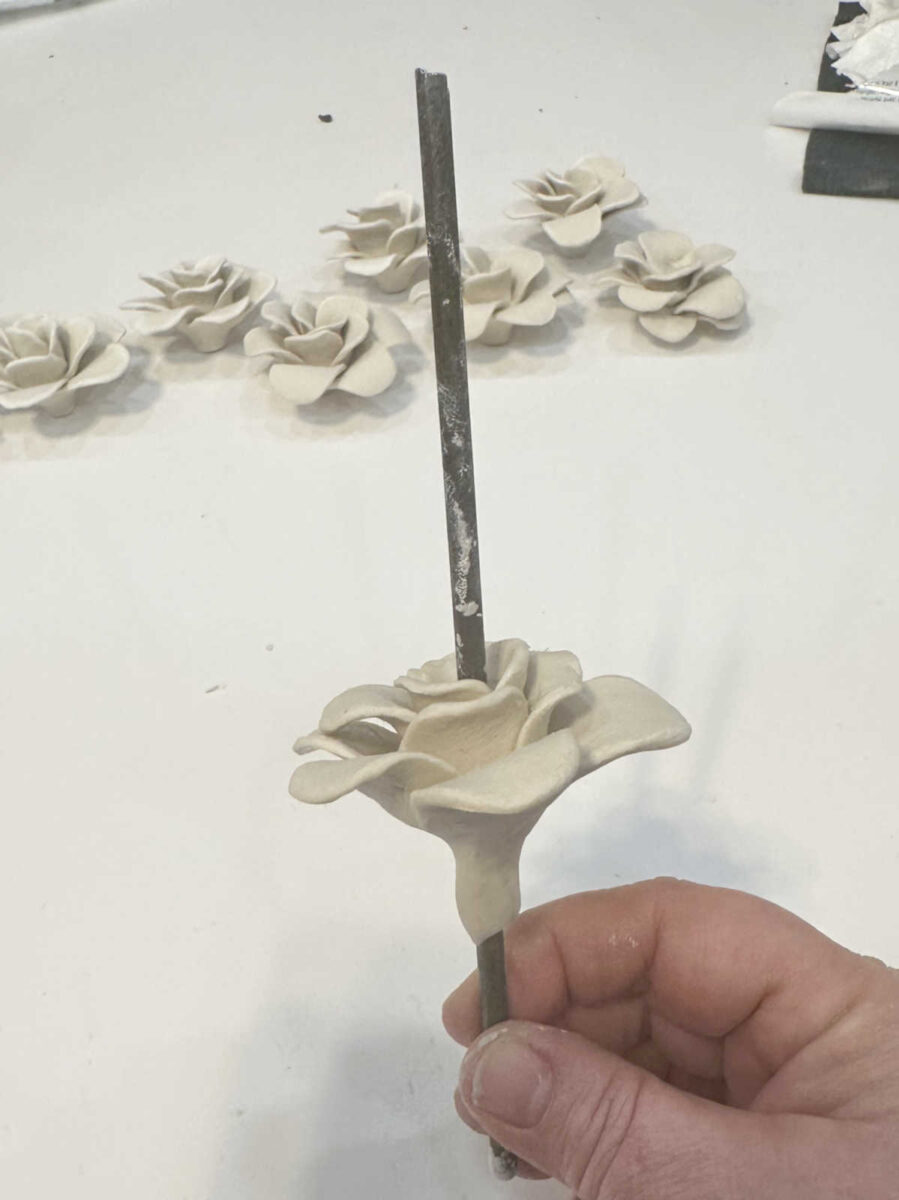
And then I stuck a 3/16″ metal rod through the center of the flower. This is the same size metal rod that I used to form the frame for the chandelier.
And then I trimmed up the bottom of the flower to give it a cleaner look…
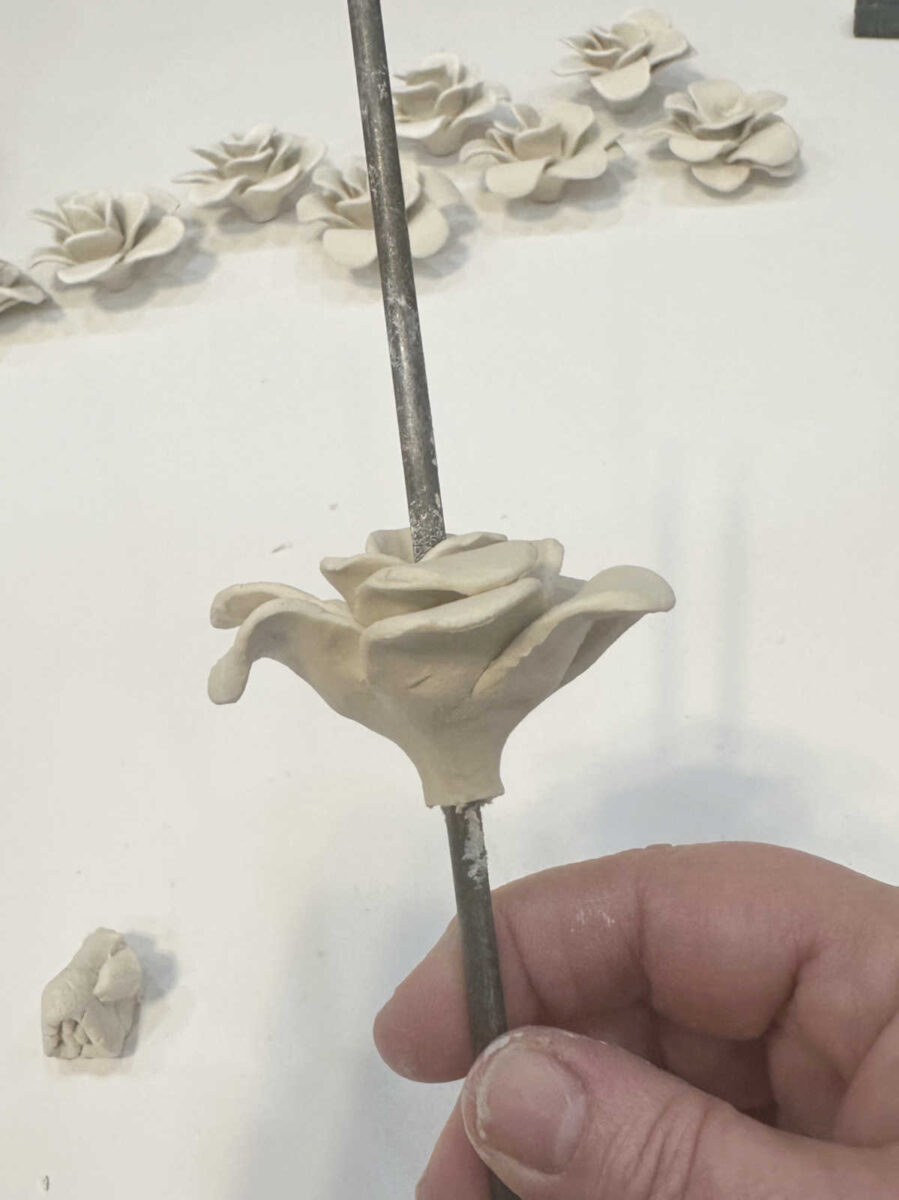
And finally, I dipped my finger into water and used it to smooth out the cut edges.
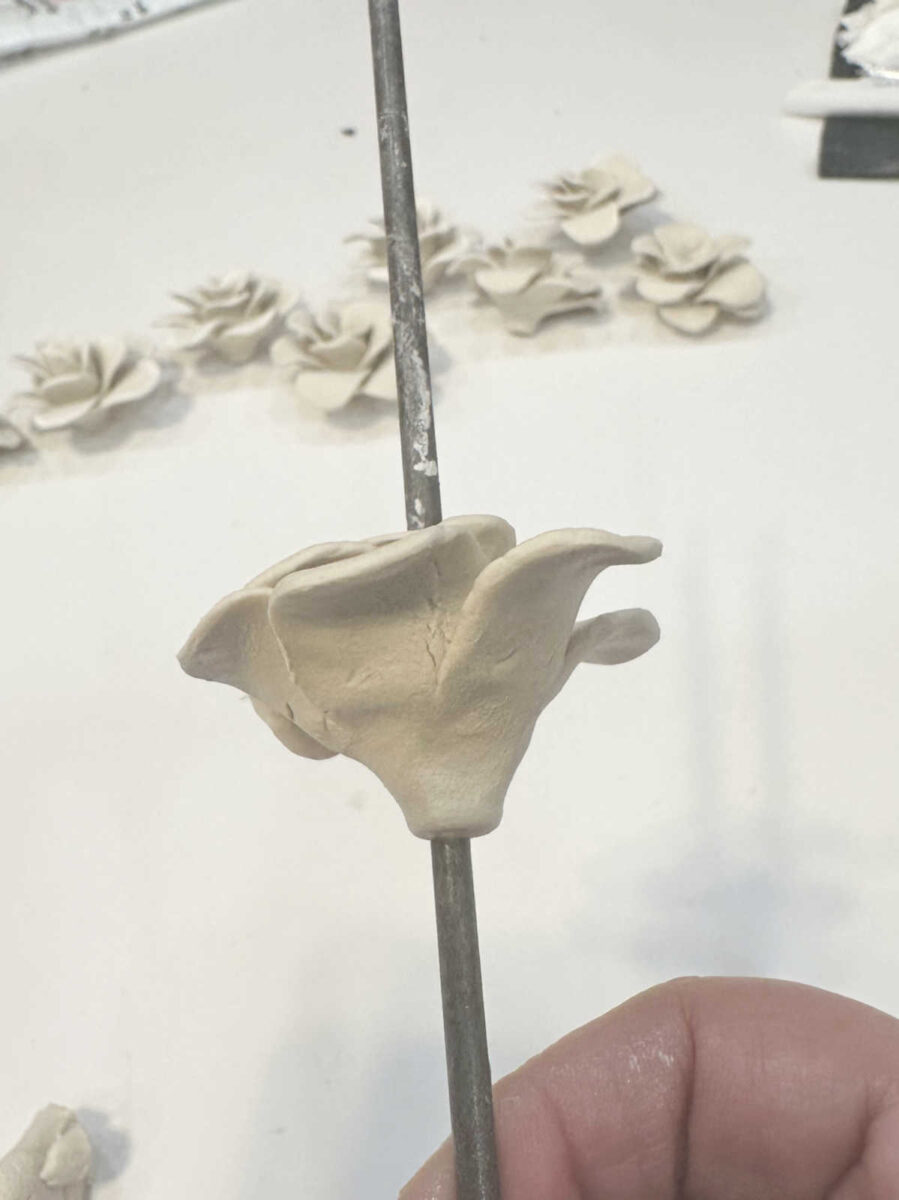
And that’s it! It’s a pretty fun process, and I can tell you that I’d much rather be doing this than building anything right now. I need these fun, creative, easy projects every now and then. And I would say that my confidence level has increased to about 95%. 😀
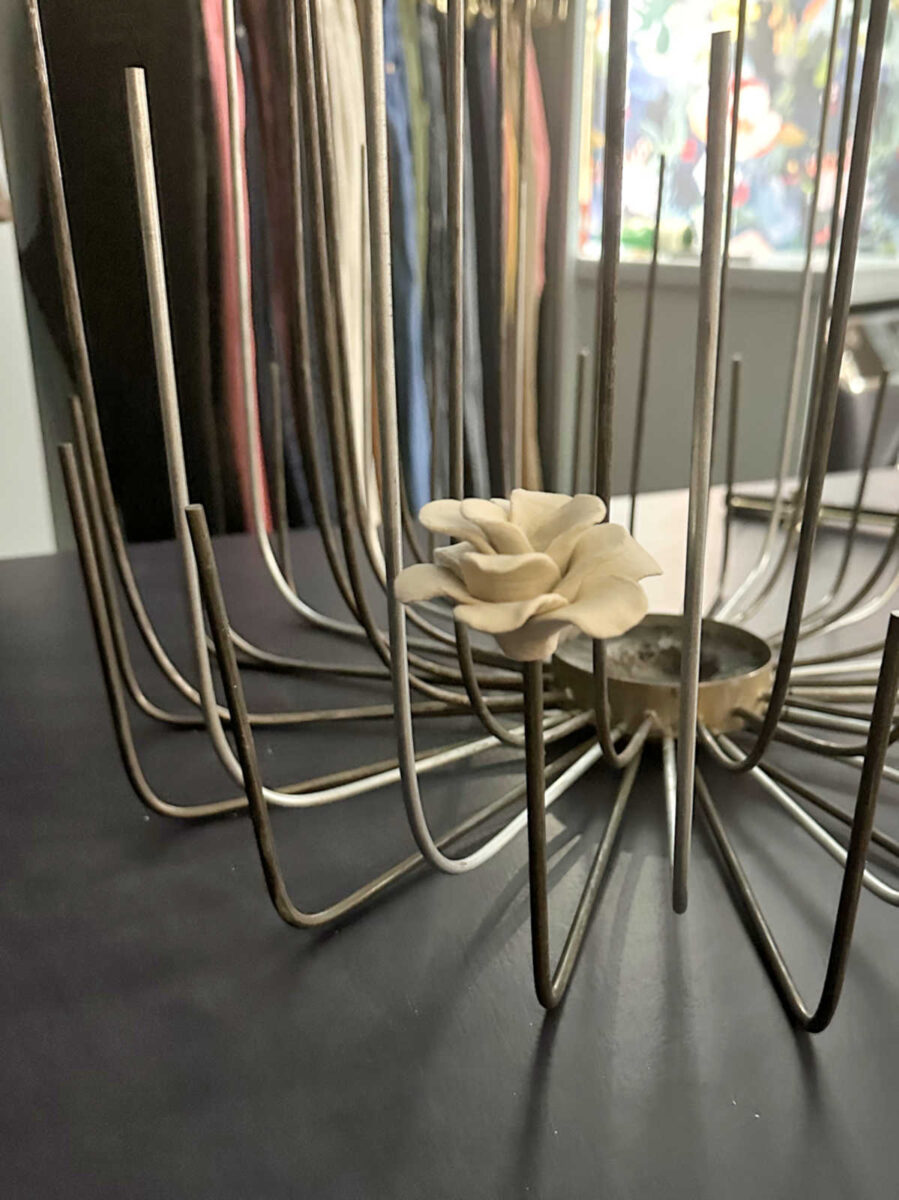
I still need to trim the “stems” on the chandelier frame to the right height, so I didn’t want to attach the flowers yet. But I was curious to see what at least one would look like. So here’s a peek. I love it!

Addicted 2 Decorating is where I share my DIY and decorating journey as I remodel and decorate the 1948 fixer upper that my husband, Matt, and I bought in 2013. Matt has M.S. and is unable to do physical work, so I do the majority of the work on the house by myself. You can learn more about me here.

Your “fun, creative, easy” is my “get me a double bourbon, NOW!!!!” YOU are amazing. And patient. Very patient.
It is going to be gorgeous. Can’t wait to see it!
Love it!
Truth: my 1st thought when I saw the flowers? That you’d found the perfect ones TO PURCHASE, ready made!
😆
You’re a by-jingo wonder woman.
This is beyond the pale. But I laughed at “how easy” this is compared to building. OMGoodness….
I also thought from the first picture that these were purchased, they look so perfect! Turns out you are also a sculptor… why would I be surprised 😂
My thoughts exactly!
Wow! What a great result. And what fun for you. It is going to look perfect.
WOWWWWWWWW! Just WOWWWWWWWW! You are so very talented! Smart too! And any and all happy adjectives that I can’t think of! I can’t wait to see it finished too! It’ll be awesome!
Having fun and saving money at the same time! What’s not to like? They are adorable!
Very nice! You are soo inspiring. Glad you get this break. Looking forward to the finished product.
It’s fun to watch you figure out how to execute your idea! Enjoy the process. ☺️
Again…You are amazing with another spectacular project. Wow!
I love how you are explaining each step of your chandelier construction. It is going to be so beautiful! I can’t wait til you finish! You go girl!
So beautiful and very professional looking. I have one cautionary thought. I don’t know how heavy each flower is but will the weight of the flowers cause the chandelier to hang crooked or off balance?
As I said it’s hard to know just looking at some photos. But oh Kristy, such a stunning solution.
I don’t think that will be an issue since the stems are pretty evenly spaced all the way around the chandelier, and every flower is made out of the same amount of clay.
Genius!
So perfect! Love it! It will be a masterpiece!
As a ‘vertically challenged’ gal, my view of this beauty would be of the bottom of the flowers. I hope your view is much more interesting. LOL
Your clay flowers are absolutely gorgeous! Perhaps they could make an appearance somewhere else as well?
I thought the same thing! These flowers show so much detail from the top, where I could never appreciate it.
OMG! This is brilliant. I want to make one! Best blog ever. You are a ray of sunshine in this very hot New England day,Kristi.
Can’t wait to see how you progress. Bravo!
Kristi- this looks great! I love the look and appreciate your detailed instructions! I can’t wait to see your end result!
I’m hoping to do a similar project and try to recreate the PB botanical chandelier. I have a few questions about this product. Does it adhere directly onto the metal (like epoxy) or do you have to glue it? Is it paintable? Does it dry really hard or is it somewhat delicate? Thanks!!!
It doesn’t adhere to the metal by itself, so you would need to use an adhesive. It is paintable once it’s dry and cured. I think the package said that takes three days to fully cure. I wouldn’t call the dried product delicate, but it will come apart, especially on the thinnest areas, if there’s much stress on it. I expect that once they’re primed and painted, they’ll be more durable. But if you want a stronger product, you might consider oven-baked polymer clay. You would make the flowers the same way I did here (possibly without the water to smooth it though — I can’t remember if you can use water to smooth polymer clay), and then bake them to harden them. Baked polymer clay is much more durable than air-dry clay.
Thank you! i appreciate your reply and advice!
Very beautiful!
I thought you were making tulip shaped flower flowers but I like these even better. With the hole for the metal rods going through the flower, how will you prevent the flowers from sliding down the rods?
I had planned on tulip shaped to match the sconces but I couldn’t get them to look right. So I went with what I could make and be happy with. 😁 I’m not sure how I’ll attach them yet. Future Kristi has to deal with that. But I had to put the rod through from to to bottom to make the holes because going from the bottom messed up the shape of the flowers. 😕
Those are gorgeous! Is the clay air dry?
Yes, this one is air dry.
Oh my gosh! I can’t even…I too thought you must have bought those…
You’ll be looking at these flowers from below the chandelier. They’re gorgeous from above, but what about from underneath?
They’ll be viewable from the side. The island d will be underneath it.
Never had a doubt you would conquer this!
Once again, your imagination and instructions are off the chart good…
Awesome
OH, Nice job. They look great, and you have to be very pleased. Yes, it was time for something more fun, and creative. Enjoy your project, and the nice get-away from some of the bigger projects. Looking forward to seeing this project up too!
They look great!
Beautiful!!!!
Pretty flowers! How light is this clay? I hope with all of these added items, the fixture doesn’t become too heavy to hang! I wish I could see into your head what your thoughts are, I bet it’s like a tornado sometimes! I know you showed the expensive one as an example, but I also know your finished projects far exceed what is in MY head! I can imagine how relaxing this part is for you, it is just what you needed after the last few weeks!
The dried flowers are very lightweight. The whole light is about 10 pounds with everything I added, so it’s not really heavy.
I love it too!
I am not crafty, and even if I was, I don’t believe I would have the patience. But, Kristi, my goodness, you have the patience of Job. I can see for you how that would be relaxing, and the flowers are beautiful. I am curious, are you painting the rods, and will the light dry out the clay? I would hate to see it dry and crack after all the work you’ve done. Blessings to you, Matt, and the fur babies, too.
They may crack a little as they dry, but I think that adds to the hand-crafted look so I’m not concerned about it. I use LED bulbs, so I don’t think the light will affect them, especially after they’re primed and painted.
Hello!
I have the same questions all the other ladies asked, plus one more. Are you planning on putting any color at all on the flowers? These flowers are so lovely. I am going to try them and see if I can practice enough to make them as well as you can. Thank you so much!
I’ll be painting the whole light solid white. But these would be pretty painted with color, too!
Yours top your inspiration photo by miles. I look forward to seeing the end result!
HOLY COW!!! They are beautiful! I was looking around our house thinking where we need flowers then decided we may need them but they would NEVER turn out like yours!! Can’t wait to see this finished – it will be stunning!!
I love this!
Those are awesome!
Amazing as always! So gorgeous. Brilliant to attach to a strip rather than to each other only.
2 thoughts –
i’d probably coat with some sort of glue or modge podge, once dry and under the paint to help prevent breaks / severe cracks down the line.
the bottom of the flower – instead of a straight cut – how about a little molding so it looks more like a flower looks … the join from end of flower to stem would look amazing slightly softened / rounder / oval … blended onto the metal rod. just a thought – not sure if you can whittle a bit away after it’s dry tho.
Bravo – will be gorgeous!
Are you going to paint them? They really look like a flower……good job.
I see that my post from yesterday was deleted, but that is okay. I was just trying to help.
I didn’t delete your comment from yesterday. 🤔 I don’t delete comments. I didn’t see a comment from you yesterday at all.
Beautiful job, wow!
You have the imaginaration of an artist and the patience of a saint. Amazing!
They look amazing, can’t wait to see it all assembled!
Though my OCD is shouting HOW WILL SHE DUST THEM!!!😂
The round upholstery attachment on a vacuum. I find that almost every time I get the question about dusting something, either a Swiffer duster or the upholstery attachment on a vacuum is always the answer. 🙂
It is going to look great, excited to see the final reveal. Very nice tutorial too!
Beautiful! I wasn’t getting your vision from the inspiration chandelier but your are so much better! Wow! I can’t wait to see the final version.