Remodel Progress! (Plus, The Closet Mystery Solved)
After talking about it for so long, we finally have progress on the remodel! The started yesterday instead of Monday, so after one day of work, it’s still very much in the demo phase.
They’re starting on the guest bedroom. Just as a reminder, this is what this room looked like when we bought the house…
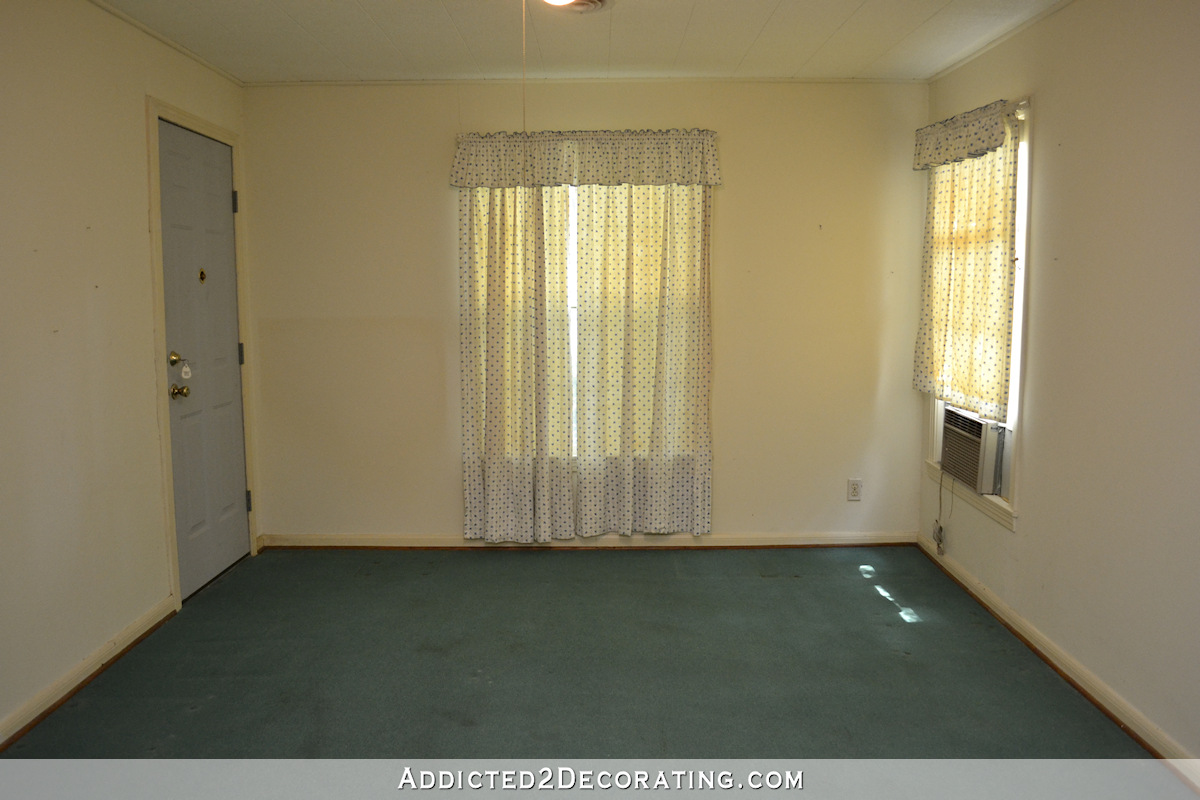
I removed the carpet right after we closed on the house, and before we even moved in. The door on the left went out to the front porch. It was very confusing having two doors on the front porch, so during last year’s front porch makeover, I had that door removed and the doorway covered over with siding. Those two things were pretty much the only things that were ever done in this room.
So about mid-day yesterday, it looked like this…
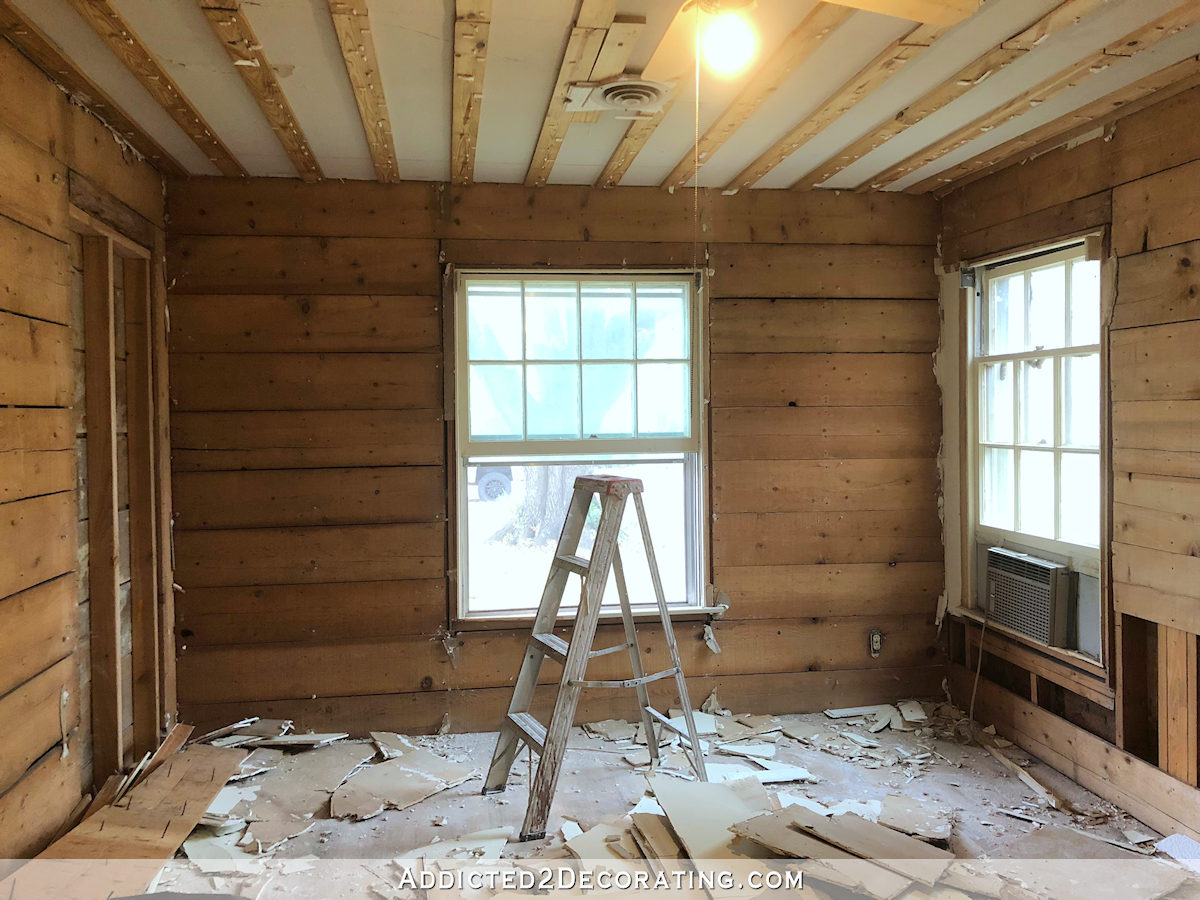
Drywall…GONE! Polystyrene ceiling tiles…GONE!
And then by the end of yesterday, it looked like this…
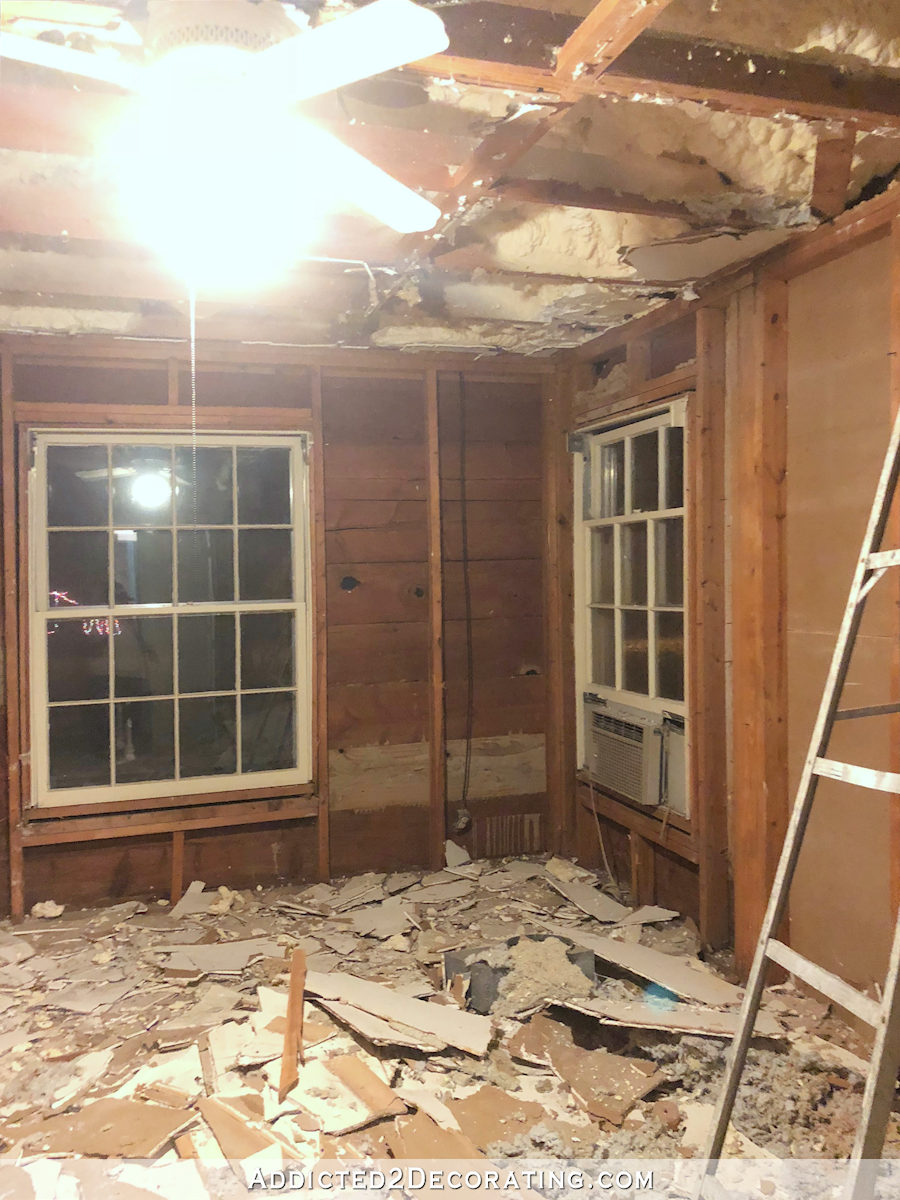
Shiplap…GONE! 1 x 4’s and ceiling drywall…GONE!
It’s messy and gross in there, but I’m so excited about finally seeing some progress in this room. I’ve been living with those old windows, very textured antique white walls, and polystyrene ceiling tiles for six years, and I’m thrilled to see them all gone.
It always freaks me out a bit to see a ceiling gone and the ceiling joists and attic exposed. But at least it’s a room where I can keep the door closed. And speaking of doors, I’ve decided to have a pocket door installed in this room instead of a swinging door. We had already decided to put a pocket door on the room that will now be our home gym, and I like the idea of the doors being the same. I’ve really grown to love the pocket doors in the studio (I have three of them), and think they’ll be much easier for Matt to use when he needs to close these.

In this next picture, you can see the tiny door (just beyond the ladder) that leads to the tiny closet in this room…
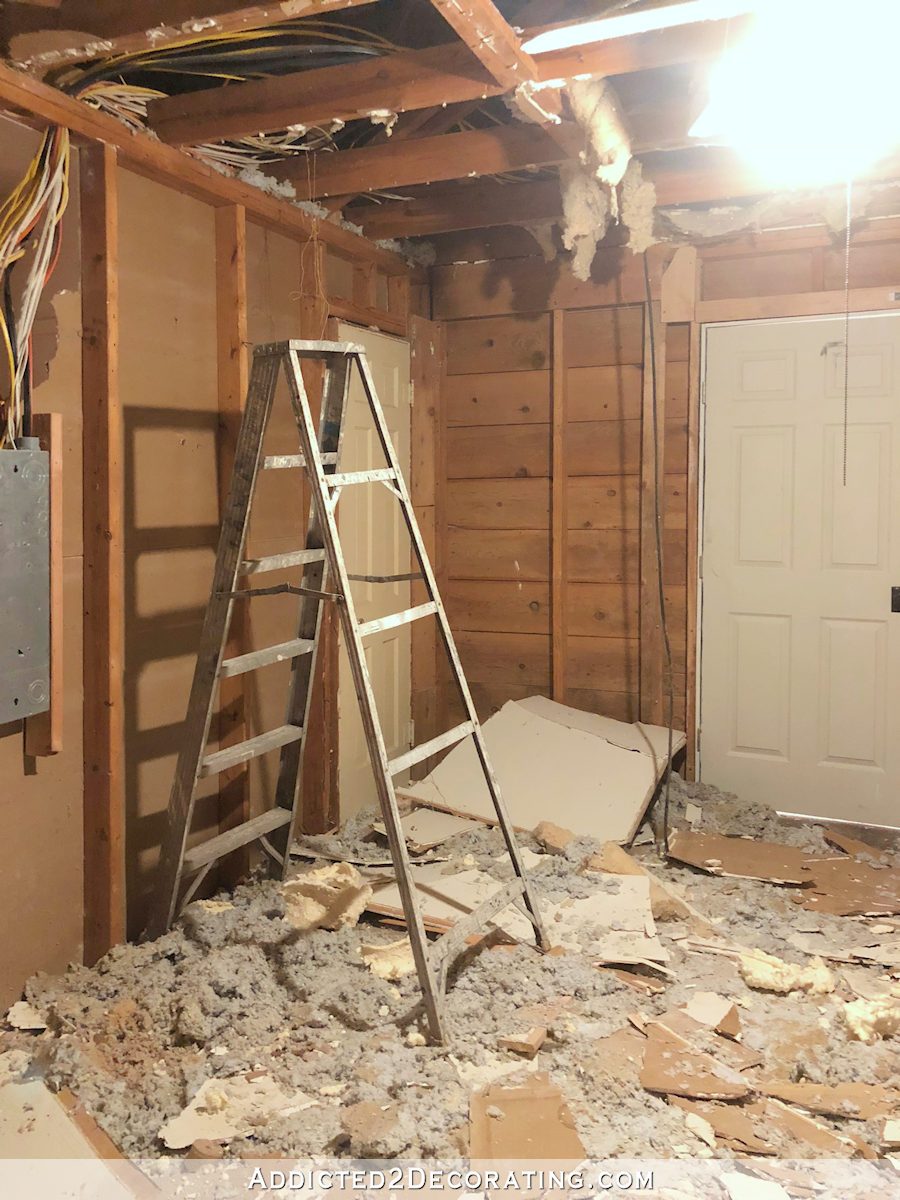
That door will be drywalled over, and that closet will be combined with the closet in the future home gym to create a much bigger closet area.
So the natural question is, “What about a closet for this room?”
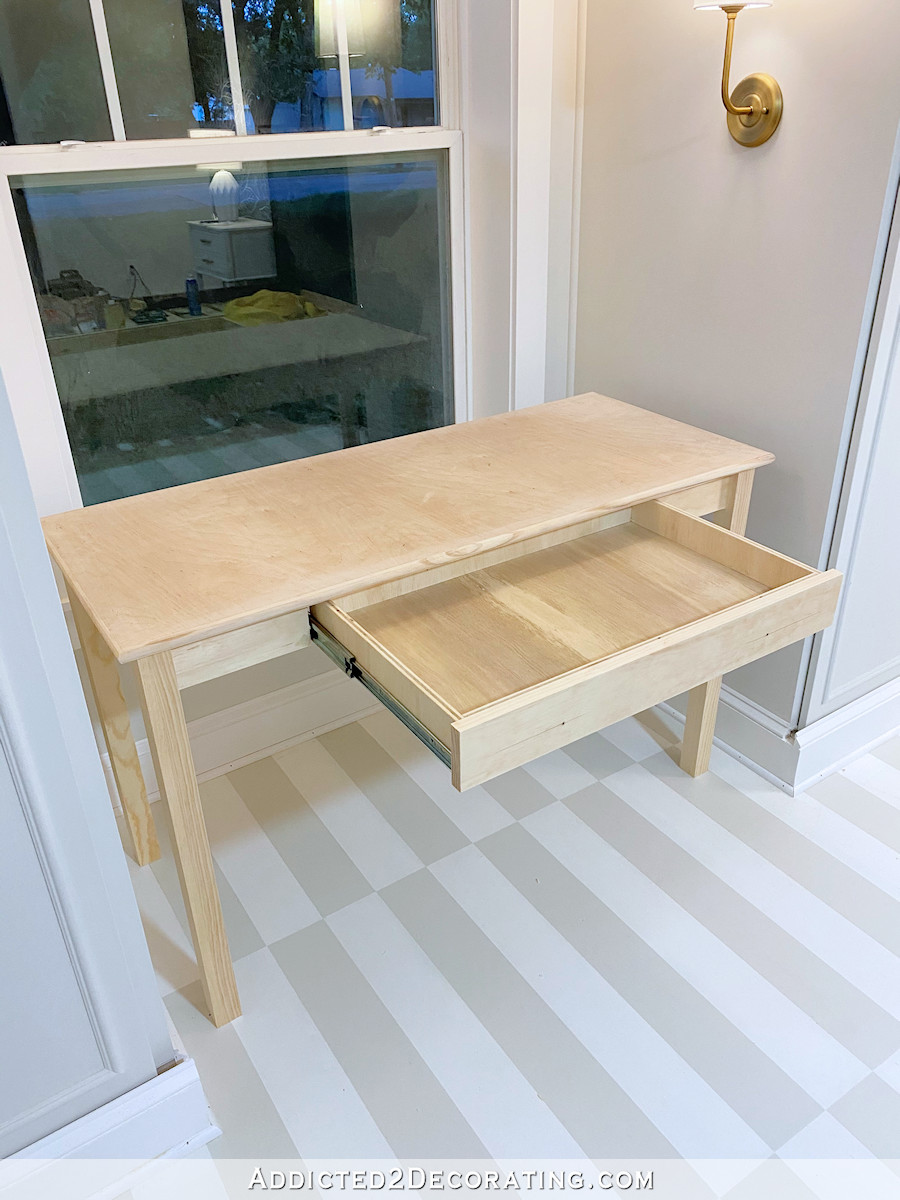
Well, I’m glad you asked! 🙂 Do you remember the closet cabinets I built in the condo bedroom that flanked the bed? Here’s a reminder of what that looked like…

Well, I plan to do something very similar flanking the front window of this bedroom, which will end up being the ONLY window in this bedroom when it’s finished. But in this bedroom, the bed won’t go between the closets. The bed will go against the wall to the right.
But these closet cabinets that I have planned are the very reason that the side window has to go. With that window there, I can’t build symmetrical closets flanking the front window, and y’all know how I need my symmetry. And yes, I’d choose symmetry over additional natural light any day of the week. 😀
And right now, the plan is to build a window seat under the window between the two closet cabinets. I actually haven’t measured the distance from the floor to the window sill yet, so I’m not even sure if there’s enough room. I sure hope there is, though, because I’d love to incorporate a window seat in this room!
I’m very excited about getting this room done. As soon as it’s finished, Matt and I will be using it as our bedroom until our big addition happens when we’ll actually get a proper master bedroom. I have no idea when that will be, so in the meantime. I’m very much looking forward to making this room beautiful and comfortable for us. It looks terrible now, but of course, that doesn’t stop me from dreaming, planning, and picturing it finished in my mind. 🙂

Addicted 2 Decorating is where I share my DIY and decorating journey as I remodel and decorate the 1948 fixer upper that my husband, Matt, and I bought in 2013. Matt has M.S. and is unable to do physical work, so I do the majority of the work on the house by myself. You can learn more about me here.


It.Is.On!
So exciting!
So how will you deal with the exterior wall when the window goes away? Isn’t it stone? Won’t it be obvious from outside that a window was removed?
My contractor has a stone mason who will fill it in with stone. I have lots of stone left over from when they took the stone off of the side of the living room exterior wall when we had new siding installed.
A window seat? With closets on either side? I’m drooling. It will be beautiful!!
Since she has shutters she could build a set closed over the area and it would not be as obvious a window was removed.
Sorry replied to the wrong comment again on my phone it is confusing which arrow
she has shutters On other windows she could build a set closed over the area and it would not be as obvious a window was removed.
Love to follow your progress. You share so many tips, I thought I’d give you one. Just finished a reno with several pocket doors. Had them before and love them, but despised having to negotiate to get them out of the wall. Found these little gems that are installed on the back of the door and allow you to just push it and it pops out! Game changer. No cheap but worth every single dime. My contractor had never seen them and has used them since at others homes. Can add a link, but go to hardwarehut.com and search for PCD-EZ-CLOSER-PK
OMG- agree – game changer. Will definitely be getting this for my pocket door.
can this be used with the Johnson soft close or soft open hardware?
If you can make the closets 3′ deep rather than the standard 2′, you can add a chest of drawers on the back wall and have the clothes poles running from front to back in the closet. You could add shelves on one side and have your hanging clothing on a double decker hanging pole on the other. We did this in a former home and it worked very nicely. Just a suggestion!
Wonderful progress. About the side window what about putting a stained glass window up along the ceiling? One long or two smaller? I love stained glass windows myself & think they would bring beautiful light in the room. Loved the pumpkin vases you made. Happy Thanksgiving to you & Matt.
I’m loving the window seat idea. Sounds like a plan. Happy Thanksgiving!
I always look for your blog. Glad you’re getting started on this project as well. I just wanted to say Happy Thanksgiving to you and Matt as well as all your fur babies..!! Enjoy your day..!!
I would add drawers in the middle, you could still have a seat it just might come up to the bottom of the window. Never can have enough storage. we all love the idea of a window seat but they are never actually used😐.
Tip: put filters over your return vent if there’s is one in that room and put a Zip Wall up in front of door. It’s not going to keep all the dust out of the rest of your house but it sure can help! Dust! The worst part of renovations!
I was thinking the same thing about drawers under the window! Or if it’s too shallow for them, a cabinet with shelves for shoes.
Or a lid that lifts under the cushion so you have a sort of trunk. Makes it a good place to store extra bedding. Even if no one sits regularly on the window seat, it gives a place to sit to put on shoes or to place a visitor’s suitcase.
How exciting to be underway! I’m so glad I have the opportunity to watch the transformation. You always amaze me, Kristi.
So excited for you all!
What did you do with all that beautiful shiplap, off the walls?
Unfortunately, it can’t be salvaged. It’s so old and those nails in that wood are so hard to remove that the wood basically splinters into pieces when taking it off. I dealt with the same thing in the breakfast room and pantry. It took forever to remove it, and I was left with a bunch of wood pieces, and only about 1 or 2 whole pieces out of the entire room.
I love your plan. A window seat is a great idea!
So glad you threw out the shiplap! I can’t wait to see the room when you are finished.
Are you going to have the window centered on the wall? I guess that would screw up the exterior symmetry, wouldn’t it? If you’re putting in new windows, have a window put in that isn’t as tall—then you’d have the extra clearance for a window seat—with some storage built in!