So Close, But Yet So Far Away
I was certain I’d have the bottom cabinets on the wall of cabinets finished by now. And I probably would if it weren’t for the weather not cooperating!! It rained early Tuesday morning, and when the rain stopped, it was unbelievably hot and humid outside. It wasn’t one of those rains that clears the air and everything feels so fresh afterwards. Nope. It was one of those rains where the thick humidity just hangs in the air afterwards, so thick it makes it hard to breathe outside. The humidity mixed with the heat created a sauna out there. And that’s where I like to paint my cabinet doors!
I had to resort to Plan B. I cleared out an area in the breakfast room and sprayed the doors in there, but I only got them primed because even though I was inside, all of the humidity in the air was still preventing the primer from drying completely. I waited about three hours after spraying them to try to sand the doors, and still the part that I was sanding off was just piling up like little primer pancakes and clogging up my sandpaper. I’ve mentioned it several times before, but when you sand the primer (I use oil-based Zinsser Cover Stain on pretty much everything), it should look like chalk dust. Here’s a close up picture from one of the doors as I was sanding yesterday morning…
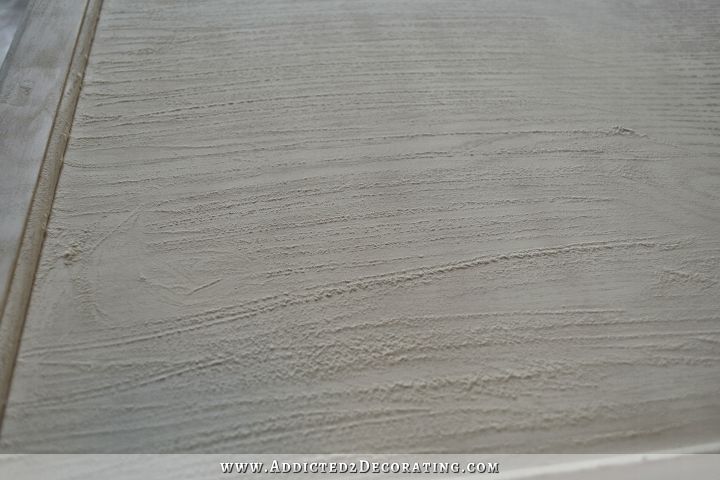
See how it looks like dry chalk dust? That’s exactly what sanded primer should look like. But if it pills, rolls, or piles up like tiny little pancakes and clogs up your sandpaper, that means it’s not dry enough.
So I basically just gave up on making any painting progress in the kitchen on Tuesday. But yesterday, I was able to sand, paint, and top coat all of the doors for the bottom row of cabinets. I also got two of the doors gold leafed. That part is so tedious and time-consuming, but it’s my favorite part.
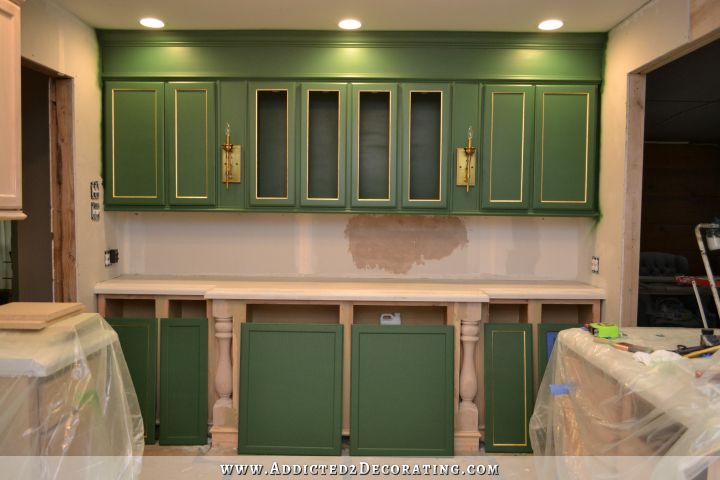
Even though I do really enjoy the gold leafing process, I did at one point last night wonder if I had absolutely lost my mind in deciding to gold leaf 29 cabinet doors and 10 drawers. But I’ll get them done…eventually. 🙂
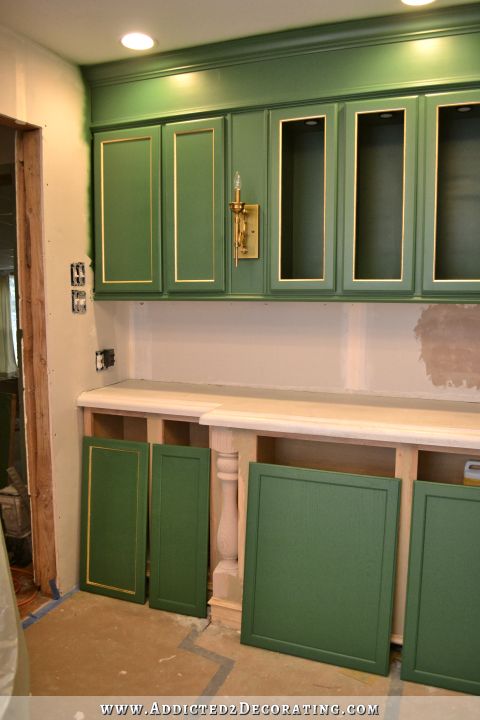
And once I get these lower cabinets gold leafed, that will be 14 down and 15 to go on the doors.
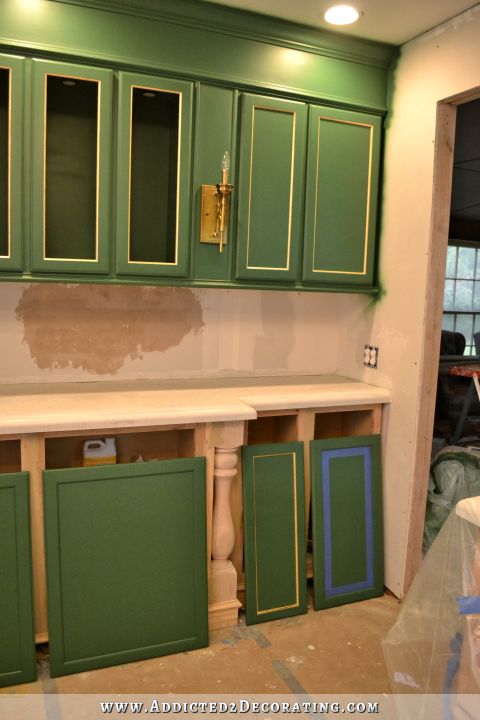
I should be on track to have these lower cabinets done by tomorrow if everything goes as planned. I already filled all of the cracks and nail holes with wood filler, so today I’ll just need to sand that smooth, caulk a few areas, and then I’ll be ready to prime, paint, and top coat.
It’ll feel so nice to have one complete wall of cabinets painted!! And this wall has the most cabinets, so I’m thinking the others should go faster.
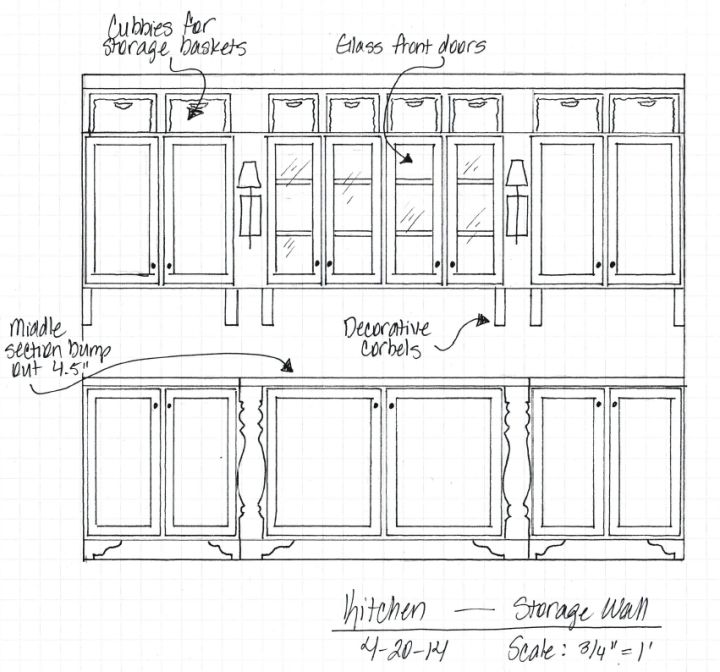
Of course instead of moving on and painting the rest of the cabinets, what I really want to do this weekend is the backsplash on this wall and the two side walls, and then make and add the corbels to these cabinets. That way this wall would be complete! And that kind of fits with my do-things-out-of-order style, don’t you think? 🙂


yes and no. the yes you like to do things out of order and the no i think you want one part of the kitchen done and pretty to help you do the rest of the kitchen.
Love your progress so far! What color are you considering/ decided on for the walls to go with that gorgeous green? Just like your inspiration photo or different?
Mine will be different. As much as I love that brass backsplash in the Kelly Wearstler kitchen, I think part of what makes that so striking is that the brass backsplash and the brass countertop and sink are all continuous. Since I couldn’t do that (and probably wouldn’t really want that), I’m going in a different direction. All of my kitchen walls will be white subway tile in a herringbone pattern. I’m kind of counting on the subway tile, painted wood floor, and concrete countertop to keep a good balance between the fancy and the casual in this kitchen. I don’t want it ending up too fancy. Mostly casual with a little bling is what I’m after. 😀
It looks great, so far and I love your plan for the white subway tile backsplash. It’ll keep it light and clean!
Kristi — it is really coming together and it is GORGEOUS! Your instincts haven’t steered you wrong yet so continue on the path you are taking. I can’t wait yo see it all completed!
I don’t think finishing that wall (including the backsplash) is at all out of order! Just think of the pictures of just that wall! I for one can’t wait to see the herringbone + green + gold leaf … but will you do handles or wait? Either way it will look finished with the gorgeous leaf and those sconces!
Ugh…handles. I spent about two hours yesterday searching for the perfect cabinet pulls/knobs/whatever, and just can’t find anything!!! I’ll find something I absolutely love, only to find that they cost about $15 each. Ummm…that’s not going to happen. Or I’ll find a beautiful little door knob that’s just the right price, and then there won’t be a handle (for the drawers) that coordinated with it at all! I’m irritated with that search, so I’ll just concentrate on the other stuff for now and come back to that.
This might be completely wrong for what you’re wanting for your kitchen, but have you considered just plain wooden knobs painted the same green as the cabinets? With the gilding on the doors, and the brass of the sconces and overhead light, will having more brass/gold on the knobs be tooo much and take away from those elements?
Don’t know if someone suggested this yet….you could find inexpensive knobs/pulls in a shape you like and gold leaf them. I have polyurethaned over
gilt hardware before and it holds up pretty well!
I find having one section of a reno complete encourages me to finish more. One section at a time shows progress and makes me feel accomplished! AND I’m excited to see the completed wall 🙂
It’s looking great! Admittedly, I wasn’t really feeling your color choice of this particular green at first and then the shininess added to the hesitancy on my part…..but I am kinda diggin on it now. Can’t wait to see it with the backsplash!
Gosh, all of your progress is amazing! You are SO inspiring!!
I have a quick question if you don’t mind… to my understanding you’re not supposed to use oil based paint over latex primer, right? Is it okay to use latex paint over oil based primer though?
Runt
As a general rule, you can use any kind of paint over any kind of primer. Oil based paint will work fine over a latex primer, BUT it’s much more durable over an oil-based primer. In fact, everything is. Oil-based primer is just far superior to any kind of latex primer. And you can also generally use latex paint over an oil-based primer.
But general rules aside, I would always suggest reading the directions on the can of primer just to see what it specifies. Not all primers are created equally, so there may be some latex primers out there that can only be topcoated with latex paint. And same with oil.
The Zinsser Cover Stain oil-based primer that I use says on the can that you can use oil-based or latex paint over the top. And it is far and above the best primer I’ve ever used. I’ve heard great things about the shellac-based Zinsser primer as well, but I’ve never tried it. The water-based Zinsser…I’ll never use that stuff again. It doesn’t block stains.
Thank you so much for the information and for taking the time to reply. I always get kind of bummed when I ask a blogger a question and they’re too “big and popular” to reply. I totally understand not replying to a simple comment saying, “That looks awesome!” but when I’m super excited or extremely curious about something and ask and don’t get a response, it’s always a bummer. So again, thank you!
Runt
OOooh… that dang darn humidity. Ugh! Looks like things are coming along and I think the rest will come along much faster. 😀 So excited for you!
Follow your muse! that way, it continues to be fun (sort of – it’s still a lot of work!), but at least you can look back at the end of the day and have that sense of completion.
Questions: is having herringbone on ALL the kitchen walls going to be overwhelming? Do you have an inspiration photo? will that many angles take more tiles, or take longer to cut? what if you want to hang artwork on the big kitchen wall? just wondering!
I personally think it’s the choice of grout that makes a herringbone tile (or any subway tile pattern) look busy or not. The black grout that’s so popular right now with white subway tile? I hate that, not only because it looks busy to me, but also because the flaws in spacing become glaringly apparent, and those would absolutely drive me insane. I won’t be using white grout, but it’ll be very light, so I don’t think it’ll be busy at all.
It’ll take more tile and more cuts, but subway tile is very cheap. 🙂
As far as the artwork, I’ll just use those sticky tabs that I used on the subway tile wall at the condo to hang stuff. Those things work amazingly well on tile.
Thanks for answering my questions, Kristi! I found a photo on houzze.com that shows a kitchen wall done in the herringbone tile, with glass front cabinets, corbels, and added feet. It’s a vintage style similar to yours,but with white cabinets instead of the gorgeous green of yours. I tried to post it here, but couldn’t get it to work, so I posted it on your FB page.
I thoroughly enjoy your blog and look forward to it everyday. I am truly addicted!
Oh, I can’t finish one part before moving on. I’d have to do all the cabinets, all the walls, all of the floor etc. Doing I one part to completion before moving on makes me think of having a baby. Ha! Most people will find out what they are having as soon as possible but I had to go through the whole pregnancy and wait to see what it was when it was born. I felt that if I knew what it was prior to birth there wouldn’t be anything exciting to look forward to and the pregnancy would have drug on FOREVER! I did it three times that way. I know, I’m weird. I absolutely LOVE the gold leaf look!
Ha, the right order is always your order! And I can totally understand wanting to finish that one wall. After all, when you’re still plugging away on the rest of the room, you can gaze over at that one done wall and see your goal right in front of you!
Loving how it’s coming together! Looks fab.
Have you purchased the tile? Did I miss that? How did I miss it?
I don’t think I shared that, but yes, I purchased it. It’s just plain white subway tile from Home Depot. 🙂
I believe if you had shown Home Depot pictures of your “stock” cabinets, they would possible have given you the subway tile. I can’t wait until you show them the final pic. Then tell them what you need for the breakfast room! If they would just read your blog and see how many times they are mentioned on here, they’d be thrilled.
This is looking so great already! How will you protect the gold leafing though?
The gold leaf is polyurethaned. Its protected. 🙂
Ah, great! I thought you were spraying the doors before gold-leafing them on purpose, and was wondering what you intend to do.
Also, what kind of handles and what price are you looking for? E-bay could have very chep ones… if you are willing to wait for them to fly from China that is! http://www.ebay.com/itm/Mordern-Cabinet-Wardrobe-Cupboard-Drawer-Kitchen-Door-Pulls-Knob-Handles-MBS202-/191088789713?pt=LH_DefaultDomain_0&var=490275600189&hash=item2c7dc788d1
(Sorry, this is not necessarily the best looking one – I like the asymmetry but it looks a bit shabby. There’s tons though…)
I spray one coat of poly, then do the gold leafing, and then spray a second coat of poly.
I always forget about looking on Ebay! Thanks for the reminder!
Yes, yes, yes! Do the backsplash!!!
I am lovin this kitchen! Every time you have changed your mind I go,oh yeaow I can see that too!
Showed your pictures to my Hubby,and he said that he would have never thought green cabinets,but he admitted he liked it!
I wish that I could find a fix for my 1988 oak kitchen cabinets with the little cathedral top on the middle panel,when I really don’t have the budget for new doors. On all of the remodel shows and real estate shows they behave as though these cabinets are the pits,and I have always liked them,but would like something different after all these years…..celebrating my 49th Anniversary today!
CONGRATULATIONS, Janet! Happy Anniversary to you both!
Despite what some over-opinunated designers might say, your cathedral top cabinet doors must be absolutely beautiful, and quite a classic. I would learn to love them all over again. Happy 47th anniversary. My husband and I will celebrate our 45th in September. Oddly enough, I still love my kitchen cabinets and have never done anything to them except take out the door panel in two doors and replace it with clear glass. I love it. They are a very light warm birch, and while I once thought about painting them for about five minutes, I just could never give up the warmth of that beautiful light wood. Now if they had been dark, they would have been painted long ago. And I believe I love my handles even better now than I did in the beginning.
Kristi, I don’t have knobs anywhere, but handles on everything, and I really like that better.
I certainly don’t think that cathedral doors need to be “fixed” in any way. I think they’re beautiful in a traditional kitchen. Maybe they just need to be painted! It’s surprising how much difference some paint can make! Put a different color on them, and it’ll look like you have a brand new kitchen.
Happy anniversary! 49 years…that’s amazing!
Thanks,especially from you as busy as you are,I’m blessed!
Thank you Kristi for sending me the gold leafing post you made. I don’t seem to be receiving all of your posts these days.
Your kitchen is already breath taking and I can’t wait to see the final.
Absolutely awesome!! Admire everything you do. Don’t you and hubby want to come live with us for a few months??? 😉 We have lots to do 😉 and no way your skills !!! Blessings on all your endeavors.
We’ll do that as soon as I finish my house. So probably the fall of 2019? How does that sound? 😀
Kristi,
I LOVE the way your cabinets are turning out! Yes, finish the one wall, so you have something “done” and beautiful to inspire you the rest of the way (and for all of us to be in awe of). Love it all! Oh, I didn’t think the sheen was too much on the cabs, but now seeing it toned down, I think the low-sheen is perfect! -Melody
Truly, truly stunning! And it’s still in progress! Do in whatever order works for you…nothing new! I like Genelle’s idea of using no knobs, only handles – have been planning that in my kitchen since day 1. I figured someday I might not be able to grip a knob, but should always be able to pull a handle!
Kristi, since you had so much cabinetry to spray on top, I hadn’t really realized that you have very little to spray on bottom until I saw this picture. If the columns don’t give you a fit, you’ll have them done in no time. And if the columns do give you a fit, it’ll still be worth having them.
Like you, I want the entire wall finished first. I can hardly wait to see it all together, so I would also wait on the other cabinets. And when you do get to those other two walls, each one will be a much smaller task that this one banquet wall.
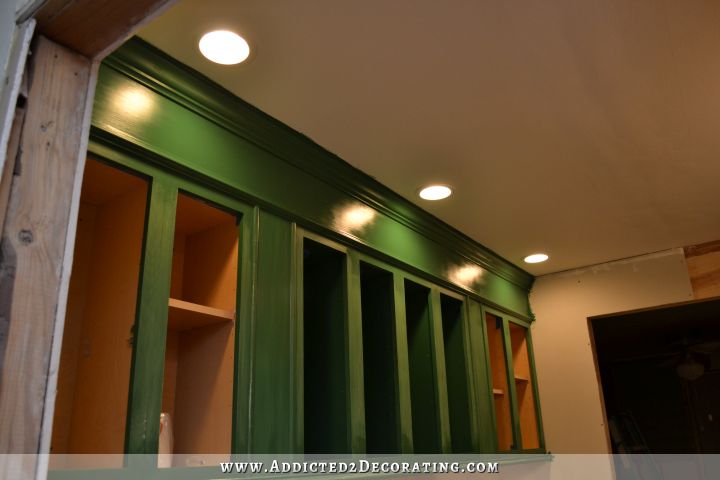
I love, love, love having so many different light sources.
I love following you post but I’m curious as to when you’ll have the OPEN HOUSE!?!?! You know everyone in blogland will want a guided tour of your gorgeous home!
I think that would be so fun!!! I’d love to do that. So as soon as I finish my house, in the fall of 2019, I’ll plan something like that. 😀
I know that PC monitors don’t all display colors the same. However, with my system the green of the cabinets is absolutely gorgeous! It was my favorite of your color samples and I knew it would be fantastic but I can’t believe how much I love it with all your special touches.
My kitchen cabinets look good from a distance but could really use a redo when viewed closely. The doors, which were probably purchased ready-made, are fine but the cabinet boxes were apparently custom made by a framing carpenter or a day laborer and show it. I’d love to have the cabinets painted but not sure our redo budget will allow for that. Unfortunately, with age and physical condition my DIY days are over except for smaller projects. I’d love to use a color like you have done but I know our time in this house is limited and that we have to down-size in a few years so I still must consider resale. Oh, to be 30 years younger (or even 10).
Thanks for finishing that entire wall of cabinets first. I think your “order” is just fine and I always anxiously await your next step.
While I really felt for you and your frustrating paint problems, I didn’t “get” the sheen problem at all early on–meaning, I just thought your green cabinets were so pretty. But once you posted your solution and those photos of the sheen you had been going for, then I got it…big difference, and they are even prettier now. Kudos to you for soldiering on!
Haven’t been up to snuff for a few days, but wanted to let you know I am still looking! I often wondered how the weather down there was, now I know. It’s looking good and will be done soon. I just wanted to mention that Vandykes Restorers is having a 20 to 60% off sale on knobs, pulls and plates. If you have some down time (ha ha) you might take a look. I would look for you but haven’t foggiest idea as to what you are looking for. They can get pricey so every little bit helps and I think they have the biggest selection. Blessings
Love the gold leaf…it just makes the cabinets POP !!
I love seeing your kitchen progress!
I was redoing a “mini table lamp” 14 inches tall ginger jar. Lovely shade of yellow and I thought painted on the inside of the glass. Yellow lamp + different shade of yellow room= we are not going there.
Didn’t prime, did the couple of light coats of deep blue over and it looked fine and sat for 24 hours- nice and glossy. Not a high gloss and lamp user wanted high gloss. One minute after spraying one light coat of clear gloss, crackling and blisters. [impolite words spoken] Contemplated paint removal- wet sanding with a 120 sanding sponge and used a razor blade scraper. Learn yellow was really on outside of glass. The blue sometimes bonded to yellow, sometimes didn’t, but not obvious until the clear coat landed.
Cleaned it all off before the storms up north of you. Now, too humid here and too hot to prime, paint, and topcoat until next week, maybe. I’ll be allowing more curing time between steps too.
The gold leaf is absolutely my favorite part (so far) of your kitchen! It looks so beautiful
Go for the backsplash!!! I saw an email from Home Depot it’s on sale!!
Hey, Vandykes Restorers is having a huge sale on knobs and pulls and plates. I have no idea what you are looking for but I saw some gorgeous brass ( like your light finishes) round nobs with round back plates. Very reasonable and stunning for your kitchen. Lots more to choose from. Also Ballard is having a sale on chandeliers, they have two that would coordinate beautifully with your sconces. One is to die for, but expensive, even with the discount. We should all chip in $5.00 and you could get it, LOL, least we could do for all the instructions! I will be happy to start the campagn if you really want it~