Part 1 – Building My Walk-In Closet Island
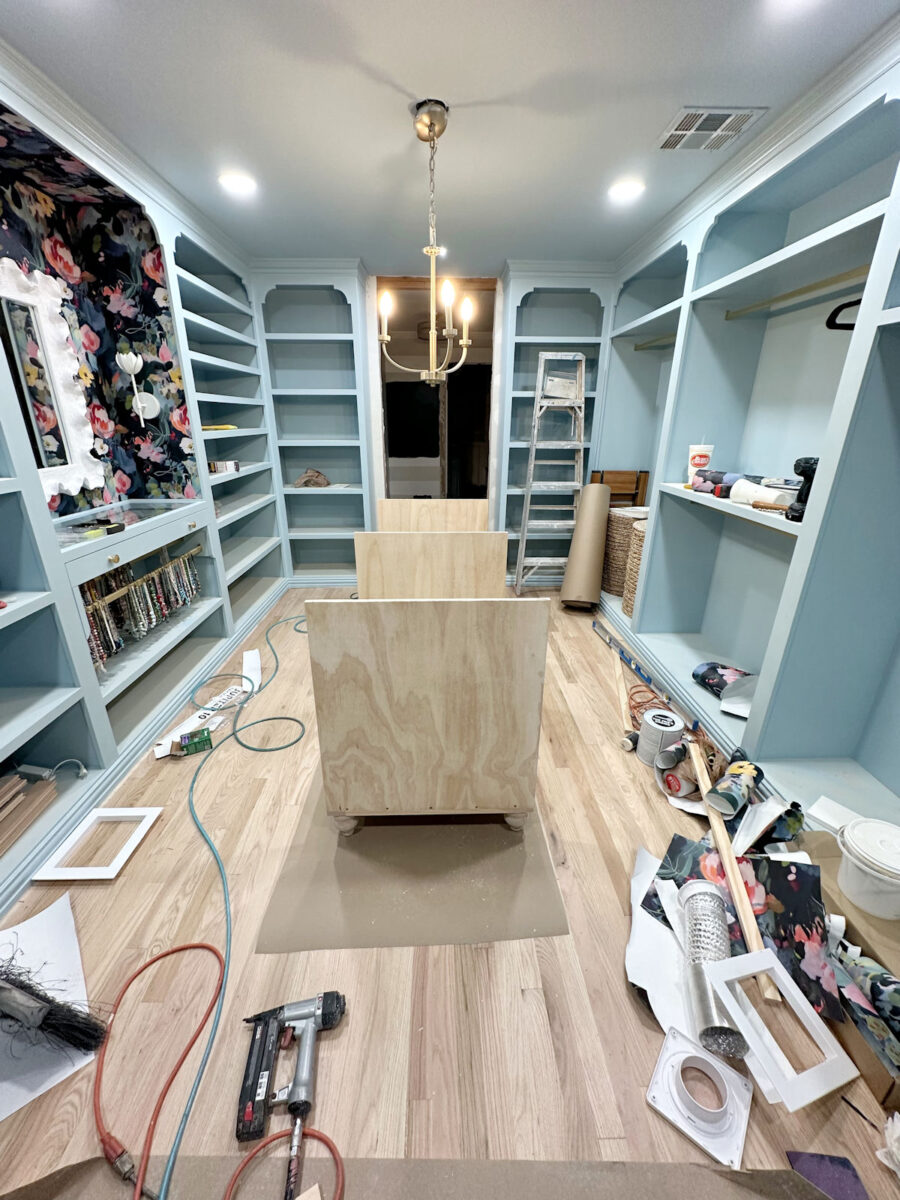
I started out working on smaller projects for the walk-in closet yesterday, but about 5:30, I decided that I’d much rather start building the island. So I headed to Home Depot to pick up everything I needed for that project. Needless to say, once I got home with all of those supplies, I didn’t have much time to work, but my main goal was to get the basic box built, attach the feet, and put it into place so that I could get an idea of what this room will look like with an island. I’ll skip to the end and show you that part, and then I’ll back up to the beginning and show you the process.
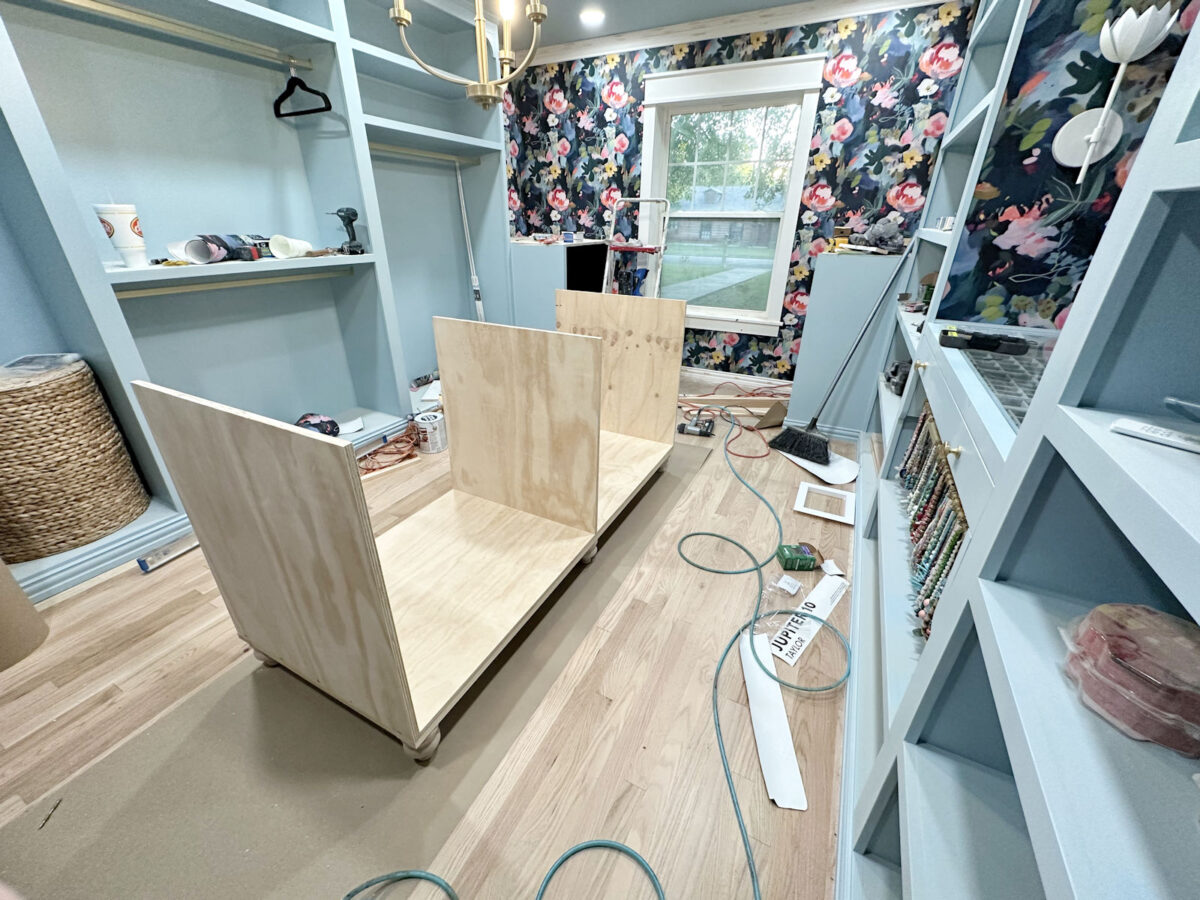
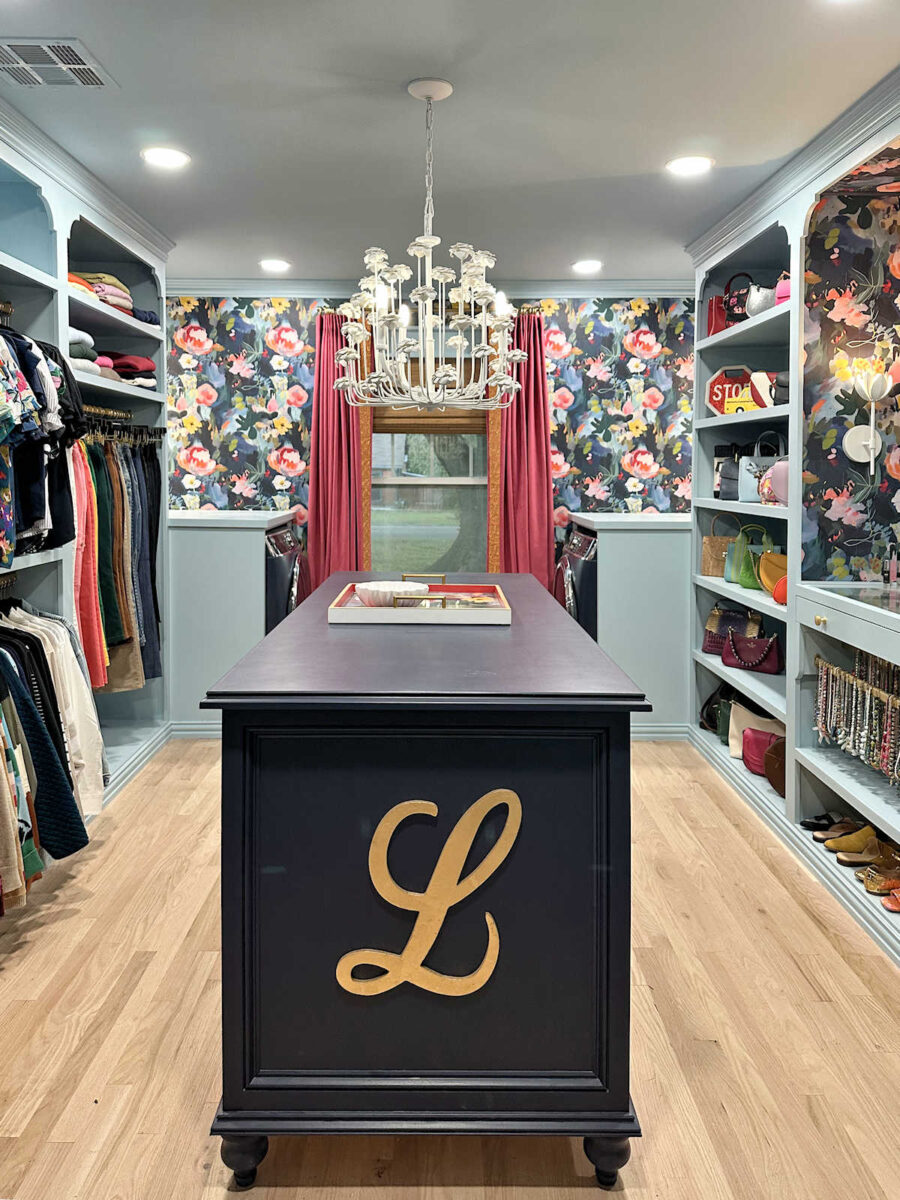
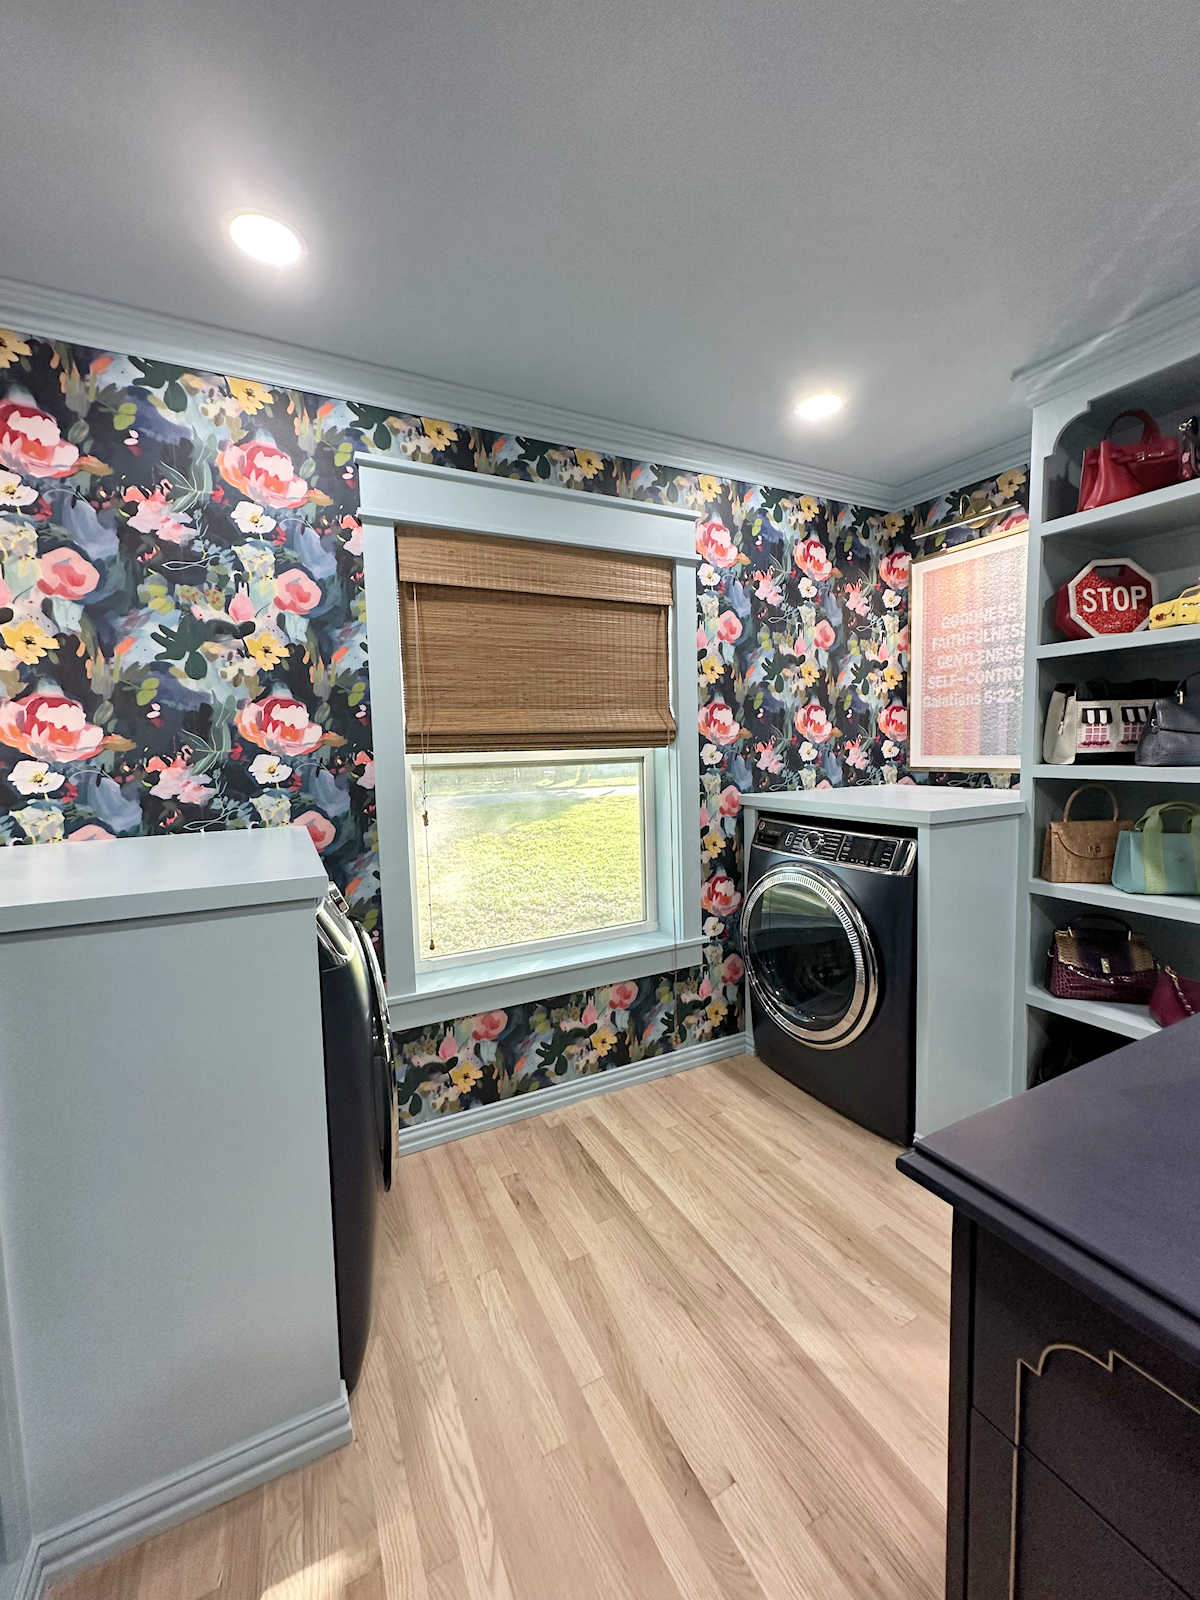
Here’s what I’ve been anxious to see for a while now. This is the size of the island, and what it looks like in the room.
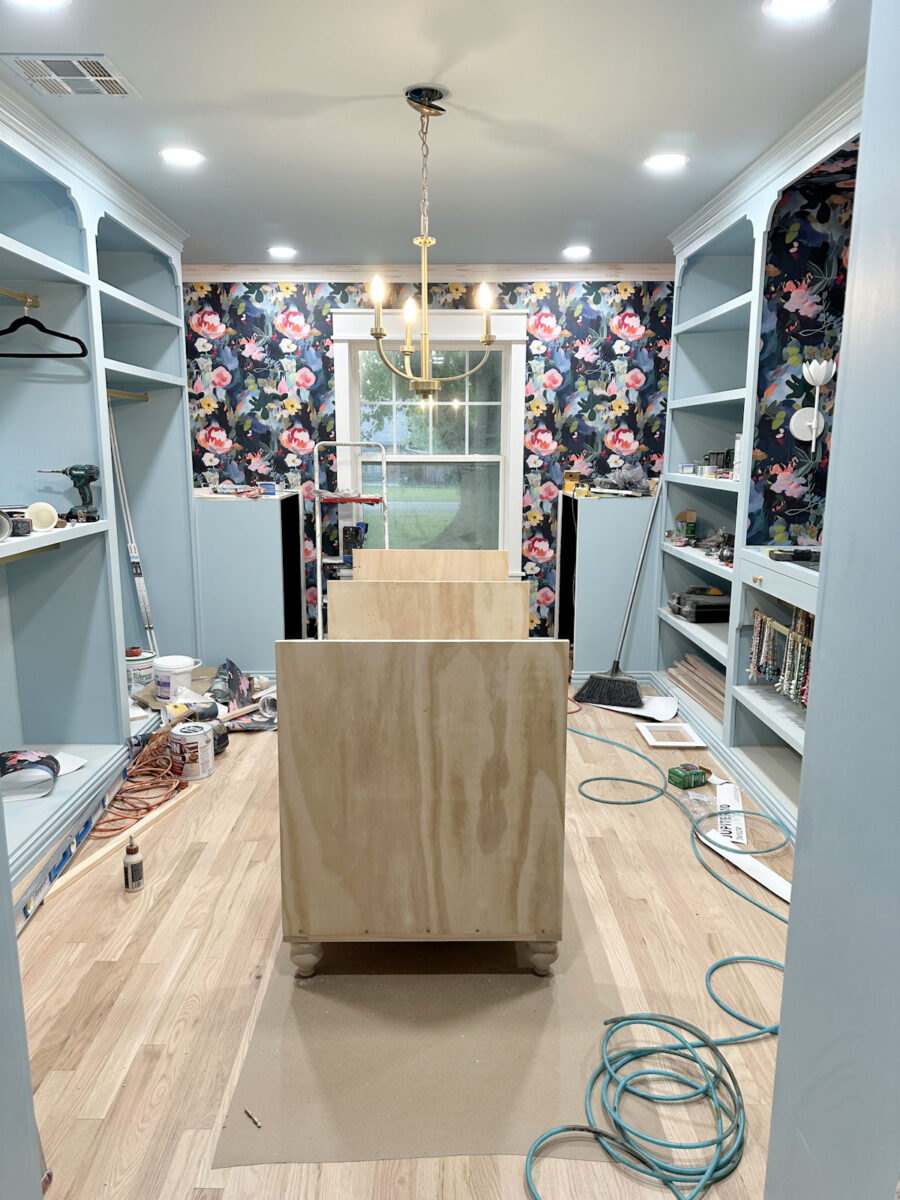
The finished island will be 30″ x 72″, plus the overhang on the countertop, which will be about an inch on all four sides. That will leave me with 36 inches of floor space on all four sides of the island. And while, in my mind, I’ve known that 36 inches of walking space around the island is plenty of room, I’ve still been anxious to actually see it. So I was very relieved to get the island to the point where I could actually stand it up, put it into place, and then get a feel of walking around it in the room to see for myself that it will actually work. And it’s great! I still have plenty of room to open my jewelry drawer all the way, which means that I’ll have plenty of room to open all of the island drawers as well. So my planning worked out perfectly!
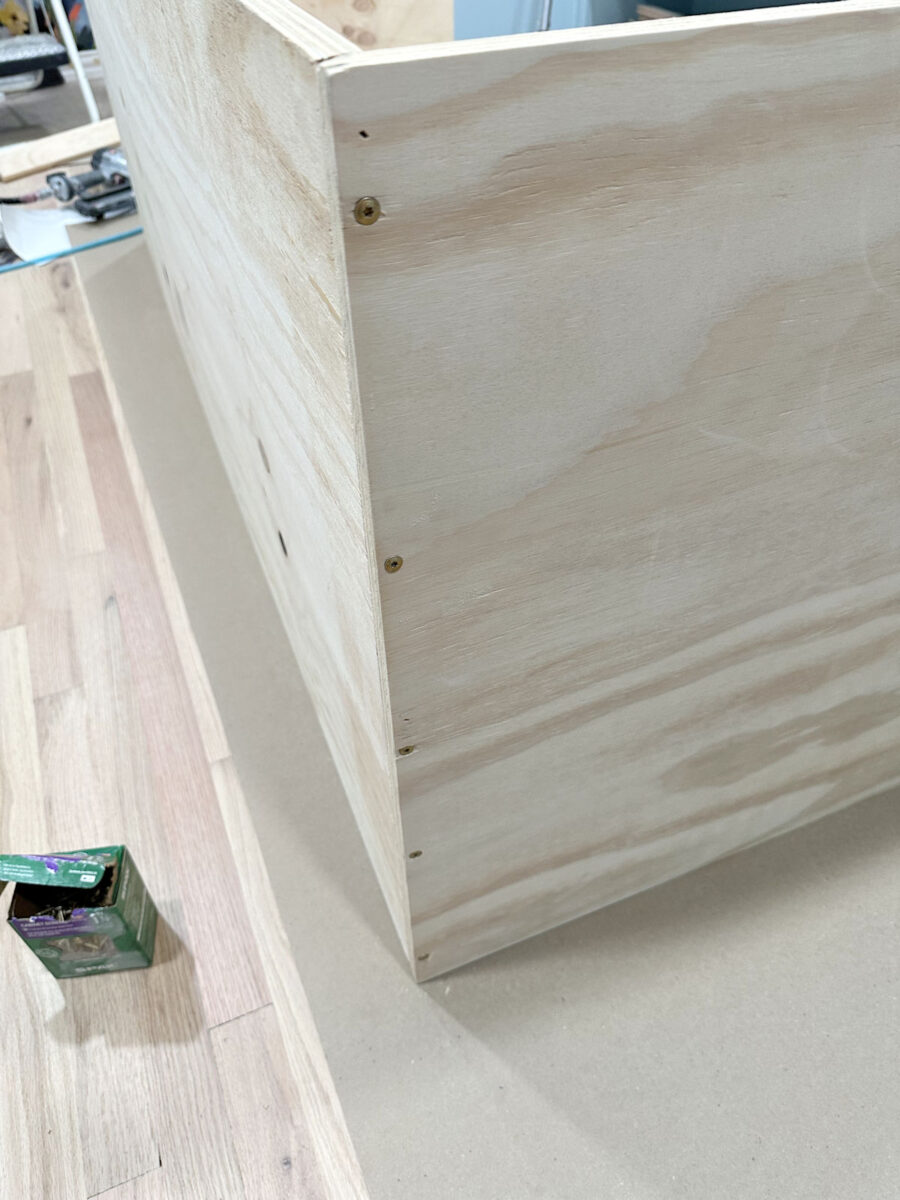
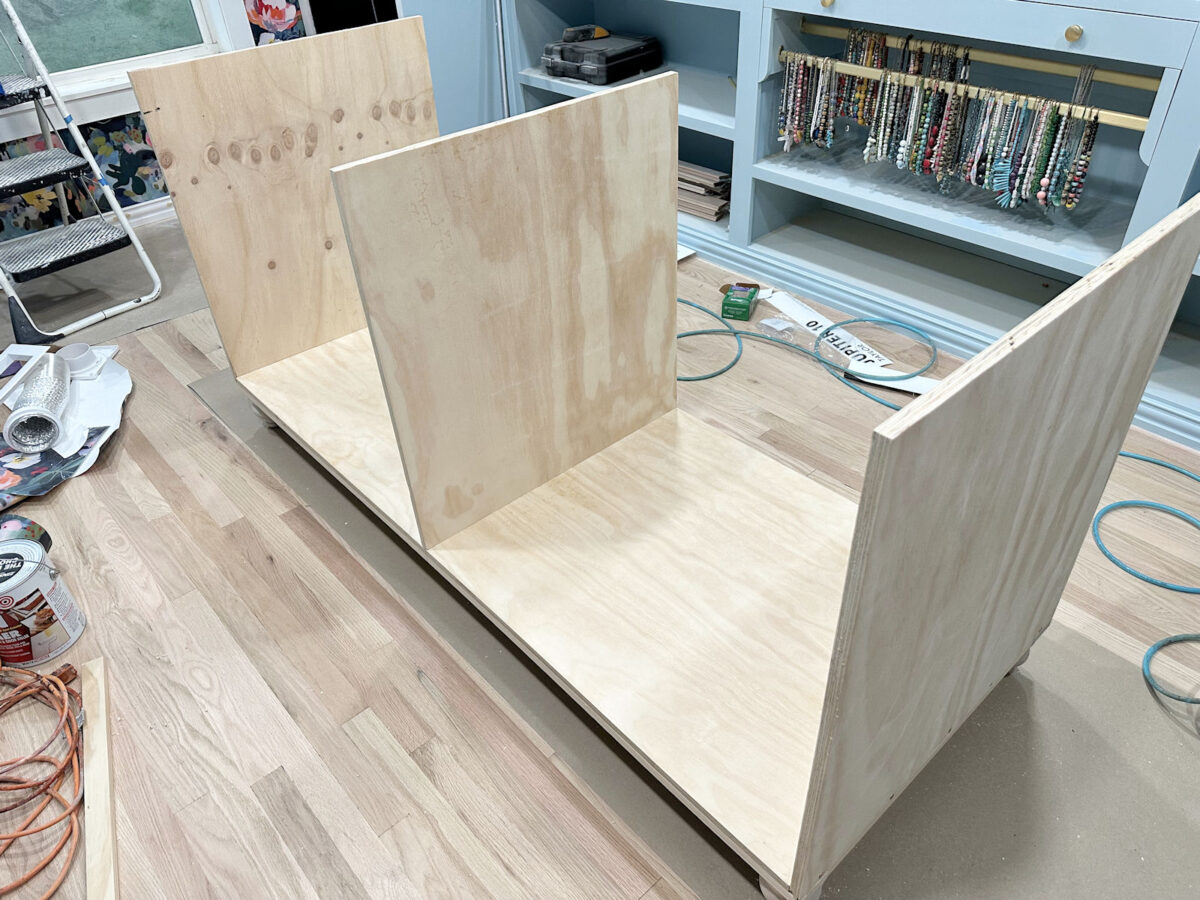
To build this, I started with the long piece for the bottom, cut to 28″ x 70.5″, and to that piece, I nailed and then screwed on the side pieces, which are 30″ high and 28″ wide.
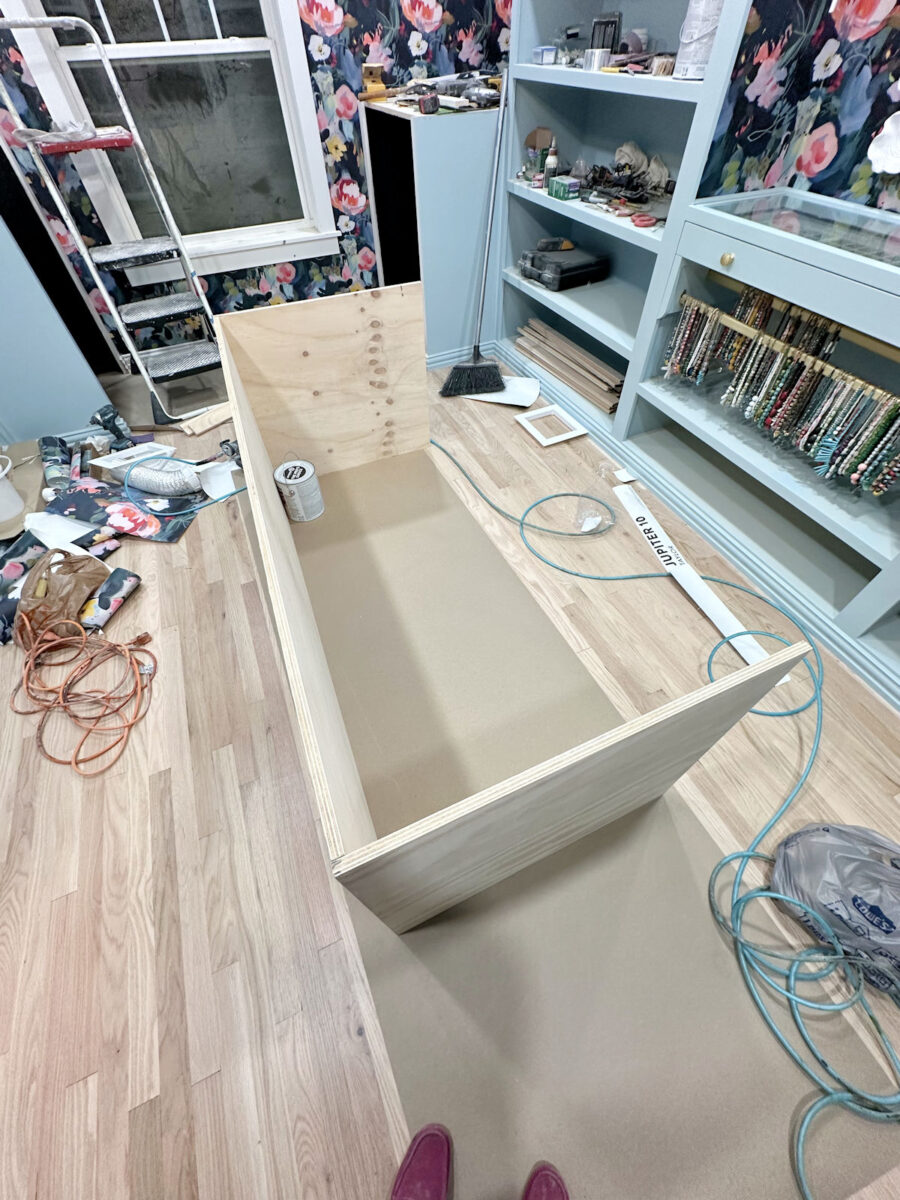
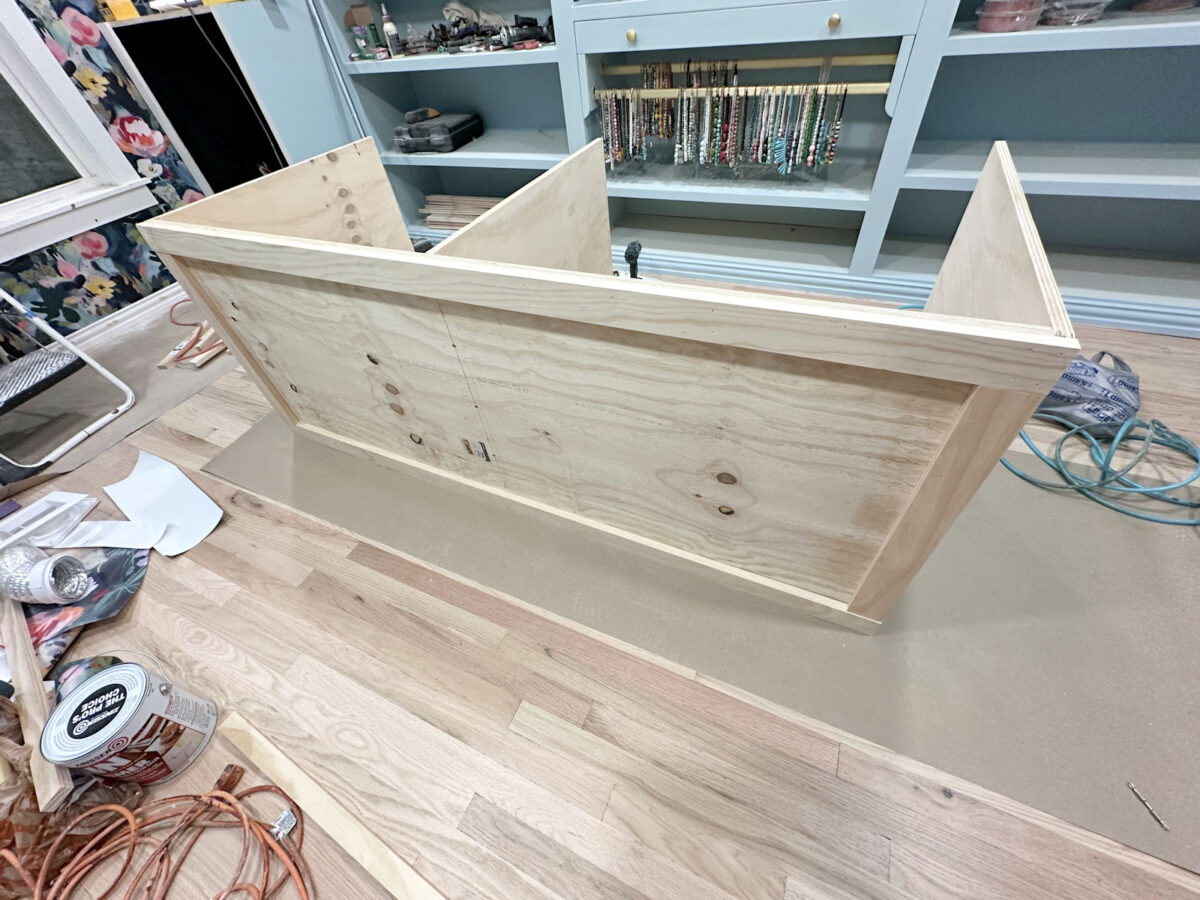
Here’s another view of that, with the bottom of the island towards the bottom of the picture.
I don’t know why I decided to do it this way, but I nailed and then screwed the side pieces into the edge of the bottom piece. In hindsight, I wish I had made the side pieces 3/4″ shorter, and the bottom piece 3/4″ wider on each side, and then nailed and screwed the pieces together so that the side pieces were on top of the bottom piece. Either way will work, though.
I nailed the pieces together first just because it’s much easier to hold them together and nail them to get them lined up, and then I followed up with 1.5″ #8 Spax cabinet screws, which don’t require pre-drilling the holes and won’t split the wood.
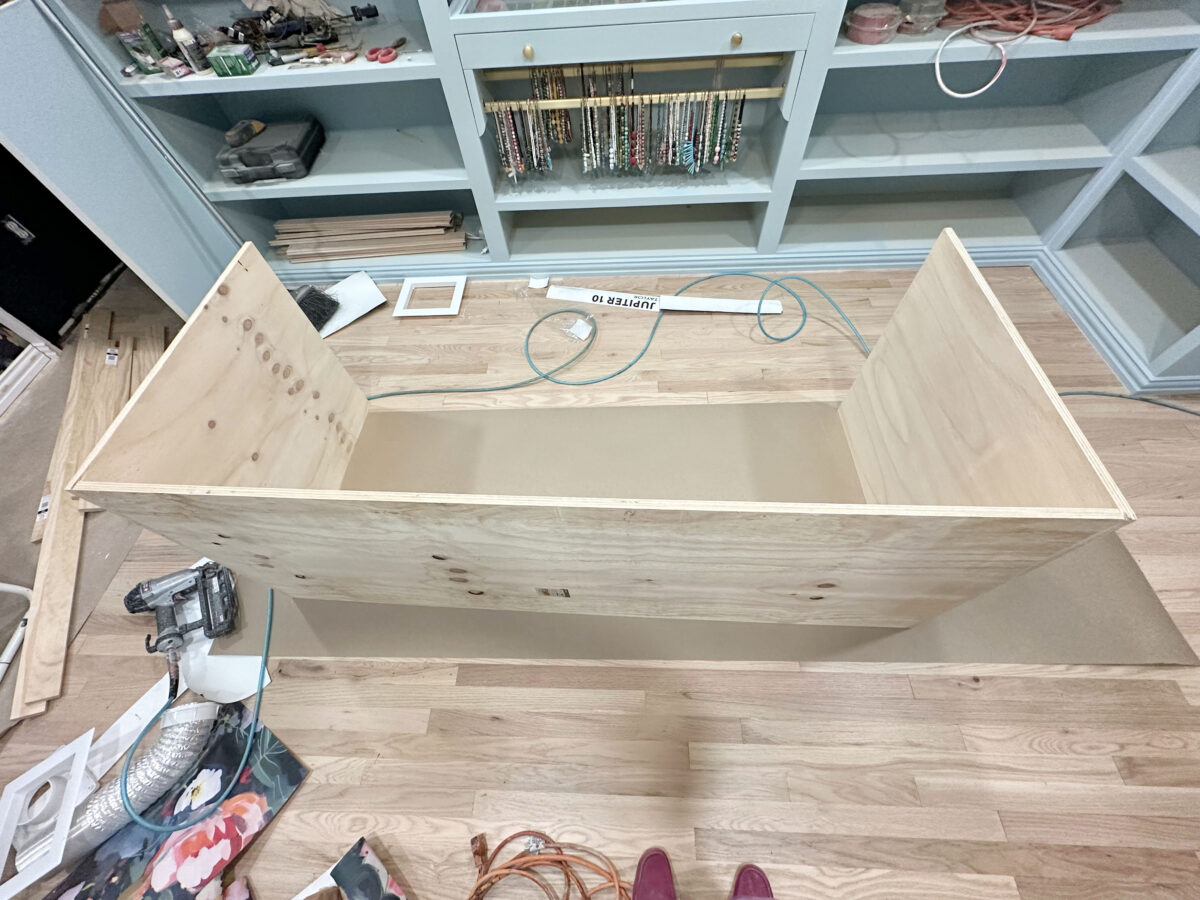
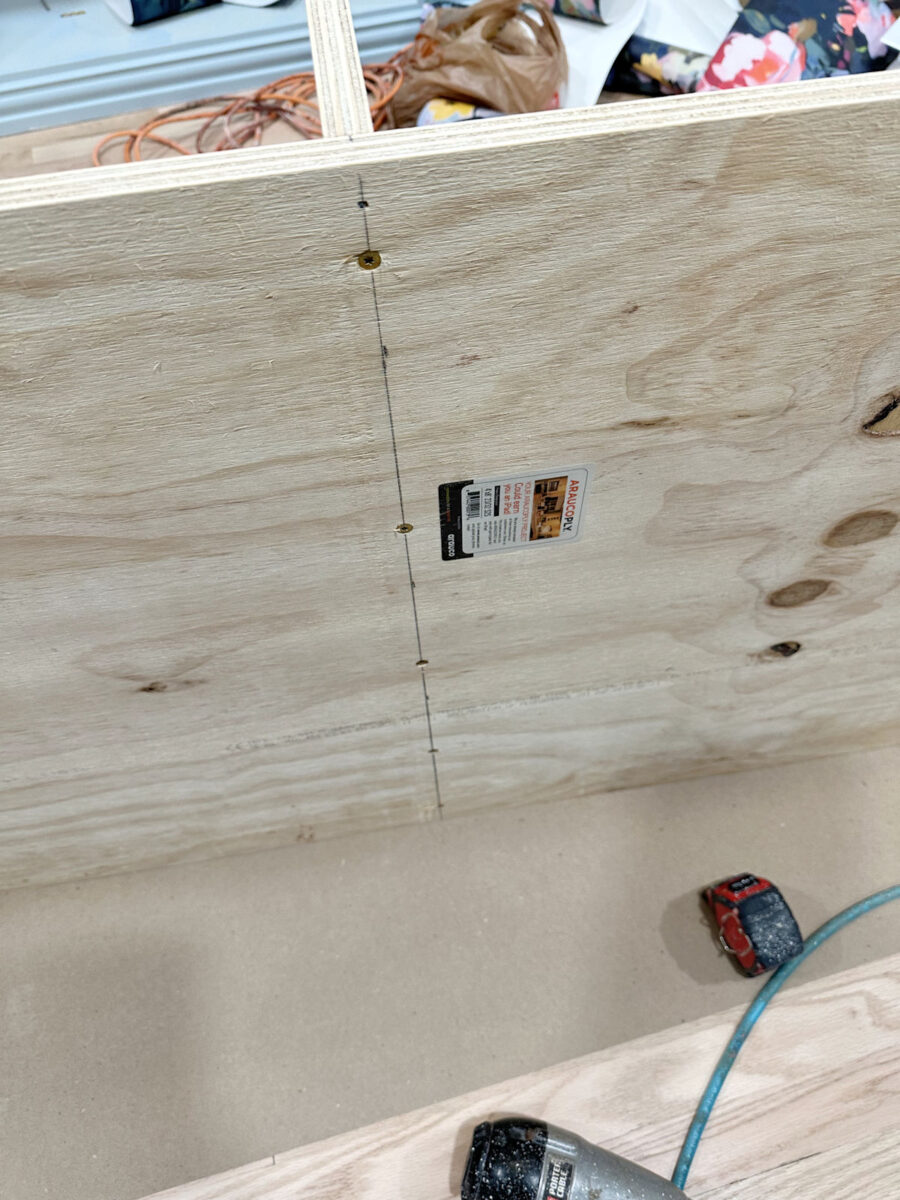
I repeated that on the other side and then added the center divider. This piece was cut 3/4″ shorter than the side pieces since it was attached on top of the bottom piece. I measured and marked the center of the bottom piece, lined up the plywood divider, and nailed it into place.

And then I followed up with the Spax screws through the bottom piece and into the edge of the center divider to secure it.
And that was it with the basic box. Pretty simple!

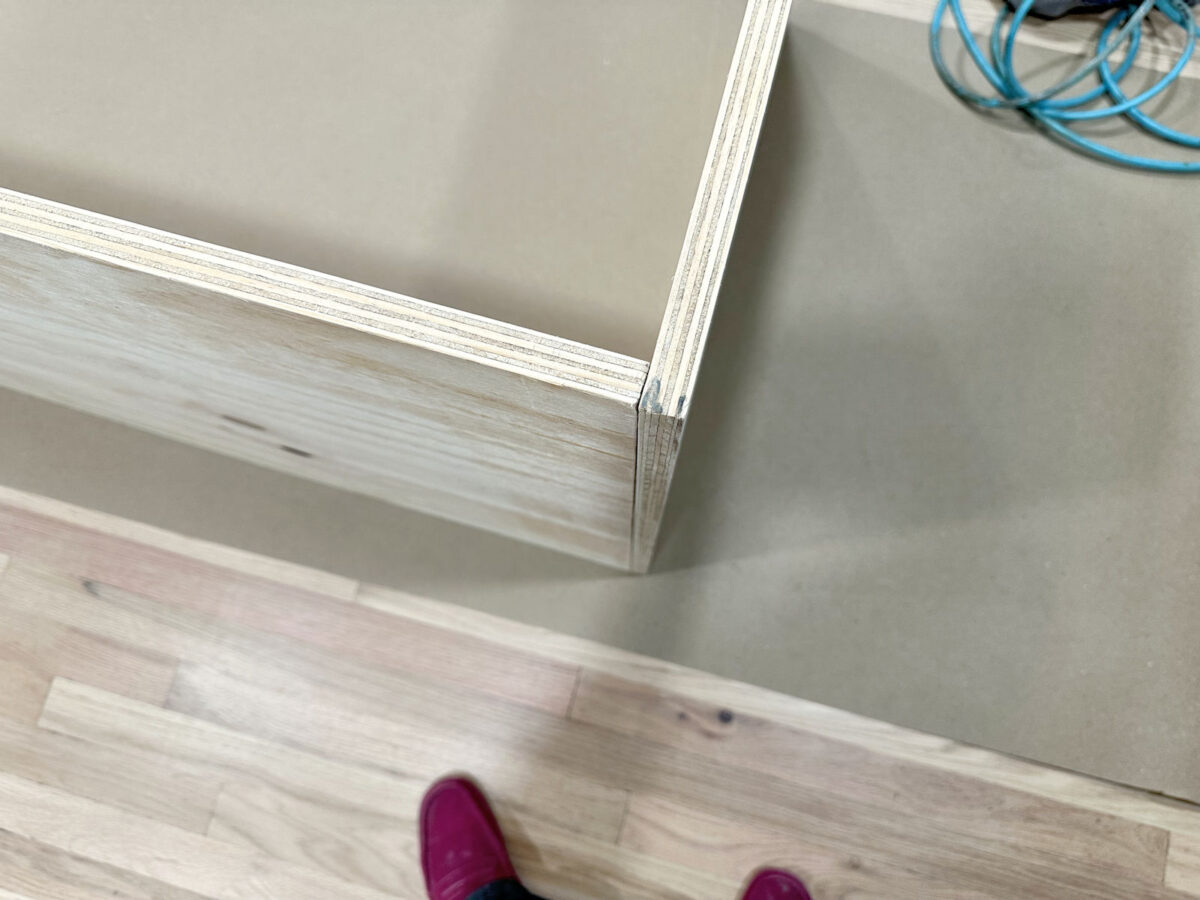
Then I added a “frame” using 1×3’s around the bottom. The purpose for these pieces was to give a little more depth to the wood in those areas where the feet would be attached, and also give me something to attach bottom trim to. I attached these pieces only using 1.25″ 16-gauge nails. There was no need to use screws for these pieces.

I flipped the piece over to attach the frame to the other side because I wanted to be sure it was lined up perfectly with the edge of the plywood bottom, and then I attached 1×3 pieces to each side to complete that frame. I didn’t need those side pieces to attach the feet, but again, the bottom trim will go all the way around the island, and this gives me something to nail that trim to.
To attach the feet (turned wood feet that are 4.5″ high and 3.5″ wide, from Lowe’s), I drilled holes for the threaded bolts on the feet. I didn’t bother buying those metal plates that the bolts screw into because that would have just added more height to the feet that I’d have to subtract from the drawer area, and I want to squeeze ever fraction of an inch I can out of the overall 36-inch island height for the drawers. Plus, they’re just not needed on a project like this. So after measuring and marking how far back the feet would need to go for the bottom trim not to hit the feet, I drilled the holes for the furniture feet bolts.
And then I used quite a bit of wood glue on the top of the furniture feet…
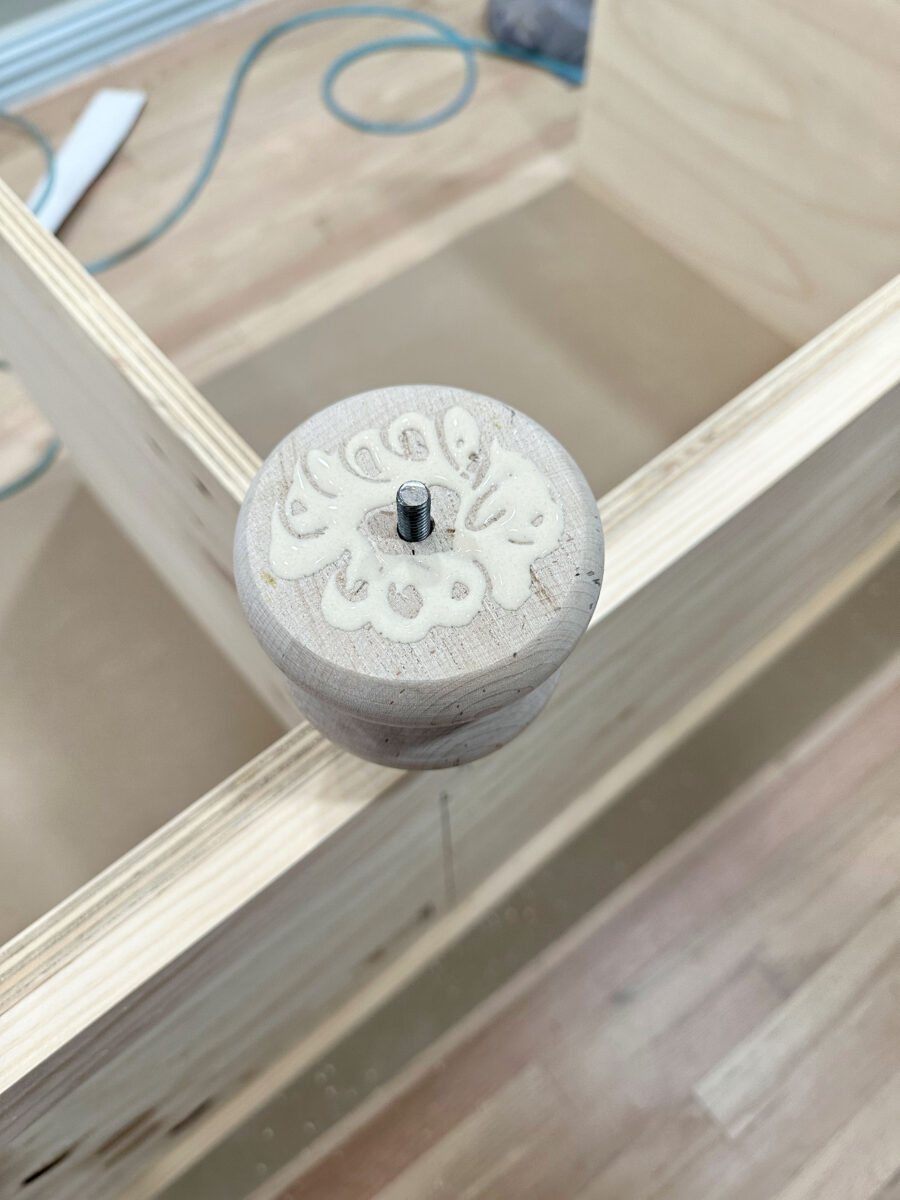
And placed the threaded bolts into the holes I had drilled. I did three feet on one side, gave it a bit of time for that wood glue to set, flipped the island over, and did the other three feet on the other side.
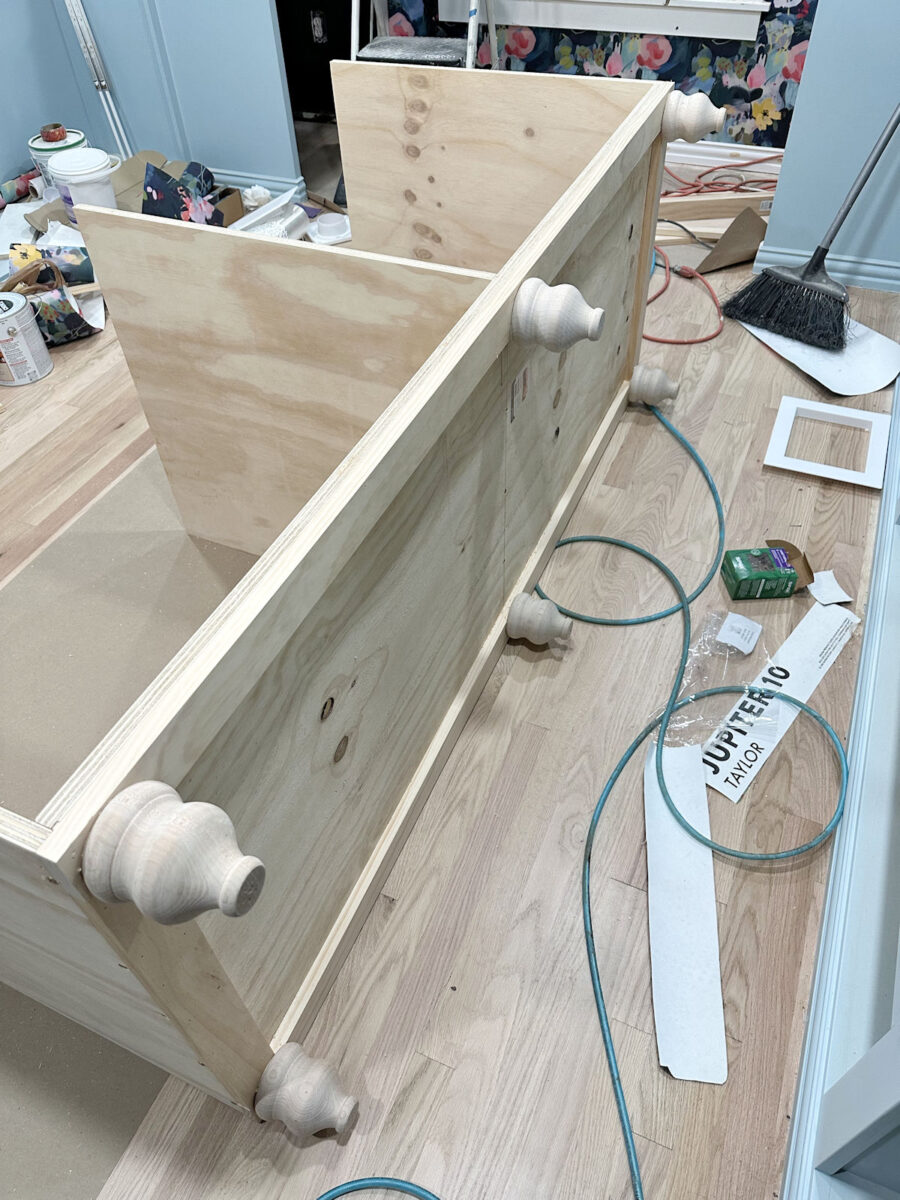
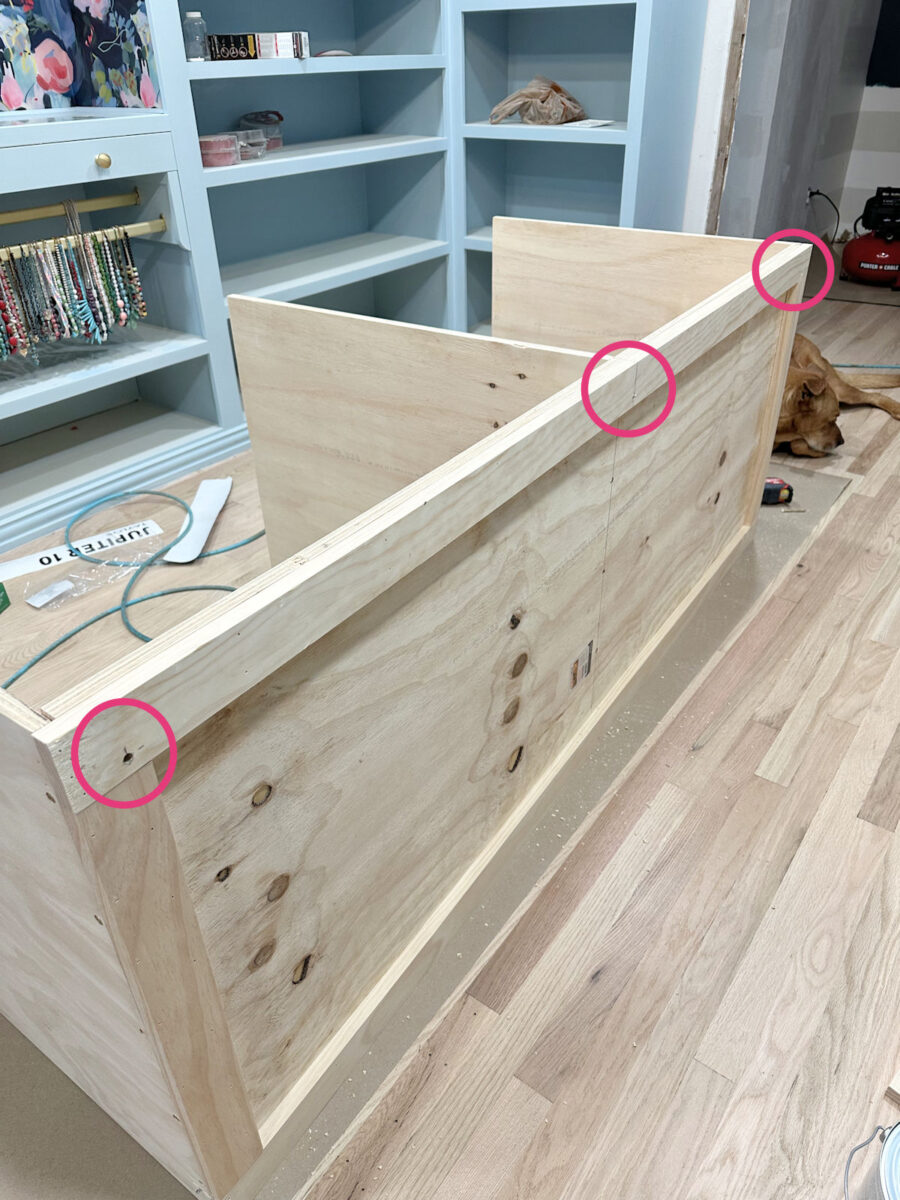
That’s as far as I got, but it was far enough for me to stand the island carcass upright and get an idea of what it was going to look like in the center of the room.

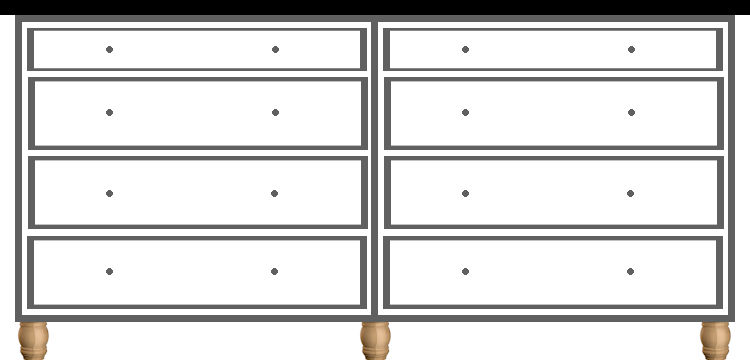
I think it’s going to be great! The size is perfect. It’s big enough to have eight drawers on the hanging clothes side of the room, and four drawers and two cabinet doors on the accessories side of the room. Each drawer and cabinet section will be about 34 inches wide.
And that leaves me 36 inches of floor space on each side of the island.
This is the side that will have eight drawers. I still need to work out the exact height of each drawer. That’ll be a “figure it out as I go along” kind of thing.
But it’ll look something like this…
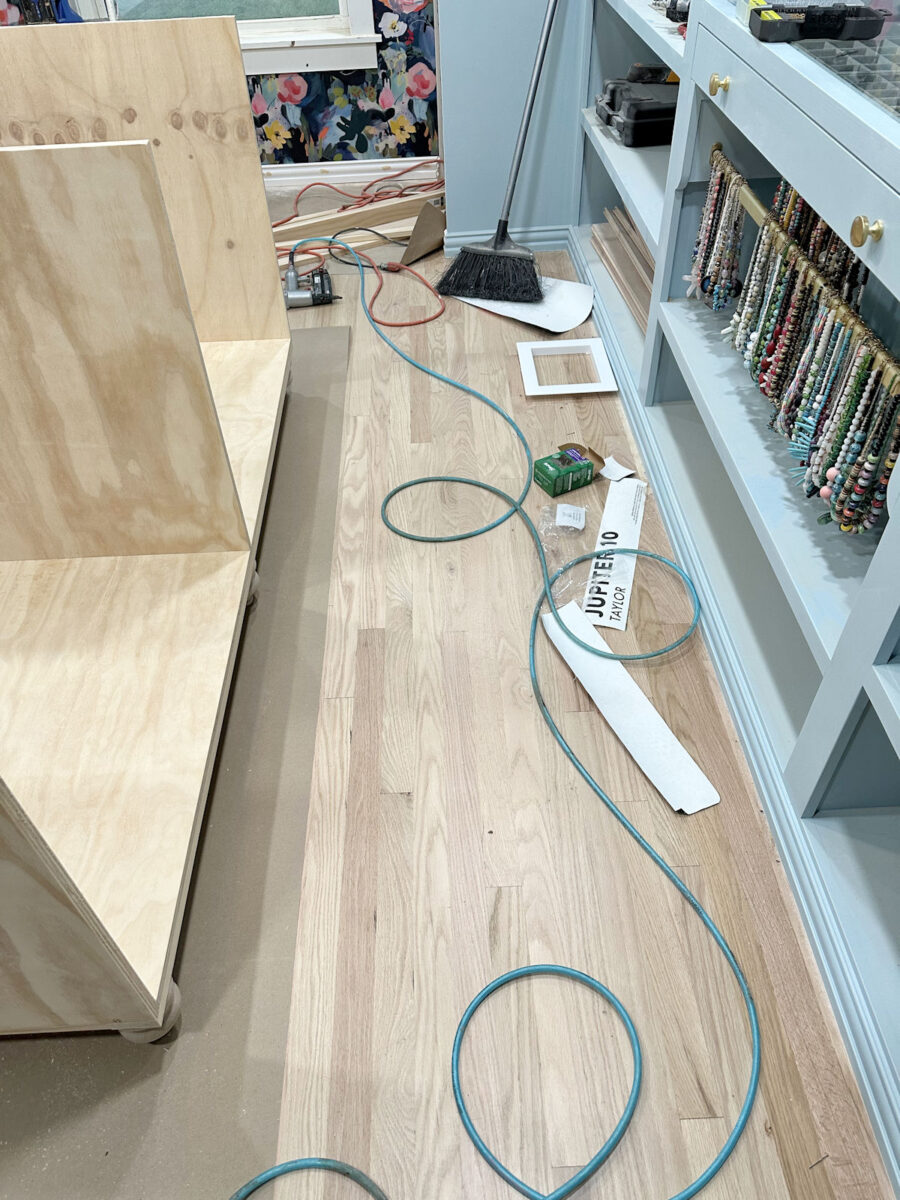
Here’s a wide angle view of it from this side…
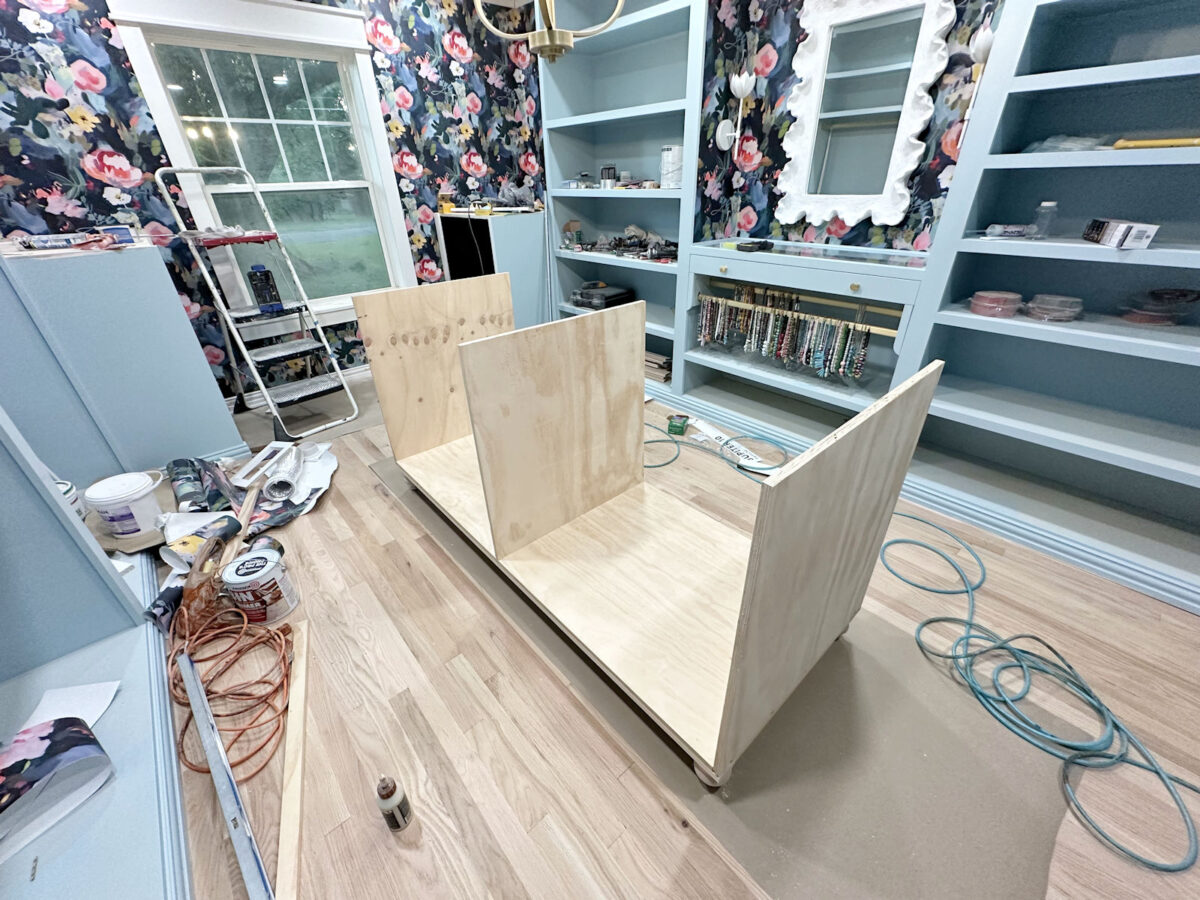
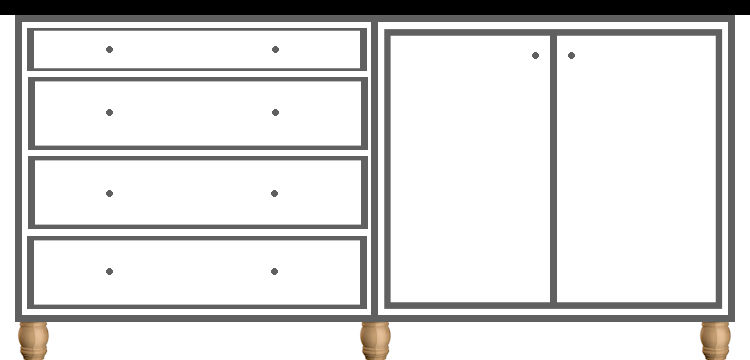
And then this side will the one with the four drawers on the left and cabinet doors on the right.

So it will look like this…
And here’s a final view looking from the washer/dryer area back towards the doorway to the closet.
I wish I had started on this earlier in the day so that I could have gotten further along on the project, but at least I got it to the point where I could actually visualize the size of the island in the closet. Hopefully I can make a whole lot more progress on this over the next two days! I hope to have a lot more island progress to share with y’all on Monday.
Side note: I apologize to all of you neat freaks who are probably feeling an incredible amount of anxiety looking at these pictures of me working on this project before cleaning up my messes from previous projects. 😂 Sometimes I forget that not everyone’s work process is like mine, where I can just shove everything to the side and jump into something new. And I promise you that my floor is okay. I’ll try to take some time this weekend and get things cleaned up so all of you organized people don’t have to feel anxious looking at the progress pictures on Monday. 😀
More About My Walk-In Closet/Laundry Room

see all walk-in closet/laundry
room diy projects
read all walk-in closet/laundry
room blog posts

Addicted 2 Decorating is where I share my DIY and decorating journey as I remodel and decorate the 1948 fixer upper that my husband, Matt, and I bought in 2013. Matt has M.S. and is unable to do physical work, so I do the majority of the work on the house by myself. You can learn more about me here.
I am so excited at your progress!
Are you planning on something like felt pads on the bottoms of the island feet so it doesn’t scratch up the finished floor?
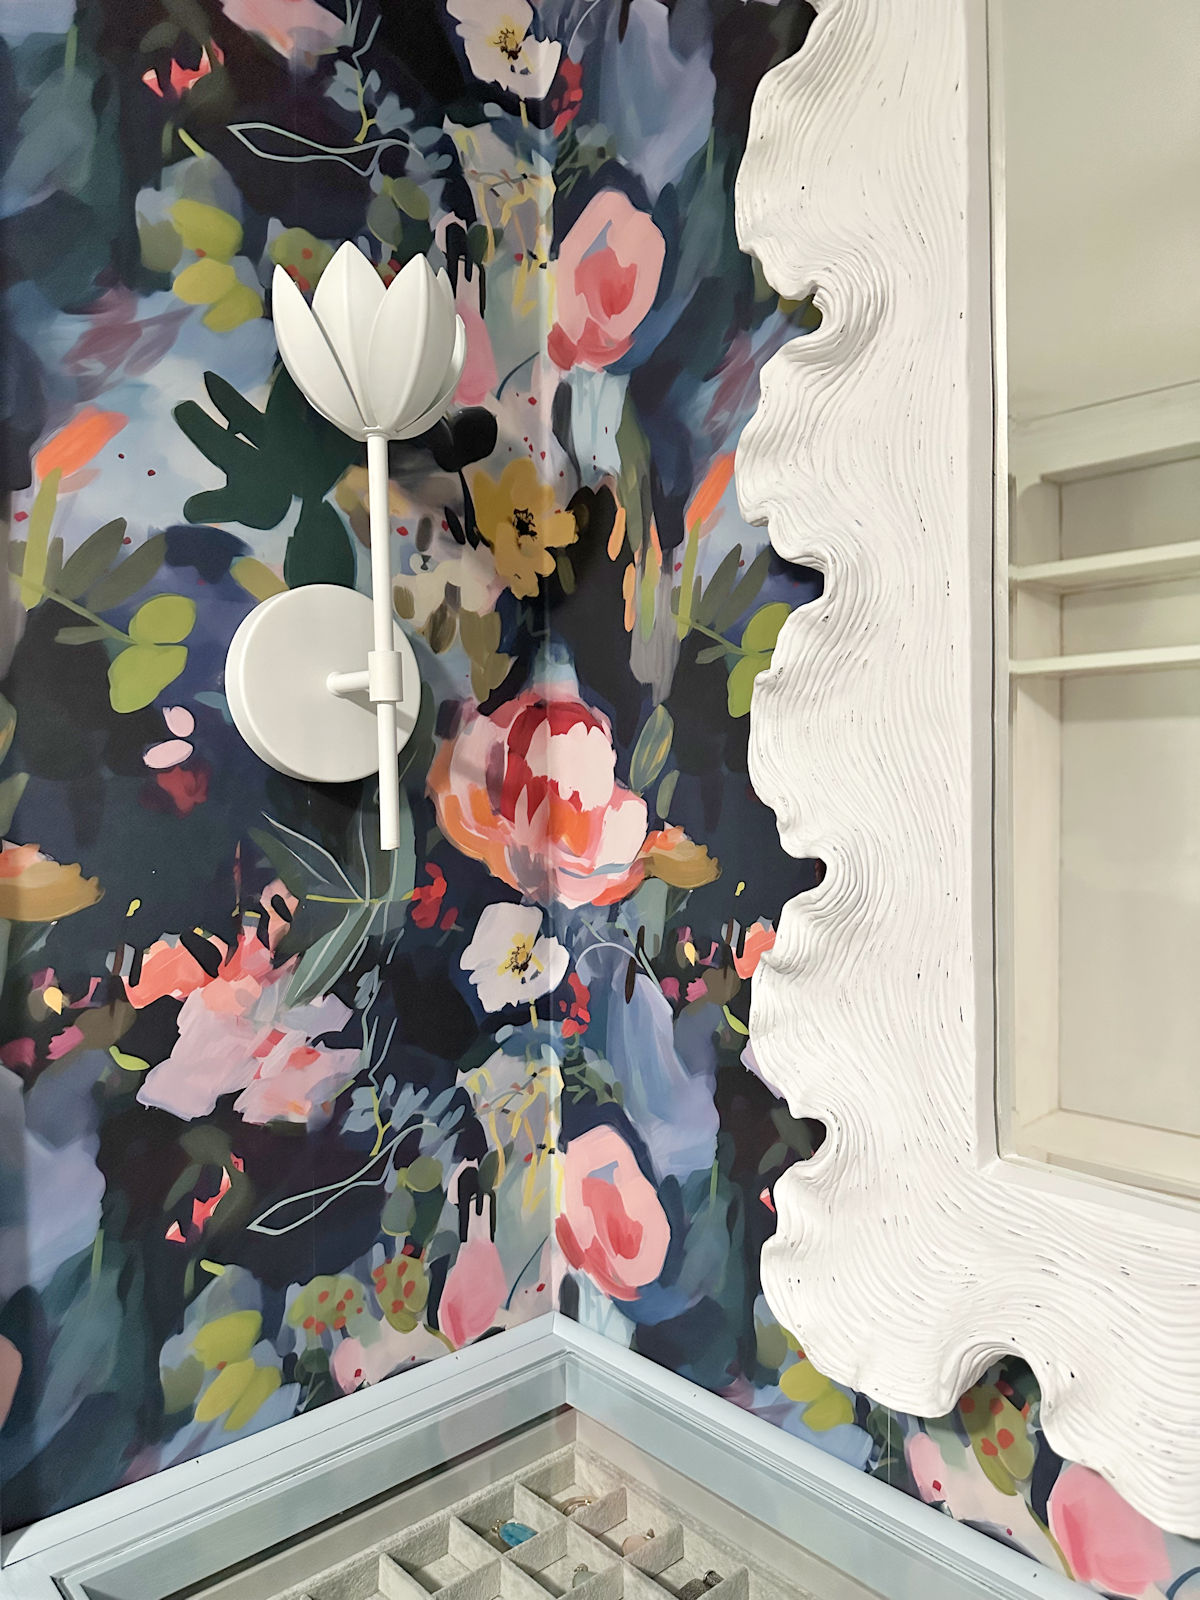
Also, your new lighting in the closet continues to amaze me, it brightens the blue color so much, making it seems so much less drab to my eye.
Yes, I’ll be adding felt to the feet.
Wow! I had read the dimensions of the island but didn’t realize how big it would actually look in the closet. You’ll have tons of storage space. I hope you take time this Memorial Day Weekend to grill some burgers, or ribs and enjoy a day off.
Have you thought about getting the washer and dryer into the room before the island gets too heavy to easily move? Just thinkin’……
Yes, those will be moved before the island gets loaded up with drawers.
I was thinking the same thing.
Kristi, you are the human dynamo. I love it. Can’t wait to see the finished product, or what progress you will make over the weekend. Please remember to take some time and rest, enjoy the long weekend, and hopefully some good weather. Looks amazing.
Cheers to you and Matt and Ever Faithful Cooper!
so impressive! I can’t wait to see the island built out. One question I have is have you thought of a full length mirror?
I’m putting that in the foyer.
My first question was going to be why you screwed the pieces together so that the side pieces were not on top of the bottom piece (I didn’t know if there was a specific reason), but that was answered before I got very far in. My second question is whether Matt drops by during the day to see your progress, or do you take him in at the end of every day to show him what’s been done…… or does he prefer just to be shown the finished project?
He peeks in on occasion. He saw it the last time right before I put the wallpaper up on the back wall.
On a build like yours where there is plenty of wood to glue your feet to and the piece won’t be moving except to bring in appliances, screwing directly into the wood works fine however there are other options besides using standard leg mounting plates which add height and aren’t very attractive. Even on a project like yours, given its size and eventual filled weight I would have added wood insert nuts for a flush look that’s stronger than just inserting the bolt into the wood. There are also heavy duty furniture mounting plates which are about the thickness of a mending plate and have a built-in insert nut. This second option is good for a sturdy connection where you may want to be able to later remove the feet.
You’re probably going to roll your eyes at me. I had intended to get the inserts for the nuts on the feet, but I had a very frustrating experience at Home Depot. I had to ask four times for someone to cut plywood, waited over 20 minutes with no employees in sight, and then the man who cut the plywood was kind of rude and dropped my plywood pieces onto the cart on their edges. And he’s been there over a decade. I see him all the time, so he knows better. I was so frustrated and ready to get out of there, and I completely forgot about them. When I got home and realized it, there was no way I was going to go back. I thought, “Forget it. I’ll just glue them on.” 🤪 If the feet give me trouble, I can always go back and add them. The holes I drilled fit the nuts perfectly, so they’ll hold the metal pieces if I decide to add them later.
Definitely not rolling my eyes, it’s why I’m better than Santa ’cause when I make my list, I’m not checking it twice, I’m checking it a half dozen times before I leave the house, writing down the aisle and bay number, then checking it a dozen times more before I leave the store.
We’ve all had the big box store employees who make us livid or frustrated enough to just want to walk out. I once had to explain to an HD employee how to use their wire rope cutter because he didn’t know how but wouldn’t let me do it myself. Urrgh, being a woman with DIY skills can be frustrating.
BTW, your closet is like a dream come true. Can’t wait to see the finished room.
Sorry if I missed this, but why aren’t the washer and dryer in yet? Surely countertops can be added after they are installed?
I’m still trying to figure out how to get them out of the sunroom. It will take a lot of moving things around to get them out. And since thats not fun, I’m procrastinating. 🤪 Nothing unusual. Just my typical procrastinating self when it comes to unpleasant tasks when there are more fun things to do.
I know how much you like symmetry. Have you thought about disguising the island doors to look like the drawers? It is all coming together so nicely!
So exciting!! I’m planning on building something completely different, but your builds always inspire me. Thank you for always sharing things step-by-step!
Wow! Wow! Wow! It is really coming along! So exciting!!!
Kristi,
A person can spend a lot of precious time cleaning up after themselves, again, again, and again. I like how you have such focus on the project in front of you and how you get things DONE!
Hi, Kristi. I have followed you for at least seven years (if not longer!). I found your blog looking for a step-by-step tutorial on creating pinch pleat curtains using pleating tape, and I’ve been a daily reader ever since. I cannot tell you how much I have enjoyed following along with your DIY and crafting projects over the years: you are amazing! This may be crazy, and I am sure you have thought of this, but with the counter overhang on the island, will the island still clear the door frame once it’s been trimmed out? It may just be the perspective in the pictures, but it looks the width of the carcus only just clears now.
My thoughts exactly. I would have installed the washer and dryer before building the island. It all looks great so far, good job.
It’s just the perspective. That doorway right now is a little over 40” wide.
YEAAAA!
So envious! I wish I had started to build cabinets/ furniture when I was younger. It is really fun to watch you work your magic! Don’t worry about clean up. You do you!
I am amazed that you started out by going to Home Depot and was able to get that far along. Thank you for sharing.
I was wondering if you are going to put some kind of seating at the end of
your island to put your shoes on?
Also what color are you going to paint the island?
It is all looking so exciting to me.
That was very interesting what you shared yesterday.
I’ll be adding an upholstered bench and full-length mirror to the foyer.
I’m planning on the island being the same color as the cabinets. That could change, but that’s the plan right now.
Will you be able to get your washer and dryer in past your island??? Why haven’t you installed them yet?
There’s plenty of room. 😊 I’m just procrastinating because it will take a lot of effort and not-so-fun reorganizing to get them out of the sunroom.
Please move your washer and dryer in before you get too much further on the island! One less time to have to move a big piece
Did you not read all the comments where Kristi addressed this? 😁
Check the time. Kristi answered most of them AFTER Kathie asked her question.
You do not cease to amaze me. That closet is turning out beautiful!!!
So exciting to see the finish line! Am I the only one thinking you should save your wallpaper scraps to line some drawers? And if you painted the island navy it would match your appliances!
Great progress. Your messiness looks like my messes in my sewing room. I have 5 sewing stations in my room and each one has its own mess. That is just how we work.
I’m looking forward to Monday’s blog. Have a good weekend.
It’s looking good! I am a little surprised you didn’t lower the overall height a bit to see more window and feel more spacious in the room (just thinking what I would do if I made myself custom cabinetry being 5’2″) but you are making sense with your drawer maximization. It’s
When you get to your kitchen renovation, maybe there will be an island or an isolated counter run to make 32-34″ high? I found that to be the most comfortable chopping height surface for myself.