C.O.P. – Organizing Under The Kitchen Sink
I’ve still wasn’t feeling great yesterday, so I only tackled a small job, but it was a Cleaning, Organizing, Purging (C.O.P.) project that felt like a huge victory when I was finished! Under the kitchen sink organizing always feels a bit daunting to me because that space just becomes an abyss where things get pushed to the back and forgotten. I had no organizational system in place for my under sink cabinet, so it became an “open and toss” situation. As long as I tossed things in and they landed somewhere in that dish rack on the right, I considered it a victory. 😀 But obviously, this solution left a lot to be desired…
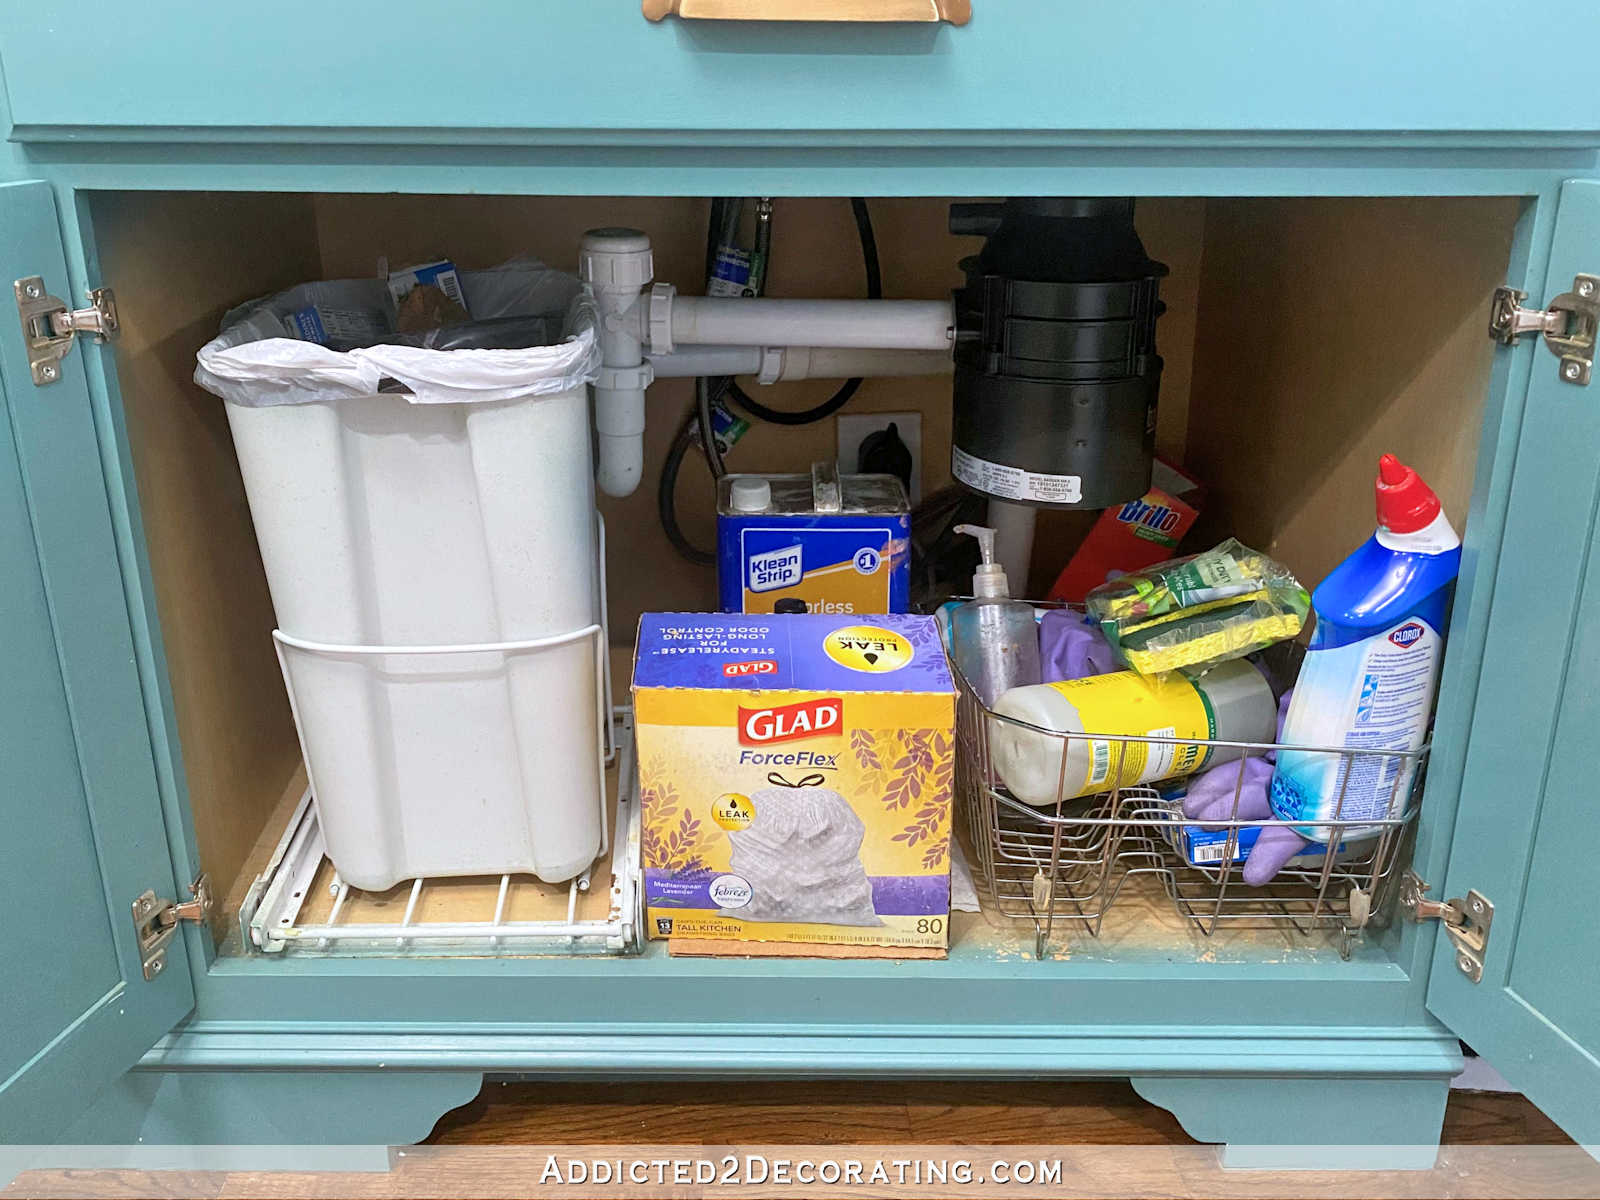
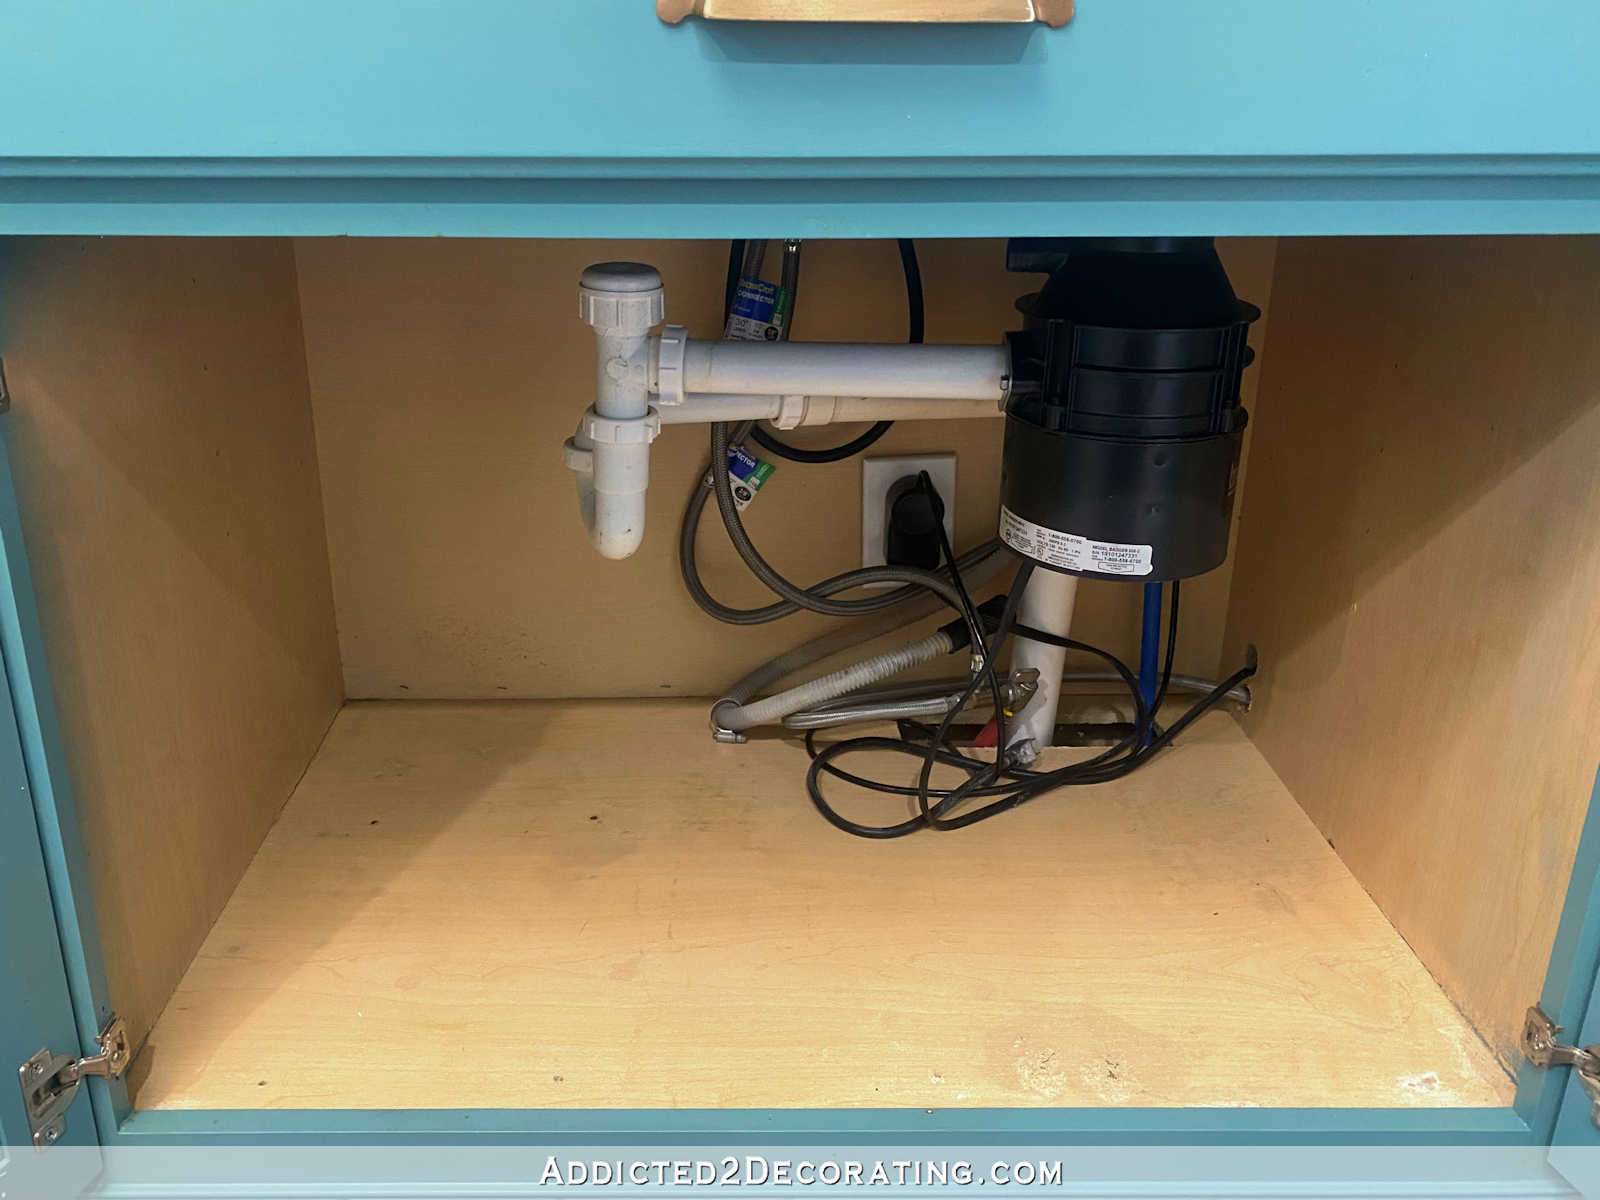
Obviously, I had to start by clearing out everything from the cabinet, and I uncovered a mess of wires and hoses at the back. Most of those go to the dishwasher, which is still going to be removed at some point, so I just kind of wrangled them and stuffed them down into that cutout so all of that took up much less space.

And then I also removed my Rev-A-Shelf trash can pull-out. I didn’t install this, and it has driven me crazy ever since it was installed because it sits askew in the cabinets. It has driven me crazy, but not enough to actually do something about it. But this was my chance to right this egregious wrong. 😀
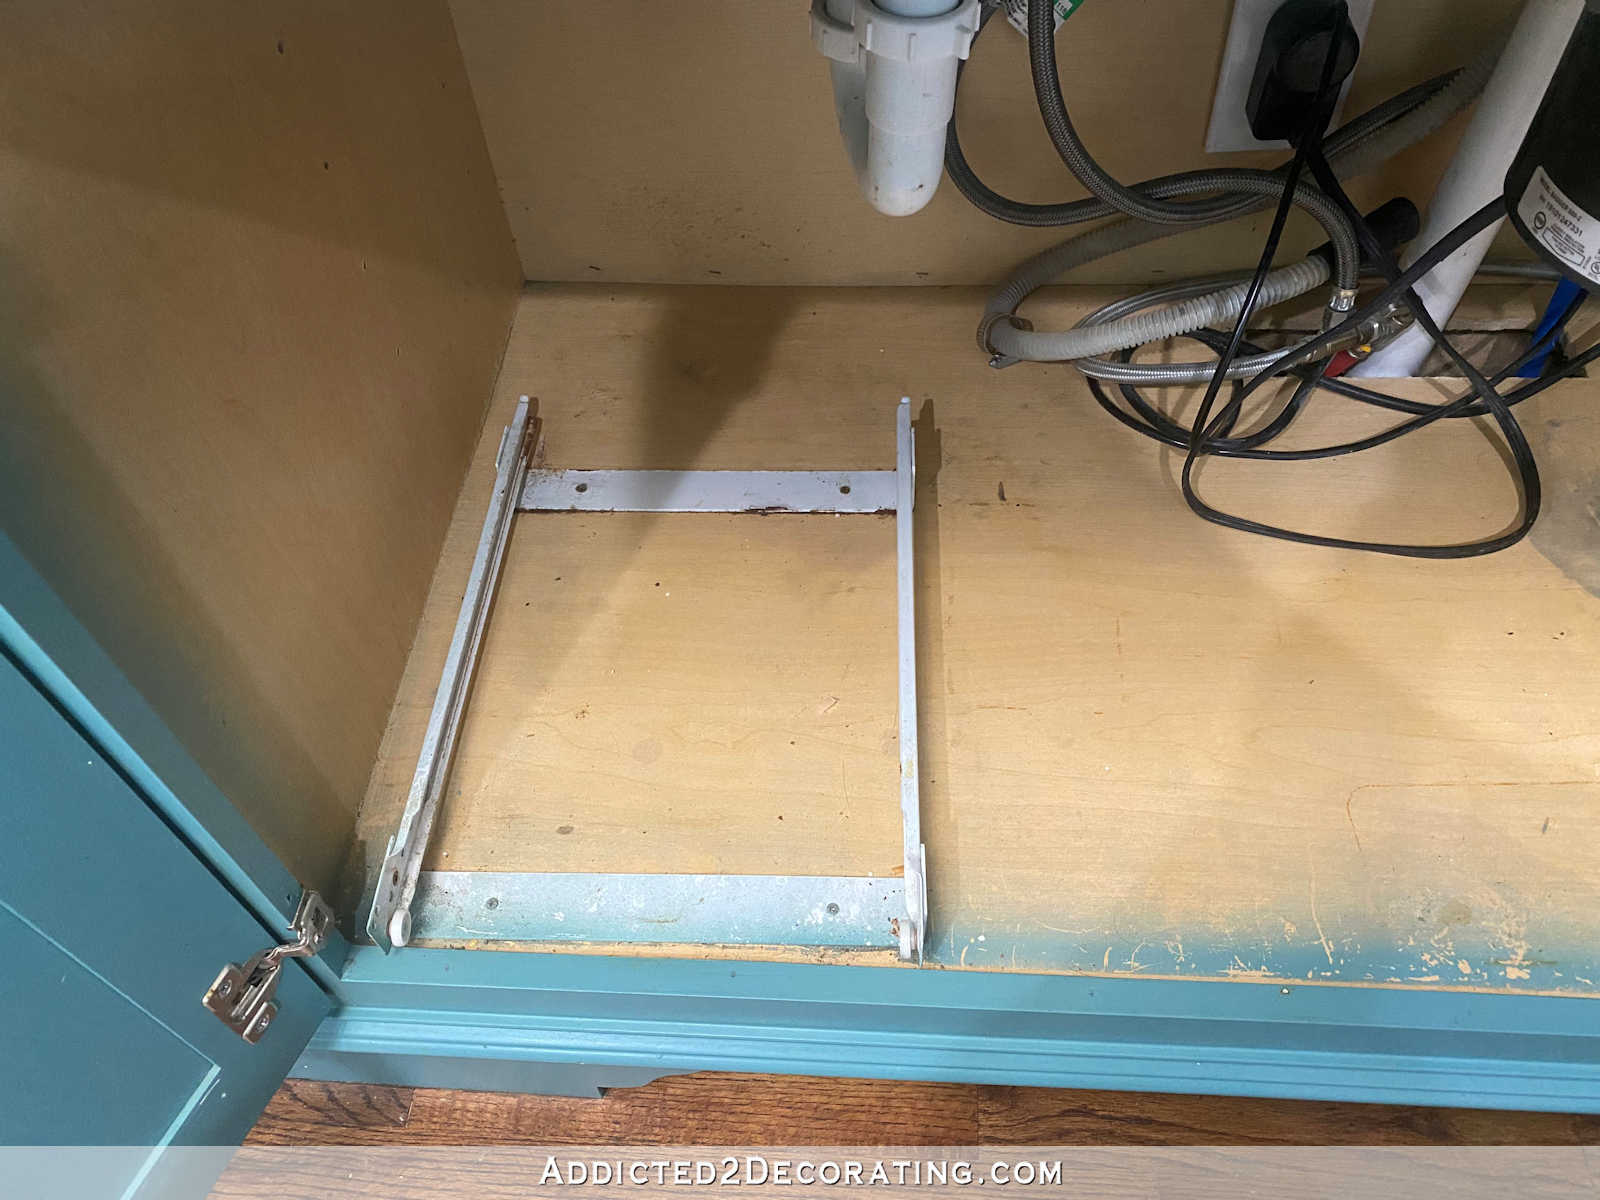
The cabinet also still had some overspray from the last time I painted my cabinets in the summer of 2017, so I took the opportunity to scrub that off as well. And since the interiors of these cabinets are laminate, it actually came off very easily with the scrubby side of a sponge and warm soapy water. Here it is all cleaned up, but before I wrangled those cords and hoses.
After looking through many options on Amazon for under kitchen sink organization, and taking measurements under my cabinets, I finally decided on this two-tier slide out organizer.
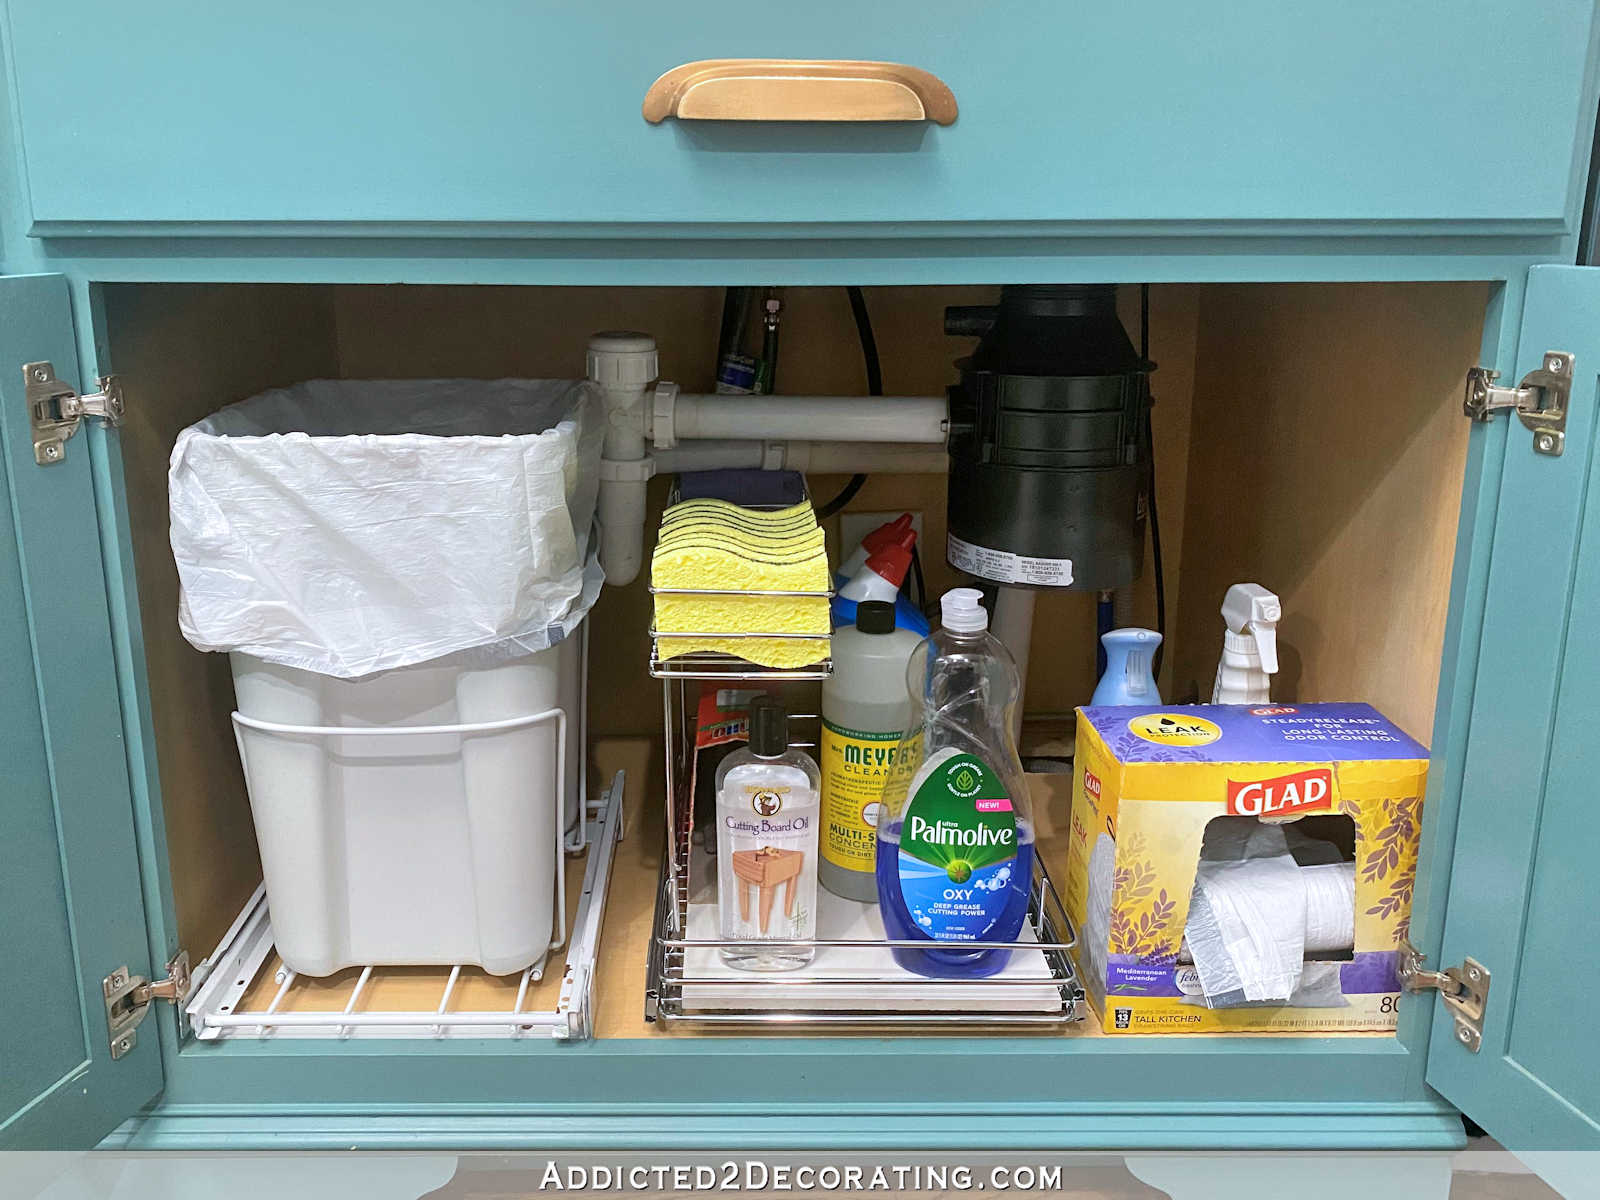
I had hoped that this under sink organizer could be installed all the way to the right so that the narrow top tier was to the right of the garbage disposal. I measured before I bought it, and I knew that it would be VERY close. And sure enough, the metal top tier was about 1/8″ too wide to fit into that area to the right. I was disappointed, but I was also prepared for that possibility.

So I had to put it in the middle. It’s not ideal, but it’s also not horrible. That top tier is the perfect space for my sponges (since I buy the large value pack from Target and always have an excess) and the sink stoppers. And on the bottom, I have all of the things I like to have at hand — cleaners, scrubby pads, dishwashing liquid, and cutting board oil.
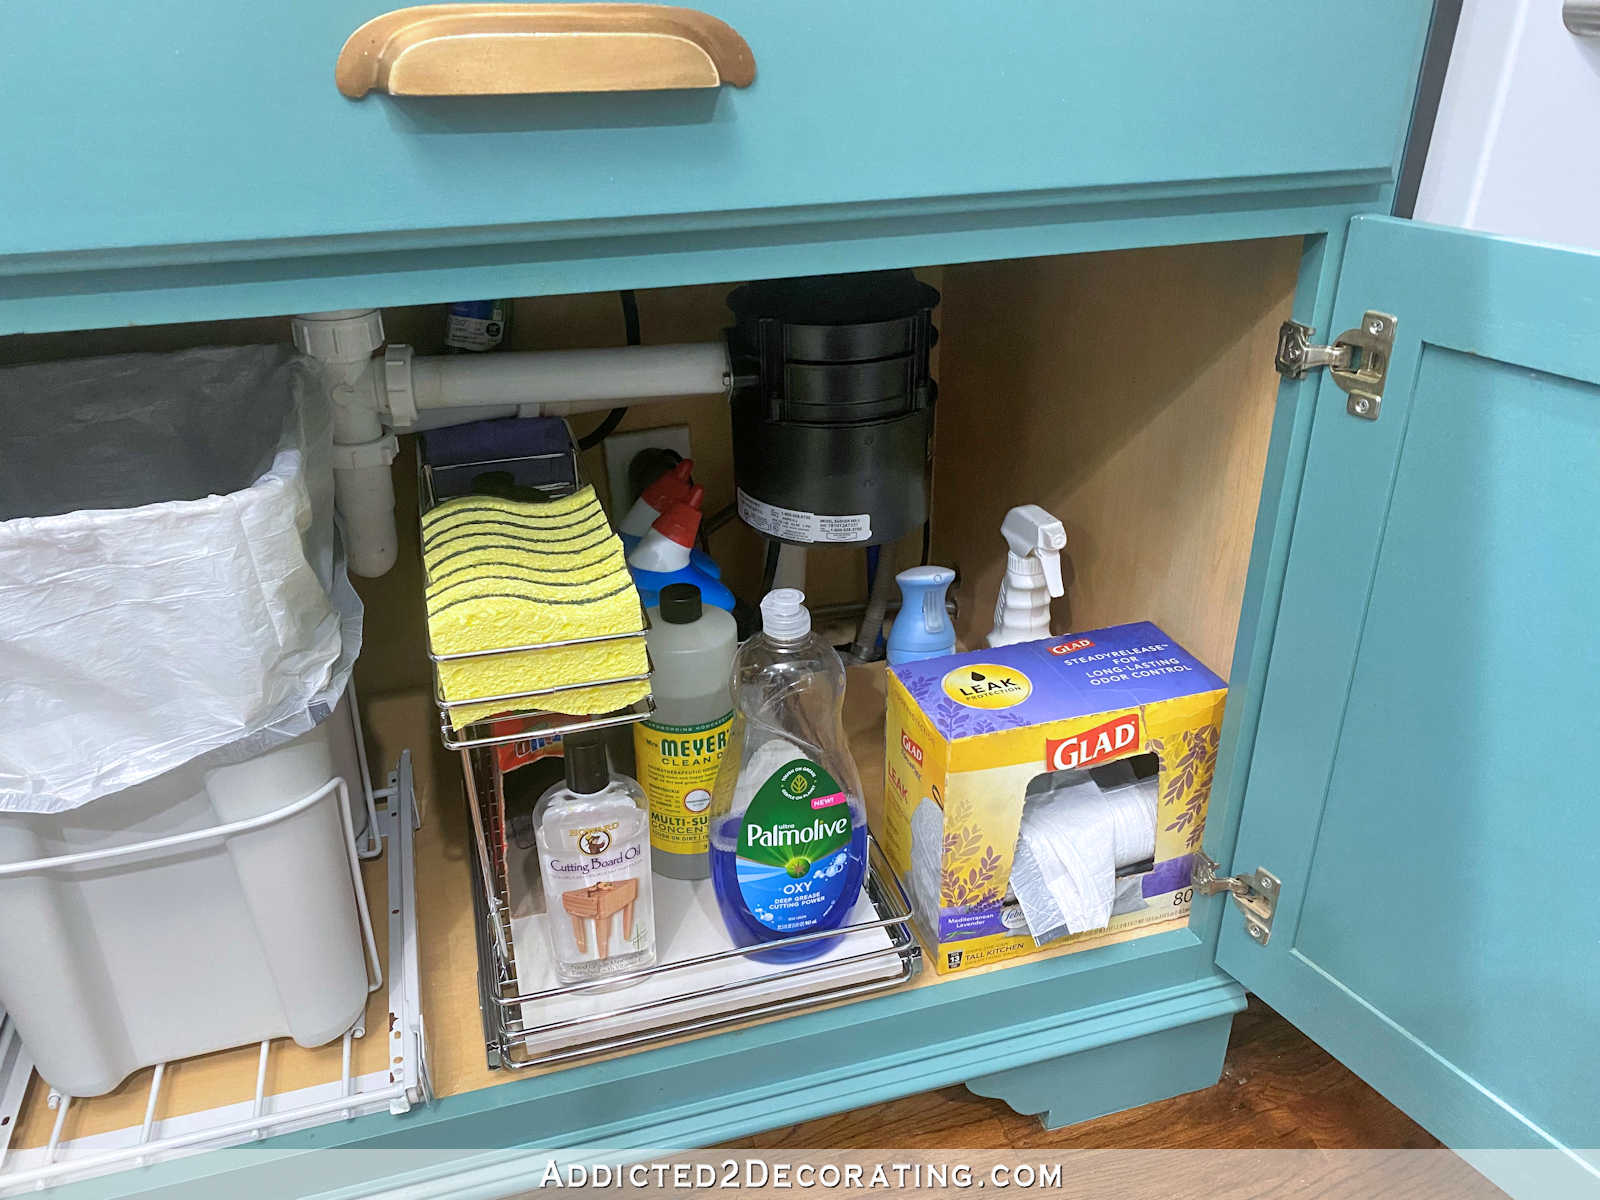
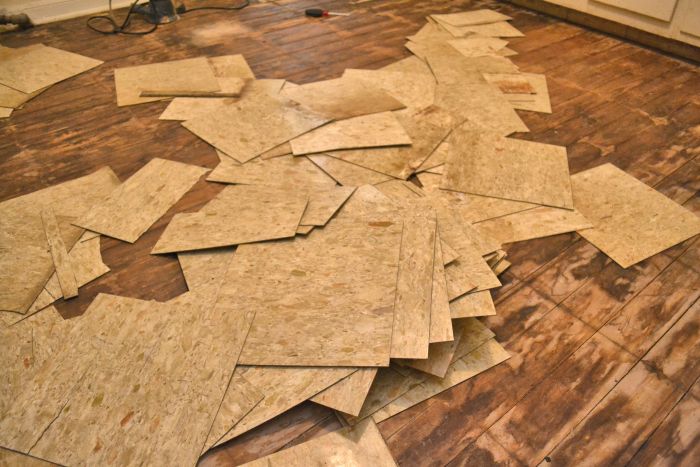
I found that the wire shelf didn’t give the bottles enough stability, so when I’d pull the shelf out or push it in, some of them would fall over every single time. So the shelf really needs a solid bottom. I solved this problem by cutting a leftover floor tile from the bathroom to fit right in the bottom of that lower shelf.

That turned out to be the perfect solution to give the bottles enough stability to stay upright when the shelf is pulled out and pushed in.
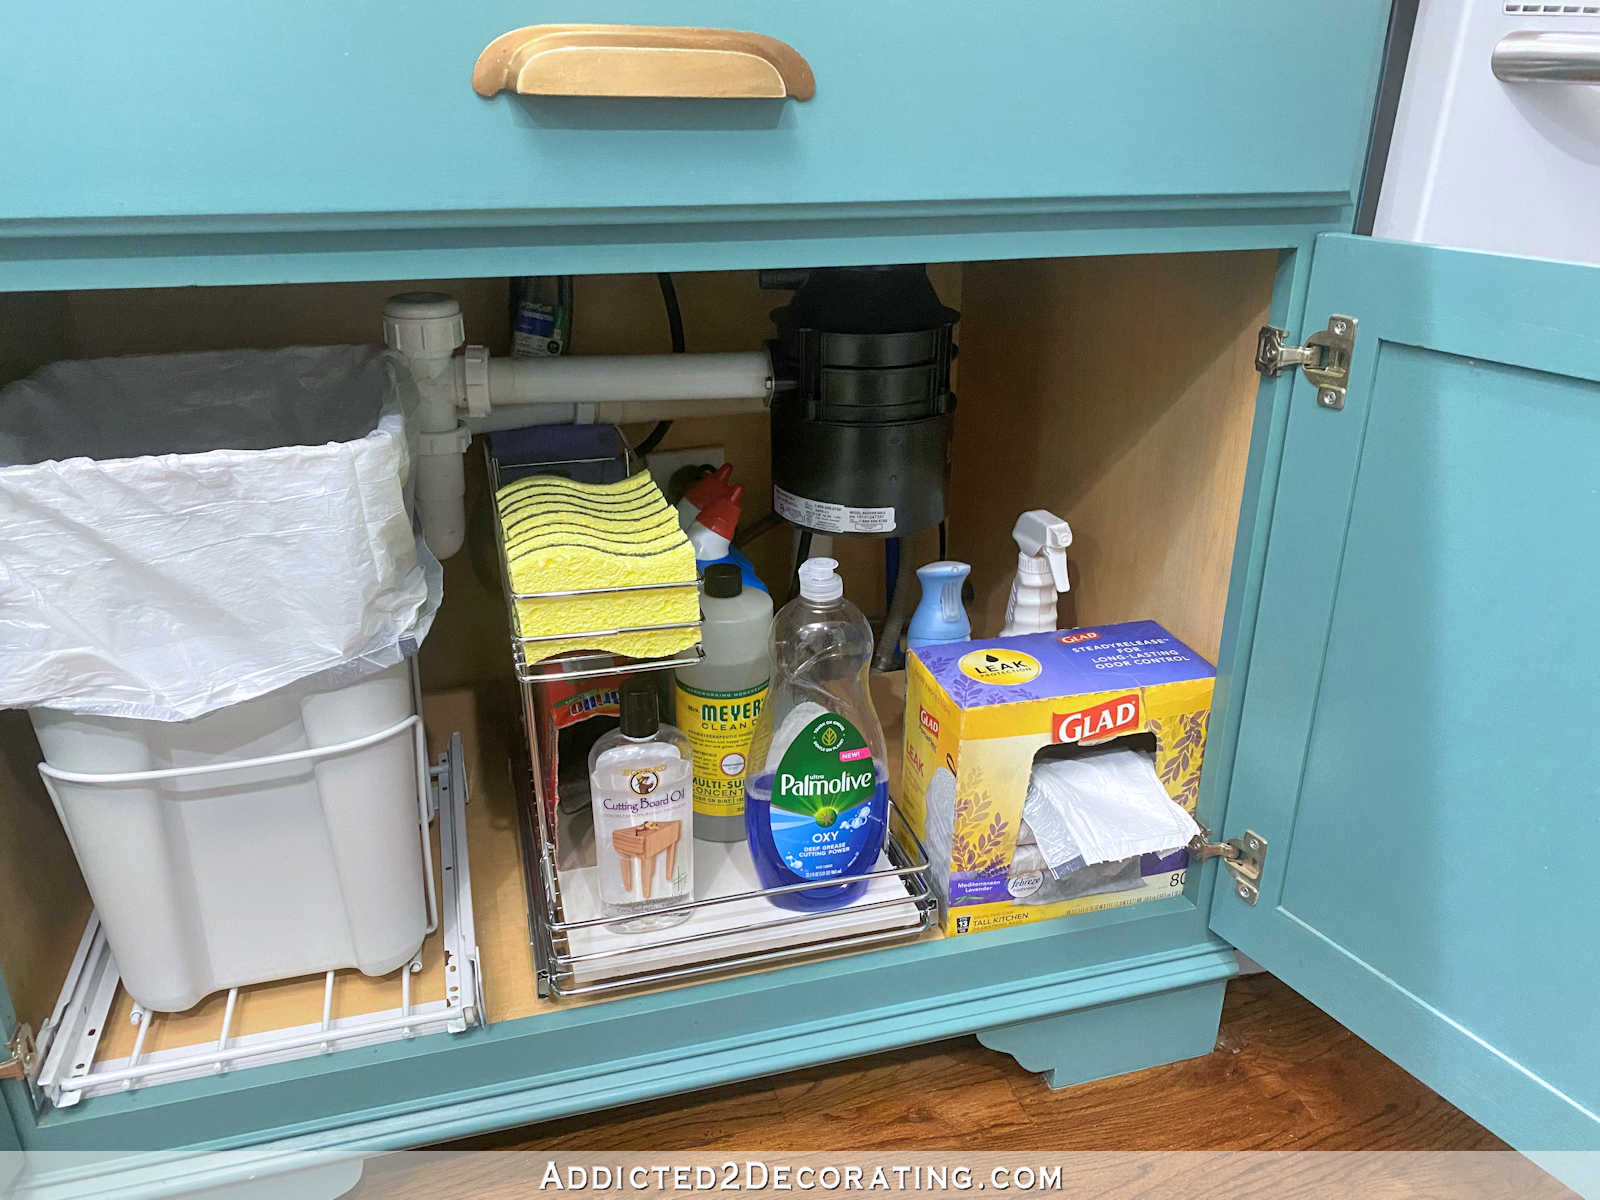
As far as the shelf being installed in the middle instead of all the way to the right, I don’t foresee that being a big headache. The main thing that I need access to several times a day is the dishwashing liquid, and it’s easily accessible just by opening the right door.

On the occasion that I need anything else on the shelf, it’s really not a big deal to open both cabinet doors for access.
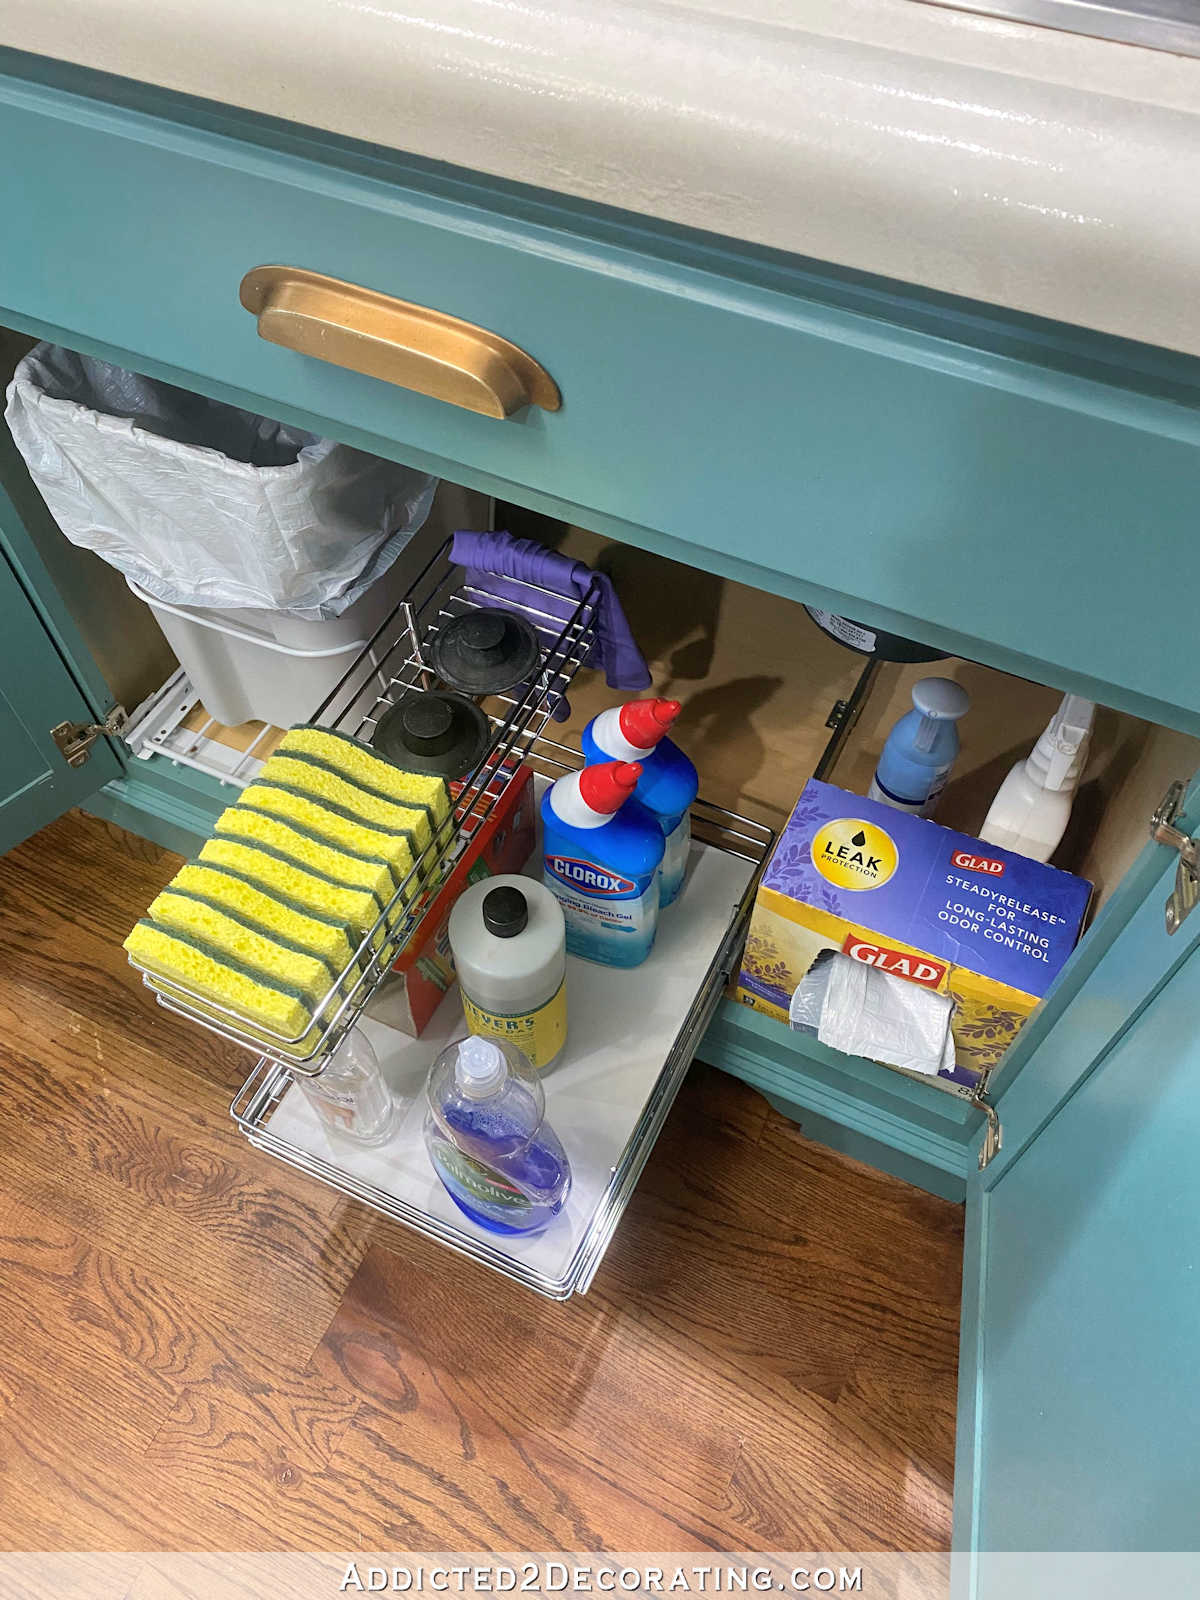
Having that shelf in the center gave me just enough room on the right to have my box of trash bags, which I do need easy access to. And right behind those sit my Febreze and Angry Orange, which I don’t really use often (so no need to put them on the slide out shelf), but I do like to have them accessible, so they live under the kitchen sink.

So this under kitchen sink organizing feels like a big C.O.P. victory for me. I’ve been in need of organization in this cabinet for years now, and it’s finally done.
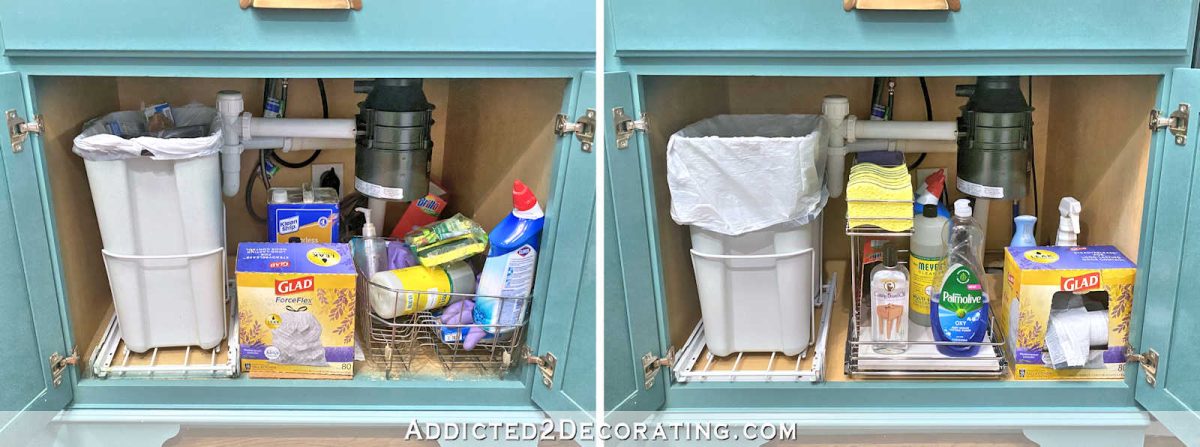
And as I’ve said before, I’m the type of person who will use the “open and shove” (or in this case, “open and toss”) method of storage until I have a system in place. But once I have a system in place, I’m generally pretty good at keeping with it. So now that I have this cabinet organized and a system in place, I don’t think I’ll fall back into old habits. This seems pretty easy to maintain.
I was also supposed to have my other cabinets finished by yesterday (that’s the goal I had set for myself), but then I came down with a cold on Sunday, and that kind of threw a wrench into my plans. I have made some progress on them, but I still need a few more days to finish. One cabinet is all I could manage to finish with this cold, but the rest are coming up in the next few days.
I know a few of you were going to focus on a C.O.P. project with me over the last couple of weeks. How are those coming along for you? Did you get finished? Did you make a good dent in your project?
Addicted 2 Decorating is where I share my DIY and decorating journey as I remodel and decorate the 1948 fixer upper that my husband, Matt, and I bought in 2013. Matt has M.S. and is unable to do physical work, so I do the majority of the work on the house by myself. You can learn more about me here.



Nice organizer. From Target?
Kristi has a link to Amazon for the organizer
When I redesigned my kitchen, I put drawers, no doors under both my sinks. The first drawer under the false front is very short, but works great for dishwasher tablets and other dish washing items. I love it, nothing gets lost because it’s so short. The bottom drawer is huge and then divided up into sections with drawer dividers and holds trash bags, scrap towels and other Misc. I put extended slides on the drawer so it pulls completely out. The one drawback, when plumbing issues occur, I have to be the plumber because the space between the drawers are too narrow for my husband. It’s always interesting to have him directing what I’m doing. 😁
I love your sponge rack! I do have a large pull-out basket for my cleaning products under my sink, but really need to do another purge. And probably add another pull-out basket on the opposite side. I don’t need to store my trash can under the sink, so an additional basket would be an ideal way to better organize that area of my kitchen. Thanks for the pictures.
How did you wrangle the cords and hoses? That’s an issue under my sink….
Kristi, I am impressed by everything you do, but using a bath tile for the bottom of the pull out tray might be my favorite thing you’ve done! It will lend stability and be very easy to clean if anything should leak. I actually like the organizer in the middle—I think it looks tidier than having it on the right and having miscellaneous things in the middle. Well done!
The bottom of the cabinet had a rectangle cut out for the drain pipe and water hoses to come through from below the house. The cut out is wider than the space needed for the pipe/hoses, so I just stuffed the extra cords and dishwasher drain hose down into that cut out space.
If I didn’t have that, and I needed to wrangle them, I’d just wrap the extra cord lengths around my hand, and then zip tie the cords in place so that they were up and out of the way. I wouldn’t recommend that with the dishwasher drain hose, but you could probably find a way to tack it to the sides of the cabinet (inside, of course) so that it’s up and out of the way rather than taking up needed “floor” space inside the cabinet.
We store our trash bags in the bottom of our trash cans. So easy to take the trash out and a new bag is right there. If the role is to large just tear 10 to 15 bags off and throw them in the bottom of your trash can. Feel better soon Kristy.
That’s brilliant! I had never even thought of that!
We have made a dent in the kiddo guest bath. It was less COP, and more hanging, and installing (to purge tools). There was a rough sort of the supplies that had accumulated. A drawer that holds bathroom stuff for was made then. We hung the towel bar, hooks, mirror and some wall storage bins. This bath looks very open and empty, but it was done purposely for a kid. I still got about 60% of the stuff leftover from the first rough sort that can get put away now since I installed some stuff. I’m grabbing something and putting it away when I get a spare hand. I do need to do some finishing with caulk & trim install. Additionally finish repairing a few spots on the tub finish too. Not sure how much more COP until I see how everything gets explored by the toddler and what I need to not store in kiddo reach.
That sounds like great progress!
Looks tidy! Here we have a pump in the countertop that has a bottle attached underneath that holds the dishwashing liquid. It’s important to get the good one; ours has lasted for years. I am trying to figure out how to build one of those under cabinet shelves that has slender shelves you can assemble to fit around plumbing. They really use space well, but are not sturdy. (Expandable 2 tier shelf organizer rack)
Looks great!
I *SO* want to call your process C.O.P.D. – Cleaning, Organizing, Purging, Donating 😂
I love it! 😀
Sorry, I have to ask….why toilet bowel cleaner under the kitchen sink?
It’s a gel bleach product, and it’s what I use to get stains out of my concrete countertop. If I have a stain, I place a piece of paper towel over it, completely saturate it with the gel bleach, and leave it overnight. In the morning, the stain is gone.
https://www.addicted2decorating.com/three-past-projects-revisited-how-have-they-held-up-over-time-concrete-kitchen-countertops-wood-bathroom-countertop-wood-bathtub-skirt.html
Would this work for rust stains on a concrete porch?
For outdoor rust stains, I would try something like TSP. I think that’s what it’s called. And I think it’s specifically for many types of stains, including rust.
Great solution!