Walmart Dresser Makeover — From Solid Black To Black And Walnut
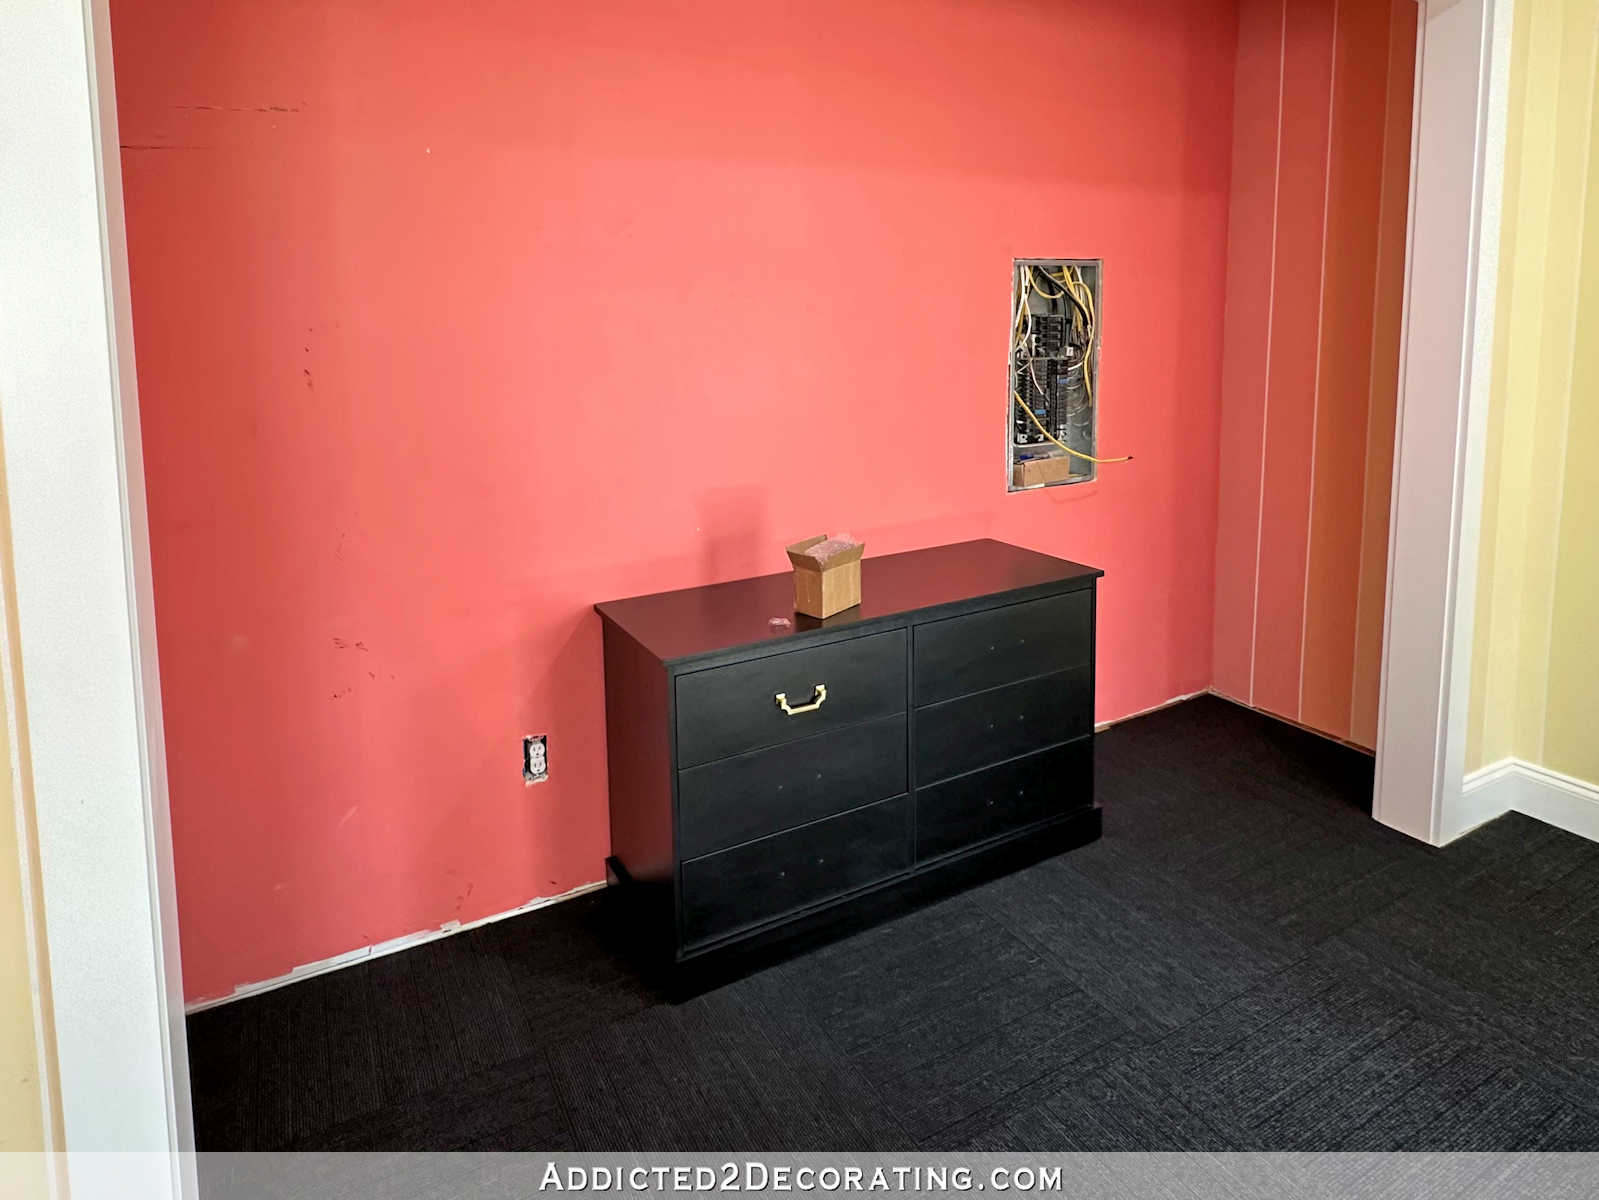
A few weeks ago, I purchased this relatively inexpensive dresser from Walmart to go in the closet area in our home gym. After assembling it and putting it into place in the room, I wasn’t thrilled with how it looked. The black was fine for the room, but it was so pitch black that it just looked like a black hole in the room. Plus, it looked much shorter than I had anticipated.
So I decided to give it a little makeover using things that I had on hand, not including the new drawer pulls. I had one piece of walnut 1″ x 2″ lumber and a rather large piece of walnut veneer left over from the bathroom remodel, and I thought adding some walnut to this dresser would not only make it show up better and give me the opportunity to raise the height, but it would go perfectly with my whole “black and walnut” plan for the accents in the room.
Once I got all of the walnut accents on the dresser, this is how it turned out…

For a “use what you have on hand” makeover, I was pretty proud of how that turned out! And it was pretty quick and easy, too.
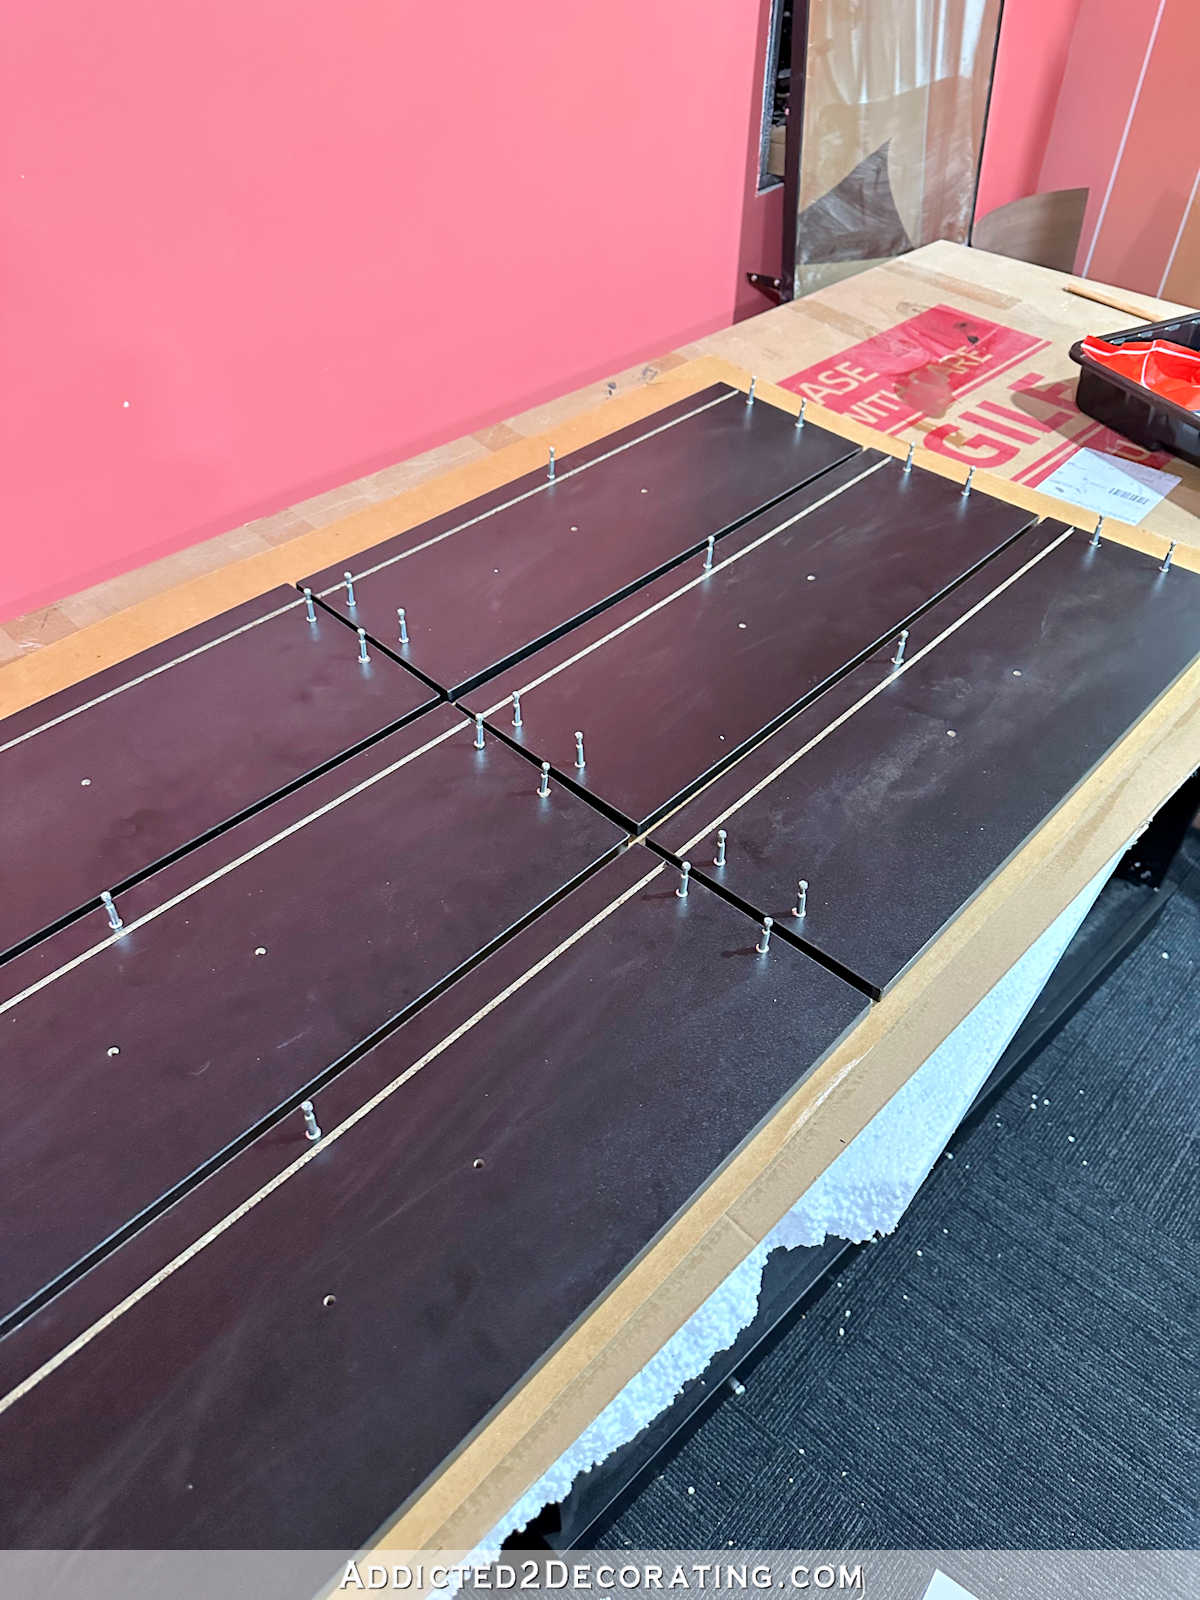
I started by removing the drawer fronts from the drawers. Because of how this dresser is assembled, this was very easy to do without damaging anything.
Then using a 4-inch roller with a 1/4-inch nap roller cover, I put two coats of Weldwood Contact Cement on the drawer fronts, allowing the first coat to dry completely before rolling on the second coat.

I also rolled on two coats of contact cement to the back of the piece of walnut veneer. Once the second coat of contact cement was completely dry on all of the drawers and the back of the veneer, I placed the drawer fronts face down onto the back of the veneer. I placed them in the same arrangement that they are placed into the dresser, leaving about 1/4-inch between them, so that the wood grain would be continuous from one drawer to the next.

Once they were all in place, I cut them apart with a utility knife with a brand new blade on it (very important when working with veneer!), and then carefully trimmed the veneer right to the edges of each drawer front. Then I carefully sanded the edges with 120-grit sandpaper.
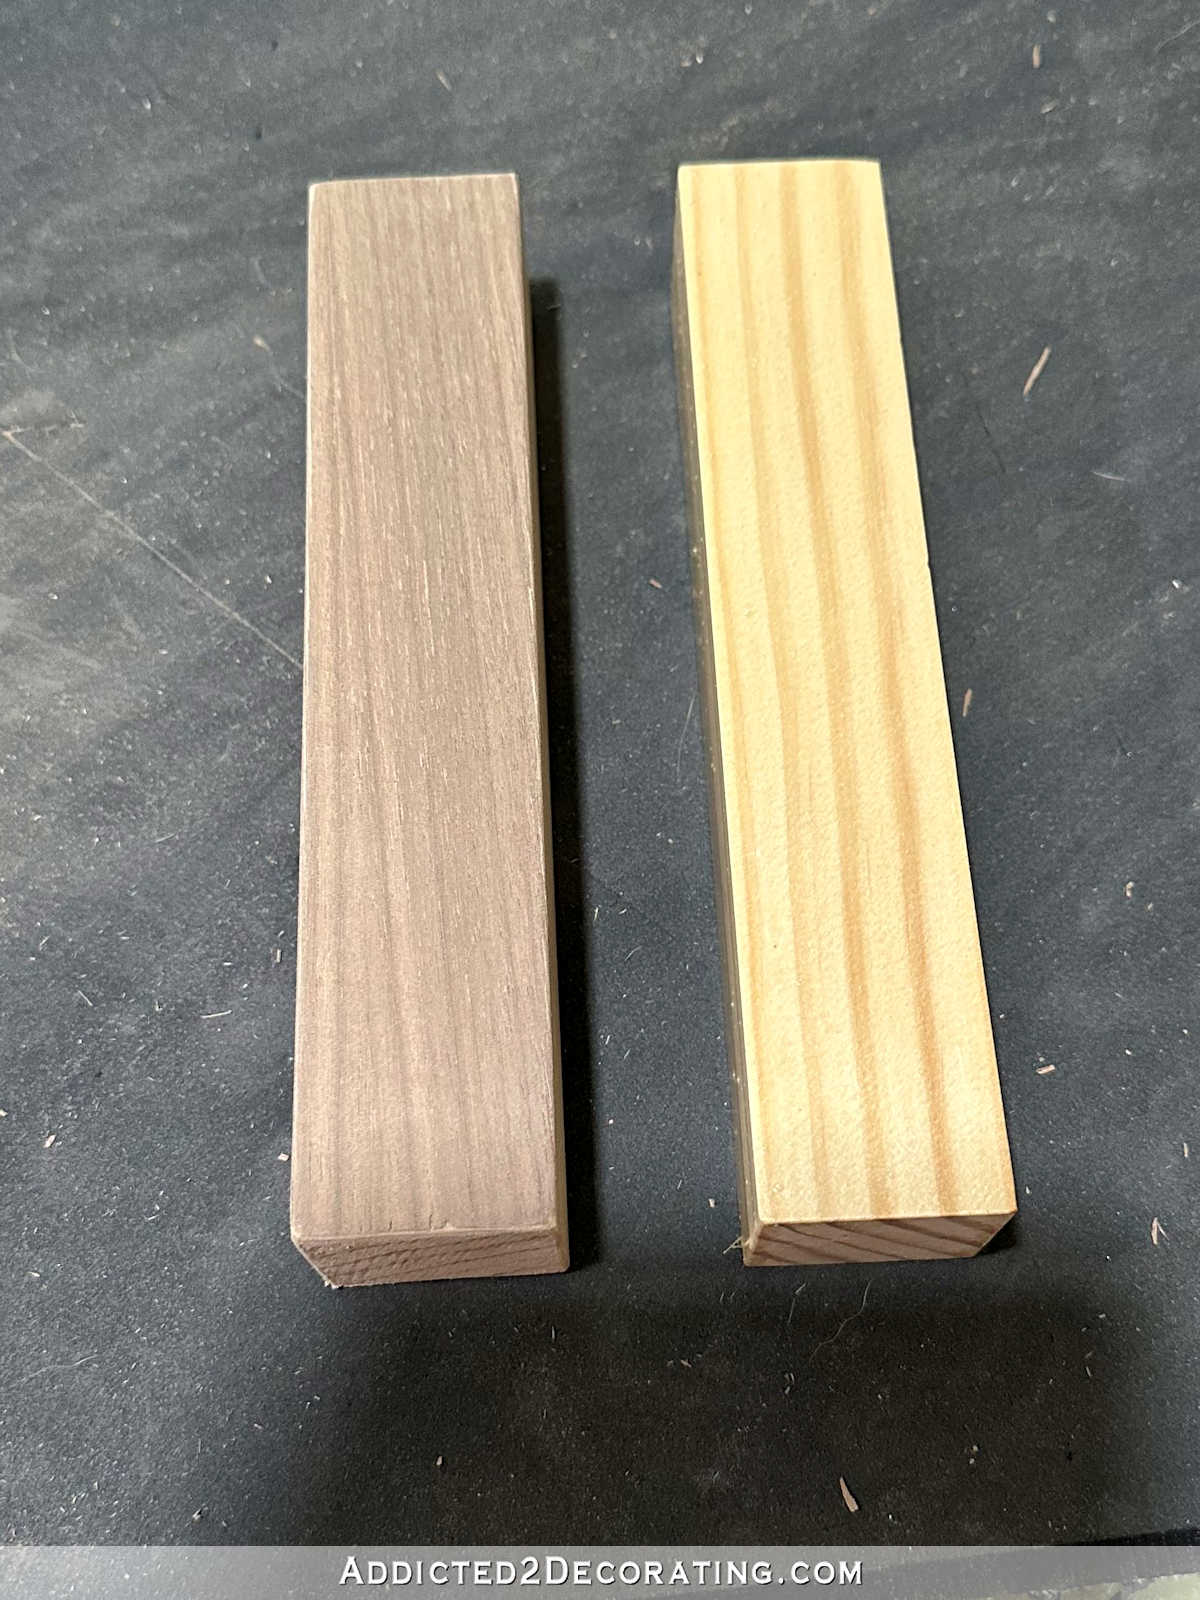
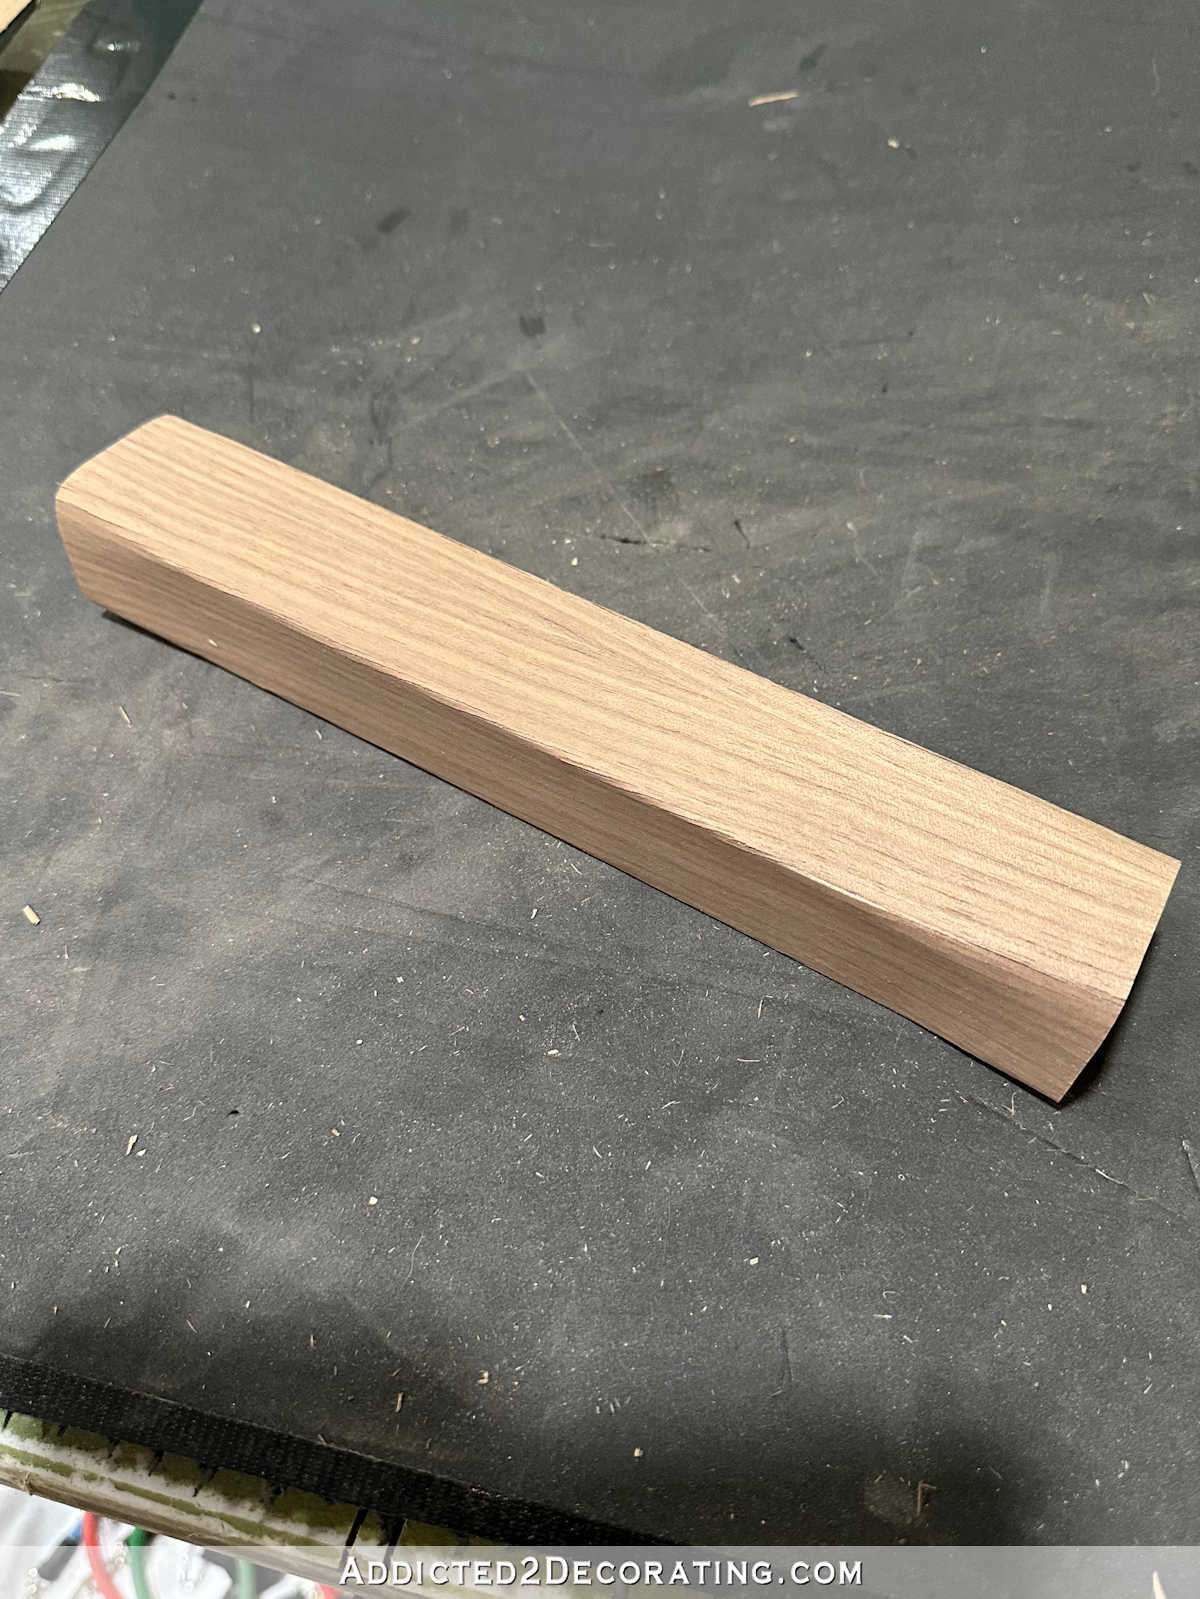
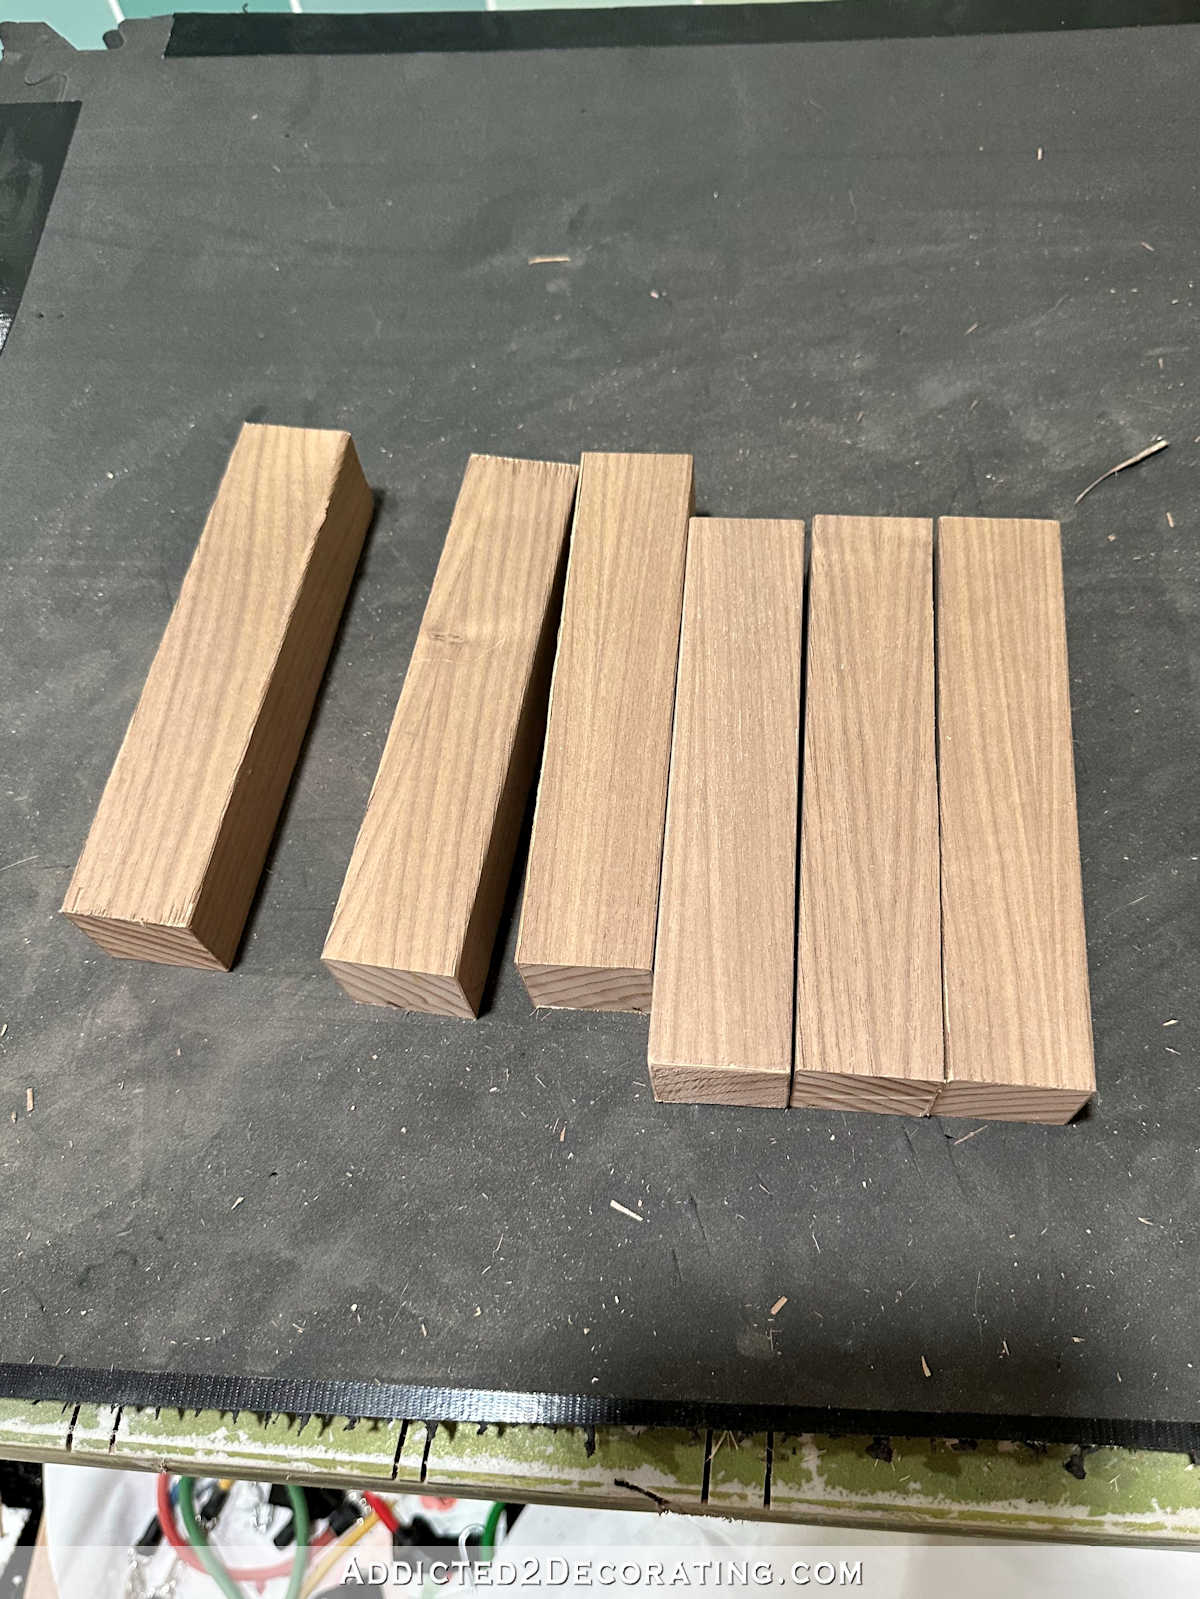
Next, I got to work on the legs. I used pine 2″ x 2″ lumber, and cut them to the length I wanted for the legs. And then I wrapped each piece with walnut veneer. You can see the difference here…
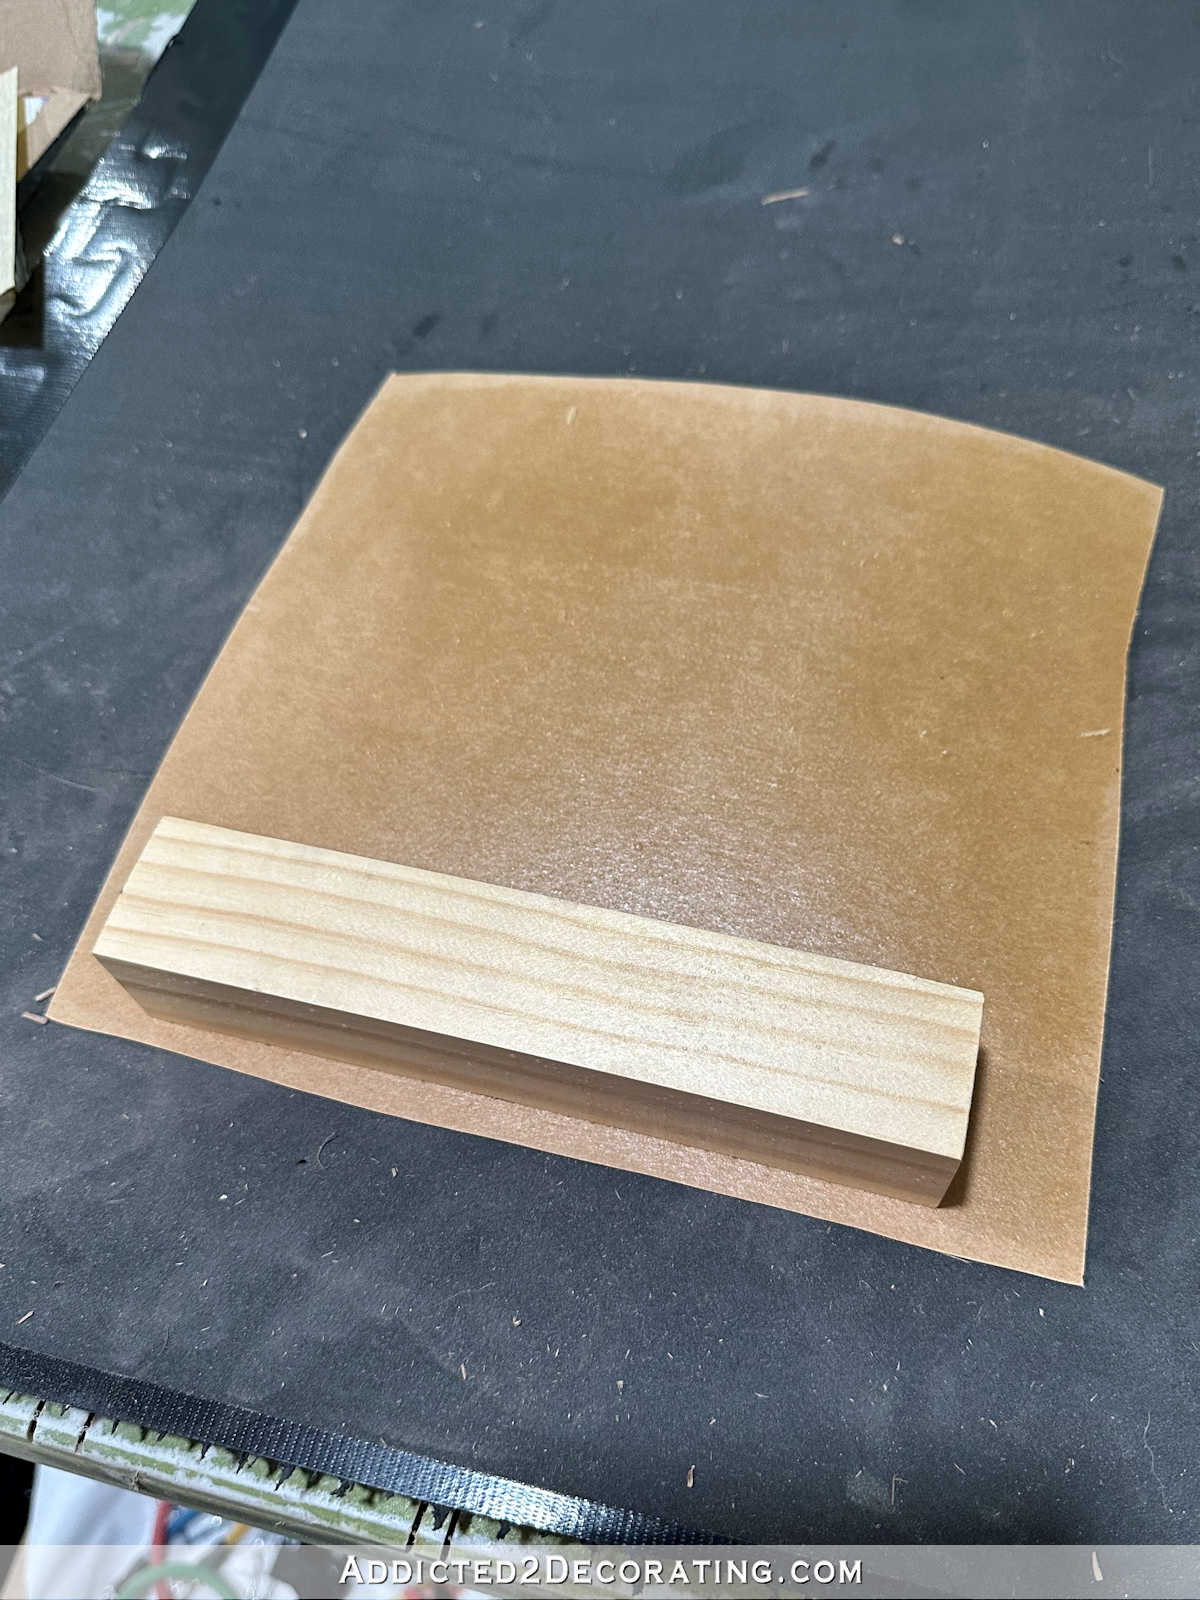
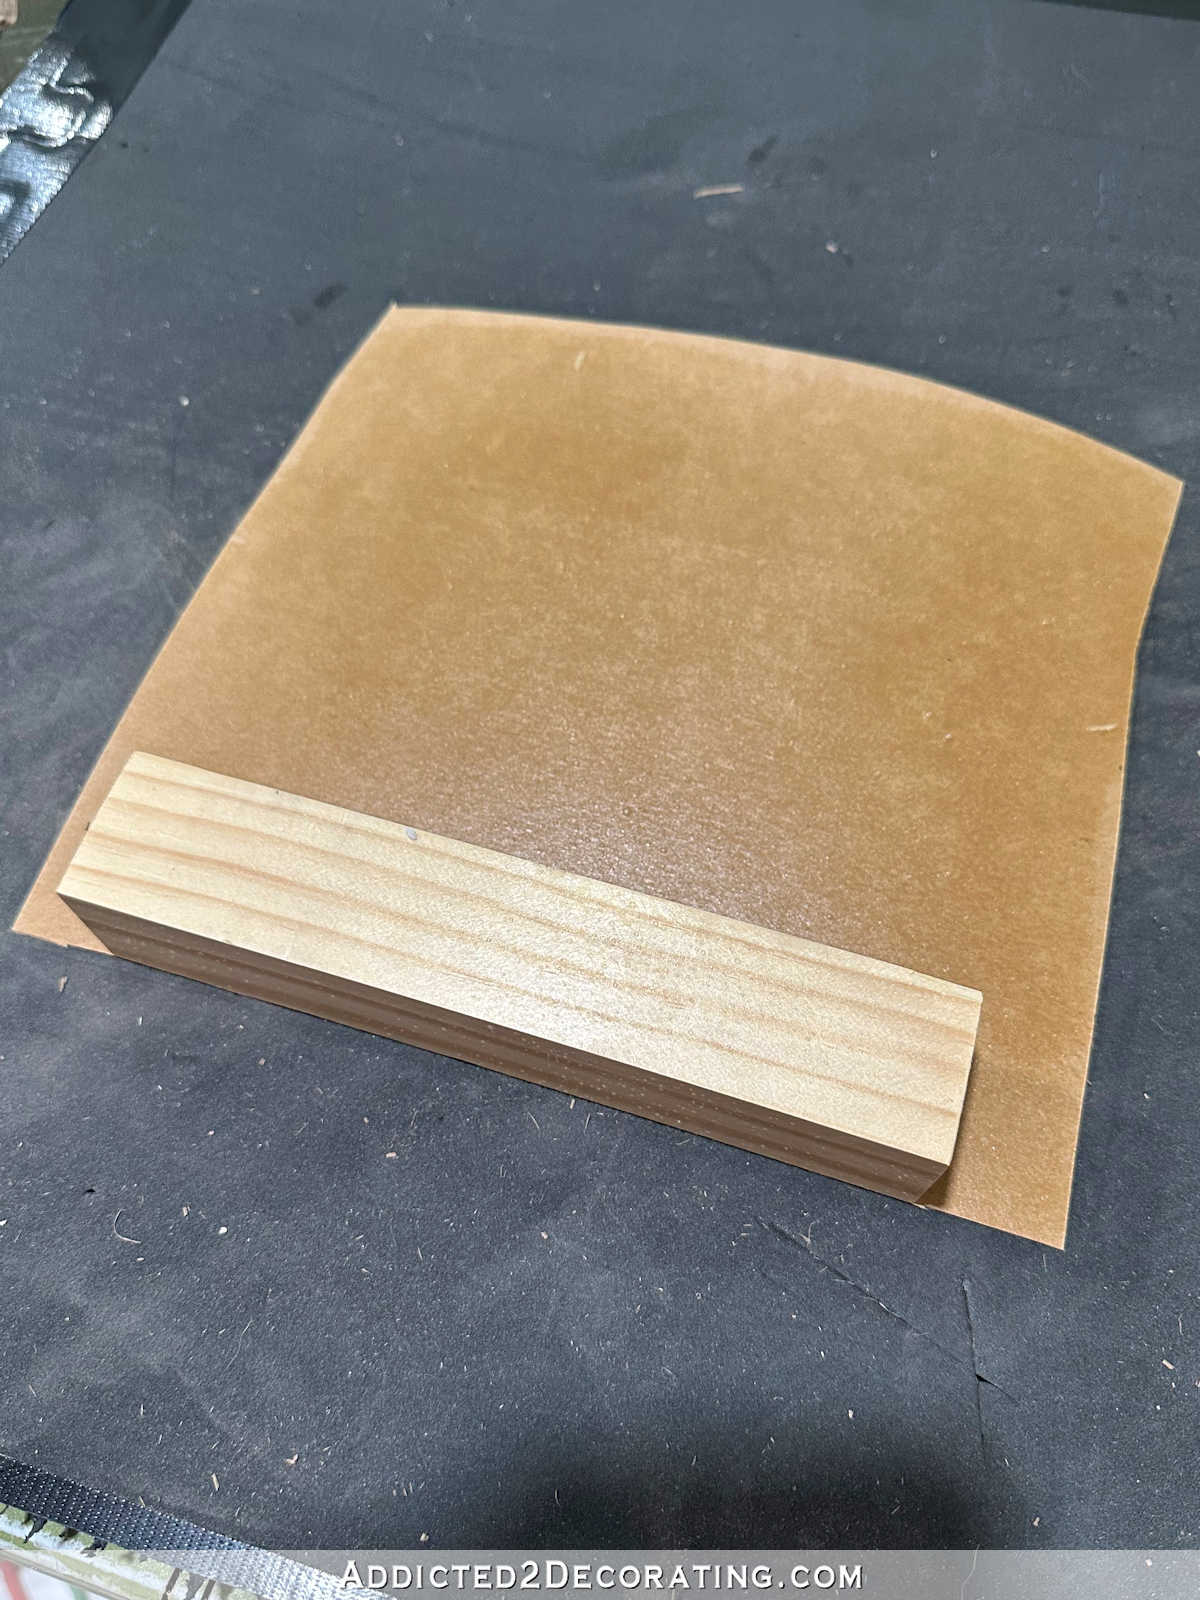
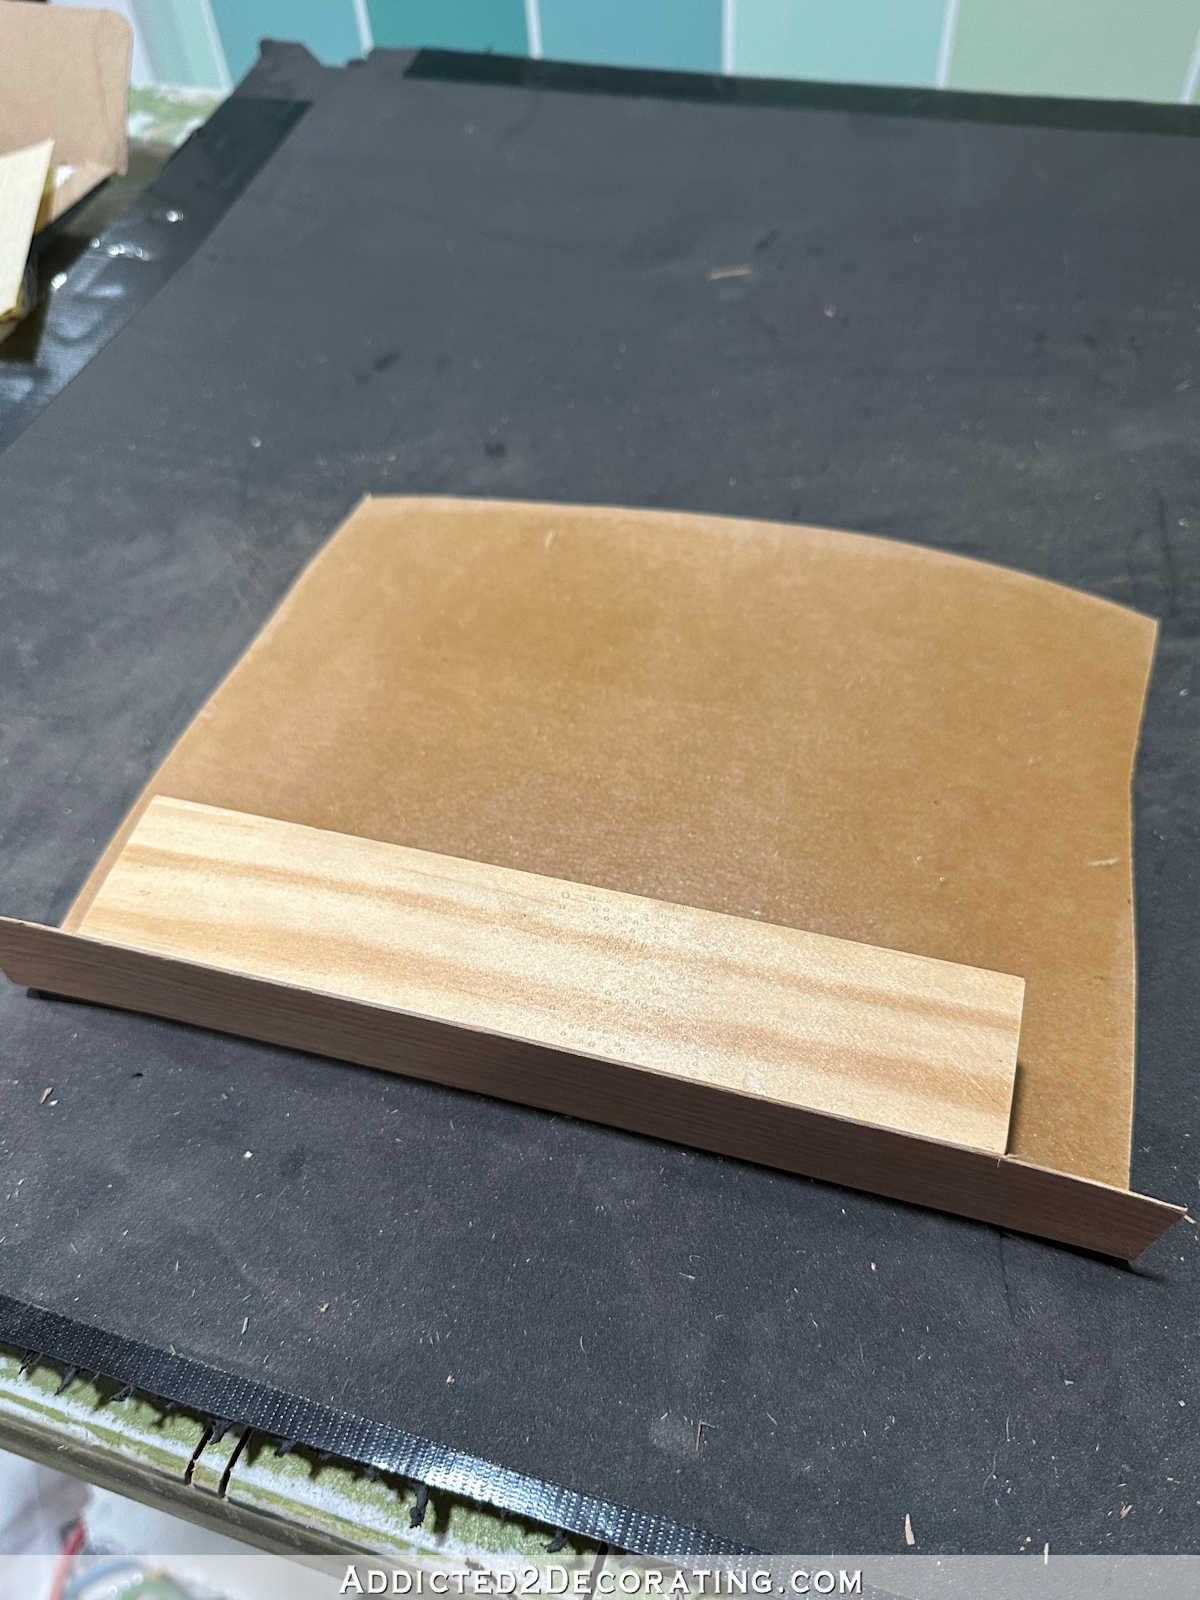
To wrap each piece, I started by rolling two coats of contact cement to all four sides of each leg, as well as to the back of the walnut veneer. Once it was completely dry, I placed the leg onto the veneer at one end and pressed firmly to make sure it was stuck really well.
Then I used my utility knife with the very sharp blade and cut off the little excess strip…
And then I just started rolling the leg onto the veneer, putting a whole lot of pressure on it as I went so that the veneer would fold perfectly around the edges.
I continued that until I had all four sides covered…

…and then I cut off the excess with my utility knife.
I trimmed off the excess on the top and the bottom of each leg using my miter saw…
And then I sanded each leg using 120-grit sandpaper. I sanded all of the edges very carefully to clean up any slight splintering of the veneer that may have happened as I rolled the veneer around those edges.
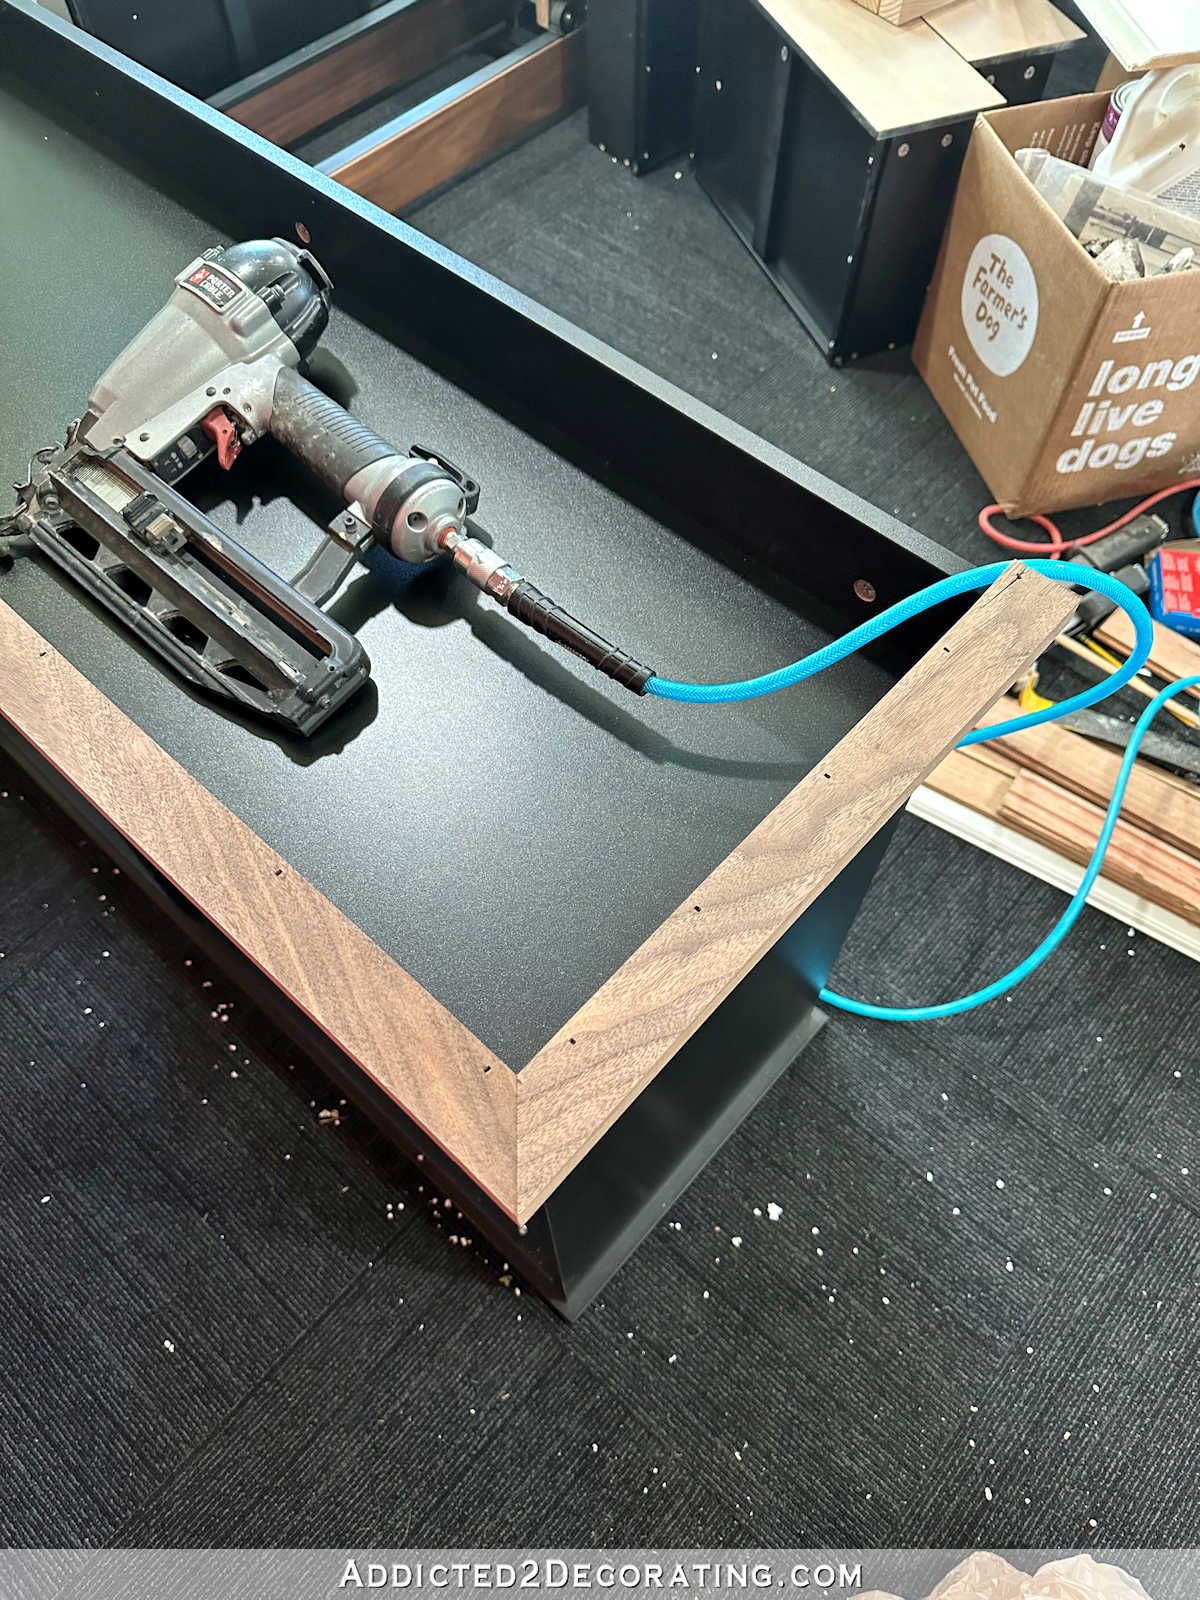
Next, using 1″ x 2″ walnut lumber, I cut and attached a frame around the bottom edge of the dresser. What you see below is me attaching the full width of the 1″ x 2″ pieces. Once that was attached, I decided that it was too wide, so I took them off and used my table saw to rip them down to about a 1-inch width. That looked much better, but I forgot to take a picture of it. But the process of attaching it to the bottom of the dresser was the same as you see here.
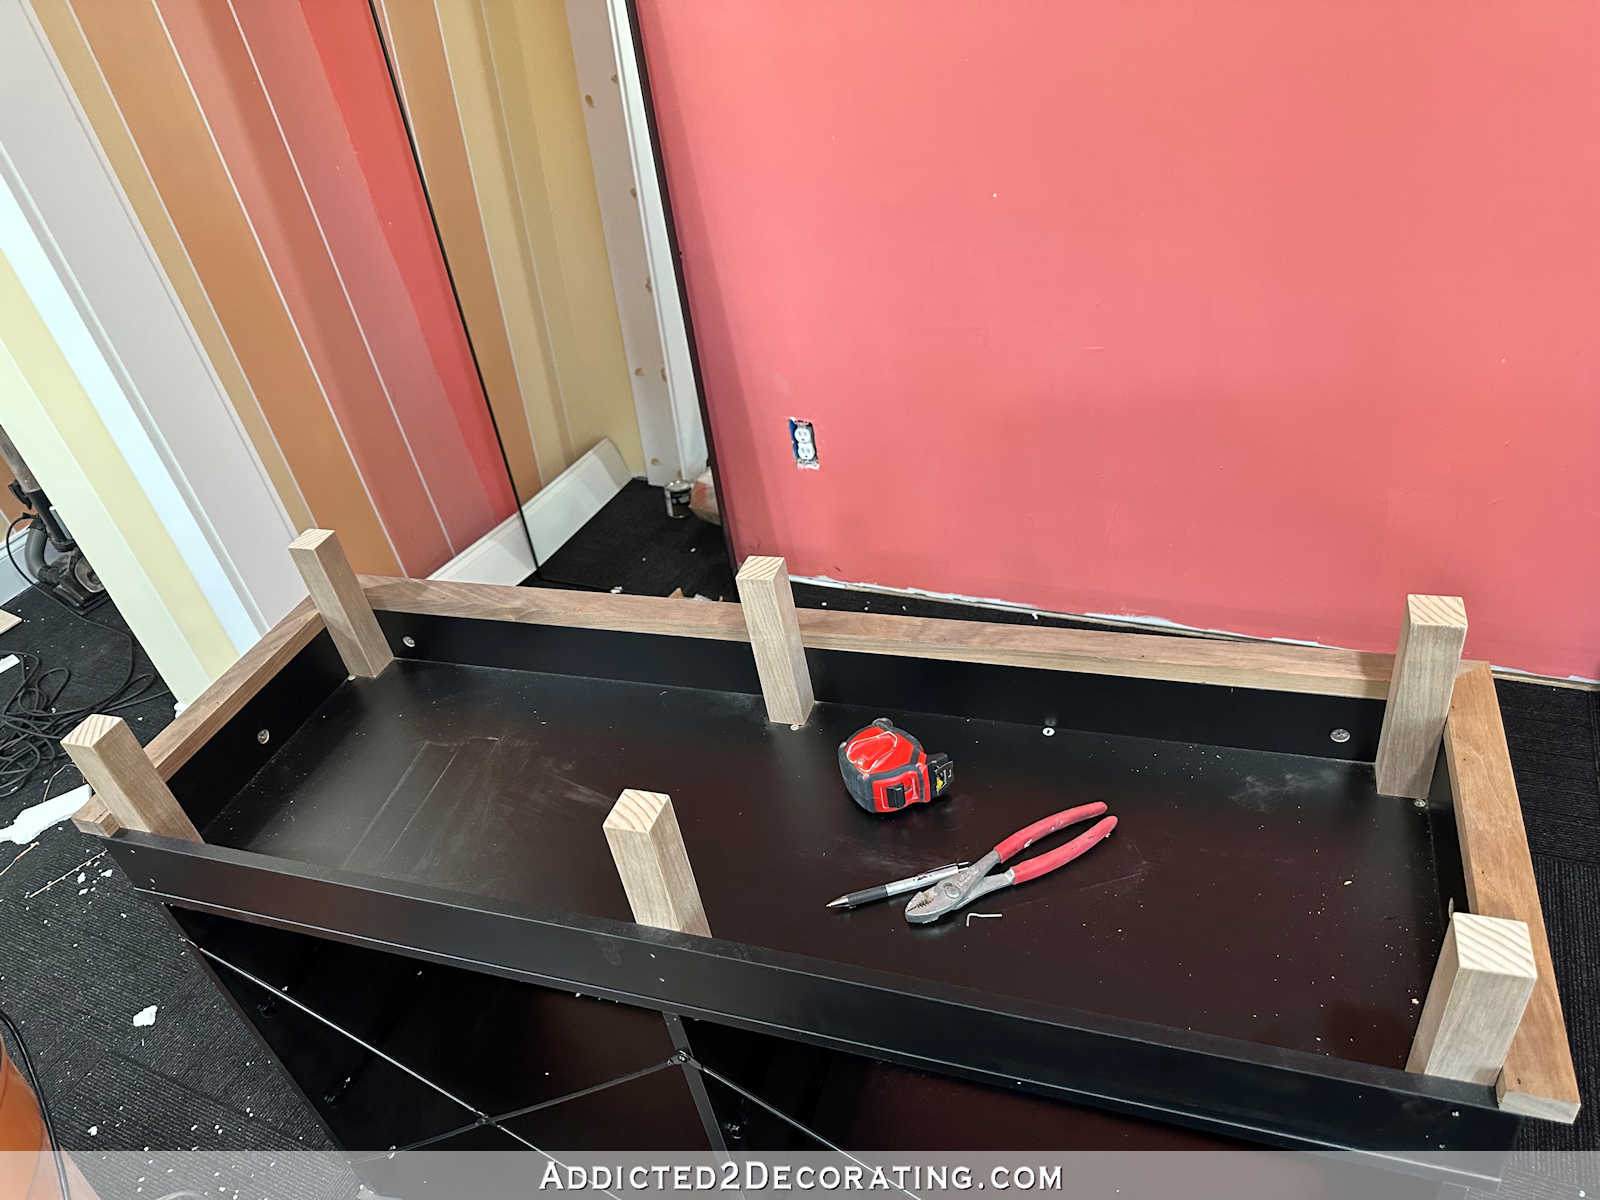
And then I attached the six legs. I just attached them using 1.5-inch 16-gauge nails shot through the outside, through the black pieces, and into the legs. And then I just used a black Sharpie to hide the nail holes that showed on the black pieces.
And this is how it turned out once I used Rubio Monocoat Oil Plus 2C on all of the walnut, and added new drawer pulls.
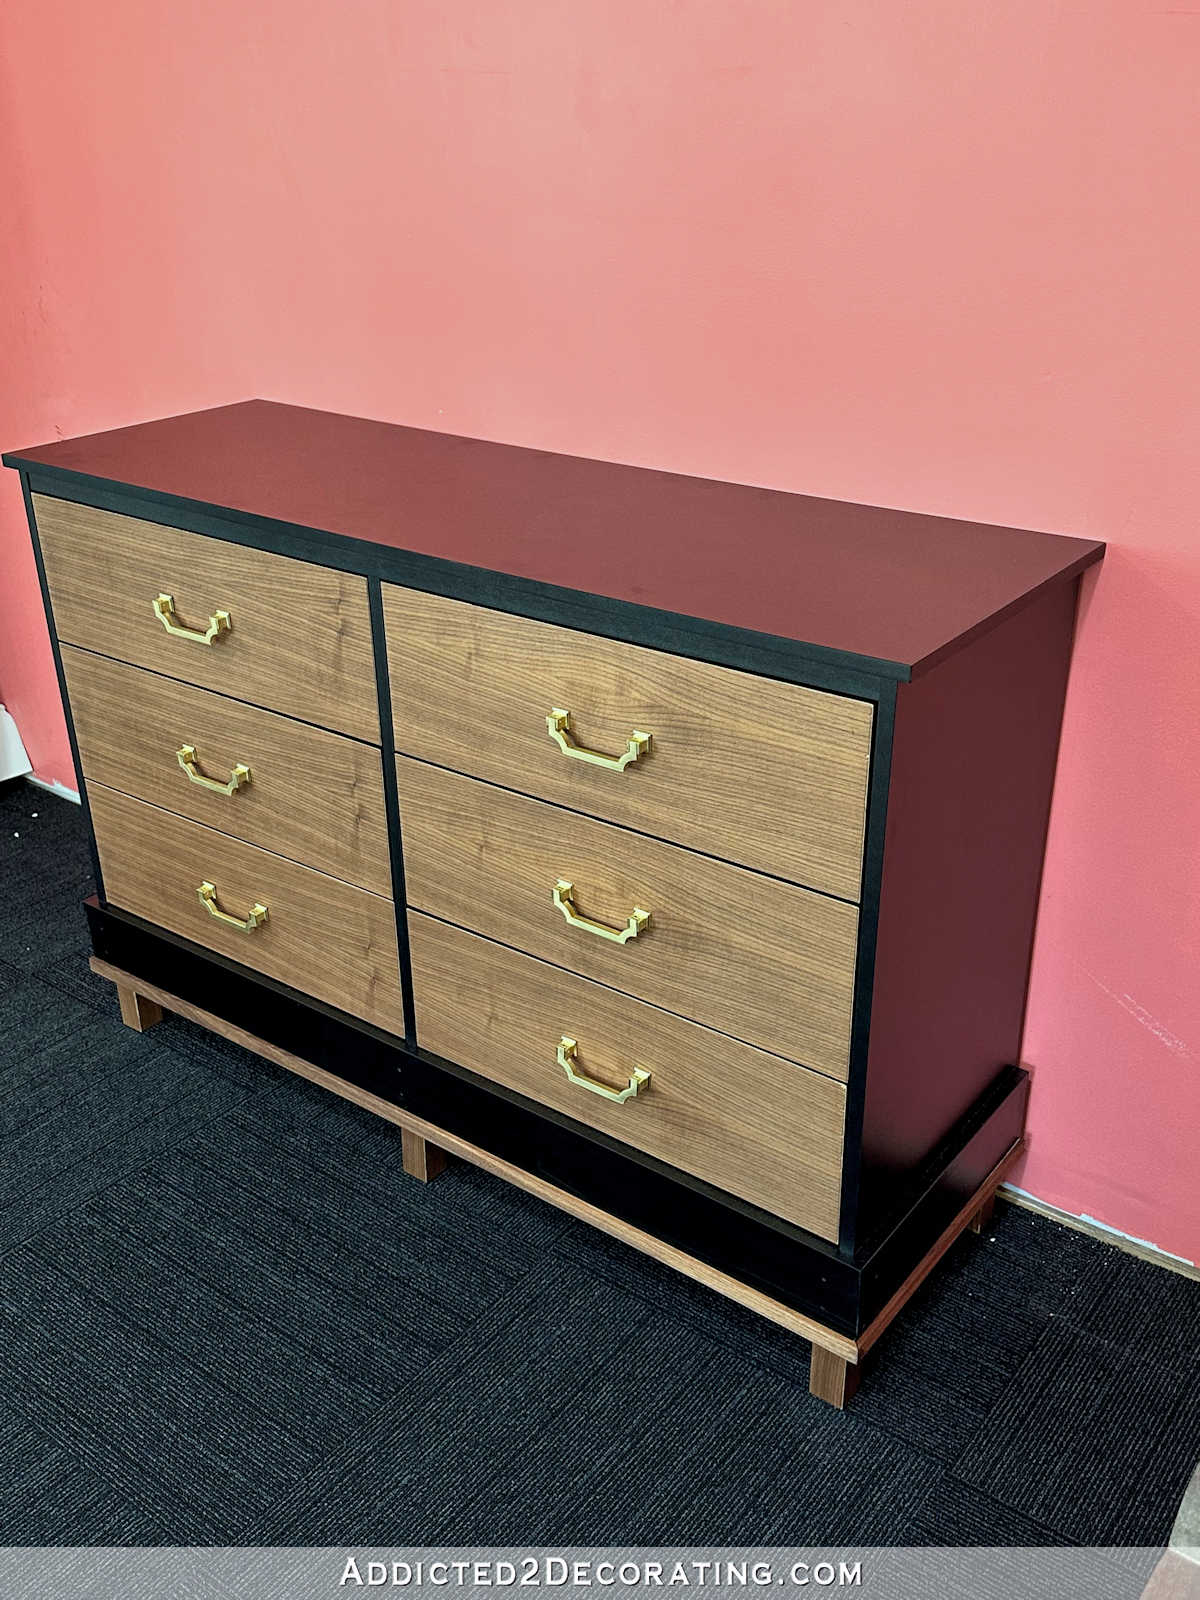
I really like how it turned out. I’m very glad it’s taller now (and yes, I recognize the irony that I bought this dresser because it sat directly on the floor and I wouldn’t have to vacuum under it, and now it doesn’t, and I will. 😀 )
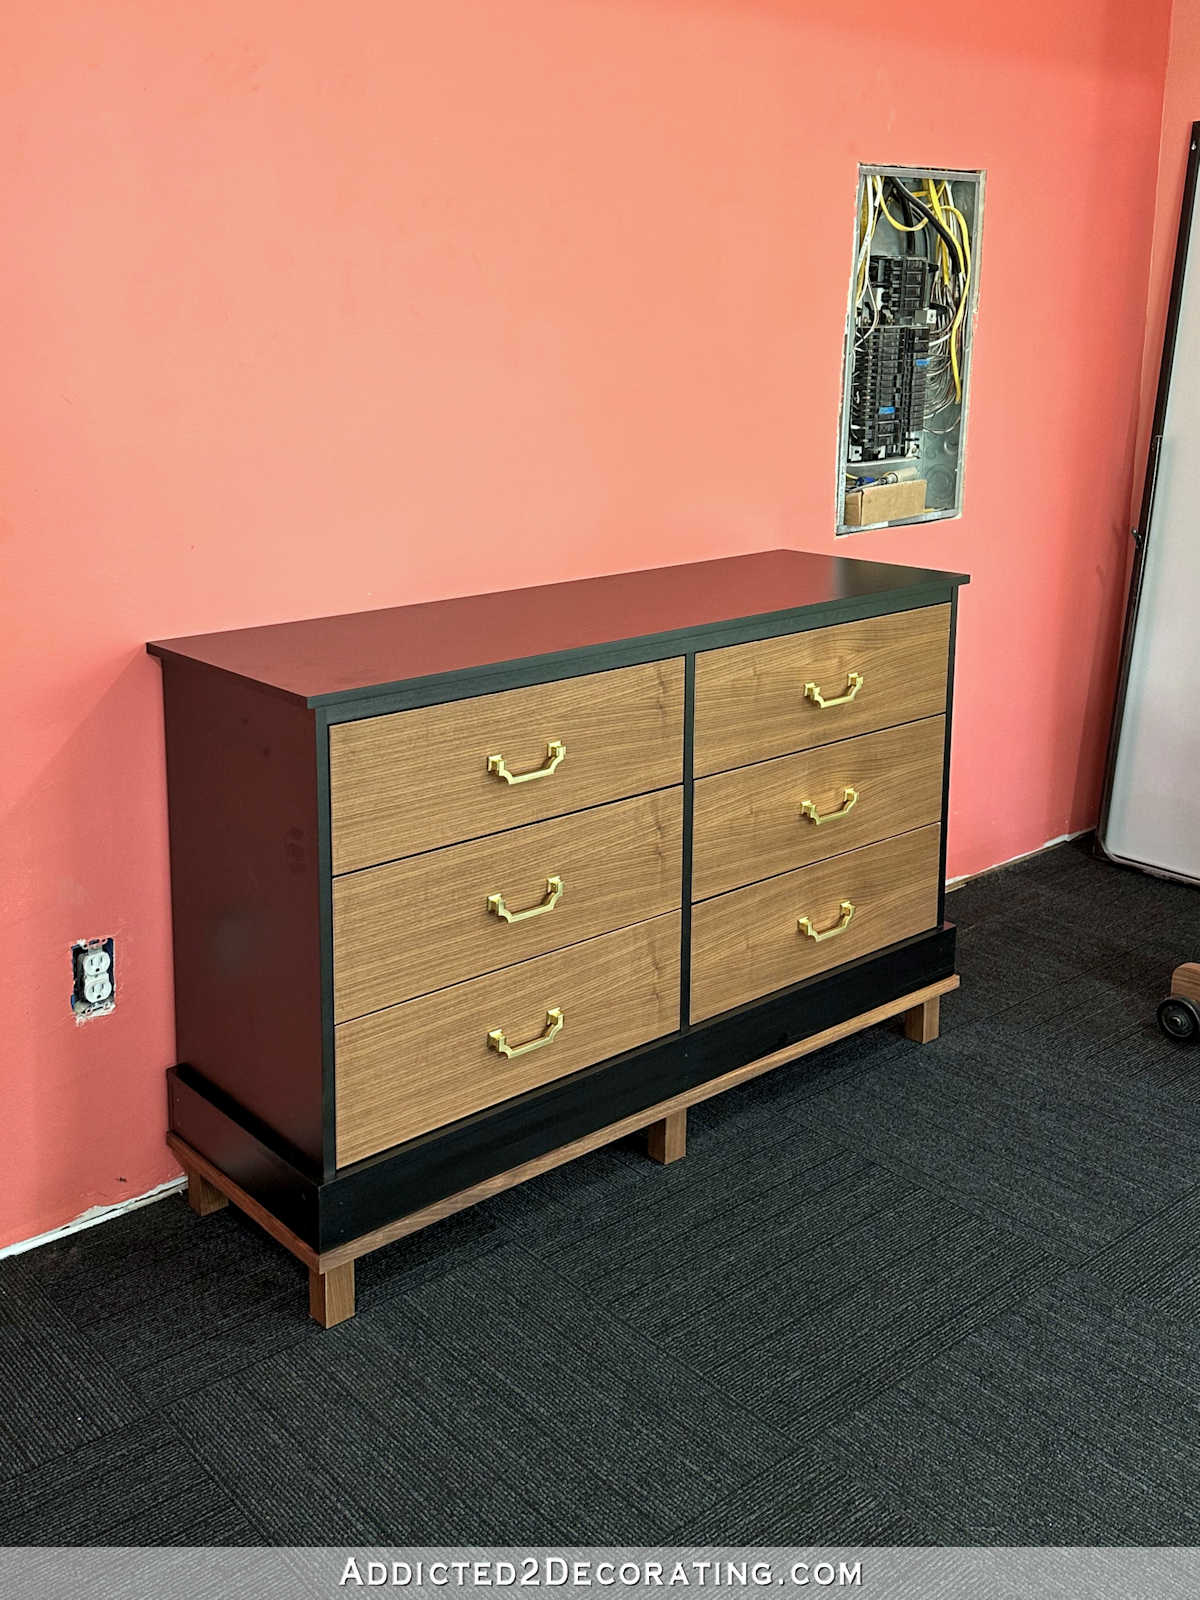
But I also like that it’s more substantial, more visible, and not just a black hole in the room. What I don’t like is how it looks against the wall color in the closet. I’ve been struggling with liking that wall for a while now, so I have a feeling that a change is coming. But more on that later.
And as you can see, I didn’t meet my goal of finishing our home gym by the end of the month. But that’s okay! It’s very close, and I’ll just keep chipping away at that final punch list until it’s all done. I have items that I’ve ordered for the room that won’t get here until this weekend or early next week, anyway. So once I decided to order those things, I knew it wouldn’t get finished by my goal date. Oh, well! That’s how projects go, but we just keep pressing on.

Addicted 2 Decorating is where I share my DIY and decorating journey as I remodel and decorate the 1948 fixer upper that my husband, Matt, and I bought in 2013. Matt has M.S. and is unable to do physical work, so I do the majority of the work on the house by myself. You can learn more about me here.


That dresser looks amazing! Can’t wait to see the finished room!
Great Job!!!!! ….but then..that’s nothing new!😁.
…and not that you need my 2 cents…. But do agree with color change for closet…
I agree – the coral colour does nothing for the dresser now that the walnut veneer has been added. However – it’s not like you have a shortage of other colours to choose from that might be more flattering.
Ooh, maybe the teal color…
+1 that wall is dying to be teal. 😀
Looks fab! You would never know. How about one of the creamy yellowish/goldish light color on the wall? I would kind of go with the drawer pulls.
WOW!! Looks absolutely fabulous! Can’t wait to see the room completed. Once you have the neon sign, you’ll know what color will be a perfect backdrop for the closet area.
Hopefully, your robot vacuum fits under the dresser now. Still easy to clean!
I love the dresser. It looks so much better!!!
The addition of walnut makes the dresser look more expensive and I love the hardware. I’m not a fan of the base and legs.
you should be proud, it came out so beautiful. Furniture makers should read your blog and learn how to make attractive furniture!
If the day ever comes when you come up against something you can not do, please let us know! The dresser is gorgeous.
Is this still the space where Matt will have his game area?
Yes. He’ll choose two or three gaming systems that he wants in here, and they’ll sit on top. All of his games will go in the drawers.
You are so amazing! Just fabulous work! I was thinking, if it wouldn’t upset your sensibilities of the color pattern, I think the color behind the Swedish ladder would look beautiful in the closet. Second choice, a yellow. Agree the orange should go.
You have vision in spades! That dresser looks so high end! And I never would have dreamed that veneer would wrap around the legs.
Wow…I love that so much better, especially for your room now. And, I like that it sits higher…perfect. I can understand the need to change that color…but you have lots to choose from for sure. Really, coming around the corner now! Nice job.
I love it! What happened to putting wheels under the dresser for ease of movement? I wish I was creative and adventurous to take on all of your projects!
VERY VERY cool thing to do with veneer! Excellent directions too!! Thank you!
It’s a big improvement on the one you bought! I love what you did with it! My son in law had some old nightstands that he changed up in a similar way, by removing some decorative scrolling and raising the height to fit their taller bed set, painting them black to match their bed.
What about painting the closet black? Since Matt will be gaming there, it may be easier on his eyes if it is dark, since a lot of the games have black backgrounds???
Wow!! Nice job! I’m all about furniture refinishing and upcycling. This is a wonderful example.
Cute! You really jazzed up that boring Walmart dresser. It has a slightly Asian style to it now.
Wow. I am deeply impressed. This gives me ideas for my husband’s basement library, currently made up of mismatched bookcases obtained on Facebook Marketplace and kept above the basement floor with leftover 4x4s.
You are a m a Z i n g !!!