Factory Cart-Style Coffee Table
Yesterday, I posted an in-progress sneak peek of my DIY coffee table on the A2D Facebook page, and people had some very interesting guesses as to what it was! A coffin? A raised flower bed? A bookcase? Ha!
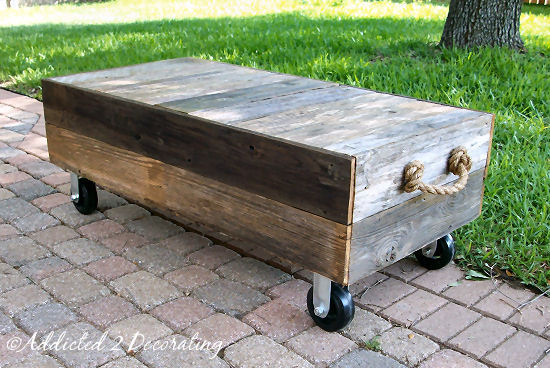
No, I didn’t build a coffin. In fact, I built a factory cart-style coffee table out of old cedar fence pickets. Want to see how it turned out? Here it is!

Woohoo! It’s finished!! And to think, I started off with this…

John and Alice were having their fence replaced, and I just couldn’t bear to see this gorgeous wood with all of this lovely grayed patina heading for the landfill!! I wish I had projects for all of it, but I didn’t…and I don’t have anywhere to store old wood.
I do love how the aged wood looks as a coffee table. That’s a finish that no amount of paint and faux finishing can replicate!

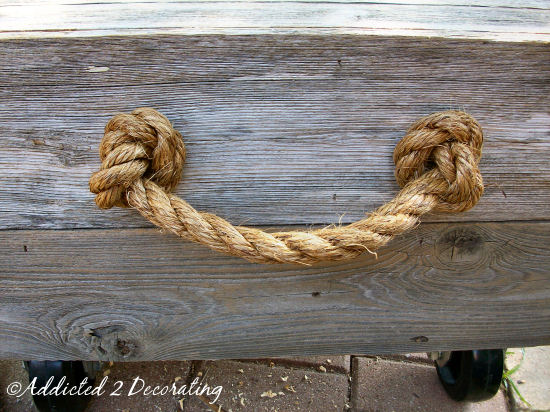
But my favorite part? Oh, that would be these little rope pull handles that I put on each side. I think this touch just “makes” the coffee table, don’t you?

Overall, I’m quite pleased with how it turned out. In a perfect world, I would have been able to find antique metal wheels for a bargain. That didn’t happen, so I opted for these black wheels from Lowe’s.

And of course, working with old weathered wood can be quite challenging because it’s generally warped and can be brittle in places.

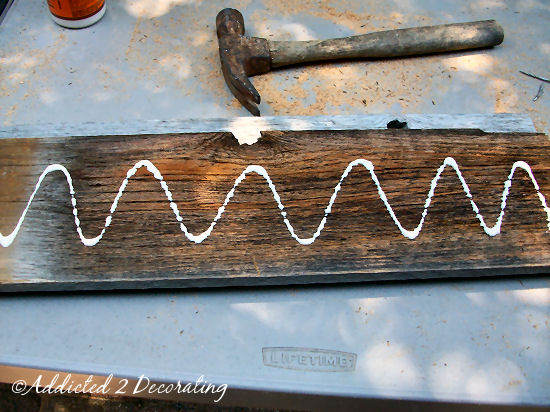
But I managed, and I love it. I even came across one board that had what appears to be a date scratched into it. It’s meaning will remain a mystery, but the character it adds is a perfect touch.

I also ended up making this cart taller than an actual factory cart would be. I just really wanted it to be a more standard coffee table height. It ended up being just under 18” tall.

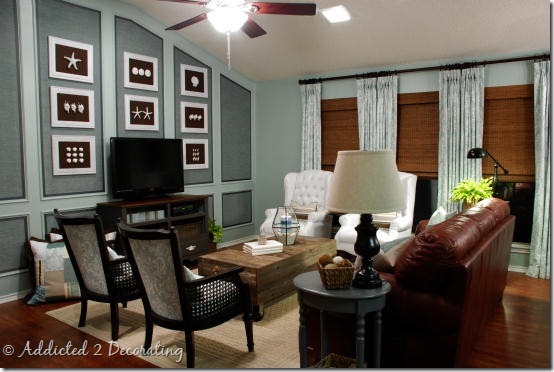
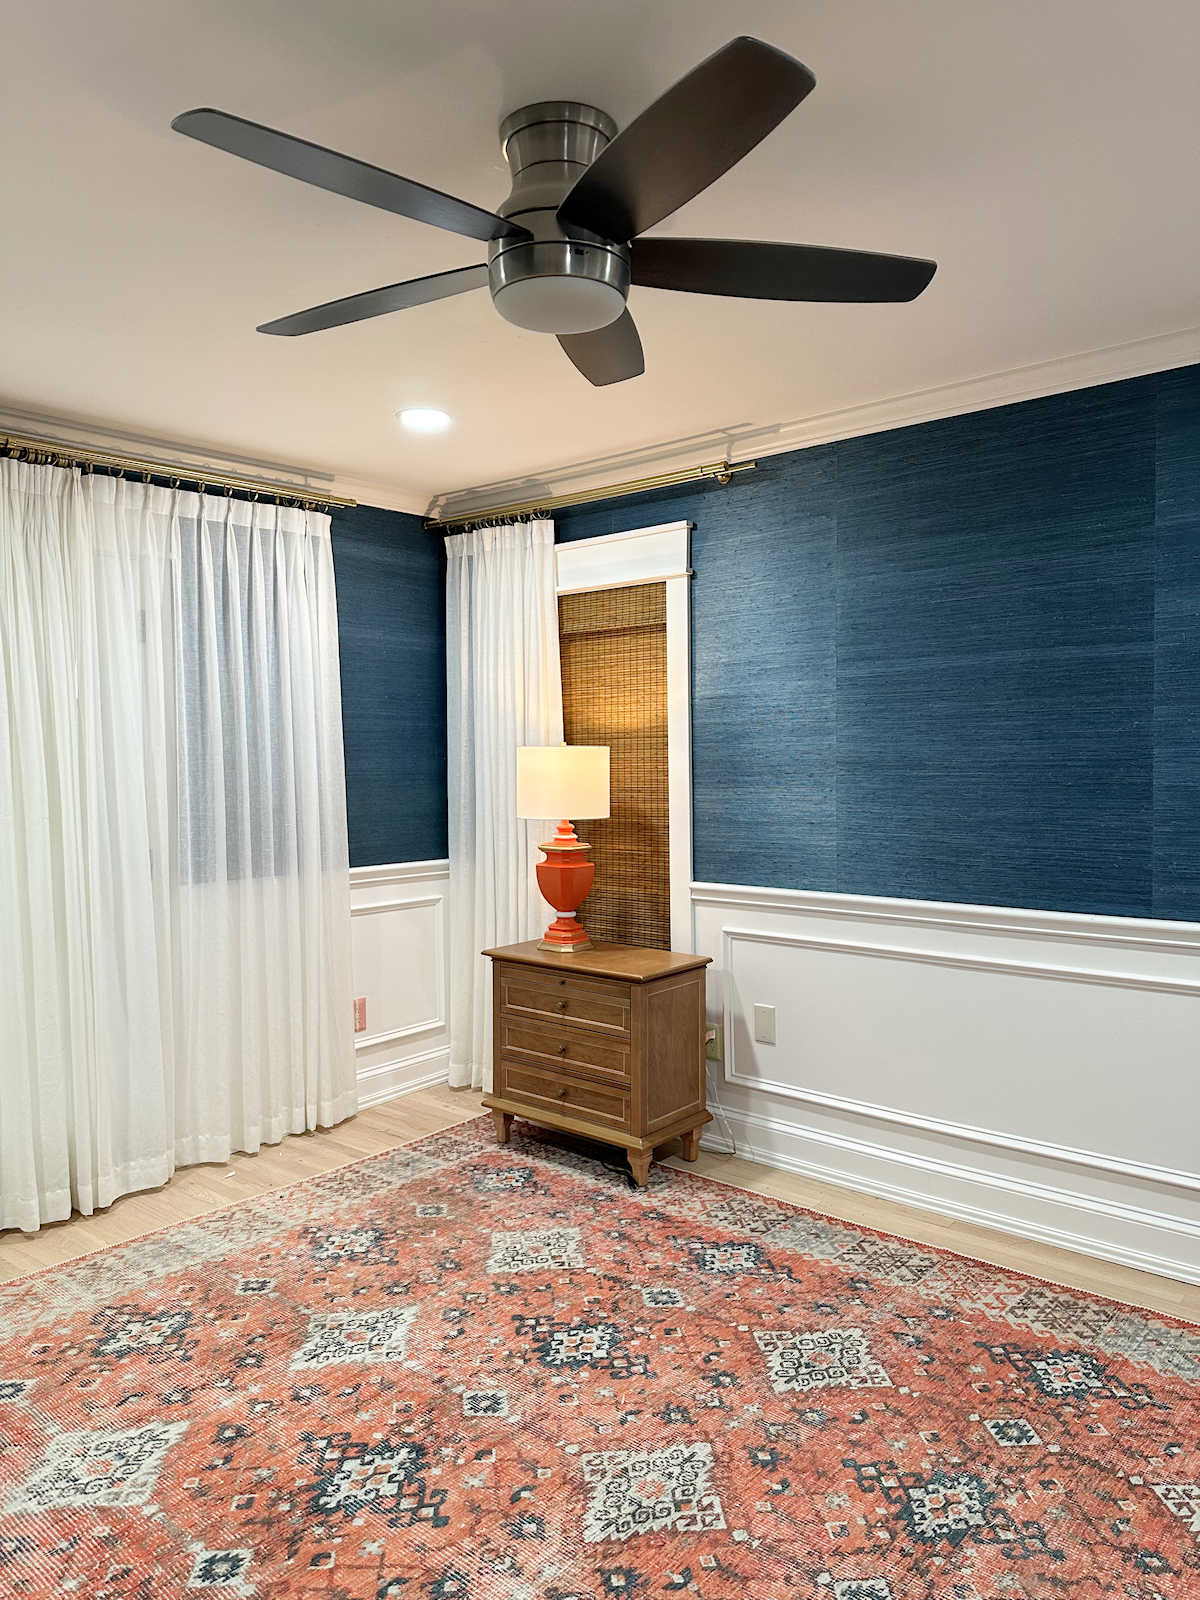
And here’s what it looks like in the room…

Of course, I’m still a ways away from being finished with the decorating in this room, so it’s still looking a bit sparse. I’m keeping an eye out for the perfect rug, so that will lighten the area some.
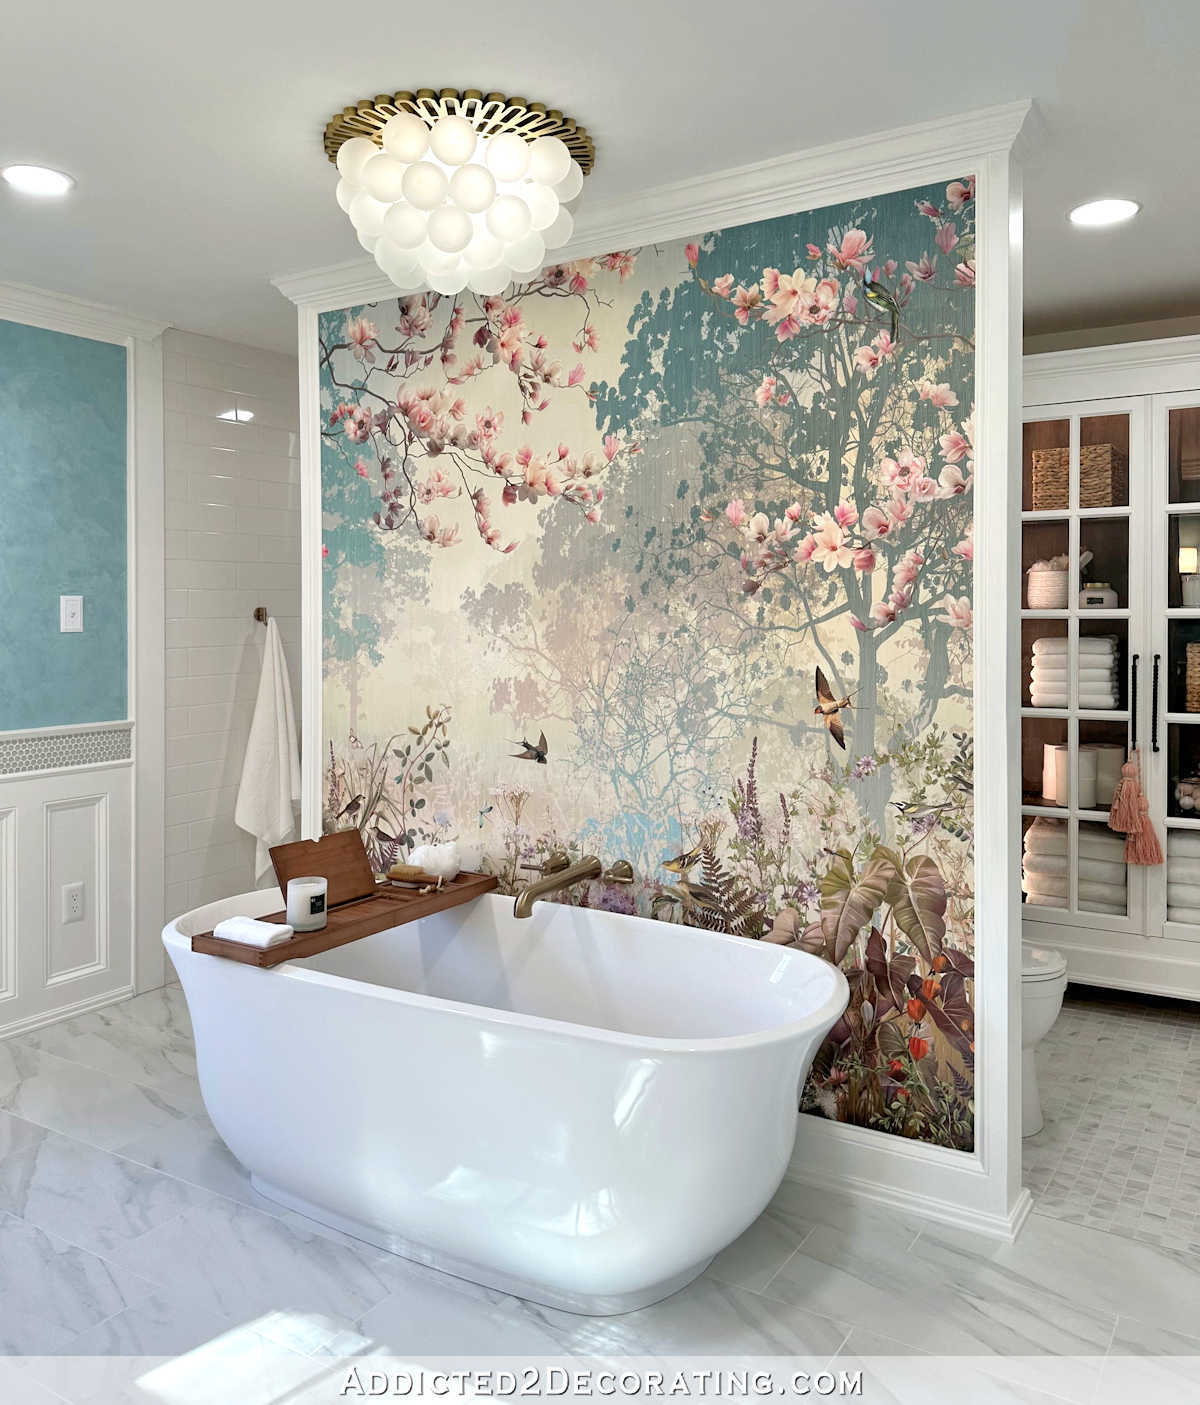
Edit: Here’s the coffee table in the finished room…
So do you want to make your own? Keep reading for complete instructions. And if you don’t have any old fence picket, keep your eyes open for them! People are always replacing privacy fences and discarding the old pickets. Or you can even check websites like Craigslist and Freecycle to see if anyone is getting rid of their old fence wood. You’ll need about 15 6-foot pickets for this project.
Project Cost:
Approximately $100. Does not include cost of pickets, which you can probably find for free.
Materials:
- One sheet of 1/4″ MDF measuring 24″ x 48″ (Home Depot sells these pre-cut),
- Two pieces 1″ x 8″ lumber, each 8 feet in length,
- One piece of 2″ x 4″ lumber, 12 feet in length,
- Wood glue,
- Four 5″ wheels,
- Screws and washers (if needed) to attach the wheels,
- Eight feet of 1″ jute rope,
- Water-based clear coat.
Tools & Supplies:
- Nail gun with 1″ and 1.5″ finishing nails (if you don’t have a nail gun, the entire thing can be put together with a hammer and nails or screws),
- Miter saw,
- 150-grit sandpaper,
- Paint brush.
Instructions:
I started by cutting my 1″ x 8″ lumber. I needed two pieces that measured 47.25″ in length, and two pieces that were 24.25″ in length.
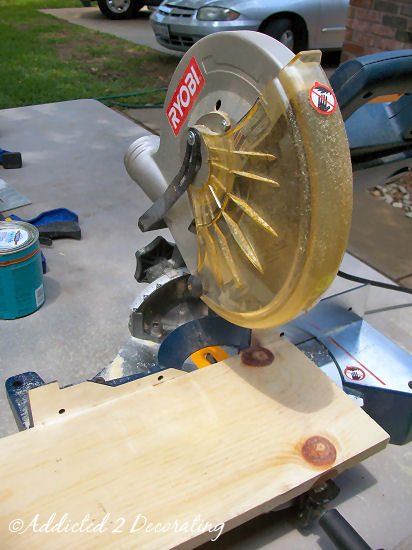
Next I cut my 2″ x 4″ lumber into pieces that measured 10.5″ in length. These will be the legs of the coffee table. (Note, I only cut 8 pieces, and used 2 per leg. But I would highly recommend using 3 pieces per leg.)
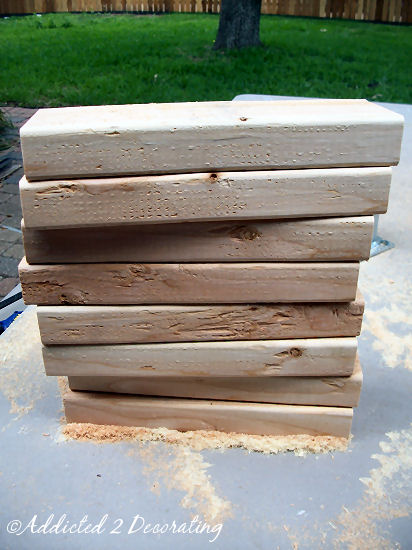
I then used wood glue to glue two pieces of the 2″ x 4″ lumber together, and clamped until they dried. I repeated this with the other pieces. (Again, I would recommend gluing 3 pieces together for each leg, rather than 2 pieces.)
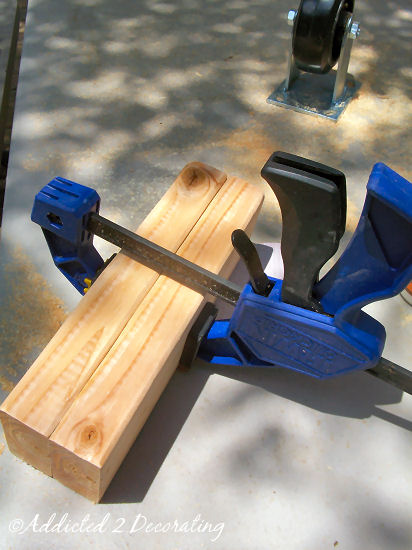
Rather than using a separate clamp for each leg, I just put them all in the same clamp and left them to dry while I moved to the next step.

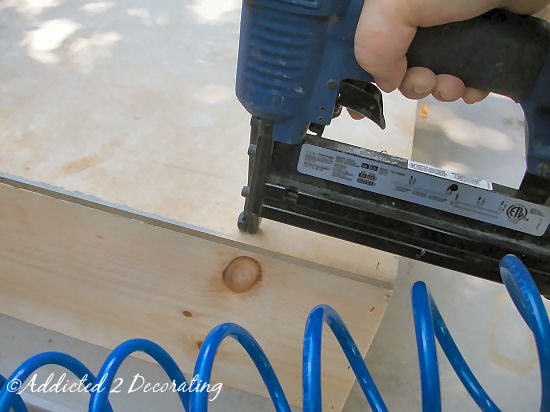
Using the 1″ x 8″ lumber that I just cut, I used wood glue and my nail gun to make a frame for the coffee table. (Note: If you don’t have a nail gun, you can use screws for this step.)

I placed a bead of wood glue on the edge of the 1″ x 8″ lumber, all the way around the frame.

Then I placed the 1/4″ piece of MDF on top and nailed it to the frame with my nail gun.
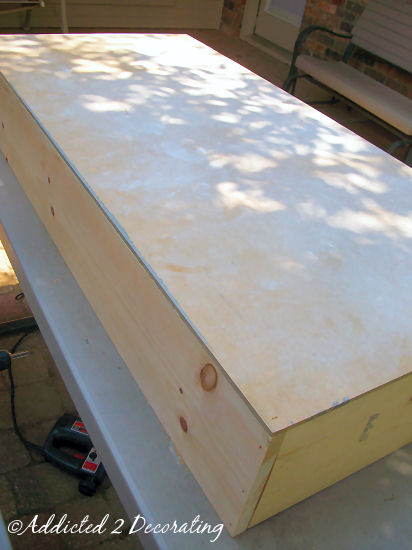
At that point, it looked like a big plain box.
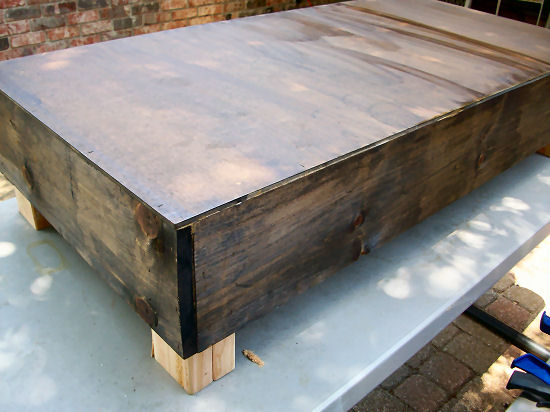
I turned the box over, and unclamped the legs (by this time, they were dry enough), and placed a leg in each corner of the box. I secured the legs using wood glue and my nail gun, shooting the nails from the outside of the frame, through the frame and into the leg.

With all of the legs secure, I turned the table over and stained the top and the sides. This stain didn’t really serve a decorative purpose. The reason I did this was so that if any of the frame showed through the reclaimed wood (through knots or cracks), the frame would basically disappear. If it was left unstained, it would be very noticeable if it showed through knot holes.
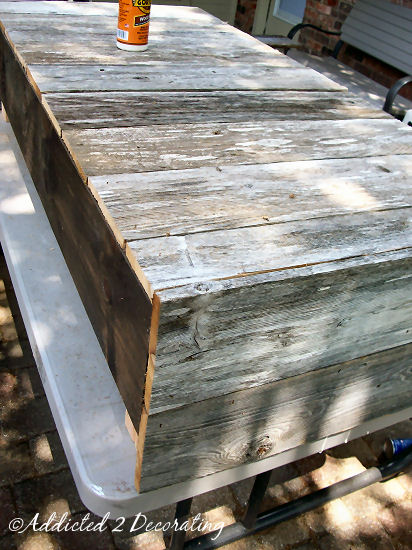
With the frame complete and stained, and the legs attached, I was ready to start adding the cedar fence boards. I cut several pieces to 24″ in length, and attached each piece with wood glue and my nail gun.
I started on end, and attached them as shown.

Then I worked my way across the entire top, and to the other end.
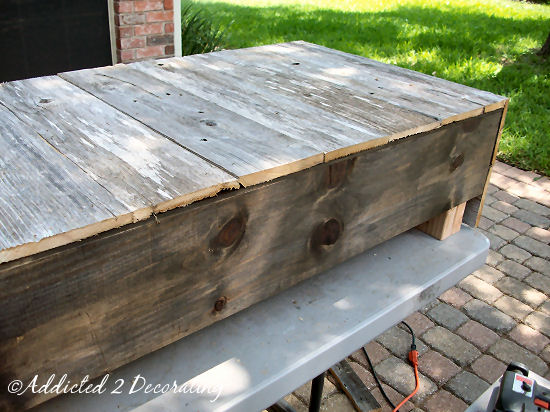
When I had all of the top covered with fence boards, I had excess board extending past the frame, so I used my jigsaw to cut off the excess board. You can see in the picture below how the last board on the top is narrower than the others.

I covered the sides of the table last, cutting the boards long enough to cover the cut ends of the fence boards on each end, and I attached them so that they also covered the cut ends of the fence boards on top of the table.
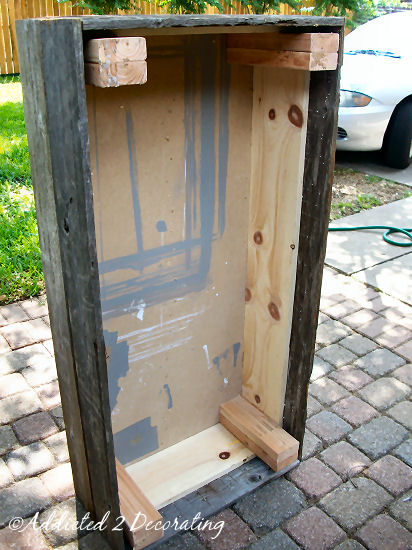
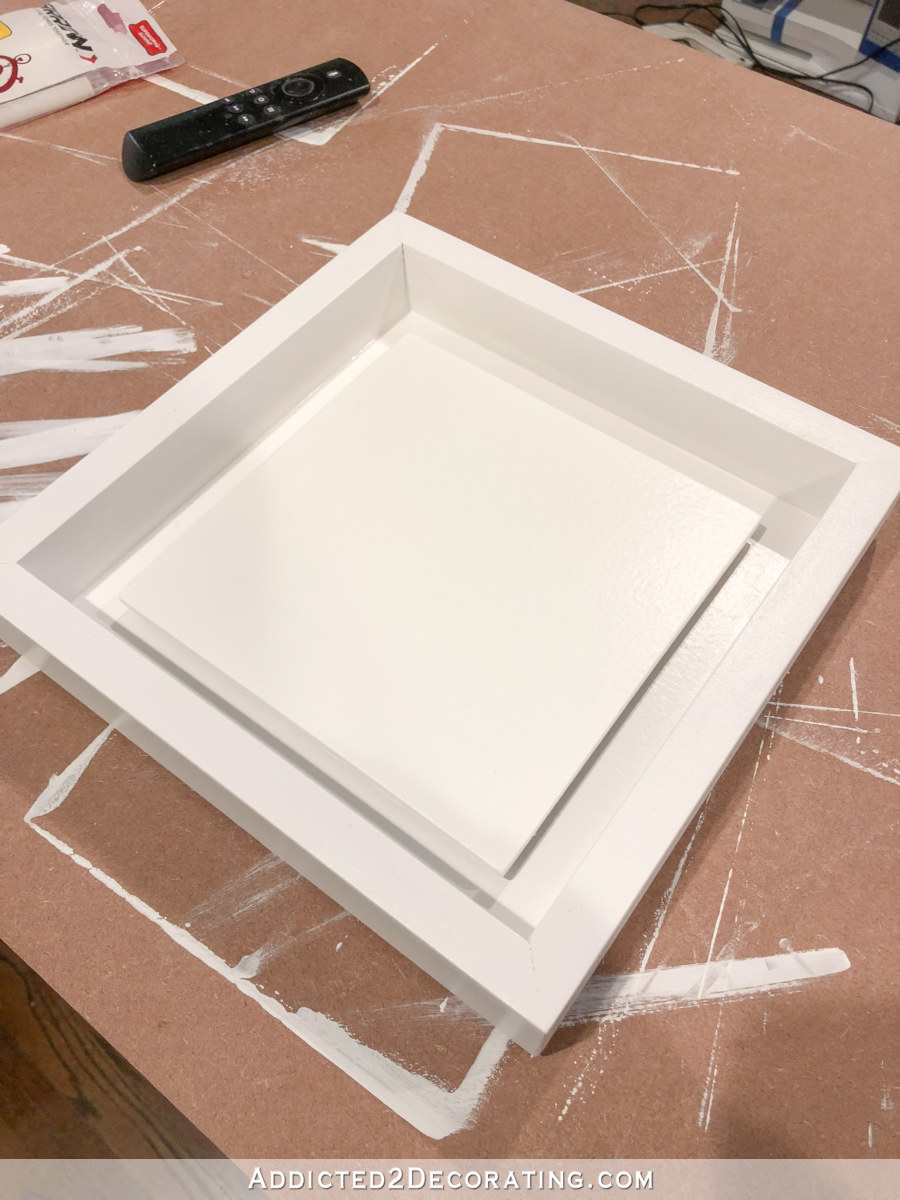
At this point, the construction was basically complete. This how the table looked from underneath. (You can see that the MDF I used for the top had previously been used for spray painting.)
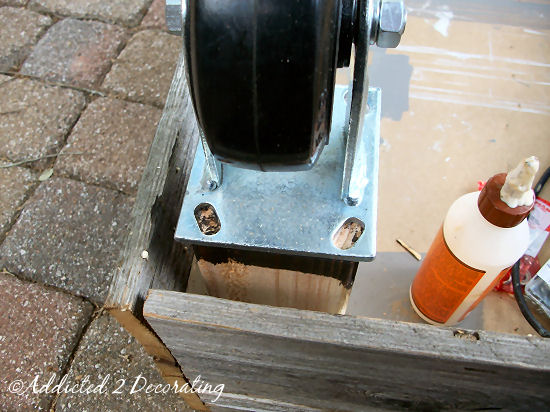
I then flipped the table upside down, and attached the wheels to the legs with wood glue and large screws and washers.
The final step was to attach the jute rope handle to each end. I started by tying two knots in the rope. This was no easy task, as this rope doesn’t bend easily. But after working with it, I finally got the knots in place.
I then drilled the holes in the end of the coffee table for the rope to go through. I actually didn’t have a drill bit large enough for the rope I selected, so I the largest drill bit I could find, and drilled three holes right next to each other for each end of the rope. It wasn’t pretty, but the knot in the rope covered it.

Then I secured the rope in the inside of the frame. I had intended to secure it by tying a knot inside, but I didn’t allow myself enough rope. I didn’t realize just how much rope the large knots used!! So I had to get creative with how I secured it. So definitely make note of this, and allow yourself, PLENTY of extra rope. (I bought six feet of rope for two handles. I recommended in the “Materials” section that you purchase eight feet.)
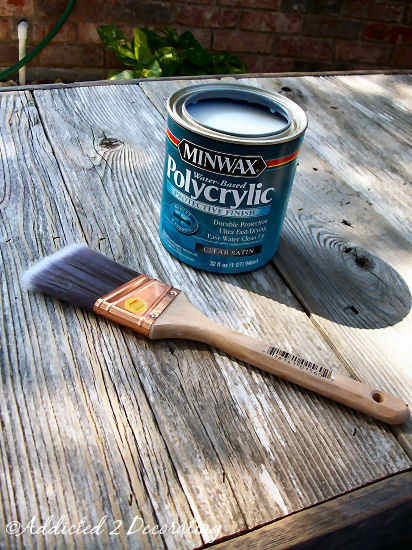
The last thing I did was give it a quick sanding with 150-grit sandpaper (just enough to remove any splinter-causing rough spots, but not enough to remove the patina of the weathered cedar), and then give it at least two generous coats of Polycrylic clear coat. I chose to use the water based clear coat because I wanted to keep as much of the grayed patina as possible, and oil-based polyurethane tends to give wood a yellow/golden hue. I wanted to avoid that, so water-based Polycrylic was a good choice for this project. I really concentrated on getting it well-coated in all of the cracks and knot holes.
And when it was dry, it was finished!
Helpful Hints:
- Be very careful working with old fence boards!!!!! Old pressure treated pine boards can contain arsenic. To be on the safe side, wear something to cover your nose and mouth while cutting/sanding, and then be sure you seal the boards VERY well when finished.
- Look out for splinters and nails!! Those old boards can bite you if you’re not careful.
- Double check your measurements before cutting. Please don’t just go by my measurements. Your MDF board may be a slightly different size than mine, and you’ll need to adjust the measurements of your frame boards and fence boards.
Variations:
- If you’re not fortunate enough to come across antique wheels at a bargain, then you can paint the wheels or use a sponge to dab on black and brown paints for an antiqued look.
- Dress up the top with a stencil to look like an old company logo.

Addicted 2 Decorating is where I share my DIY and decorating journey as I remodel and decorate the 1948 fixer upper that my husband, Matt, and I bought in 2013. Matt has M.S. and is unable to do physical work, so I do the majority of the work on the house by myself. You can learn more about me here.

sureis quiet here today. Love the coffee table. Can we have one at home Kristi.
Looks great. The first thing I thought was that I LOVED the rope handles on the side. You can do amazing things with a pile of old wood. =)
I love it! Of course, I'd paint it white 😉 An ivory rug would be perfect!
I love it! So rustic and fun and the rope handles are great!
Looks great- I agree, you can't fake that finish.
Actually, you can. I re-use a pickle jar filled with vinegar, drop in some steel wool til it pretty much dissolves. Takes a week or 2. Brush this on any wood and you would be amazed at how old it will look when it dries. I wanted an accent wall to look like an old barn but the cost of old barnwood is ridiculous. I used the rough side of plain plywood plus 2×4’s to make Bat on Board look. The varience in grays, browns and even black is incredible.
It looks awesome! I am inspired. Myabe I'll get around to doing something with some old pallets soon! 🙂
Love this – great job!!
I love it — you are so talented!
I absolutely love it! The rope handles give just the right touch. Can't wait to see how you accessorize the room. It is going to be beautiful. I also love those drapes!
I looks great with that couch!
I love it! I so wish I could master a saw! You did a great job… the aged look makes it perfect.
This is gorgeous! It reminds me of the factory cart from RH (which is over $1000!) Thanks for the inspiration.
love it! And if you wanted, you can easily "age" the cut ends of the wood with steel wool & vinegar, so it doesn't look like freshly cut wood. 🙂 I may be raiding some palette piles… 🙂
So neat!
That is a great rustic look…you did an awesome job!!!
I totally love this! Such a great reuse of materials. And I love your addition of the rope handles. I know you were on a budget, but I am so sorry to say the wheels ruin it for me. Absolutely love the rest of it though.
I commented on your FB post. I should've came here instead! I love it!! You did a fabulous job! wish I was that talented =)
Can't wait for the DIY instructions! Looks great in your room…
It's gorgeous! And didn't end up looking like a coffin at all. 😉 I was surprised it wasn't painted some bold color, but I love the way it came out!
Love it….you did a fantastic job. I have a clumsy 14 month old so I had to switch out my wooden trunk to a soft ottoman as a coffee table. This is such a great use for old fence panels…awesome!
If I come across any vintage wheels I'll be sure to get your address and send them to you!MJLucky 7 Design
I LOVE it!!! :0) You did a marvelous job building it too! hugs
MissyMy Cottage Charm
Congratulations! Your table looks great! It goes very well with your wooden floor. Also, the rope handles really give the rustic feel.
YAY, I <3 it!
Nicely done…:)
WOW!!! I LOVE it!!! You are so goooood!!!
I love it! I would have never thought of that.
I just saw this on Tatertots and Jello. This is amazing! I have got to find some old abandoned wood planks somewhere – I keep seeing these awesome projects. Great job!
Great job and great idea! Love, love the rope handles!
Blessings!!
Gosh – I LOVE that!! What a fun project. And it turned out so great. It reminds me of something from Restoration hardware!
I shared it on my TT&J facebook page and pinned it to Pinterest 🙂
xoxx
Jen
Wow – the coffee table is so cute! Way to go!
Wow…wjat a great way to re use!!!! [email protected]
I'm in LOVE! I need one ASAP! jules
The ropes do give it a great finish, awesome job!
How fabulous! What a creative way to use those old fence pailings!
I would love if you came over and linked this project to my
weekly Round Tuit party at:
http://jembellish.blogspot.com/
Have a great week!
Jill @ Creating my way to Success
love the coffee table im over from the girl creative and im your newest follower.
Awesome job! I love it! This would be awesome as an outside storage box/coffee table on my deck. I have a bunch of old wood I can use to make one. Thanks for the inspiration!
I am so in love with this table! We JUST tore our old fence down last week and I had my husband save me a lot of the planks before hauling them off to the garbage. I knew there was a craft/decorating project just waiting to be whipped up with them! Thanks for the great idea!
Love this!
It looks fantastic in your room! I love old weathered wood, and a factory cart is a great build for it
Fantastic job! I like the extra height you gave it.
This turned out great. Who would have thought some wood could become something so cool. The rope handles are a great touch too!
This is what I call PURE AWESOMENESS! I would love for you to share it at my link party Wednesday evening. So clever!
Fabulous! Green and thrifty-and beautiful, too!
I love it!
LOVE this! I've had a slight obsession with reclaimed wood lately, and I'm dying to make a couple of crates just like your table to keep toys in. LOVE LOVE!
Wow – so awesome!!! I think I may need one of these!
– Jenn @ Social Salutations
Love the rustic flair! You should definitely post this in my DIY linky party! It's so inspiring!! Awesome job!
http://lovelacefiles.blogspot.com/2011/06/first-everlinky-party.html
I love this! I've been wanting to do this for years now 🙂 Bravo!
I've featured you at http://www.thriftyandchic.com. Come grab a button!
~Alicia
Yes! Yes! I love it. You did a fantastic job on this piece! In an ideal world I could just buy one of the ones from restoration hardware but hey, we improvise right? It's what we crafters do best! Please join my party this weekend at http://designergarden.blogspot.com/2011/06/vip-party-18.html
Kristi I LOVE your coffee table!! I think you did an amazing job on it! Thanks so much for linking this up to Think Pink Sundays! I featured you today! http://www.flamingotoes.com/2011/06/crush-of-the-week-think-pink-highlights/
Fabulous!
Love the rustic look of the planks, what a find! I'll definitely being making this, it's such a versatile design I think I will make the wheels hidden underneath so it looks more stationary but has the functionality of movement & use antique dresser drawer handles for the sides…Thanks for sharing!
Kristi – Love the texture and colors the old planking add to this piece. The rope handles are a cool addition too! Another fantastic job – I am so glad it wasn't a coffin =) ~ Stephanie Lynn
I love it! Make me one! The rope handles do add a really nice touch.
I think the coffee table looks great and I love the rope handles as well. They are the perfect accent.
So great! much more personalized than a store-bought one! love it.
i really like this!! i've been brainstorming coffee table ideas for our screened in porch and i'd definitely like to put casters on so i can move it around when we need to. great job!
OOH! I love it!! Seriously!
i love this table you did.. im on the lookout now for some boards..
How am I just now seeing this? This is fantastic!! I love it. Now I need to find some old boards. 🙂
It looks amazing! I am inspired. When I see
how people create I feel that I would love to do something like that by myself.
However I’m not sure about all these carpenters’s business. It looks a little
bit dangerous for beginner.
What stain did you use for the frame? This is awesome.
I’m pretty sure I used Minwax Special Walnut.
I want to use old wood like this for rustic picture frames. Anybody doing this type of frames? Please email me with pictures of your work. Thanks, appreciate.
[email protected]
Could you please tell me which stain you used on the frame? It’s a really nice ‘weathered’ look and I’ve been looking for something just like that for an upcoming project. The table turned out super cute btw…very inspiring!
I have an endless supply of wood as we own a construction/remodel co. I am sooooo making this, thank you for the Idea 🙂
I wonder if I could make something like this out of pallets, & if it’d be cheaper? This would be awesome for outdoors, to store my gardening tools in over-winter….I could weather it with sealer 🙂
nice work and I really like how you post so many how to pictures.
I’m really enjoying the theme/design of your web site. Do you ever run into any web browser compatibility problems? A few of my blog audience have complained about my blog not working correctly in Explorer but looks great in Opera. Do you have any recommendations to help fix this issue?
Yet another project that makes me wish that I were more handy! I love how this turned out.
Do you know anything about how long the chemicals (arsenic etc.) remain in the wood? I mean for example, say you have a pinepressure treated fence. It been outside in the elements for the past 15-20 years…wouldn’t most of the chemicals leach out?
“The EWG study shows that pressure-treated wood up to 15 years old exposes people to as much arsenic as newly treated wood.” From here –> http://www.ecomall.com/greenshopping/archweekarsenic.htm
I especially love those rope handles and I’m dying to know what your workaround was for attaching them when your rope was too short!