John & Alice’s Family Room
Did you think I was going to flake out on you again? Well, I’m not. I actually have the pictures today!
So let’s get right to it. I’ve been working on John & Alice’s family room for what seems like forever, and there were about a thousand DIY projects that went into this room (that might be a slight exaggeration, but you can see all of the related DIY projects at the end of this post). So are you ready to see how it turned out? Well, here it is…

Now let me remind you how this family room started out…

That wood paneled wall with the orangish stain definitely screamed “1980s”, as did the shirred cornice that stretched across the top of all four windows. Every piece of furniture in the room was leather.

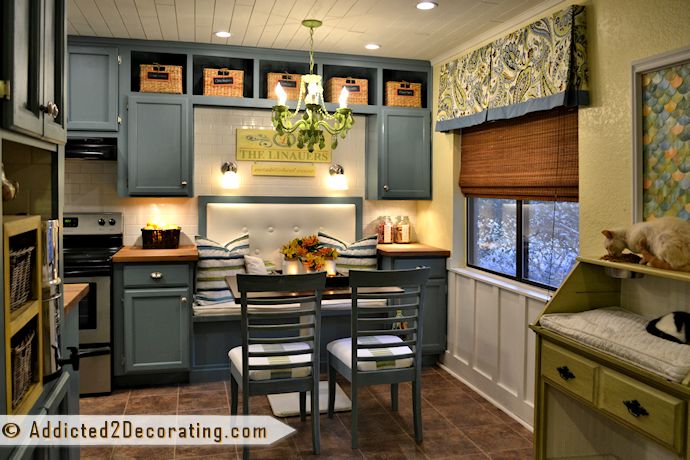
The breakfast area wall was covered in white and green checked wallpaper, which continued into the kitchen. The brass light fixture needed to be upgraded, as did the little table and chair set.

The fireplace was a multi-colored brick, with a brass screen and orange oak mantel that matched the paneled wall and the kitchen cabinets.
It was definitely time for some updating! And hopefully I did just that.

The oak paneled wall was painted and covered in a pretty chenille fabric, then “framed” in a pewter colored grosgrain ribbon. All of the leather furniture, except for the sofa, was moved out of the room and replaced with two pairs of upholstered chairs.

The fireplace was given a coat of light gray paint, and the busy crown moulding/corbel mantel was replaced with a very simple rough hewn-looking mantel. The brass fireplace screen was given a couple of coats of black paint (Rustoleum high heat paint).

Remember last week I told you that I had to remake the breakfast table…again!? I made it once, and stained it, and hated it. Then I whitewashed it, and didn’t love it but thought it was fine. So I moved it into the room, and then it cracked!! The crack started at a knot, and went clear across the table.
So I had to remake the table again. I’m actually glad, because I love how it turned out. And you’ll notice that I ended up making it square instead of round…

Well, I’ll just hush now and let you look around. If you’ve been following this room transformation, you know there are about a thousand DIY projects (that’s possibly a slight exaggeration) that went into this room. Most of them can be found over on the DIY Projects page.


Oh, I’m sure I could go on and on. We took so many pictures!! But that’s probably enough, right?
But I’ll leave you with a few “quick view” before and after photos of various angles. Just move your pointer on and off of the pictures below to see them change from the “before” view to the “after” view.


I hope you enjoyed the tour of the finished family room! I had a lot of fun on this room, but I’m sooooo glad it’s finished. I was beginning to think it would never end!
DIY Projects That Went Into This Room:
[categorythumbnaillist 493]

Addicted 2 Decorating is where I share my DIY and decorating journey as I remodel and decorate the 1948 fixer upper that my husband, Matt, and I bought in 2013. Matt has M.S. and is unable to do physical work, so I do the majority of the work on the house by myself. You can learn more about me here.

Oh my heavens this is AWESOME!!!!!! sooooooooooooooooooooooooooooooooooooooooooooooooo much better than before!!! Great job, Kristi!
WOW!!!!!
WOW! It's gorgeous now! You did a fabulous job!
This is fantastic, Kristi. I am just in awe!
Sindy 🙂
Everything is absolutely gorgeous! What a huge job….but it sure paid off! You are extremely talented, Kristi!
Beautiful! Love the transformation!
This is an amazing transformation! Even better that we've been able to follow along. You are very talented! Thanks for sharing!
What a great transformation – your clients – John and Alice must be thrilled with the results. I love the fireplace wall and built-ins.
My best- Diane
Wow! The transformation is just stunning…. I love it. There's not a single thing I'd change.
They must surely love this room now. You did a wonderful job with it.
Just can't stand how much I love this! You rattention to detail is fab..and those chairs..swoon!!
Wow! That's wonderful. How gorgeous! God has really gifted you. =)
LOVE it!! The coffeee table is my favorite DIY of all but I love the whole makeover.. the colors are just great.
Love it! You did a great job.
That is stinkin' AMAZING!!!! Love the colors and the upholstry and the tufted wingback chairs. Love the leather couch in the midst of it all, the end table, lamp…I could go on and on. INSPIRING! Makes me want to put the finishing touches on things in my house. Makes me want to spend some $$$$.
This is amazing, you have done an outstanding job everything looks so good!
Kristi! It looks wonderful! It looks bright and updated…I love so many pieces in this room. Beautiful job!
you've excelled yourself Kristi – this is totally fabulous! Everything is just so clever and it all comes together so well, the finished product is truly something to be proud of. Well done, you really deserve to put your feet up for a bit after that one 🙂
You did a GREAT job. I love it all!!!!
Fantastic! You rescued a house stuck in a time warp! The transformation is simply outstanding. It is like a completely different modern house. Well done!
What a fabulous transformation! I love the colors and all the new accessories. Wonderful vignettes. I especially love the coffee table. Great job on the breakfast table!
Fantastic job Kristi!
~ Tracy
I can't believe my eyes ~ fabulous! It's hard to believe it's the same house. It definitely has the "wow" factor now.
What a gorgeous room and such a change from the original. I love all the seating you put in there. It doesn't look cluttered. The colors are so relaxing. You should be very proud of your work!!!!!
HOLY CRAP!
HOLY COW!
Wow! I am speechless. There is hope for horribly outdated rooms–and you did no demo!
Oh wow. Just beautiful!! Love all the colors and especially the overall feel of the room. FANTASTIC!! 🙂
Gorgeous transformation!
It is beautiful! Have you already shared paint colors?
OMG!!! You are so amazingly talented! You are my kind of designer/decorator! You showed how to transform a room on a manageable budget without going out and buying everything new! You should be hired immediately by HGTV because what you do is exactly what I like to see! Nothing pretentious, nothing that takes being rich to accomplish, just imagination and hard work. This was just a beautiful makeover and I'm sure the home owners must be thrilled! Congrats on a job VERY well done!
wow. amazing.
That is SO incredible, I LOVE IT!! What an amazing job. 😀 I hope you are proud!!
Please let me know if John & Alice ever put their house on the market! Actually I feel like I should hire you to house hunt with me! Like that brothers show on HGTV. Great job Kristi!
Fantastic~I wished you lived closer to me AND that I could afford you!
NIiiiiice job! I squinted to see the writing on the chalk board and squealed when I read that it was my fav poem!!!!!! Nice choice all around.
oooohh and ahhh'ing here! I puffy heart love those white chairs and the caned chairs. sigh. You will list a source right?!
I L-O-O-O-V-E everything! You are so inspiring and creative, it's crazy! Thanks for sharing your passion and creativity with us. A fan in Canada (^_^).
This looks amazing!!
One of the best reveals ever! You should be VERY proud!
Stacy
I'm in LOVE! I have been wanting to change my living room and adjoining kitchen to a coastal theme but I am not in total love with the beach cottage look. You hve given me some great inspiration. Just wondering if my charcoal leather sofa will work, as it is in great shape and who eants to replace a great sofa that cost me $1800. YOU are FANTASTIC! KUDOS
You have just raised the bar so high for the entire decorating blog world. This is one of the prettiest rooms I've ever seen. I can't decide if the pairs of chairs or the coffee table are my favorite. I love it!!!
I love what you did. It was fun to cruise the room and actually see your beautiful DIY projects you did. An amazing job, I hope they love it as much as we do!
It looks so much better. What a wonderful change. The color is soothing and sleek. The only think I would change are the chairs in front of the fireplace. It takes away from all the work you did and the cozy feel of the room…but maybe they needed that much seating? Either way, you have done a nice job. Dianntha
Kristi, everything you have done here is amazing! I'm in awe of you talent, hard work, and vision. 🙂
I can't wait to see the budget breakdown etc. This room does NOT look anything like what you started with. WOW. I love the neutral vibe with the touches of blue and grey. GREAT JOB….
Fantastic!! Well done, it is so beautiful! Thank you for sharing.
wow. this is gorgeous – stunning redo!!! I love it – it's incredible. love the frames, the furniture, the paint – what fabric are the curtains- i love that too!!!
wow – you should be really really proud. i want a new client!!!
Joni
i do have to say that these pics don't seem as focused as the one you took with your mom's camera? they seem kind of fuzzy to me, not as sharp. i am really struggling with this issue. i get complaints. i don't know what to do. i love the sharp, crisp pictures. ugggh……i don't know what to do!
Joni
Holy Bluelicious!
I'd love for you to share this at my link party…
WOW!
Wow, this is fabulous!! This is a major transformation, the space has really been brought up to date. Loving the white wingback chairs and the soft palette you used.
OMG!!!!!!! I happened upon your blog through about 10 others….WOW! You are one talented lady! This is Gorgeous! You are magnificent. Amazing. (still thinking of flattering words)….INSPIRING!! That's what you are. INSPIRING. Thank you!
This is beautifully updated. What kind of flooring does this room have. I like the wide planks.
It's actually Mannington vinyl flooring.
Gorgeous! Especially that painting on the mantel and the pillow fabrics!
GORGEOUS!
I'm in LOOOVE with this space!! just beautiful!!
Thanks for linking up! I featured your post in my wrap up http://tidymom.net/2011/great-ideas-5/
Have a fabulous weekend!
Amazing transformation! I really love what you did with the fireplace and how you turned the ugly paneled wall into such a beautiful focal point.
Wow! It's hard to believe that's the same room, fantastic transformation!
Found your site through Shabby Nest link up! Awesome makeover it looks great!
Found your site through Shabby Nest link up. Awesome job on the makeover it looks great!
It is hard to believe this is the same room! WHAT a transformation! I am new to your blog but will be back for sure!!!! This is wonderful! XO, Pinky
WOW…my favorite easy project is the painting of the fireplace brick.
What made me laugh? The reminder of what we did in grade school to cover our "rented" books. We used garbage bags turned inside out and were not allowed to draw pictures or write anything on that paper. Unreal. Can you imagine kids doing that now? Too funny.
This is amazing! I'm loving it. I'm really interested in the furniture (printed chairs) and the curtains. I've been trying to find something similiar but have no luck. Please advise and let me know when you have further information on this. GREAT job. [email protected]
wow. this is AMAZING! you are such a talented designer! way to go!
Hello, I found you per Monday blog hop via Skip to my lou.. Love your blog.. Newest follower.. Awesome posts, can't wait to settle to explore more.. Please feel free to visit me sometime.. Thanks .. Marilyn from http://theartsygirlconnection.blogspot.com .. Ciao :))THIS REVAMP IS FAB…
I bow to the master! I envy your vision.
Amazing!
Kristi this is gorgeous!! I love how the whole thing turned out, what a great transformation!!! I'm sharing this on FB & Twitter! 🙂
This is absolutely phenomenal! I am in love with everything! The way you solved for the old pannel wall is just genius! I shared your post and decorating project on my Friday Favorites this week. Thank you for sharing the great ideas! Have a beautiful weekend!
I love everything you did in this room! I especially like that you just painted over the fireplace and did the new mantle for a superb new look! We have a painted (white) fireplace very similar to this one and I keep thinking I need to update with cultured stone but after seeing how great a light gray version looks, I'm rethinking the plans! Thanks for sharing all your hard work!
DD
S.O. much better.
absolutely amazing job…the whole thing is great….
Wow, it looks amazing. Hard to believe it is the same house.
I'd love to know what paint colors you used for the furniture and the walls.
As soon as I viewed these pics I was caught off guard by the window treatments. The woven shades should have been mounted at the level of the drapery rod. As it is, visually their are to many broken up lines. This is a woven shade gone bad example.
There are very few (if any) hard and fast decorating rules. I've seen them done both ways. It's a matter of taste, and I happen to like them just the way they are.
No- this clearly appears as an afterthought in order to hang panels and wood woven blinds together. I may have even believed this was the look you were after had the blinds been an inside mount, but they are an outside mount hung incorrectly. Any others that you have seen hung like this were also incorrect. Learn from this-don't use cockamamy excuses.
THESE ARE INSIDE MOUNT! Perhaps you need to get your eyes checked.
As I stated, IF they were an inside mount, that were previously there and it was the only possible way to hang these shades because the home owner insisted on using them–well then I guess its OK. However, you started from scratch and poorly directed these folks (who trusted you) to an ill proportioned wall that is highly aesthetically unpleasing. This is just to awful to ignore. Would you like me to move on and comment on the bathroom shade too?
Is Riverside, New Jersey really such a boring place that you can find nothing better to do than to harass people online?
How about you post a link to YOUR website so my readers and I can critique YOUR work. Either put up or shut up.
Amen, sista! Those who can, do. Those who cannot, become internet trolls! Keep your chin up Kristi!
If you are trying to sound erudite and intellectual, then perhaps a few lessons on proper grammar and spelling might enable you to sound like less of a jacka**. For your edification, I will use the following example from your original post: "THERE" are TOO many broken up lines". And, I feel that using the phrase "aesthetically DISPLEASING" might have better conveyed your unhappiness at the look that was achieved. And the window treatments rock, just so you know.
I have designed and fabricated window treatments for many years and for several designers. There is no hard fast rule for hanging shades and draperies together. It's a matter of taste…which is something you obviously do not possess. That, and you're uncouth.
Kristi, the website probably has pictures of your room designs. Ring a bell?
All the pics are fantastic.The entire collection of things in these pics are really perfect.I would like to see your more updates.Keep in touch with us.Thanks for all the information. .
Omg…OMG!!!!!!!! thank you for posting. this is MY STYLE!!! I'm starting my re-decor, thank you, thank you!!
Wonderful transformation without a great deal of remoldeling and shifting appliances around. Colors combinations are beautiful…love that "Elephant Skin" color. I could use that with my fantasy of a Country French style kitchen. What a cost saver you produced. Family room is sophistcated(sp) looking. Love how you work! Mary S.
I love the beach elements!
WOW-WEE!!!!!!
I have to keep you in mind with my living room; I’m stuck!! This is great… love what you did with the paneling!
I love this WHOLE room and the layout is so similar to my family room I am hoping to use some of your wonderful design ideas in my room. My biggest dilema is the wall of windows, in my room it really is a whole wall that is all glass (with a small area up top I could hang rods). I am wondering how you did the curtain rods. I can’t zoom in close to see. Are they small rods with finials on each end just butted up against each other or did you not use finials on the interior parts of the rods? I appreciate your expertise in this area and that you shared this gorgeous room with us! Also what kind of blinds are these? I am hoping to find something similar at a hopefully reasonable price since I will need so many (i’m guessing 8). Thanks again!
First, you totally cracked me up, with your “put up or shut up” reply to Idiot3310…. OOPS I mean Pluto3310!!!
I LOVE the way the drapes and blinds look together!! “Their” not “unpleasing” at all, in fact I am very pleased by them!
ALSO> Can you PLEASE PLEASE PLEASE share the 2 paint colors? The fireplace taupey-gray, and sea-glass-ish wall color? I have a serious LACK of paint color picking skills, and I have been searching for just these colors!! (I KNEW they would look good together) I can see it in my head AND on these photos, but I can see it at the paint store…. WTH? LOVE your blog, and LOVE this room makeover, and LOVE your mad skillzzzz!!!! I am also sending this question to your e-mail link… I am desperate.
THANKS!!! Julie
Love the room, especially the floors!!!!!!!!!
I notice the kitchen had tile floor and the living room had carpet, how was the hard wood floor installed? Just curious because I am dying to do this to my kitchen/living room! Can’t figure out if i need to take out the tile or just lay the hard wood floor right on top? Wouldn’t it leave it uneven when taking out the carpet?
Thanks and awesome job!!!
Thank you, Beatriz! Regarding the flooring, all of the old flooring (tile and carpet) was removed before the new was installed. If they had left the tile, there would have been 1/2″ ridges where the tile stopped and the carpet was removed. Hope that helps!
So glad my fireplace research has paid off! Love the floating mantel. Just what I was looking for.
Do you remember what color is used on the built in’s? Fireplace?
Amazing!! You really just hit it “right on”…. love the painted brick with the cabs
painted as well… the rough mantle is very “interesting” and give it balance.
I painted my fireplace years and years ago….It’s been 25 yrs. and have updated
many things…. when i finally changed my floors to travertine, i took it right up the
fireplace ( 2 story living room) and it’s beautiful.
wow I don’t think I have seen anyone this incredible yet understated. I have visited so many interior sites and blog but none so simple yet aesthetically pleasing and well executed like a pro.
you inspire me to star a career in interior designing and i will start will my new apartment.
Love your blog and this whole project, but especially the jute candlesticks/candle holders. Just wanted to let you know I featured you in my roundup of jute craft projects here. Feel free to check it out if you want and hope you like it! : )
-Mel the Crafty Scientist
Great job! That is one of the best tv walls that I have seen!
Amazing work!!! You did a awesome job!
Very talented! Can you give me the name
Of the paint colors? For the fireplace and
Walls? I have an old fireplace that is outdated
And really like those colors! Thanks so
Much for your inspirations 😉 Kristi B.
This is AMAZING! Wondering if you might be willing to give me the fireplace/wall colors too? You did such a beautiful job 🙂
It looks beautiful. I have a similar colored brick fireplace and was thinking of something close to that color for the paneling on either side, currently primed sort of (unintentionally) pickled looking white. Only thing is that instead of painting the brick completely I’ve sort of ‘limewashed’ it with very diluted white paint to tone it down. I might add more solid areas of paint to give it a sandblasted look. Just can’t decide if the wall color would still look ok with some red brick showing. Complimentary colors I suppose. Any thought?