DIY Fireplace Part 3 – Creating A Faux Brick Fire Box With Drywall Joint Compound
When I was in the planning stages of this fireplace project, I had decided that I would do a fancy faux brick interior on the fire box using joint compound.
Then I started building the fireplace, and it took way more time and effort than I had planned, so I decided that I would probably forgo the faux brick fire box and just paint the whole thing a solid black.
Then I read this comment yesterday, and I decided that I would probably regret it if I cut corners on this project and didn’t see my complete vision for this fireplace come to full fruition. So yesterday I tackled the faux bricks using joint compound. (Thanks for the shove, Alta! 😀 )
(By the way, if you’ve missed any of this project, you can see part 1 here, and part 2 here.)
Before I could start on the bricks, I needed to do a little detail work on the actual fire box. If you’ll remember, this is how it ended up when I finished building the basic structure on Monday.

Now what you couldn’t see in that picture is how rough the cut edges of the frame were that attached to the fire box. In some areas, the frame overlapped the edges of the fire box by up to 3/8-inch.

So I used my orbital sander with 100-grit sanding discs to sand down the edges and make them flush with the inside of the fire box.
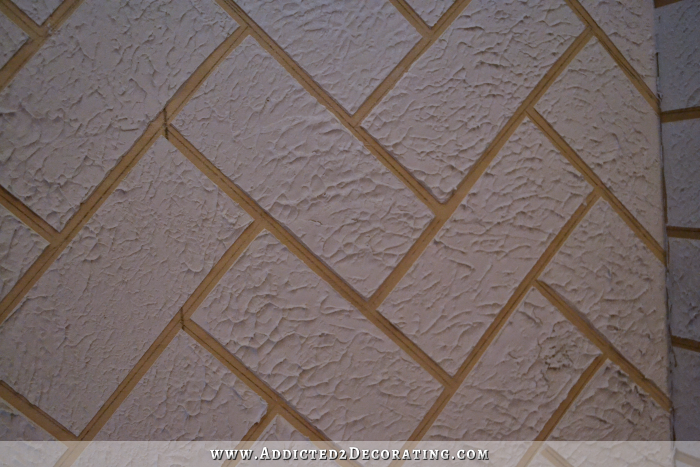
Once that was done on all four sides, I began marking off my brick pattern. I used a piece of 1″ x 3″ lumber cut to about 5.5″ long as a template for a brick, and just used a pencil to trace around it. I started on the back side and did a herringbone pattern.
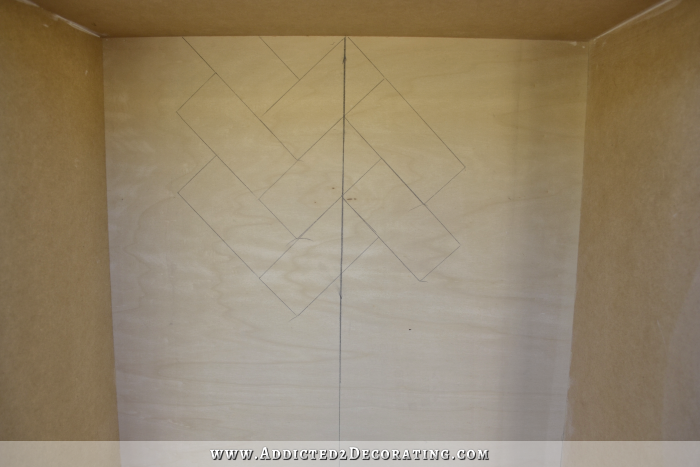
And I did a standard brick pattern on the sides. I didn’t do the top or the bottom because, frankly, I was tired of taping off the design, and I didn’t think they’d show in the end anyway.
Then I used 1/4-inch masking tape to tape off the design. This tape is generally not available at home improvement stores, but you should be able to find it at auto parts stores.
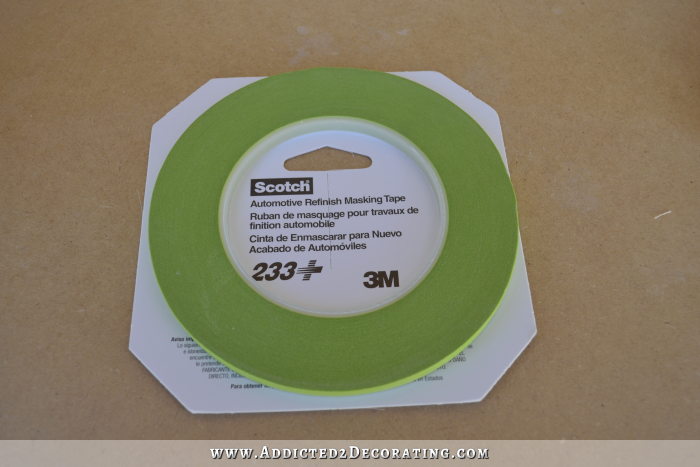
I just went right over my pencil marks with the tape.
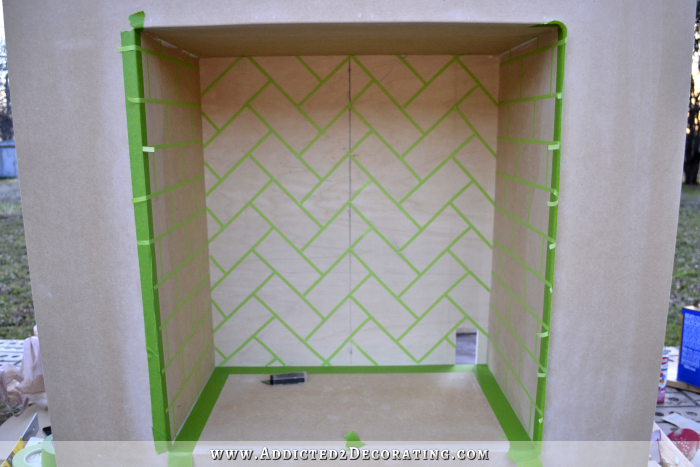

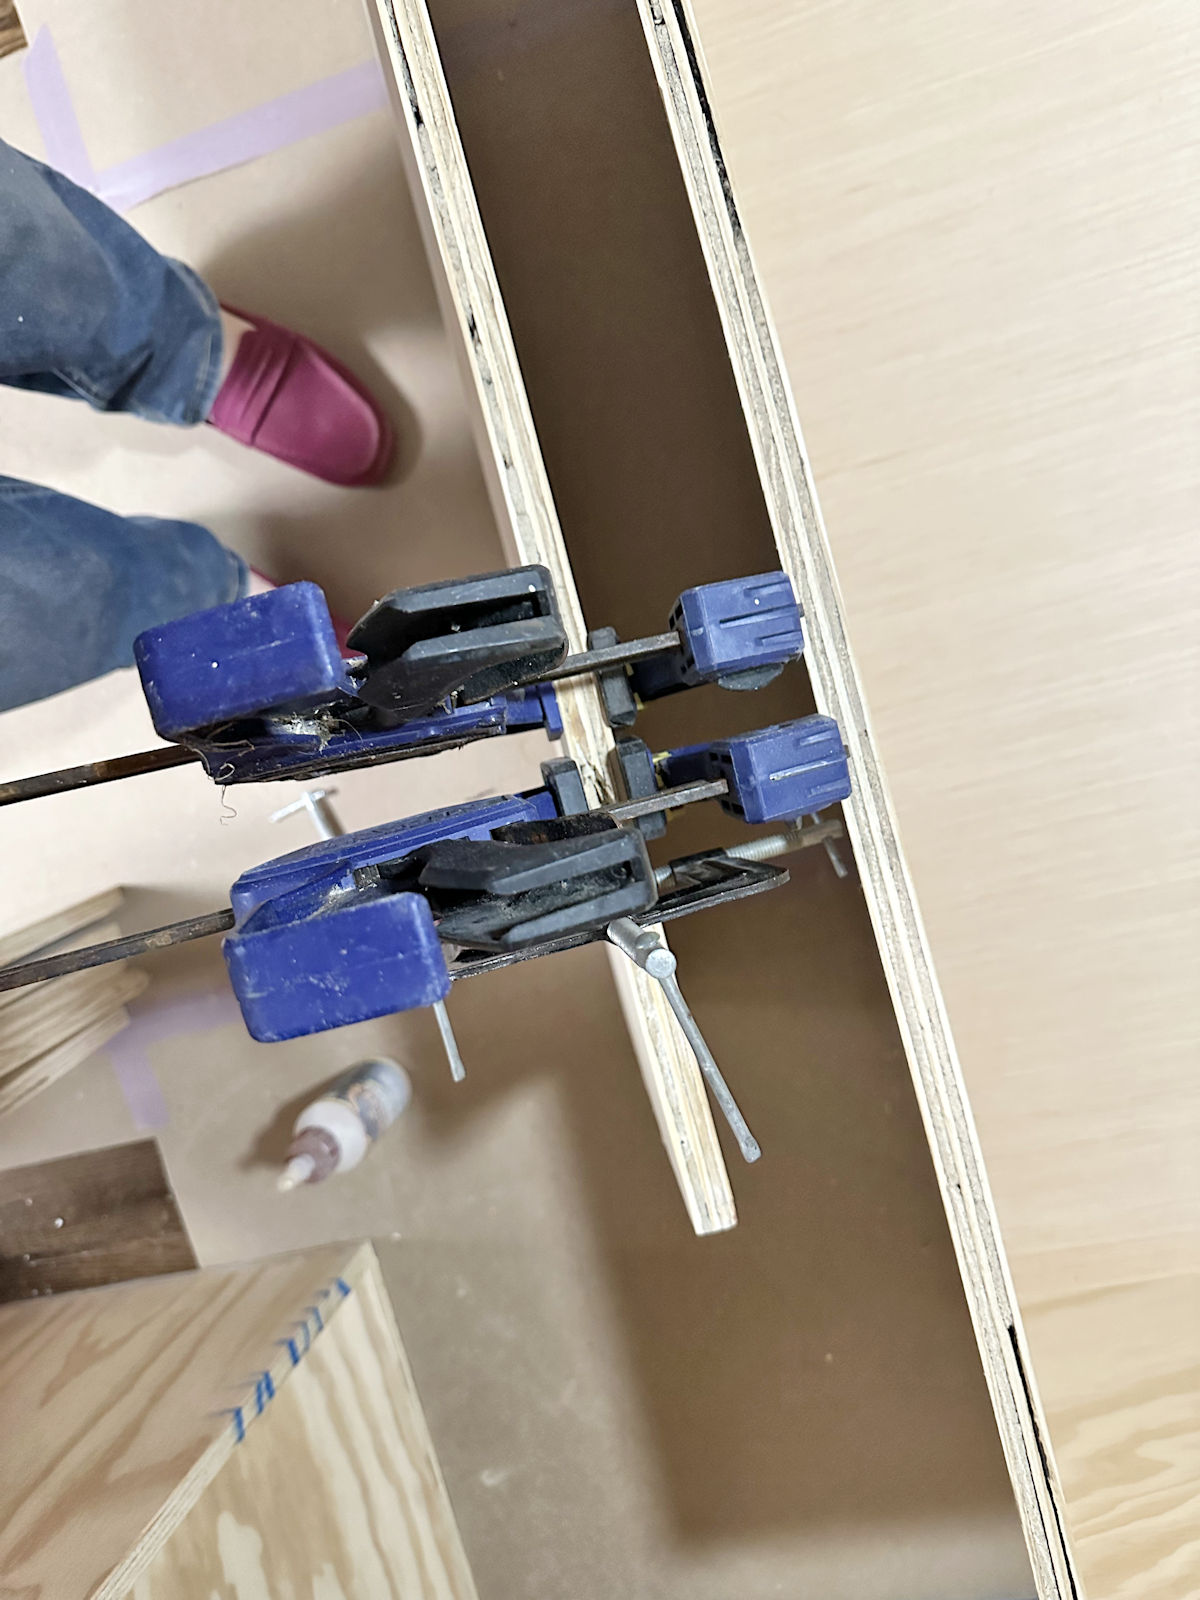
When everything was taped off, I used a 3-inch metal scraper and a small 3-pound container of drywall compound…
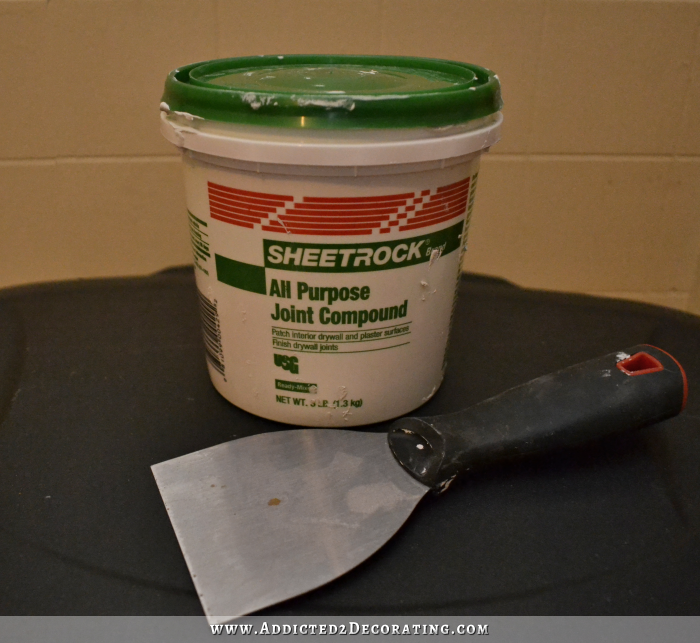
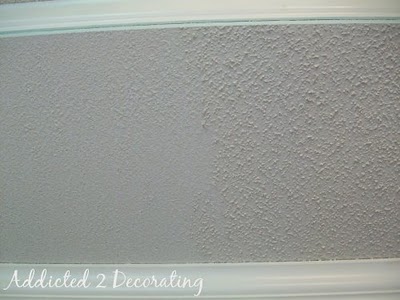
…and covered the back and sides with a thin layer. Then I used a small sea sponge (found at Michael’s) to add some texture to the drywall compound.
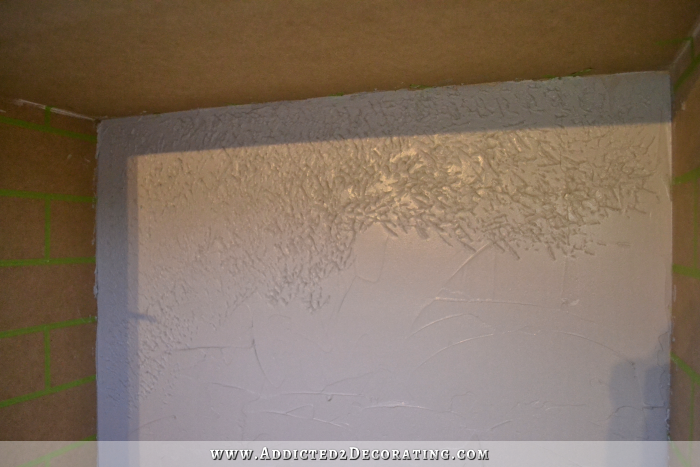
I used the sea sponge over the entire surface, and then removed the tape before the drywall compound started to dry.
Update: Many people have asked me how I was able to find and remove the tape once it was covered with drywall compound. If you’ll look closely, you can see a few tape ends peeking out from the top, and I also had one peeking out in the hole that I cut for the electrical cord.

Since all of the tape pieces were connected and taped to each other, once I started pulling one piece, it would reveal the ones taped to it, and so forth. I did have a couple that got lost, but I just used the point of a razor blade to poke around and find it, which wasn’t difficult since I had a pretty good idea of where it was supposed to be. If any drywall compound got messed up from my poking around with the razor blade, I just smoothed it over with my finger. But again, that only happened with about two pieces, since the rest were all pretty well stuck together in a web of sorts.
So to clarify, I taped the whole thing (back and both sides). The I mudded the back, and removed the tape from the back. The I mudded the left side, and immediately removed the tape from the left side. And finally I mudded the right side, and then immediately removed the tape. Of course, on the sides, removing the tape was a cinch since I left the pieces quite long on the front ends.
Then I placed it in front of a space heater so that it would dry faster. It took about two hours for the whole thing to dry completely.

When it was dry, it was very rough and had lots of pointy peaks from the sea sponge texture that I added.
So I used 120-grit sandpaper to sand down the peaks and give it a more natural brick texture.

(There are still a couple of “bricks” on the bottom right corner of the side wall that haven’t been sanded in the picture above, and none of the back wall had been sanded at that point. So you can see the big difference that the sanding makes.)
And that’s where I left it when I finished sanding at 10:30 last night.

I’m going to paint the whole interior black, and then use some various shades of black to give the bricks more of a textured look.
I really love this technique, and it can be used on almost any vertical surface to create the look of brick or tile. (I say “almost” because, of course, you wouldn’t want to use this in a shower or bathtub area.) Need a new kitchen backsplash but don’t have the cash for new tile? You can buy a big (and very heavy!!) 5-gallon container of drywall mud for about $15, and a roll of 1/4-inch tape for about $7, and create your own “tile” backsplash for a tiny fraction of the cost of real tile. You can paint it any color you want, or use several similar, neutral colors sponged on to create a natural brick or tumbled stone look.
I’ll get this fire box finished today, and hopefully get pretty darn close to finished with the fireplace. It’s supposed to be sunny and in the mid-60s today here in central Texas, so I’ll have no excuse if I don’t have a near-finished fireplace to show y’all tomorrow. 😀

Addicted 2 Decorating is where I share my DIY and decorating journey as I remodel and decorate the 1948 fixer upper that my husband, Matt, and I bought in 2013. Matt has M.S. and is unable to do physical work, so I do the majority of the work on the house by myself. You can learn more about me here.


Wow! What an absolutely brilliant idea!!
So creative. You set my mind whirling with all these ideas!
You never cease to AMAZE me!!
Amazing!!
How did you make the joint compound even? And how did find the making tape once you had covered it all with the joint compound, and won’t painting everything black obscure the grout lines? So many questions. Sorry.
The tape is peaking out of the top. It’s hard to see.
The pieces of tape at the top are the only pieces I see. How did you find the rest of the tape strips, after the compound covered them all?
As you pull the tape off it will reveil other pieces of tape. I did my back splash something like this and believe me you will find the tape.
Janis is absolutely right. Since the pieces are all taped to each other, as you pull one, it will pull up those connected to it, and so forth.
Awww,
Thanks for clarifying Kristi.
You are the most considerate Blogger!
Kristi – you are amazing! Thank you SO so much for the clarification both in a personal email and on your blog site. I especially appreciated your note about how you dealt with any messed up dry wall compound when pulling off the tapes. Your fireplace is looking fantastic! You are my inspiration!
The grout lines will be smooth and the bricks will be textured. The grout lines should not be painted out different or it will be evident there has never been a flame in the firebox. Real fireboxes are always blackened by smoke.
Making the joint compound even was a bit challenging, but I just tried to apply even pressure each time so that it would be pretty close to evenly coated. It wasn’t perfect, but nobody would notice. 🙂
As far as removing the tape, I just added some more details about that to the post, since so many people had that question. But basically, there were small ends peeking out the top, and once I pulled on those, those pieces exposed even more since they were all connected, almost like a web.
Ok probably a dumb question but how do you take the tape off once you’ve got the dry wall compound spread in a thin layer over the whole thing? How do you find the tape? I can’t see it at all in your picture above this comment: “I used the sea sponge over the entire surface, and then removed the tape before the drywall compound started to dry.”
If you look carefully, the tape is peaking out of the top.
But what about all those taped below the top and toward the middle? How do you find those? And how do you lift that tape so neatly – i.e., w/o pulling off some of the drywall compound at the edges of the “bricks” (besides very VERY carefully)?
I wondered about the middle tape part myself. =]
I’m still asking the same questions…How to get off the tape after the first row that is hanging out at the top..without disturbing the joint compound? It looks fantastic !!
Lynne (and others), since the pieces of tape were all connected and taped to each other, once I pulled one piece, it would reveal those pieces connected to it, and so forth.
Thank you for another great tutorial!
I love this idea and WILL be adding a “tile back splash to my lake house kitchen now. Thanks for the tutorial.
I can copy, even embellish sometimes.
You invent!
Well said, isn’t she amazing?!!!
Well, I can’t take credit for this idea. I saw it a very long time ago on HGTV (can’t remember what show exactly) and they used this technique to create a “tile” backsplash in a kitchen. I’ve wanted to try it ever since then!
That is genius! I can’t wait to see it painted. Genius!
totally AMAZING! Holy cow,,,can’t get over how great the box and the brick came out! As always,,,You are my Interior HERO!
GREAT JOB!
Aaaand you continue to amaze! I do not know how people come up with stuff like this. I learn so much from reading your blog, and even from the comments. You are really inspired! And inspiring!
You will be so very happy that you did not skip this step. It will make a huge difference.
Hawt dang, Kristi, that looks even better than I thought it would! You have an absolutely genius talent for taking an idea and turning it into reality! Taking the extra time to do this step will give your firebox extra dimension and add even more to the ambience of the ‘fire’ once everything is complete.
To answer one commenter’s question, yes painting the whole thing, ‘bricks’ and grout, in the flat black will cover the grout lines, but this is okay for the application inside a firebox. If someone was going to make a colored brick-look backsplash, I’d remove the tape, let everything dry, sand, and then re-apply tape on the grout before painting the ‘bricks’ in various tones. However, for a backsplash, you can also paint the whole thing in a white or off-white color, including the grout. I’d seal it thoroughly with several coats of water-based polyurethane to make cleaning easier. This concept can also be used to make diagonal ’tiles’ as a backsplash. Just google ‘joint compound backsplash’ and check out the pics!
I am soooo looking forward to seeing the finished project!
Alta, you are always such a big supporter of Kristi’s and I enjoy reading your comments so much!
Kristi, you did an amazing job (as per usual) with those “bricks,” they look remarkably real! I cannot wait to see this entire project finished, people are just going to be in awe of how awesome this fireplace is!
LUV, LUV, LUV! Learning from you is such an exciting pleasure! I want to be DIY-Kristie when I grow up! ~;0)
I love working with drywall mud! It can become almost anything! It has been my go-to textural material for ages. I’ve even used it to create dimension in my murals, especially those with people in them.
Your fireplace will be as stunning as everything you do, though right now, it’s gonna have to work darned hard to be better than those gorgeous mosaic lamps!
Ok, you blew me away on this one! So stinking clever!! Did you think of this yourself?
No, this isn’t my original idea, Juliette. 🙂 I saw it many years ago on an HGTV show where they used this technique to create a “tile” backsplash in a budget kitchen makeover. It looked remarkably real when it was finished, and I’ve always wanted to try it.
Kristi,
So very CLEVER! I might copy this one too.
Wow!
I am really impressed with how this came together! WOW! can’t wait to see the finished fireplace!
If only I could have had this at my fingertips last year at this time. I painted a faux tile backsplash in my rental kitchen, but this would have been much more convincing. Looks great, can’t wait till tomorrow!
Amazing! How do you come up with these ideas? It’s going to look fantastic.
I had actually seen this done on HGTV on a kitchen makeover where they used this to make a “tile” backsplash. I wish I could take the credit, but I can’t. 😉
My mouth is open! This is so fab. You just gave me a great idea to do a faux brick accent wall in the guest bedroom using the primary color of the room as the grout lines and painting the faux bricks the pop of color. I just love you so much and you need to conduct seminars in other cities, write books, be on hgtv so we can follow you around like the love sick puppies we all are. You are simply amazing.
This is turning out nicely! Totally love it! I’ve done this technique myself on window boxes. I used a floral stencil and drywall compound. Looks amazing!
My goodness your just flying through this project! When do you sleep? Building, designing, and then writing your blog. Your drive and commitment inspires so many of us Kristi. You go girl!
I honest to God don’t understand where you come up with these ideas. I would never have thought to put the tape down and then sand the “tile”. It looks so real I wouldn’t have known it wasn’t real. Congratulations.
What a great idea! I always enjoy your work. I am wondering if this could be adapted onto an outside cement wall with special finish applied to stand up to weather? Looking for ideas to turn an egress window into a stone or brick look. Looking out at plain cement is awful! Thanks!
I don’t think I’d use drywall compound outside, but I’m wondering if you could do the same thing with that concrete stuff that you use to repair cracks on driveways and sidewalks. It seems like it would be thick enough. Just trowel it on, and remove the tape immediately. Might be worth a try!
Thanks, Kristi! That makes sense. I might give it a go once this weather gets nice again 🙂
Wow this is fabulous Krisie! I can’t wait to see the finished project! Hurry please! And are you saying I could use this technique if I wanted to do a white faux brick wall in my kitchen??????????????
Yes, you absolutely could use this technique in your kitchen! And then when you’re finished, you can snap some pictures and send them to me! 😀
You are AMAZING!!
How did you come up with this?! I swear, you are SO creative. I love it. Like everything else, it’s going to look amazing when it’s finished.
As much as I’d love to take the credit, it’s actually something I saw many years ago on some HGTV show where they did a kitchen backsplash in faux tiles. It looked amazing,and I’ve wanted to try this technique ever since.
Yet again I am amazed. What a wonderful idea. I cannot wait to see it finished. You have every right to be proud of your work and yet you humbly share it with all of us. Thank you.
Sheila F.
exactly how i did my backsplash in my last house, people never believed me that it wasn’t real slate until they went real real close up. that tape is a great tool
I love it, Kristi! We did a faux brick over the real fireplace mantel in my booth, using the same technique, except we didn’t tape anything off. We just used a level to run our fingers along to make the grout lines. It was way messier than what you did, and the result looked messier, too. I like your idea of sanding the roughness down a bit.
I have to tell you that I begin to smile before I open your blog posts. I’m sure to be surprised and delighted. Since this project would leave me twisted like an arthritic pretzel, I’m especially impressed. Brava.
Wow, this is stunning! I do think it might look better to do the bottom, though as I think it will show some and be a visual distraction…but I could be wrong. I have a gas fireplace and the gap around my gas insert is much larger than the one in your set. I am amazed by this solution, wow…:)
Wow!! Just Wow!! My only question is how could you see your tape after covering rather thickly w/ the compound? Weren’t there many small pieces beginning and ending throughout the design?
Susan, I had a few pieces peeking out the very top, and since all of the pieces were connected and taped to each other, once I started pulling the very top pieces, they would pull up the ones connected to them, and so forth.
Love what you have created here! I think that if ever i give this a try,I may just tape diagonal strips at equal distance apart in both directions and then use an x acto knife to cut away the tape to create the elongated “bricks”. that way there is less drawing,taping and piecing together to create each individual brick. If that makes sense to you lol
You kill me! Holy cow! This piece is going to be magnificent! Everything you do is wonderful. I’m lucky that I can do simple arts and crafts! Love seeing all that you do! Fun to watch.
Beth 🙂
I read this post with my mouth hanging open. I can’t believe you are building this, it’s amazing!
I am new on your site, but I love your ideas. Enjoying all of it, thanks.
Really amazing work. You make “faux” a non-dirty word. Totally impressed. 😀
Beautiful faux brick. I love it. I can do that for a blacksplash.
Can’t wait to try it! Thanks!!
Lovely!!!
Make sure that no one starts a fire in it. LOL!!!
THANK YOU! Your posts about your fire box and faux brick interior is exactly what I need for my own (electric) fireplace that I’m trying to put together but have been stuck on these steps! <3