Dresser Turned Television Console
Okay, so I don’t have pictures of the finished family room. We tried to take them during the day, but the sun streamed through the windows and distorted the colors. So we tried to take them at dusk, but even the smallest amount of light coming through the windows turned everything blue…and not in a good way. The table and chairs…blue. The floor…blue. It was very strange, and very frustrating.
So we ended up having to wait until the sun went down completely last night to take the pictures, and since it’s the middle of summer, that ended up being around 8:40. So we didn’t finish up taking pictures until 10:30, and there was no way to organize and sort through the approximately 1,273 pictures that my mom took in time to post them this morning.
So sorry. They’re coming. Really.
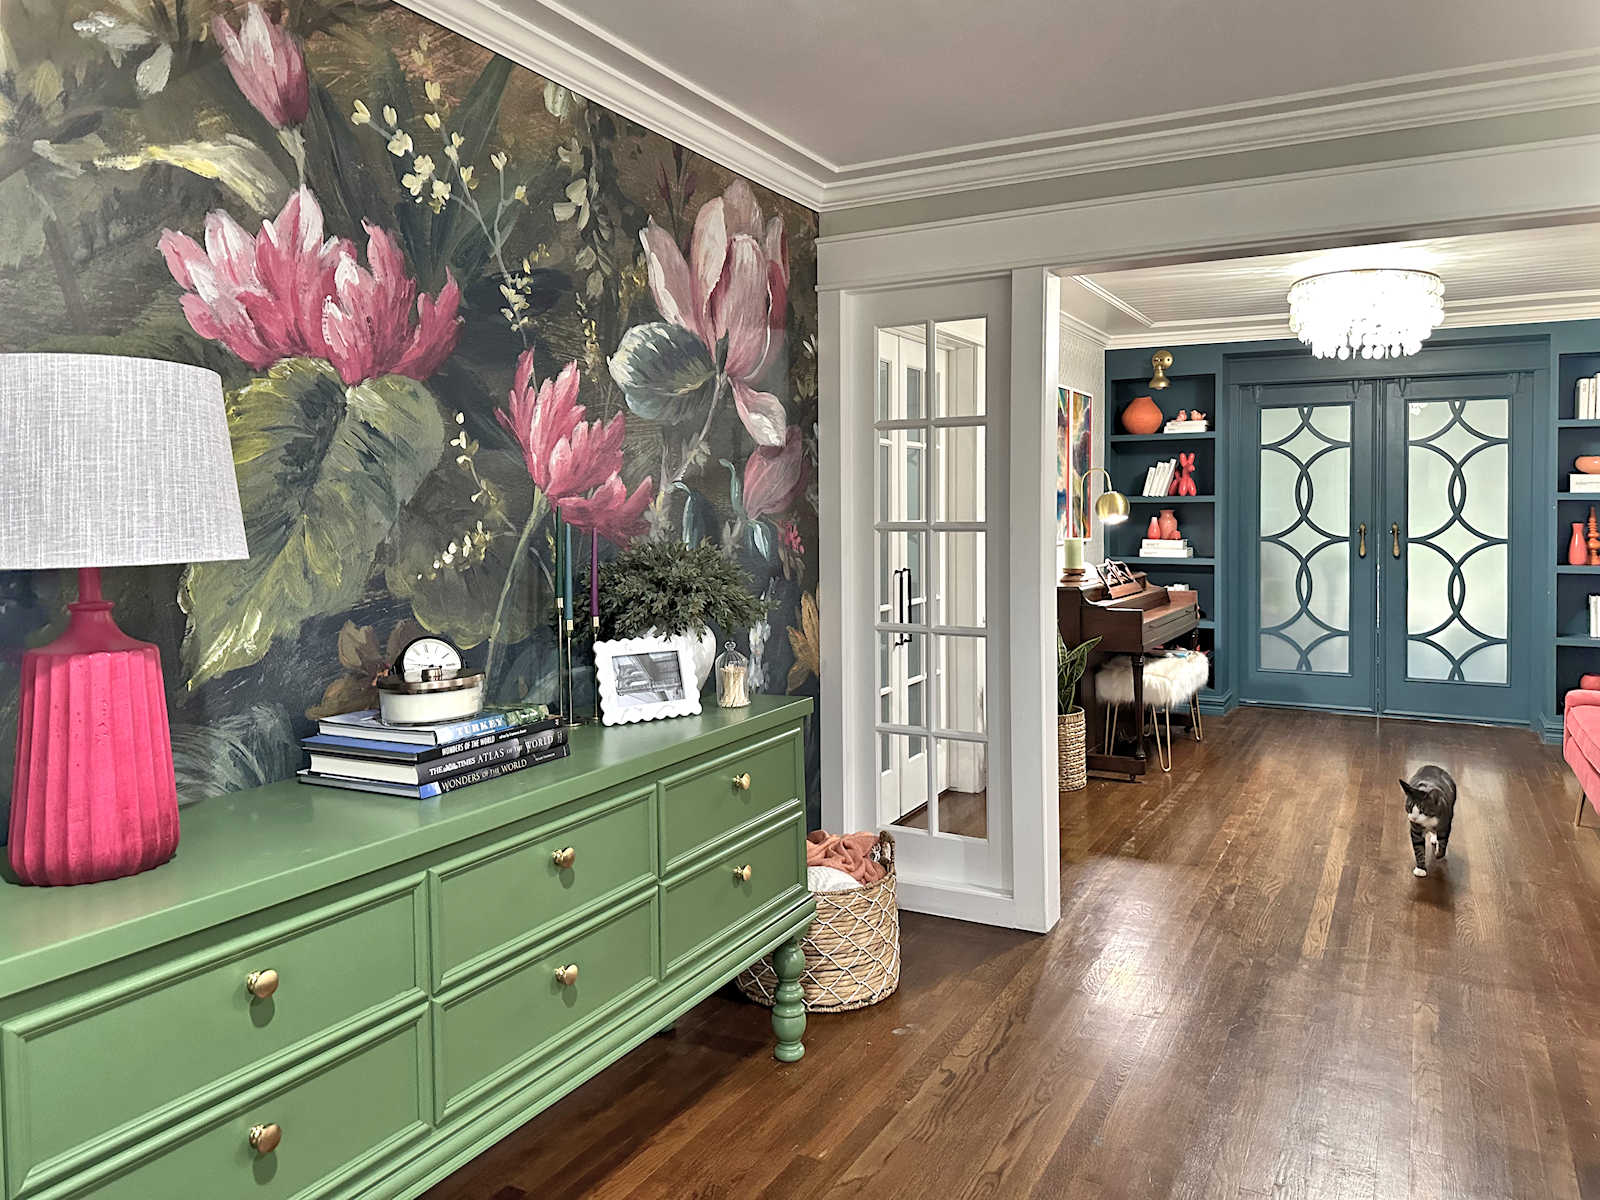
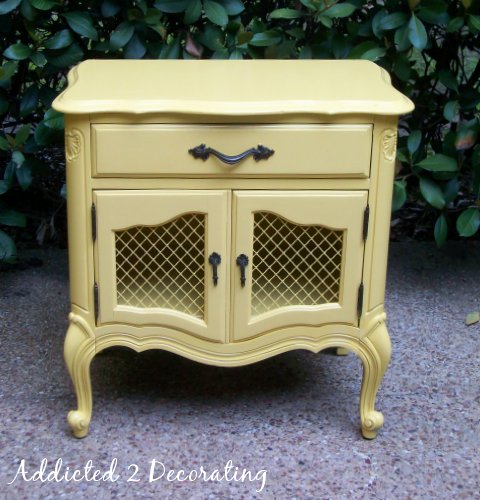
So as a peace offering, I thought I would show you how I turned this dresser…

…into a t.v. stand for John & Alice’s family room.

Sound good?
Now obviously, if you choose to do this, your dresser will probably be slightly different in the way that it’s built. I think the chances of you finding one exactly like this one would be very slim. But hopefully just seeing the process will help you understand the basic steps needed to go from dresser to t.v. stand. And of course, I call it a t.v. stand because that’s what I used it for, but this would be pretty as a buffet, or in an entryway, or just about anywhere!
So once again, this is the dresser that I started with. I found it on Craigslist for $60, and it was solid wood and quite heavy.

The first thing I did was sand the top, not because that’s the appropriate order in which to do things, but because I was anxious to get that ugly finish off of the top…and I love sanding.

Aahhhh…much better. Now all is right with the world, and I can move on.

Next I needed to determine which drawers to keep, and which ones were going. I played around with different configurations, and finally settled on keeping the bottom two drawers, and getting rid of the rest. That meant that all of the area above the two bottom drawers needed to be basically gutted.

It wasn’t the easiest thing. These old solid wood dressers are generally very well built, and very sturdy, so once I removed the back panel, it was just a matter of whacking away at the support pieces with a very large hammer and prying them out. Some of them could be unscrewed and removed easily, but some of them took some muscle. When it was all done, it looked like this…

Now obviously, there was a bit of a problem. Those two pieces needed to stay between the two drawers that I was keeping, but needed to be cut off so they wouldn’t interfere with the open area above.

And because I didn’t have the appropriate tool to take care of that at the time, I decided to go ahead and prime the thing. Again, not because this was really the appropriate time to do this, but because I was anxious to move forward.

I finally purchased the appropriate tool to cut down those wood pieces, which was a very simple hand saw that allowed me to get the blade right next to the horizontal support piece that I wanted to keep, while cutting away at the excess vertical pieces.
I then used my circular saw and cut a piece of 1/4” MDF to fit on top of the drawers. This support was needed because all that was there was very thin, flexible chip board. I attached it with wood glue and my nail gun. Notice that the front of the MDF doesn’t come all the way to the front of the drawers. You’ll see why in the next steps.

Next I used a 1” x 2” MDF board, cut to size with my miter saw, to separate the two sides. You can see here that this MDF board sits in front of the 1/2” MDF sheet that’s on top of the drawers. Now you can see why I left that space. I attached this piece with wood glue, and then shot nails at an angle from the back with my nail gun.
I also cut two more 1” x 2” MDF boards and placed them horizontally at the bottom of each section to cover the edge of the 1/2” MDF board just above the drawers. I didn’t take a picture of this step, but you’ll see those in later pictures.

Next I determined how high I wanted the shelf to sit, and I cut five support pieces that height. I glued and nailed two support pieces on each side…

…and also attached one on the back of the front middle separator piece. (This picture was taken looking through the back of the dresser towards the front. You can see the two 1” x 2” MDF boards that I was talking about earlier, which are lying horizontally on each side of the middle separator piece.)

These support pieces were attached with wood glue and my nail gun. (That’s basically how I attach everything…wood glue, nail gun.)

Then I cut a piece of 3/4” MDF with my circular saw for the shelf, which I placed right on top of the support pieces. (Wood glue, nail gun…I’m sounding like a broken record here.)

With the basic structure done, it was on to making it look pretty. That meant covering up any raw edges that showed on front with 1” x 2” MDF boards. I placed them along the sides to cover up the shelf support pieces, and along the front edge of the shelf to cover those raw edges.

Now here’s my big secret…this is why I prefer MDF boards over actual solid wood lumber. I’m not a carpenter, and I don’t do things perfectly. Sometimes I mess up royally, like this corner where I didn’t set the shelf support back far enough, so the “finishing” MDF pieces stuck out way too far. It looks terrible, right? Well, that’s where my trusty electric sander comes into play.

And because these are MDF boards, and not solid wood, they sand much easier. I was able to salvage it, and make it completely smooth.

Another secret is that I rely heavily on wood filler. I know, if you’re an actual carpenter and you’re reading this, you’re probably having a good laugh at my expense right about now. But this is how we non-carpenter DIYers have to do things. I filled in all the cracks and nail holes with wood filler, let it dry completely, and then sanded it smooth.

So after everything was sanded smooth, it was just a matter of re-attaching the back panel, giving everything one good coat of primer, sanding it lightly by hand, and then finishing with a couple of coats of paint. I also re-stained and polyurethaned then top.

So that didn’t look too hard, right? I assure you, you can do this!

Addicted 2 Decorating is where I share my DIY and decorating journey as I remodel and decorate the 1948 fixer upper that my husband, Matt, and I bought in 2013. Matt has M.S. and is unable to do physical work, so I do the majority of the work on the house by myself. You can learn more about me here.

I kept looking at this dresser when you first posted it, trying to figure out how you made four rows of openings into three. Now I know!
Great job… it works perfectly in the room.
This desk turned out amazing! Love the colors you matched together.
PS — I use wood filler all. the. time. No shame! 😀
I love this! I am working on a similar project. I found a dresser (I dumpster dived) which had cabinets and also three narrow drawers at the top. I removed the cabinet doors and I'm leaving the three narrow drawers. Painting it violet and adding new knobs/handles to the drawers. I was also going to paint the interior a different color, but not sure what yet. Did you paint two different colors in the interior?
Me too Karen! I thought she cut the top off to cut it down to size.
I can't believe how well the top sanded! I'm working on an antique storm door right now, and my sander/sand paper combo has been a little frustrating.
What grit(s) of paper did you use?
I almost always use 150-grit sandpaper. Sometimes I follow up with a 120-grit.
Thanks for this peace offering! I love your tutorials. They are always so clear and easy to follow. Heaven for a diyer like me 🙂
It is amazing how nice the wood top looked after you sanded it. It makes me wonder what some of the old dressers I have would look sanded and refinished. I like the way you built the supports for the shelf, and how you were able to sand the edges smooth even though they stuck out.
I am ever so amazed at your talent and DIY skills! I, too, was wondering how that dresser went from a 8-drawer dresser to a six! Very clever!
Thanks for the project breakdown. I always thought of MDF as looking so cheap, but I love how you use it to augment the existing wood. The paint is gorgeous, both inside and out.
looks fantastic!!! LOVE the project!
I really like this
Best idea I've seen in a long time..
Ummm…I meant 220-grit, not 120. Start with 150, finish with 220.
what will you do with the remaining drawers?
Gorgeous!
that is beautiful! What an great idea and tutorial! I love it! What color of paint did you use?
Wow it's a lot of work but you guys really did a great job. That sander really helps the wood become smooth. The color blends nicely. Thanks for the helpful tips.
This is WONDERFUL!!! What a great idea! Thanks so much for sharing!
Great job, you are very talented! I would love for you to link this up to My Favorite Things party! There's a new one every Friday
& be sure to check out my giveaway too! Stopping by from the Tip Me Tuesday party.
Thanks
~Iffy~
http://www.stayathomenation.blogspot.com
What color paint did you use?
Carpenters may laugh at you…but we are in awe of how you work things out so that your client has something useful, beautiful, and reliable, and prolly not cost an arm and a leg if they bought something like this at retail and customized to boot! Great job. Mary S.
it`s a great job .. really you have a wonderful brain … ,,
Nice making of the chest of drawers which are very good for storing and also easy segregating of different kinds of stuff in your cupboard. Easy steps for a wonderful cabinet making experience.
how did you paint the inside of the areas-did you use a spray gun??
Nope, I painted it with a brush.
Could you tell me what the paint color is? That color would match my furniture perfectly.
Could you tell me what the paint color is?
WHAT! That is NOT what I call easy!!!! I wish I had the patience and talent for that! BRAVO!!!
We just finished our dresser Makeovers and we love it.
I have a half done old dresser that has broken drawers. It has been moved twice now and my husband wants it out, but I keep swearing I will finish it one day. Now thanks to you I now know what to do. This will look great in either my daughters bedroom as a tv stand or our new remolded basement for storage. Thank you for helping me with my deadend dresser. So excited to get started..
Ironically, my mom had this exact dresser while I was growing up, I just started my own little family and it was passed down to me. I also have the mirror, which I just made into a pegboard for my craft room, I think the dressers next! It would hold my fabrics and sewing stuff very nicely. Thanks!!!
Found this when searching for inspiration for our version of this make over. Thanks for sharing your methods!
I linked to your blog from mine – I hope that’s OK.
Kristi,
What paint colour/finish did you use on the dresser come tv console? Looks Fabulous
Looks great.
Kristi, this dresser looks great! Gave me a laugh when you sand you didn’t have the proper tool so you went ahead and primed….exactly what I would do! Thanks for the great tut.
Hi Kristi. I know this is an older post, but I just saw it. I’ve been following you for a while but it was a lovely surprise either way. I have a very similar dresser that I purchased used, as an entire bedroom set. Anyhoo… My question for you, the diy guru is this: do you think it possible to avoid totally gutting the piece and just remove the center bars where the drawers “slide” under each drawer? And maybe use thinner plywood for the shelves? Thanks in advance for your thoughts. dj
Hi Dana~
I definitely think that’s an option. If the drawer spaces are big enough to accommodate a basket or whatever you want to put in there, then there would be no need to gut the entire thing. I decided to gut this one because the two drawer spaces at the top would have been less than useless once the drawers were removed. Those spaces weren’t even tall enough to fit a DVD player or anything like that, so I decided to rework the entire thing. But if all of the spaces on your dresser are usable sizes already, then you could just use them as is.
Thanks for the quick reply. I thought that might be the case and normally, I can be very decisive when it’s my area of expertise, but this type of DIY isn’t within my comfort zone. My dresser is only 3 drawers deep and the top ones are shallow, but all my cable equipment is very thin and won’t take up much height. But since I found your tutorial, I’m not inspired to jump on this project. Thanks!! dj
Looks fantastic! Thanks for your tutorials!
How did you handle any power cable or other cables for the TV?
Did you cut holes in the back to accommodate any power or other cables?
Thanks again for taking the time to inspire us!
This turned out so beautiful! I wish I had the patience to do stuff like this. I am curious though… what paint did you use for the blue and green on the inside and the grey/brown on the outside? They look marvelous together!
I’ve had this exact dresser in my family since as long as I can remember. I’ve been unable to part with it and now thanks to you I can give it new life where as of now it’s been used as a tabletop for our lizard cage. I’m so excited to transform this family treasure that might I add doesn’t look as good as yours into something new!
Thanks!
Excellent work! The dresser looks fantastic. Can you tell me what paint color you used?
Thanks so much,
Steve
Awesome job! Read through all the comments hoping you’d mention the colors you used…how come you’re not sharing that detail? 🙂
Hello!! I was curious where you got your baskets. I am having a hard time finding the right dimension basket.
Either Hobby Lobby or Michael’s. I can’t remember which one.