Kitchen Progress and One More Kitchen Floor Decision
I didn’t get my kitchen finished…obviously. I think it was pretty clear from the items left on my “to do” list on Friday that I wouldn’t be finishing the kitchen. It would have taken about three people to get through a list like that in three days.
But that’s okay. Progress is progress, and I’m still headed in the right direction. There were no major disasters, and no projects that I screwed up on and will have to start over again. It was just a slow and steady progress kind of weekend. And I’ve decided no more deadlines. It’ll be finished when it’s finished, and until then, I’ll just keep up the steady progression forward towards the finish line.
So here’s how my weekend went. On Friday, I took about an hour-and-a-half to finish sanding the floor. Then I finished up the other three drawer fronts, changing them from flat front to recessed panels. There was nothing quick and easy about that project. It took me four hours to finish the remaining three, and that didn’t even include any of the wood filling, sanding, or caulking needed to really make them look finished.
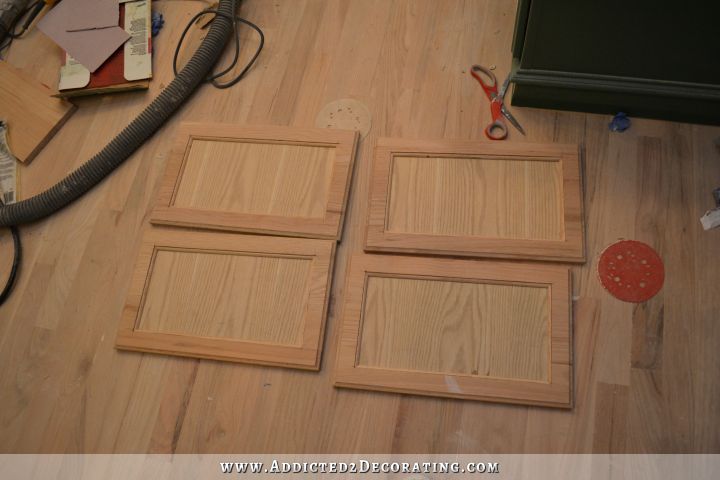
One of the major challenges with that project was cutting the tiny quarter round that frames the recessed panels. I had purchased a brand new blade for my saw specifically for that project (and then proceeded to waste an hour and a half putting the new blade on because I always forget how to do it and end up taking the wrong thing off and then have to spend and hour trying to figure out how to put the thing back together that I never should have taken apart in the first place…*sigh*), but even the brand new blade had trouble cutting the tiny piece of trim. It broke so many pieces that I started getting concerned that I would run out, and then I’d have to order more and wait another 10 days for it to arrive. But I eeked out just enough non-broken pieces to finish the job.
I also filled the gaps on the backs of the drawer fronts with wood filler (I decided to go that route instead of using the wood veneer) and set them aside to dry.
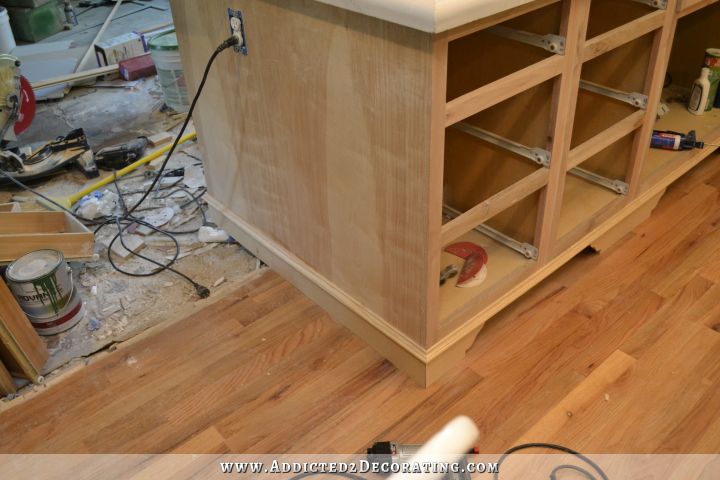
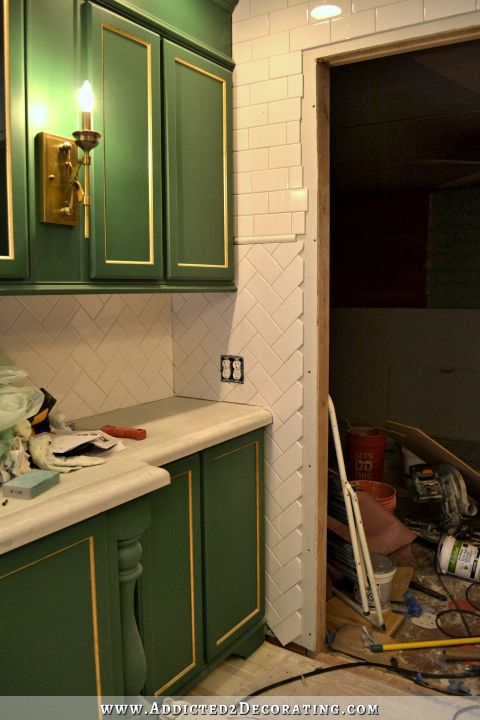
Then I decided to finish up the trim and furniture feet on the peninsula cabinets. I got the cabinets wood filled and sanded, and then I got two pieces of trim cut and installed…

…and then I realized that I didn’t have the piece of toekick plywood that I needed to install before I added the feet. And by that time it was about 9:45pm, so it was too late to go to Home Depot.
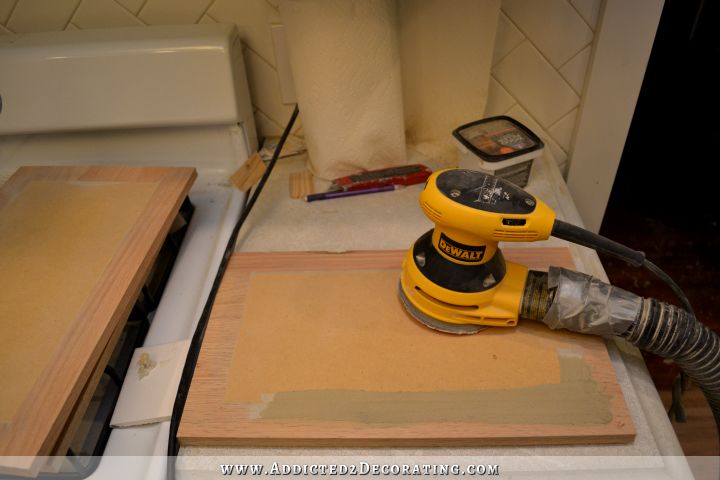
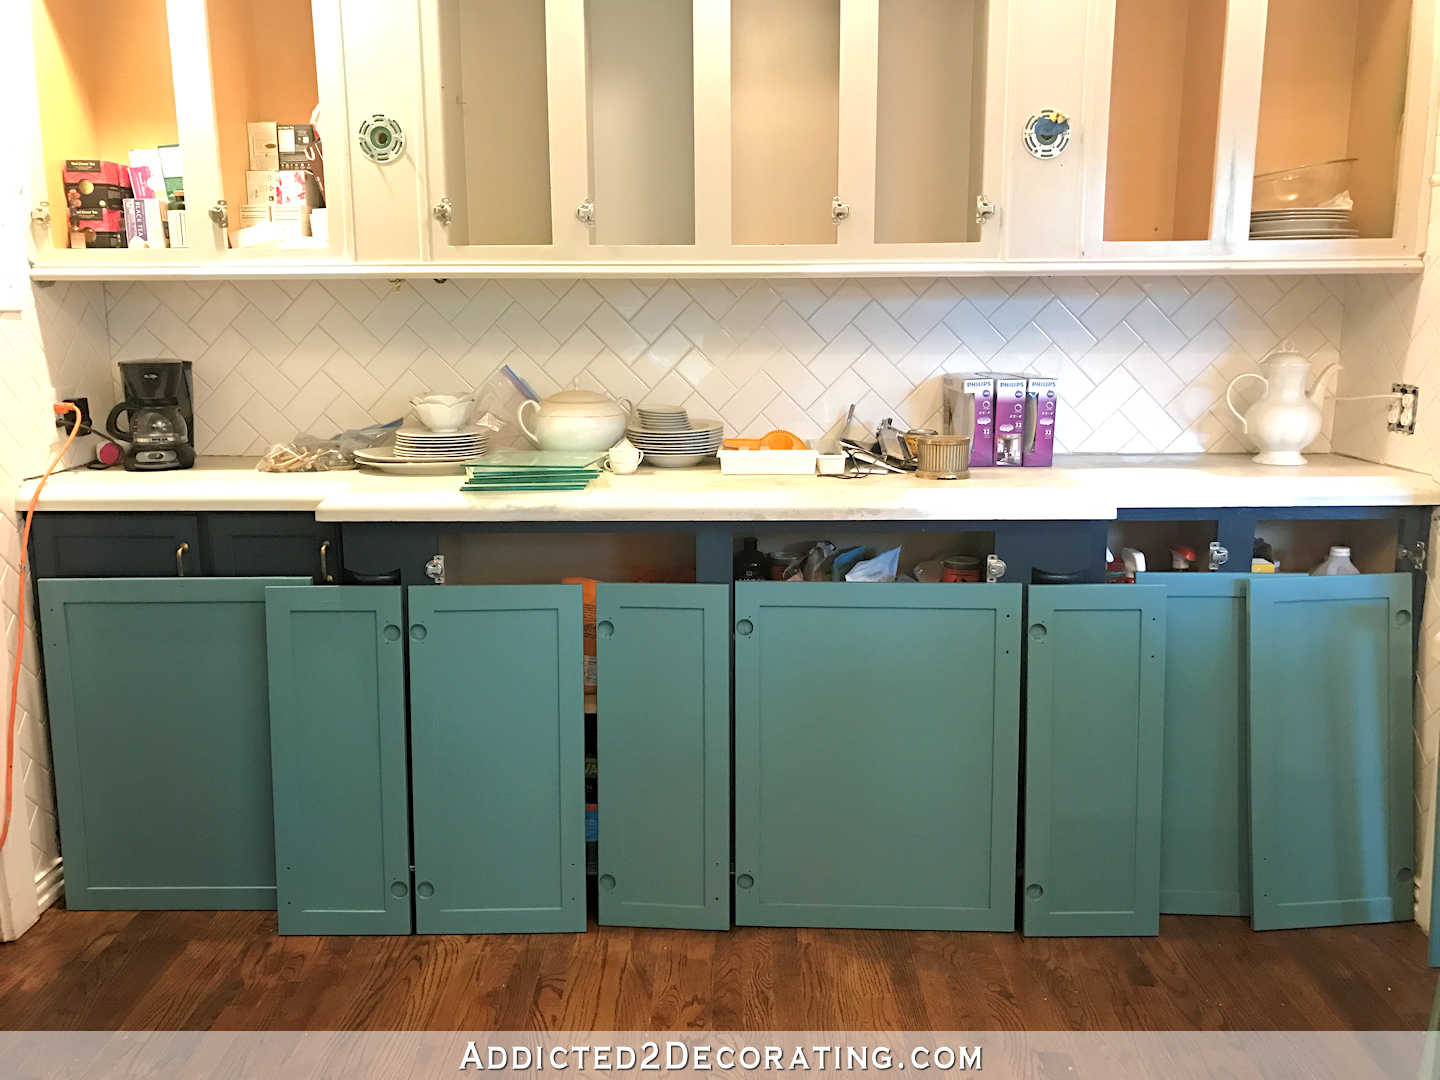
So I decided to work on the drawer fronts by sanding the backs smooth…
Then I cleared out all of the tools and stuff from the kitchen, spot sanded the floor where needed (my shoes left black scuff marks all over), swept the floor, and then gave the floor the first coat of Waterlox.
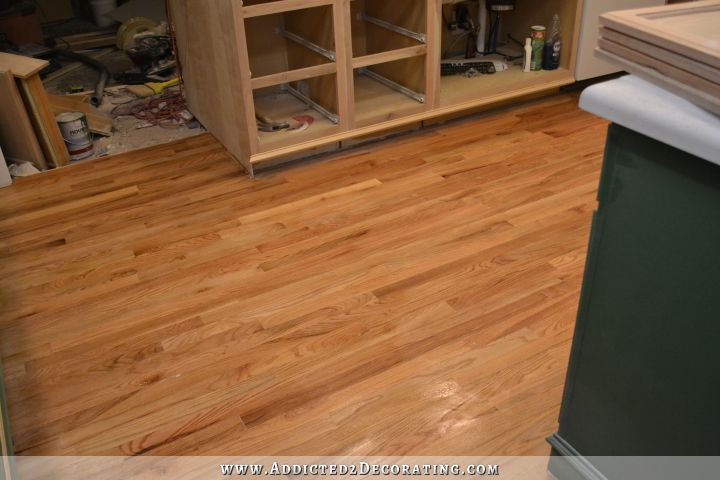
Then on Saturday, after a trip to Home Depot, I played around with some stain options for the floor. The new red oak floor with the Waterlox looks considerably different (much lighter) than the rest of the house, and I’d like it to match better. I had to mix my own color to get it to match, and ended up using Rust-Oleum American Walnut and Wheat in a 1:1 ratio. It’s almost a perfect match to the rest of the house.

It’s not a whole lot darker, but when you apply that slightly darker, richer color to an entire floor, it makes quite a difference. I still haven’t stained the floor, and I’m kind of dragging my feet because once I stain it, there’s no going back. Also once I apply stain, those floors will no longer be easy to repair if they get scratched, and the easy repair is the main reason I chose to use Waterlox on my floors in the first place. But I don’t really see any other option at this point, so I’m almost certain I’ll go with it.
After testing stains, I finished up the trim and furniture feet on the peninsula cabinets.
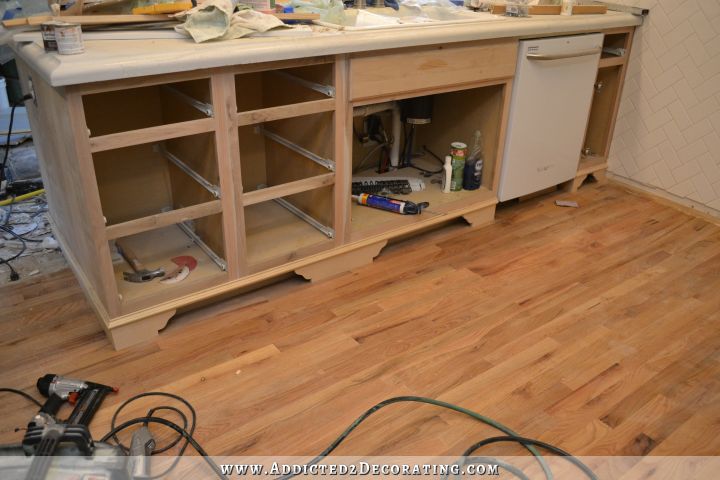
I only did the kitchen side and the side of the peninsula. I haven’t touched the breakfast room side yet, and I probably won’t until the floor in there gets leveled and the flooring is installed. Right now it looks kind of funny with the back side of the peninsula kind of cantilevered over the breakfast room floor like that, but once everything is finished on that side, it’ll look normal.
With all of the trim installed, I did all of the wood filling, caulking, and sanding, and then painted on one coat of primer.
I didn’t do the side because it needed quite a bit more sanding than the front of the peninsula required, and frankly I was running out of energy. I just wanted to do the easy parts. 🙂
Then after a quick sanding, I gave it one coat of paint and called it quits for the night.
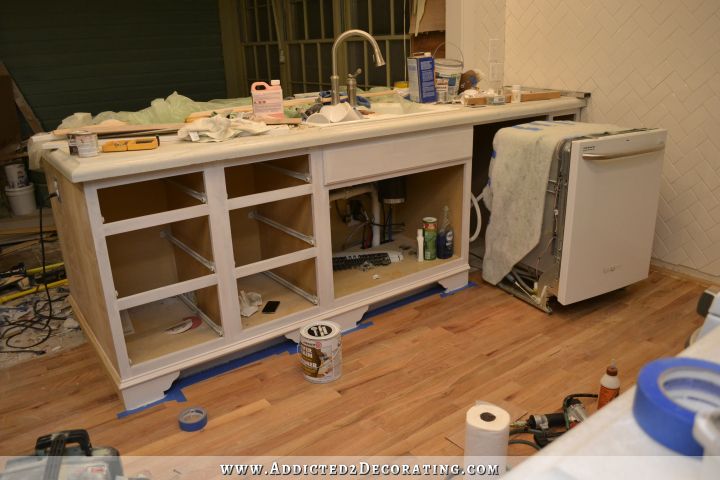
Yesterday, I was pretty tired, so I took things a little slower. I only got two things done. I wood filled, sanded, primed, and painted the trim around the doorway. (Sorry…no pic.) And then I put the second and final coat of paint on the front of the peninsula cabinets.

You’ll notice that the floor isn’t covered because I ended up painting it with a brush. I just didn’t have the energy to tape and paper the floor, and drape the cabinets, walls, and countertops with plastic, so I used a brush instead of the sprayer. Since it’s only lower cabinets and not uppers, and didn’t have any big flat areas, the brushing was really quite easy.
So that’s where things stand as of this morning. I’m not even disappointed that I didn’t meet my goal of finishing this weekend, because I know that I’ve been working as hard and as fast as I possibly can, and I’m very proud of the progress I’ve made. Of course, I’m anxious to get it finished so that I can actually have a normal kitchen that isn’t filled with tools and paint cans, but that will happen very soon. Until then, I’ll just keep on moving forward, slow and steady. But I might need a nap first. 🙂

Addicted 2 Decorating is where I share my DIY and decorating journey as I remodel and decorate the 1948 fixer upper that my husband, Matt, and I bought in 2013. Matt has M.S. and is unable to do physical work, so I do the majority of the work on the house by myself. You can learn more about me here.

Slow and steady wins the race! Girl, you deserve a nap! The kitchen is looking amazing, and I think you are awesome! I love everything you have done, and I know once it is all finished you will be so proud and happy! Keep up the good work. You are truly an inspiration!
It is really coming together! I think you should still celebrate “HOUSEIVERSARY”! Maybe a picnic in the livingroom. And maybe your next room should be your master bedroom. Then you will have a beautiful room to lay your weary body at the end of a hard workday.
I agree with the bedroom! You need a nice retreat to go after a long day of working on the house. Love…love this blog!!!!
I have been following this kitchen remodel and kept thinking ” i wish i had the know who to do something like that” and then i realized you have often said that u just go for it.
SO
i have taken up the same attitude
I am a newly retired 65yr old woman and have taken on the remodel of our guest bath
and
i am loving the experience
Good for you Denise! I bet it turns out fantastic!
what kind of flooring are you going with in the breakfast room? i hope it is the wood floors and i can see you painting under the table to make it look like a rug. i think of slow and steady wins the race.
I’m tickled pink with your progress! And, yes, you DO deserve a nap! It’s the little final details that seem to take time out of proportion to the result of the bigger things, but they are important too. You are doing it right, getting it exactly as you want it, and doing a professional job. Everything looks so fine, and once this kitchen is completed, you will have a room to be proud of for many years to come. Take the time you need, and enjoy the final steps in the process.
The magic will happen very soon, when all the elements come together in one final moment of completion, and we will all give a great big ‘HURRAH FOR KRISTI’!
I agree, no more deadlines. No one in construction or design ever successfully made one anyway. Just keep moving forward. The floor is going to look great!!
The feet and trim on that peninsula look fantastic. So does the floor. Gorgeous!
I agree with “no deadlines.” There are far too many artificial deadlines in life. Be gentle with yourself and take a break or at least pace yourself when you are tired. I make the worst mistakes when I persist past exhaustion.
Kristi, Since I’m fairly new to your blog I’ve missed the part perhaps where you describe your the purchase of your cabinets. I’m curious as to why you purchased the flat fronts and only to modify them yourself. thanks!
And Denise, you must share pictures of your bathroom remodel. I will be starting a full scale remodel on my own soon having never done anything of the sort in the past.
this is definitely a “you can do it” kind of blog Kristi!
ok I will. I will post pix of b4 and after soon
today i finished caulking the wood of my BOARD AND BATTEN walls….i used my pointing finger to smooth the caulk and noticed some tiny redish orange spots.,,,,then realized that was my blood from my finger tip….a wet finger is such a great tool for smoothing !!!!
Dana, she bought stock cabinets from Home Depot (or maybe Lowes), which is why she needs to modify them to suit her design.
“And I’ve decided no more deadlines. It’ll be finished when it’s finished, and until then, I’ll just keep up the steady progression forward towards the finish line.” <<< My favorite part of this post! We're all anxious to see the completed kitchen, but I think we were all getting a little concerned that you were maybe pushing yourself too much. This is going to be one of the most beautiful kitchens I've ever seen. And, might I say, you are my favorite blogger!! 😀
You have made remarkable progress!! You just keep on at your pace, there is NO reason to burn yourself out.
I feel as if “I” need a nap after reading all that you do! It all looks great and kudos to you for accomplishing so much!
Hi Kristi, For what its worth, I’m proud of you too. 🙂 I feel pretty safe in saying that whatever pace you need to take is fine because we’ll all be here to enjoy the progress you make with you. It doesn’t matter what project or room you’re working on. I’m still going to be checking your blog every Mon-Fri morning to see if you’ve posted and cheer you on. Keep on keepin’ on. 🙂
Lookin’ good!
Glad to hear you’re not beating yourself up regarding arbitrary deadlines. You’ve done SO much in your home. It’s amazing. You’ve inspired me to help my mom with her sewing room makeover. She has a lot she’d like to do and after following your blog for a while I’m convinced the two of us can make it happen! It’s not big DIY by your standards LOL!, but big for us! Painting cabinetry, pulling up carpet, deciding on new flooring, wallpaper removal, paint, paint, and more paint. 🙂 Thanks for the inspiration AND for the very detailed posts. Seeing the misses and “could have done betters” are just as helpful as the final tutorials.
Kristi you have done so much already. Those tile walls had to have done you in last week! I cannot belive that you started doing stuff at 9:45, you should have taken a nice cool bath and gone to bed! It will all get done, just take your time. Accidents happen when you try to hurry and you don’ t want that! Everything looks great, you are headed for the finish line. I have a quick question for you. When you use your Dremel Max to cut wood, what is the thickest piece you have ever cut? Also, have you ever cut metal with it? I need to cut the broken legs off of our house number sign. It was one of those heavy aluminum ones you can order through Home Depot and Frongate. Bloody legs snapped trying to put it in the ground years ago so it is just stuck on the mail post. I am spraying a large oval wood plaque that has its own legs and I am going to attach the aluminum one to the plaque but I have to get those darn legs off of it. Any suggestions? Thanks, and always, Blessings
Great progress on a mammoth project.
I have to say, that I am so glad you went back to the unpainted oak. I have to admit I was just SICK when you decided to paint it. It low looks so beautiful. I have read many times that green is the best color to compliment wood.
Thank for all the entertainment!
I am your biggest fan! You really inspire me! May I ask please, what is your preferred brand of wood filler? I have a project looming that will require lots of filling. Thanks in advance!!!
I always use Elmer’s from Home Depot. Dries fast and sands beautifully. If you’re wanting to stain it, be sure to read the label and get one that says “stainable”.
Kristi, thank you so much for taking the time to answer my question! I so appreciate it! If I can ever help you (from Northern Calif or via the interwebs), know I will gladly respond! 🙂
Every day is so exciting to read & see your progress! Good for you…deciding to just keep plugging away on your list. Yes, you WILL get there…and it is going to be so awesome! Maybe you should consider putting a bed in the kitchen and camping out a few days in there to take it all in! 🙂 before you start your master bedroom!
What you have done is nothing SHORT of AMAZING. I have had a question though…do you have to pull any permits, or have inspections, etc.? We are in an area where one is supposed to pull one if they sneeze :(. Maybe the inspectors know that you are extremely competent, and “don’t bother with Kristi!”
I continue to state that you are far better than many of the TV do it yourselfers! Simply…incredible!!!! Upward & onward! Hooray for you!
So happy that you are starting to accept what you can do in a reasonable time frame. Everything is going great. You are to be greatly admired.
I NEED a nap after reading everything you accomplished. : ) I’m glad you took the pressure off yourself to finish the room under a deadline. Just do whatever you can, whenever you can. Its looking great!
My husband and I always double the time frame and the budget!
Kristi — for tiny trim like that, I find using tools designed for model-making works much better! The miter box is an aluminum channel, with slots cut for typical angles, including 45. It’s about 2″ wide x 6″ long. The saw is made by Xacto — about 5″ x 1″ tall blade, with a rigid spine, locks into a small handle. You know the rest!
You might want to purchase this small moulding cutter. Works great can miter all angles. I found it while working on doll houses. I purchased mine at hobby lobby.
Easy Cutter One hand use and doesn’t split the trim. Can’t post photo so google dollhouse trim cutter. This is not a small miter box.
I am so enjoying reading of your progress. Everything looks so beautiful so far. This will be a job to be proud of!
Beautiful! I cannot wait to see the finished product. Just take your time, you are doing a wonderful job and you are such an inspiration! I have gotten so many ideas from you! You have inspired me to do a little bit of rearranging to my kitchen, too. I’m going to move the stove (if I can talk hubby into it) and add a few more cabinets. I need so many more cabinets in my kitchen! I’m also going to paint them a green (hopefully like your green!) I enjoy looking at all your projects. Just keep with it. The worst parts are behind you and you will be finished soon! It takes a crew to do what you are doing, and you are just one person. Do not be too hard on yourself!
I swear Kristi to get me motivated to keep going at my own projects(Theirs lot’s of them!) I just need to read your blog for a few moments and i’m inspired to keep going… my new mantra is “If Kristi can do it so can I!” LOL
Your Kitchen looks BEAUTIFUL, Keep up the inspiring, creative, talented work Kristi. Just incase you may have missed it I think you rock! LOL Have a great morning !
Hi Kristi, missed hearing from you today, but know that you are probably totally focused on the finish line. Just wanted to let you know that your followers are sending all positive thoughts and wishes to you, as you work your way through this enormous undertaking. Hoping all is going well. Blessings
Hi, Kristi; could you please tell me what you are doing/plan to do regarding the cabinet/drawer interiors? Will they be painted? Green or another color? Stained? You may have already covered this in a previous post and I just missed reading it – if so, please just point me in that direction! Thanks!