Teal Kitchen Cabinet Sneak Peek (Plus, A Few Cabinet Painting Tips)
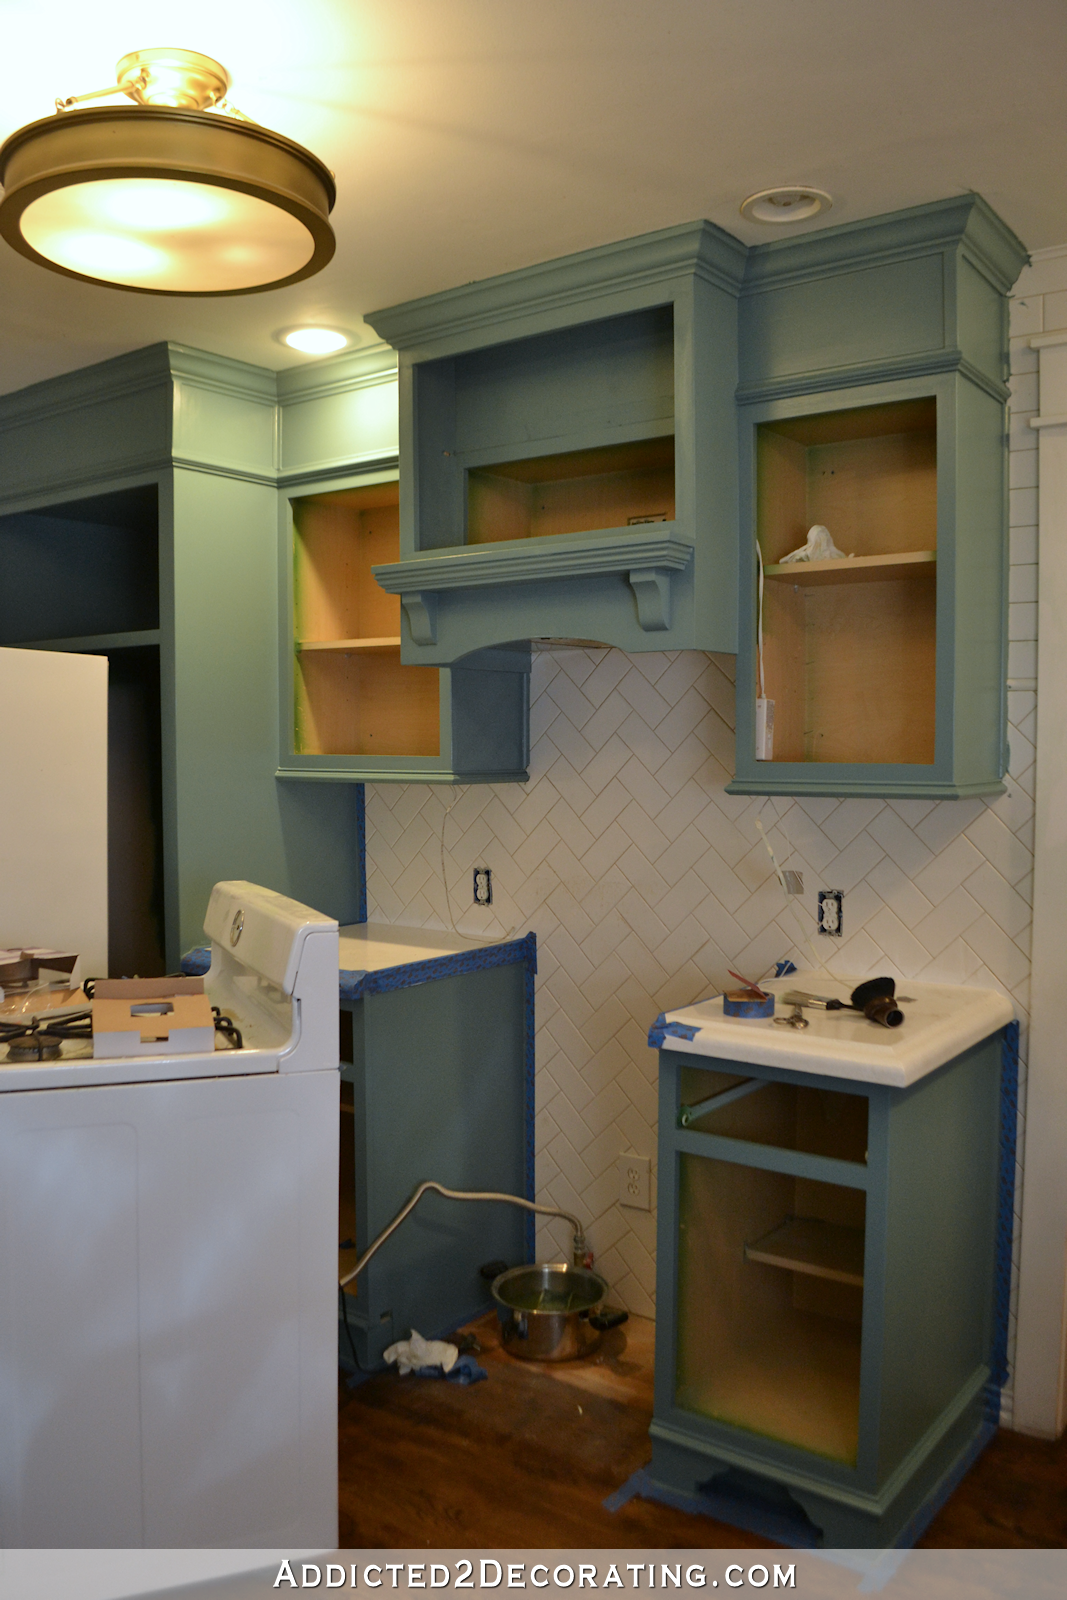
I got started on painting the kitchen cabinets yesterday, and while I didn’t get very far (I only painted the backs of all but two doors on the wall of cabinets), I couldn’t step away from the blog for the weekend without showing y’all a sneak peek of the color. I’m giddy with excitement about the new direction of my kitchen.
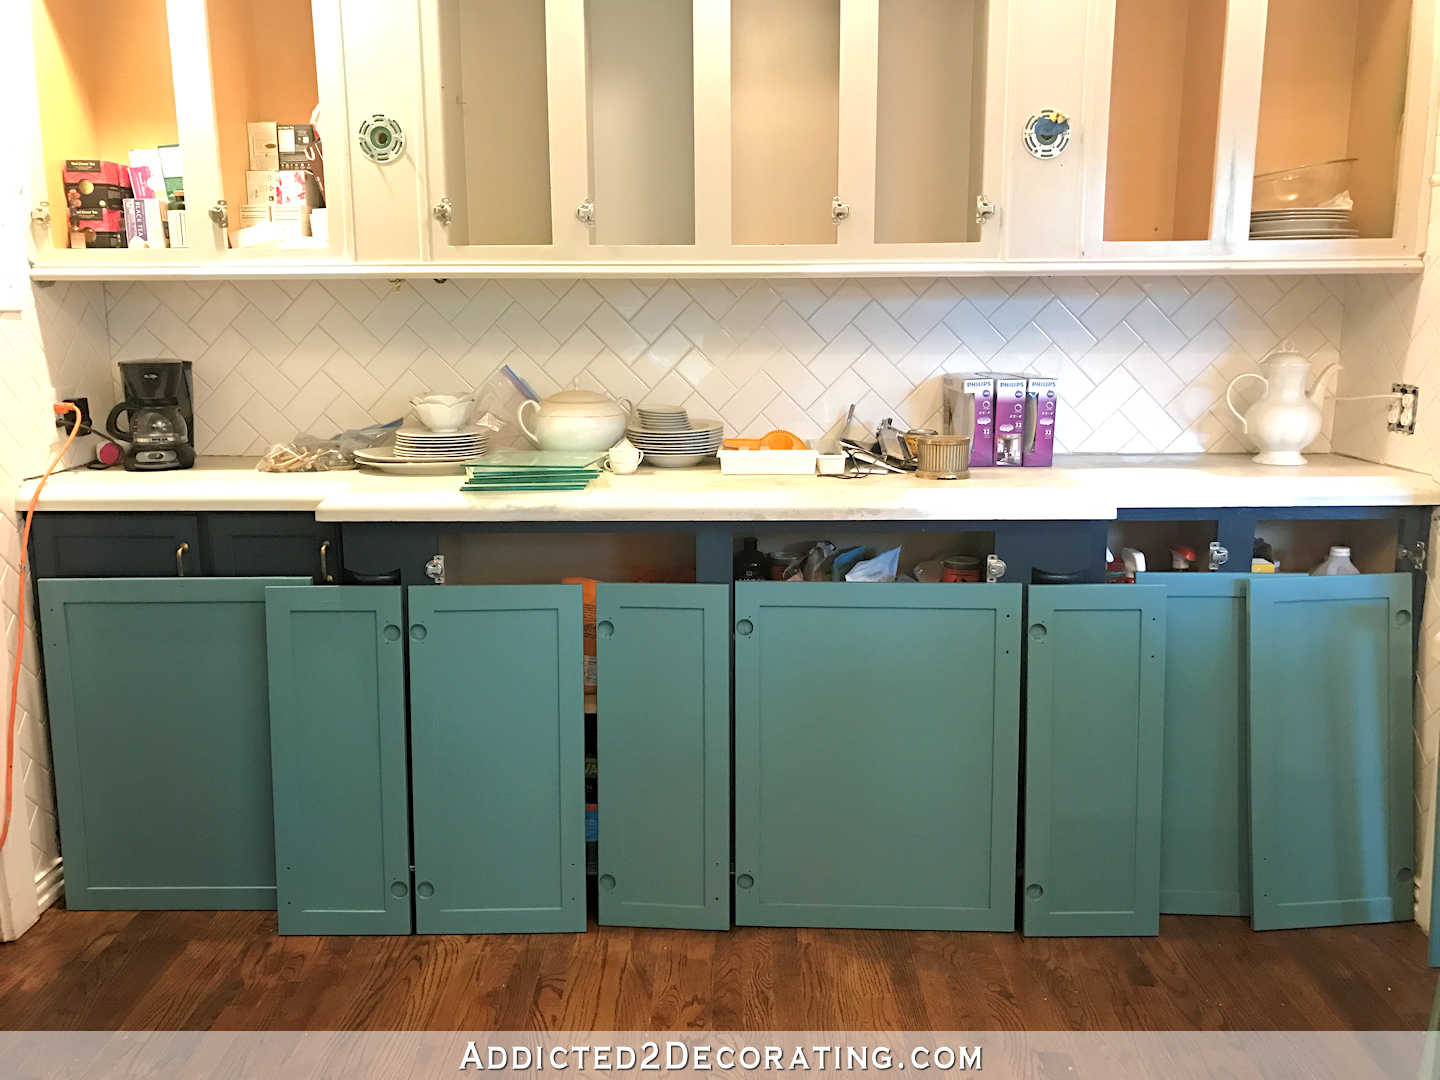
Aaahhhhh!!! Isn’t that pretty?! This color is absolutely, 100% “me,” don’t you think?
And the interesting thing is that even though this color is pretty much identical to the color on the kitchen cabinets at the condo, it feels like a new, fresh color because of the differences in the two kitchens. The condo kitchen was tiny (about 8′ x 8′). It didn’t have any windows in it either, and the window in the neighboring eating area (only one of four windows in the entire condo) was underneath a walkway in an interior courtyard in a building built like a rectangular donut, so it never got a lot of light even during the brightest time of the day. It was very much like a little cave. A pretty little cave 😀 , but a cave nonetheless. So the teal always looked dark and gray.
My current kitchen, while still small (10′ x 14.5′) is much bigger than the condo kitchen and feels about four times as big just because it’s so open to the breakfast room. And while it also doesn’t have any windows directly in the room, it gets a ton of natural sunlight from the eight windows in the two neighboring rooms.
So with the room differences, it feels like a brand new paint color to me. I like that.
Anyway, I had several people ask me what I was going to do about the streaky buildup of paint where I tested color after color after color on those two cabinet doors.
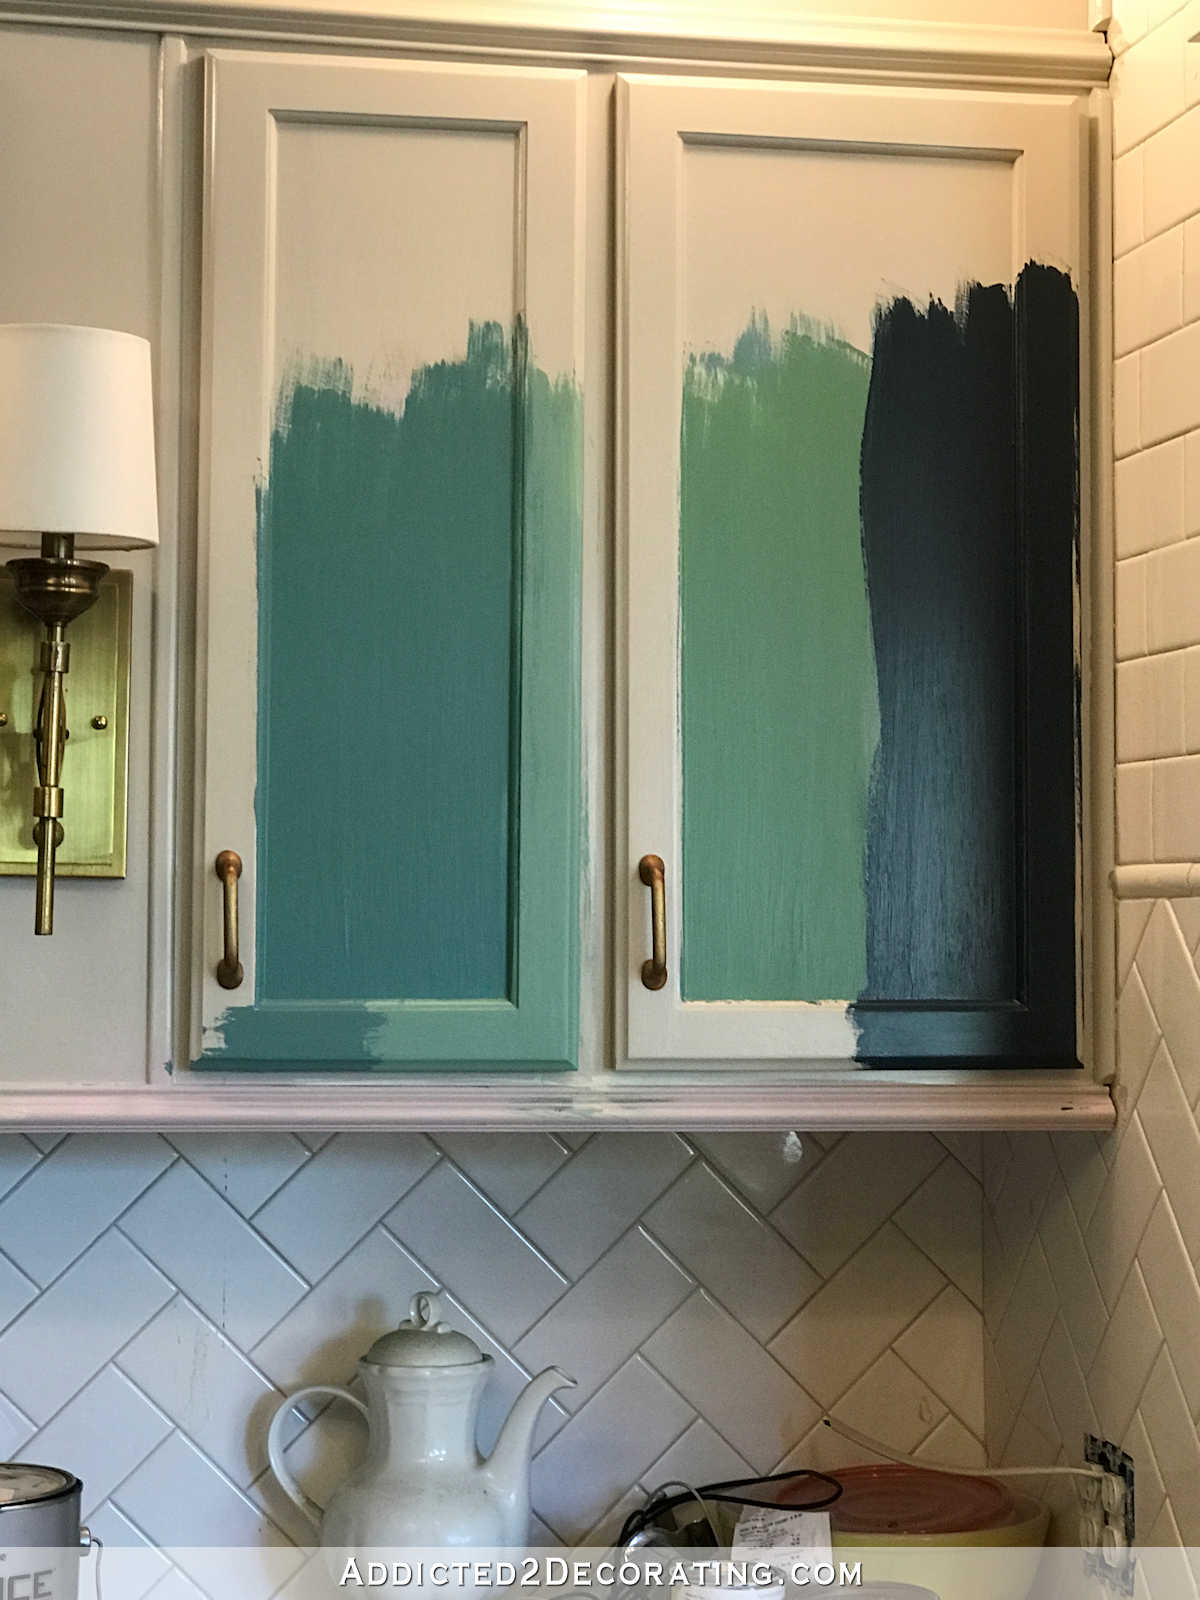
All I did was use my small Ryobi Corner Cat sander, starting with 80-grit sandpaper and ending with 220-grit sandpaper, to sand off all of the streaky buildup of paint.

It made very quick work of removing all of that paint, and even got into the corners of the recessed panels. This is the second corner sander I’ve owned. The first one was something called a Mouse. (Black & Decker, I think.) That thing was tiny and not very powerful, although I bought it many years ago, so they may have improved it by now.
But this Ryobi Corner Cat is far better than my old Mouse. It gets into corners just like the mouse, but the sanding pad is quite a bit bigger. It’s also more powerful, so it does the job faster. It doesn’t have any removable parts or accessories like the Mouse, but I just wanted a simple corner sander that actually sands in corners and this one does the trick. I highly recommend it.
I also want to answer a few questions I get repeatedly about painting cabinets. I do have a very thorough post about how I paint kitchen cabinets with a brush and get an almost flawless finish. You can find that here.

But here are a few more questions that I get quite often…
Do I have to sand my cabinets before painting?
Only if you want them to look good. 😀
I absolutely hate all of these products that promise “no sanding required.” Your final paint finish will only look as good as the layer underneath. If you’re putting paint on top of cabinets that are dinged, scratched, have heavy grain, have an imperfect finish, etc., then your new layer of paint is going to show those imperfections. Prep work is key to getting a flawless finish, so if you’re going to tackle a huge project like painting kitchen cabinets, take the time to do it right. Yes, sand your cabinets and doors first.
The good news is that you don’t have to do it all by hand. Start with a small sander like the Ryobi Corner Cat to do all of the flat surfaces. If your cabinets and doors are in pretty good condition, just start with 150-grit and end with 220-grit. If they’re in pretty rough condition, start with 80-grit and end with 200-grit. Then go back and sand by hand any details (routed edges, beaded details) that the sander couldn’t reach. The goal isn’t to remove all of the existing finish. The goal is simply to get a smooth surface. So don’t rely on your eyes to know when you’re finished, since they sanded doors will probably look terrible, just like my door where I painted all of the sample colors…
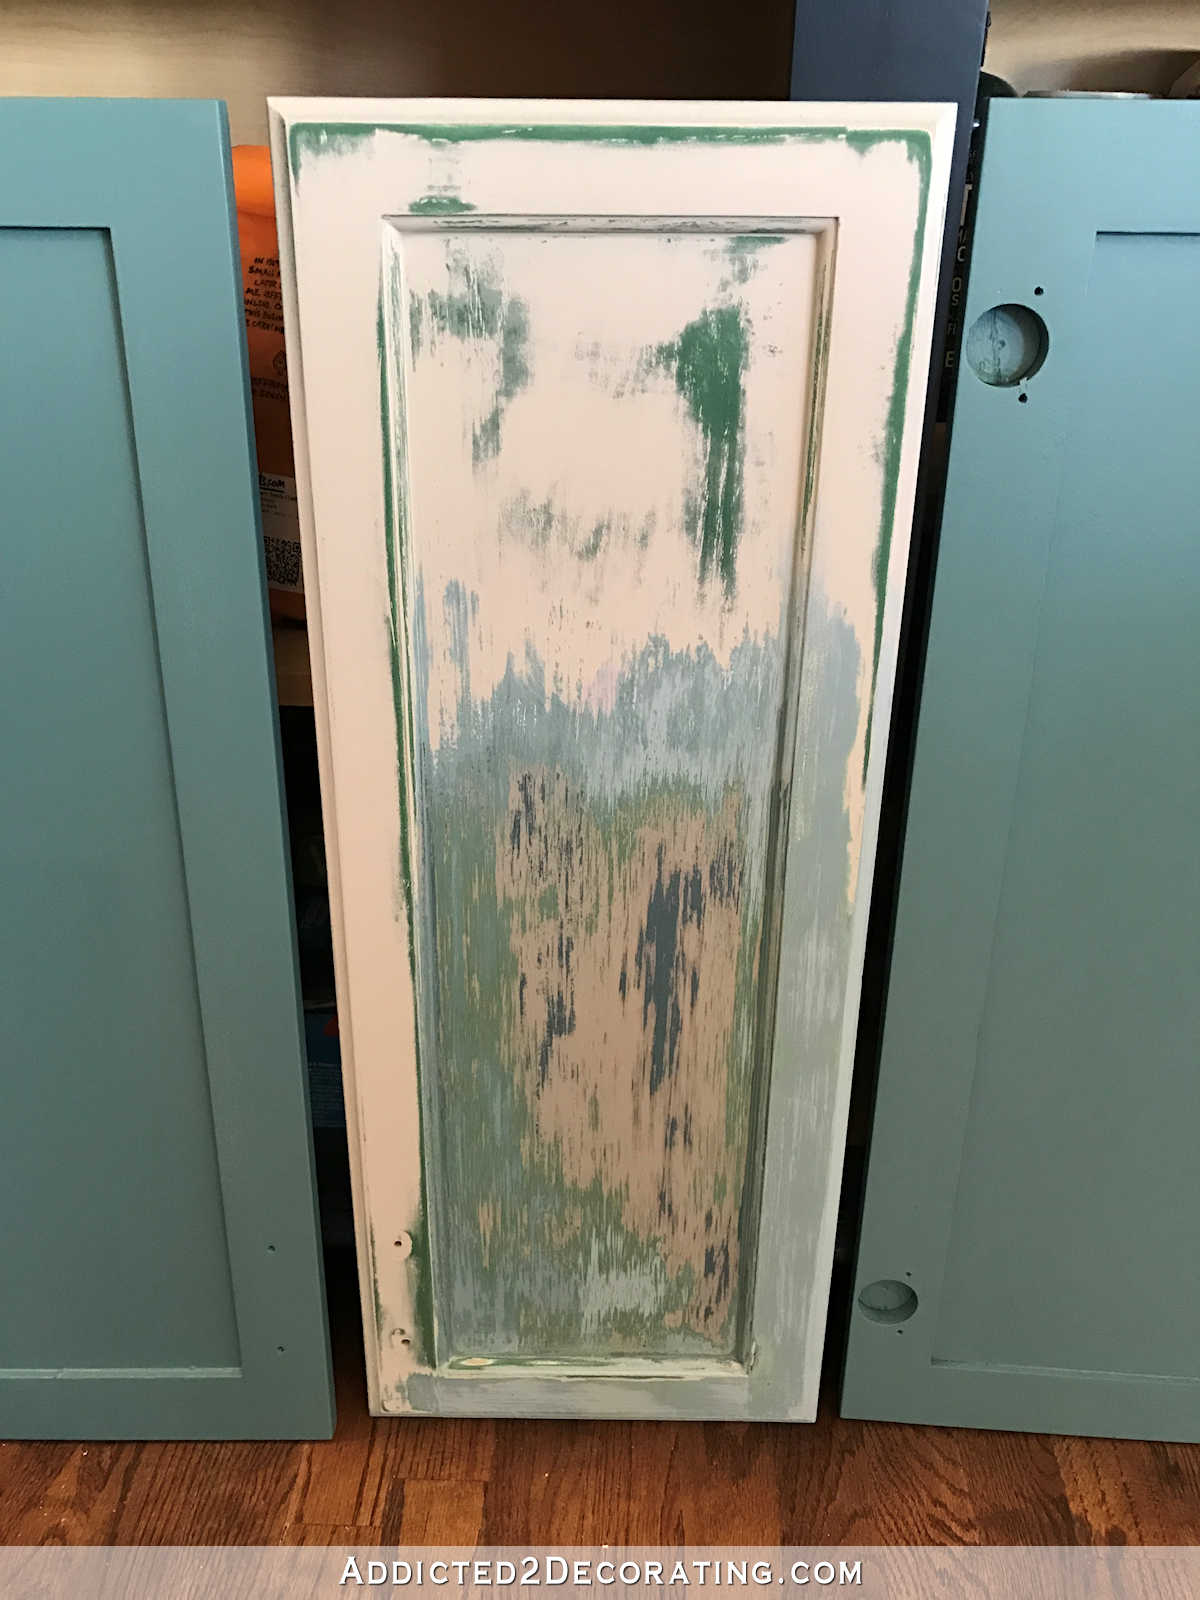
Rely instead on your hands to feel how smooth the surface is. If you feel any roughness, do a bit more sanding. That door in the picture above looks terrible, but it’s super smooth and ready for a new coat of paint.
Do I have to prime my cabinets before painting?
Only if you want them to look good. 😀
Okay, just kidding. Whether or not you have to prime first depends on what the existing finish is. And I’ll just assume that you’re painting with latex (water-based) paint, since the use of oil-based paints seems to be a thing of the past.
If your cabinets are currently stained and polyurethaned…
you need to prime first with an oil-based primer. It’s safe to assume that any stained and polyurethaned factory finish is done with oil-based products, in which case an oil-based primer (my favorite is Zinsser oil-based Cover Stain) is the best way to cover it. Once the primer is dry, you can paint the cabinets with latex paint.
If your cabinets are currently painted with oil-based paint…
you need to prime first with an oil-based primer. Once the primer is dry, you can paint the cabinets with latex paint. If your cabinets haven’t been painted in a couple of decades, it’s pretty safe to assume they’re painted with oil-based paint. Use extreme caution when sanding anything that was painted before the early- to mid-80s, though. It could be lead paint, so things that old should be tested before sanding.
If your cabinets are currently painted with latex paint…
there’s no need to prime first, but you will want to sand first. Even if the finish is in perfect condition, I still recommend sanding just enough to give the existing finish some “tooth” so that the new layer of latex paint will bond better with the old. There’s no need to put a lot of time into the sanding process if the existing finish is in great condition. Just quickly run some sandpaper over the surface (by hand) and you’re done. If the existing finish has some issues (rough spots, cracks, dings, etc.), use a sander. When the sanding is done, you can paint on a new coat of latex paint.
If you have no idea what the current finish is…
then go ahead and prime. It’s better to be safe than sorry. If you assume it’s latex, but end up painting latex directly over oil-based paint, there’s a good chance that the latex paint will fail at some point, and start peeling off. Don’t take that chance. If you’re unsure, just go ahead and prime first.
So those are my tips for the day. 🙂 And don’t forget to refer back to my “how to paint” post for the details on getting a flawless finish. Even if you’re using a sprayer, some of these tips will still apply…
Now I have one more day of gorgeous, clear, sunshiny weather before the rain gets here this weekend. We’ll see how far I can get on these cabinet doors before then. 🙂

Addicted 2 Decorating is where I share my DIY and decorating journey as I remodel and decorate the 1948 fixer upper that my husband, Matt, and I bought in 2013. Matt has M.S. and is unable to do physical work, so I do the majority of the work on the house by myself. You can learn more about me here.


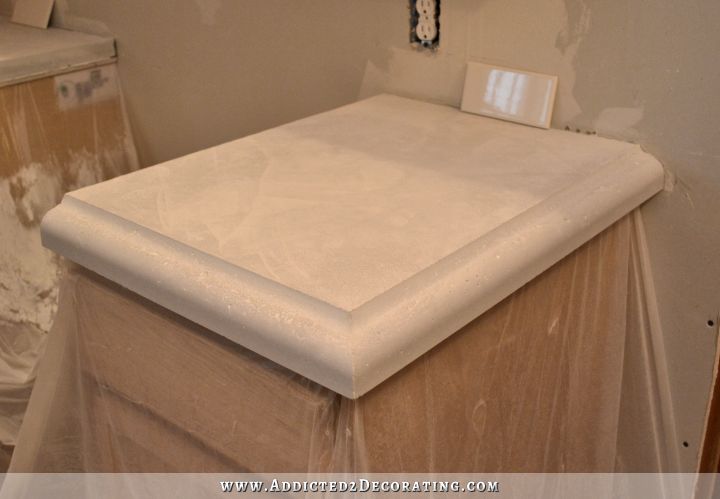
Thats going to look soooo good……Did you make a decision regarding your worktops?
I’m going to have them refinished. That’s on my list of things to do for this month. IF I can ever get the guy to call me back. :-/ Unfortunately, there’s only one company in this city that does the polyurea coatings, and the guy who runs the business isn’t the best at returning phone calls. But the goal is to have them done by the end of this month. I’m going with light, bright, and white.
I thought I really liked your green cabinets but this teal is much, much better! Can’t wait to see the finished product with the different lights during the day. Also, thanks for the tips on painting cabinets. It’s on my project list for this summer.
It does look like you!!!! I’m so happy. I loved the condo and now I’m loving the house too. ❤️
WOOOOWWWWWOOOW! My color too. Just LUUUUVE it. (can you tell?)
I love the new color. I thought the condo cabinets were a dark gray blue due to the photos, but this teal is great. I think it looks so much better than the green. I like green, but Kelly green seems too bright to me in large amounts. And with the new floor stain, your kitchen will look incredible when you are done.
I just finished painting my kitchen cabinet doors and boxes. Now I have to add custom end panel trim and line rail edge trim and build them up to the ceiling and add crown molding. Mine where a circa 1989 medium brown stain with recessed cathedral panels. They now are BM White Dove with new nickel hardware. I also repainted my walls BM Ocean Air (a light blue with green undertones) and trimwork bright white (previously a honey stain) and replaced the ugly tile floor with hardwood. The new counters still have to be picked out, but I’m hiring out on those and the subway tile backsplash. (the current 1989 ones are white formica with wood trim–yuck).
Sorry if you’ve covered this already, but are you still sticking to brass fixtures?
I have’t decided that yet. I’m really leaning towards more of a mixture of metal finishes with less emphasis on brass/gold. But I don’t want to completely get rid of the brass/gold, because I do love touches of it in each room.
Looking really good Kristi. I prefer a little more blue like the condo cabinets but this is pretty also. Can’t wait to see it all finished. A mix of metals is also good I think.
Hi Kristi,
I love your color. I am still concerned about having to much of one color. I am wondering why in all of your samples you never tried white just to make sure that that wasn’t what you wanted.
Thanks
Janet
I liked the Kelly Green, but it was pretty intense. Then I loved the dark blue, but it seemed a little too dark. But this new lighter, brighter teal looks perfect for you! Enjoying your process!
That’s my barometer for any decor change. If I’m smiling, it must be right!
It’s easy to learn if your paint is oil or latex. Put some rubbing alcohol on a rag. Rub a small spot of your painted surface. Latex paint will come off on the rag. Oil paint won’t. It’s best not to use a white rag if you are testing white paint.
How nice to see the progress you are making! Please relax on the weekend!
Thanks for the great tip Barbara!
It is going to look so nice and bright, especially when your counters are finished! Have a great weekend!
Lovely colour choice. I was wondering if you gave any thought to adding a few glass panels to the upper cabinets as it would break up the colour and perhaps display some of your finer China?
As an after thought, you could also mirror the fret work doors in your music room in a smaller scale. 🙂
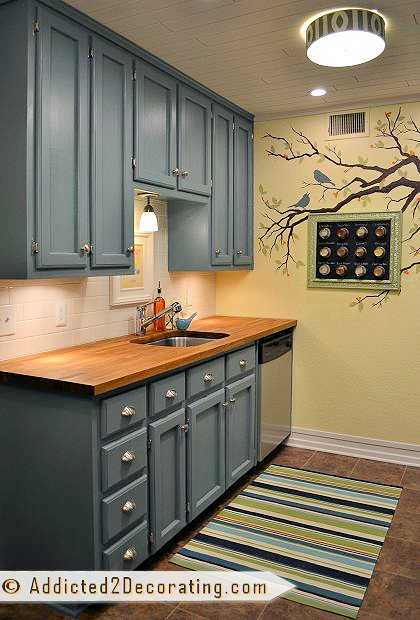
The four middle cabinets do have glass in them. You can see it in these pictures after I finished the kitchen remodel. –> https://www.addicted2decorating.com/finished-kitchen-remodel.html
Good gosh, i’m a ditz, thanks Kristi
My kitchen colors are so close to this! We have white upper cabinets and teal on the lowers. We have a dark wood floor and a wood sliding barn door going to the laundry/pantry. Hoping to add subway tile as backsplash soon too! I love the way yours is turning out 🙂
I love the teal! Everything you’ve done in the past few weeks is making my heart sing! A few posts ago, you posted a picture from your breakfast room, looking through the kitchen into the front room. I love vantage points like that because you can see all the rooms at once and how it all comes together. Do you think you will keep the icy blue color in the front room, now that your cabinets are teal?
I’m going to wait and see how it looks once the cabinets are finished, but I have a suspicion that those walls are going to need a blue with just a touch of green in it. The blue on the walls right now is very cool, but I’m going to wait and see how it looks.
I think something with green will be beautiful and tie everything together so nicely! I’m not sure if you’ve posted a picture into your music room or if I’m just making it up in my head, but I think the black walls could really look beautiful with the blues and greens you’re doing. A nice dark backdrop for all the colors to pop against!
Do you have any preferred water based primer as an alternative? I learned from you to use zinsser and I love it, but when I painted my kitchen cabinets I couldn’t use it as I have an open floorplan and the stairs to the bedrooms are next to the kitchen so any cooking smell goes straight up. Since I have little ones I had to op for a water based primer from BM called Stix. I didn’t care much for it since it peeled off as I was removing painters tape 🙂
I actually don’t. You just won’t get the same durability and stain-blocking performance out of any water-based as you will an oil-based primer. HOWEVER, there are some low-VOC/low odor/odorless oil-based and solvent-based primers available, and I would recommend those over a water-based primer. I know that Zinsser has an odorless solvent-based primer, and Kilz makes an odorless oil-based primer.
I absolutely love it, but then, I feel like I’m looking at my newly painted cabinets! You will be so happy. It’s bright and cheery! As I look around my project home, I’m realizing like you, these are my colors too! Isn’t it funny how having the right colors can influence your mood? You are my inspiration. Thanks Kristi
Hi Kristi. Beautiful!!!! I am getting ready to paint my cabinets. Does the paint need to be sealed with a top coat?
If you use a high quality paint that’s made for cabinets, like Benjamin Moore Advance, there’s no need to topcoat. That paint dries very hard, and is incredibly durable. If you use a lower quality paint (e.g., any of the big box store brands), you could certainly topcoat it. I would avoid Minwax Polycrylic at all costs. I hate that product. It ruined two projects I painted, and made the final project streaky and cloudy in places. And it dries so fast it’s hard to get it smooth. The absolute best clear coat I’ve used is General Finishes High Performance Water Based Top Coat. I love the satin finish. I couldn’t find it locally, so I ordered it on Amazon. You can find it here –> (affiliate link) http://amzn.to/2mOQJeI
Kristi, you are amazing….and I wish I could be more like you…however, I ‘fail’ in whatever I do. I am painting my bathroom vanity right now and it is a nightmare. I thought I did all the right things. Cleaned them…2 coats of good primer…used a purdy brush…good quality paint…etc… My doors looked terrible; streaks..brush marks…primer still showing…drips…etc !!!! However…I put a quest out on Hometalk because I was having such issues….it seems I have issues with ‘loading my paint brush with either too much paint or not enough…and I go over my work too many times. I guess ‘me trying to be a DIYer…or crafter handywoman just might not be my thing’. Even my spray painting little ‘trinket’ things never worked out in the past….even using light coats. Tried my shot at abstract art…..nope….’fail’ …
BUT GIRL….YOU DO IT ALL….and your HOUSE is looking amazing and I have read EVERY post of yours. I went back to the very beginning and read them all. I look forward to your post every day. Keep up the amazing work and enjoy your weekend.
Laura
Laura, I’m so sorry to hear that! I wish I could hold a “how to paint your cabinets” clinic in person. I’m confident you could get the hang of it with a bit of hands-on instruction. Don’t stop trying those projects, though! A lot of DIY is about practice, practice, practice, and testing, testing, testing. Why do you think I do some of my projects over and over again? 😀 I certainly don’t hit a home run on the first try with my projects. I’m learning new things every single day, even after 20+ years of DIYing.
Kristen. … I have a disability and suffer in chronic debilitating pain every minute of every day….so getting these cupboards done “once” has been a struggle…the thought to redo and redo them is terrifying to me. As it is each task takes me forever to complete…(pity party I know) But the pain is real and is too much to work through some times. These have been a week in the making now…..you pull yours off inn a day….I only had 4 little doors and 5 little drawers…..
Laura, I feel your pain… literally. I have fibromyalgia, but am fortunate enough to be able to work full-time. Which means that 60+ hours a week are eaten up by work. I only bring that up to show that I don’t have a lot of free time, and certainly NO energy when I get home at night. I also realize just how hard it is to get anything done or keep your spirits up.
I believe you did everything right. Followed all the steps. Put all of your effort into it. And it failed. Not you, Laura. The project. There’s a huge difference.
I’d like to suggest that you put your project aside for as long as it takes for you to not be hurting and angry. Then, when you physically and emotionally feel better, ‘PUTTER’ at it. One door or drawer – not the entire front. One leg or side. Baby steps.
Yes, having an unfinished project is a PITA. But every little step is progress. And, if it takes you 3 months to a finished project that you’re proud of, you will have won.
Don’t give up, please. I think you can do this. And you will be so very proud of yourself when you’ve finished. Even if it doesn’t quite turn out the way it looks in your head!
I feel for you as well….I have fibromyalgia too….so I know your pain as well. I am not going to keep burdening you. I just want to Thank you for your kind words and encouragement ! I struggle just to get out of bed every day. Thank you from the bottom of my heart for taking the time out to say such thoughtful words to a complete ‘stranger’. God Bless You.
Laura, have you tried using a foam roller instead of a brush? And “whisper light” hand when using the brush, as though the surface could break if you press down. My husband has a heavy hand when painting, so I won’t let him touch a brush! And he can’t caulk worth a darn! I just imagine I’m putting on eyeliner when I caulk! 😉
I love the colors too. Will you be sharing more on the grain filler you are using?
SQUEEE! I LOVE this color for your kitchen!
I’m loving the teal, and thanks for the refresher on refinishing cabinets. And especially thanks for highlighting the sander. I had a mouse-type one too and, as you said, it wasn’t very powerful.
Nail polish remover has been a godsend to me when trying to determine whether a paint is oil-based or latex. Simply put some nail polish remover on a cotton pad or a tissue and rub it on the painted surface. If the paint comes off, it’s latex. Simples!
I like how the teal doors against the dark blue cabinets. Have you thought of going two-tone??
I was really hoping she would do a two-toned with the Gentleman’s Gray lowers as well. I think they look amazing together!
You know how I love your green cabinets. 🙂 But this color is looking way better than the others you tried. Can’t wait to see it come together. I’m so glad this new color and how things are coming out make you happy! Again, thanks for sharing your journey.
Is the next corner sander going to be a “Dog”?😉
Thanks for all of these useful tips! I plan to tackle my kitchen cabinets soon and I have a question about sanding. I am not opposed to the effort and time involved with sanding, but I’m wondering how you avoid messing up the cabinet door detail when using a palm sander. I have raised panel doors, and I am worried I will end up ruining the crisp lines of the panel and rail/style edges when sanding with 80 grit paper.
Thanks so much!
You don’t have to start with 80-grit. I almost always start with 150-grit on a low speed (if you have a variable speed sander).
Can you tell me what the name of the color is? I love it! I want to use it on my kitchen cabinets too.
Hey Kristie
I cannot for the life of me find where you talk about the type of paint you use when you paint your cabinets. I have found lots of info on the prep and the primer. In your condo kitchen you said you used Kelly Moore interior oil-based paint in a satin finish but I am not finding where you talked about the new kitchen paint or even the bathroom cabinet paint.
You’re kitchen looks amazing!! I love the color of the cabinets. I have read the entire article and comments, but I think I may have missed it. Could you tell me what color you used? Thanks.
It’s an old Behr color called Hallowed Hush, but I had it color matched and mixed in Benjamin Moore Advance paint in a satin finish.
Thank you so much!! You are an inspiration! I love your work.
What paint was used on the line of cabinet doors painted teal?
That color is Hallowed Hush by Behr.