My Little Spinet Piano – Completely Stripped And Restained
Well, y’all guilted me into it. 😀 I’ll admit that I just wanted to avoid the hassle and hard work of stripping and sanding the case of the piano, but in the end, I’m glad I took the extra time and did it right. And I did it right there in the music room and managed to strip and sand the whole thing without messing up my floors.
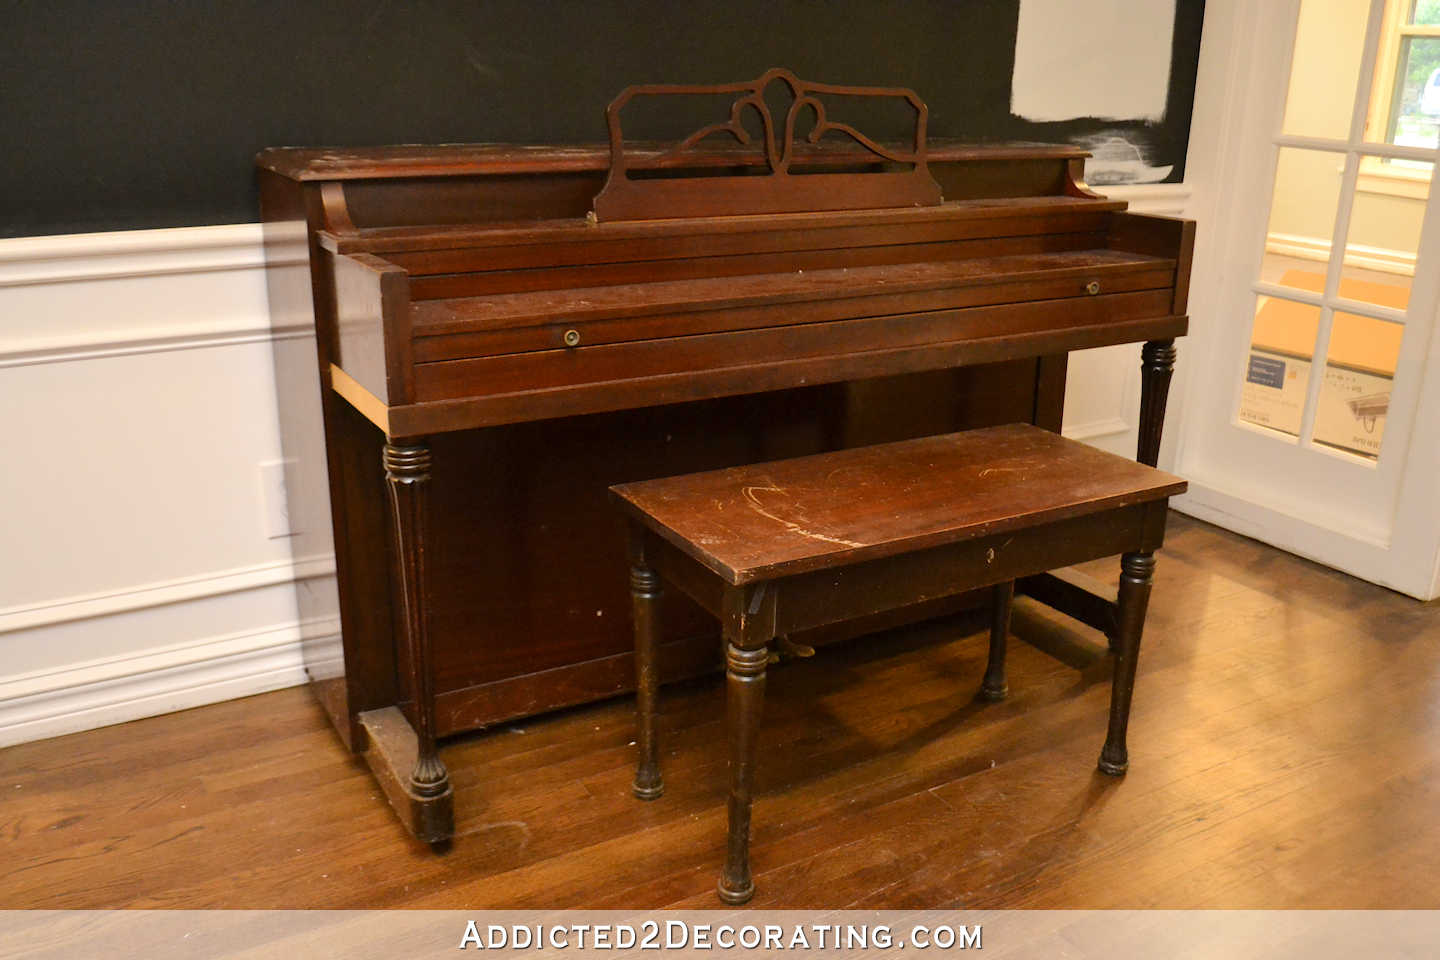
Here it is completely stripped naked.
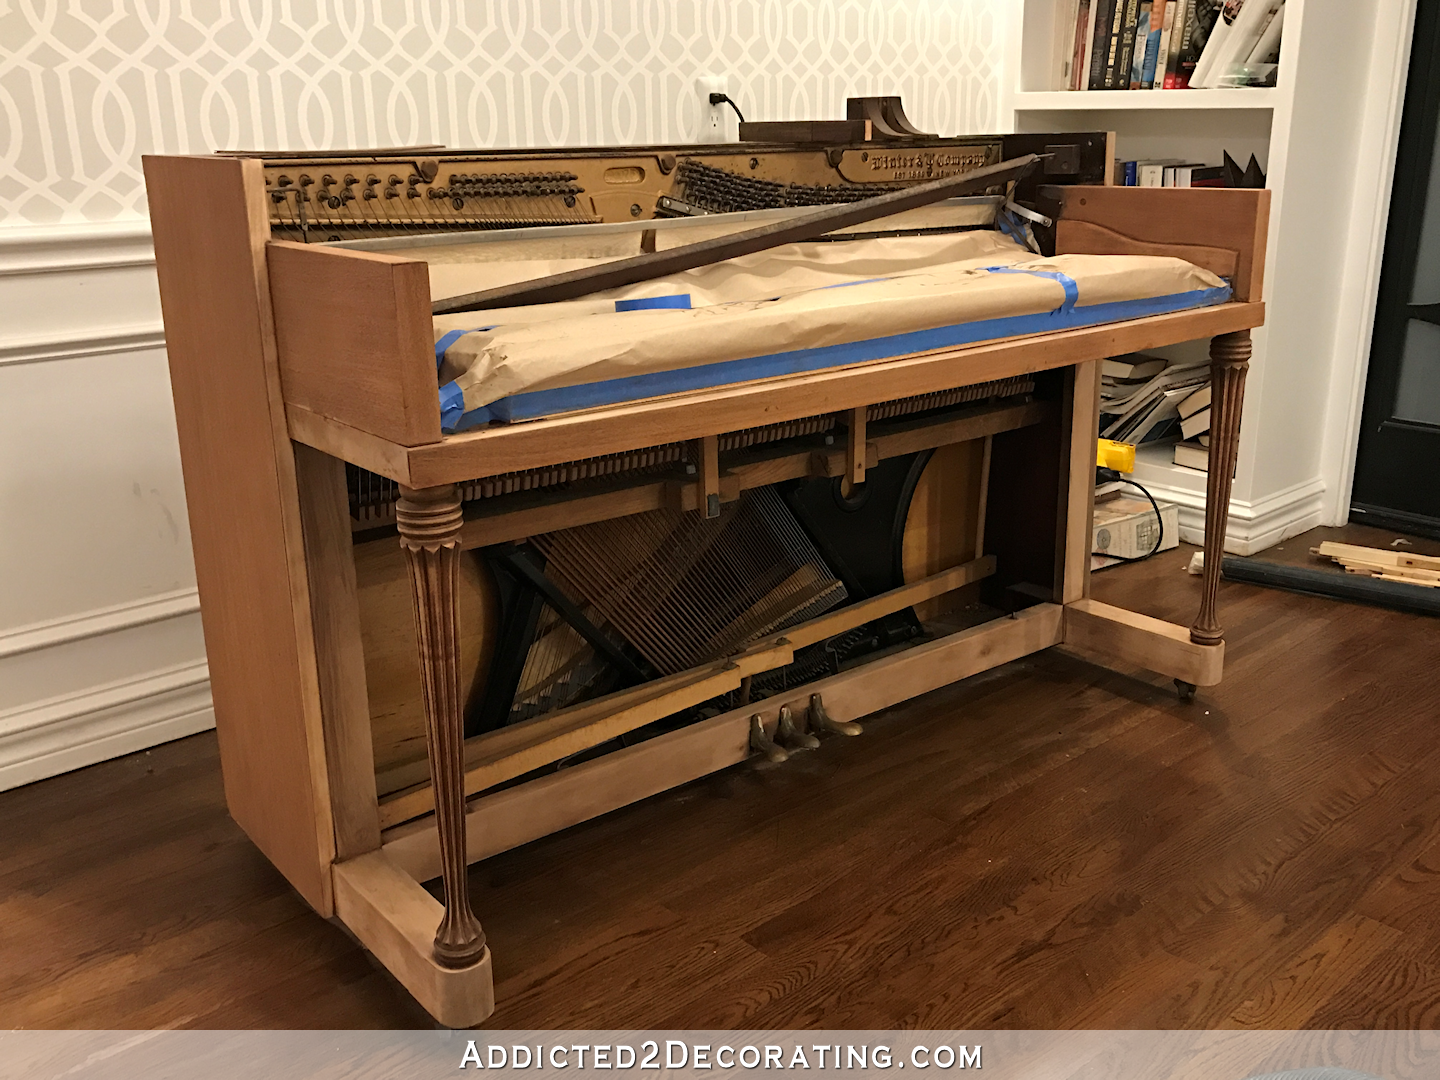
It took two days and was definitely challenging. Just like on the removable pieces, I started with a chemical stripper to get the thick layer of lacquer off, and then I sanded the rest. And it took every sander in my tool arsenal to get the job done — my regular Dewalt 5″ circular sander, my Ryobi Corner Cat sander, and my Dremel Multi-Max with the tiny triangle sander attachment. And then there were parts that couldn’t be sanded any way other than by hand, like those dreaded fluted legs.

I did the best I could on those, but there was no way I was going to be able to get all of the stain off of the legs.
Once I got the whole thing sanded, it was very clear that there were two different kinds of wood on this piano. The old finish didn’t show the two woods because factory finishes are sprayed on so dark and thick that they pretty much hide the wood that’s underneath.
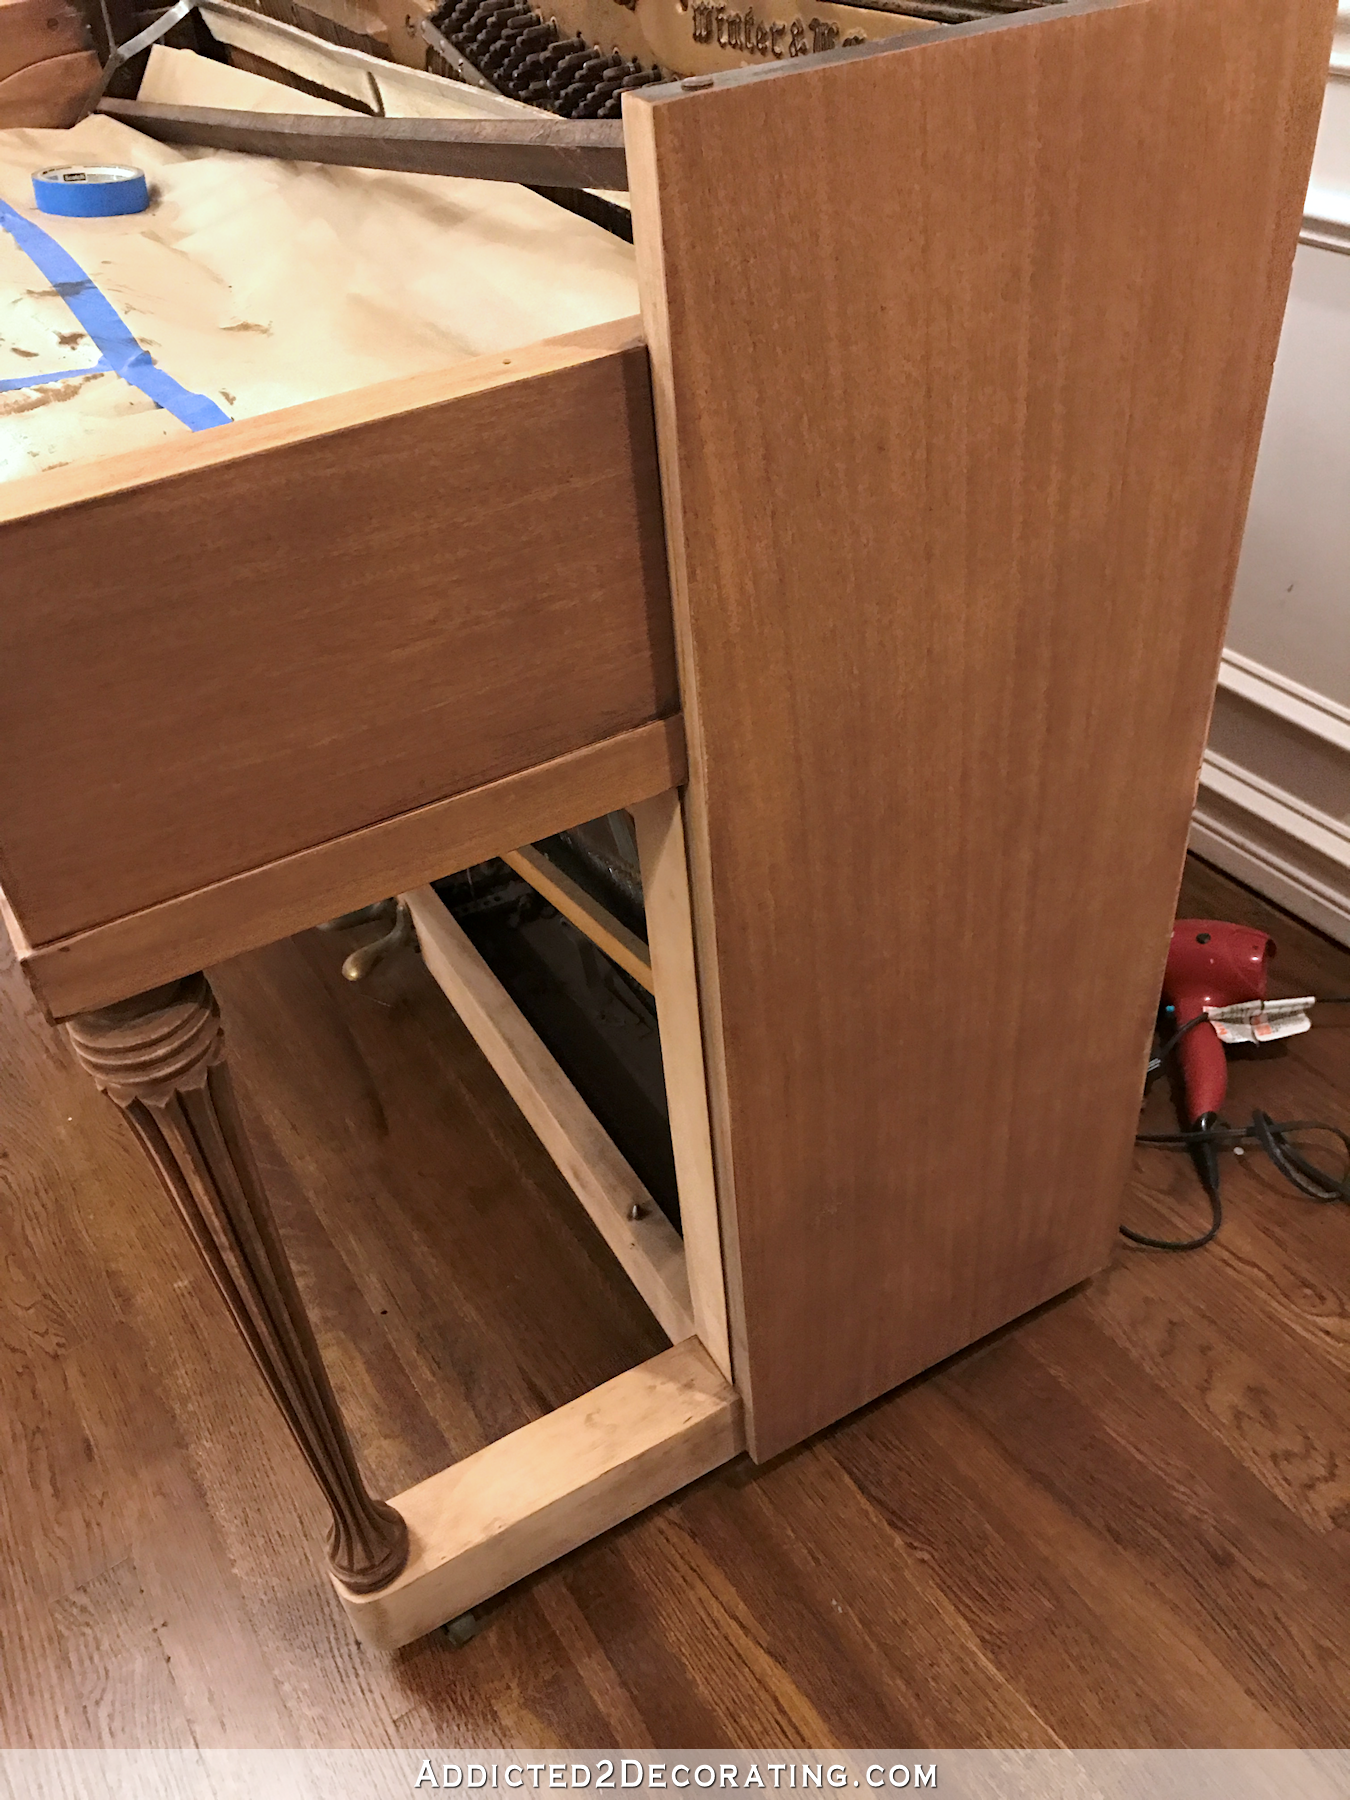
But without that thick, dark finish disguising the wood, there was no mistaking the two different types of wood. One was the pretty veneer with the orange/red coloring and the subtle grain. The other was much whiter with heavier grain.
I decided to just put a coat of stain on everything, see how it turned out, and then go from there and decide if the white wood needed anything else done to it to make it blend with the veneer.
And after all of this stripping and sanding on a piece with so much sentimental value, there was no way in heck I was going to trust it to Minwax stain. My on again, off again, love/hate relationship with Minwax stain is something best left for cheap Craigslist finds.
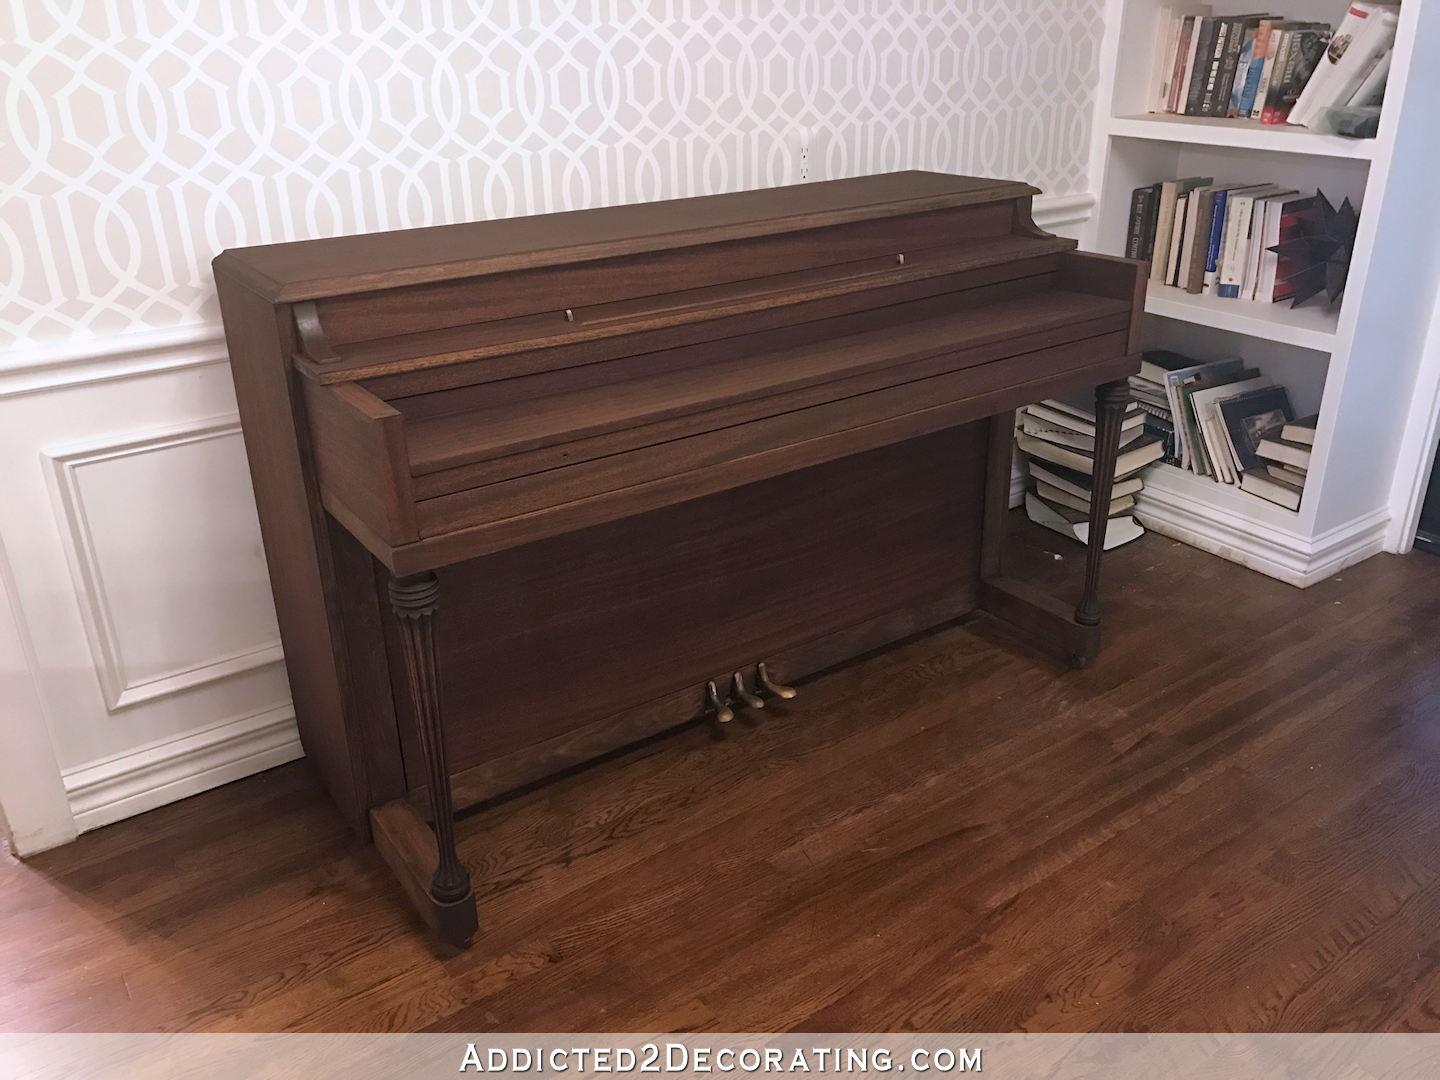
So I tried a new-to-me stain called Old Masters, which I found at my local Benjamin Moore store, and I used the color Dark Walnut. It costs quite a bit more than Minwax (about $25/quart), but it is AMAZING. They have wiping stain and gel stain, and I used the wiping stain. It went on so beautifully and evenly, and I didn’t even use pre-stain conditioner.
The color was actually a bit darker than I had hoped for, but I chose that color because Dark Walnut generally has a slightly green undertone, which I wanted so that it would cut down some of the red/orange in the wood veneer.
But you can definitely tell the difference between the two woods. I’ve been thinking about how to deal with that before I put the clear coat on, and there are three different options I can think of. First, I could just leave it as is and be okay with the fact that it’s two different woods. But because I’m me, I probably won’t do that. 😀 And while I could probably live with it in most places, I absolutely hate how it looks along the edge of the lid…

The second option would be to get another color of stain that has an obvious red color to it, and put one more coat just on the white wood portions of the piano before clear coating it. And the third option would be to add just a touch of reddish stain to the first coat of polyurethane just for the white wood areas.
Anyway, I still have quite a bit of work before I can call this project finished, but I love how it’s turning out, and I’m so glad y’all guilted me into refinishing the whole thing. 🙂 Right now it’s looking a bit dull since it just has stain on it with a very matte finish, so I’m anxious to get the polyurethane on it. That will brighten it up and bring out the detail in the wood.
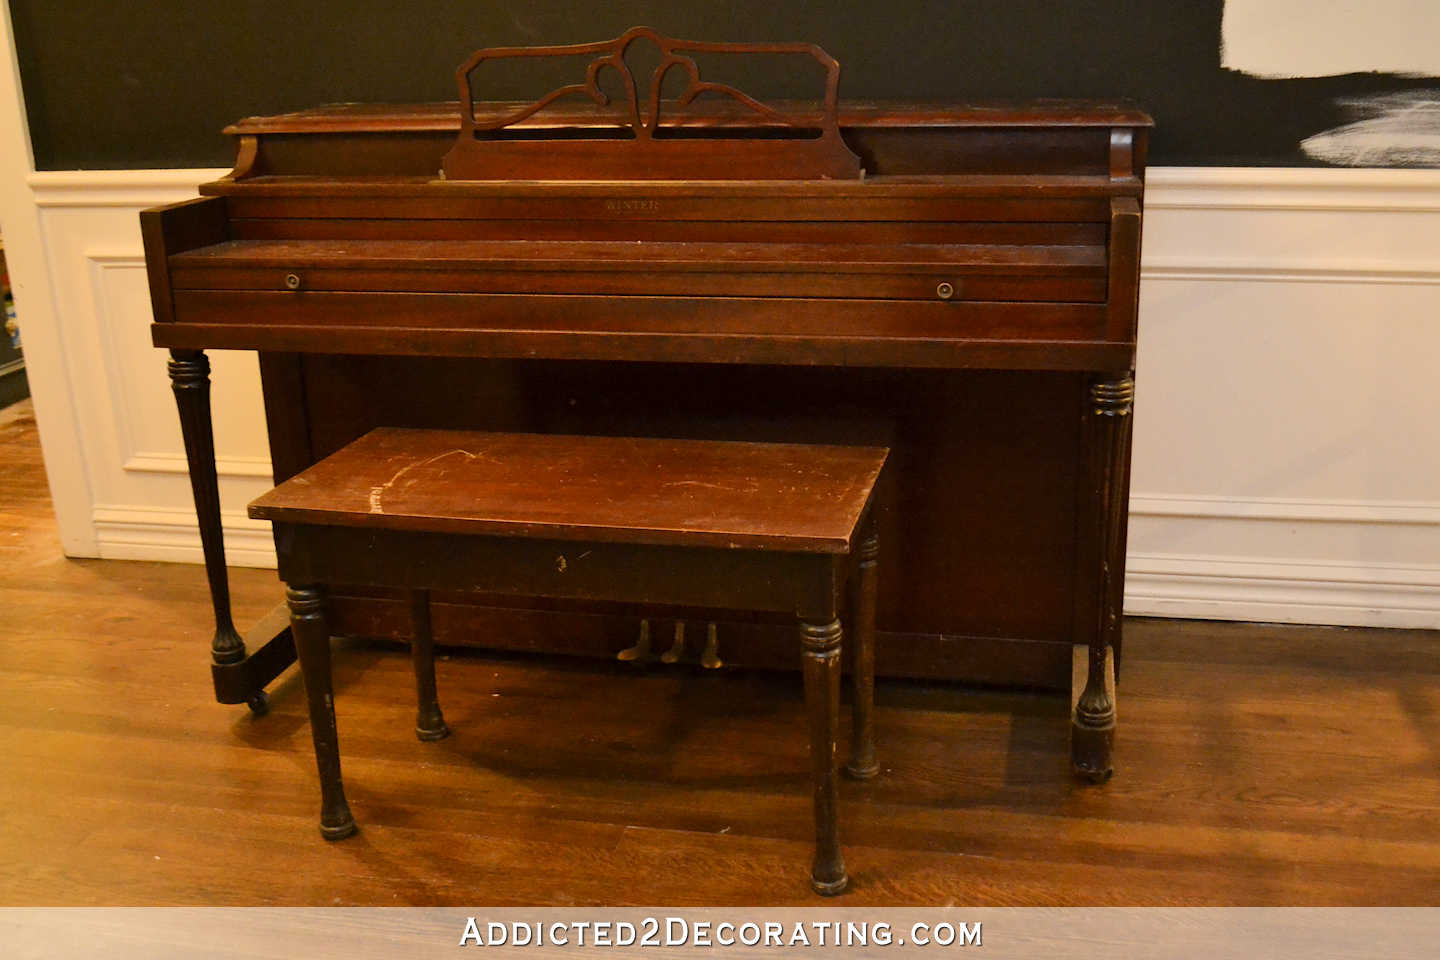
But even in its unfinished state, this little piano has come a long way from the dark, red color and the old, thick lacquer that had gotten soft with age to the point that anything placed on the piano would result in fibers being embedded in the finish…
To now, with everything completely stripped and sanded, and with a new coat of Dark Walnut stain.
Well, not everything. You might notice that the music stand is missing. Yep, I got the whole thing stripped, sanded, stained, and then got all of the pieces put back in place, and then realized that the music stand was sitting over to the side and hadn’t been touched. 😀 So I still have a bit more stripping and sanding to do. But at least the hard part is finished!

Addicted 2 Decorating is where I share my DIY and decorating journey as I remodel and decorate the 1948 fixer upper that my husband, Matt, and I bought in 2013. Matt has M.S. and is unable to do physical work, so I do the majority of the work on the house by myself. You can learn more about me here.


I love how it’s coming along and the color of stain will be perfect when you get it done. Little imperfections are a part of life and this little spinet has so many memories for your family that no matter how it looks when completed, it will be a treasure.
Yes 🙂
Beautiful job! 4th option? Get same veneer and apply where able on edges/blocks and then stain to match! Is that a possibility?
I considered that briefly, but ruled it out because (1) it would cost more than I want to spend, (2) my inexperience with veneer would probably make the finished product less than desirable, and (3) even in the same species of wood, a new veneer and the original 65-year-old veneer probably wouldn’t take the stain the same, so I’d end up with the same problem.
Sigh …. all great points!
I would make a toner with poly and colorant to even out the color.
Thank you! Thank you! Thank you! I am so glad that you refinished the entire thing. I know it’s your house and your piano and your blog and your decisions. I just really, really think that in the end you, and your family, are going to appreciate the beauty of this piano more now that you’ve given it a classic finish. Even with the whiter wood pieces and without the poly in it, the grain in that veneer is gorgeous! I really love being able to see it on the sides (which would have been covered with paint if you had painted the case). Even before the poly, I love the stain with your stenciled walls. Gorgeous combo. And, I like that the piano will be a bit darker, but in the same general family as your floors. With some decorating and finishing, that room will be gorgeous!
Agree with all of this. Kristi, the result so far was worth every single second you spent on this refinishing job. She’s GORGEOUS! It’s like you took a pretty little old lady (well, not *that* old) and made her a brand new ballgown! She’s been renewed and looks quite classy now. Great job as usual!
Agreed! It’s so beautiful! You did the right thing.
Really beautiful! So glad you made the extra effort. I can’t wait to see it with the finish coat.
No suggestions on making the pieces match but I already think it looks great! If I was standing by it, maybe the slightly different woods would be more noticeable but I’m so glad you went the extra mile! I think with all the sentiment tied up in it, this one was worth it.
Is it possible to cover this area with an old brass finish to match the pedals? This may just look odd, but it is all I have to offer.
I was thinking something similar! A burnished metallic on the lighter wood.
Oh, my Dear, you did a beautiful job, that looks perfect! I would leave it as is, but I’m sure you will do one of the other options. It is seriously fabulous!
I am so glad that you decided to go with staining! I feel awful speaking up sometimes because I know how it feels to ask for advice but not realllly ask for advice, you know? I get annoyed when I mention something and my mother-in-law jumps in with unwanted opinions.
Your piano already looks so gorgeous! And I know it’s cheesy but I love that your memories are going to match up with the current look of the piano. I think this is definitely a decision that you won’t regret making. Excellent work.
Sooo good! And I bet your Mom will be pleased too!
Yes, what is Mom saying about it?
She’s only seen a picture that I sent last night via text, but she liked it! She hasn’t said it explicitly, but I’m pretty sure she’s relieved that I didn’t paint it. 🙂
I’m dying to see how you put the clear coat on. This is where I always run into trouble. I can’t get a nice even brushstroke-free finish. So frustrating. I hope you give good detailed step by step. Especially since I don’t think you are going to spray it. This is a really exciting project – it already looks really great.
The piano looks fabulous. I would stick with staining to get the edges to the color you want either using just a stain with a slight reddish undertone like English chestnut or a mix of the dark walnut with bit of red chestnut. If you put stain in the poly and don’t like it, you’ll be stripping again but you can easily bleach the edges if it’s just stain.
I know you love color…but this is a family heirloom and you did it justice. With all your painted wood this will be a very nice “stand out” piece. Don’t touch the finish on the pedals, they show that the piece has age and was loved.
It’s coming along nice! Glad we could “help!” LOL! I wonder if you could add a bit of red stain to the walnut, maybe let it soak in a bit on the lighter parts, then wipe off excess? It definitely needs a bit of red to match up properly. And maybe you will need more than one coat on the lighter parts. In the photo, it doesn’t seem a lot lighter, but I’m sure it is bothersome. Good for you on putting in the extra efforts! It will be great to have that wood finish and not so many painted surfaces!
So worth the effort. It’s beautiful! The different tones wouldn’t bother me, but I’m sure you’ll find the solution that will make it look even better. Bravo for having the patience to do this! It looks amazing next to the stenciled wall.
Wow! That came out amazing! I’m glad you stuck with it. You have me almost wondering if I have it in me to get my Grandmother’s electric player piano from my parents and do the same (it’s about the same size and shape…not an upright). But I just can’t justify the space it’d take in the house and the work it’d take to move it, not to mention the repair the auto-player needs when nobody in the house plays.
Love it! It looks amazing next to your stenciled wall! Good job, Kristi, as always!
OORAH <3
Ebonize the edge.
wonderful..wonderful that is all of my 2cents worth.
The walnut stain really did tone down the red tones.
It’s absolutely beautiful. I don’t even mind the edges as they are…. I believe you will come up with a great solution to evening out the colors to suit you better… You make me want to start working on mine.
How lovely if you have a picture of your mother sitting at that piano when she was younger framed and sitting there on top 🙂 🙂
Really sweet idea!
One of your best furniture restorations, Kristi. Cheers, Ardith
So so so nice! It looks great already and will look even better with the finish on it. You did a great job!
I think it looks beautiful and if you put additional coat of stain on that rim and then poly, I don’t think it will even be noticeable. Especially when you put something on top and add some music………just my 2 cents.
What if you added an antique old gold around the edges, I think that would be so pretty? It would give it classic definition with its old heritage. Just a thought…..
The piano looks gorgeous….I bought an old spinet from a church auction which was replacing the piano with a new one. The piano that I bought was purchased for the old church new in 1964 and which is has a brass plate on the side inscribed showing the family name in memory of that donated at that time. It is such a classic and the sound is amazing! I think my little auction treasure will always have it’s unknown ancestor heritage!
Good luck!
It looks fantastic!
Beautiful!
With paint it can all match. With wood it is different. I think it looks great but a photo can be deceiving. All different woods grow together in a forest. I don’t mind mixed woods. I understand you have a decision to make.
Try what you have available- if you’re not satisfied try the General Finishes gel stain- it sits on top of whatever is underneath it- very good products! Great job 👍❤️
Hi Kristi! Your piano is looking great! Just my two cents here…what if you apply a second coat of the same stain to the lighter areas? To make them darker will make the difference in tones less noticeable and might be a safer choice than trying a new stain color. Also, are you refinishing the bench as you work on the piano? Keep up the posts…I look forward to finding a new one each day:)
It’s beautiful Kristi! I’m so glad you tried the stain. I’m sure you will figure out a nice way to help it balance out. You have a real eye for that type of thing.
I’d get a second stain, lighter with slighty red undertones, and stain it to match. It doesn’t have to look 100% perfect, as long as they’re close. 🙂 Test in an inconspicuous spot first!
I can’t believe you went to all that trouble and didn’t use a wood conditioner!!! :O
Just a thought…we have a 100 year old baby grand that was stripped and stained at one point, but the very ornate music stand was painted black. I guess whoever did it, didn’t want to go to all the trouble of stripping the ornate scrollwork of the music stand, but I love the contrast between the dark walnut stain and the black music stand!
You did good … sometimes guilt has a way of letting us know the right thing to do 🙂 It is beautiful and just think, you only had to do it once 🙂 You do absolutely beautiful work. I wish I had your patience.
wowza…you are amazing. bravo well done.
Your little spinet turned out beautifully! You do such amazing work. I have an old Story & Clark that is in need of some TLC, and you are inspiring me to refinish it. A previous comment from Rhonda mentioned antique gold trim, which my little piano has and it is very subtle. The antique trim could be a way to not worry about making the wood types match. An antique bronze/gold, playing off the metal tone of the foot petals and knobs. It could be made even more subtle by putting a thin layer of the stain over the top of the antique gold/bronze trim color. Whatever you do it will be lovely and just right for you.
It looks GORGEOUS! The dark walnut is perfect! 💗
I think aged gold trim work and an aged gold music stand would look amazing! It would add a nice pop and look so good with that stenciled wall!! What a beautiful piano. I so glad you took the extra time.
Wow, that is beautiful!
Be careful to not “over try” to match the woods. Maybe get some advice before proceeding.
Is there a local community college with a woodworking program? The instructors could be a great resource for free advice. They could use it as a teaching opportunity for their students.
Oops, I mean, “professional” advice.
I just love it, Kristi!
beautiful work! I suggest not trying to match the 2 different kinds of wood … even if the colors match, the grain pattern will never match (unless you use a stain that sits on the surface, which is really not that different from paint. Personally, I enjoy seeing that lovely wood grain that all that elbow grease has brought out). The 2 different kinds of wood is part of the piano’s character. I would just embrace it as part of the piano that you have embraced for so many years.
It’s stunning already. Can’t wait to see the final product.
Could you gild the brackets and banding of the top? Or use one of the Modern Masters metallic paints in satin or matte?
Ooooh wow. The walnut stain is perfect! As for the slightly different edges, I would first carefully run another layer of the walnut stain on them. They will darken. It appears to be mahogany veneer on ash, very different characteristics. So glad you went this route. You definitely preserved the heirloom quality of this lovely piece.
nice – really nice! I’m impressed that you did all of that over the course of two days. How did you ever keep the sanding dust from getting all over everything?
Anyway, I was one of the ones who thought you should paint it black – I’m a believer now!
When I’m sanding inside, I hook the sander up to the Shop Vac. It sucks up about 90% of the dust, and the majority of the rest seems to fall to the floor rather than floating through the air and getting all over everything.
Wow. Beautiful.
Love the stain. How about painting the stand black and also the trim around the edges. It wouldn’t be too much black 🙂
I’m weary of the smug “stain the wood, don’t paint the wood” readers… painted wood is just as beautiful…LOL! And you would have made it beautiful if you had painted it and if you still decide to paint part of it or all of it. It’s still good wood and it can still be re-done down the line if someone else or even you wants to take the time…My comment is meant to be light-hearted & non-offensive, like I used to say about smug marrieds, when I was single…all in good fun!
Thank you so much for the detailed description of why you use chemical stripper first before sanding vintage pieces—I never “got it” before, but your explanation that the sander may be just beginning to sand through some of the finish while another part is wearing through the veneer made it click for me! Many thanks for solving a mystery for me—