Peninsula Drawer Front Makeover (From Flat Panel To Recessed Panel)
I finally gathered enough courage yesterday to remake one of the big drawer fronts. If you’ll remember, the final decision on how to make the gold leaf look balanced on the peninsula was to keep all of the small top drawers plain, with flat fronts, and just add brass cup pulls. Then on the four big drawer fronts, I would remake those so that they have recessed panels, as well as the same gold leaf treatment, to match the cabinet doors.
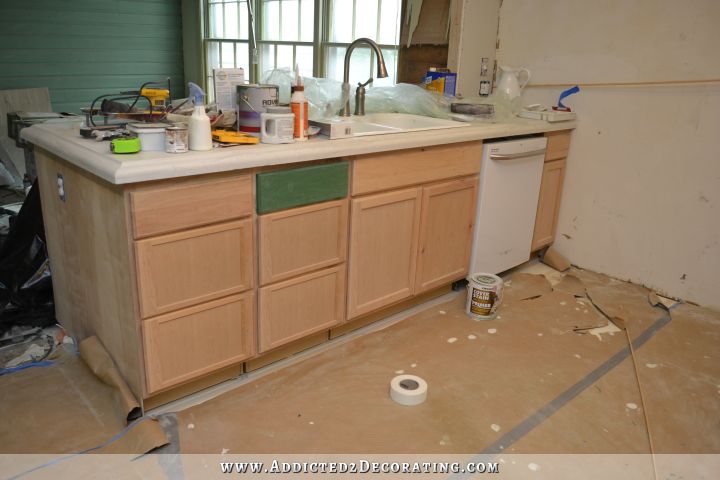
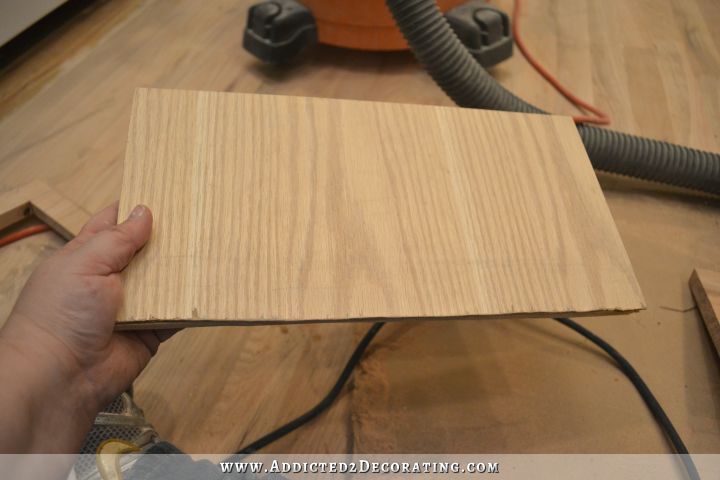
Here’s how they looked yesterday before I got started…

And here’s a poorly done mock up of how I want them to look when I’m all finished remaking the four big drawer fronts.
The process was very similar to what I used to remove the center panels on the four middle upper cabinet doors to create glass front cabinet doors.
I didn’t take a picture of the drawer front in process, but here’s a view of the cabinet door before I cut out the center panel. I simply used a piece of lumber to create a fence, held it tightly in place with a couple of C-clamps, and then used my Dremel MultiMax with the blade right along the fence to cut out the panel.
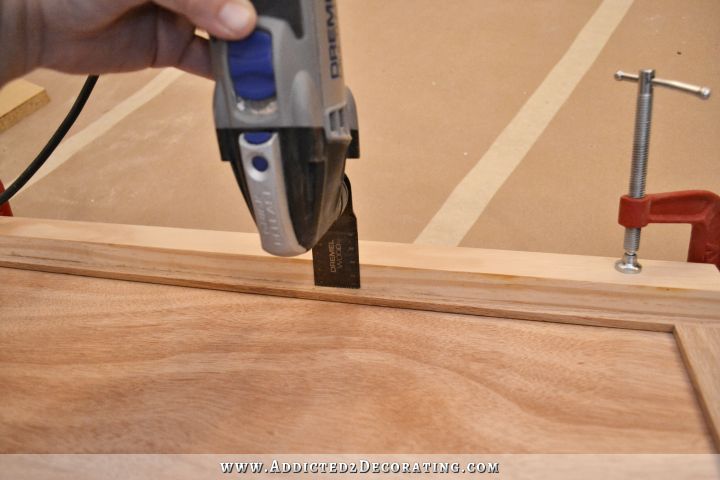
That’s the exact same thing I did with the drawer front in order to cut out the center area and create a frame.
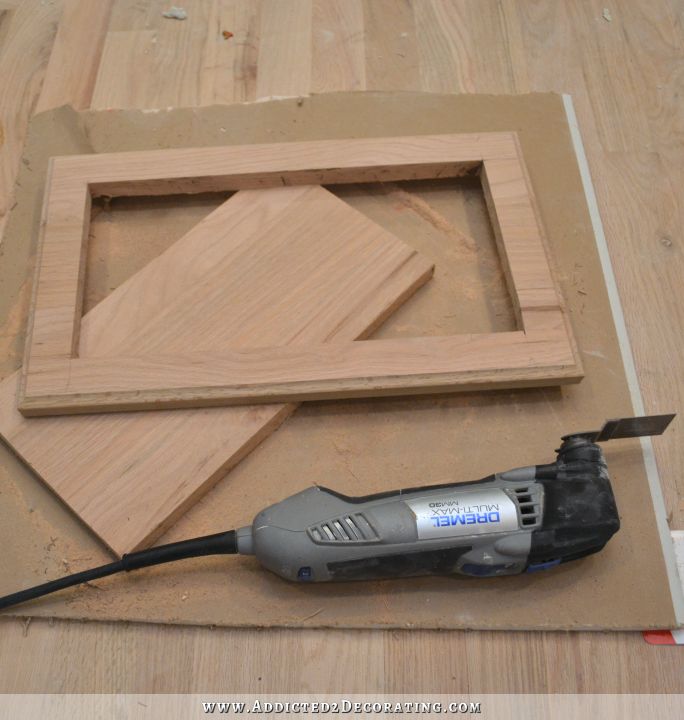
Once I got the inside edges of the frame all sanded and cleaned up, I used it to trace the shape/size of the opening onto a piece of 1/8-inch plywood (found with the stock cabinets at Home Depot), and a piece of 1/4-inch MDF, and I cut out both pieces using my jigsaw. I then used wood glue to glue the plywood onto the MDF, placed the thick piece of oak I just removed from the drawer front on top simply for weight and support, and then clamped them together until the glue dried.
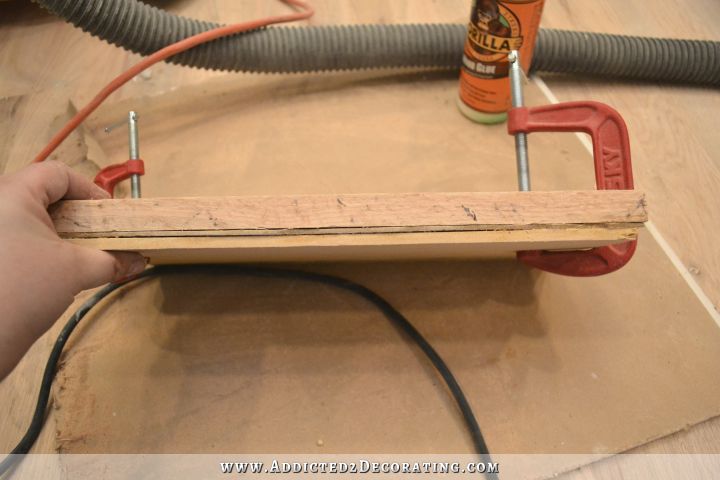
And when I removed the clamps and the scrap piece of oak, I was left with the plywood firmly attached to the MDF. As you can see, I didn’t do a very detailed job in cutting out the plywood or the MDF. I had the wrong blade in my jigsaw, and it did a real hack job on those edges. But since they would be covered up, I wasn’t too concerned.
Next I placed the panel inside the frame…

And then I cut 1/4-inch quarter round to go around the perimeter of the panel. I ordered the quarter round on Ebay. It’s one of the only two places I could find that had quarter round in the 1/4-inch size, and the other online place charged double the price. Eight pieces of 36-inch-long quarter round cost about $23 with shipping.
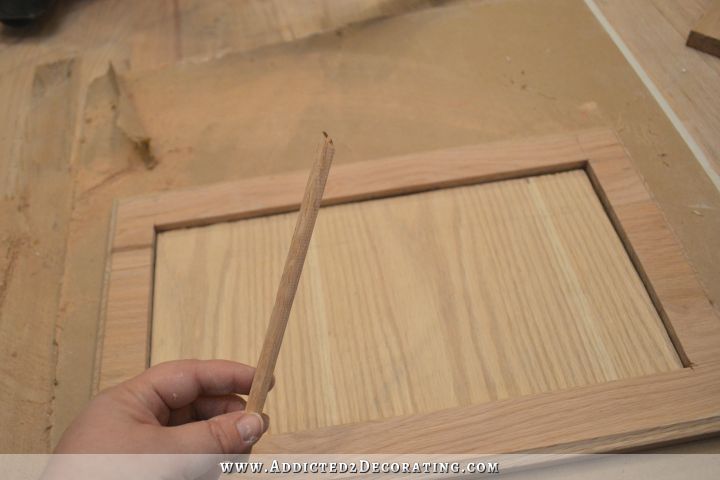
I attached the quarter round using wood glue on both flat sides of the quarter round so that it would be glued to the frame as well as the panel.

And with that, the rebuilding of the front of the drawer was finished! It’ll still need some detail work, like caulking and wood filling, but the basic design is done.
The back side is another story. It’s pretty ugly.

Before I finish that off, I’m going to put a bead of wood glue into the cracks and let it dry completely. Then I have two ways I can finish that off. The first is to fill all of the cracks with wood filler, and then sand the whole thing perfectly smooth. The second is to cover the whole back with very thin wood veneer. I have a roll of veneer that is really thin and has an adhesive backing on it, so it would be a very easy fix. And really, the only part that will ever show is about the top three inches. The rest of it will always be hidden by the actual drawer box that it’ll be attached to.
And here’s my new drawer front shown with the cabinet doors that it’s supposed to look like, and with the other drawers that I haven’t gotten to yet.
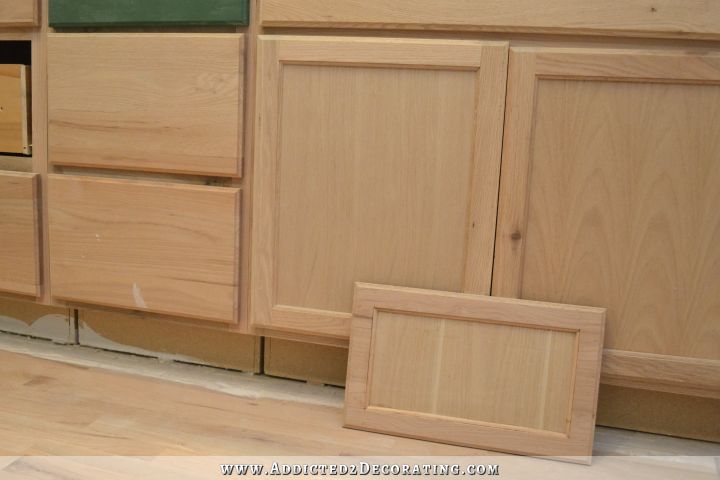
That’s a pretty good match, right?!
What’s interesting is that the new design creates an optical illusion of the drawer front being shorter than the other flat panel drawer fronts. Can you see that too, or is it just me? Last night when I finished this first one, I stood it up like that, and kind of panicked. I thought, “Oh my gosh, I’ve made it too short!!!” It took me a couple of seconds to realize that would have been impossible since the outside frame is the original drawer front. 😀
One down, three to go.
In other news, I’ve gotten about 2/3 of my floor sanded (with the exception of the areas under the feet — I’m dreading tackling those areas), and I’ve also gotten quite a bit of the tile done on the fourth wall. I just have the herringbone to go, but of course, it’s the hardest.

I took those while I was sitting on the floor working on my drawer front. I’m short, but not that short. 🙂

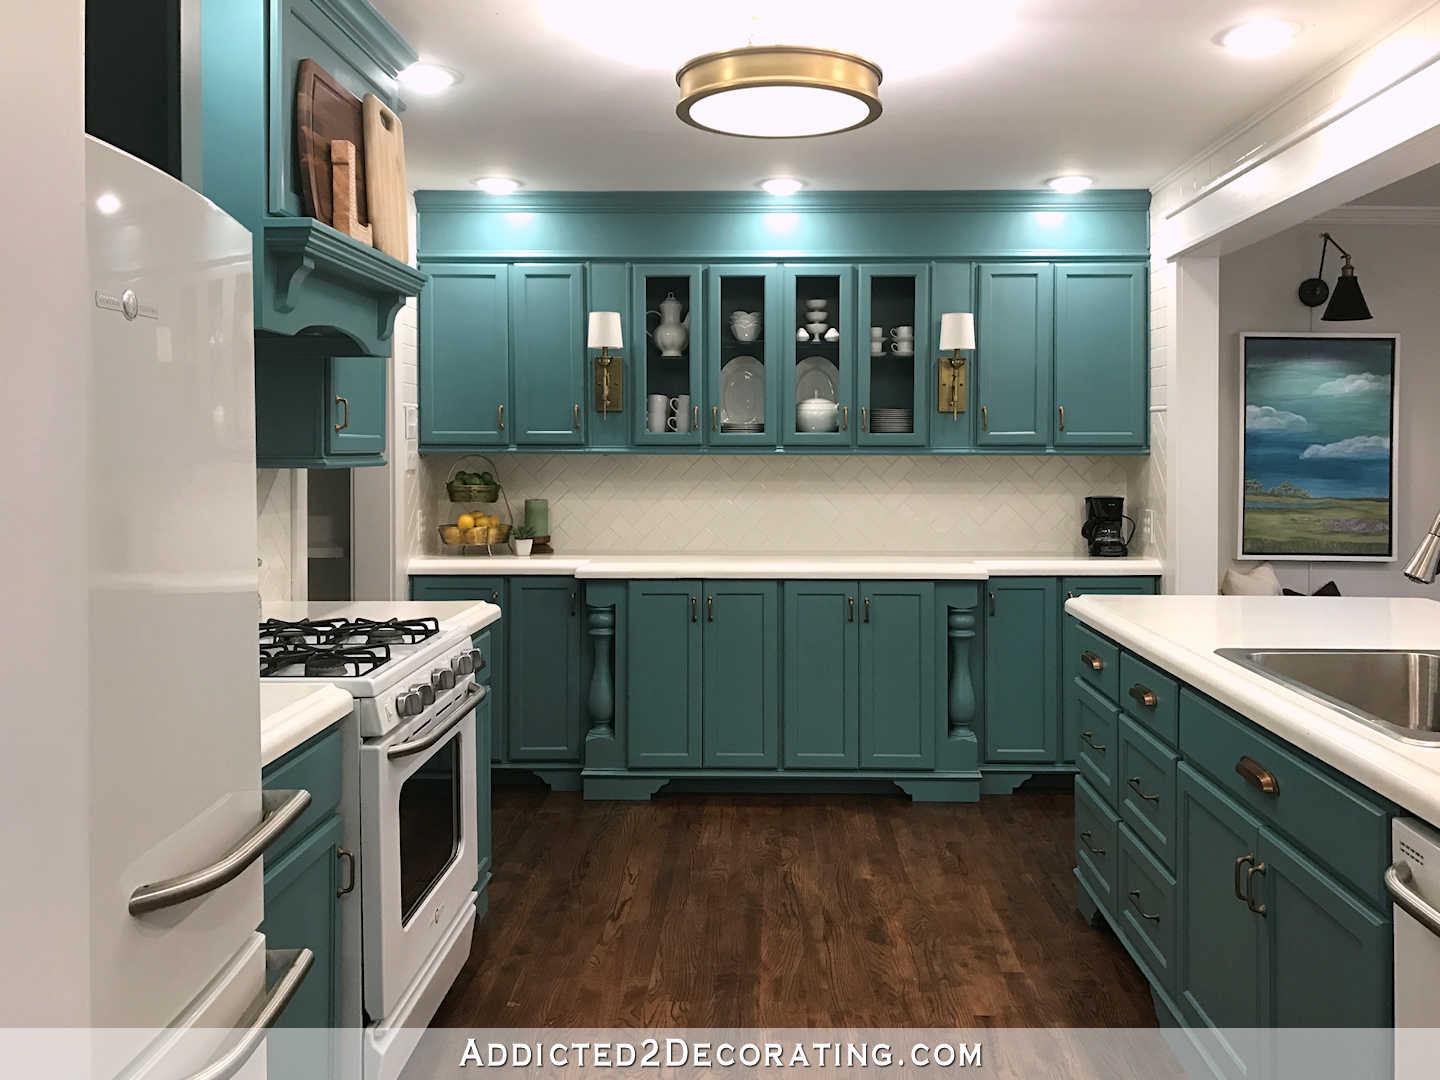
Addicted 2 Decorating is where I share my DIY and decorating journey as I remodel and decorate the 1948 fixer upper that my husband, Matt, and I bought in 2013. Matt has M.S. and is unable to do physical work, so I do the majority of the work on the house by myself. You can learn more about me here.


I’m so amazed at your carpentry skills and that you had the b*lls to just start cutting out your drawer fronts. I believe I would have been freaking out taking a Dremel to brand new drawers without the “edge” to guide me. The one you’ve done looks perfect, exactly as if you had purchased it that way. And you’re right – it does look shorter that the rest. Great job.
Wow. I would have tried using a router on the inner edge of the drawer front. AND I would have messed it up! Lol. The drawer looks fantastic. So funny about the optical illusion. I think you may make it to a finished kitchen for your HOUSEIVERSARY!
Hi Kristi, the drawer front sure is an optical illusion. Just goes to show how easily the eye can be tricked! I had to laugh when you said you finally worked up the courage to tackle the drawers. That, to me, seemed pretty tame given all that you have done. I am still blown away by all the blocking and build up you did on the big wall, not to mention the feet. I am still trying to figure out how to do that on my cabinets. I am hoping that once I figure out a template, I can get a local lumber mill to cut them for me. I am not nuts about saws, even though we have a table saw in the basement. Hope yougot a chance to look over the piece on Houzz about black doors. Sounds like everyone who reads it is going for it. I love the look in my kitchen/lounge. Don’t think I would use it anywhere else. Gotta run, hubbys birthday is today and I have to bake his favorite chocolate cake. Blessings
YES! I knew you could do it. They look great. Yes, the optical illusion is there. Give yourself a pat on the back. You made the perfect place to add gold leaf. You got to send in you kitchen to a DIY magazine, or something. I love my dremel, but I guess it’s time for me to check out that dremel multi-max.
Kristi – you make it all look so easy! The drawer fronts are a perfect match. You came up with the perfect solution for your space. I look forward to seeing them painted. The tile is truly a work of art. Never be in a rush to get any of this done. Thanks for learning and then teaching us along the way…
I am constantly impressed by your guts and true grit. You are an AMAZING woman. Can I be like you when I grow up? You are a true craftsman and your daddy would be proud!
Kristi…I think it seems like an optical illusion because of the grain (which I at first was wrongly placed but when you placed it next to the cabinet doors I could see why you placed it as it is)…If the grain was horizontal instead of vertical I think it would not appear to be so. I doubt I would have even looked at that! Or perhaps it is just me and my way of looking at things.
You are nearly done, Keep up the good work.
Truly impressive! One question though,…How did you attach the inside panel to the “frame” of the drawer? Did the 1/4″ quarter-round trim hold it in place? Thanks for all your inspiration!
For now, the quarter round is holding it into place. Wood glue is very strong, and since I glued the quarter round to the frame and to the recessed panel, it’s pretty secure. But I do plan on adding more wood glue in the spaces on the back. Once I do that, it’ll be very solid.
I was wondering how you would fix those fronts. They’re perfect! They are gonna look soooooo good when you get them painted. Way to go, Kristi. Still standing in Awe…
Loving it! Now I’ve been trying to figure out if there’s a “color” I could live with on my cabinets! I have only one large drawer at the bottom with 3 “normal” size above (and then 4 more normal across top of remaining lowers) so I would have to do all drawers in kitchen or none to have it look right to me 🙁
Great job!! I am at the “tile the floor so I can get to the doing the trim” stage of my room addition. So trying to follow along with you. My only thought on the inside of your drawers: would the veneer hold up as well to wear and tear on the inside of the drawers, as opposed to the solid wood? I can be tough on the inside of some of my drawers; well others in my home can be! Knives, silverware, the gadget drawers all can get a bit scratched up. Looking great!
Does your Dremel Multimax have sanding attachments? I have an off brand machine that might do the sanding around the cabinet feet. (If you have to do it by hand, maybe start with paint remover?)
I agree with whoever said it is the grain of the insert that is making the drawer front look shorter. Once it’s painted, it will be fine. You did an excellent job, as usual. Question: I notice that in the last photo where you have the drawer front leaning against the kitchen cabinet door, there is another front to the drawer that you cut out the panel, is that correct? If so, since the panel will be attached to the ‘real’ drawer front, why do you need any kind of veneer or whatever to cover up the cut-out part?
You’re making great progress. Don’t worry if you don’t get everything done by the 18th, but it’s sure looking as if you just might!
Onward and Upward!
I went back and re-read your comments, and see where you already said that the actual drawer box would cover up most of the remake of the drawer fronts. Seems like some wood filler, sanding and then painting the drawer front and back before attaching it to the drawer box would be a neat way to do it. They look really good, Kristi. Remaking those drawer fronts will add even more to the custom look of your cabinets.
I’ve done something similar in the past, and even made a tiny groove with a knife blade where the ‘rails’ would have met the ‘stiles’ to make it look even more authentic. Don’t know if you want to go to that trouble, but that shows what a perfectionist I am!
Everything is looking great. I check your blog daily for updates and I’m so sad when there isn’t one. 🙂
Were the cabinets in the condo unfinished that you painted? Have you painted any existing finished cabinets? I’d like to paint the cabinets in the guest bath. They are a maple that I think would look better white. Not sure about stripping all of them and the groves in the doors and drawers. Curious if you’ve tried to change existing or just went with new.
weird effect: it doesn’t only look shorter than the other drawer fronts, to me it looks wider as well! What a bit of wood grain can do to the eye… I’m really curious on the result of this front when it’s painted – cannot wait (but only because I’m curious, not, like you, because I necessarily want that kitchen over and done with…)
I’m loving the trim on your kitchen door (I know. I know. That was yesterday’s post but I’m behind.). Its perfect for the decor.
You did a great job on the drawer and they’re going to look great with the gold trim. Now you can brag about your custom cupboards!
Love, love, love all that you have done in your kitchen. How will your drawer front be attached to the drawer?
I’ll just screw it on. That’s how it was held on originally.
I think this will be a perfect fix for making a uniform look in the kitchen. Everything will look quite intentional. And, best of all, more gold leaf!!!
Question… how did you get the drawer front OFF the drawer??
Mine were just held on with two screws. I unscrewed those, and it fell right off.
Drawer looks amazing! You didn’t let us down. 🙂 And I do see the optical illusion.
I have the same question as Kelly. How did you get the drawer front off?
It looks great btw!
They were just held on with two screws.