My “New” Kitchen Floor
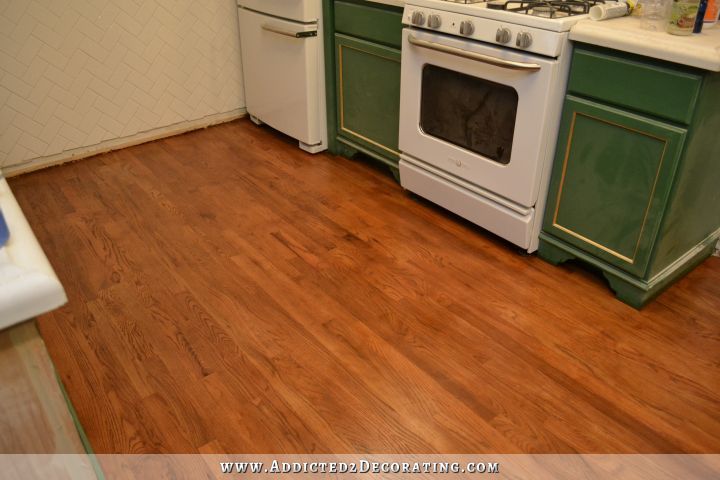
It has taken a while, but I finally have the stained red oak floor finished in my kitchen. I say “almost” because it still needs three more coats of Waterlox, each applied 24 hours apart, so it won’t officially be finished until Friday. But the color won’t change much, so what I have now is pretty much how it’s going to look when it’s finished, except that the finished floor will have a satin finish instead of a semi-gloss finish, and the color will probably be dulled just a bit once I add the satin finish on top.
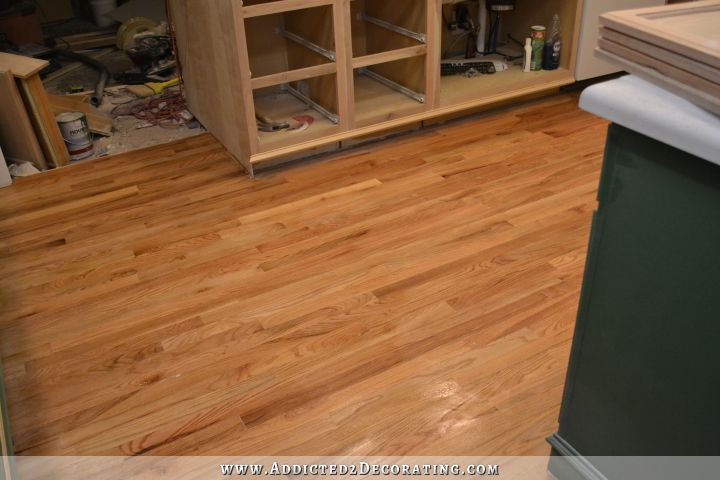
So let me back up a bit. After I got the whole floor sanded…
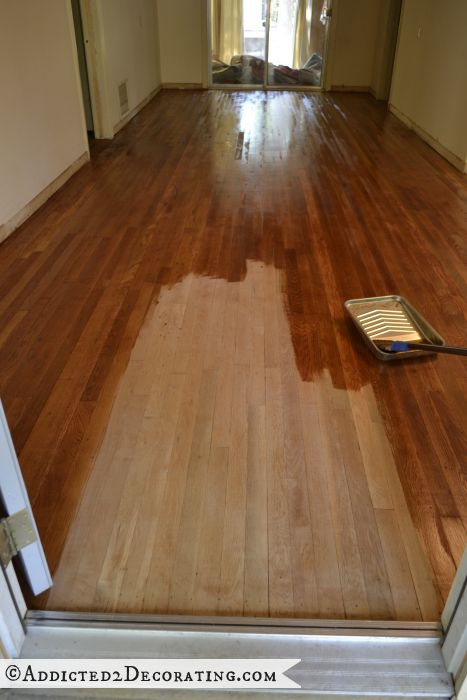
…I was hopeful that I could just seal it with Waterlox to it to make it look like the other wood floors. The kitchen floor is red oak, just like the rest of the house. But evidently the age of the wood makes a huge difference in how the color will turn out, because the Waterlox turned the original red oak to a gorgeous rich brown color with the very first coat…
But with the kitchen floor, the first coat of Waterlox barely made a difference at all in the color.
So I knew that if I wanted the floor to look anywhere close in color to the original floor, I’d have to use stain.
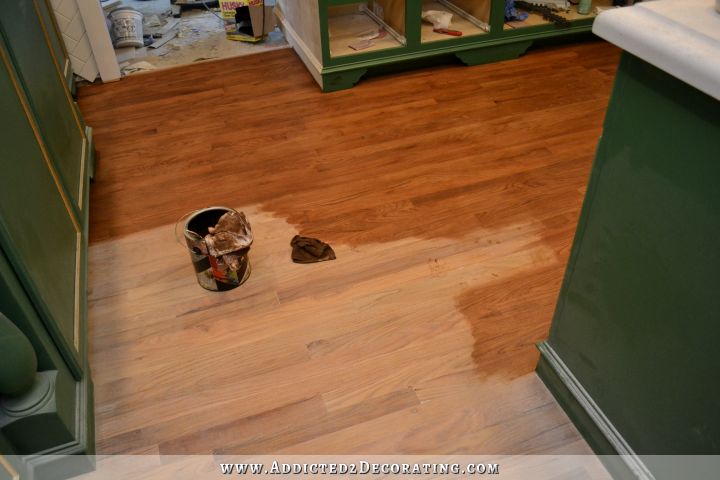
I ended up having to mix my own color using two different shades of Rust-Oleum stain. I used one part American Walnut to one part Wheat. Before I stained the floor, I sanded the whole thing using 150-grit sandpaper. Then I applied the stain with a rag.
It actually looked very close in color to the rest of the floor, but it’s not exact.
I gave that a few hours to dry, and then applied the first coat of Waterlox right before I went to bed last night.
I’ve found that that’s the easiest way to do Waterlox. Apply it right before bed, be sure the animals are tucked away behind a closed door somewhere, and give it eight hours to dry. By the morning, it’s dry enough to walk on with bare feet or socks. Then repeat the next night, and the next night, until it’s finished.
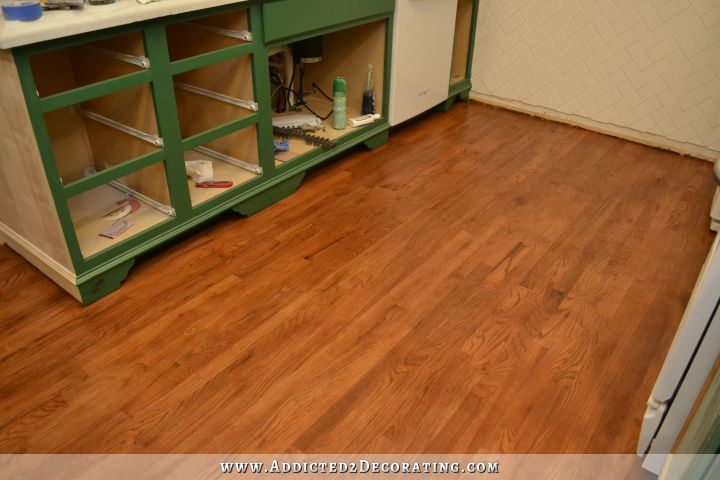
So this morning, it looked like this…
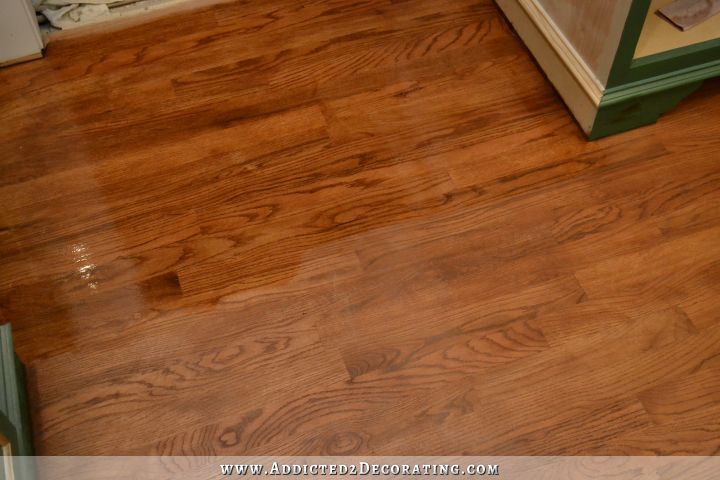
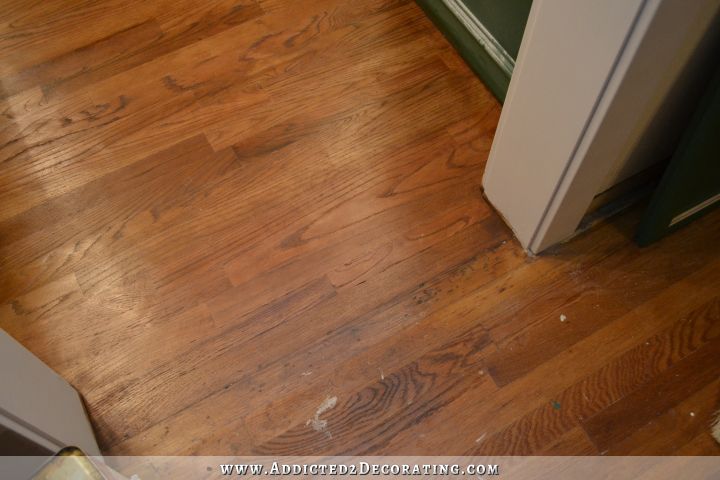
And here you can see where the old red oak floor with Waterlox only meets the new stained red oak floor.
It’s not a perfect match, as you can see. The new floor has more red in it, while the old floor has more yellow in it. But it’s good enough. 🙂
I still need to do two more coats of the regular Waterlox (which has a semi-gloss sheen), and then I’ll finish up on Thursday night with a final coat of Waterlox in a satin finish to take away that shine. The satin will also dull the color just a little bit.
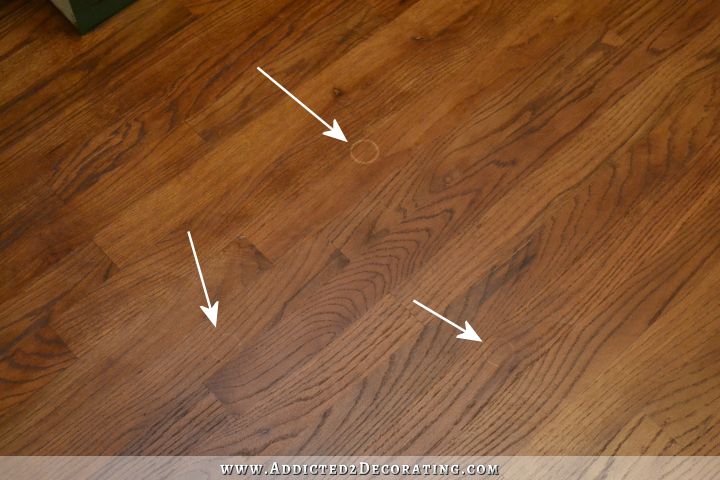
One interesting thing is that when I applied the Waterlox last night, I had three perfect little circles appear in the floor. They didn’t show up with the stain, but only with the Waterlox.
They’re a little over an inch in diameter, and I can’t even imagine what caused it. I was so disappointed when they showed up, and sat there staring at them just wondering how in the world I was going to fix them. But you know what? I’m not. I’m done with this floor. Those three little circles will just stay there as a reminder to me that perfection is overrated, and sometimes we need to learn to accept and laugh at the imperfections. After all that I’ve been through with this floor, I think it’s an appropriate reminder. 🙂
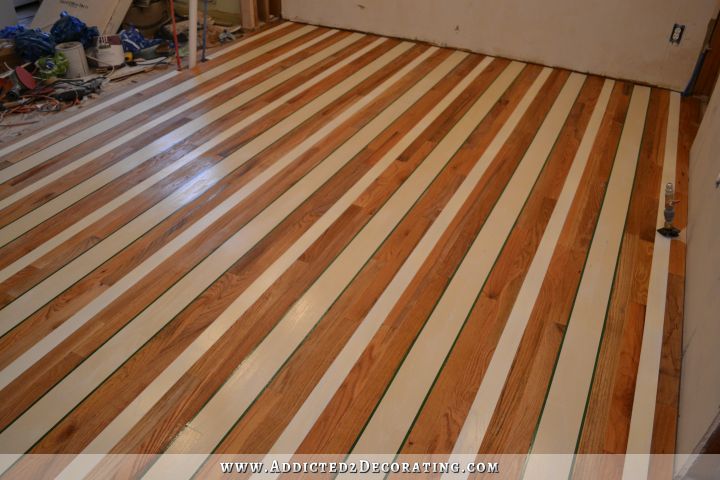
What a journey this floor has been! From a striped nightmare…
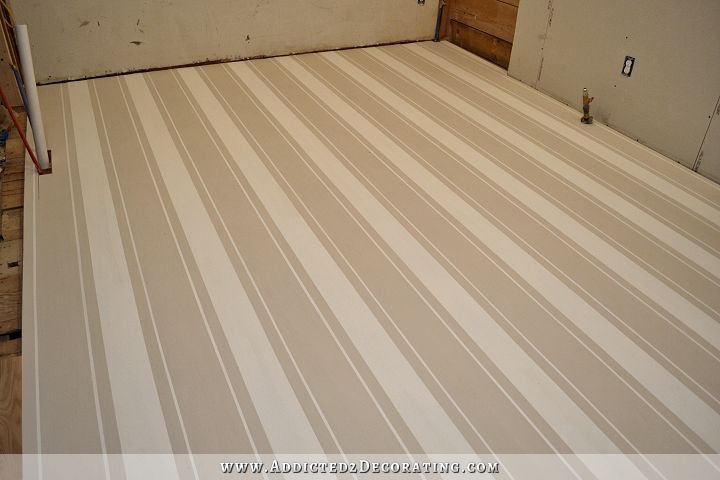
…to beautiful tan and white stripes (that I ruined by painting over Waterlox that hadn’t cured yet) that no longer went with my cabinets once I decided to add the gold leaf (that gold leaf was a game changer)…
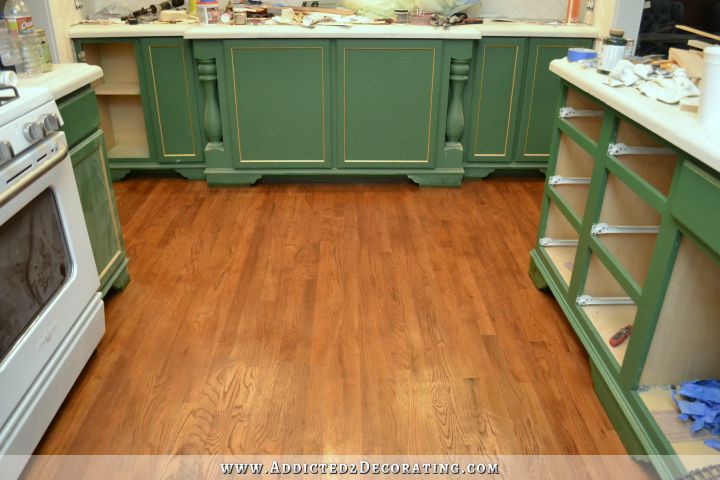
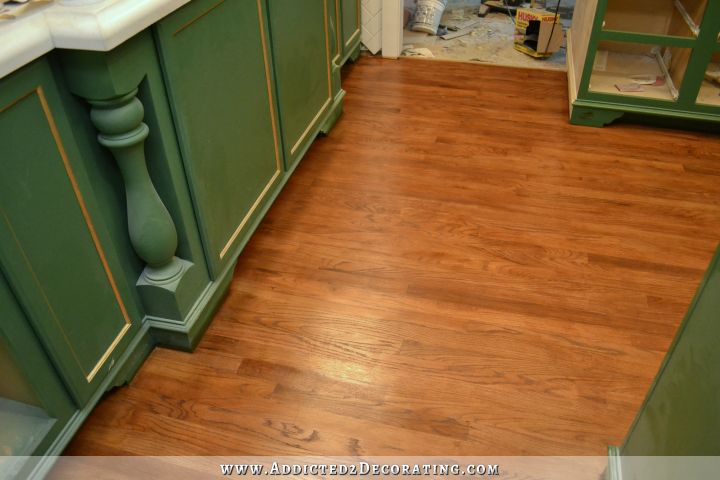
…and now just simple stained red oak floor…
Hopefully I won’t have to refinish this floor again for many, many years. 🙂
EDIT: You’ll also notice that I made a mess of the decorative feet on the cabinets with the stain and the Waterlox. Those will definitely need touching up, but it’ll have to wait until this weekend after the floor is dry and can be taped with painters tape.
Addicted 2 Decorating is where I share my DIY and decorating journey as I remodel and decorate the 1948 fixer upper that my husband, Matt, and I bought in 2013. Matt has M.S. and is unable to do physical work, so I do the majority of the work on the house by myself. You can learn more about me here.




Muuuuch better!!! They compliment the cabinetry instead of taking your eyes away from them. Your cabinets are your “jewels”!
I agree wholeheartedly!!
I agree, I love the floors now! Great Job!
Beautiful. Do you have the cat locked up?
Yes, both cats slept in my office last night (with food, water, and litter box in there), and the dog slept in Matt’s game room. 🙂 So no surprises this morning with little paw marks on my floor.
I love love love the floors now. They look so rich and expensive and they match close enough! They are beautiful!!
It looks beautiful, so rich with your very elegant cabinets. And it matches pretty darn close to the rest of the house, certainly better than the “professionals” matched my new kitchen floor to existing 90 year-old floors in the rest of the house. Well done!
What you have to do is have a great ‘story’ behind those three little circles — the more outlandish the better! I propose a reader contest to come up with the best story of what they are / what they’re for / what they’re from. Then if anyone ever mentions them, you’ll be prepared with an intriguing answer. 🙂
Ha! Great idea! 😀
I think the circles are crop circles. Very small aliens in very small spaceships landed in Kristi’s kitchen.
I, too, thought of crop circles and think it would make a great story for those who ask.
The floor looks beautiful!
Crop circles. They are the worst.
LOL…now that’s funny! 😀 I’ve got crop circles on my hardwood floor!
Bwahahahahaha
Naw… We all know they’re just the wet rings left from the wine bottle she was sampling while refinishing the Waterloxed paint. 😉
From your pictures I cannot see a great difference in color from old to new. But I do think that working on the floor and changing the finish has taken the newness from the wood and softened the look. It looks well against the old flooring. The transition is nothing to really notice. Once again an amazing job. And those 3 little rings are the remnants of your Blood, Sweat and Tears that have gone into this beautiful kitchen.
Sheila
That’s it! I can hear Kristi now….”Yes, this one is Blood, this one is Sweat, and this one is Tears.” 🙂
Beautiful job, Kristi! The new floor looks great both with your cabinets and the old floors. I think that an octopus tiptoed across your floor during the night!
Kristi,
thanks for sharing this amazing journey! Your approach helps me to remember to not get stuck in planning (plan, just don’t get stuck in it!) and just get started. I tend to over analyze the process and that slows down the getting started. The kitchen looks amazing – keep up the good work
All your hard work is beautiful and impressive!
Love the floor – it looks wonderful. It really changes the kitchen into a warm, comfortable looking place. Congratulations, Kristi!
3 dots… rubber feet of your air compressor?
That’s what I”m thinking! 🙁
I cannot believe how many times you have had to sand this floor. Here’s to at least 20 years before you do it again.
“Crop circles”, LOL! Probably more like, “Cap circles”!!! But, the circles just antique the floor! In a short while, you won’t even notice them, or if you do, they’ll just blend right in. That’s one of the advantages of a real wood floor, right? And I agree that the color is close enough to perfect with the rest of the house. You did a terrific job with them.
Onward and Upward!
So much better! I love the color next to the green cabinets.
Love love the floor the way it is now. I personally did not like the striped idea. Braided home made rag rugs would look great on these floors with a base color of green
Floors look great; never doubted that. BUT—-The Waterlox people owe you big. Really big!! As in gobs of compensation. Because we all lnow you fo not need anymore product being you are done with floors!!
“do” not “fo”!! Not the world’s best editor…
Me too. Love the floor, love the cabinets, love the blog!!
It looks awesome Kristi! I really loved the painted floor but also agree that matching the floor to the rest of the house was a great idea. You are impressive as always. I think the circles look like feet from a tripod or stand – perhaps a light or camera? I think you should make up a funny story about them though: maybe you have 3 legged fairies who sneak in at night to enjoy your work or the time Matt tried out a peg leg. Just kidding, the crop circles absolutely make the most sense. 🙂
You know your cats are thinking to themselves “she didn’t want paw prints on the floor, she never said we couldn’t make circles!” Ha ha.
I love following your journey. After watching DIY shows where the floor matches perfectly the first time, no floor finishing on the cabinet feet, the tile pattern changed at the right place the first time… You are giving us a real view of DIY and reminding us that things do not go perfectly. Way to go! Thanks for telling it the way it is.
Like the secret circles in wheat fields…….;)
Kristi, the floor is beautiful!!
I love that you left the circles. This is akin to the “humility” block in quilting; a block with a “boo-boo” that you leave in the quilt to remind you to “let it go!”
I loved your painted floors but I think these look so much better with your cabinets. The really make the green stand out as the focal point in the room and from the picture there is very little difference between the new and old wood floors. They are simply gorgeous.
Looks purty!
Whooo-Hoooo! Atta girl! Wowie Zowie! Gorgeous, gorgeous floor! I knew you could do it. Absolutely smashing. You’ve hit on exactly the right color to complement your cabinets. I don’t envy your knees this morning, but whatever you do, you do so well, even achy knees can be proud.
BTW, did you know that some Amish quilters intentionally put an “error” into their work, because perfection is reserved for G-d’s work? Three mystery circles–perfect.
It looks amazing! I could hardly tell where the floors were/are different – to the natural eye, it looks like they are almost the same floor. YOu did an excellent job at matching the colors up. I gotta say the “Houseiversary” posts, really showed such a dramatic difference. To be quite honest – you are doing a heck of a job all by yourself in that relatively short time.
Put it this way, my sister in law, and brother have been thru three contractors, to just get some repairs done on their house, and for the last 6 months, it has been sitting in a state of flux, waiting for yet another contractor to come in and pick up where the last contractor goofed up, and simply left everything the way it sat and walked out.
They are being held hostage by contractors, because they are trying to get their house ready to be put the market for sale. Yet, they cannot move forward, and still cannot do anything, until the repair work is complete. In MY Eyes, you ought to be mighty proud of yourself, because you do possess the knowledge and will, to do so many things on your own. I for one would hate being held hostage by a contractor. I do not possess the building skills that you have, or the extensive power tool experience, but I am thankful that my hubs can and does, do any building, electrical and plumbing work, when its needed. I jump in and decorate when he is done. I have Lupus, and it sucks for wanting to do more than I can, all too often. Sadly this often includes lifting (and holding onto), power tools, and heavy materials. Of course, I’m okay with all of this – because we still get things done on our own, as a team. And isn’t that the whole point of any do it yourself home makeovers? Saving money and saying “I did this”!?!?
So give yourself a HUGE pat on the back, you are heading into the homestretch of this amazing kitchen – I seriously cannot believe it is even the same room!
Oh, and if I were you, I’d go and go ask Peeve about those little circles – I bet they are there because they possess a certain, “input code”, done by a certain feline, for the specific ability to regain secret access to, “Kitty Narnia”!!! 🙂 She obviously just waits for you to go to sleep, before she pops in the sequence code, that drops out the floor, and the kitty sized wardrobe cabinet appears!! ,,,, 🙂
I believe it’s the Navajo who intentionally weave a mistake in their rugs, believing that perfection is bad luck. So…you will have good luck from now on! 😀
Absolutely gorgeous! They really do compliment the cabinets and let them shine! I also agree that the floors are so professional looking with the old, over time they will look absolutely identical. Good Job =]
OOOh if that’s not a match I don’t know what is! As for the circles… well let me tell you a little story about my new dining set. I set the battery charger for the lawn mower on the dining table (the one time I took the tablecloth off because I have a black cat and well you know how cat hair appears on things) Anyhow- the charger have these weird hard rubbery foamy plastic feet. Yes- I have um… a beautiful set of 4 circles that ate through the finish on my beautiful dining set and I checked- yep- even on the chair at one point. DOH!!! The plastic feet were reacting with whatever was underneath, wood, finish… etc.
So Long story short… did you have something with feet that might have reacted with the wood or whatever you put on it? Or created a resist that made the stain resist? That’s MY theory. 😀 Otherwise you have been sent “kisses” from beyond. lol or is it hugs? you know… XXX 0000 *sigh*
Either way- I learned the hard way… don’t put anything on bare wood, finished, sealed or not- you never know what is going to react with what.
If it were me – on Friday morning; 1. I’d stroll in there and somewhat fall graciously to the floor. 2. Gleefully roll around and around and around while hugging myself. 3. Stand back up and holla “FLOOR?!! I WON!!!” Bam! 🙂
Love it, circles and all! I not only enjoy reading your blog faithfully each day I’m cracking up at some of the comments! Barb, you’re a stitch! I love your home and potential plans. That big oak tree and the land, what a fabulous buy!!
Rhonda, not only would I roll gleefully around on said floor. I would host parties on it – reveling in my own accomplishments I would haul out my best stemware and serve sweet tea and wine for everyone! Kristie is such a rock star in my book 🙂
Wonderfully rich floors to go with luxurious cabinets! Really an awesome job, Kristi! Those circles pushed correctly lead to the Kat Cave!
Kristi, the floor looks great. I think the match is about as close as anyone could hope for give the difference in age. The natural wood just works as a compliment to your cabinets. Now you have your three major components. The white, the green and the beautiful wood of the floor. This is a kitchen that will stand the test of time, elegant yet practical blending beautifully with your plans for the rest of the house. I know the last thing you probably would want to do is another painted floor, but the striped (not the basketball court) floor would be charming in a sunroom. I always thought it mimicked the stripes on an old fashioned canvas awning. Quick question, and a dumb one, Waterlox, is water based right? Do you apply it with a lambswool pad? Our laundry room floor needs to be sanded and sealed and I think we could tackle it with this product if it is water based. Blessings
Waterlox is oil-based. It’s actually a tung oil finish. I think they did recently come out with a water-based version, but the original stuff (and the stuff I use) is oil-based.
Wow, beautiful!
You got the refrigerator door flipped! That’s the 1st thing I noticed. 🙂
BTW – floors look awesome and the only one who might notice the coloration difference will be you. I can barely see it when it is pointed out to me.
And THIS is how a wood floor should look– absolutely gorgeous!
I totally agree..!! Now this totally complements the cabinets..
OMG its so beautiful!! It looks so good with the cabinets! I’m so glad you changed your mind with the stripes. I had to literally stare at the screen for a minute or two to figure out what you were saying about the floors not matching. It looks so great, you are the only one who will even notice :-))
just found this on the Waterlox website about patterns in the finish:Benard cells are defined as: “defects that look as if someone has imprinted a series of hexagonal shapes on the surface of the varnish film. They may be four or five sided or even roughly circular. Often there is a mixture of these. Benard cells have very noticeable centers and are sometimes produced by convection current circulation patterns induced by solvent evaporation in paint films. They can also be formed by leaving a physical impression in the film surface when applied by a roller. A roller will form a stipple effect on the film surface, creating areas where pigments or flattening agents in the paint or varnish, congregate and form the hexagonal pattern.”
To repair this, you’ll need to buff the surface to remove them, vacuum and tack and apply another coat with the lambswool applicator method that we discuss on our website in the FAQ/Project Help page.
I think those circles are where you kept moving your wine cooler while you were working!! Everything looks great. Quilters also have a ‘mistake’ on their quilts many times because only God make things that are perfect.
You have definitely changed my mind about wood floors in the kitchen! Cheers to you for such a beautiful Kitchen! Keep up the wonderful work you’re doing!!!!!!
I love watching the kitchen come together, including the glitches that you had to overcome. I learned so much about paint, stain and do it yourself projects. It’s heartwarming to know there is someone else out there that will not sacrifice on the vision they saw in their mind’s eye and to persevere until it is ‘Good Enough’. Thank you for being an inspiration to us all.
Looks great! When I did my floors with waterlox duringvour build I didn’t realize one of the screens had been removed. When I came back to do the 2nd coat I discovered moths stuck to the floor. Removed the moths but the outlines remained. Thought about sanding them out but decided they added character.
Love them! The color is rich and warm like caramel…perfect.
I really admire your courage to show us all this including the mistakes. We all make mistakes in our building and decorating and have to figure out solutions. So it’s all normal. But still, you are being pretty intimate with the universe. 🙂
Beautiful. Just beautiful. Thank you so much for the formula for the stain. We put in a red oak floor in our living room and will be staining it soon. We, too, have the old hardwood floors (farmhouse) and want the new floor to be just close enough to the original. Thanks again for sharing all your hard work.
I want to thank you for your posts. Being the wife of a Home Improvement contractor, I too have taken on many of the tasks that you are explaining. I appreciate how thoroughly you explain and document the process. You are very gutsy to take on all of these projects. I pray that you and Matt will have many years to enjoy the fruit of your labor. Blessings, Jeri
The floor looks amazing, Kristi. I was coloring my hair in the kitchen and unknowingly dropped a glob of hair color on the floor. Yep, I now had a perfectly round dark spot on the floor. My eye always went right to it, but no one else ever noticed it. By the way, did you move out the fridge and stove to refinish the floors?
Kristi,
Your floor looks beautiful – my husband and I have been toying with the idea of laying and finishing our own floors. As far as sanding and stain/waterlox where would you say that falls on the DIY scale? Thanks!
Wow! Just oh WOW!! Gorgeous, wonderful, beautiful floors!
We’re installing wide plank red oak floors in our house. I’ve been waiting 30 years for those floors. Hubby sawed them out, we had them kiln dried and planed. We’ve had to screw them down every so often, then add plugs to cover the screws, even though they are tongue and groove, because they are so wide. Now they look like they are old and pegged. We had them drum sanded, but I still went over them with a hand sander and then I stained them with a rag. I used a different brand of stain and poly, but I prefer water based poly and I did 5 coats of a satin finish. I’m so in love with my floors. Still have a couple of floors left to do, but it’s worth all the work and all the back aches.