Back Painted Glass Backsplash – My DIY Trial Run
Well, y’all really had some strong opinions about the fabric-under-glass backsplash idea yesterday! 😀
I’m still not ready to resign myself to subway tile (or any other kind of tile for that matter). My creative juices are still flowing, and I’m kind of determined to come up with something that hasn’t already been done on every single DIY/decorating blog out there (including mine…I had subway tile at the condo).
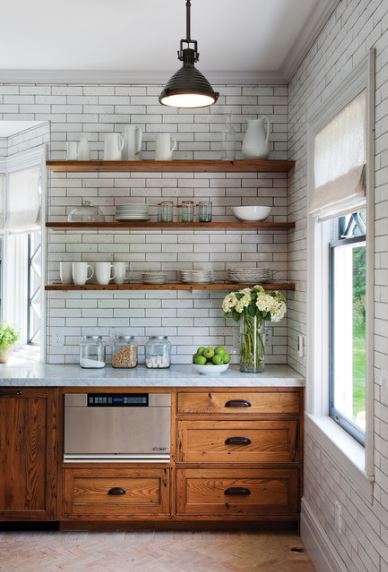
Okay, so I’ve ruled out the fabric part, but I haven’t quite ruled out the glass part. In fact, the more I look at it, the more I love it. Glass backsplashes don’t need fabric behind them to be beautiful. Check out these back painted glass backsplashes.
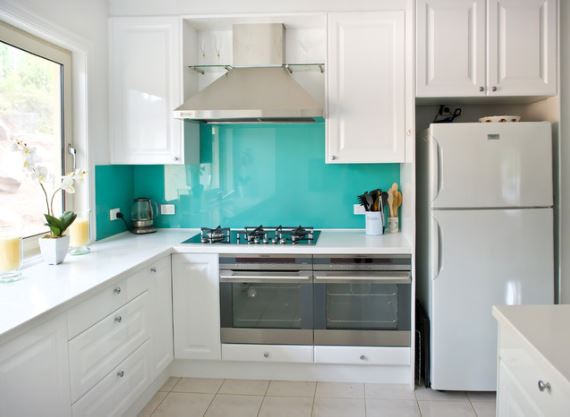
Contemporary Kitchen by Melbourne Kitchen & Bath Designers Let’s Talk Kitchens with Allan Aitken
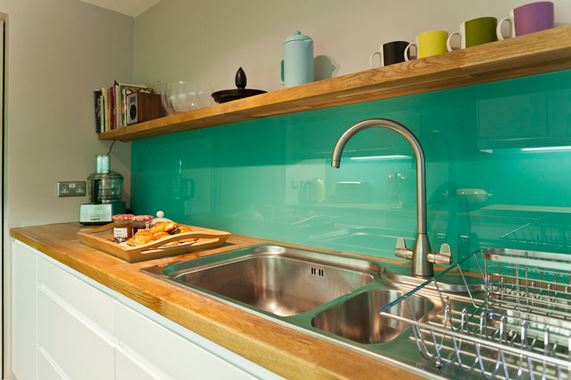
Midcentury Kitchen by Bristol Architects & Designers DHV Architects
Those are solid pieces of glass that have been painted on the back and then installed. I think they look amazing! Now obviously, those are brightly colored backsplashes in neutral kitchens, and my situation will be quite different. But it still got my creative juices flowing.
First, I needed to find out if glass was even option. I mean, if it was going to cost $1200 or so just for the glass, I could rule it out immediately. I know many of you suggested plexiglass/acrylic, but if I go this direction, I want real glass. So I called the local glass place that I always use for any of my projects that require glass or mirror to be cut, and told them exactly what I wanted to use the glass for. I gave him the measurements just for the one big piece that would go on the wall of cabinets. And the price for a solid piece of 1/4-inch thick, 18-inches-tall, 10-foot-long tempered glass with the edges sanded smooth?
$190.00!!!
I couldn’t believe it! That’s totally do-able!
So the next step was to figure out a paint option. Professionally painted and installed back painted glass backsplashes are quite expensive, but I knew I could save money if I could find a way to do it myself. In fact, the guy at the glass place asked me if I would be using the glass just plain, or if I would be painting the back of it, so he’s obviously heard of this before. Of course, there’s such a thing as glass paint that you can get at Michael’s and Hobby Lobby, but the colors can be quite limited, and glass paints generally aren’t completely opaque.
I did find this Glass Paint by GlassPrimer. It looks like an amazing product, AND they can mix it to any color you want (matched to any manufacturer’s paint colors), but it’s quite expensive. One gallon of the paint and catalyst is $265.00. Yikes! Plus, I don’t need a gallon of paint for my two backsplash areas. Not even close.
And then I remembered that the Martha Stewart craft paints will actually stick to glass. It takes a while for it to cure (21 days, I believe), but once it’s cured, it stays and is actually dishwasher safe. So I decided to do a little experiment.
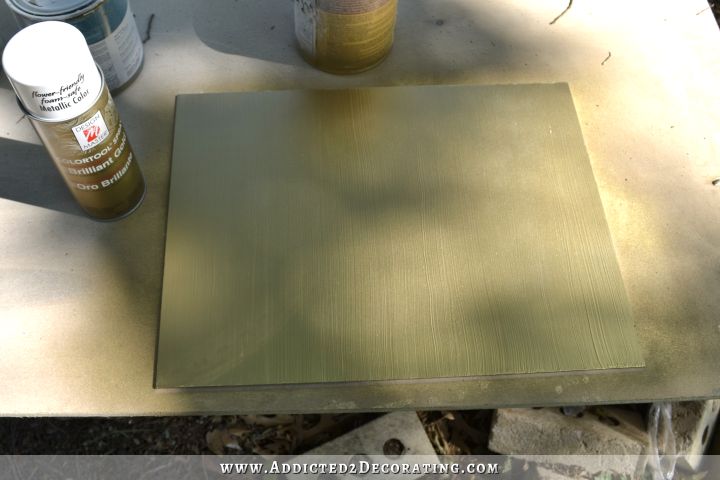
First, I grabbed three of these 12″ x 16″ pieces of glass from Home Depot.
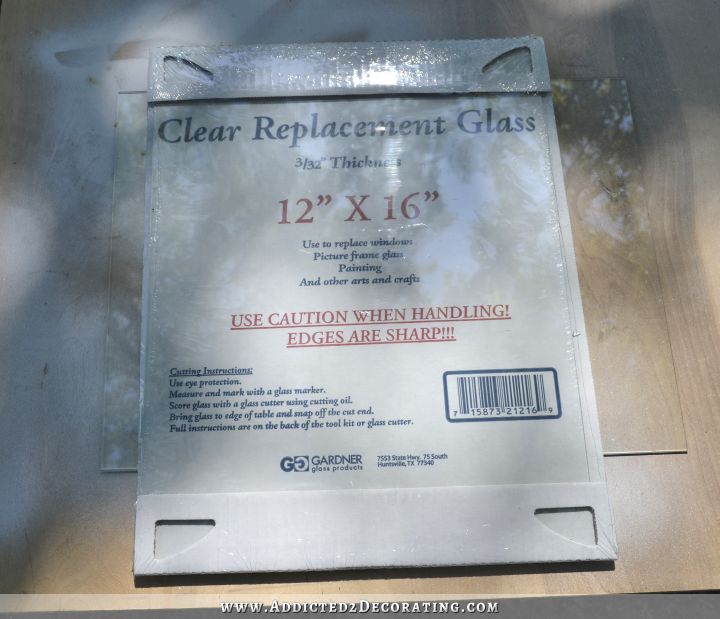
(Sorry for the awful pics! I was working outside in the bright sunlight under a tree, so there were lots of shadows and reflections.)
And then I used these five colors paint — gold, light gold, yellow gold, green gold, and wedding cake.
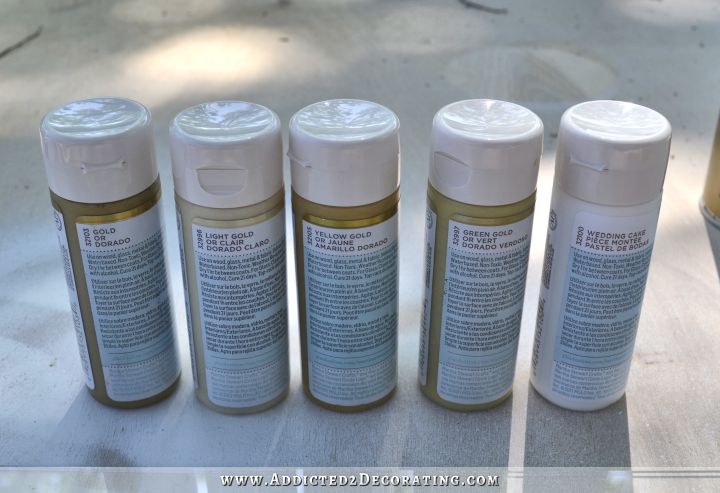
My idea was to do a “watercolor” effect, much like I did on the paper I used for the herringbone “tile” lamps. So I placed random squirts of all five paint colors on the glass…
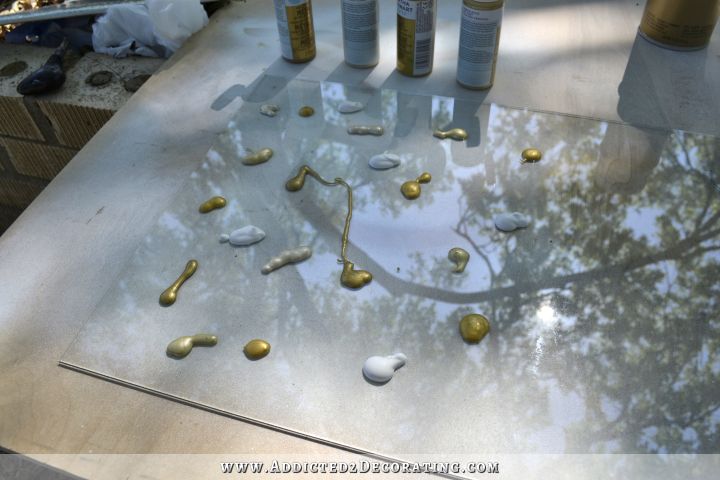
And then I dragged my brush across the paint enough to cover the glass, but not so much that all of the paint colors mixed to together too much.
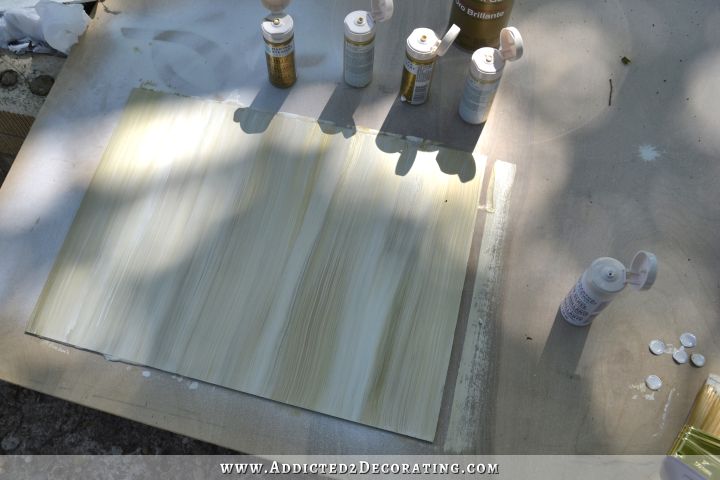
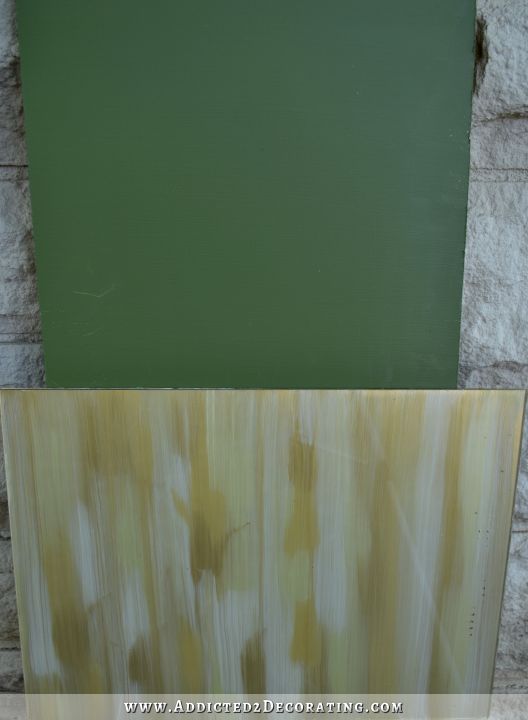
Then I did a second leaving out the white. I thought that various shades of gold might be really nice together with no white mixed in.
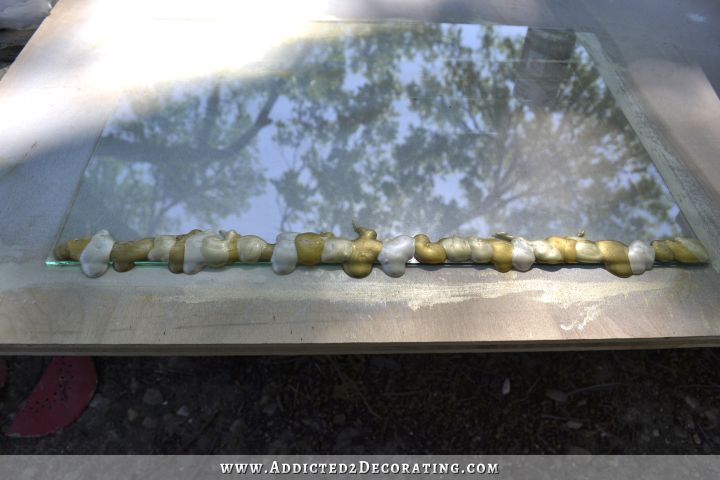
And then for the third one, I placed all of the colors along the bottom, and then dragged the brush up to spread the paint over the glass.
When the paint was dry, I used this Design Master brilliant gold spray paint…
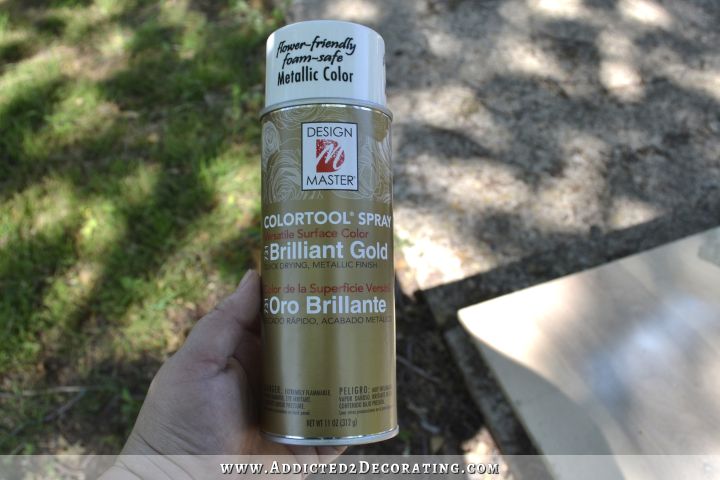
…and I sprayed the back of the painted glass just to be sure that there weren’t any clear or translucent areas on the glass.
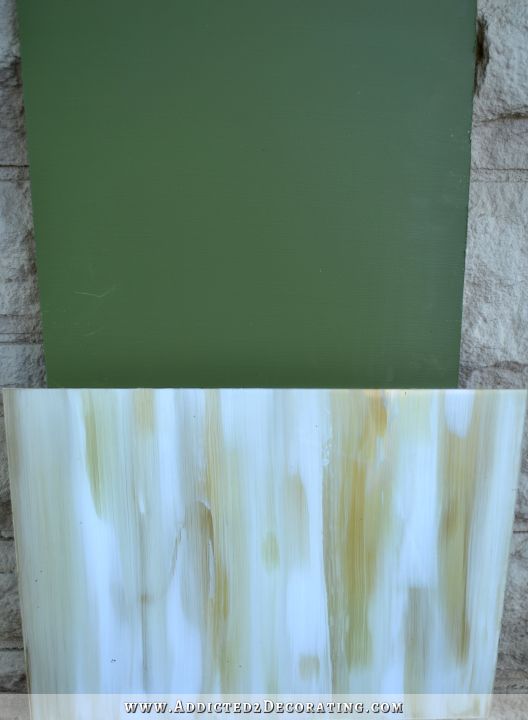
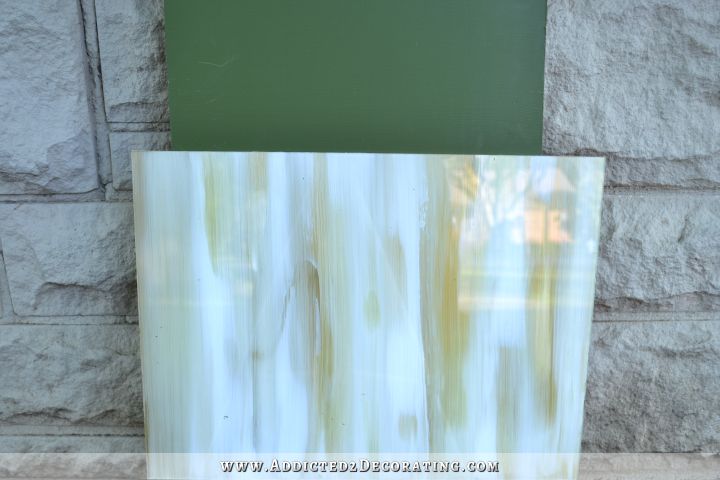
Ready to see the results? I painted a piece of MDF with the green cabinet color so that I could see them together.
First up, here’s the one with all five paint colors scattered randomly over the back of the glass…
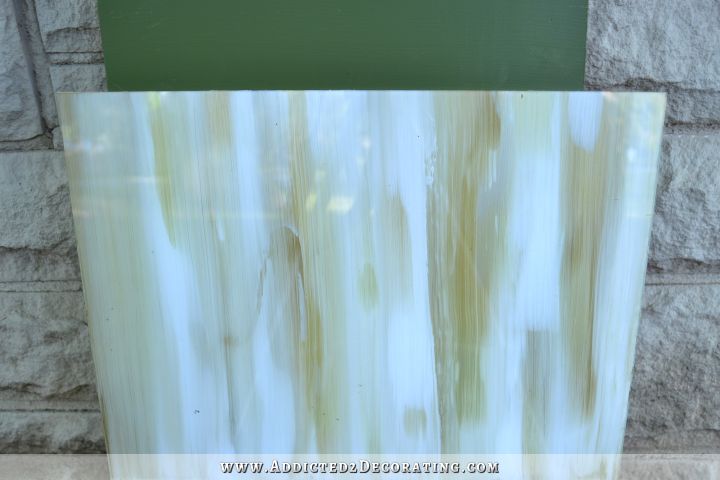
And next, here’s the one with the four paint colors (sans white) scattered randomly over the back of the glass…
And then the one with the paint colors lined up at the bottom of the glass…
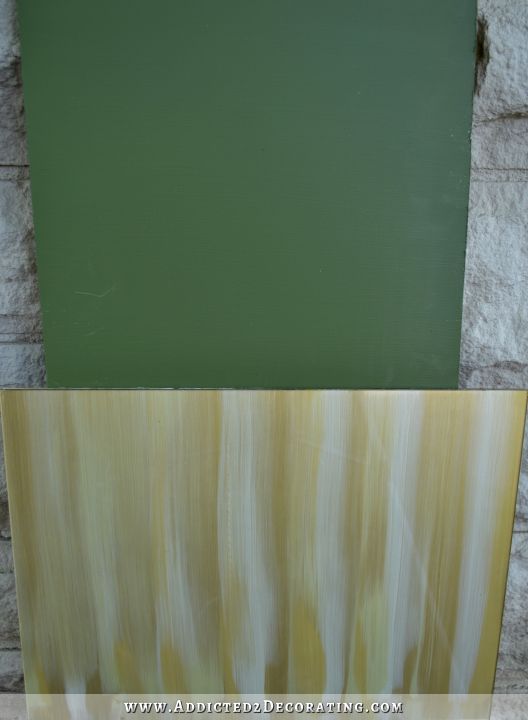
I don’t really like the last two, but I have to admit, I’m loving this one with the white…
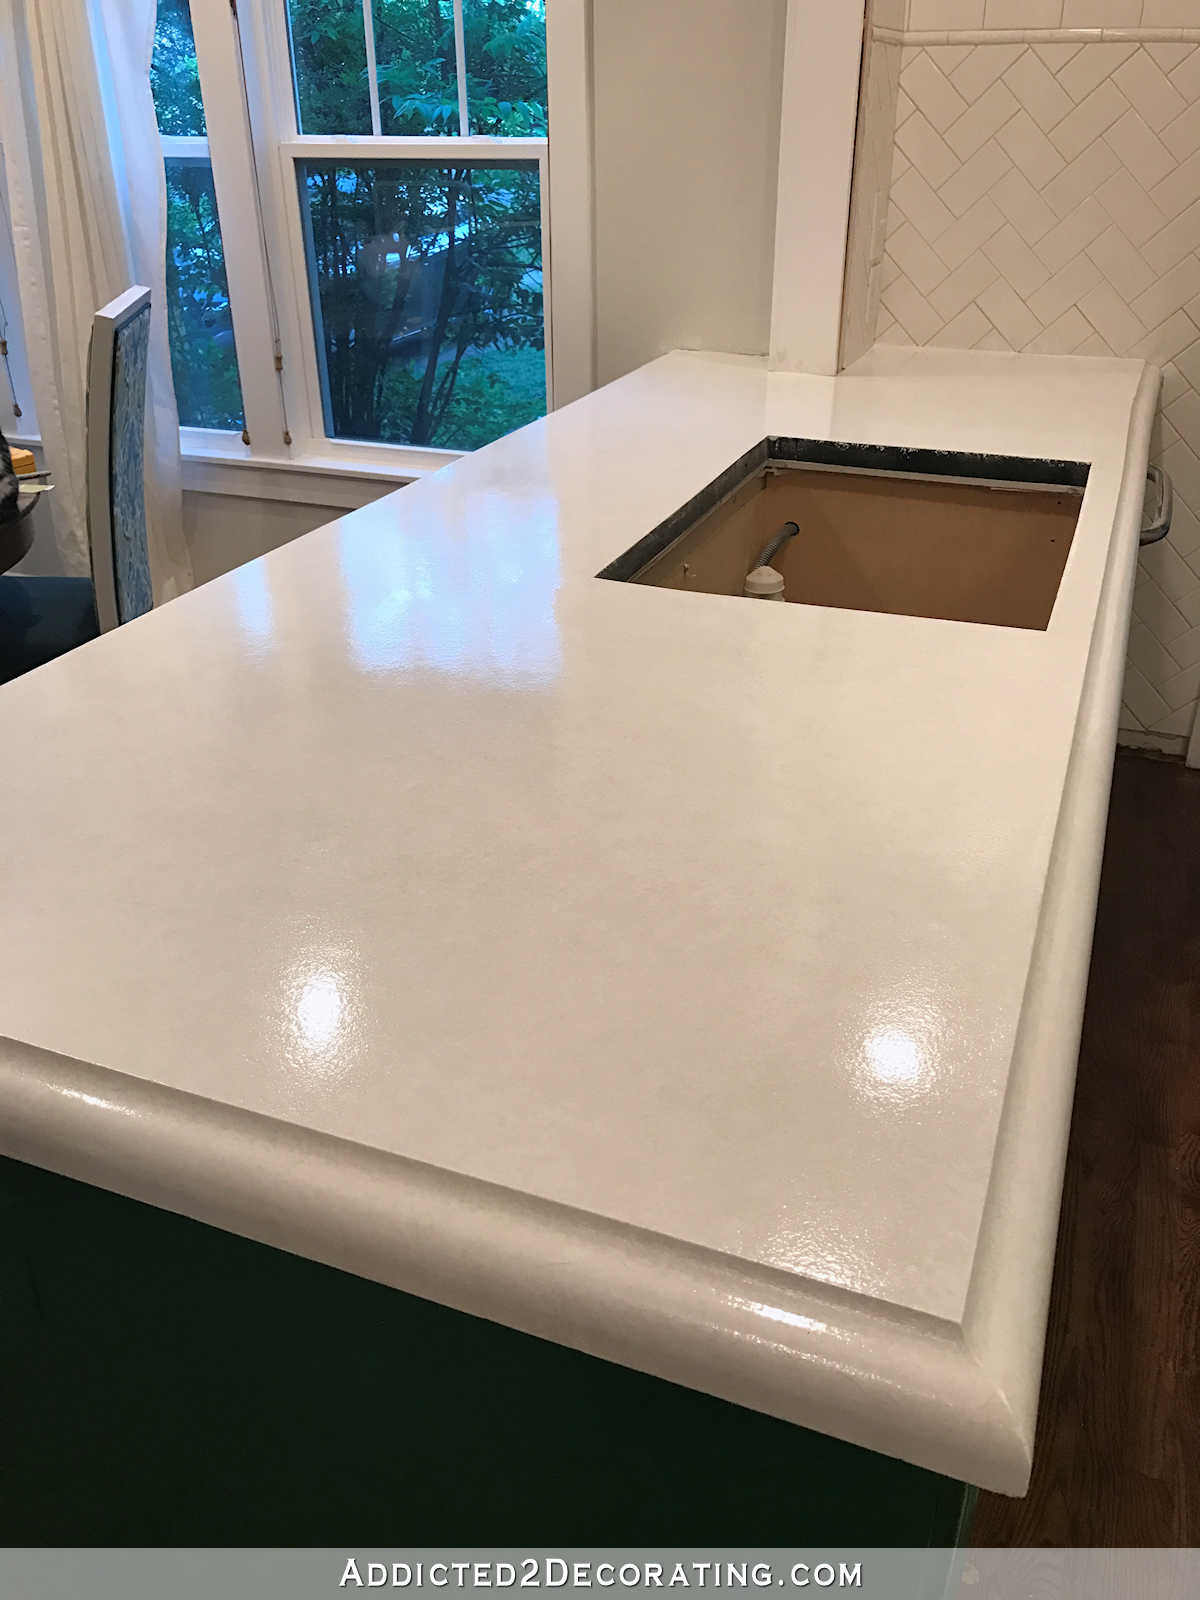
I’ve decided to keep my walls white, and my countertops will be white (not bright white, but kind of a natural bone white).
And I LOVE the super shiny effect that the glass gives it.
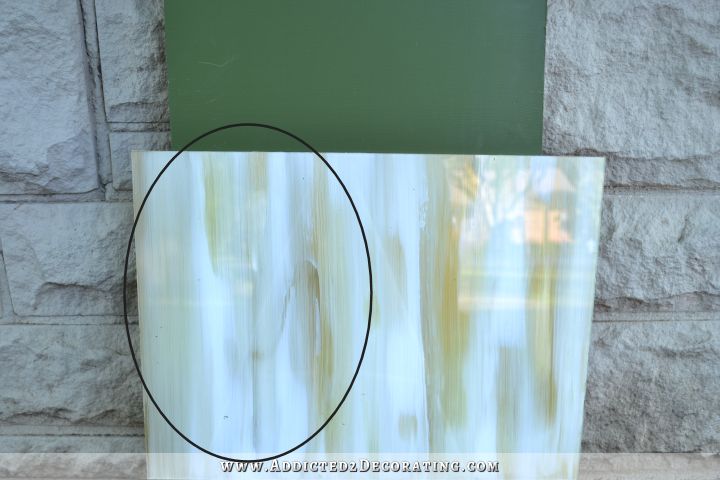
I still haven’t made a final decision. There are several other ideas I want to try. The first thing I want to do is try the five colors randomly placed again, but use less gold and more white so that the gold is even more subtle. Because I absolutely love how this section looks…
But I’m not too crazy about the heavier gold look of this section…
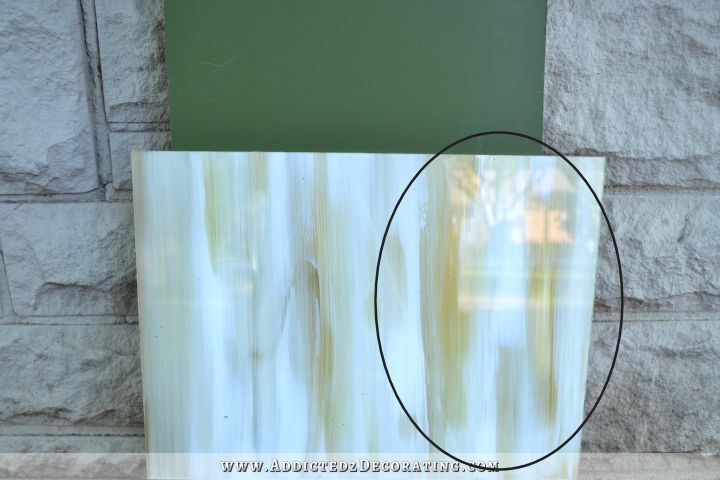
So my paint technique definitely will need some improvement if I go this route. But this was just a first trial run, so I’m okay with having room for improvement. 🙂
There are several other ideas I want to try as well, such as using a stenciled design on the back of the glass, and then one paint technique that I have in mind that uses a spray bottle of paint, and then another that creates a “gold flake” effect, and yet another where I create a marble effect using golds instead of gray paints. And I might even want to try some sort of “mercury glass” effect using gold paints instead of silver.
So I have lots of other paint-on-glass ideas swimming around in my head that I want to try out. If I do eventually land on a tile backsplash, it’ll be because I’ve exhausted other possibilities. But for now, I’m really wanting to challenge myself to come up with something that’s beautiful and unique to my kitchen.
One last note, several of you mentioned yesterday how liquids could seep behind glass, which makes it a not-so-great choice for a backsplash. But glass backsplashes are sealed with caulk, just like stone, tile, granite, beadboard, and any other kind of backsplash, so moisture behind the glass shouldn’t be an issue.

Addicted 2 Decorating is where I share my DIY and decorating journey as I remodel and decorate the 1948 fixer upper that my husband, Matt, and I bought in 2013. Matt has M.S. and is unable to do physical work, so I do the majority of the work on the house by myself. You can learn more about me here.

I definitely like the one with white in it. I think the glass is a great idea. It would be so easy to wipe clean & wouldn’t collect dust in the grout, etc. Excited to see what you end up doing!
I have done this technique with a squeegee, the cheap ones you can get at the dollar tree. I loved the results.
I would LOVE to see the results of the squeegee with the paint. Any pics you can post?
I worked for high end gc. We did a fair amount of back painted glass. LEsson learned: test you mastic (glue) you will be using to attach glass. Not all are compatible with paints!
What a wonderful idea! Much better than subway tile. This is going to look great in your kitchen.
Love the glass and the last one I loved, despite the fact you thought the gold was a tad much in the one side…the randomness of the paint mixing makes it one of a kind and truely a unique look for your kitchen.
ok. this is awesome. Just. Awesome. You never cease to amaze me.
how did you attach it to the wall?
I have not been reading your blog for a long time so I have to ask, are you planning on having kids one day ? Because using glass might not be the best idea if you do. Things get broken with kids in the house. I am remodeling my kitchen and I found these great panels that I want to use. If you are interested, I can find a link.
I’ll be using tempered glass. Unless someone plans on shooting bb guns in my kitchen, I think I’ll be okay. 🙂
I have four boys, the things they come up with !! Even my daughters make me shake my head often.
Kristi-
You always crack me up! I really like this idea and think it looks kinda like marble..which you like, ya? ! I hope I don’t sound like a dummy, but could you paint the wall and put the glass over it?
I could, but it would give a completely different effect. A wall span of 10 feet is not going to be perfectly flat, so getting a piece of glass to lie perfectly flat against an imperfect wall is virtually impossible. That would create unwelcome shadows. Plus, any imperfections in the wall, or any paint texture, will be visible. The beauty of painting directly on the back of the glass is that the result is a completely flawless, perfectly smooth look.
That makes sense. Leave it to me to look for the easy way out.
Oh- you inspired me to paint my ugly orange oak coffee table. It’s white now..much better.
That was my thought. Do the paint technique on the wall and cover with the glass. If you ever wanted to change, you wouldn’t have to clean paint or buy new glass.
I’ve heard that those who’ve done this have trouble with bugs getting between the painted wall and the clear glass. Ew.
As long as you don’t plan on putting glass behind a gas stove, you will be fine. Unfortunately, even tempered glass will not survive the heat of a glass stove over time.
Then how is it that I see glass backsplashes behind stoves all over the internet?
I count six backsplashes behind stoves on the first page alone: http://www.houzz.com/photos/query/glass-backsplash-kitchen
I think you nailed it! The first example with the white looks like a pair of onyx book-ends I have, I went and double checked. Wow, you are a talent! I had new cabinets installed a year ago, and as I read your blog about the feet you are putting on yours and this amazing idea for backsplash, mine pale in comparison, LOL. Great job!!
Now that I’ve got an idea of glass costs, I so want to do this! I am very curious to see how you mount the glass to the wall.
Reyna, I hate to be a kill joy, but the cost of the glass is going to vary considerably by region. Kristi was quoted an AMAZING price for her glass, but I can tell you that here in west Los Angeles, I’d be quoted probably 2-3 times that amount, possibly more. Check as many glass dealers in your area as you can, you may even find pricing vary by shop.
Yes, how does the glass backsplash get fastened to the wall?
I wish I would have thought of this as an option 10 years ago….I had “inherited” wallpaper as a kitchen backsplash and the glass would have nicely sealed it off. I can’t wait to see the end result that you decide to go with. I love that you’re trying something new. Good luck!
Yes! I love this for your kitchen! The one with more white in it is my fav, it has a pearl look to it.
Super glam. This would work with the cabinets for sure. Loving the ones that you have the ovals on. Super excited to see this. Cheers
This looks incredible. I too like the glass with the white paint mixed with the gold. Incredible. I’ll be closely watching this process because I want to do this too. Thanks!
i think glass will look great in your new kitchen. and i’m totally interested in the DIY portion! 😀
Awesomeness!!! I love the glass and paint!!! Can’t wait to see it all together!!
Brilliant! definitely loving the paint idea! 😀
You amaze me more every day. I LOVE the glass and your designs. The one with the white in it is definitely more appealing. I also like the fact that it will be easier to take down if you change your mind in a few years. Wish I had your get up and go girl!!!
I have a similar plan for my kitchen. I purchased some awesome old glass tiles on eBay. I think they were actually window panes from a factory. One side of each tile has soft rolled ribs while the other side has sharper ridges. I was going to paint the backsides but my neighbor/contractor/friend was concerned that the tile adhesive would stick to the paint, not the tiles, and the tiles might fall. Then I found some brackets that I could attach to the wall and slide the tiles in using no adhesive. Now I have decided to go ahead with the brackets, but to paint the walls, not the tiles. That way should I ever want to change the colors while still being in love with the glass tiles, I can change it up SO much easier. So that was my thought for you. Why not do your paint scheme directly on the wall and let it shine through the clear glass?
I think Bev made a good point. I love the look of the last tile (with the most white) and I think it would be striking with the cabinets, but paint the wall instead of the glass would give you the option to change it down the road. Do you think it would look as good as paitning the glass ? Now I:m anxious to see what method you decide on. 🙂
No, painting the wall would look different from painting the glass. Walls are seldom every completely flat, so there would be areas (especially on a 10-foot long section) where the glass wouldn’t sit completely flat on the wall. Plus, any imperfections in the wall, brush strokes in the paint, etc., would show. If you’ve ever seen a desk with glass on top, and items placed under the glass (like photos and such), then you know what I mean. Even though the glass is sitting as flat as possible against the desk and pressing the items flat, you can still visibly see the edges of the photos and other items.
That the beauty of painting on the back of the glass — you get a perfectly smooth, absolutely flawless effect regardless of any imperfections in the wall or brush strokes in the paint on the back of the glass.
And that’s why you’re the decorator and I’m not. 😉 I have no doubt that whatever you decide to do, it will be gorgeous. In any case, I’m so excited to see the cabinets painted that I can’t think about much else. I look at that photo several times a week !
Oooooh love this idea, especially the white with the gold hints!! You could also even use a subtle white/gold wallpaper or contact paper stuck to the glass as well, so they aren’t permanent on the wall. Of course, with your painting skills you won’t need to do that, but maybe for the rest of us 🙂
Can’t wait to see the kitchen come together!
LOVE the ones with white! It almost has a mother-of-pearl look to it. Gorgeous. You’re a genius!
I love it! It’s going to look fabulous! Have you thought about how you’ll install? Some of the diy shows, I’ve seen that used glass tile, had some problems with seeing the adhesive behind it, appearing to look like shadows. I’m almost certain it had to do with the color and the way it was applied. Maybe someone who has worked with glass tile can comment.
I definitely wont’ use adhesive. That would be just basically gluing paint to the wall, but nothing would really be holding the glass. I’ll probably use some clips, or perhaps some screws through tiny screw holes that I’ll have them drill for me, or maybe even just some small moulding around the edges. The weight of the glass will be sitting on the countertop.
Molding is a fabulous idea, then it becomes framed art as well as a classy splash back!!
You ROCK GIRL 😉
Cx
I did a lot of backpainted backslashes for restaurants. They are glued to the wall and yes they are tempered glass so you cannot drill holes!
Test your mastics with your paint. Both have solvents and they are not all compatible.
Looks gorgeous! This really seals it for me to try it in my own kitchen!
Just to throw my two cents in, the glass looks amazing in the inspiration photos because it is so shiny and reflective and perfectly clean. If you actually use your kitchen, EVERY LITTLE WATER DROP will show up. I wipe things down every day, even after every meal, but I will be forever grateful for a forgiving, matte tile surface on my backsplash. If you love to clean glass constantly, this is a great choice.
Julie, I agree with you about the glass showing every splash and splatter. I cook a lot and get very tired of wiping everything. My imagination leads me to think this will be high maintenance – wipe marks get wipe marks. But, on the other hand, the paint effects might lessen that as long as there is no direct sun shining on the surface. And I love the paint effect of the example that was shown first. Heavier on the white. I think with the gold smaller areas of the various golds will be more effective. Just wondering – is there more than one white to shade into the effect? A white with a yellow undertone would perhaps enhance the gold effect and let you use fewer actual gold streaks for the same overall lovely effect. What a creative idea this is!! Can’t wait to see you finalize this!
You can use a product for windshields like “Rain-x” on the glass. This will keep it from spotting.
I use it on my short doors too.
I agree with what must have been others…the one fabric image seemed to have movement in the positioning. However, LOVE your new painted idea. I actually have a canvas behind my push-in stove (doesn’t have the higher back). I probably could have duplicated it, creating a cheaper version, but I figured it was less expensive than nice tile. Also, I can remove it whenever I am going to be making a mess in the kitchen.
Mercury glass…..please. I would LOVE to see that!
The other option looks nice, but once you typed mercury glass, that was it for me.
Me too! Gold hued DIY mercury glass…that could be gorgeous! And I’m house shopping…so these ideas are really really getting me in the DIY mode since are are seriously considering a fixer upper!
I would paint the wall instead of the glass so that I could change colors or designs later.
Just don’t glue the glass to the wall, mount it some other way.
Painting the wall instead of the glass wouldn’t have the same effect. 🙂 It would look very different, especially with a piece of glass that’s 10 feet long.
The first one looks like marble. very nice. I liked the fabric idea too.
This is a pretty cool solution!
I’m curious as to why you’re so concerned about which paint to use. Pretty much any paint should stick…even latex, and if you’re going to seal it with caulk, water getting in to flake the paint shouldn’t be a huge concern…same as with the fabric. Oil paint will definitely stick and shouldn’t take quite as long to dry/cure as Martha’s paints as long as you avoid reds.
My Grandmother is a painter (artwork…not walls) and she used to do a technique called “Reverse Plexi” painting (with oil paints) where she painted the picture on the back of plexi or glass in reverse. It’s a unique technique that not everyone knows how to do (or has the patience for), so it was pretty popular when she sold her paintings. I mention it because some of the techniques might help you get more of the effect you’re looking for.
Essentially, you’re painting in reverse, so you need to paint the detail first, let it dry, then paint less detail and less detail until you’re painting the background. For example, let’s say you wanted a clean striped pattern with 3 colors (2 plus white). You’d start by painting the first color stripes. Let them dry. Paint the second color, overlapping the stripes from the first color. Let them dry. Then you’d paint over both sets of stripes with your background color (white), which gives you the backing and the final stripes. If you were dong a pattern (say flowers, for example), you’d ink-in or paint the detail on the flowers, then the flower background colors, then the background of the field over everything.
I can’t wait to see how this comes out.
Yes reverse art, is such a lovely form of painting that started by the Greeks, if I am not mistaken. I always wanted to try my hand at it, but never set aside the time. I had a clock from Japan, that had it on the glass front. Very neat affect when done correctly!
Kristi, you sparked my interest even more with the mercury glass idea you mentioned, that might be very cool looking, with the gold you are talking about, and your green cabinets you have shown….what a very rich looking color scheme that will be!
Originally, my main thinking in regards to the type of paint I use was just that moving and installing a 10-foot-long piece of glass would probably end with some scratches in the paint on the back side if I use regular paint, regardless of how careful we try to be with it. But then last night as I was brainstorming other ideas, I realized that after it’s painted and dry, I could just cover the entire back side with contact paper. It wouldn’t show from the front, but it would keep the paint from chipping/peeling/scratching during installation. So if I take that extra step, I could probably just use any type of paint.
I think this could look awesome! I agree that it might be a little high maintenance to keep clean, but if you don’t cook that much, then it shouldn’t be too bad. I also agree that painting the wall instead of the glass would be a MUCH better choice for making your backsplash versatile. Someday down the road you could pop it out and change the paint, use fabric instead, or get rid of it completely and go with something else.
I love this idea!!! I can not wait to do this!!!! I loved the look of the glass backsplash and can not wait to see how you get it all pulled together!! OMG I am going to buy some glass today and try this!!!
How is the glass installed? Is it something you can do?
I’ll install it myself, probably with some sort of clips (like mirror clips) or trim around the edges. The weight of it will sit on the countertop.
I love your idea of the glass back splash…and can’t wait to see what you decide to do.
Add one drop of hot pink!
go to Lowe’s.com they have some cool different tiles.
I don’t want tile. That’s kind of the whole point of this. 😉
One straight run of glass is great but in a kitchen there needs to be cut-outs for electrical outlets and a big sheet of glass is unforgiving. It would take some very careful measuring and cutting to line them all up properly, I find it difficult enough to get them in the right place on drywall. If it all comes together though, the mother of pearl effect would be stunning.
Oh good point. I hadn’t thought about that.
She can have the outlets installed under the cabinet boxes so nothing will detract from the backsplash.
Yep, the glass company will cut everything I need — holes for outlets, light switches, etc. I hope to arrange everything so that I don’t have any of that interrupting my backsplash, though. And things like that do add to the price. But I certainly wouldn’t try to DIY the cutting of tempered glass for electrical outlets.
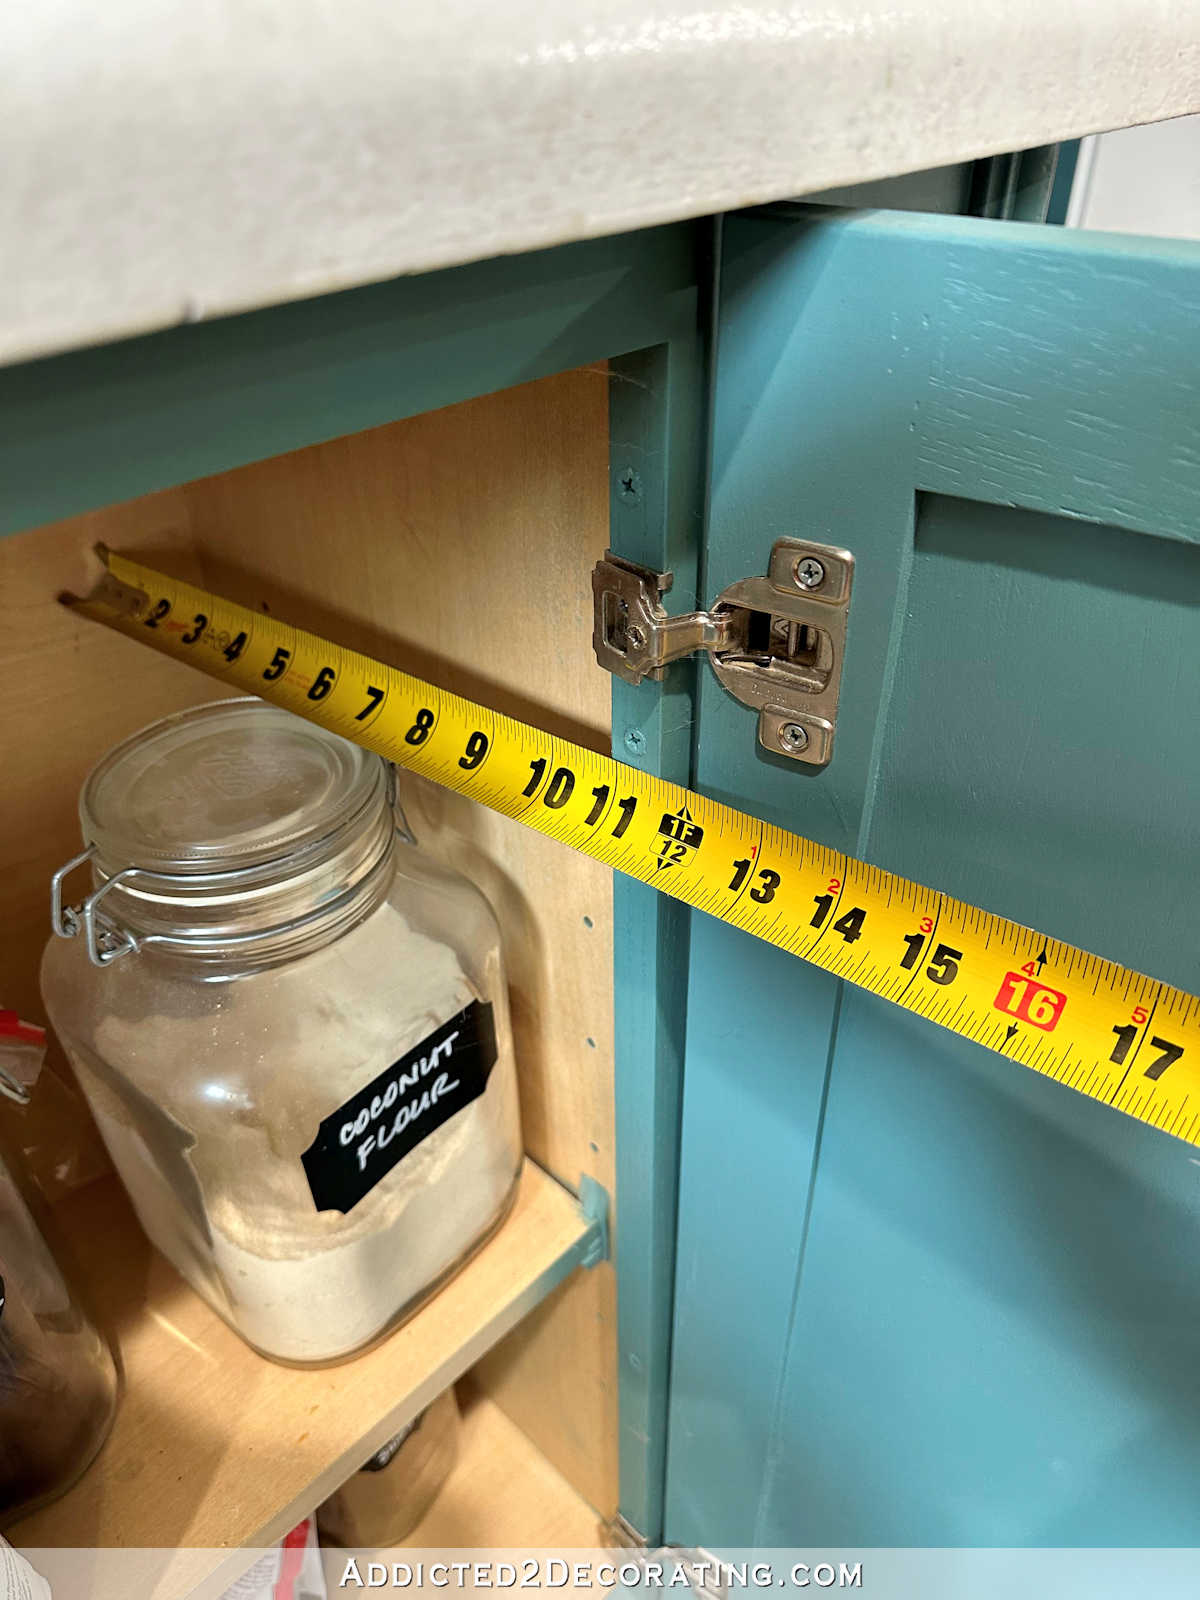
I’ll solve the electrical outlet problem by moving the outlets to the underside of the upper cabinets. Probably only lose an inch or two of vertical ‘floor’ space in the cabinets by recessing slender outlet boxes there. (I always unplug my appliances after use.)
I love all of them. Really reminds me of striped marble. I wouldn’t mind seeing you use all of them in a herring bone design or something. But, I do like the one with more white. It pops next to the green. Kristi, I love how your mind works. I can’t wait to see this kitchen completed.
I can’t make up my mind if I like it or not, but out of your samples, I agree the one with the most white is the prettiest. Along with many others, I wonder about the ease of painting the wall rather than the glass and what difference that would make in the final product. I have no doubt you will pull this off … my mind just isn’t visualizing well today!
You are so awesome! At breakfast my hubby and I discussed this idea of painting glass (we are looking for back splashes too). Hubby suggested using our favorite photo(s) either behind glass or like wallpaper. We may try that.
Look forward to seeing how this goes for you. Thank you so much for all your inspirations.
Do I remember correctly that your new appliances will have the “glass” looking fronts? If so, wondering if that would be too much “glossiness”. Or, it could look really awesome! Just a thought…..
My new appliances are just solid white. They’re shiny like new painted appliances, but they’re not that glassy look. 🙂
I love the first one with the white….the ones with too much gold take away from the beautiful green instead of just enhancing it. The painted glass backsplash is genius!
If your asking for votes I really like the very first one too
So much better than the fabric. I like 1 and 2. If the mercury glass turns out nice, I might even consider it over subway tile. Unfortunately, I have to decide what to do with walls that had a “country” wainscoting. It was also continued as the back splash. Removing it left holes and glue. I have also considered bead board, but I dread cleaning out the grooves.
I predict that you are going to start a real trend with this. I love the one with more white against the dark green cabinet color. They both pop! I love the high contrast. Can’t wait to see how you execute this. I have been wanting to do something about my boring builder tile black splash.
I really like the painted glass. I didn’t care for the fabric as it just resembled wallpaper to me but the painted glass looks great. I agree the first one is my fav too. I’m sure you’ll tweak it a few times to blow our minds. 🙂
LUV this! I, too like the one with white, best. ~:)
You don’t mention… how will glass be adhered to the wall? And how will it not allow for a gap around the edges where kitchen grease, dust, etc. could get behind it?
I’ll either use mirror clips or screws (screwed through little tiny holes that I’ll have the glass company drill for me) to keep it in place. And I’ll seal the edges with clear silicone caulk.
Like many others, I like the one with more white. It immediately made me think of stained glass panels you can buy at Hobby Lobby or other craft stores. If you need cutouts for receptacles and switches, the glass place can cut them for you, I believe. They will probably want to do their own measuring ( 😀 ) and will charge you more bucks, but since the initial charge for the glass is so low, it will be worth it.
I have a solid glass sink and counter top in the bathroom, and the look of dried water droplets annoyed me greatly. I had to clean the sink often. Then I had a brainstorm: I applied RainX, the stuff you put on car windshields to make rain slide off. And it worked! I no longer have to wipe the sink down so often, just when it’s time for more RainX.
Oh wow! The RainX is a brilliant idea!!!! I’d definitely going to do that!!
How about adding a touch of copper? Also what about the plugins in the bottom of the upper cabinets..
I actually did look for some copper paint to add to it yesterday, and I couldn’t find any that I liked. 🙁
Now this looks MUCH better than the fabric. Not too crazy about the striped look, but I love the last one with more white.
I’m so glad you’re being the guinea pig on this one. I thought about trying painted glass on our back splash, but chickened out. I kept trying to come up with a way to make it non-permanent, so I could just paint the wall, and take down the glass whenever I wanted to change the color. Those channels that mirrors sit in would just be too ugly, and I suppose the glass would be too heavy for me to manhandle anyway, huh?
Love the glass idea! It would look great. Others have suggested painting the wall instead of the back of the glass. If your wall is not completely flat, and we know the walls in older homes aren’t always perfect, there would be some areas that the glass doesn’t fit snug to the wall, and I don’t know how that would work. It would be noticeable, I think. Anyway, I really like the paint idea and know you would make it look particularly fine! Throw in the tiniest splash of the green you are using on the cabinets?
Another terrific idea – I love the color variations and the movement; personally, I am partial to less white, just because I would prefer less of a contrast between the cabinets and backsplash, and it would more closely resemble the inspiration kitchen.
I would most definitely paint on the glass, not the wall, since minor imperfections would show if just the wall was painted and it wouldn’t have the same impact. I wouldn’t worry about breakage (with kids or whomever) any more than I would worry about breaking a window, and the cleanup wouldn’t be any different than the glass front on a microwave or oven door. You might be a bit concerned if it was behind a sink, but certainly not on the buffet.
Hi Kristi…. I think you may be on to something here…. what about a very teeny spot of the green of your cabinets..? Also I think the stencil idea might work also in two very similar colors….ie white on cream… or I am still in love with the tree mural from the condo…..using more subtile colors……??? Pat
Check out this product for a back splash feature that you can change whenever you want.
http://storefront.kitchenpalette.com/www.kitchenpalette.com/index.aspx
I’m curious as to how it would look with the striped effect running horizontal. The long, flowing horizontal lines might be more effective as a design element. Also, was thinking that if holes could be drilled into the tempered glass nail head embellishments might work nicely. Not one against another as on furniture, but spaced every few inches. Might be cost prohibitive, or even impossible to drill. The heads could be glued onto the surface though.
The problem with going horizontal is that by the time I get paint squirted all along the 10-foot glass, the paint at the beginning will already have begun to dry, and will have a different effect than the paint applied last. Not sure if that makes sense. 🙂 But I even had that problem on the little section of glass I was doing yesterday.
This is a far cry from where you were yesterday, and I must say a bazillion times more attractive and unusual than fabric under glass. I cannot believe the price you were quoted for the glass. The last time I bought glass it was 40×40 for my coffee table and it cost more than $200. And that was in Cincinnati, which was probably cheaper than here in PA. I do like the look of your first try. It looks like a very rich marble. I agree with you about adding more white. I really like the look, it has great depth to it. It certainly will be a one of a kind kitchen!
I love the fact that you’re taking your time to explore your options and experimenting for just the ‘right’ look in the backsplash! I kind of liked the idea of fabric under glass but I really like the idea of painted glass. (Maybe I’ll like your next idea even better!) I liked your glass tile with the most white in it but as you experiment you might hit just the right one that’s going to say “Here I am Kristi!” and you’ll just know. I think the glass will be really pretty with the shine on it. I have a glass-topped stove that several people told me I couldn’t keep looking nice and with a bit of glass cleaner and a light cleaning and buffing each day, it looks good.
I’m surprised that you didn’t paint a herringbone pattern on the glass. That might look cool.
You really have the designers “eye”‘. I Love the glass with the green cabinets! Genius!
Ellen
Hi Kristi
I have to admit, when I first thought about back-painted glass as a backsplash, I couldn’t imagine looking very nice. But, as usual, you’ve changed my mind. I really love the colours you’ve chosen; and it looks amazing! In a way, it would be like one big glass tile; and cleaning would be such a piece of cake.
That’s what it always comes down to for me–how easy is it to keep clean? If it’s easy to keep clean, then it’s a keeper!!
Marisa
My husband is just about to confiscate my iPad. Every time you do something, I go to him and say ” OMG, this is beautiful, and don’t we just NEED to do it?!” I get the “look” every time. However, even darling hubby thought this was nice (I’m sure he meant lovely and beautiful, but I’m not pushing my luck…). I thought your first attempt was the most interesting and I loved the variations of color. I’m looking forward to seeing the other options you mentioned wanting to try. Thank you so much for sharing all your projects! You’re truly talented!
LOVE this idea!! And the thought of Mercury Glass is so romantic! I’m a HUGE Goober for Mercury Glass though!! But, yes, yes, yes,,,this idea is totally a GRAND SCALE — DO IT – in my book!!!
You are my interior hero!!
Kristi, this idea of using glass is absolutely limitless. You can do anything, any pattern, color, or texture you want to and, if you tire of it in a few years, you know it will be inexpensive enough to make a change (unless you start charging yourself labor). One of the first ideas through my mind was using a stencil pattern with a background color and heaven knows there are so many gorgeous stencils that my difficulty would be deciding on only one. You know, this glass thing has great prospects. This would work if someone wants to put in a focal point, say over the stove, like you see done with murals, fancy tiles, etc.
I like the color scheme and I like the style of the first one. I’m not certain I like so much of the white, though. I think I would need to see it with the countertop, too, since it will make as much an impact on the backsplash color as the cabinets do.
Can’t wait to see what other ideas you try.
WOW! I knew you would come up with a great idea. I like the idea of some copper too.
I played with back painted glass some years ago when I worked for a company that made many of the screens for gambling machines in LV. Surprise, surprise they were not made in USA. One tip that may help is that holding the glass back slightly off the wall helps prevent any pressure marks and variations in moisture affect the glass finish. A bead of silicone at worktop and under wall cabinets is enough in my limited experience. As for paints there are ‘inks’ specifically designed for glass which stick like ‘the proverbial to a blanket’ and artists acrylic paint is also pretty good. One of the problems we did encounter is the issue of glass backs that are subject to heat. The differential expansion of glass and the surface treatment – ink or paint means that in some areas it does not matter what you do it will be difficult to manage the stability of the finish. What did work reasonably well was, as you have found, using a material set in a resin on the back of the glass. I’m about to install a new kitchen. OMG the price of kitchen units is frightening in the US, I’m considering going back to glass backs based on what we did in the 80s. If my wife gives the OK and all goes well I’ll send you photos and a description of how we go about it. All the best. Brian
Can you elaborate about using a material set in resin as a stabilizer to the paints?
I too prefer the one with more white. I’m wondering how this will look with your countertops. Will the patterns relate?
I’ll definitely wait until the countertops are in before I make a final decision on the backsplash, but I’m thinking that the countertops won’t have much of a pattern in them at all. At least, I’m hoping. 🙂
I didnt have time to read all the comments so this may have already been addressed….is there any chance water or dampness could seep between the glass and the wall….my hubby asked me this and it astounded me as he is never even remotely interested in home decorating…!
I’ll caulk the edges with a clear silicon caulk, so there shouldn’t be any way for water or other liquids to get behind there.
It’s interesting…not my style, I’d prefer some cool glass tile, but definitely would be easy to clean.
Loving the new idea,and anxiously awaiting your newest idea of some sort of mercury glass effect.Cant wait to see your ideas !
LOVE this idea!!
You may have already addressed this, but why don’t you use a copper colored paint to make it look more like the inspiration kitchen? I think it would make that cabinet wall pop!!!
Wow, what a great start for the coordinating kitchen serving trays! I could see them scattered in the kitchen doing service as a coffee/tea station, napkin and straw holder corral, fruit basket holder, whatever your heart desires- Ooh-ooh, or framed for kitchen art that coordinates with your backsplash.
This is so creative and elegant. I’m already thinking that the contrast of high gloss glass against the matte concrete counters will be superb. Just wondering why you chose gold over green? There isn’t anything to compliment the gold in the whole room is there? But the more white the better. It’s going to look so great. Will be glad to see what you finally come up with. I know it will be great.
I love the white as well. I had a thought as I was looking at the glass. What about using a backlight behind the glass that is on a switch so it can be turned on or off? I love the glass look though. Bu if it were illuminate from behind it might adds. Bit of interest. You could put in rope lighting. Slightly recessed into the wall.
I, too, like the part that you like. Very cool idea and very cool effect.
Fab idea and looks great! I used acrylic craft paint on the inside of our shop window to paint our logo. The hardest part was thinking backwards and painting the foreground first! The design was hard wearing on the inside but when we closed down it scraped off with a paint-scraper and a bit of elbow grease. You could probably reuse the glass at your next remodel lol 😉
I can not wait to see the mercury glass effect. I think that is going to be the winner for me; especially with the green paint and the gold lighting fixtures.
Freaking LOVE!!!!! I am a faithful reader of your blog and always look forward to what you do next!
I might have missed this info but will the glass place cut holes for outlets? I love the idea.
This is such a cool idea! I really liked the first one too, with the white. It almost looks like some type of stone or something! Before seeing it, I was thinking of your lamps, but decided that on a project this large, you’d go insane! LOL! I like the variation of sizes in the gold stripes, a bit thinner than the one you don’t like, more white as you said. I think this looks incredible and the shine of the glass gives it such life! Easy to clean too! Can’t wait to see what you decide! Hugs, Leena
I think painted glass is beautiful but to do anything other than a solid color will detract from the uniqueness of the larger picture and make it distracting and busy. Solid painted glass is a statement in and of it’s self. You have a beautiful design plan, allow the design to be the stand out feature and not the individual elements.
Have you given any thought to gold leafing and then the glass (sure you could do something similar in paint) think this would look awesome with what you want to do with the rest of your design.
example of what I have in mind on this cabinet in link below:
http://www.1stdibs.com/furniture/storage-case-pieces/cabinets/artisanal-gold-leaf-chest-pyramid-facing/id-f_283142/
Look forward to seeing what your final design finally is.
http://www.tinlookceilingtiles.com/catalog/faux-tin-backsplash-rolls
just another idea for you 🙂
LOVE this idea. I’ve always loved the look of glass tiles on a backsplash. I love the shine it gives to a kitchen. This idea seems quite affordable. I like the color with a lot of white in it too.
Love your idea.Great job.
That looks beautiful Kristi. I may even like it better than the mirror that I put in my dddddddark kitchen!!
When you get ready to buy glass, talk to the folks at the glass company that is between 22nd and 23rd streets on the north side of Franklin. When I got my mirror pieces they were about half the price of everyone else.
Blessings,
J
I’m late to the party but David Bromstad used this technique on a huge narrow wall at the bottom of a staircase in a home he decorated in Miami.,,it was gorgeous and a brilliant yellow but then, that’s Miami. I’ve tried and will continue to look for that site, when I do I’ll copy it and send it along. I also found a special paint just made for glass, need to find that again too. When I saw what David had done I knew I wanted to use it some day, now,with a new home, I will use it behind where the stove will be.
I’m going to love your blog. Looks like you have a lot of devoted followers and we all learn from each other.
So we stayed in a hotel last might that had these beautiful stone panels for the shower surround & while standing there admiring them, this tutorial came back to me! I’m going to do this in whites and ways for the three sides of my shower surround & then as an accent wall behind the restoration style console sink my hubby is making for me. IL have to have the glass place make holes for my scones and plumbing but it shouldn’t be too bad! Now I can’t wait to get further along on our house and do it!!!
Would it be possible / safe to do this for the walls of a tub surround? It would look gorgeous!!
If you use tempered glass and make sure that the edges are really well caulked, I think it would work.
Hi all
After reading this we tried the Martha Stuart paint as shown above, well i have to say the above is very misleading with our experience. The above mentioned Martha Stuart paint scratched off with our finger nails, we gave it 2 weeks to dry also put it in the sun for a week and then tried to install it, the glue seemed to pull the paint off the back after a few days when we glued it in our kitchen wall! We were very frustrated because it looked so good but was just not working. After calling and speaking to a glass paint company in New York, We then started from scratch and used that other paint mentioned above, we ordered from . They said it has a 10 year guarantee on it. We got it the next day since we are in New York and our house painter rolled it on our glass in the garage the next day. My husband then put it in place with the same glue and I have to say its a job well done now for 8 months with no surprises! This is a bar back splash next to our horse barn that many of our horse exhibitors see so we wanted it perfect. Hope this was informative for anyone looking to make one of these beautiful kitchen accents trouble free.
OOPs, i think i typed the link in wrong, im not too good with this here:
im sorry, i messed up again, here it isglasspaint.com
What adhesive would you use to stick the glass? I’m a glass artist (stained, fused, mosaic all kinds), needless to say I’d love glass, plus I hate cleaning grease off grout lines yuck. But curious about the adhesive and other “technical needs” since it’s so heavy.
I wouldn’t use adhesive. I’d have holes drilled every so often in the glass, and attach the glass with some type of screw into the wall.
I haven’t had time to read the other comments or the replies, but why not paint the wall, and just put the glass over that. Just saying …
https://www.addicted2decorating.com/back-painted-glass-backsplash-my-diy-trial-run.html#comment-209380
I must admit I’m too tired at 11:56 pm to read all those other comments, maybe tomorrow. But, I just had to respond to this since a glass back splash has been swirling in my head for two years. My area is a lot small than what’s shown, again, it’s late and I don’t recall the sq. inches or sq. ft. but I love that shiny look and please,don’t even think acrylic or you’ll regret it. So…my thought has been to simply paint the wall and then cover it will clear glass. I’d have some tiny holes drilled just like in years past and ask the glass guys what their best idea of a screw looks like. Not those fancy glass stars like in my grandma’s mirror in her living room but something simple, something unnoticeable, maybe paint that the color of the wall so it disappears. Love the your idea too, I’m just not feeling that ambitious right now. Oh, btw, if the glass is eventually removeable, then I could change the wall color if I wanted to….some day.
Whaa a the…??? U DON’T NEED SPECIAL/GLASS PAINT!!! It’s done w same latex used on your walls… We’ve been doing it for over 20 years in Toronto …we just use the same latex -any Benjamin Moore color -and drill the glass panels and attach with collars and screws so it was changeable -but it can also be mounted with clear solvent free sealant since all the glass edges are caulked anyway… In the early yrs. The glass was just mounted over the chosen backsplash wall paint color which is fine if your wall was perfectly smooth and well finished but it does make for a better finish to actually paint the glass and let it completely dry first… it scrapes off after soaking w a hotwater sponge easily if you do want to change the colour…The glass also doesn’t have to be tempered if its at least 3/8 of an inch thick-I’ve done it quarter-inch thick without it being tempered since back splashes don’t usually have flying objects coming their way or are at risk of being hit so hard they would crack. Especially if glass is flat mounted w sealant instead of screws…the glass store can drill for you if you’re not confident using a ceramic bit… Be sure to use high density foam roller with at least two coats of self priming paint for a good opaque finish so it doesn’t have brushstrokes and roller marks -you can also use a flat floor stain sponge/pad if you have good technique… But I found a small high density roller in several thin coats gives you the best Smoothe finish second only to spraying -which is by far the best- with your house paint and a compressor. The good thing about glass is it does slightly blur out any paint technique that isn’t as top-notch as it would need to be at eye level on your wall!!
Also…Alice is right and Acrylic/ plastic /plexi of any kind is a nightmare for cleaning ! shiny glass can be scoured clean!! plexi scratches unbelievably and it would look a mess within two weeks! trust me I learned that the hard way! Lol
BTW love your blog thank u for the post!
Love, love, LOVE what you are doing here. Thank you for sharing your journey and every detail in the process. So helpful and inspirational. 🙂 Hopefully, you’re loving your new kitchen!
How did your backsplash turn out? Did you attach it to the wall with adhesive or moulding? How did the paint hold up?
I ended up not using a backpainted glass backsplash in my kitchen. I used tile instead.
What a fabulous demonstration of possibilities you’ve given us. I stumbled upon this post today, and am so glad! In process of deciding what to do in kitchen update…really love the look. Too early to decide on what I will actually do, but absolutely fascinated by this as a possibility for giving it a really high-end look with a do-it-yourself budget.