Bathroom Remodel Progress — And One Thing Leads To Another
I think I’m still two or three days away from getting to any of the pretty stuff on my bathroom remodel, but things are moving along nicely! I did decide to make one change to the bathroom that put me a bit behind my anticipated schedule, but I think it’ll be very worth it in the end.
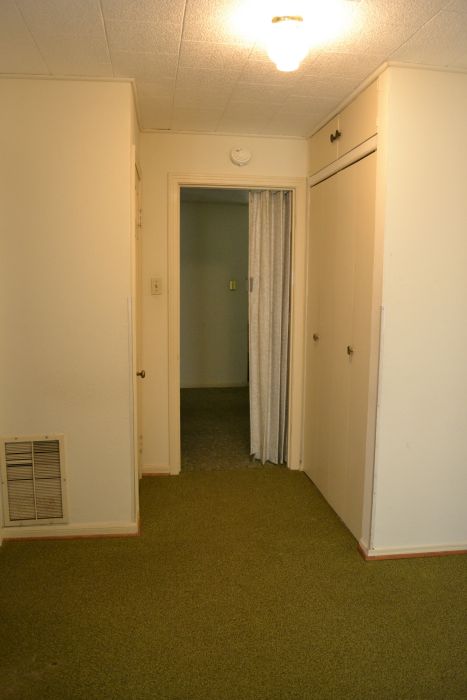
One thing that has always bothered me about this hallway bathroom is how close the door is to the vanity wall. When you walked through the bathroom door, you had to kind of veer over to the right to clear the vanity. And that vanity was only 19 inches deep.
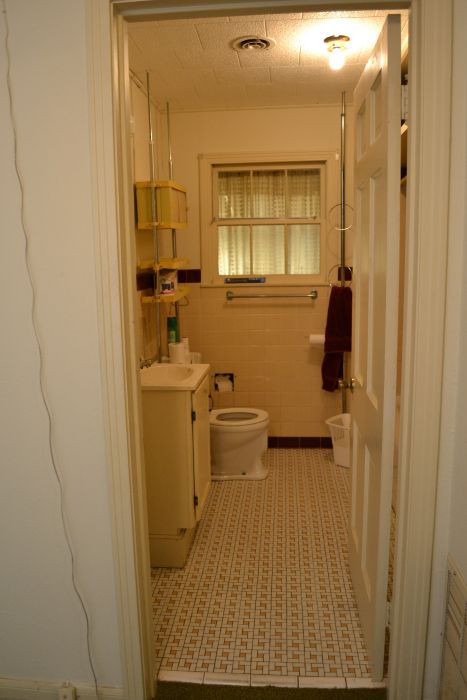
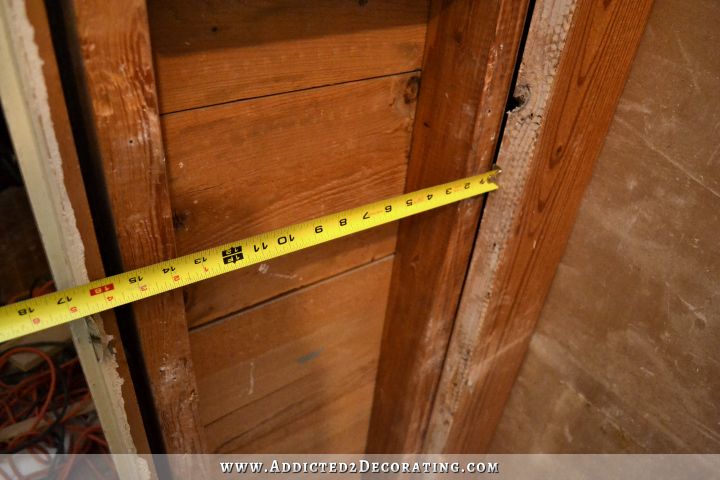
The space between the wall and the door opening was about 17 inches, which meant that the very small vanity stuck out into the door pathway by two inches.
That’s not a huge deal, especially since the vanity didn’t extend all the way to the door wall. But it also left very few options for vanity replacement since most vanities are deeper than 17 to 19 inches. So with this arrangement, a vanity that extends all the way to the door wall was out of the question.
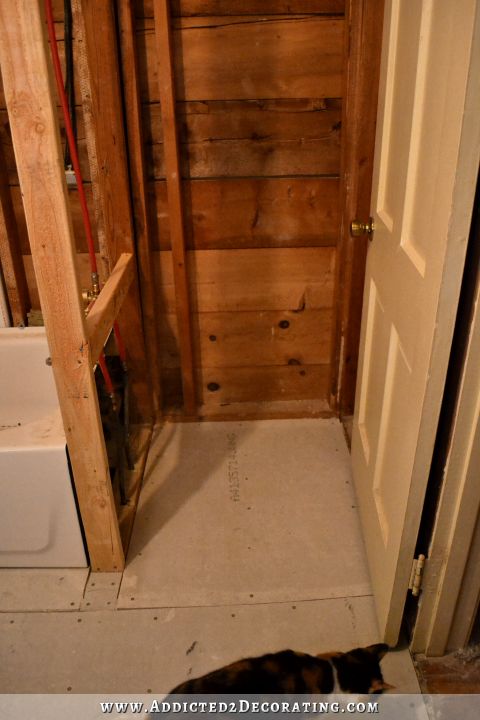
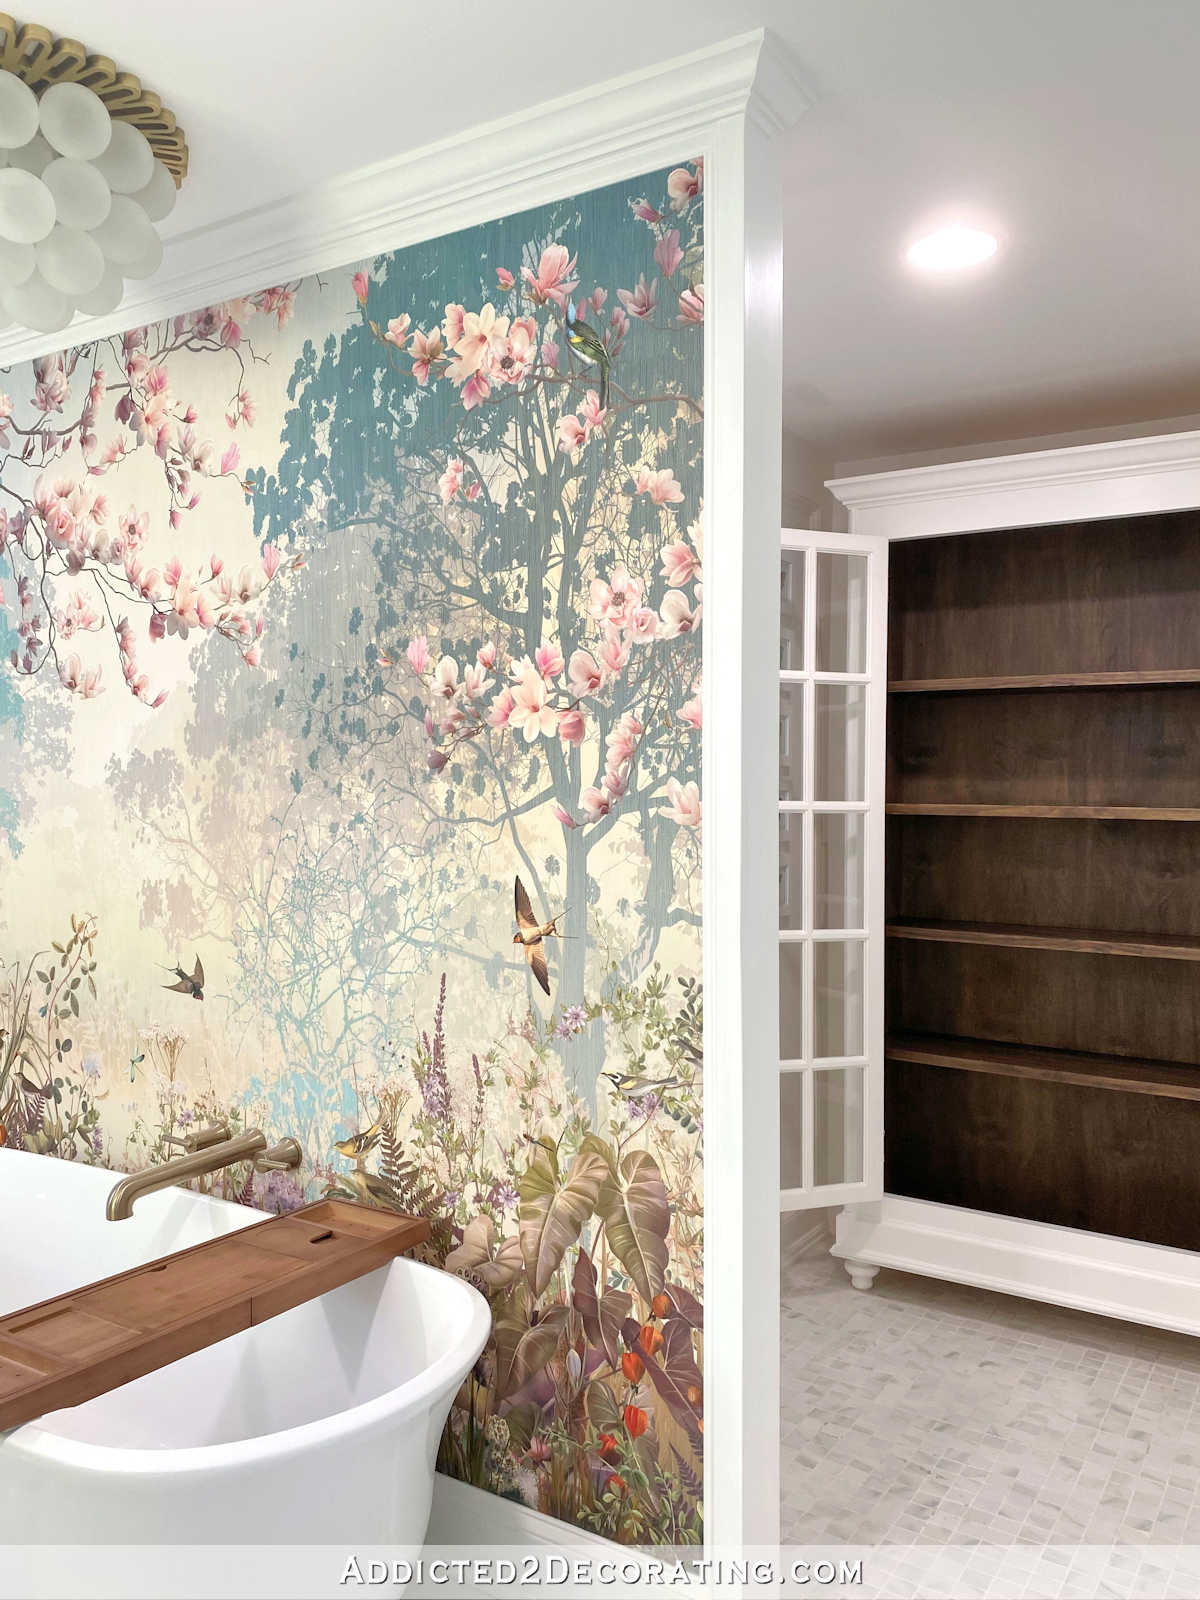
But then after the new tub was installed, I noticed that there’s a good twelve inches of space on the other side of the door.
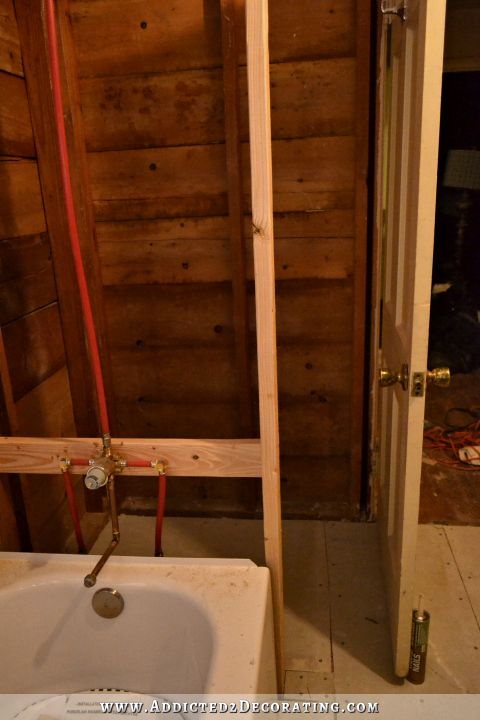
So moving the door over, towards the tub/linen closet area, would allow space on the vanity wall for a standard depth vanity, and would also allow me to use a wider vanity that extends all the way to the door wall.
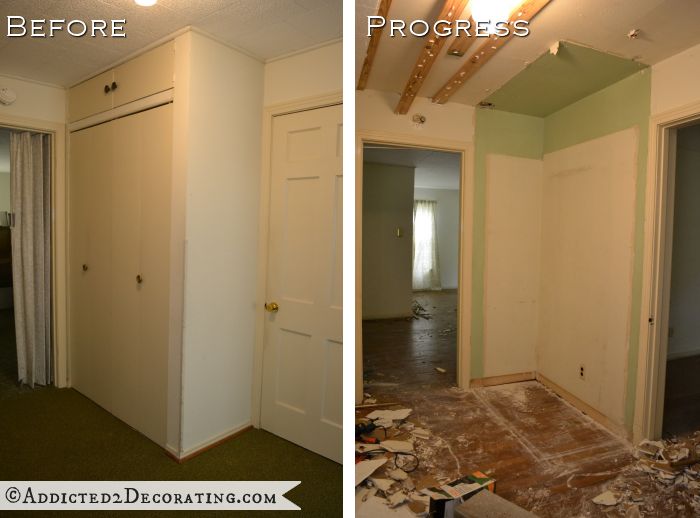
The decision was made. I would move the door over. There was just one little thing standing in my way — the hall closet…
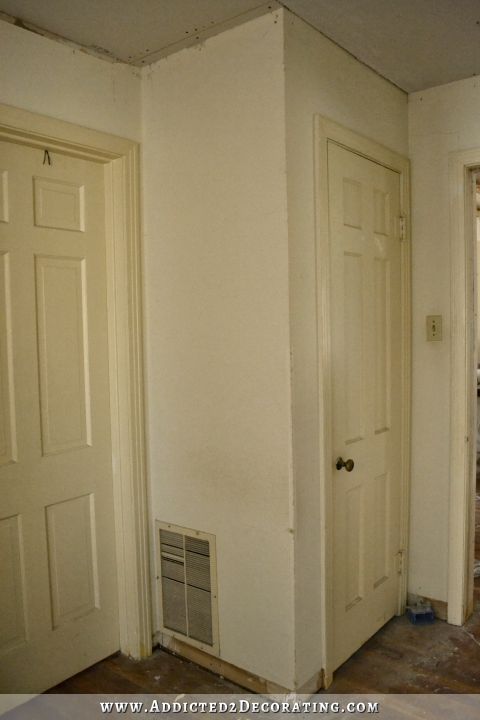
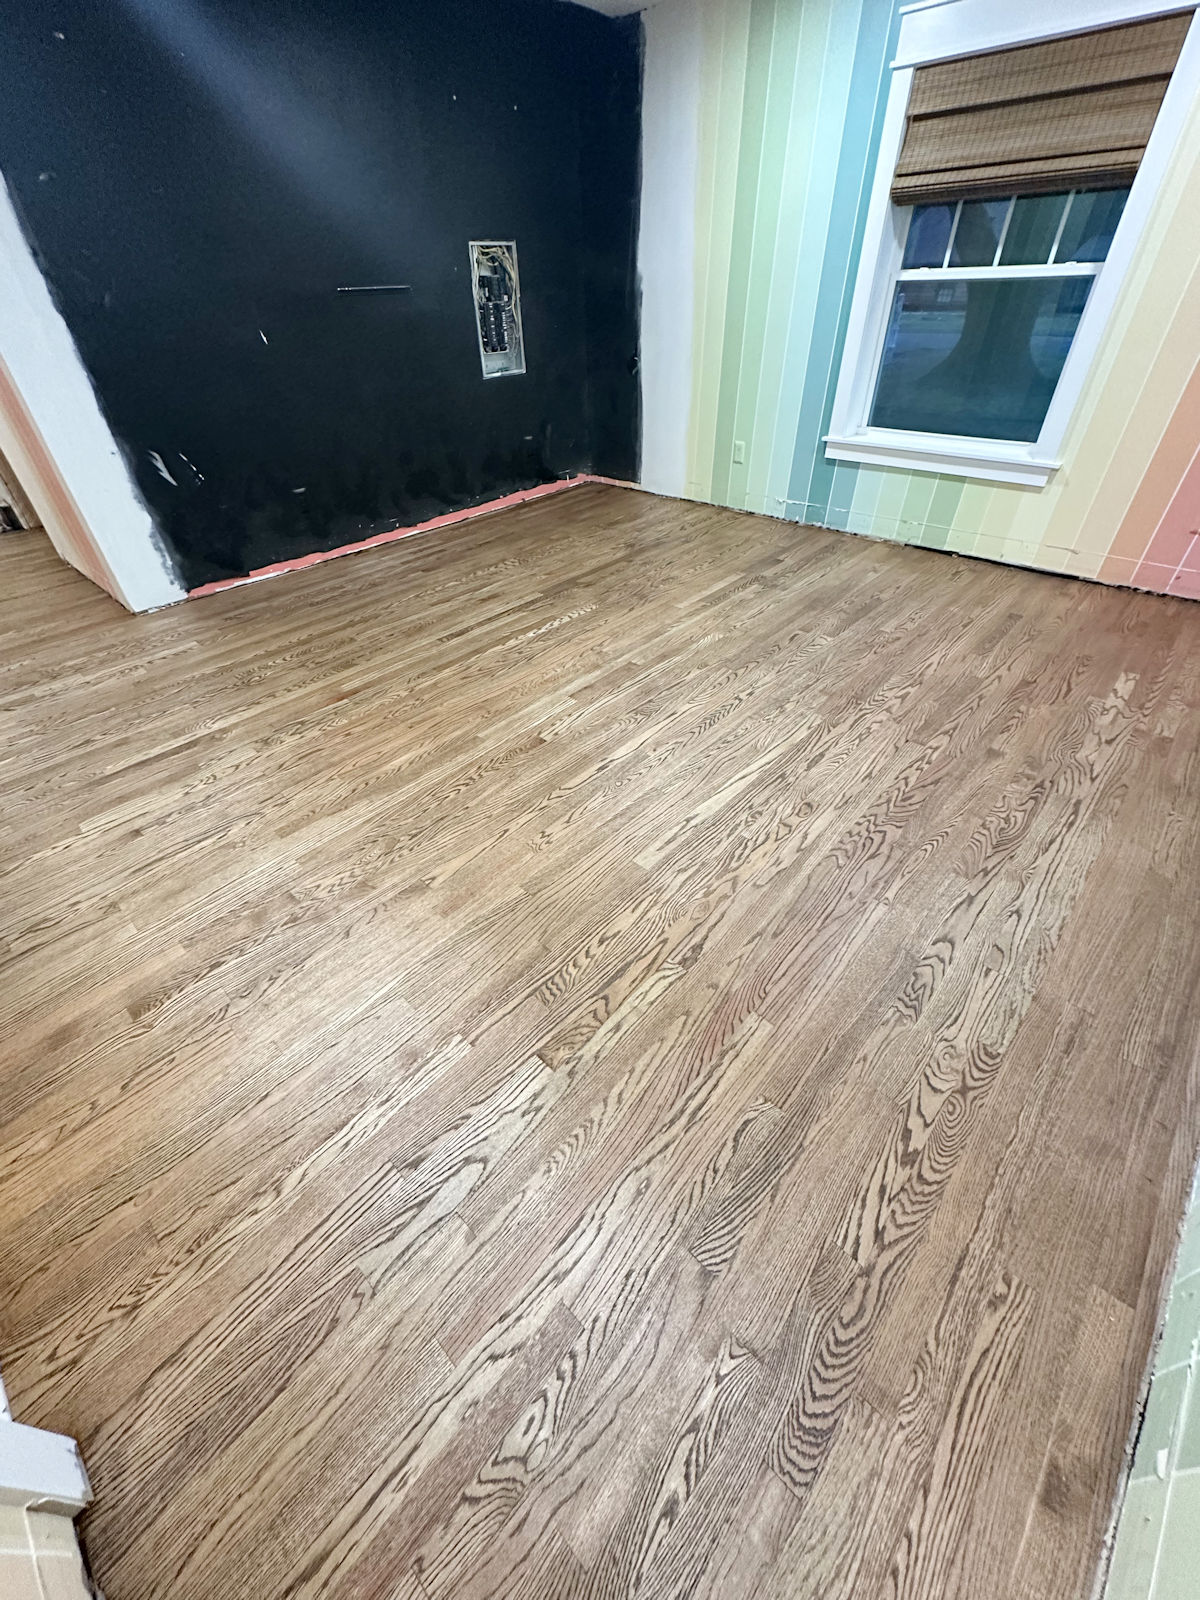
When we bought this house, there were actually two closets in this hallway, making this rather large and spacious hallway feel very cramped.
The larger closet on the right was added long after the house was built. I removed it before I refinished the floors, before we even moved in.
That closet, since it wasn’t original to the house, was quite easy to remove, and the floor underneath the closet framing was in good condition and looked great after I refinished the floors.
But this other closet was original to the house, and there was nothing easy about removing it. Whoever built this closet never intended for it to be removed, I can assure you! I’ve never seen so many 3-inch nails in my life, and that old wood didn’t want to let any of them go. The closet walls were also lined with shiplap underneath the drywall on both sides of the 2 x 4 framing. All of my walls are lined with shiplap, but the shiplap is generally on one side and not both sides of the 2 x 4 framing on each wall.
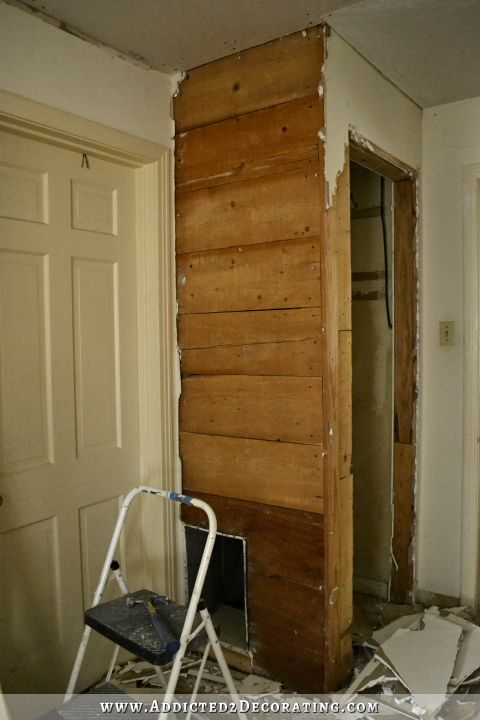
All of that to say that removing this closet, which was about half the size of the other closet that I removed, took me about three times longer because of the way it was built, and because of its age. And unfortunately, this closet was framed before the hardwood floors were installed, so removing the closet means that there will be flooring repair needed.
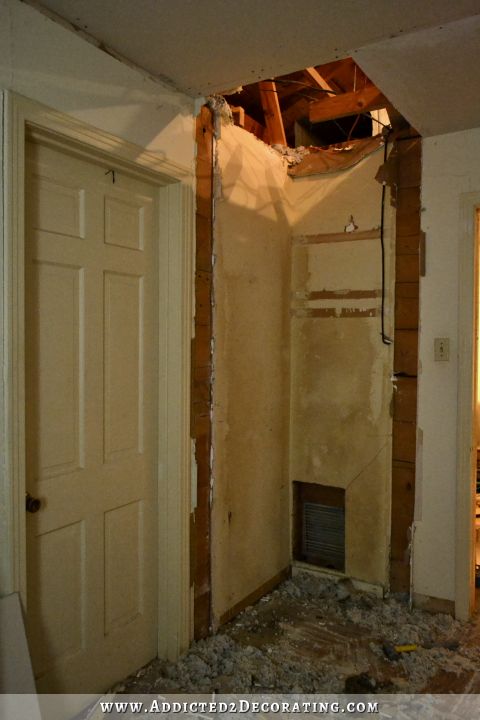
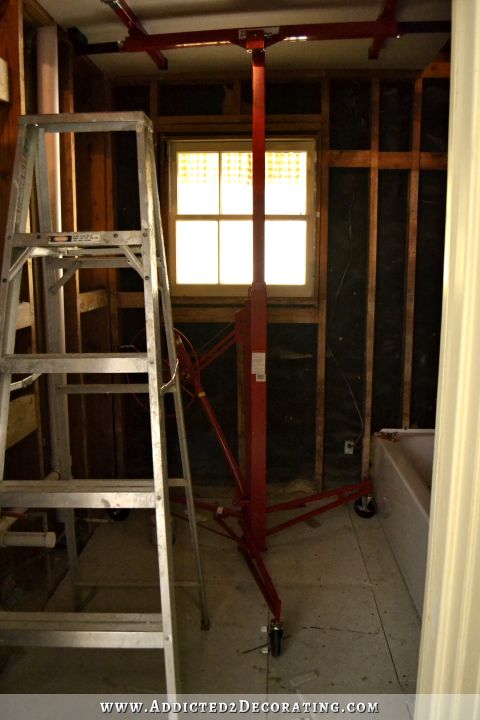
I finally did get the closet out, but then that left me with this huge air duct that I had to contend with.

The duct was part of the old furnace, and hasn’t been functional in over a year. So I knew it was okay to remove it. I just had no idea how in the world I was going to remove it by myself. You can see in the picture above that my first idea…and first attempt…was to try to cut it out in pieces, but I couldn’t get my reciprocating saw to cut through the back side of the metal with it being so close to the wall.
I also couldn’t just lift it out as one piece and carry it out because it was extending into the attic about four feet, plus there was a small metal lip holding it just above the joists. And speaking of joists, whoever installed this system simply cut right through a ceiling joist in order to install this duct. Do you see how that joist just dead ends into the side of the duct? Lovely.
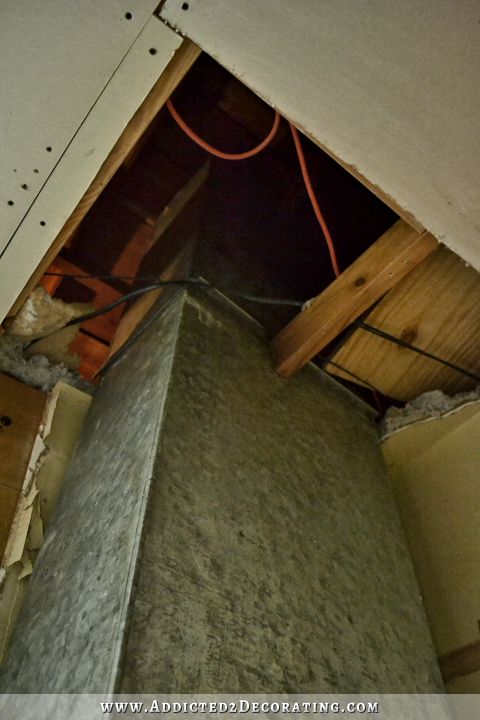
So after about two hours of struggling with this, trying this and that, I finally got the thing out by climbing up on the ladder and cutting the duct as close as I could to the ceiling, all the way around the duct. I was able to angle the duct out just enough to get my saw through the metal without damaging the shiplap on the wall. (I wasn’t concerned about the drywall since it obviously needs to be replaced.) And then I climbed into the attic and lifted the rest of the duct — the four-foot section that extended into the attic — off of the ceiling joists.
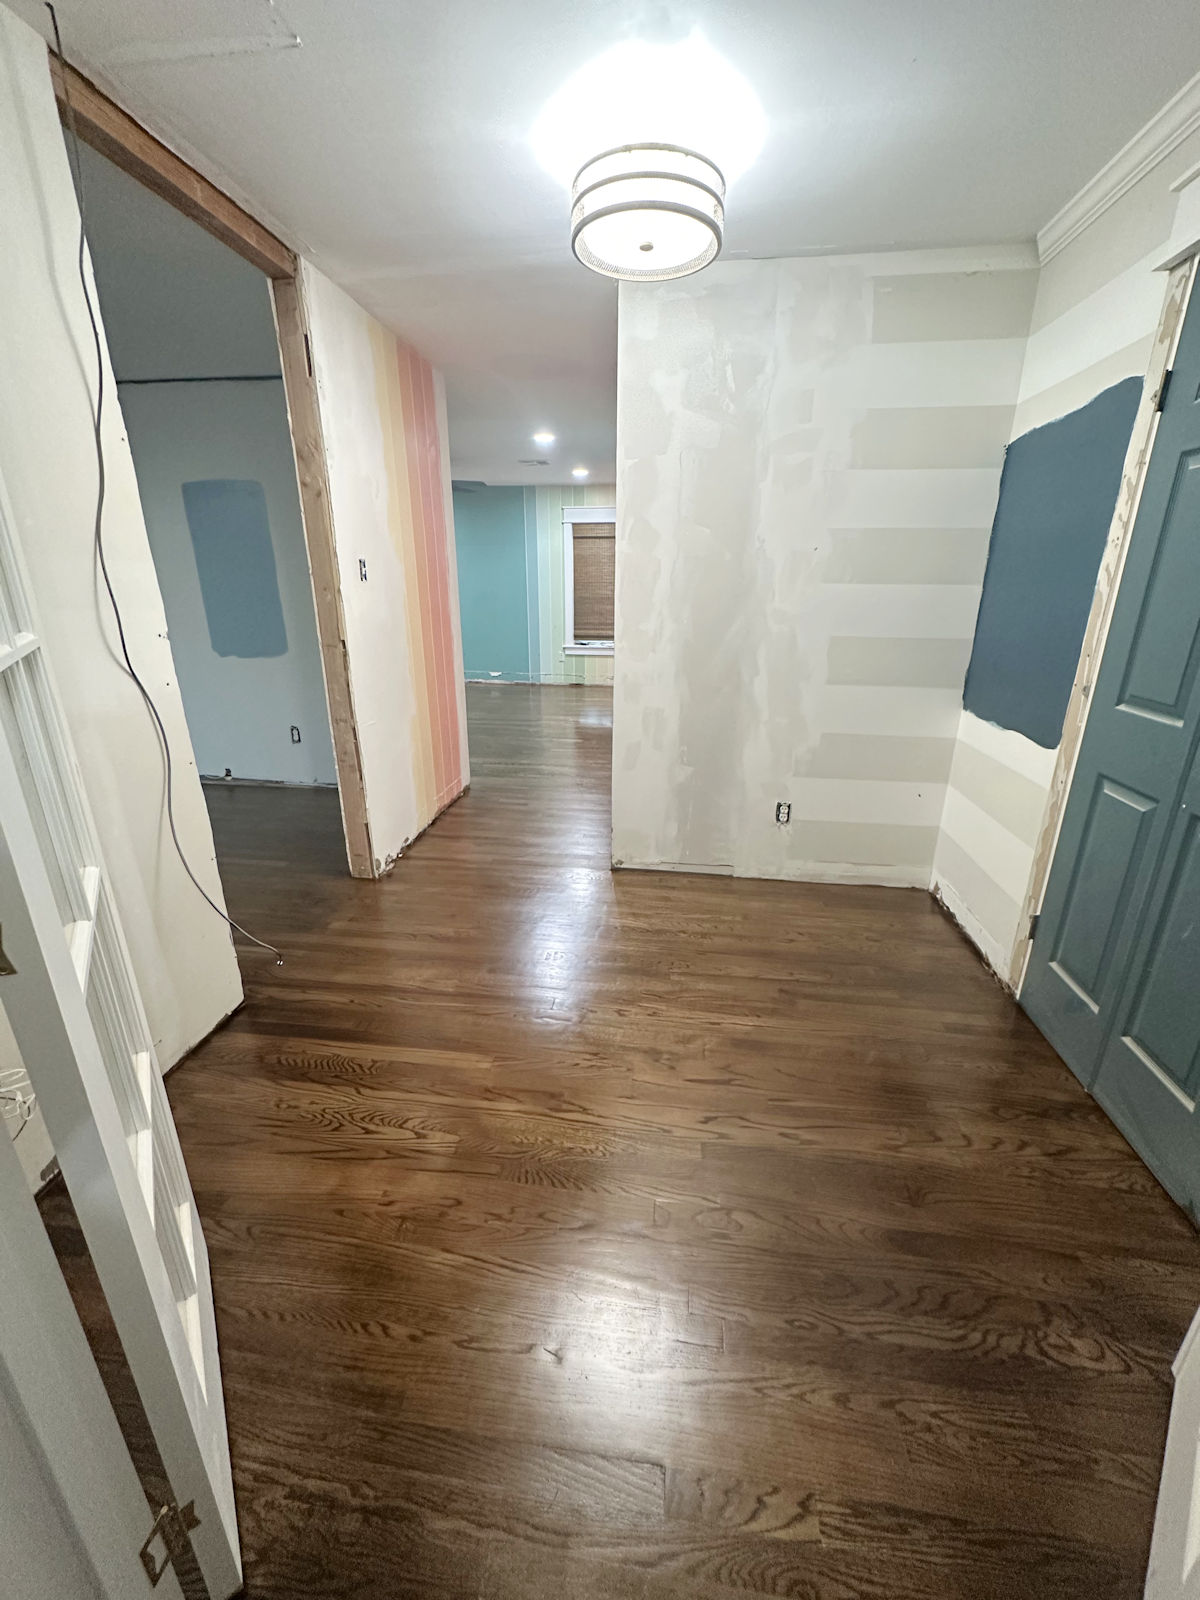
Our hallway looks huge now! Matt loves it. Our hallway in the condo was so narrow and cramped that he had trouble maneuvering through it. He loves all of the space in this hallway!
And now, of course, I’ll be able to move the door to the bathroom over. It seems like a lot of work for 10 to 12 additional inches of space, but considering that the space gained will be on the vanity wall, allowing much more flexibility and infinitely more options for the vanity, I think it’s very well worth the effort. Plus, that closet was serving no purpose. I’m glad to be rid of it.
Oh, and now that the closet is gone, I’ll also be able to move the opening from the music room into the hallway over a bit, so it’s no longer crowding the pony walls and columns like it is now, and I’ll be able to widen it considerably. Matt’s pretty happy about that as well. But that’s a project for another day. 🙂
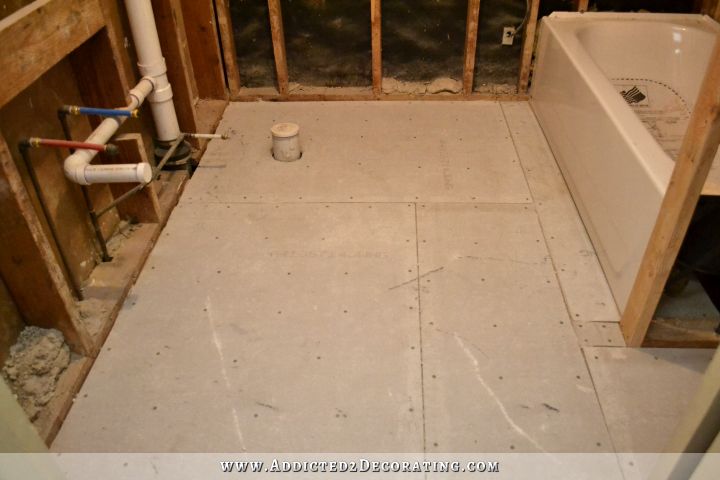
After getting the closet situation squared away, I turned my attention back to the bathroom. I finished installing the subfloor and the concrete board on the floor. It’s amazing how just finishing that up made this room feel so much more…well…like a room. No more walking and balancing on floor joists, and no more standing in my bathroom and seeing the exposed earth below. It’s not pretty yet, but I have an actual floor!
Next, I insulated my bathtub. One thing I loved about the cast iron tub was how substantial it felt. And because it was so thick and heavy, it wasn’t noisy at all when water hit the sides during a shower, and bath water stayed warm. These newer, lighter, much thinner tubs are quite different. When anything hits the tub, be it your shoe hitting the side or shower water hitting the inside, it’s very noisy and gives off a hollow, ringing “ting” sound. I wanted to remedy that, so after doing a bit of research, I learned that you can insulate the cavities underneath the tub to not only reduce the noise, but also to keep bath water warmer for longer.
I used almost an entire package of Roxul Safe & Sound soundproofing insulation and shoved it as tightly as I could into the spaces beneath the tub. I was amazed at the difference it made in the noise! I’ll add a bit more after I seal up the area where the drain comes through the floor, and right before I drywall this wall.
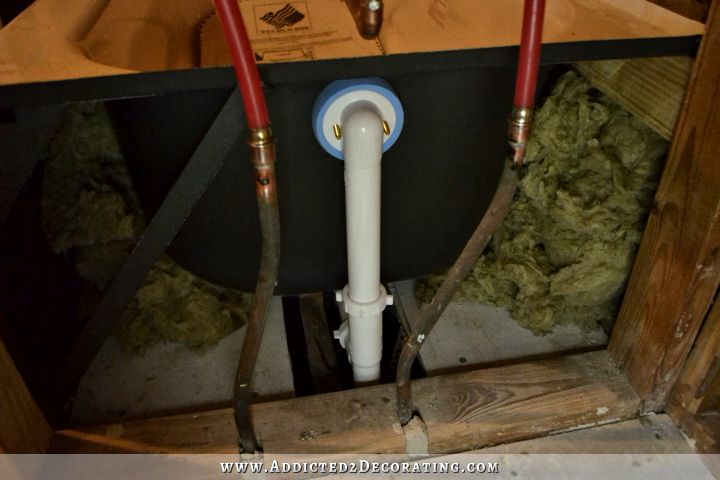
You can also use spray foam insulation to insulate a tub. It would have been cheaper, but the reason I went this route is because it’s just a bit safer. When using the spray foam insulation, you have to be very certain that you don’t overfill the cavities because if you do, the spray foam can actually lift the tub off of the floor as it expands. It’s recommended that you fill the tub up completely with water before using spray foam just to give it more weight and reduce the chances of that happening. And since I currently have no faucet, and no way of filling my tub with water, I decided to take the cautious, albeit more expensive, route.
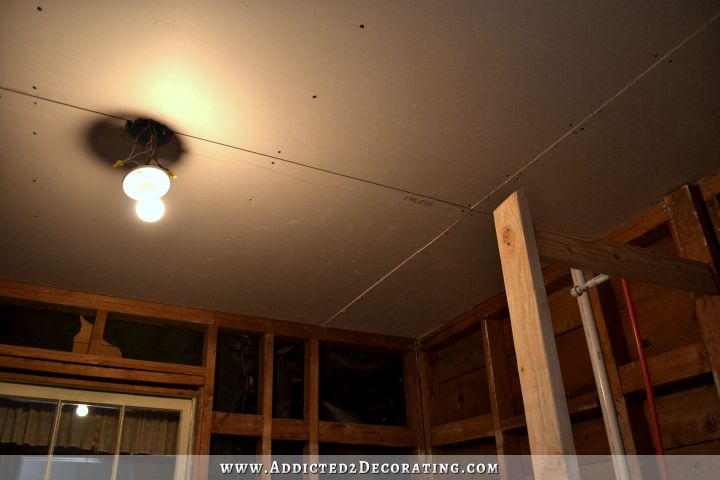
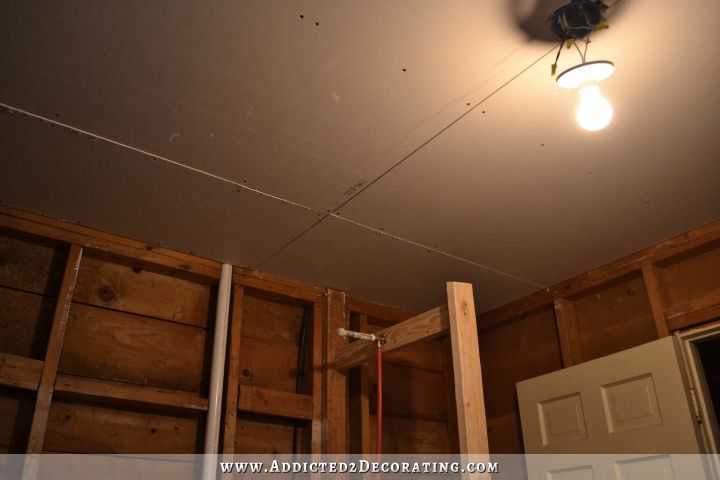
And finally, I drywalled my ceiling…by myself!! I was so ridiculously proud of myself. 😀
This is the one project I was dreading the most, and even more so since I was now going to have to tackle it with the tub already installed. I bought this drywall lift* about four months ago, but had never even taken it out of the box, so I decided now was the time.
I won’t say that it was easy, but what made it so challenging was just having to work in such a small, cramped room, around a bathtub, while maneuvering the drywall around the 2 x 4 framing between the tub and the linen closet area. If the room had been wide open, with no tub and no roughed in wall, it would have been so much easier. But this drywall lift was a lifesaver. There’s obviously no way I could have drywalled the ceiling by myself with out it, and it was very easy to assemble and operate.
This room is just under 8 feet in each direction, so technically I could have just used two pieces of drywall and had only one seam to deal with. But unfortunately, I’m not strong enough to lift a whole piece of 5/8-inch drywall onto the drywall lift by myself, even without the obstacles of the tub and the roughed in wall. But add in those additional obstacles, and I think even with two people, it would have been a highly frustrating job — probably not impossible, but also not worth the enormous frustration. So I had to cut it into pieces that I could actually handle, which left me with two additional seams. I did make certain to piece them together in the tub and linen closet areas, rather than the main area of the bathroom, so hopefully if my taping and mudding skills haven’t improved since I did the kitchen ceiling, at least the additional seams won’t be front-and-center.
And that’s my progress this weekend!
Next on the agenda is to reframe/move the door. Then I need to do some rewiring and add some new wiring. Since the door will be moved, I’ll need to move the switch and plug that I already added, but I also want to add a plug to the linen storage area, and add another switch for the exhaust fan. I’ll also need to decide the exact placement for my sconces, and get that wiring situated. And then I’ll finally be ready for concrete board and drywall on the walls. Once I get the drywall and concrete board up, I’ll feel like I’ve finally turned the corner, and I’m on the home stretch towards a new, finished bathroom!

Addicted 2 Decorating is where I share my DIY and decorating journey as I remodel and decorate the 1948 fixer upper that my husband, Matt, and I bought in 2013. Matt has M.S. and is unable to do physical work, so I do the majority of the work on the house by myself. You can learn more about me here.

Kristi, among a number of awards you could win, you should receive one just for your tenacity. It’s mind boggling. Cheers, Ardith
I totally agree!!!!!
Most definitely! I’m so impressed yet again!
Agreed. Wow. 🙂
Ditto here!
I agree! I am so proud of you for tackling the ceiling drywall. I love drywall lifts. We are lucky that there is a tool rental shop right down the street from us and the lifts are only $20 a day to rent. As always, dear, great job!
I totally agree! You are absolutely amazing in your ability to look at a challenging situation and make it spectacular!!!
Wow that was a lot of work!. Why did I think you were removing the window in that bathroom?
I believe she said she is removing it, but not until she’s ready to drywall over it because she doesnt want the cat using it to get into the sunroom.
Hi Kristi – good job! Just had one thought ( and this would depend on Matt’s requirements of course). Now you have taken both the hall closets out (and I haven’t looked at the plans to see if this would affect the opening to the other rooms) but have you thought about bringing the bathroom wall out a little more – you know seeing as you are going to move the door/doorway anyway. Sorry for suggesting extra work but it was just a thought but only if it doesn’t make it harder for Matt! 🙂
Jen, I was thinking the exact same thing! Kristi~ First of all, YOU ARE AMAZING AND I AM SO PROUD OF YOU!! Secondly, If you did move the door over and out, you could make the bathroom deeper and not have to repair the wood floor in the hall (as it would now be a part of the bathroom and you could save yourself that hassle! And lastly, have you ever thought about adding a vanity with a more narrow footprint and then just a bump out where the sink goes. Something sort of like in this link. http://4.bp.blogspot.com/-e_JVHl9Rxas/VNQYFVos7AI/AAAAAAAAlh0/USfcwI4QkSQ/s1600/vanity.jpg Just some ideas you may not have considered. 🙂
I was going to make this same suggestion!
I think it all goes back to it being a load bearing wall and too expensive to bump out!
You certainly were a busy beaver this weekend. Good idea to move the door, anything that can make Matt’s life easier is well worth it. Looks like you have the worst of it done, so from now on it might not be too hard on your body. Looking foreward to this weeks progress. Blessings
Wow, you are amazing Kristi- and brave! What about a pocket door? And, do you need to make the doorway wider for Matt?
Dear God, Kristi, not only are your abilities praiseworthy, but your great ideas blow me away. This continues to be my favourite blog, I love everything you do!!
I totally agree – mindblowing ideas, tenacity and a great blog! Go Kristi!
Hi Kristi! Ilove your blog…you are awesome. I think moving the bathroom door is a great idea. Have you considered a pocket door? It seems that would help with the small space as well? I have a pocket door in my bathroom and love it…so i was curious if you had considered it.
I was thinking the exact same thing–pocket door!
Great idea and a pocket door might be easier for Matt because there would be no door in his way in the bathroom.
Love watching your progress. Since you are moving the doorway for more room to maneuver a wheelchair, wouldn’t a pocket door give even more room? I’ve only recently found your site so do not know if you have a dislike of pocket doors, but they do clear a lot of space in a small bathroom.
Wow – you are impressive! I agree with Ardith – talk about tenacity! You GO, girl – I am consistently amazed at what you do – amazed, impressed, and inspired!!!
Thank you.
That drywall lifter is a revelation to me. I was wondering how you would manage that alone in the confined space of a bathroom. And kudos to you for the design decision to remove those closets and move the door. A great decision to avoid that cramped feeling getting through the doorway for everyone who uses that room and just an all around better look to the hallway. As usual, you rule, Kristi.
I literally laughed out loud when I read about the nails holding together the closet. Having done some renovation in older houses I can both identify and sympathize. I believe such a plethora of nails is the mark of an amateur carpenter/builder – one who doesn’t realize that a few well placed nails are enough for strength and stability.
In the house I’m in now the person who built the house used such nails to hold the baseboard in place? Really???? And who was going to be swinging off the baseboards (if such a thing is even possible) to require 3 and 4 inch nails spaced roughly two inches apart all the way around the rooms????
And don’t you just love the people who don’t realize that while they’re nailing everything to within an inch of oblivion they are also cutting through joists as though they’re just another random piece of wood in the way? Arrrggghhhhh. Definitely the work of rank amateurs who don’t grasp the first thing about the physics of construction.
Kristi,
BRAVO! You ROCK!!! I look forward to reading your blog everyday, and I am always impressed with your tenacity and zest for life. You go, Girl!!
Zeita
Things are looking good – and I’m so glad you decided to properly renovate the bathroom. You put in an extra few days and get a finished bathroom in return! Waaaay worth it! We are cheering for you!
All this over the weekend? Mind blowing to say the least! You amaze me. Absolutely cannot wait to see the finished bathroom but I have to say that the process is fun to watch too!
Okay, my jaw dropped when I saw what you did to remove that hall closet. A.m.a.z.i.n.g.
Here’s me being proud that I bought a Dremel Multimax due to your recommendation and started on redoing an old mirror frame by adding some pretty trim (which made me cut mitered corners for the first time in my life – again due to your explanations!) and now I’m mind-boggled by what you did in about the same time 🙂 You are definitely my DIY hero and who knows: If I ever might need to change structures in our house, I might only attempt to do that by myself because I read your blog!! So far, I’m grateful to you for having learned so much already that I tackle that mirror 🙂 and apart from that I remain in awe of your abilities!!
You are beyond amazing! How many people could get this amount of work done in such a short time? Not, people…ONE person.
Why you haven’t been snatched up for a network DIY show is the question.
You are an inspiration. My husband is home recuperating from surgery and now he’s hooked on your blog and is singing your praises. Now he’s planning on getting a dry wall lift for ceiling work in our old house in April.
Since you are going to reframe the door way, why not get a door that opens out to give you even more room (and not to block the storage area when the door is open)?
Love that you removed the closet and gained the space to move the door.I will second (or third) the suggestion of a pocket door.
You will love a regular depth vanity.
Will you have a hall closet somewhere in the new design?
“Then I climbed into the attic”!!!! Thank you for the front row seat to your growing skills and abilities (which were already substantial.)
Ha, I laughed too! One week, terrified of the attic. Next week, ” then I climbed into the attic” . Love it!
Awesome! Have you thought about replacing that door with a pocket door or even a wider standard door to increase the accessibility?
You’ve made great progress so far. Looks good and it looks so much nicer already even with no drywall on the walls.
Did you decide on the doors already? If so it might make it easier on you if you can build it into a prehung frame to use when you move over the door.
Amazing! Are you set on a standard vanity? I keep thinking that something like your console table with a bowl sink on top would look fantastic and give Matt more room to get closer to the sink. You could still add drawers (or baskets) on the sides of it, leaving a knee pocket under the sink itself. Kind of like what people do with old dressers. I think that would look incredible in there.
Lots of progress! Good for you!
i am so stinking impressed! Wow! Look at everything you have done and now you are just getting up in the attic like it is nothing. You are encouraging us diy people, especially women, that with some hard work we can do it!
Sometimes…well, frequently, you leave me (almost) speechless. This is one of those times. I would have looked at that door and at that closet, and thought I would just have to figure out a way to live with it. Nothing, but nothing stops you. And that you could do all that, by yourself, over a weekend, while I was proud of myself for cleaning out two (two!) kitchen cabinets and cooking lunch for ten on Sunday, leaves me yeah…almost speechless.
Here’s an idea. We live in an older house and have one 12’X12′ room with 5 doors in it! One thing we did to make more room was change direction of the door. You could even make the door swing out since you have so much space in the hall now. Just a safe gaining thought.
*space gaining
You sure did get a lot done this weekend! Looks like your cat was keeping you company as you were working. Looking forward to seeing how this project turns out!
Kristi: THat was my thought too. Why not create a pocket door. You have the skills, and you would have all this extra room.
Hi Kristi, I finally got a chance to reread your post when I was not pressed for time. First, your nail comment reminded me of the kitchen. I think you had a similar problem in there with a riot of nails. Second, I am really curious to know if you know, why there is so much shiplap in your home. Was it originally built with all the walls like that? We lived in a house during college that had wood lap siding on the outside, with the walls all wood on the inside looking like bead board, except that they were individual boards. When it snowed, if the wind blew a certain way, we would get snow blowing through the wood! Need less to say, the oil bills were outrageous. Last thing, don’t know if anyone suggested it, or if you have given it any thought, but what about having the door open out into the hall instead of into the bathroom. I had that done in my laundry room upstairs. There is a closet right behind where the door opens so you had to close the door to open the closet. It made me crazy so I finally had it changed. I keep the door closed all the time since it is the laundry room, but even when it is open it is just against a wall. Blessings.
Hi, I agree with Mary Ann. A pocket door may be more trouble than you’re willing to go to, but wouldn’t a door swinging out into the hall give Matt more room inside? As well as everyone else of course. Love to watch you work!
I am so impressed that you did the ceiling drywall YOURSELF! I think it is a brilliant idea to move the door. You even went up into the attic and it sounds like you didn’t even hesitate due to the lighting you installed YOURSELF! These are huge accomplishments. I am amazed.
Have you thought about installing a pocket door instead of just moving the door you have? Would really open the space not to have the door swinging in. I a big fan of pocket doors so I try to use them anywhere I can! Great work…I hung ceiling drywall in my new open living/dining room (20×24) a few weekends ago. I rented a hoist for $40 and it was the best money ever spent. Allowed me to use 12′ pieces of drywall for fewer seams.
I really don’t understand how you don’t weigh only 80 lbs with all the hard physical work that you do! I’m ready for a nap just reading about your progress!
Why don’t you install a pocket door? Then you will have plenty of room in the bathroom.
After she moves it over, I don’t think there’s enough room (length) for a pocket door. But maybe I’m wrong.
Good Job! I bet that hallway does look enormous! You’ll turn that DIY corner very soon, now, and then the “funner” stuff happens.
Whew! Glad to see that little closet go! I would put the toilet there and maybe a narrow linen closet instead of the vanity, since now when the door is open your focus goes directly to the potty. Or maybe a pony wall to sort of hide the thing? But I’m sure you will prove my idea wrong and once again I’ll be amazed by the outcome. Looking forward to another DIY Impossible made Possible by A2D!!
Have you ever read the kids book “If You Give a Mouse a Cookie”? That is how I’m feeling about bathroom renovations right now, lol, I thought you might relate!
We expanded our shower after a bad leak. Which lead to moving pipes. Which lead to moving electrical. Which lead to taking down the ceiling to add a light to the now larger but cave like shower. Which will now lead to moving the a/c duct because the new glass shower door is precariously close to the vent when it opens. And no, we’re nowhere near tile ready yet either, as all the plumbing and electrical must be done first. So I’m really relating to your list of changes as you go! 🙂
Amazing job. As I picture you up there screwing in drywall nails I wondered what is the drill your using? I’m in the market for a new one.
Thanks.
And OMG Kristi….you went back in the attic ALONE and it didn’t even seem to phase you!!! You are one awesome girl!!
you have got to be one of the most versatile bloggers out there, one week you are amazing me with your sewing skills and the next your climbing in attics to remove a duct from a closet….awesome, awesome job Kristi.
One question…how often do you fall asleep on your dinner plate? I just don’t know how you keep up your energy day after day. You are IMPRESSIVE!
Nobody would ever question doing whatever it takes to gain an extra 8 to 10 inches! And in a bathroom yet. This was a very good idea. (As was the lift!)
What will happen when you get your new hvac since you took out the duct work?
I’ll get all new duct work. New HVAC systems really aren’t compatible with all of that old furnace duct work. And the A/C unit (or whatever the part that goes inside is called) will go in the attic.
You are A M A Z I N G !!!