DIY Custom Wood Air Return Vent Cover, Part 3 (SUCCESS!)
After my brilliant idea for a custom air return vent, and then my colossal fail on that project, I needed a “Plan B”.
Some of you had some great suggestions for me, and I actually set out yesterday to put one of them into action. I headed to Home Depot to find one of those laser-cut panels that people use to make those pretty radiator covers like this…
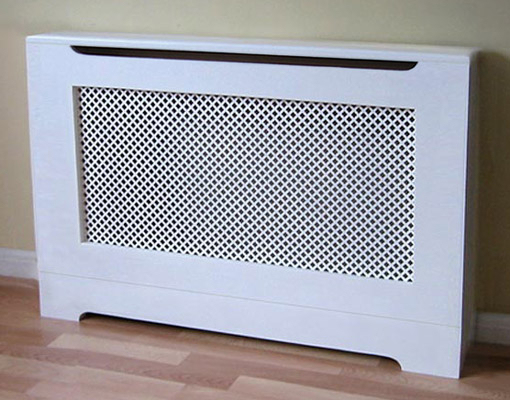
Radiator Cover via Coverscreen
The problem? Even though it’s on the Home Depot website, they don’t sell it in the stores around here. I checked all five (or six) Home Depot stores in this general area, and not one single laser cut panel to be found.
So then it was on to “Plan C”, which meant revisiting my original idea of the shutter-type cover. I’m actually glad I went back to this, because I’ve had this picture tucked away in my inspiration file for well over a year, and I like it just as much today as I did the first day I saw it.
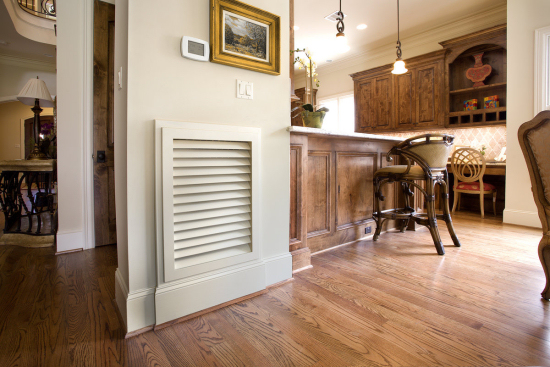
Wood air return vent cover by Worth Home Products, via Venting Direct, starting at $118
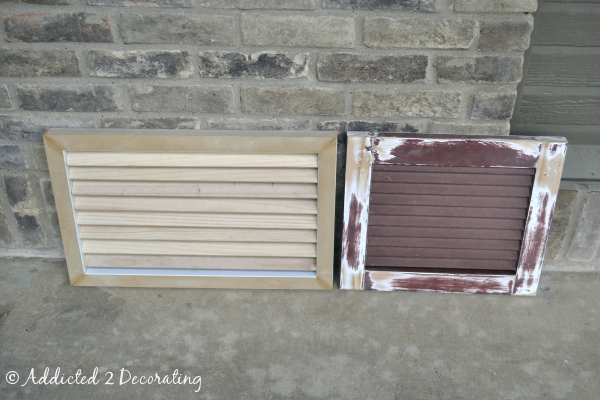
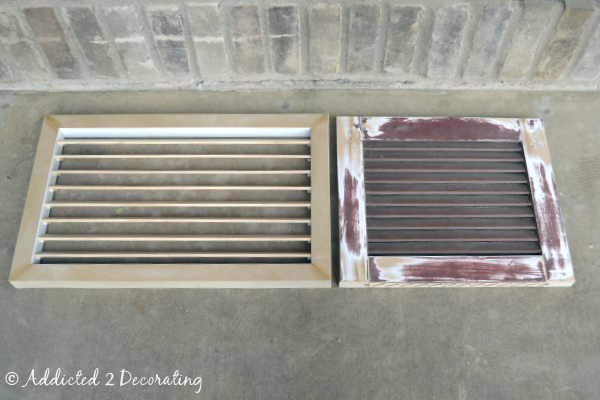
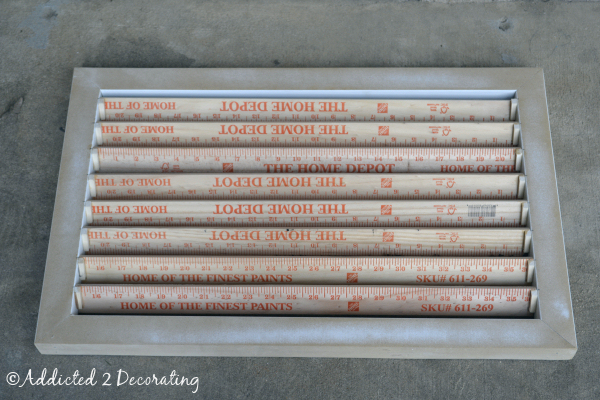
So after purchasing all of my supplies that cost a grand total of about $12.50, I set out to make my new vent cover, and I have to say, I’m quite proud of how it turned out. Here’s a peek of the new vent next to the last DIY attempt.
You know what? I actually think I like the look of the new one better anyway! As you can see, I made it quite a bit wider, and I also placed the slats at a lesser angle and further apart…
I probably could have put them a little closer together, but there was absolutely no way I was going to take a chance at this new one causing a drag on the air flow, so I did more spacing than necessary. (I’m generally not one who places function over form, but the thought of having to replace a burned out HVAC system because of a pretty little screen is too much even for me.) 😀
Now the funny part…can you tell what I made this out of? I searched all over the lumber section of Home Depot to find pieces of wood to make the slats. They have a very small section of craft-type wood in the lumber department, and I thought I could find just what I needed there, but no such luck. The smallest pieces I found were about 1/4″ thick, 3″ wide, and 36″ long. The 1/4″ thickness was fine, and the length could be cut down easily with my miter saw, but I had no way to rip the 3″ width down to a more appropriate width. Plus, they cost about $2.50 each, and the thought of paying $20 just for the slats didn’t really interest me.
Then I thought that I could use the big paint stir sticks that they have for the big 5-gallon buckets of paint. Those weren’t long enough.
But then, right there in the paint section, I found just what I needed. The perfect “slat” material for my new vent cover…
Yep, those are Home Depot wood yard sticks that cost about 61 cents each. The perfect slats for my vent!
Well, that’s all for now. I was just so excited that this project actually turned out like I envisioned, so I wanted to show you. I still have to paint the vent, cut down and reinstall all of the trim, and paint the trim. I’ll show you everything when it’s finished, including how I made the vent cover. Hopefully this project is about to be wrapped up.
Addicted 2 Decorating is where I share my DIY and decorating journey as I remodel and decorate the 1948 fixer upper that my husband, Matt, and I bought in 2013. Matt has M.S. and is unable to do physical work, so I do the majority of the work on the house by myself. You can learn more about me here.


Love it!
this is a great idea, and one i may use for my own home! i’m just wondering what you did to support/attach the slats? is that doweling glued in place? how did you get them so pristine and perfectly level? lovely job!!
Love it! The yardsticks,wow!
Love this! Can’t wait to see the final product and tutorial.
Great idea! Can’t wait to see just how you did it.
Brilliant! Can’t wait to see the final version, and how you put it together.
Awesome! Way to stick to it!
Genius! Necessity is the mother of invention 🙂
I knew you’d figure it out! No doubt about it!!!
Smiles,
Lesli 🙂
Genius! Pure genius!
Congrats. I can see why you like it. The wider version looks a lot nicer, anyway. I think it will look great when it’s all finished. Can’t wait to see the finished product. Am also interested to know how you made the slats. I may want to make a shutter later on – with slats.
How did you secure the slats in the frame? That is a great idea and I need to make 6