DIY Tub Skirt (Decorative Side Panel) For A Standard Apron-Side Soaking Tub
This weekend I got one more pretty big project marked off of my “to do” list on my bathroom remodel. I spent the last two days giving my very basic soaking tub a big makeover by adding a DIY tub skirt to the side of it to continue the wainscoting design onto the bathtub side of the room. It really dressed up that boring, basic bathtub!
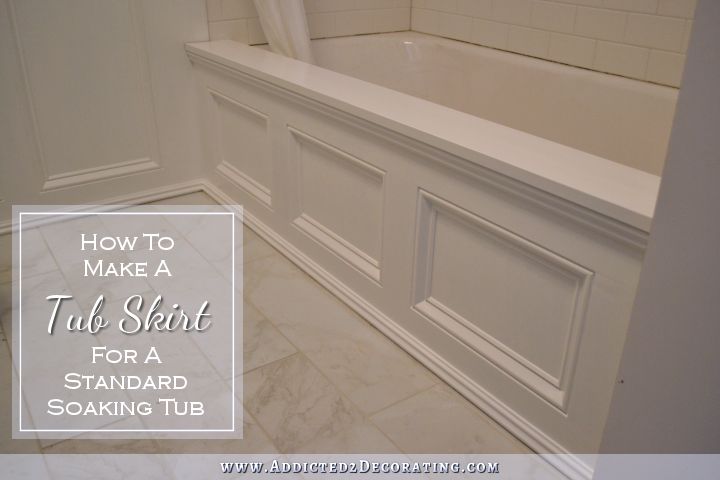
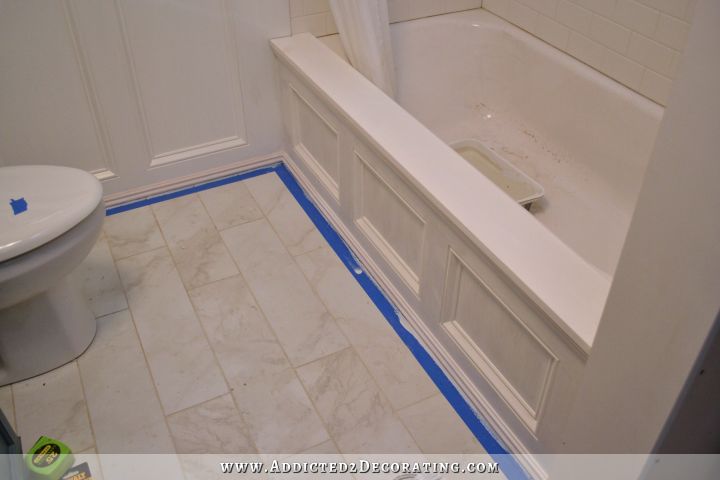
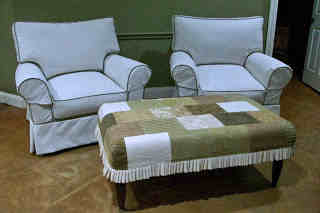
Too bad I still didn’t have time to caulk around my tile. The picture kind of makes it look like I have a serious mold problem. 😀 I don’t. The tile just hasn’t been caulked yet.
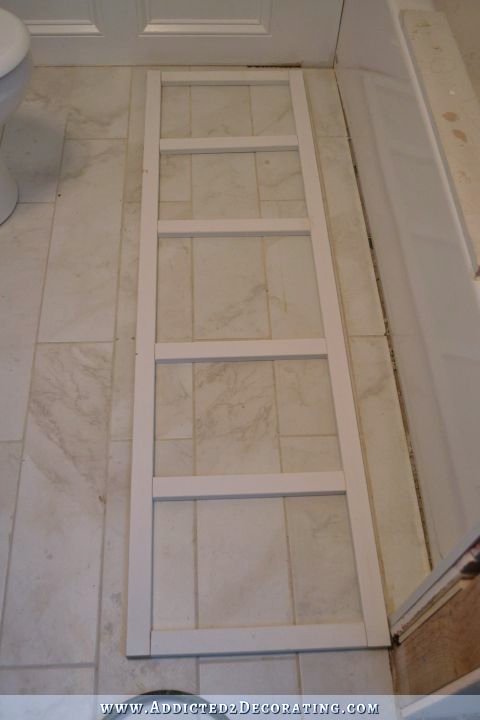
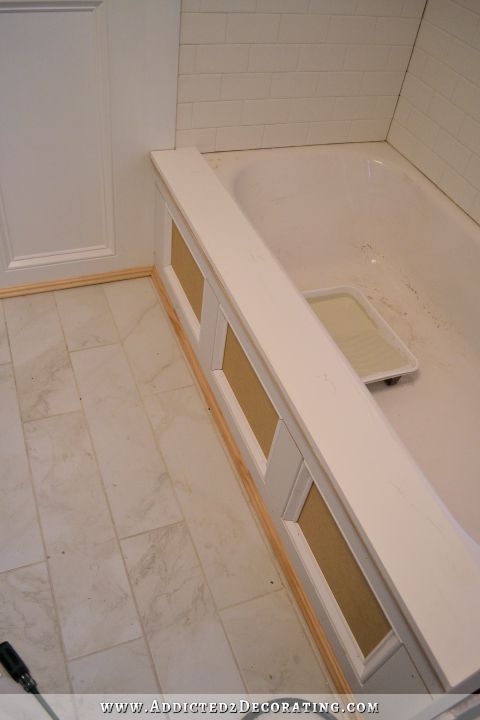
This project was actually quite easy — much more so than I had expected. I started by building a frame that would go right up against the bathtub. I made it out of 1 x 2 pre-primed finger joint boards. I cut two to the length of my tub, and then cut six more shorter pieces to make the frame the exact height of the side of the tub. I assembled the frame using wood glue and 2-inch 16-gauge nails in my nail gun.
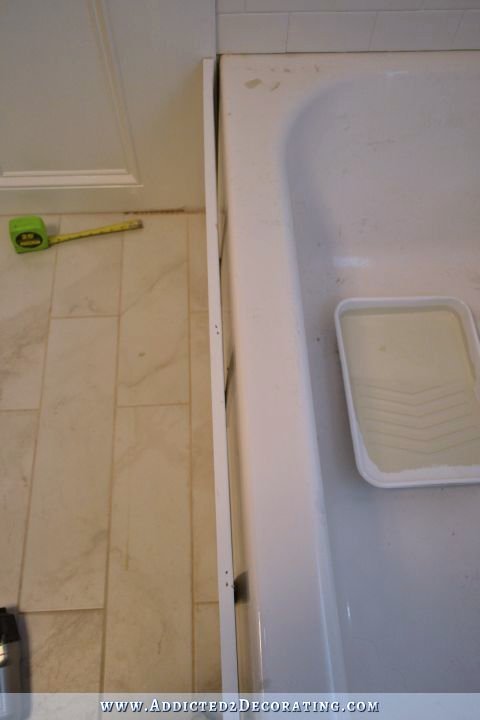
The I used silicone adhesive on the backs of the vertical pieces where they would touch the tub (the tub is curved, so it only touches near the bottom), and then used nails through the vertical piece on each end and into the wood trim on the side walls.
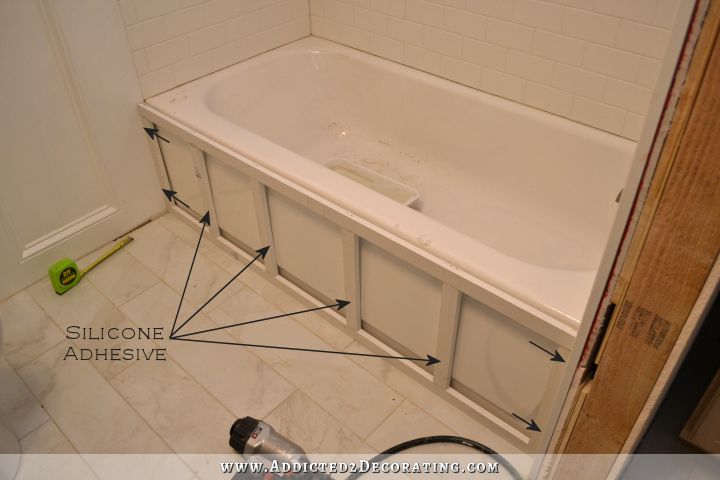
As you can see, because the tub is curved inward towards the top, the frame stood away from the side of the tub at the top about 3/4 inch. But because of the adhesive and nails, it stood securely in place.
Next I added a piece of 1/2-inch MDF, attached to the frame with wood glue and 1-inch 18-gauge finishing nails.
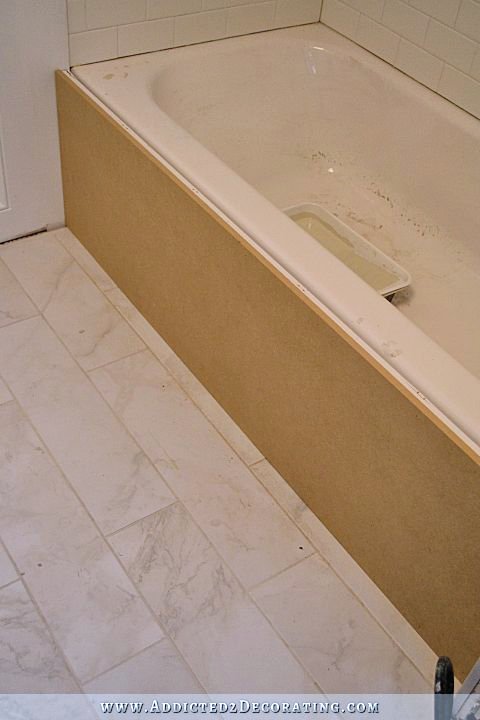
I used MDF because I wanted a really smooth surface for painting, and plywood, even smooth sanded cabinet plywood, shows wood grain. Plus, I know that once MDF is primed with two coats of oil-based primer, and painted with two coats of paint, it’ll hold up just fine. If I had to do it over again, the only thing I’d do differently is to prime the back and edges of the MDF with oil-based primer before attaching it. I had intended to do that, but got ahead of myself and completely forgot.
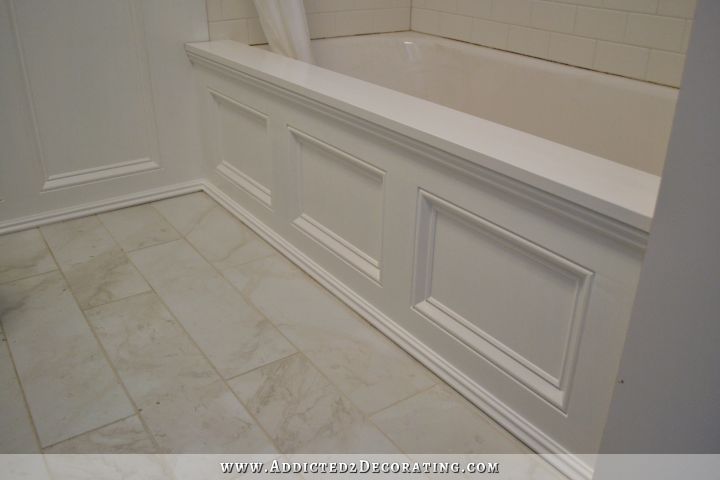
Then I was ready to start adding my trim to match the rest of the wainscoting. I started by adding the two horizontal pieces of 1 x 4.
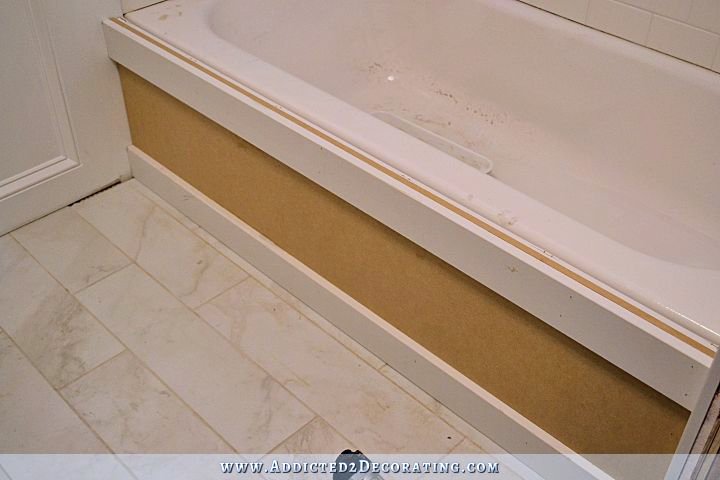
And then added the vertical pieces of 1 x 4, and then the panel molding along the top and the bottom.
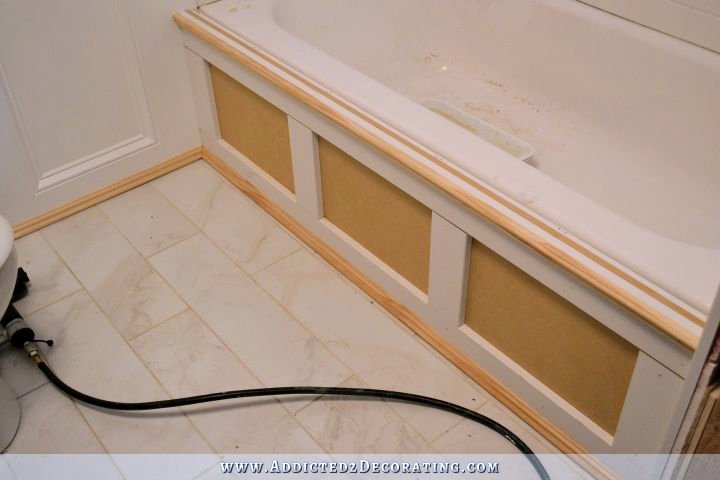
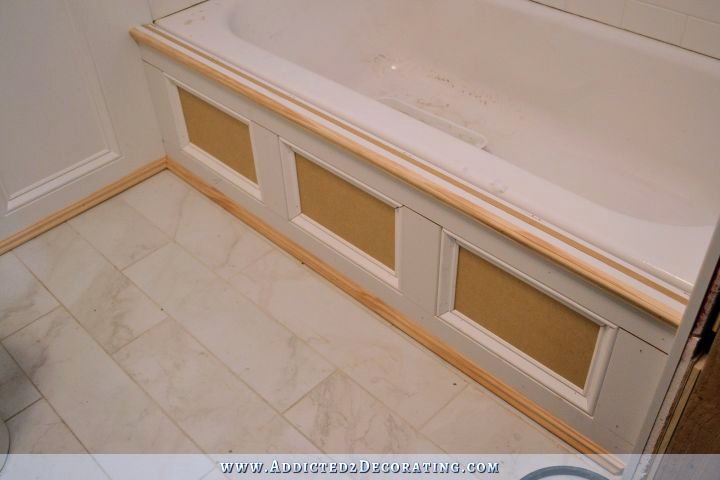
I finished off the panels with the same base cap molding that I used on the rest of the wainscoting.
And finally, I added the ledge on the top to cover all of the layers and the gap between the skirt and the bathtub. Since this is the one part of this skirt that could potentially see quite a bit of water dripped and splashed on it, I used a pre-primed finger joint board for this (not MDF!!). I attached it onto the tub with a very thick, continuous bead of silicone adhesive all the way from one end to the other. This not only adhered it to the tub, but will also prevent any water from getting underneath it. I’ll also caulk where it meets the tub when I caulk the rest of the tub/tile. Then I attached it to the skirt with the same adhesive and 2-inch nails shot right through the top of the ledge and into the top edge of the skirt.
Once the silicone adhesive was dry, it was VERY secure and strong. I even stood on it to put up my shower curtain rod. I did have to notch out a small area on each end to wrap around the wood trim that was on the end walls.
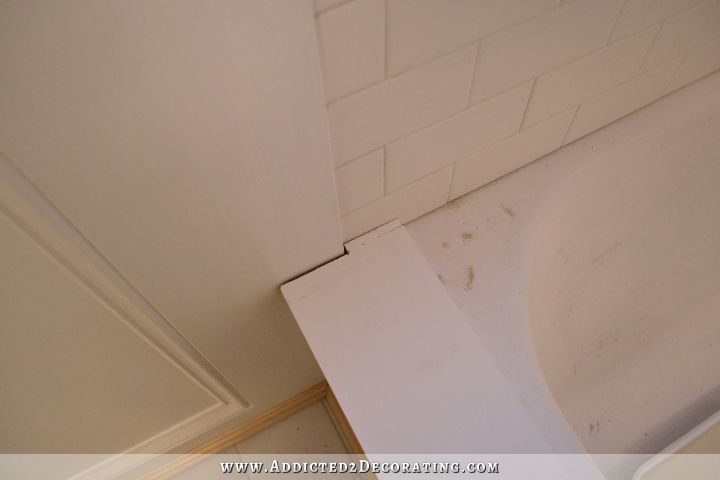
I still haven’t caulked that area yet because I didn’t have the right kind of caulk.
And finally, just like on the rest of the wainscoting, I filled all of the joints and nail holes with wood filler, sanded them smooth, and caulked all of the cracks and crevices (anywhere where water or moisture could seep in). Once that was dry, I followed up with two coats of OIL-based primer. I personally think it’s key to use an oil-based primer in a bathroom (except on drywall), but quite honestly, I use it just about everywhere.
And then I finished off with two coats of paint. I used a latex paint (Behr Polar Bear) in a semi-gloss finish.
My tub area is so close to being finished! I just need to install the exhaust fan above the tub, tile the ceiling above the tub, and then caulk, and it’ll be done!
My project list for this bathroom is really starting to dwindle. The last remaining big projects are (1) vanity mirror, (2) linen storage, (3) finish the doors, and (4) shower curtain. It’s getting there!

Addicted 2 Decorating is where I share my DIY and decorating journey as I remodel and decorate the 1948 fixer upper that my husband, Matt, and I bought in 2013. Matt has M.S. and is unable to do physical work, so I do the majority of the work on the house by myself. You can learn more about me here.

It looks amazing….and even though I will never do this myself…I really appreciate your “how to” steps. Good job!
Kristi,
Thank you for The Best tutorial for a bathtub enclosure I have seen. I have put off this project because my garden tub, like your tub, isn’t totally flat and I wasn’t sore how to deal with it. You solved that problem for me. Thanks again.
I’m so doing this to my boys bathtub.. the steps you have written are very understanding. I love this look. Thank you for sharing!
II concur.
This is amazing and I think I could do it but the home depot links show they don’t carry those particular moldings any more. I am not sure which to use. I realize this is an old post so might not get replies but its worth the trouble if I could make one like this
this is amazing
I love this so much that now I have to re-think my plans for my bathroom!
I LOVE that you did it yourself using what you had and improving it, rather than ripping it out for something new.
It’s BEAUTIFUL!
I’m always astonished by your creativity! Would you consider publishing a book regarding all these projects with the instructions on how to do them?
I’m running out of ink printing them. Great job.
Actually, I am in the very beginning stages of planning something like that. 🙂
I sure hope once it’s done, you offer your book for sale on your website with the option of having it personalized/signed by you!
Best wishes.
I honestly think a book is a great idea. You meet all of the requirements of the author of a good how-to book: You do the work yourself, so you’re credible; you do good work; you write instructions that are clear and understandable; you explain why you made the choices you did; you include step-by-step photos; you include what NOT to do as well as what TO do.
If you need tips on shopping your book idea, perhaps Design Sponge could help.
It looks great now you got me going I want to do this to my tub now, thank you
That looks so classy! I love it!
OMG…that’s just gorgeous!
Nobody does it better. Nobody.
Yeah! Nothing else to say. Gorgeous!!!
So beautiful and FANCY!
I need an idea on how to finish my jetted large tub in my master bath. Can you visit me? And bring your tools?
Outstanding job! At first I was going to say, “You need your own show on HGTV”. Then I thought of how they always do things so quickly, like magic. That brought me to realize another thing I appreciate about you, Kristi, is that you do this in “real time”. Realistic time, like the rest of us! People who live, eat, sleep, run errands, have a life in between doing house projects. Rock on, Kristi. You are the Queen of lovely and good work on a budget in real-world time!
You’re right, I don’t think I could ever have a tv show. I’d basically have to give up everything my blog stands for — working by myself, encouraging women that they CAN do these projects on their own, and giving detailed instructions so that others can replicate these projects. All of that would be sacrificed for a tv show. I couldn’t do that.
wow, oh wow, it’s looking so beautiful and classy!!! Congratulations!
If you ever have problems with that top board swelling and need to replace it, Home Depot actually carries a variety of fiberglass and PVC trim boards and molding. They look just like their wood counterparts and can be cut with regular woodworking tools and even painted, but they’re waterproof because they’re plastic.
I had to frame a window inside my condo tub and I was able to do it with PVC trim boards and some fiberglass colonial casing. Once it was installed, caulked, and painted, you could never tell it wasn’t wood.
Thank you so much for this information. I decided to do this pin, but used the materials you suggested and it came out gorgeous and I have no worries about the effect of dampness on the material.
Thanks Justin. Great idea. I also have a window inside my tub and want to frame it. Hadn’t thought of the moisture problem.
Hi Kristi,
Was going over the instructions for the wainscoting on your walls, and now after reading this project, I am wondering. Did you use MDF on the walls too? Then add the 1×4 on top, and trim work like you did on the tub? Or did you place 1×4’s on top of drywall?
Your tub surround is quite beautiful btw….been trying to figure out something to fancy up my large tub that is surrounded by ugly drywall, with a stupid 10×10 access panel, that was painted over by the builder. This would be beautiful in my bathroom!!! 🙂
The wainscoting on the walls is directly on drywall — no MDF. Traditionally, there should be some sort of panel under there, but I’m working in such a small room where every inch counts (especially over by the vanity where it’s inching closer to the door with each new layer I add), so I skipped that layer on the walls and just made sure the drywall was really smooth. That was quite easy since I was working with brand new drywall that hadn’t been textured.
Thanks for your reply…one more question though…If you have texture on your walls already, I would need to do a skim coat, how many coats would I need to do? I have a fairly new home, the texture is not too bumpy. 🙂 Thanks!
One thin skim coat of drywall mud should do it, or you could just use something smooth for the back panel of your wainscoting. You could use 1/4-inch MDF or 1/4-inch sanded plywood as the backing. Either of those would give you the smooth surface you need, and would actually be the correct way to do it. But of course, the correct way is more expensive as well.
True dat, and I’m all about less expensive if I can get away with it!! Thank you, your the best!!
I have also actually sanded (with my random orbit sander) a rough-textured wall in order to get a smoother one. Dusty and messy, yes, but also easy and cheap! Be sure to cover or remove everything and wear a good respirator or dust mask.
That is really beautiful. How ever doesn’t get wet. How do you keep it from rotting or mildewing.
Lisa, I have “knockdown plaster” and I did board & batton directly on it. Turned out great.
Wow. Just…. wow!
Beautiful!
Stunning!
Never would have thought to surround a tub like this. It looks really great.
Looks beautiful, but I was wondering how to remove the panel in case if there are repairs needed under the tub (themechanical enineer inside me).
This is a steel apron-side tub.
http://www.homedepot.com/p/Bootz-Industries-Maui-5-ft-Right-Drain-Soaking-Tub-in-White-011-2340-00/202207069?N=5yc1vZbzci
There would never be any reason to remove the decorative panel. All that’s under there is a steel panel.
This is so classy and so beautiful….I want to do this soooooo much in my guest bath!
What a beautiful job!
That looks wonderful!!
Stunning!
You always do such a great job!! Very talented! One day I might be brave & confident enough to try some of your wonderful projects! Keep the projects coming, enjoy being a part of your journey!
This looks amazing! What does it look like from inside the tub? How is that edge finished?
Wow! Wow!! Wow!!! This is one of the most striking examples I’ve seen of how one element in a room (the tub surround) makes the room itself look like a very expensive custom job. Of course all the elements (the ceiling, the floor, etc.) have that look and they all add up to create that impression, but this one’s the tipping point. You’ve made this room look like a million bucks.
Why fingerboard Kristi? Is there a joint in there?
I’m so excited to see the tub area finished!
I mean finger joint. sorry.
Is it possible to get a picture on the inside of the but, once you complete, so I can see if there is overhang, etc?? How does it look from w/ in the tub. I realize you can only get a closeup of the wood meeting tub.
I have got to do this. I pin your stuff from time to time, but I need to pin this to several boards! And I’ll like it on facebook and talk you up to all my friends! I’m inspired to say the least! Good job, Kristi.
This is something I have never seen before and it is just beautiful!
Great job Kristi! Can’t wait to see the bathroom completed.
Very, very pretty.
Oh my! I love this; I love simply you break it down and make it not-so-intimidating. I cannot eve at the difference it makes as it elevates the humble tub into something so high end.
Looks super Kristi! My mind has already gone to “where will she go next”. I know you are already thinking about the next project. I had an estimator in for my kitchen cabinets yesterday. Waiting to hear how much it will be. I keep telling my husband to trust me, I have a great teacher and I can do this myself. I can take my time and do it the right way, not that the contractors won’t but they will be doing it differently. Hoping it cost and arm and a leg, then maybe he will let me do it! Blessings
Great idea for the tub skirt and nice job on the actual work! Ignore this piece of advice if you like, but from experience I would like to see you cover all your wonderful hard work with blankets, thick drop cloths or whatever when you finish the ceiling fan, etc.. (Tools have a way of leaping out of my hand!)
Looking forward to your next communication.
Wow, the tub skirt looks amazing and so classy. I agree with the other comments, you are the perfect candidate to do a book of everything of do (after this house of course). I have no doubt it would be a top seller! You truly do amazing work Kristi.
That looks gorgeous! We’re thinking of doing something similar in our guests bath. I’m just curious what it looks like from inside the tub. I know that’s a random question since you’ll almost never see it, but the BF is kind of skeptical of that.
Thanks for the tutorial!
I’d be interested in know how it looks from inside the tub too – and how has it held up? I would love to do this in my bathroom!
Great looking idea but your choice of materials are not wet appropriate. I know it looks great and probably looks good a couple months later but would hate to see your many readers follow your install and have an issue.
Regular box store MDF is not intended for any wet or even damp application. If you were to wipe down a piece of MDF before you paint it you will see it slightly swell. That is why using drywall mud to fill in holes always raises the nail holes and make them more pronounced. Use SW nail fill for MDF.
They do make wet application MDF. I would not choose MDF at all but if you do you can paint both sides and all edges to make sure it doesn’t absorb moisture, swell and develop mold. You should paint any wet exposed wood edge also to prevent similar issues.
As someone noted above even HD and Lowes sell exterior safe trim that could be substituted. I would also leave the board 1/2 off the floor and the floor trim a couple 1/16’s off also to prevent wicking and allow the panel to breathe from behind.
Great work and not bashing in any way it takes along time to learn a trade and I totally get the DOIT yourself deal. I always look at it as you can always learn a better way.
I scrolled all through the comments to find if somebody had looked at the ramifications from an engineer’s vantage point. I agree that the wainscoting adds a lovely touch to the tub, but I was worried about what the average grandchild could accomplish by splashing water out of the tub. If there’s anything I’ve learned in home remodels it’s this: Pray for the best, but prepare for the worst.
That said, I think it would be appropriate to use wet application MDF or even vinyl trim. The only thing worse than that basic look is damaged customization.
yes, as an engineer and tradesman I agree with James and Brian. Not bashing anyone just wanted to make a note.
Good idea and looks good.
Paul
Three-and-a-half years later: https://www.addicted2decorating.com/three-past-projects-revisited-how-have-they-held-up-over-time-concrete-kitchen-countertops-wood-bathroom-countertop-wood-bathtub-skirt.html
Love the look. Thought about trying a skirt that I could put on hinges and pull out for storage but nixed that idea pretty quickly!
I just bought a Kohler Archer deep soaking tub with a defect (1 1/2 ” chip) right front corner of the apron. Was going to fix it (got it for $300 and it won’t show in our bathroom) but now I’ thinking it is going to be way too tall for me to get over at 5′ 1″. Ugh! What’s an “addicted- to-buying-stuff-I-think-i’m-gonna-use-and-can’t” gal gonna do??
Hi Kristi,
Want to try this with my bathtub. What width is the board used for ledge?
Thanks,
Dean
Hi, I was wondering if you could post a picture of what it looks like now? I wondered how well the project has stood the test of time? Thanks! It looks amazing!!!
Hello,
This is AMAZING! I’ve been looking all over the internet for something like this.
I want to do this remodel also, but would like to add a “step up” to my existing garden tub. I’m looking to modify these plans just a little to add the step and keep the wainscot look on both faces.
Dear Kristi, i fell in love in all your projects which were here! You are the craftmaster and the great designer. You did refer that you didn’t have “the right caulk” for the cover ledge. What means “the right caulk” in the wet areas? thanks
Any caulk labeled for use in kitchens and bathrooms.
Hi Kristi, The tub skirt idea is FABULOUS!! How much did it cost?
Thank You,
Helen
This is great, I’m doing this over the weekend in my bathroom. It would be really useful to have a “supplies“ list, because I had to go back-and-forth between here and Home Depot app repeatedly to figure out everything I needed. But I can’t wait to get started! Thanks for the info
Everything you’ve done is absolutely AMAZING!!!
Thank you so much. I still need to figure out how to miter properly but I am still trying. These pieces are small enough I can try to old manual miter boxes.
Anyway, perfect for what I have been looking for! Thanks much.
Love this so so much, it would be super helpful if you listed all the materials you used in one place. I’ve been guessing
A couple of comments on your tub apron surround:
1. would it not have been simpler to have the surround closer to the tub so the surround was under the top edge of the bathtub-less chance of leakage without the large horizontal wood strip and large bead of silicone sealer (which I have seen fail if covered with water onto some substances normally found in houses;i.e. anything that has any oil contact like plastics, paints, wood, etc.). One other more expensive option, that I have found better than silicone sealer is FlexSeal. I used it to connect two rubber sheets on a roof and it was better than the VERY expensive specialty adhesive supplied for this specific connection. It seems to stick to everything, one thing silicone sealer cannot.
2. I found that when oil base sealer is used, many times water base paint will not stayed adhered, especially if it becomes wet.
I had always heard oil base primer for oil or water base, but only water base sealer for water base paint, not with oilbase paints. Our whole house was primed with oil base primer with a finish coat of water base paint. On the south side where there is dripping from rainfall on our deck, the paint is flaking in large sheets.
Just FYI
Hi. This looks great. It is what I just came up with in my mind and here you are with the tutorial. My problem is that I rent. I need to find a way to seal the top ledge without making it permanently adhered to the tub.