Hallway Bathroom Revisited
As I’ve been busy working on the studio, I’ve had the chance to really take my time in making decisions about the hallway bathroom. This is still the main, most used bathroom in our house. It’s the one that guests use, and the one that I use the most during the day. But right now, it looks like a mess.
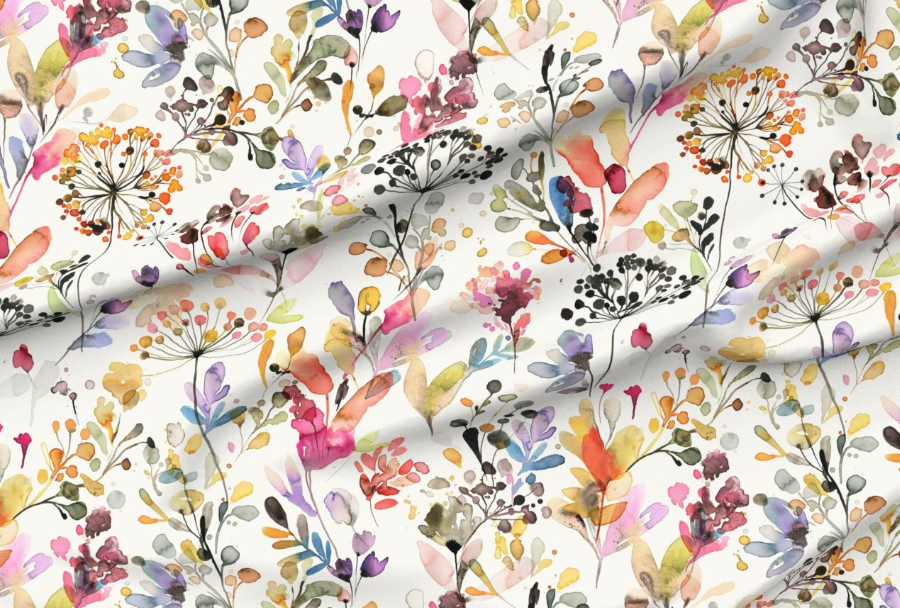
I finally did get a plumber here to finish installing all of the new bathtub/shower fixtures. So that part is done now. But other things look “in progress” even though I don’t plan to work on this bathroom until I’ve completely finished the studio. I’ve had this wallpaper sample taped to the wall for probably two months now.

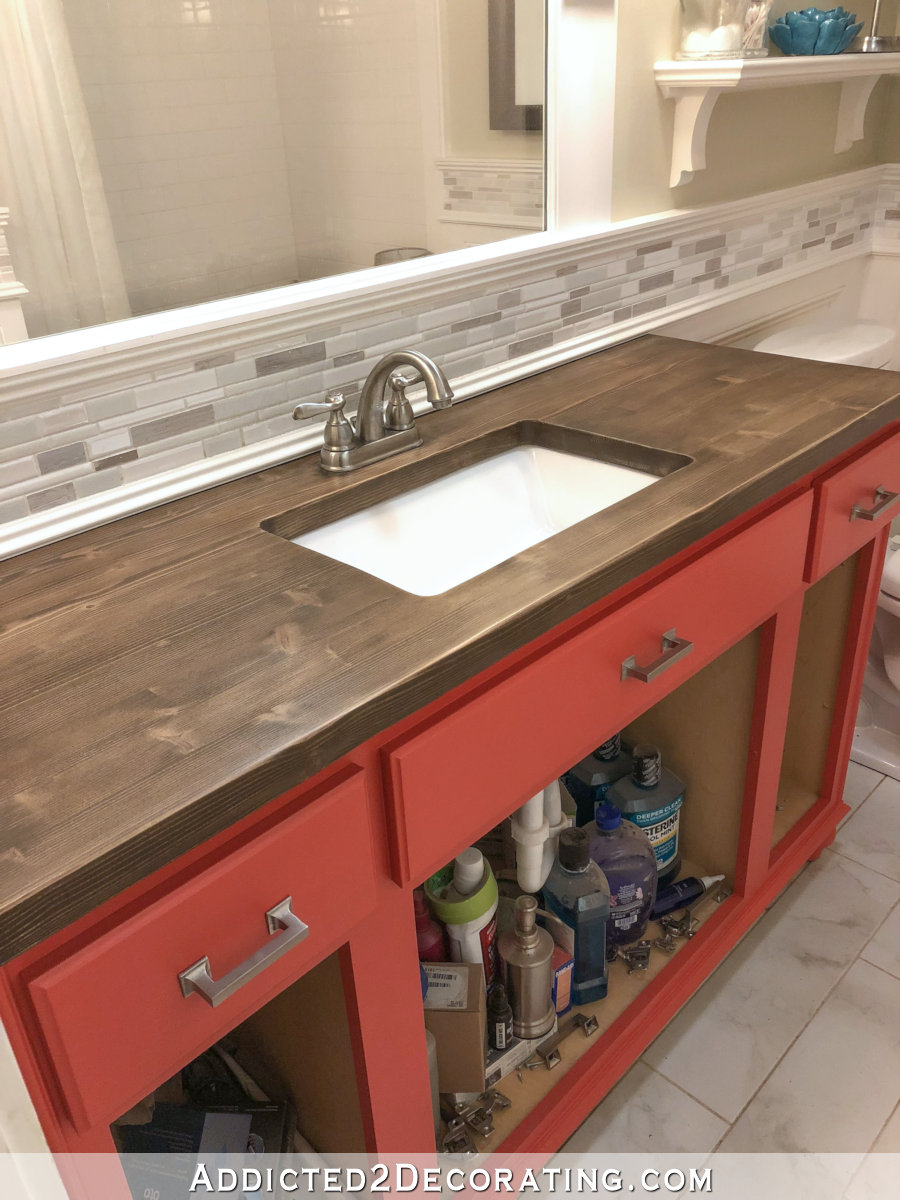
And while the main countertop has been switched out from wood to quartz since the beginning of August, the other little countertop on the corner countertop just inside the bathroom to the right is still wood. I have the quartz countertop for that area, but figuring out how to get it into place has been a challenge.

So focusing my time and effort on the studio has given me plenty of time to try to figure out exactly what I want to do with this bathroom when I start working on it. And I think I finally have a plan in place.
First, I am 100% sure that I’m going to use this wallpaper in the room. It’s just too perfect for my house and for my personal taste to pass it up. BUT…I’m going to remove all of the accent tile around the room, finish up the top of the wainscoting in a very simple and understated way so that it’s not trying to be the star of the show, and then I’ll bring the wallpaper down to the wainscoting.

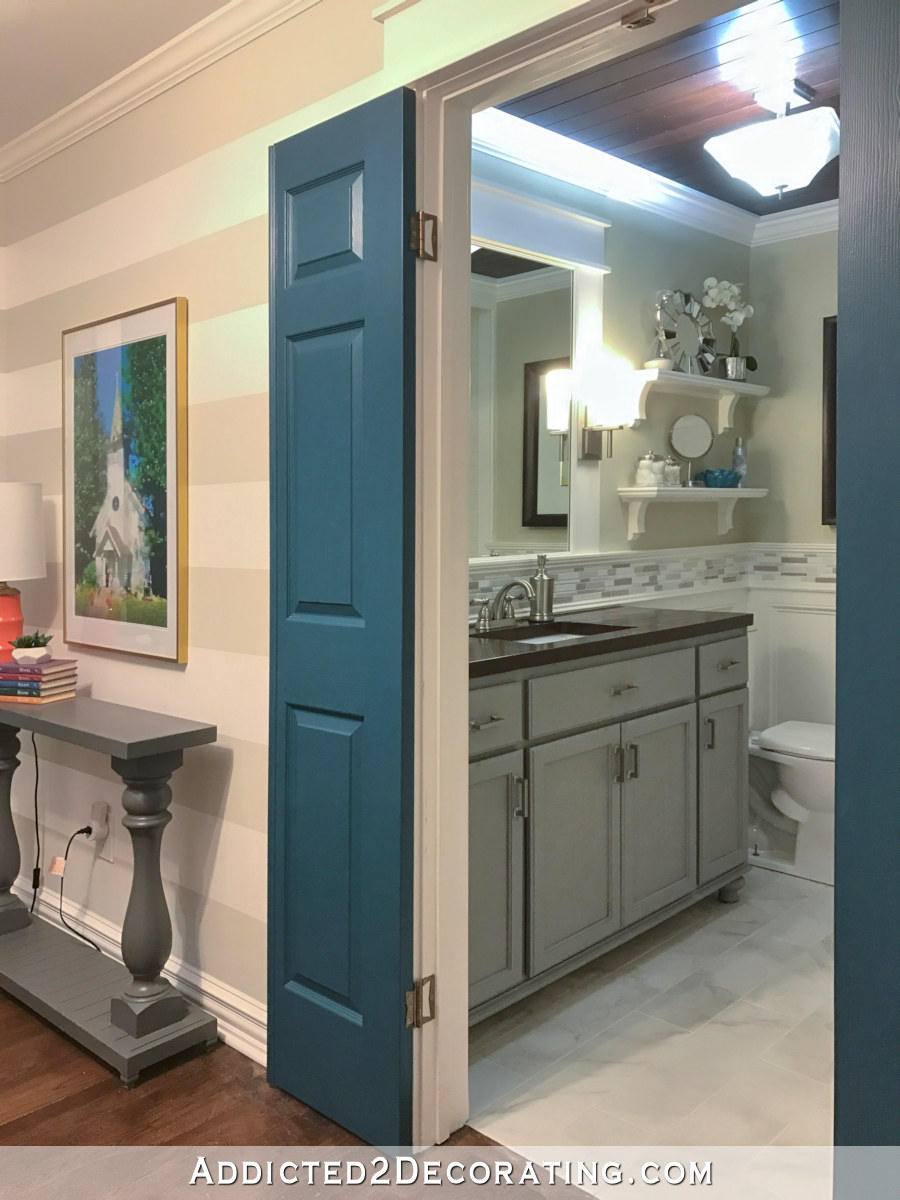
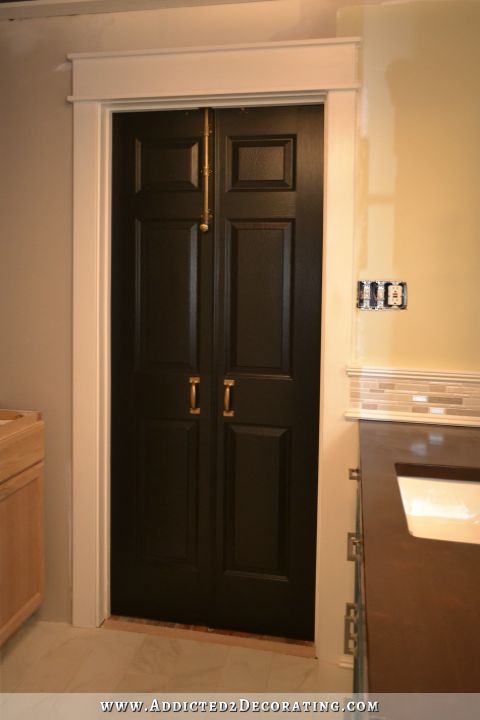
I can’t remember if I mentioned it before, but I’m also going to get rid of the current mirror. I don’t have a new photo that shows the mirror really well, but you can see it in this older photo. I basically trimmed out a plain frameless mirror in the same way I trim out all of our windows and doors, and then I installed the sconces on the frame.

I like that mirror, and it has served us well for the past nine years, but I’m ready for something more decorative. And smaller. I want it to be a smaller mirror with a pretty white frame sitting against that dark wallpaper. And I want wallpaper visible between the mirror frame and the sconces.
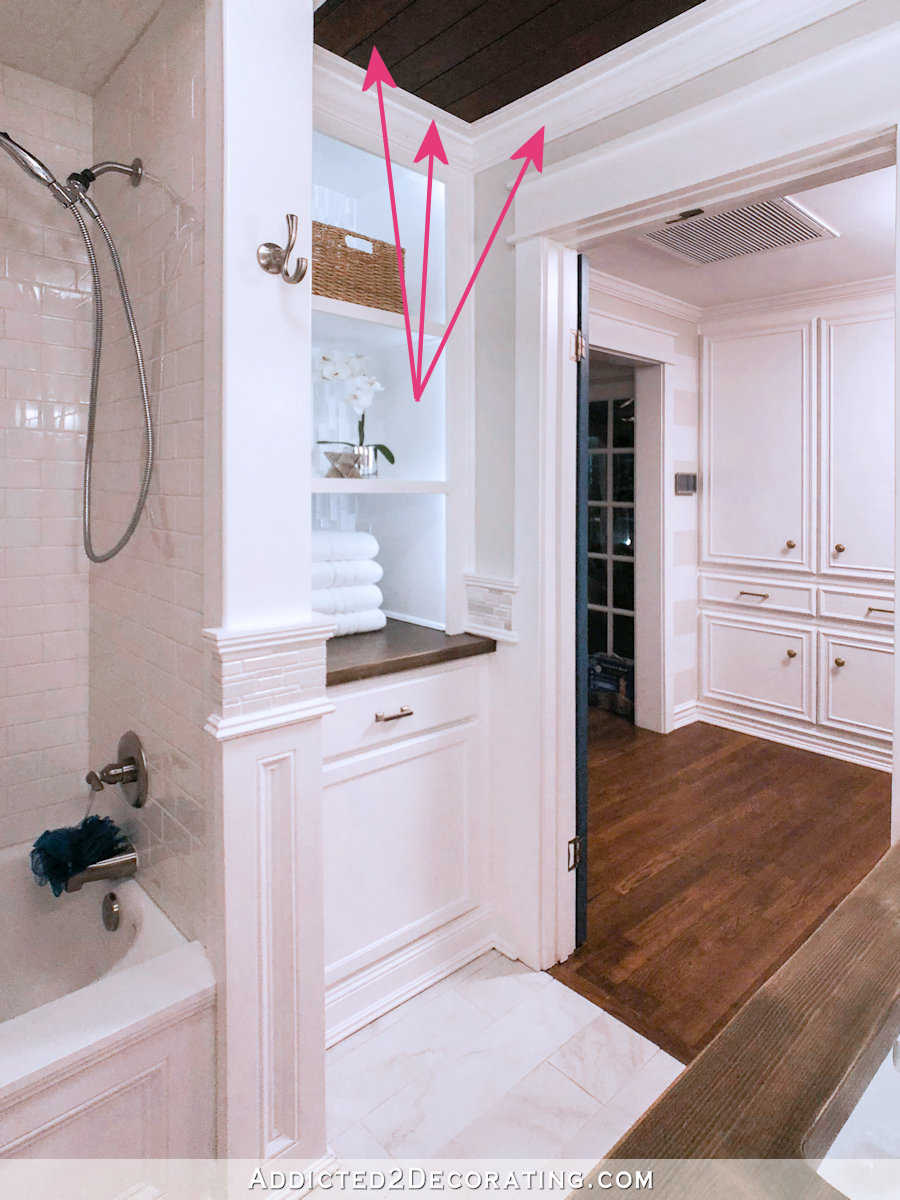
But I’m pretty sure I’ve already shared all of that with you in previous posts. What I didn’t share is my decision about the corner cabinet and shelves. I’ve pretty much decided that the upper part of the corner cabinet (the part with the open shelves) needs to come out completely.

That will solve a few of problems, but it will also create a couple of problems.
Let’s talk about the problems it will solve. First, it will allow me to get that wood countertop out of there and swap it for the new quartz countertop. (That’s really the main reason that got me thinking about the possibility of taking the upper cabinet out completely and leaving it out.) Second, removing the upper cabinet completely will get rid of the tile on the back that I installed vertically. I liked that design decision at first, but have come to really dislike it. Plus, if I’m getting rid of the accent tile in the rest of the room, keeping the tile at the back of these shelves will make no sense at all.
But the third reason is probably my favorite unintended benefit. I would then be able to carry the wallpaper around into that little nook, which will balance out the look of the wallpaper in the room. Without that, I feel like that dark wallpaper mainly on two walls of the room would make it feel unbalanced.
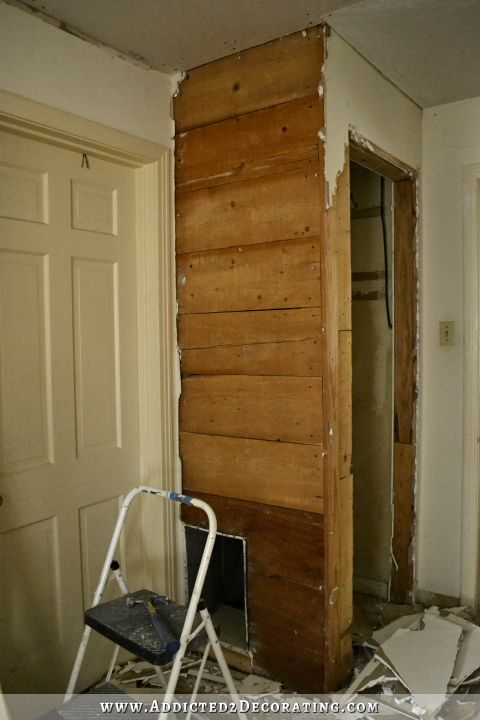
What problem would it create? Well, the crown molding would have to be completely redone in this area since it wraps around the front of the cabinet, and I’d need to to wrap around to the back wall of the nook (i.e., the wall where the vertical tile is now). And once that’s removed, that means that the ceiling boards in this area, which end at the front of the cabinets just under the crown molding, would have to be removed and replaced with boards that go all the way to the back wall of the nook.
So the plans are starting to go beyond just a quick little makeover with some new wallpaper, a new mirror, and new vanity paint color, a new shower curtain, and some new plumbing fixtures.
But I don’t really see any way around it. With that cabinet there, I can’t get that countertop out. It all starts with the countertop. And there’s simply no way I’m going to have one quartz countertop and one wood countertop. That’s not even an option.
So it looks like the new countertop will set off a whole domino effect in this little bathroom. But that’s okay. It’ll be fun, and give me something to look forward to once the studio is finished. If you give a DIYer a new countertop… (Perhaps I should write a children’s book. 😀 )

Addicted 2 Decorating is where I share my DIY and decorating journey as I remodel and decorate the 1948 fixer upper that my husband, Matt, and I bought in 2013. Matt has M.S. and is unable to do physical work, so I do the majority of the work on the house by myself. You can learn more about me here.
This is easy peasy for you and will be beautiful! Personal experience of mine and my sisters/friends is that the pretty accent tile gets tiring/old/dated/what was I thinking really fast.
Ya gotta love that domino effect. The most seemingly simple changes can create an astonishing amount of work.
Idea: Create a fake header/beam. Install right where the cabinet hit and reinstall the crown where it was. Paint the 4sqft of ceiling the background blue of the wallpaper or a color close to the wood. Call it an open closet. Like the nook in the gym.
Okay, this is interesting! I’m going to have to think through this idea and see if I can envision it.
I was going to suggest something similar so I will just add that I was thinking of this but with a light in in. Maybe hanging or maybe just one of your zero profile can lights.
I am honestly not crazy for that paper in this bathroom. I feel something more simple, or just paint would be better. It just seems old fashioned. (Sorry!) I am glad the tile border is going, I was not crazy for that either, but love the wainscoting, and I think to top it off by running a simple narrow flat trim on edge that creates a ledge would look good. (Like a picture ledge?) I like the shelves, but understand the dilema in changing out the wood. I don’t suppose it is open under the wood, where you could cut out the center, then chisel out the remaining under the box of the shelves? But that still leaves the tile backing, so I guess the shelves should go. Why not replace them with simpler shelving, possibly glass? Whatever you do, I know it will end up surprising me in my final opinion – you have often proved me wrong, so what do I know?
What if you just painted the dark wood counter white to match the shelves. It would look like a piece of furniture. Next you could wallpaper directly over the tile in the back after adding wallboard “mud” to smooth out any imperfections. They also make a heavy white paper-like fiber-like wallpaper-like product to smooth out imperfect walls when doing traditional wallpapering. Once these two suggestions are completed you’ll have the look you want without the demolition you are suggesting. If you don’t like the results, you can still do it again the more labor intensive method.
Oh! This is actually a really good idea. So much simpler and it really will look very nice and finished and let this room be “done” over a weekend rather than becoming a huge project.
I came to say this. I really like that nook with the shelves and lighting. You can even paint the dark wood counter white and then put the quartz on top of it- maybe trimming the dark wood back to the cabinet depth, putty the seam and letting the quartz overhang it. I’d pry that tile off without removing any shelves, plaster any dings or gouges and then wallpaper between the shelves.
Wall board mud is a bear to remove, should she ever want to, and the wallpaper surface repair would not stick to the tile work. It would be easier to put a thin piece of plywood over the time and go from there with a finish.
What about taking the cabinet out so that you can install the counter, put wallpaper at the back and then reinstalling it? It’ll let you install the counter, keep the shelving, use your wallpaper, and NOT have to redo the ceiling or crown molding. 🤷♀️ I like your plan for the wallpaper and new mirror. It’ll be pretty. ☺️
I like the shelving nook so I’d carefully remove it and the tiles, put down the new countertop, put back the frame, wallpaper the alcove, and put the two white shelves back in. What you have on the shelves is neutral enough to work with the wallpaper.
I pretty much love how you don’t let relatively recent, completed design choices stop you from doing large chunks over when you know it will serve you better or feel/look better. It’s the blessing of DIY! When a person has paid someone else thousands to renovate a room, they pretty much live with the end result whether they love it or not so much. When you did it yourself, you can do it yourself again much more easily.
I totally agree with Julie S on everything she says.
Oh, I truly love the look of that nook! It just looks so “built in” if you will? I was wondering if removing the styles from the front of the shelving and the trim above and below the mid wall tile (in front of the nook, that is going to be replaced anyways), if that would then give you the clearance to remove that wood countertop? Sorry but I am the carpenters wife and constantly making him work smarter not harder, LOL, he doesnt always listen but those AHAH moments do happen! He won’t often admit tho!
Thanks for this blog…..I love it!
You need to write a design book! So many of us are AFRAID to truly express our style. It’s so easy to worry about what other people will think and settle for greige and blah because it’s safer! At the same time, there has to be a balance between what makes us happy and what fits with the style and vibe of a particular house. You make it seem so easy but in reality, it’s not at all!
Regarding the small cabinet, have you considered the following?
Remove the small quarter round molding from around the base of the upright section, the part that sits on the wood countertop. Cut a 1/2″ piece horizontally out of the front face frame.
I have read that Quartz can be cut to less than 1/2 inch (1- 1.2 cm thick), so have your fabricator cut yours to get a slice that thin. Slide it under the cut face frame to sit on top of the old wood top. Have the fabricator put a front piece on to match your vanity counter edge.
You can certainly remove the back tile, but consider making a thin veneer to go over the existing tile in the back. I’d cover it with your lovely wallpaper. Install by gluing and finish with very fine quarter round moulding around all four sides. Trim the backs of your shelves and reinstall.
There is always a surprise with you.
Have a good day.
I really like the cabinet. Couldn’t you put a door on it?
I like the idea others mentioned about painting the wood counter white to match the cabinetry. Then you could use that piece of quartz elsewhere.
I hate to say it, but as pretty as the wallpaper is, it’s so dark for that small room! And so busy. Seems to be not your usual bold or understated geometric designs, a pattern that deviates from all your other design choices. Stepping into the 70s.
You always make things beautiful, so it will be interesting to see what you end up with here!
Godspeed!
How about painting the ceiling white to balance the dark wallpaper and create vertical symmetry in the room? Would also have the benefit of being able to just add wood to the newly exposed corner and make it look seamless, without having to remove a significant part of your ceiling.
I would never be able to accomplish all the ideas and changes you are implementing…which is why it’s such a pleasure to read your blog and learn what new ideas you have…and that you can accomplish them. The bathroom will be more beautiful than it is now…that wallpaper is fantastic.
Okay my 2 cents and that may be all it’s worth but here goes. I’m for easy/simple. Leave the cabinet. Paint the inside of the cabinet the dark background color of your paper, then cut you some 1/8-1/4″ boards the size of the back areas and wall paper them, to cover the tile. Gets you paper over there with out all the fuss. No change to mouldings at the ceiling.
I’d install the quarts over the wood, and retrim[paint it white if this is just a temp thing]. It would give you visual balance, even if temporary. A fix that would not be hard to do and would give you time to see if it is what you like. If not rip it all out like you plan. We know what ever you do will be great!