Bathroom Built-In Storage Progress (a.k.a., My Comedy Of Errors)
First things first…THANK YOU so much for all of your invaluable feedback yesterday! It seems like videos are the way to go, and possibly with some accompanying printable written instructions filled with detailed pictures that you can print out and take with you into your garage or shop where you may not have internet access. So my mind has been working in overdrive trying to sort through ideas and really get a handle on how I want to provide all of this DIY information that I have constantly swirling around in my head. 🙂
But speaking of videos, yesterday as I was working on my bathroom built-ins, I was thinking to myself the entire time, “Thank goodness I’m not trying to make a video of this project!”
Let’s just say that if my work yesterday had been recorded for you to see, y’all would have lost all confidence in me. Seriously. You’d be thinking to yourself, “Why am I taking DIY advice from this fool?! She clearly has no idea what she’s doing!” *Sigh* It was just one of those days. 😀
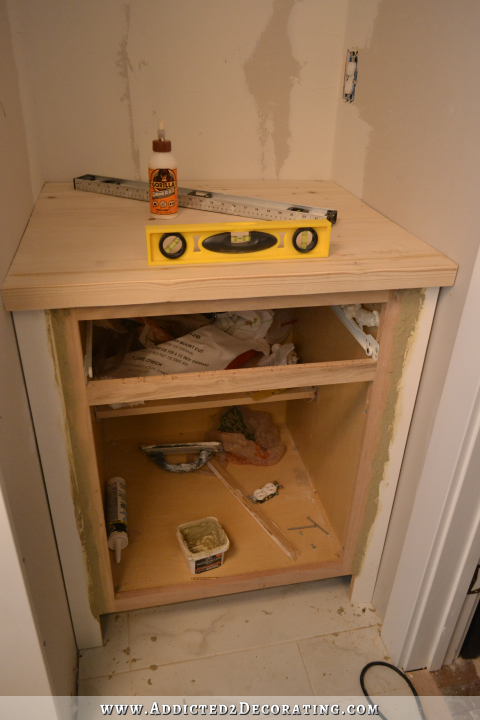
Things got off to a very rocky start when I added the filler strips to the base cabinet. The cabinet is 24 inches wide, but the space is about 28.5 inches wide, so I needed to fill in the sides. I measured how wide the filler strips needed to be and cut them using my table saw from some leftover pre-primed 1″ x 6″ finger joint lumber I had on hand. That part went okay. I’m really loving having a table saw!
But when I tried to attach them, things started going a bit sideways. I attached them just like I attached the cabinets together for the vanity. I pre-drilled some holes through the stiles on the cabinet and into the edge of the filler strips. Then I attached the strips using wood glue and 3-inch screws through the pre-drilled holes.
Or at least that’s how easy it was supposed to be!
It took me about three tries on each side because as the screws went in, it would pull the strips to the front or back, leaving them really uneven with the frame around the cabinet. I finally got it, but not without quite a bit of frustration.

And the reason that happened is because I was using a drill bit that was too small for my pre-drilled holes. So when I tried to screw in the screws, it was as if I hadn’t even pre-drilled once the screw hit the filler strip. I thought I could power through, but it was impossible to do so while also keeping the filler strip perfectly straight.
So why didn’t I change the drill bit after it didn’t work the first time? Because I can be stubborn as a mule sometimes. 😀 I thought, “Dang it, this WILL work! I’ll MAKE it work with sheer determination and brute force!”
It didn’t work. So on the third try, I decided to do it the correct way using a larger, longer drill bit. That worked.
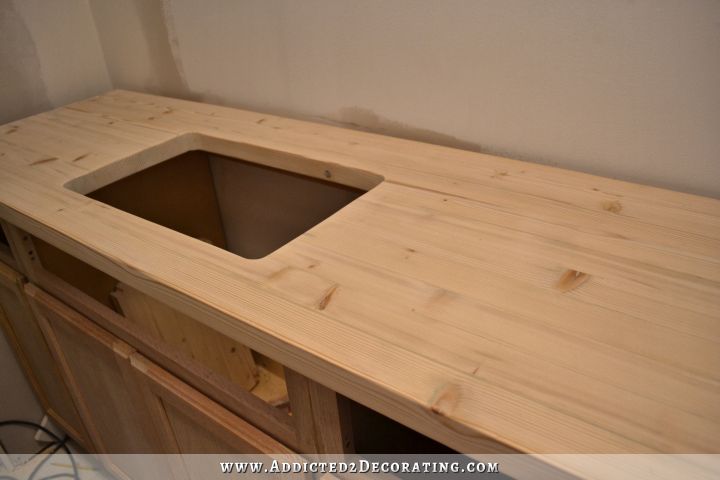
After adding the wood filler to the filler strips, I started working on the countertop. I had a length of countertop left over from the vanity, and set aside specifically for this built-in area. The problem was that it was only 19.5 inches deep.
That was exactly what I needed for the vanity after cutting down those cabinets, but this cabinet was 24 inches deep, and I needed a countertop that was at least 25.25 inches deep. So I had to add three additional strips of wood (using the same method as before — wood glue and Kreg Jig), and then I cut it to size and did all of the wood filling and sanding outside.
With all of that done, I brought it in to set in place and get started on the staining. But it was such a tight fit (on purpose), and I had to push so hard to get it wedged in there, that I ended up breaking off the front board. It didn’t come off completely, but I could feel the wood glue bond break, and the screws give way just a bit.
So frustrating! But it was wedged in there so tightly that I wasn’t even about to try to remove it. So I just got it put back together as best I could by filling the gap with wood glue, and pushing the front board onto the rest of the countertop as tightly as possible. I stood there for a while holding it (since a clamp wouldn’t fit in that space) until the glue held it in place, and then left it alone to dry for a couple of hours. It wasn’t perfect, but it worked out fine. And once it’s all finished, I doubt anyone will notice.
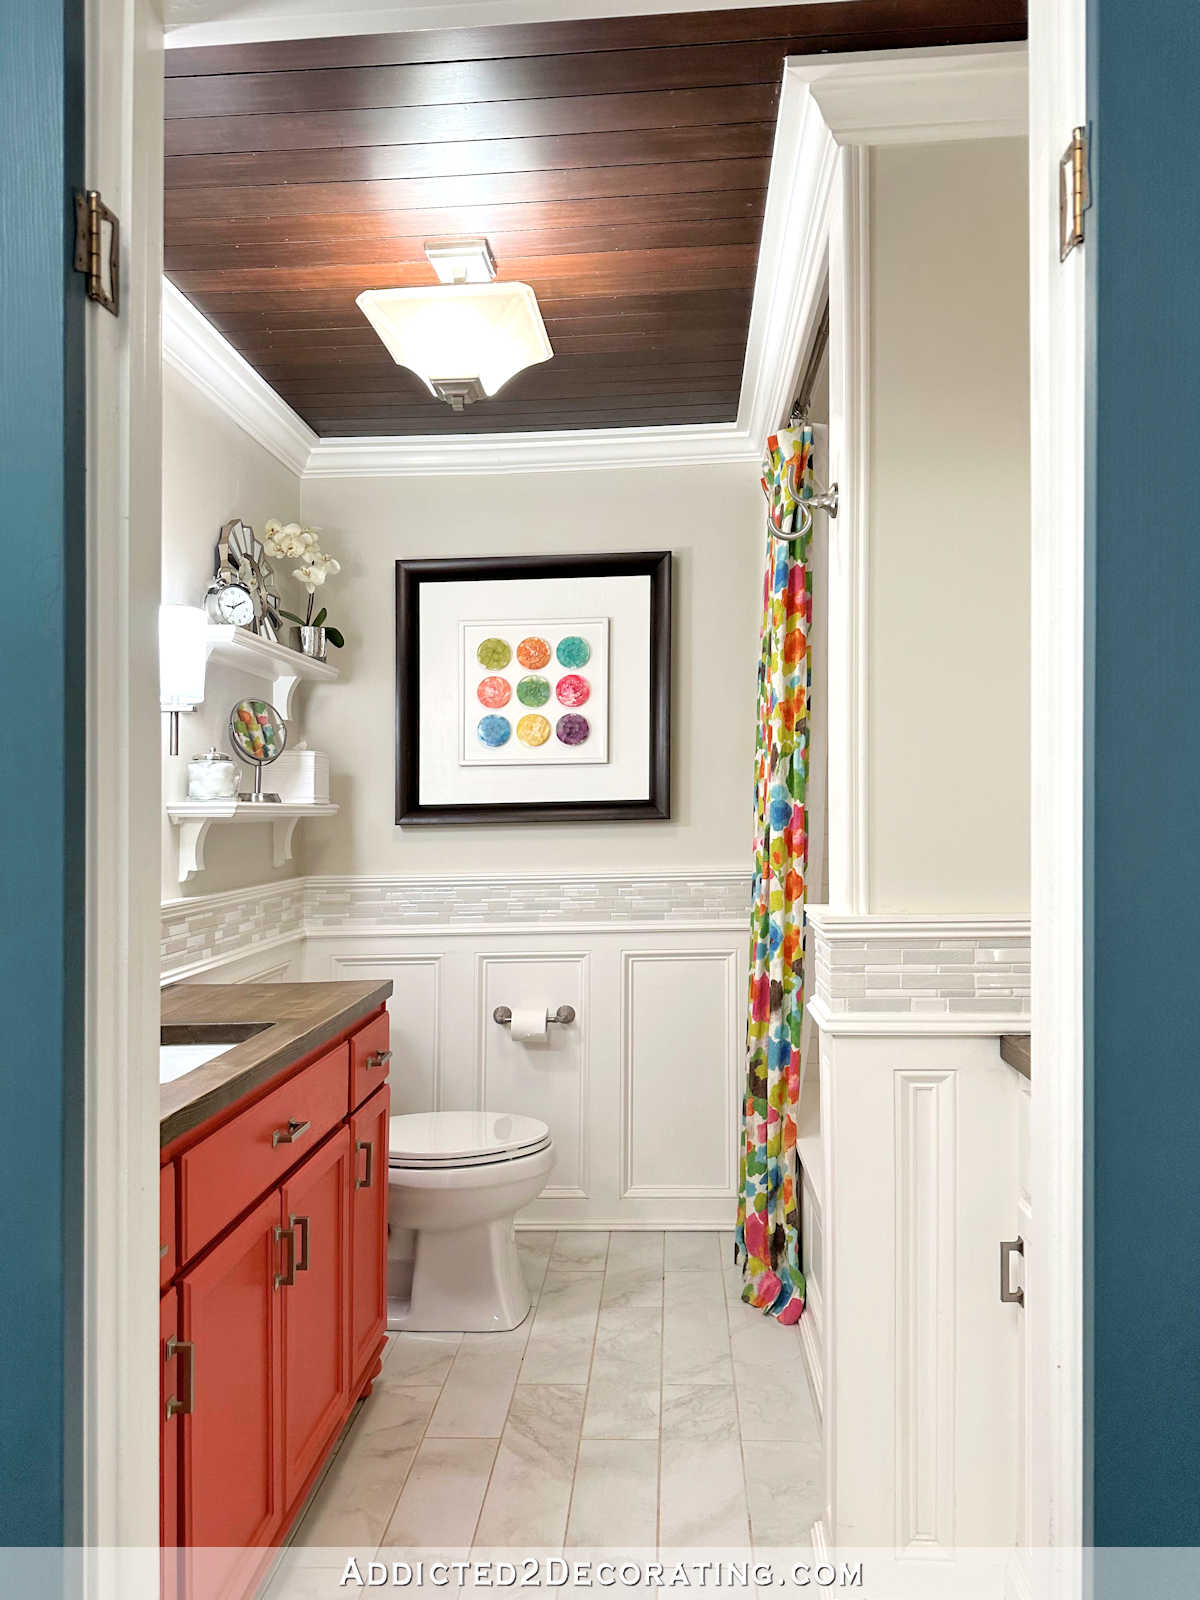
In my frustration, I just had to take a minute, stand back, look at the big picture, and remind myself that once this area is done, and the imperfections aren’t front-and-center, I think it will be really pretty. And this is the main reason I switched from a single door that swings into the bathroom, to double doors that swing out. I just couldn’t stand the idea of this built-in storage being hidden most of the time behind a door.

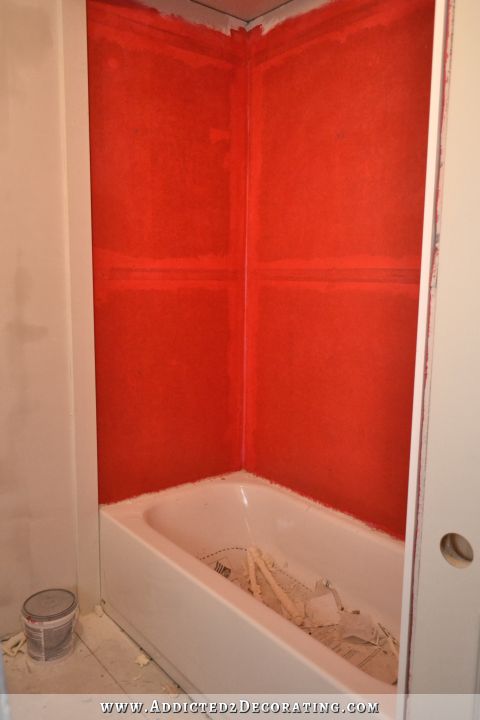
So while the glue was drying on the countertop, I decided to start working on the upper shelving area. I had Home Depot cut my MDF into smaller pieces so that it would fit into the car, but I still had to cut them to the exact sizes I needed. That was a bit challenging on my small table saw, but I managed to get it done. Then I brought the pieces into the bathroom to start assembling.
The basic structure was going to be two sides of 5/8-inch MDF, and a back and top of 1/2-inch MDF. I was going to assemble them on the floor, and then have my brother or neighbor come over today and help me lift it into place.
Well, I got these two pieces — back and one side — put together using wood glue and 1-inch nails.
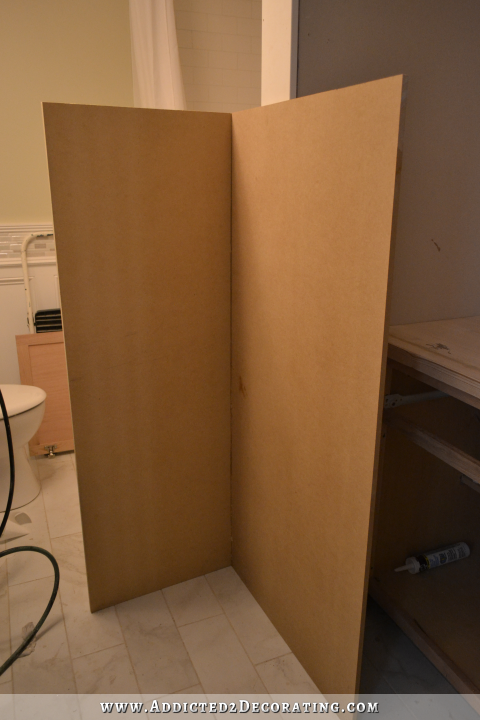
And then it dawned on me that if I pre-assemble this and then try to lift it into place, it probably wouldn’t fit around the door trim.
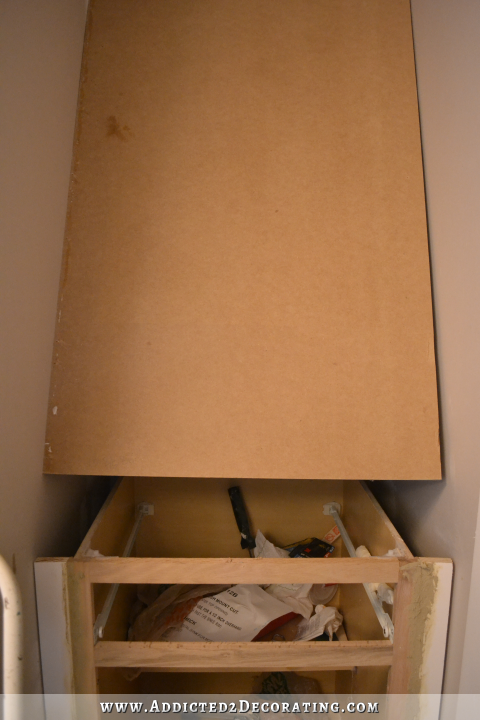
So I decided to just try to lift and place the two pieces I had assembled. Just to put this into perspective, those pieces are 58 inches tall. The side piece is 5/8-inch MDF, and is 19.5 inches deep. The back piece is over 28 inches wide. I’m only 60 inches tall. 😀
Somehow, quite miraculously, I did manage to lift the pieces high enough to get the bottom corner onto the countertop. But I was right. Even with just the two pieces, it was impossible to maneuver them around the door trim. And then I realized that I never even did a dry fit of the back piece before I started assembling it to be sure that I had cut it accurately and that it would even fit the back wall. Ugh!
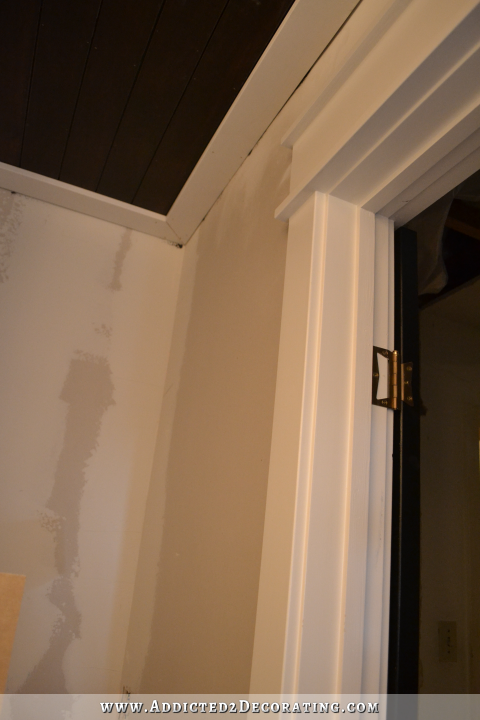
So before the glue dried completely, I disassembled the two pieces, removed the nails, and lifted the back piece into place to be sure it was the right size.
It wasn’t.
But for some reason, that didn’t stop me from pushing with all of my might to get it to go flat against the wall! Why? I have no idea. More stubbornness, I guess. More of my bullheaded thinking that I could get this MDF to comply to my wishes with sheer determination and brute force.
The MDF won, and it was wedged in there so tightly that I couldn’t get it out.
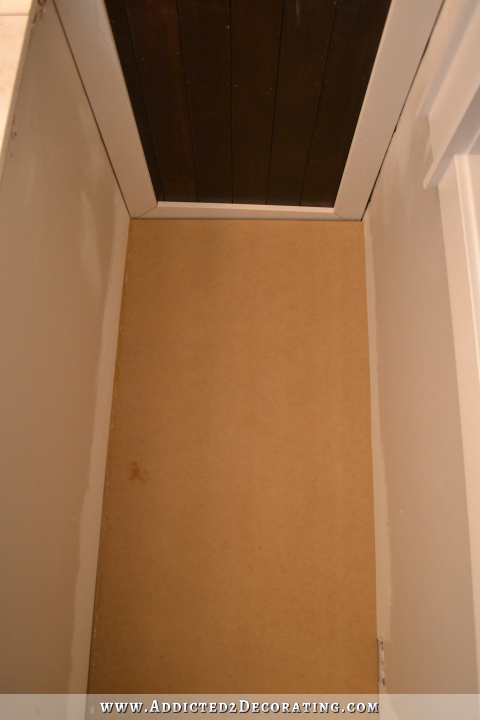
I tried everything I could think of — flat head screwdrivers, pry bars — and nothing would budge that MDF.
I finally decided that if I removed the countertop that would give me something to grab onto. So after much pulling, tugging, hitting with a hammer, etc., I finally got the countertop out. Thankfully the glue and screws held this time, and I didn’t have any more breaks.
That allowed me to grab onto the bottom of the MDF and pull it out from the wall. I pulled and tugged, and even kind of grabbed it and hung onto, trying to pull it down using my body weight. Each time, it would just barely move, but at least it was moving!
So after a few more times of me grabbing on and pulling down with all of my might (and body weight), the piece finally gave way and unwedged itself.
At that point, all I could do was laugh. My whole day had been a joke, and all of it by my own doing, and my own stubbornness. Had any of you been watching, you would have thought I was brand new to this whole DIY thing, and this was my very first project ever.
I decided to stop torturing myself for the day, and call it quits. Something tells me I might need to change my strategy a bit if I hope to actually get this bathroom finished any time in the near future. It might be time to put aside the “sheer determination and brute force” methods I attempted to employ time after time yesterday, and actually rely on some tried and true DIY methods that have proven successful on my past projects. 😀

Addicted 2 Decorating is where I share my DIY and decorating journey as I remodel and decorate the 1948 fixer upper that my husband, Matt, and I bought in 2013. Matt has M.S. and is unable to do physical work, so I do the majority of the work on the house by myself. You can learn more about me here.


oh my, poor you, that sounds dreadful! Hope you are off to a better start today and can remedy what didn’t work yesterday. Let me assure you that things like this happen to all of us and might in the end even make the object they happen with dearer, as we remember our faults (fondly after a while).
In my experience, this is happening to a lot of professionals, too, but while we are trying to remedy the outcome and get it to look like it’s supposed to with a bit or a lot of work, I had to experience several “pros” who tried to convince me that a) there was no other solution to this particular problem or b) “what problem are you talking about? this is looking the way it was planned to look” or c) had gone before I could comment… One of the reasons I try to fix a lot of things by myself these days (and refix it time and again until it works!)
I just have to giggle, because I have had those same kind of days! I can also be so stubborn that I will force it, even when I have to start all over again because it just doesn’t work! Oh the top fits, but the bottom won’t budge, or vise versa. Just do it right I finally say and then it does work. Sometimes you have to do it twice to get through that stubborn you,LOL! My hubby just giggles at me sometimes, especially when he sees that Ah HA moment in my face,lol ! Everything looks great.I can’t wait to see you bathroom finished and where you will go with the dining room 🙂
LOL! sorry, I couldn’t help laughing. reminds me of an episode of “I Love Lucy”. Spunk and determination are good things, but sometimes we can let them take over, huh? But, you’re still the best, even with the flub-ups. I like that you are just real as can be and share all these foibles with us. And I like that you can laugh at yourself, that’s a healthy thing.
Onward and Upward!
I totally agree with Alta! Stubborness is a sign of determination but it can also get in our way. Believe me, I know! Keep plugging away and being your amazing self!
You made my day. I know how you feel. Good luck!!!
Bathroom will be gorgeous!
Sometimes we are our own worst enemy. Smart to finally walk away and come back refreshed and clear thinking. Question. Can tile be installed over MDF?
Yep, as long as it’s primed really well first, same as drywall.
Makes sense. Thanks.
You sound like me! Also 60.75 inches, I lie and say I’m 61 inches usually. I won’t let things become obstacles because I’m stubborn too. Sometimes I don’t have enough arm length to do what I want and it P’s me off. My hand strength seems to be getting worse as I get older too. One thing, out of many, that I admire about you is that you know the names of construction pieces. I would be saying the “top board thingy that attaches to the side pieces thing”. You rock!!
Videos can be helpful to know what NOT to do, also! Sometimes I am like you – I KNOW it will work! Then it doesn’t and it can be so irritating. You could show us that taking it step by step is the way to go.
That is so true! When I’m contemplating a new project I usually look up 3-4 different methods (either blog tutorials or videos) to achieve similar end results that I would be happy with. And then I look up at least as many failed or “this didn’t go as planned” videos to see what are the common pitfalls to the project in mind. I still have plenty of newbie failures, but at least this process gets me thinking! I always appreciate it when talented people show something that didn’t work for them; it’s still instructive!
If you really truly do the videos, PLEASE show us the videos of what NOT to do. Sometimes amateurs need to see that even people who have some experience get things all wonky, and things sometimes don’t work right the first time.
I wanted to do a project, so I read a book about how to do it, and started it. All they showed was the right way to get it done the first time, and not any of the problems that might happen…. and it took me 7 times of trying to get it done.
You could even label the video, “How not to do this.”
This post really made me laugh with you when I got to the part of the mdf being stuck. It reminds me of those days when I trip over everything, knock things over, hit my head on shelves, you name it…..all in the same day. Hang in there. It’s going to look great.
Measure twice and then again a third time! You definitely must have a Blooper section of videos for your YouTube “guidebook”. 🙂
Gosh, Kristi, I can’t stop laughing 🙂 We all have such days. And I admire your sense of humour!
But why do you want to have MDF at the back? Can’t you fix the 2 side panels and tile the back?
I decided to use a back and basically build it like a box so that the open shelving area would be perfectly square and plumb. My walls are definitely not perfectly square and plumb, and I thought if I just relied on the wall as the backing, it might be really noticeable that they’re out of square and not perfectly plumb once I put the glass shelves in.
That was too funny. Thanks for the laughs. Tomorrow is another day 🙂
We’ve all had those days when we say “I will prevail no matter what”. I find that prevailing is the least of my worries and the “no matter what” usually needs to be corrected/fixed.
My question is regarding your countertop. If it’s wedged so tight on top of your counter, do you need to leave room for the wood to swell? My fella is always telling me that this is what what wood does whether it’s in a bathroom or any room.
As far as making a video goes keep in mind that outtakes can make for great fun at the end!
Think of this little episode as your first outtake.
Yes, it actually does need room for expansion. Now that I had to take it out anyway, I’ll be making some adjustments before I put it back in. 🙂
I did get a giggle and a couple of snorts out of your post today! I have experienced the same confidence in my ability to make things work so I can sure relate. Your comment about doing the videos with your mistakes included: I say go for it! Guaranteed one of us watching will figure a way to go down the mistake path. By watching your experiences, we are more likely to follow the path of patience, that of being a learner.
As always, love your blog. Warmest regards
We ALL have those days now and again, don’t we? Yay of keeping your sense of humor through the majority of it. Now, moving on to a new day 🙂
I needed a good laugh! Sorry it was at your expense, but thanks for sharing the laughable moments as well as the laudable. Here’s to better luck today.
Glad you finally realized your day was cursed and quit! Sometimes that’s how it rolls! I’ll bet things will go much better after your break from it!
If you make videos, it would be awesome to see these” problems” so we know how to deal with/fix them! Projects never go perfectly 100% of the time
You have definitely plastered a smile on my face. Just look back and laugh, and the positive energy will return. Thank you so much for making us laugh. Love you.
A little humility, perhaps? It can have a bitter taste. But keep on keeping on, Gal. We’re right there with ya!
Yikes! Very frustrating day for you. I did not realize that you were building a top cabinet. I just thought you were going to have the base and then use floating shelves above it. Lots of work in that bathroom…..I don’t think I could tackle a project like that. I want to swap out my shower doors and go to frameless, I think I can manage that and maybe changing the lights and faucets, can’t imagine that will be too difficult. If it is I can always call a plumber! Keep up the good work, you are almost done. Blessings
LOL @ the 58″ being moved by 60″. You think heels might help? 😉
This is the reason why all of us love you so much. You are not afraid to show us that you are human and make mistakes too! That makes you so believable, sure you can edit all of your mistakes from your posts and just show the good. It gives us that much more encouragement to tackle projects because if Kristi can have a problem and come threw it so can I.
Don’t be so hard on yourself!
I can see it now, the A2D “Let’s Get Real” blooper video special. Turn those moments into video gems, as only you can, Kristi.
lol, you made me laugh, thanks. I have days like this, but I usually attribute it to laziness. “I don’t want to measure that thing twice, I want to just throw it there and have it fit. Oh it doesn’t fit. Well I’m not taking it out, I’m gonna push it with all my strength and then it will fit. Oh, it broke.” And then end up with something that looks a mess (and then dare wonder why something else I made two years ago looked great and this doesn’t 😛 ). Quitting for the day and starting again when you are actually more patient than stubborn seems to be the right strategy, at least for me.
As for the videos, have you ever seen craftsy.com? Might give you ideas – or maybe they are worth hosting you even!
Wow! I have never seen that website. I’m bookmarking it so I can look at it in more depth tonight. Thanks, Phoebe!
Hi Kristi, I hope you see this remark as I am a little late coming to the party 😉 I’m one of the people on facebook the other day, that thought you should do a Vimeo or YouTube video rather than a book.
After reading today’s post and seeing your remark about “I’m glad I’m not filming now!” An idea popped in my brain…I think I have a better (?) idea for a video to share. See if you like the idea.
You are a perfectionist and your work is simply beautiful, admit it. You do better work than 95% of the people out there could. BUT, you always seem to run into ‘bumps’…like the time your kitchen wood got rained on. I wonder if there would be a way for you to make a video that showcased your ‘bumps’ and how you work around them; like what goes wrong and what YOU do to fix it.
There are many do-it-yourself videos out there but as you know, things rarely go as planned (BTDT). I’m thinking if the video started out by show casing your project when done (in this case the linen closet) pointing out all your things that are done just to perfection but then sharing a “what could go wrong” video? or “what went wrong and how to fix it”? Beginners and pros alike…always have the goofy, unplanned for things go wrong when they are renovating that make them want to pull their hair out.
What if YOUR vids…showed the project in its glory first….finished, what you did to make it look perfect (like filling in wood, etc) BUT then, what went wrong and how you got out of the predicament! You have 100s of photos so at first your videos could be a voice over narrating what we see. People would enjoy your honesty and they would also enjoy knowing “what if?”! I know I would!
This way too, it could be a project that starts when you started on your home or condo and up through today. You may find you like the photos narrated as it would give you time to nicely show people what you do in each predicament. The viewers would respect your advice since they would see the finished photo first.
Gee I hope this makes sense and I hope you see it. It’s so easy in words but hard for me to type. Lori
I love that idea, Lori!
Thank you for reading it Kristi. Oh, and there could even be a video or photos with voice over about what reno does to your clean home, lol…going through that now 🙂
This is exactly why we like to follow your adventures Kristi! Your blog posts are real, encountering the same kind of things we will. Can’t wait to get your email each day and see what you have been up to. Your videos will be the same, messy, determined, but full of creativity and amazement at the final result. You’re doing a great job!
LOL! Thanks, I needed a good laugh today! Sounds like some of my projects!
Oh Kristi,
I’m so sorry. Hopefully everything is going better today.
I was just reminded when I re-looked at how you attached the vanity cabinets together, that I was wondering how you made the drawers fit after you cut the depth from 24″ to 18.5″. I’m guessing that you just cut the sides and bottom of the drawers (similar to how you did the sides and back of the cabinets) and then just reattached the back? But I’m also wondering about the “guides” (whatever the thingies that the drawers roll on is called) did you have to buy those new? And from the pictures it looks like you had removed them before you started removing the depth.
Yep, that’s exactly what I did. I was dreading the process of cutting the drawers down, but once I got started, I realized it was really pretty straightforward. I think I cut about two inches off of the sides and bottom panel, and then just put it all back together with wood glue and 1″ finishing nails. I did have to buy new drawer guides. The original ones went the full depth of the 24-inch cabinets, so I purchased new 18 inch guides for the new shallower drawers.
Kristi, you are definitely not a fool! But that was a funny comment. It sounds like you had a frustrating day yesterday. I’m glad you got your wood counter-top out, because didn’t you put about 10 coats of stain on the other counter-top? You’re going to have to do a lot of staining to get this one to match and if its stuck in there, wont you get stain all over the MDF? What a mess that would be.
Well Kirsti this sounded like Comendy of errors! But logic prevailed and your stubbornness spoked. You have certainly bought some laughter into my day, so thanks. Hope your day is going in your favour. Keep up the good work! nearly completed!
I’ve been trying to make a diamond tufted headboard for a king size bed for a few weeks now. During the process I have hit many roadblocks. So much so that I said to my boys, I needed to make a YouTube video on “how not to do it”. I do admire your tenacity and think your house will be stunning when you are finished.