Master Bathroom Trim Progress
Every time I reach the trim installation and finishing part of a room remodel, I always think it’s going to go faster than it actually does. I always forget just how slowly the trim finishing process really goes, and a lot of that is just due to my own personal process that I use. A lot of people fill nail holes with caulk — dab on some caulk, swipe it with a wet cloth, and you’re done. But I personally use wood filler, which then requires a lot of sanding. And that process takes a lot of time.
All of that to say that I am making progress, slowly but surely. But one thing that was driving me crazy was the trim around the exterior door. I trimmed it out a while back, and ever since then, it has bothered me. I tried to put it out of my mind and just move on to other projects, like installing the crown molding, but then that made the problems with the door trim even more visible to me.
I tried to find a picture that showed the problem, but I couldn’t find a good one. That fact of the matter is that I’ve been avoiding taking pictures of the door straight on because I couldn’t stand looking at the door trim. I thought that if I just stuck to taking pictures at angles, then the problem with the trim would just be hidden in the angles and perspective of the photo. But that didn’t help me when I had to actually look at it in person.
The problem is that the door isn’t level or plumb, and it’s very visible to the eye. There’s no need to get a level out and check, because you can see just by looking that it’s not level.
So I dreaded the day that I actually had to trim out that door, and when I finally did, I had to make a decision. Do I trim the door so that the casings are even with the door jambs all the way around? Do I install the casings so that they’re level and plumb, even though they’ll obviously be “off” with the door jambs and the actual door?
I decided to kind of split the difference on the side casing pieces, and then get the header casing as close to level as possible. I thought if I split the difference, that would make the problem disappear.
It didn’t. Because as I learned later, the ceiling in that room isn’t level. (Old houses can be such a pain!!) And that unlevel door and the door casings became even more of a frustration after I installed the crown molding. When installing the crown molding on the unlevel ceiling, I did try to level it out some (whish is why you see that gap at the ceiling in some places), but I couldn’t get it 100% level because that would have left a gap that was way too big, and would have been very noticeable. So I had to split the difference with the crown, and then that left the level header casing on the door looking very unlevel.
I think you can probably see the problem in this picture, although I have to admit that it doesn’t look too bad in this picture. If it looked like this in person, it may not have bothered me.
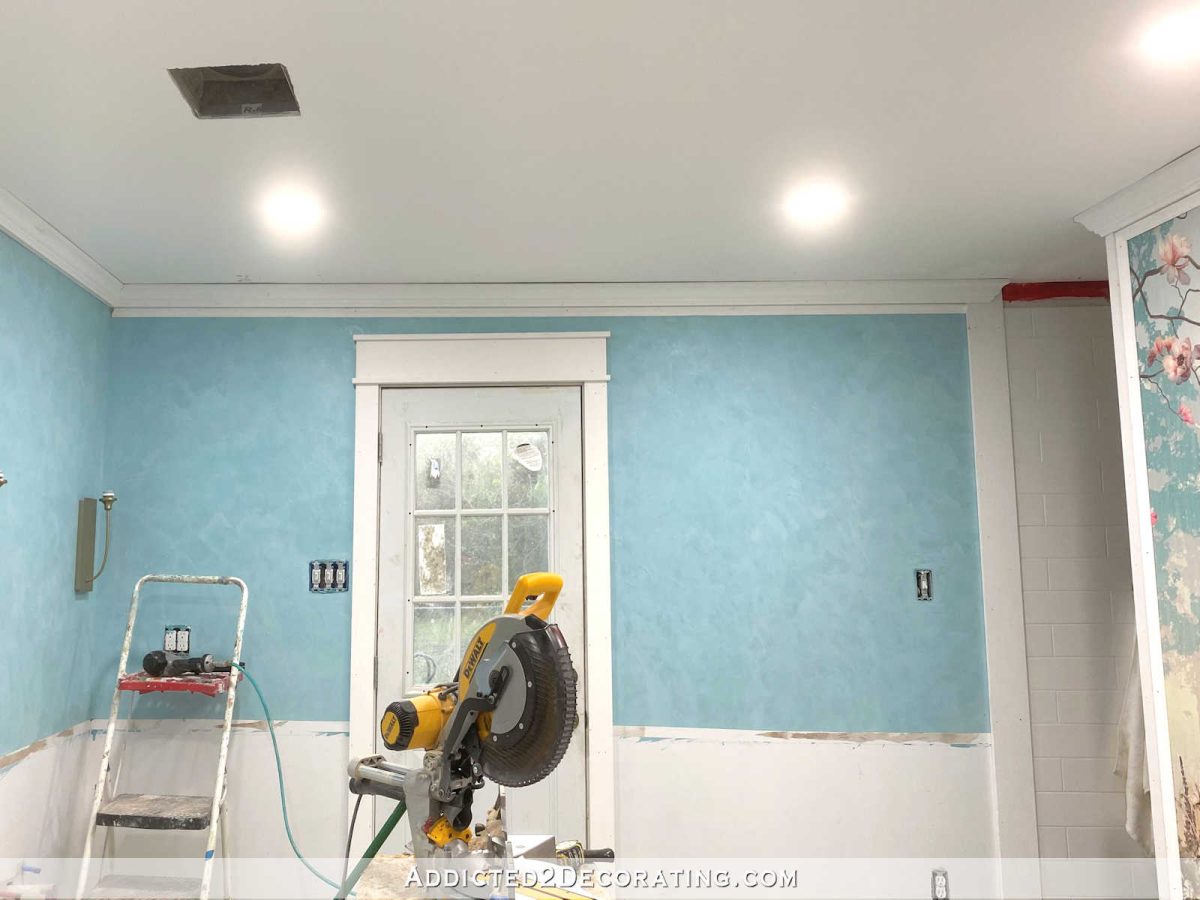
But somehow that picture hides just how “off” that top header piece was. And it wasn’t just the top piece. The side casing pieces were obviously not plumb, and it was very noticeable being that close to the vertical transition piece at the entrance to the shower. It might be more visible in this picture…
I think you can see that the header casing on the door is closer to the ceiling trim on the right, and then drops down considerably on the left. Every time I walked into the room, that was the first thing I noticed, and it drove me crazy.
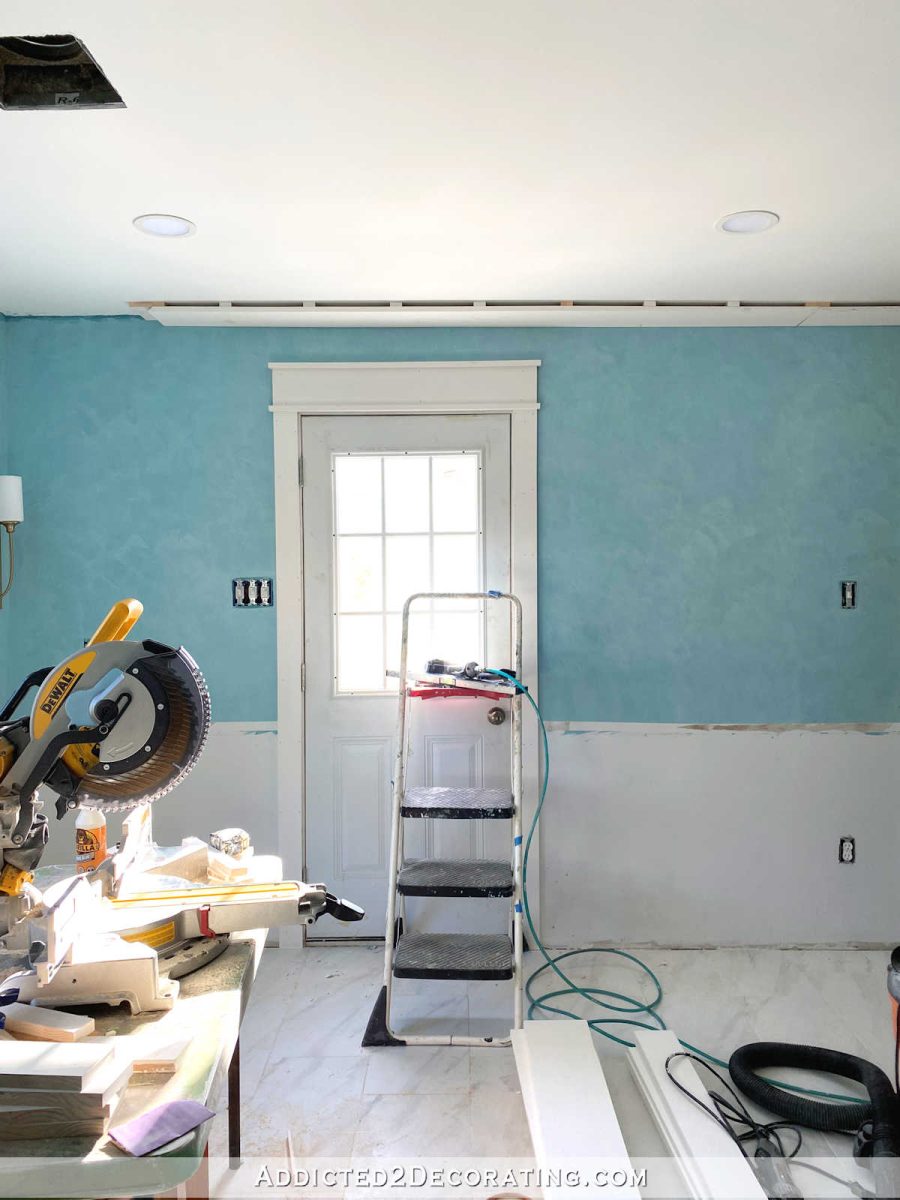
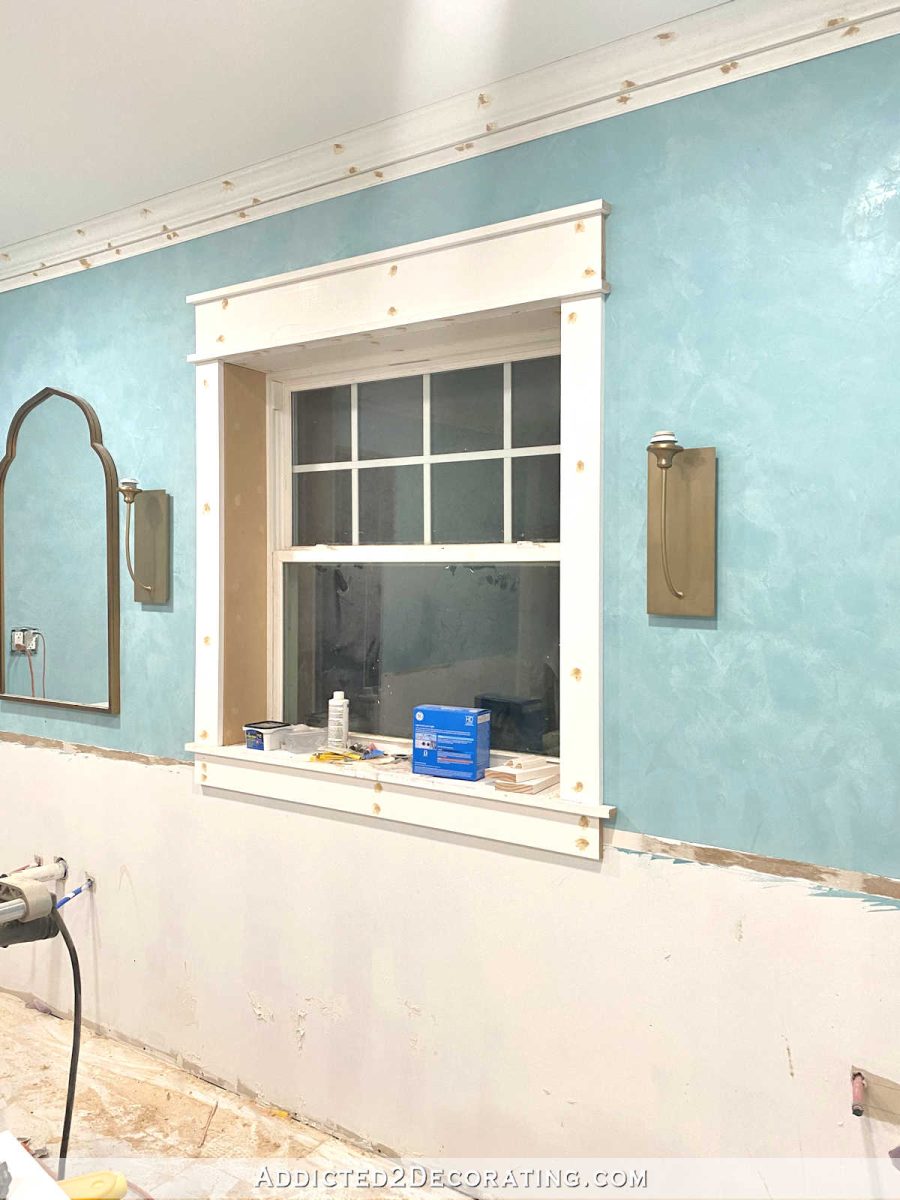
The header casing on the window also has the same issue. That casing piece is level, but the crown molding isn’t. But because there’s a much wider space with more wall showing between the two, and because when I enter the room, I’m always looking at it from an angle (meaning that the discrepancy is hidden by the angle and the perspective), it doesn’t bother me as much. I don’t notice it when I enter from the home gym door…

And I don’t notice it when I enter from the exterior door (which will eventually be our master bedroom door)…
But having to see that door trim straight on every single time I walked through the home gym door just got to me.
All of that to say that (1) trimming out rooms in old homes can be such an immense frustration, and the solutions aren’t always straightforward. Sometimes you really have to work with things, and redo things, to see what will work, and what solutions will trick the eye into not focusing on unlevel ceilings, or non-plumb corners, or unlevel floors, etc. And (2) I reframed the door, and I’m quite pleased with how it turned out.
Is it perfect? Absolutely not. And if I stare at it, I can still see that it’s not quite right. And I can still see that the door isn’t level, but I’m going to live with it.

And I’m probably going to keep the doors in this room white so that attention won’t be drawn to this crooked door. Once we do our addition, and I can have a door installed there that isn’t obviously crooked, then I can reassess the door color.
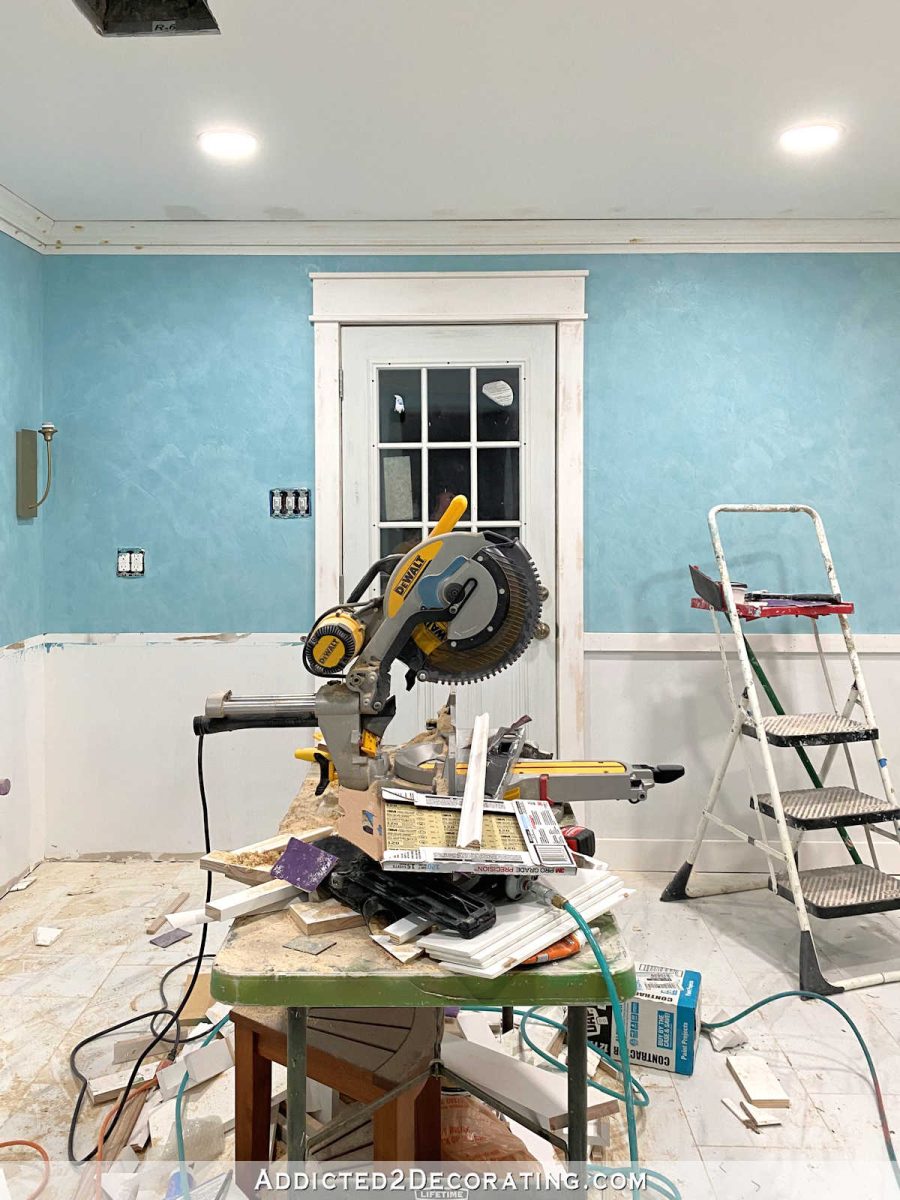
But I ended up reinstalling the side casings so that they are perfectly plumb. That made them very “off” with the door jambs, but as long as I keep everything white, I think it won’t be quite so noticeable. And then I ended up making the top header casing as close to even with the unlevel crown molding as possible without it looking completely crooked in relation to the door. So I kind of split the difference, and I think it works. Again, it’s not perfect, but at least now it’s not so obvious that my eye is drawn to it as soon as I enter the room every single time. I think now the difference in the space between the casing and the crown on the left and the right is something like 3/16-inch. Before, it was around 3/4-inch in that small span of space.
Anyway, those are things that almost everyone remodeling an old home has to deal with , and it’s a complete pain. But it’s possible to find workarounds. They won’t be perfect, but they’ll work.
So moving on…
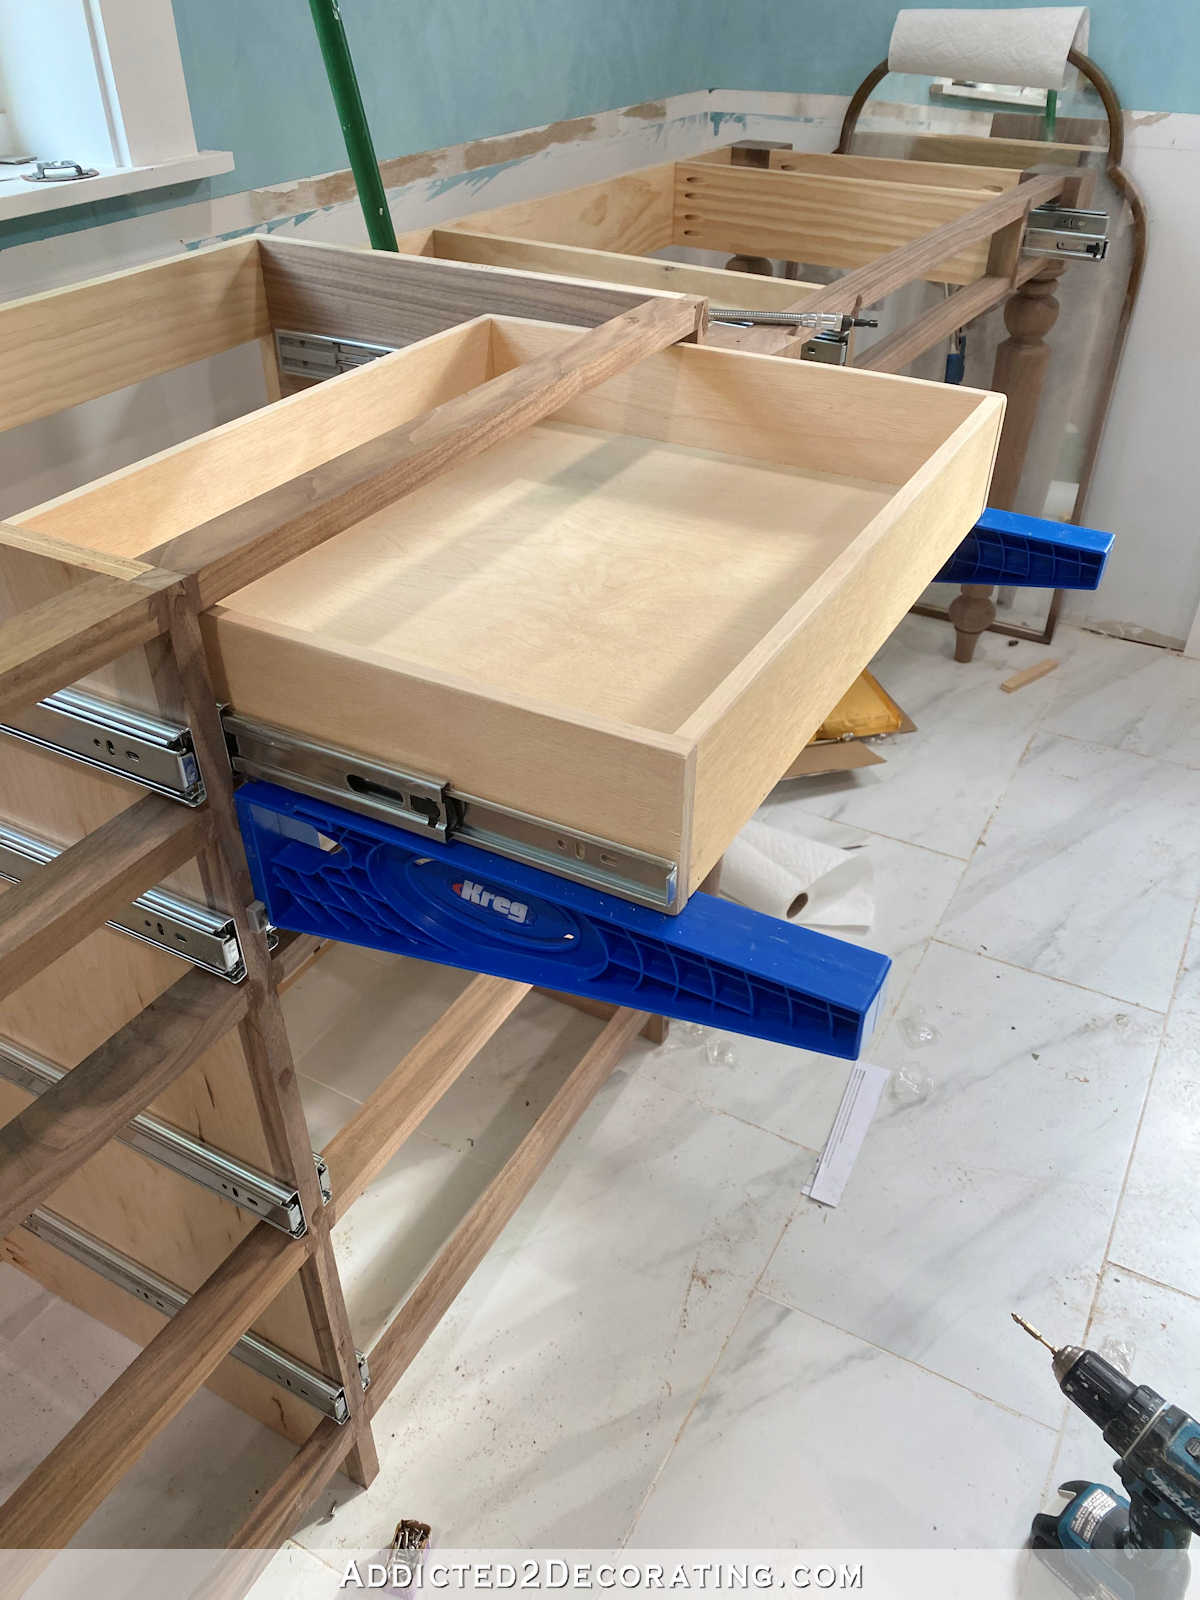
I got quite a bit of sanding done, and then wanted to at least get one stretch of crown caulked. If you’ll remember, I installed crown molding on top of a 1″ x 2″, and then had to fill underneath with base cap molding. That left a very deep space between the two moldings that I needed to fill with caulk. Here you can see the difference that the caulk makes. It makes the two pieces look like one piece.
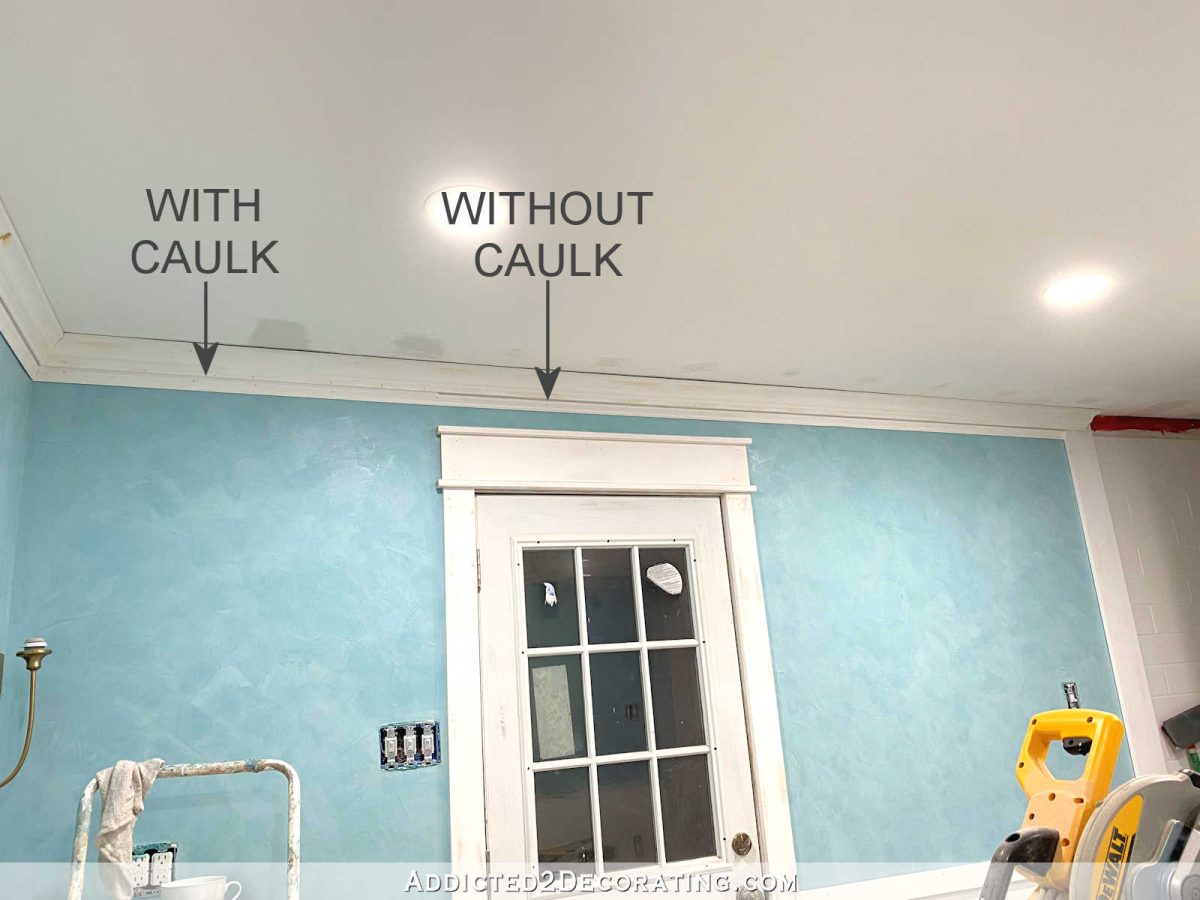
Here’s the difference with about half of that wall caulked…

And here’s that strip of crown/base cap on the left wall completely caulked compared to the mural wall, which hasn’t been caulked yet…
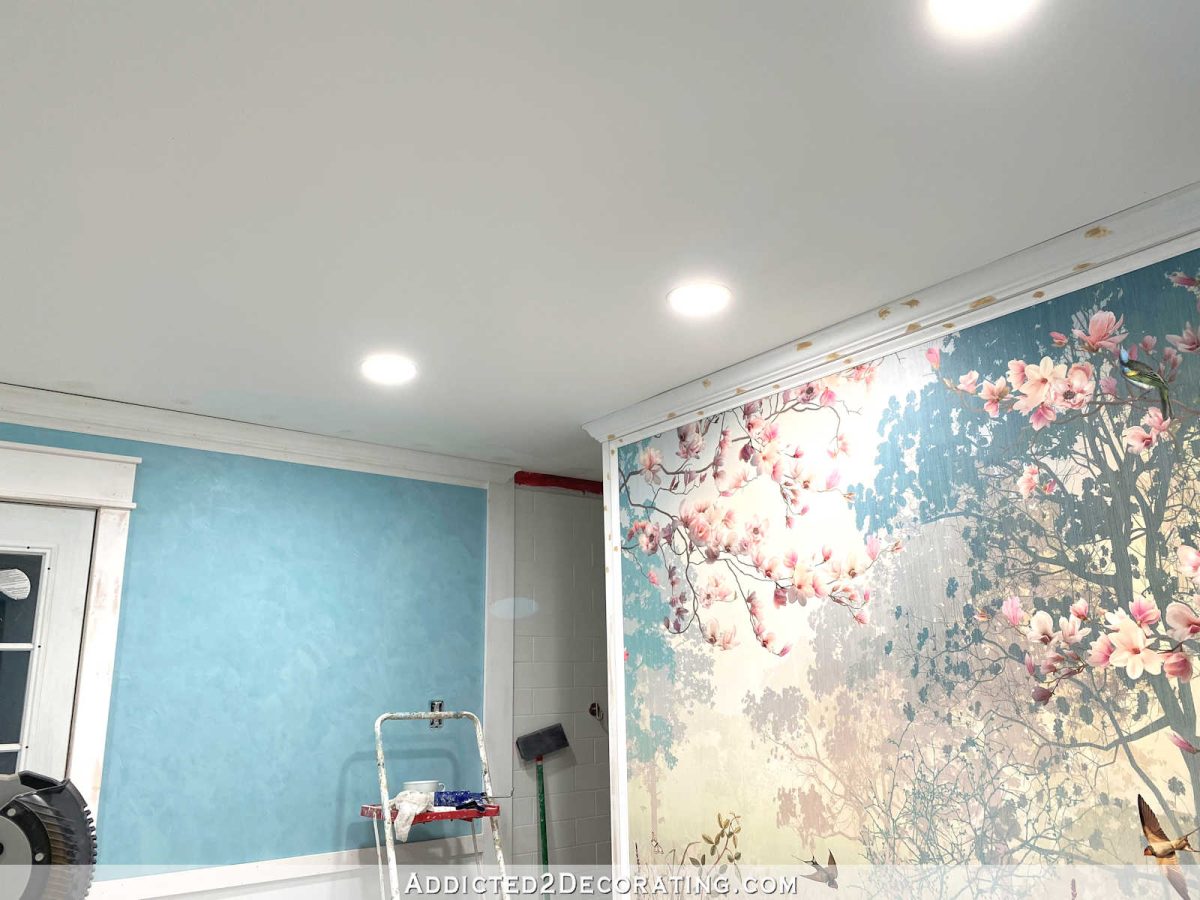
And here it is compared to the window/vanity wall, which hasn’t been sanded or caulked yet.

So that’s the progress so far! I’m actually excited to finish the trim now that I’ve taken care of that door issue. I’m such a perfectionist, which I’ve had to relax about quite a bit since we bought this house, but when things are obviously off and I don’t know how to fix them, it really weighs on me, and it makes me completely lose excitement about my project. But now that the door is fixed in a way that I can live with, I’m very excited about finishing up the trim in this room. I think it’ll look great when it’s done!

Addicted 2 Decorating is where I share my DIY and decorating journey as I remodel and decorate the 1948 fixer upper that my husband, Matt, and I bought in 2013. Matt has M.S. and is unable to do physical work, so I do the majority of the work on the house by myself. You can learn more about me here.


I wonder if you tapered the second piece (the wide board) from the top to be parallel to the crown if that would work to hide the discrepancy.
Good progress. What is the wall treatment in the bathroom. What colors did you blend?
The wall treatment is Modern Masters Venetian Plaster. I had it custom mixed in a color to coordinate with the wallpaper mural in the room.
Caulk is my friend. And “split the diff” is my mantra. You aren’t the only one.
Our house is 115 years old. My new mantra is ‘life is full of little disappointments’. It’s working for me.
Great solution for your door dilemma! For your trim caulking, have you ever tried Painter’s Putty instead? I used to use wood filler and sand my nail holes when installing new trim until I heard about the Painter’s Putty. It goes in easy, doesn’t need to be sanded and can be painted over right away. I still use caulk for the edges but this has saved me quite a bit of time and has quality results.
I know you said you can cope with the window because of the angles, but will it bother you whilst you’re in the bath? I know it might be more work to split the difference and fix that now too, but I’d hate for you to finish that incredible bathroom and then not be able to relax in the bath because all you can see is the window!
Brilliant job with the door though. Old houses definitely make these things more interesting, but I’d still go for that than a new build any day.
I think you did a fabulous job, Kristi! I, too, am a perfectionist and it’s the little things that can really drive me crazy. The difference in us though is that you have the talent and ability to correct pretty much any poblem. Sadly, I do not! 🙂 But it pays to be persistent! Good job! xo
Bravo for you for ‘living with the door’ as is. In all honesty, I’m pretty particular (anal?) :). But I’m sure I never would have noticed it if I ever got the opportunity to see it ‘in person’. Can’t wait to see the finished bathroom. 🙂
This is a work of art!
I think once the door is painted to match, the vanities are in and your accessories are around the room you will have many more beautiful thing to draw your attention and not the molding. Relax!! It will be a stunning room when done.