Large DIY Craft Room Cutting Table — Part 1
After stressing for months over the design of my big workroom table for my studio (which will be used as a cutting table, sewing table, art table, craft table, etc.), I finally decided on a design and got busy building the first table yesterday. After looking at designs that included drawers, cubbies, shelves, and all kinds of fancy storage and organization, I noticed that I kept being drawn to the very simple workroom tables that had a large top with one big, open shelf underneath. So that’s what I decided to go with.
But just about every single craft table/workroom table that I found with that design was built out of very rough lumber, like rough 4 x 4’s for the legs and 2 x 4 studs for the frame, and I didn’t want a rough, strictly utilitarian-looking table in my studio. So I came up with a design that used nicer lumber and will have a more polished look when it’s finished.
I also decided to take the advice that many of you gave me and build two tables that can be hooked together when I need one long table (when I’m sewing draperies, for example), but can be used and moved separately at other times. Each table will be approximately 59″ square when finished, so when they’re hooked together to form one long table, it’ll be 59″ x 118″. I might actually get excited about making draperies with a table like that! 😀
So far, I got the base built for the first table. One down, one to go. And I have ordered a large piece (5′ x 12′) of Wilsonart sheet laminate to make the tops, so I can’t finish the tables until that comes in. But so far, here’s what the very simple base looks like…

I think I’m still going to add some trim along the bottom edge to pretty it up a bit, and I still need to prime and paint it. I have no idea what color to use, though! The top will be white laminate. I could paint the bases green to match the back entry, or black to match the other black accents in the room. Or I could choose another color from the wallpaper except for coral, since that’s the color I plan to paint the cabinets when I get them built.
Anyway, I still have another table base to build before I need to have a color picked out, so I have a bit of time. But for now, let me show you how I built my big craft table.
How to build a large craft room table
Step 1 – Build the legs
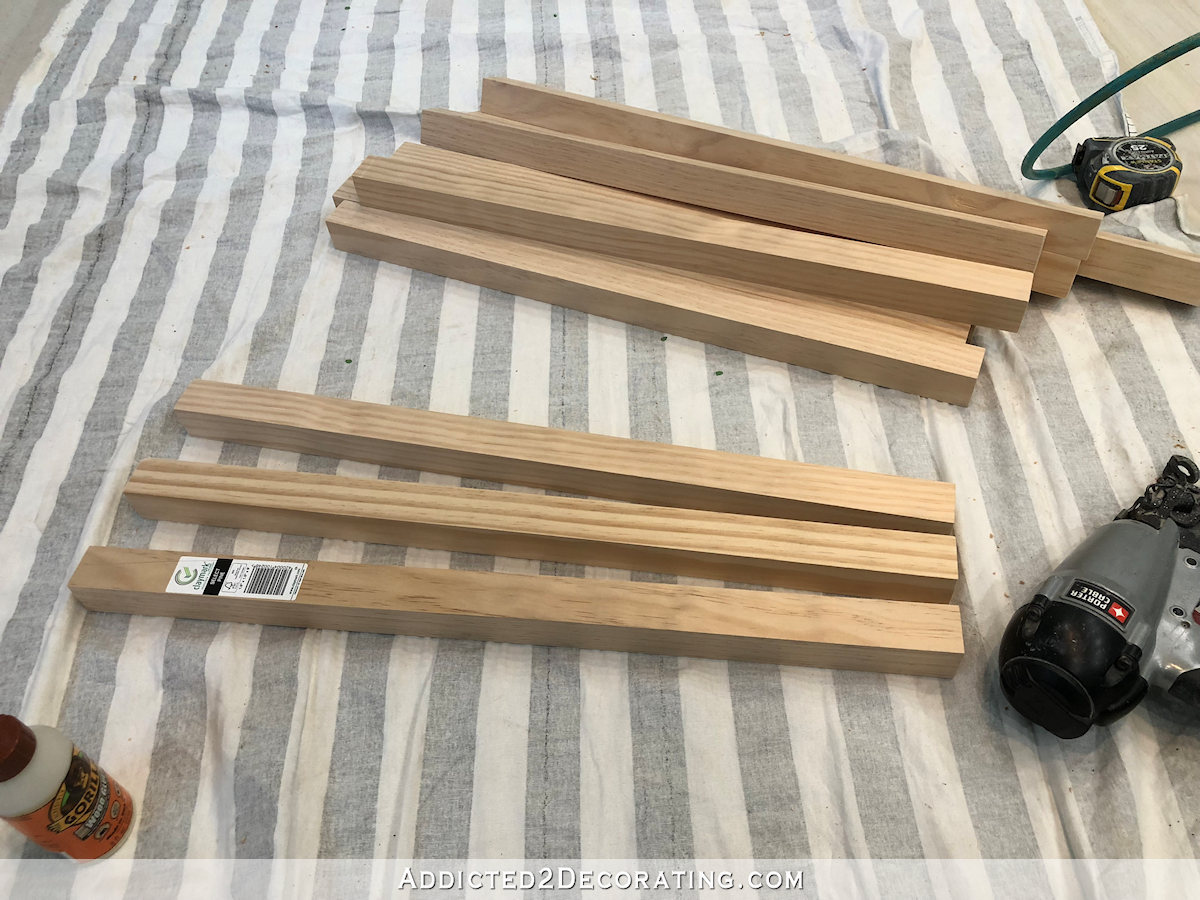
This is where most people use 4 x 4 lumber, but since I didn’t want my table to have a rough look to it, I decided to build my own thick legs using 1.5″ x 1.5″ pine. I get these at Home Depot, and they come in 6′ and 8′ lengths, and they’re cut perfectly square and sanded smooth.
I cut 12 pieces to 26.5 inches, but you’ll have to determine the height you need. I arrived at this length for my legs because I want my tables to be 34 inches high (I’m only 5′ tall, so 36 inches is a bit high for me). So I subtracted the thickness of the table top (1.5 inches) and the height of the casters (6 inches) to arrive at the 26.5-inch length for the legs.
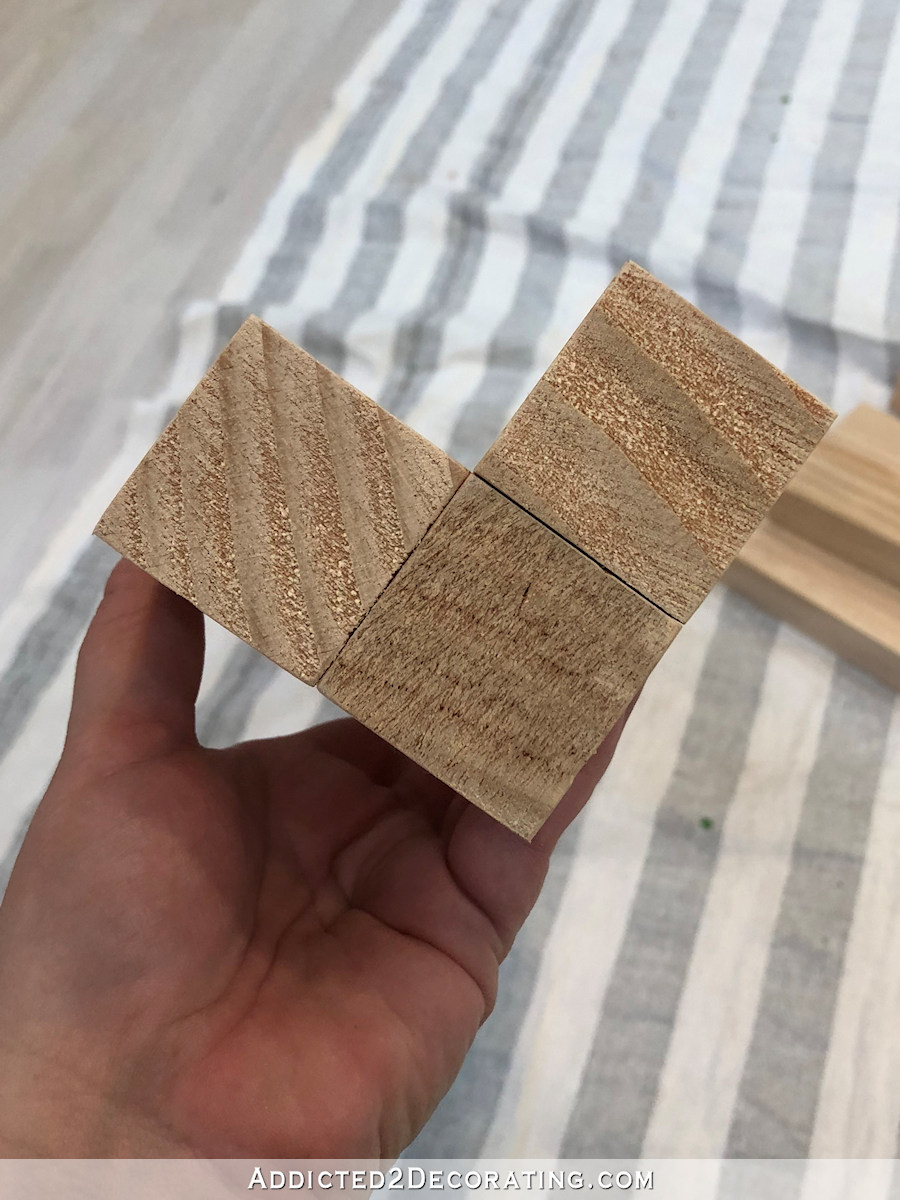
I used three pieces per leg, and put them together using wood glue and 2.5-inch 16-gauge nails.
I attached them in this configuration…
So here are all four legs after assembly…

I set those aside to let the glue dry for a bit while I worked on the bottom shelf.
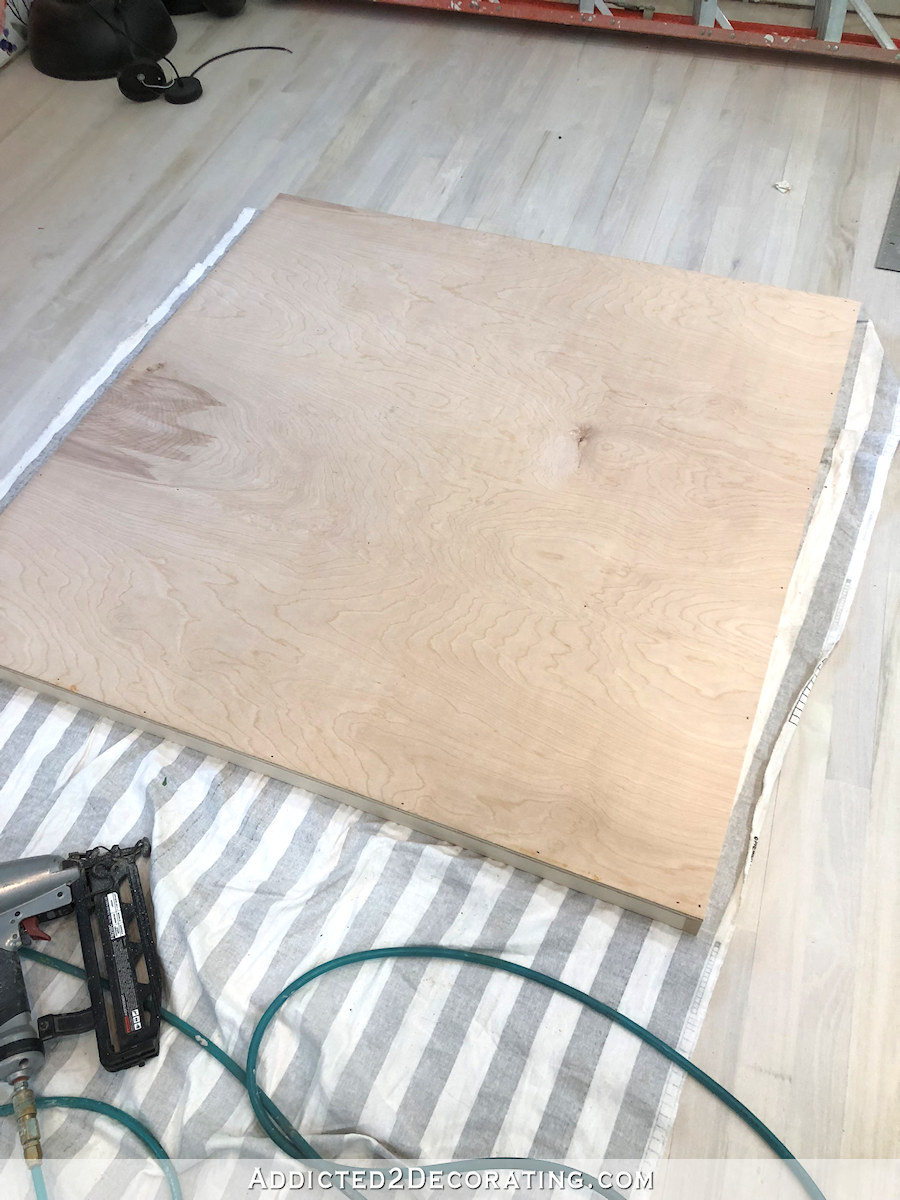
Step 2 – Build the bottom shelf
I started with a piece of 1/2-inch plywood cut to 48″ x 48″. I just had Home Depot cut a piece of plywood in half for me. Then I placed it face down on my work surface.

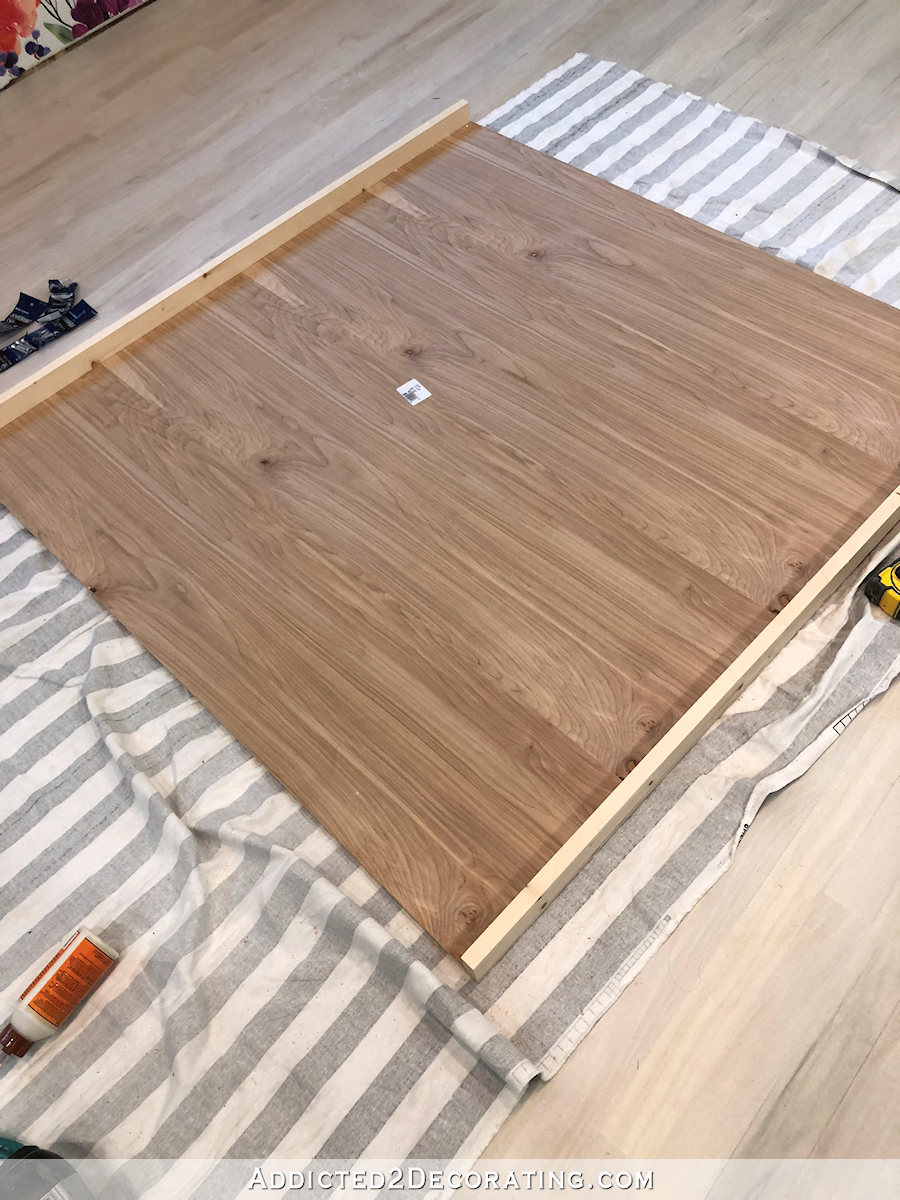
Then I used pieces of some 1″ x 4″ lumber that I had ripped in half on my table saw, so they were just under 1.75″ wide. And I cut two two opposing side pieces, and then glued and nailed them into place using 1.5-inch 16-gauge nails. I had to stand the plywood up on edge to nail the pieces on from the top side of the plywood.
I didn’t get an action shot, and this definitely would have been easier with either two people, or by working with the plywood on top of sawhorses, but I managed. Here’s how it looked once the two pieces were glued and nailed on…
Then I cut and attached the other two sides, and glued and nailed them into place the same way — standing the plywood piece on edge so that I could nail from top side of the plywood. You’ll notice that I didn’t bother with mitered corners, but I did make sure to nail these support pieces together on the corners.
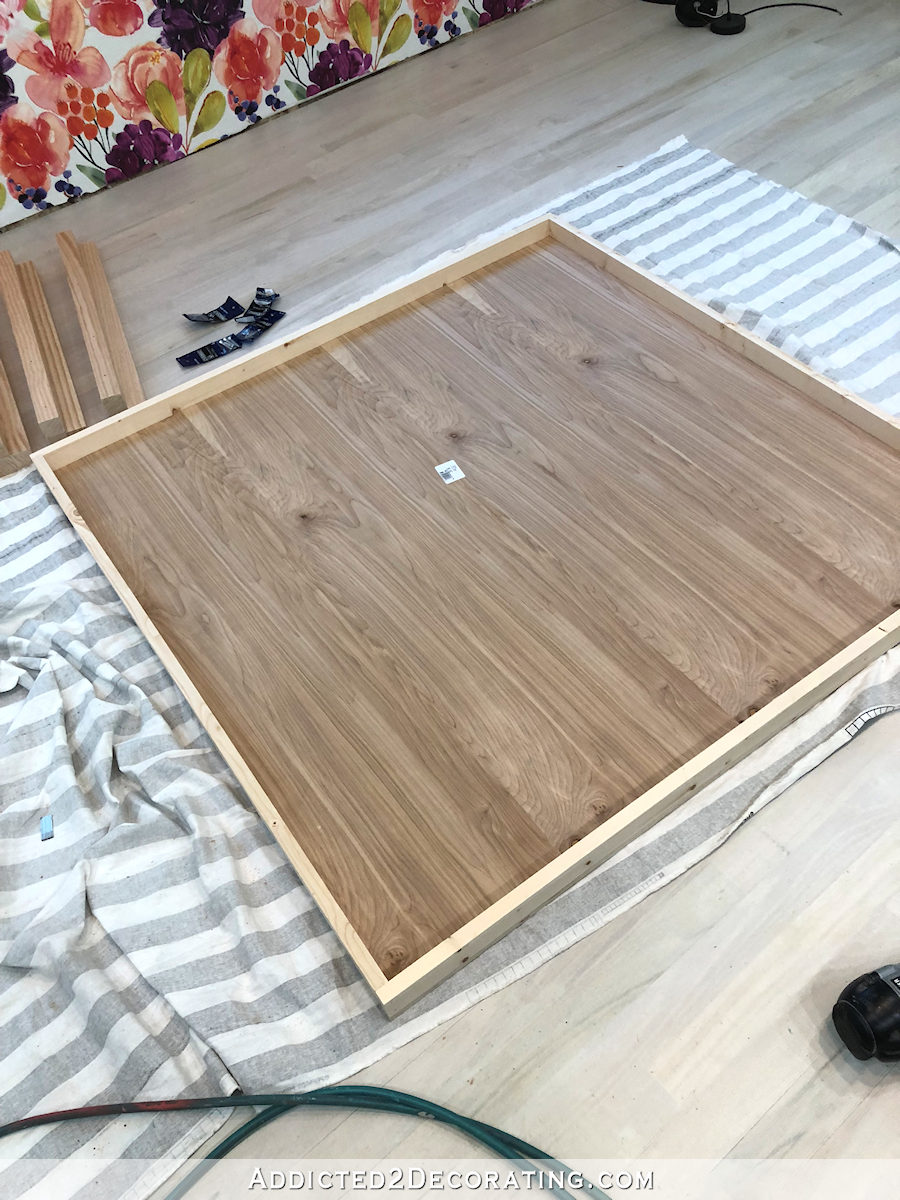
And to finish up this support frame, I cut two more pieces to place 15 inches from each side, and I glued and nailed those into place. First, I nailed through the outside of the outer frame and into the ends of these pieces…
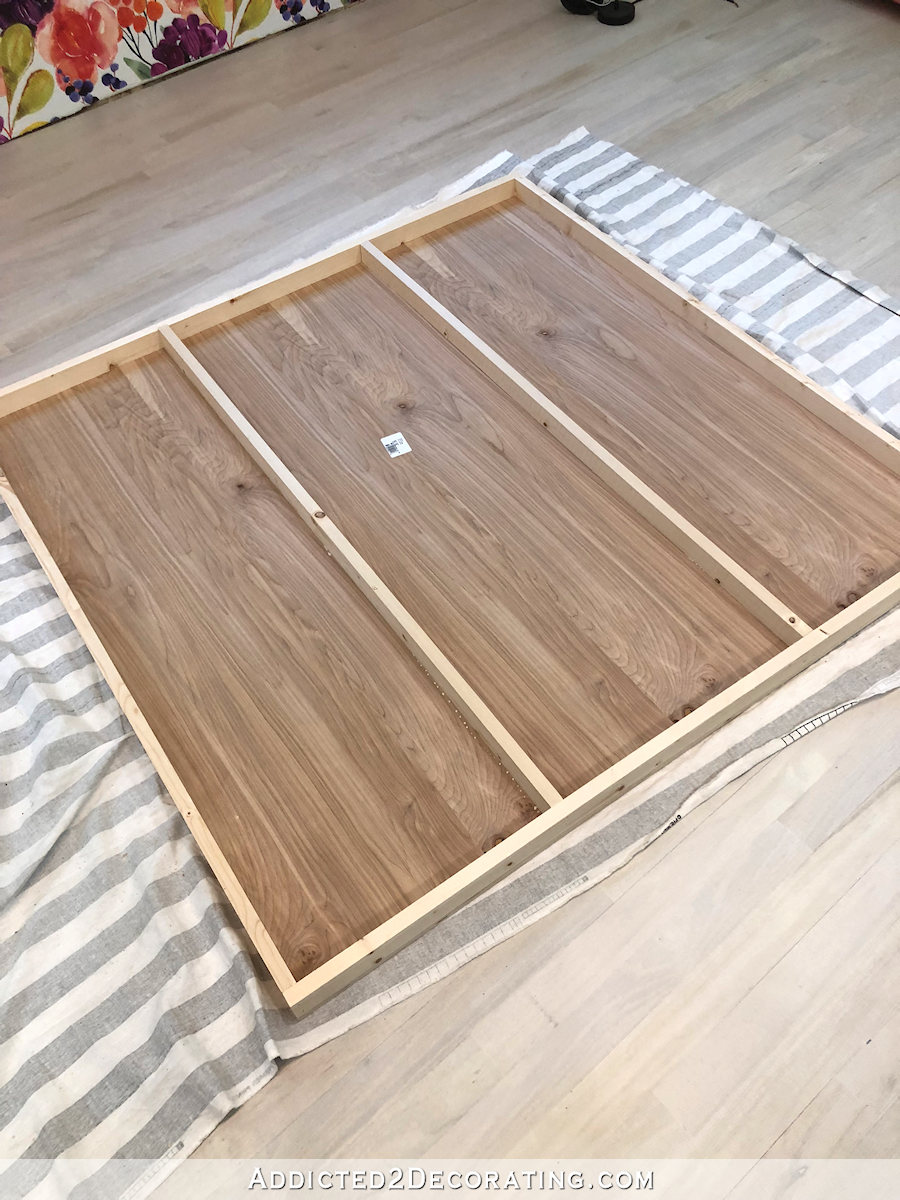
And then I turned the shelf over, and placed a few nails going through the top of the plywood and into the edges of those pieces. Since I had placed them 15 inches from each edge, I knew exactly where to place the nails.
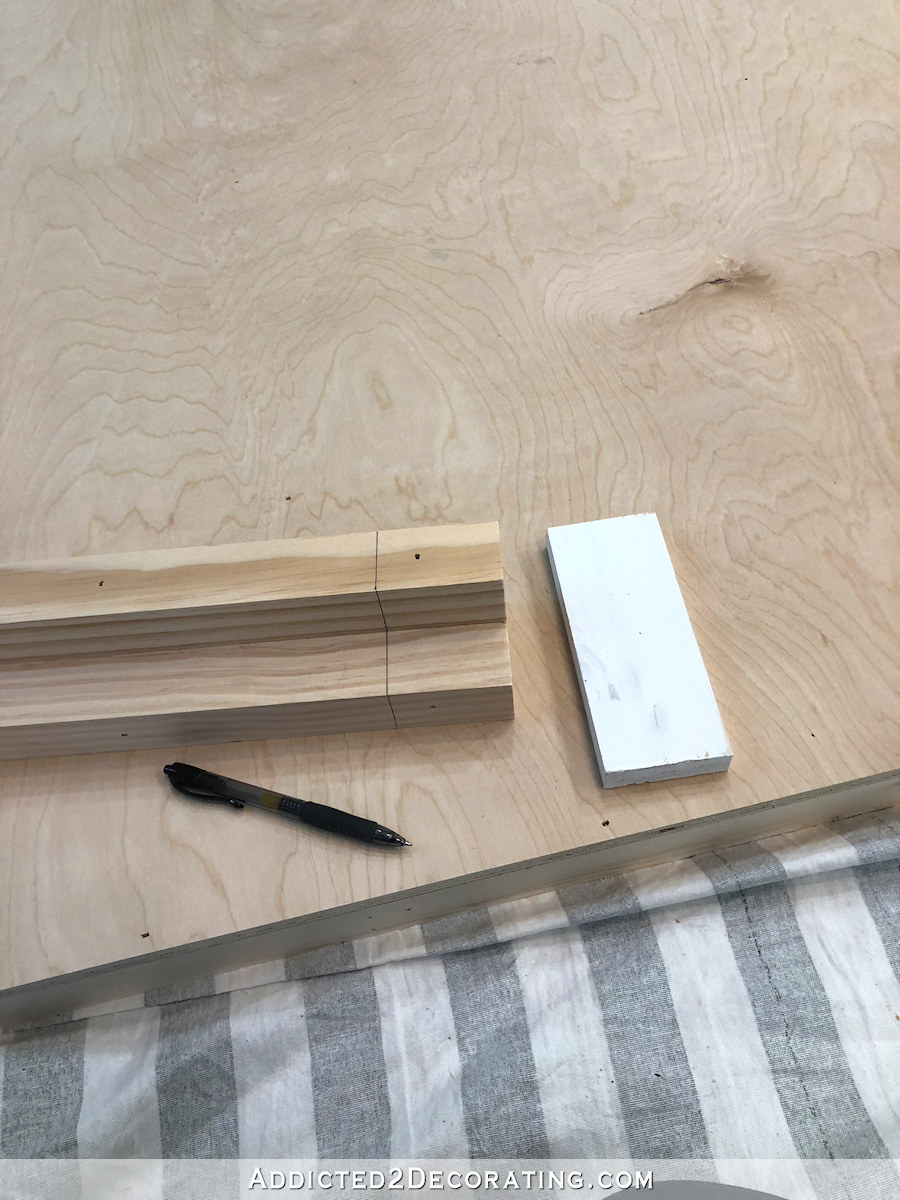
Step 3 – Attach the shelf to the legs
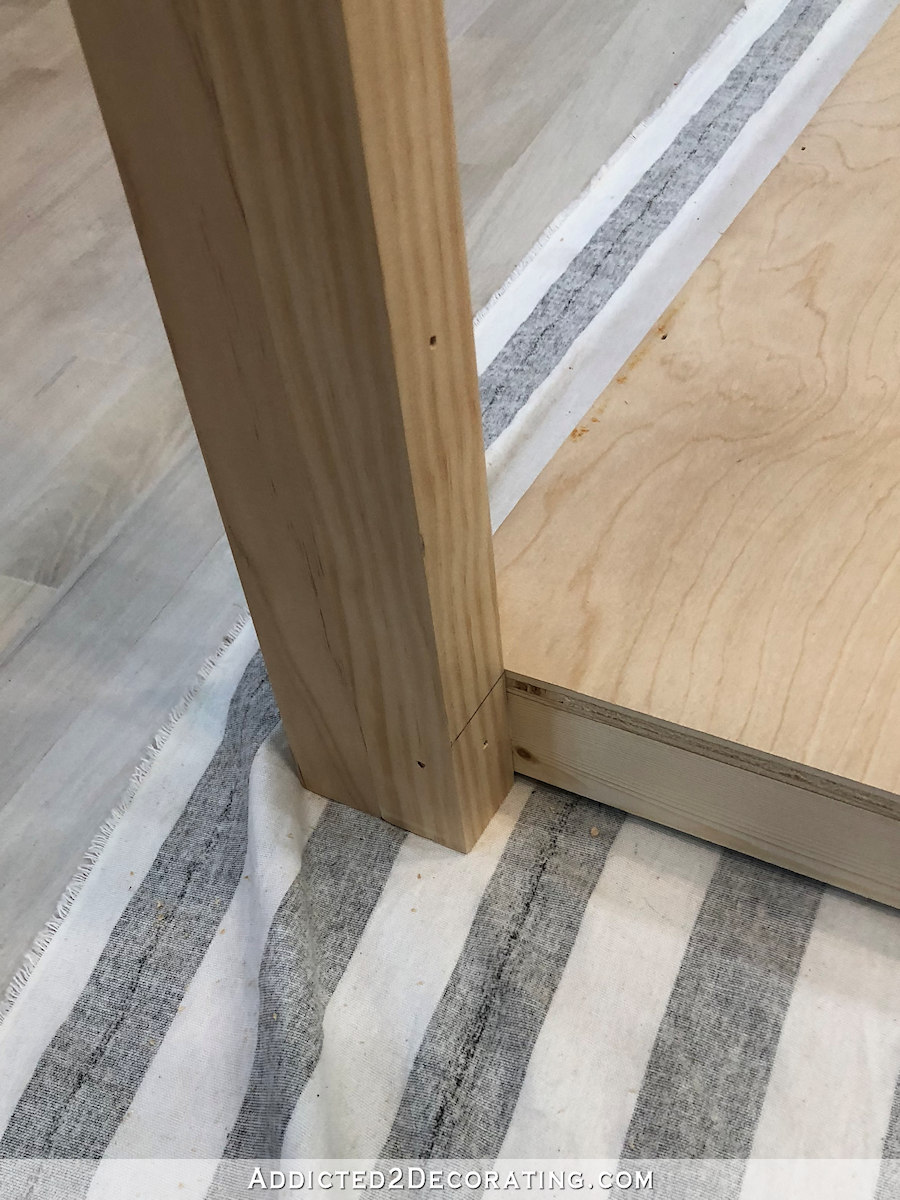
Using a scrap piece of 1″ x 3″ lumber and a pen, I marked the shelf placement along the bottom edge of each leg…
And then using that mark as a guide, I used wood glue and 2″ 16-gauge nails to nail the legs to the shelf.
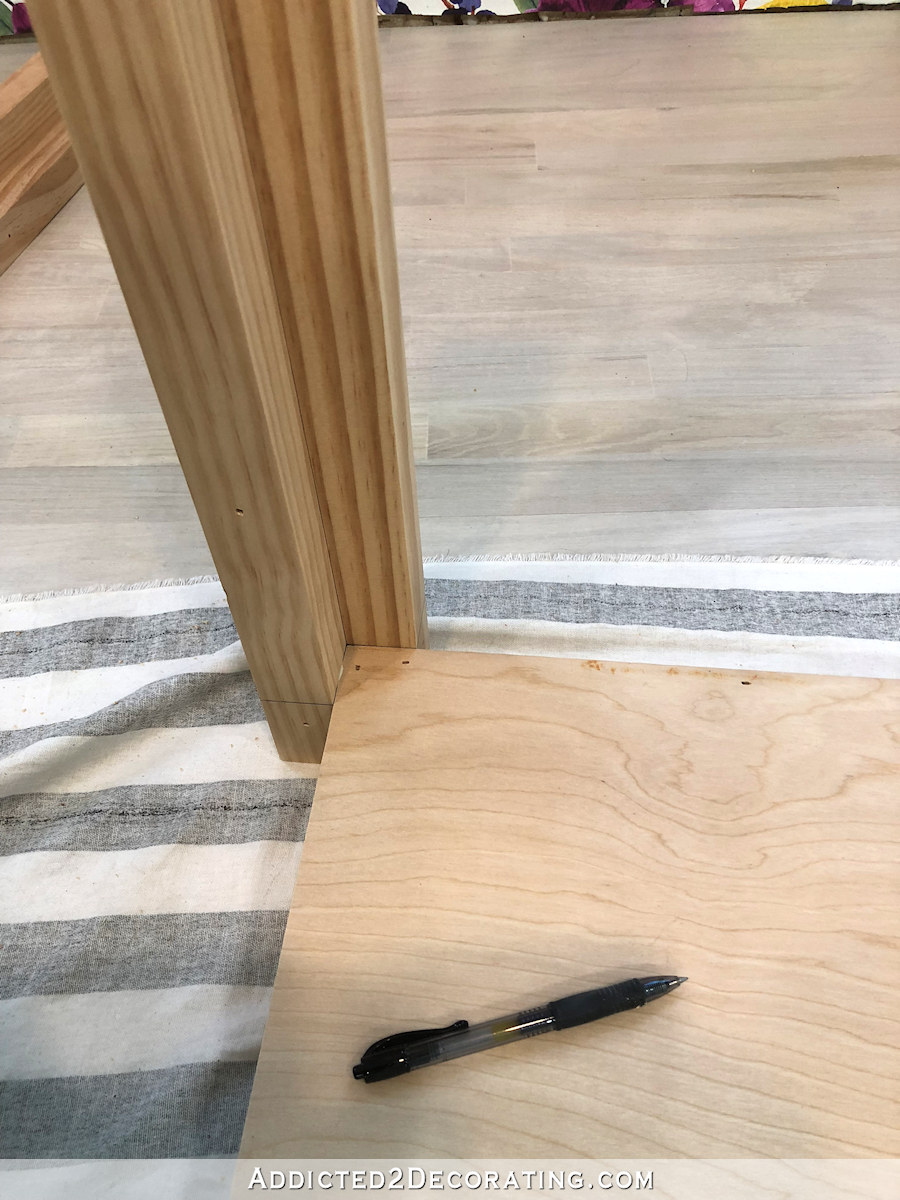
I just nailed right through the outside of the leg and into the side edge of the shelf.
These nails were just a means to get the placement of the legs right, so once all of them were in place, it looked like this…

Then I stood the shelf and leg assembly on edge, and used 2-inch screws to actually assemble the pieces together, with the screws going through the inside frame of the shelf and into the legs. I did pre-drill the holes first because I didn’t want to take a chance on splitting the wood on the legs.
I repeated that process for the other three legs so that they were all attached very securely.
Step 4 – Attach top frame, apron, and lower trim
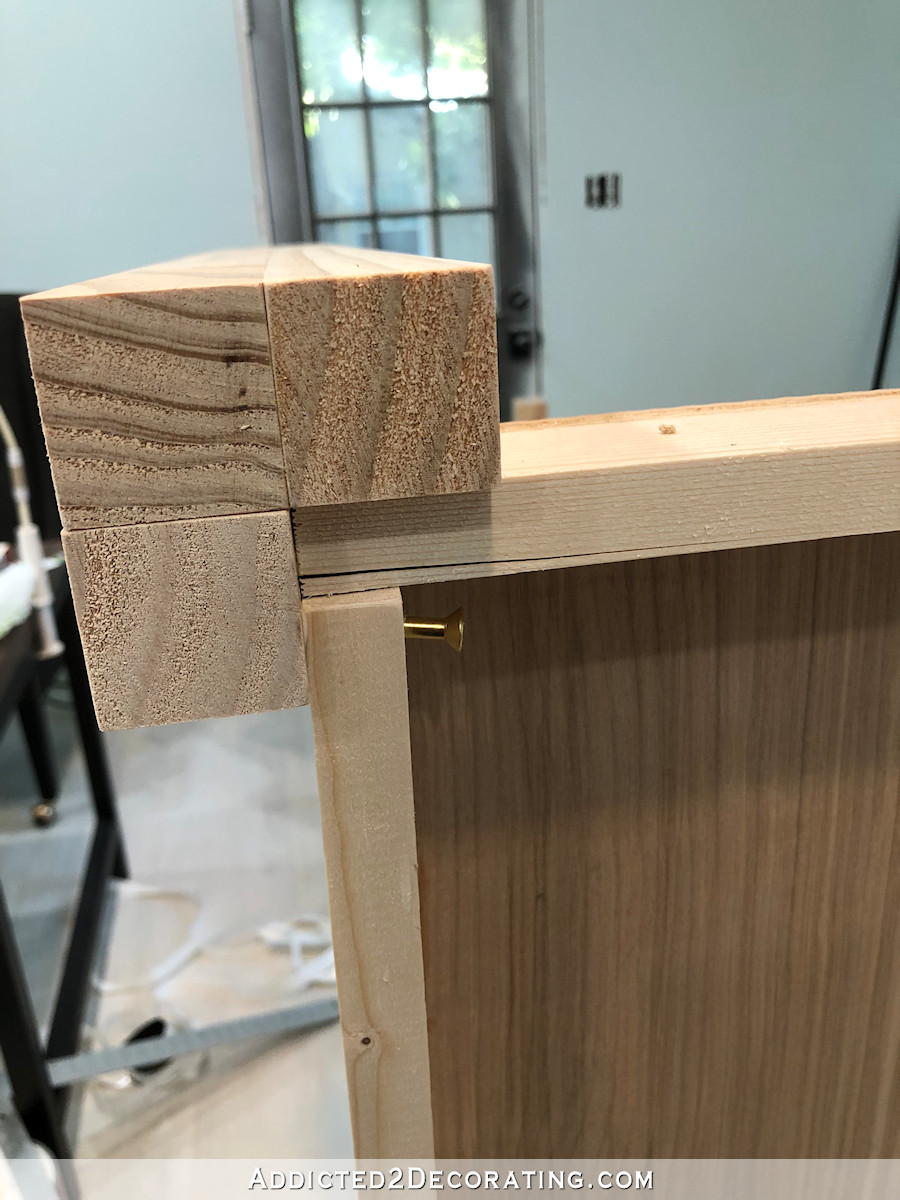
With the legs now securely attached to the lower shelf, I turned my attention to building out the frame along the top of the table frame. I cut a piece of 1″ x 4″ lumber and used wood glue and 1.5-inch 16-gauge nails to attach them inside the notch on the legs.

I also used a piece of 1″x 3″ lumber and attached it to the side of the lower shelf to cover the edge of the plywood and the support frame of the shelf. I attached that piece using wood glue and 1.5-inch 16-gauge nails as well.
And then I cut another piece of 1″ x 4″ lumber and attached it right to the face of the frame piece. I did this to give it more strength and structure, but also so that the apron of the table would extend out the same distance as the lower shelf.

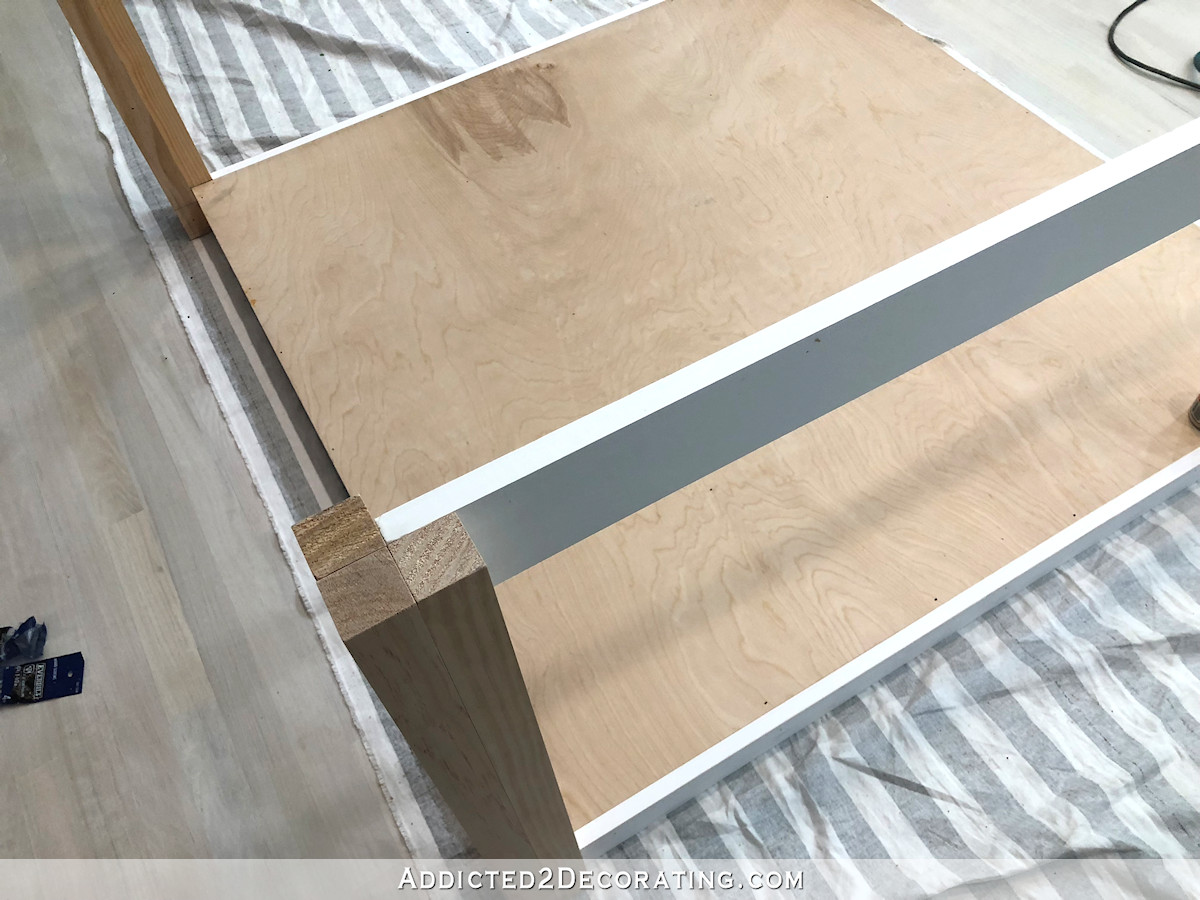
I repeated that same process on the other three sides, starting with the opposite side of the table…

And then finishing up with the other two sides…

Step 5 – Add additional support
I added additional structure and support in two ways. First, I added L-brackets on each corner.
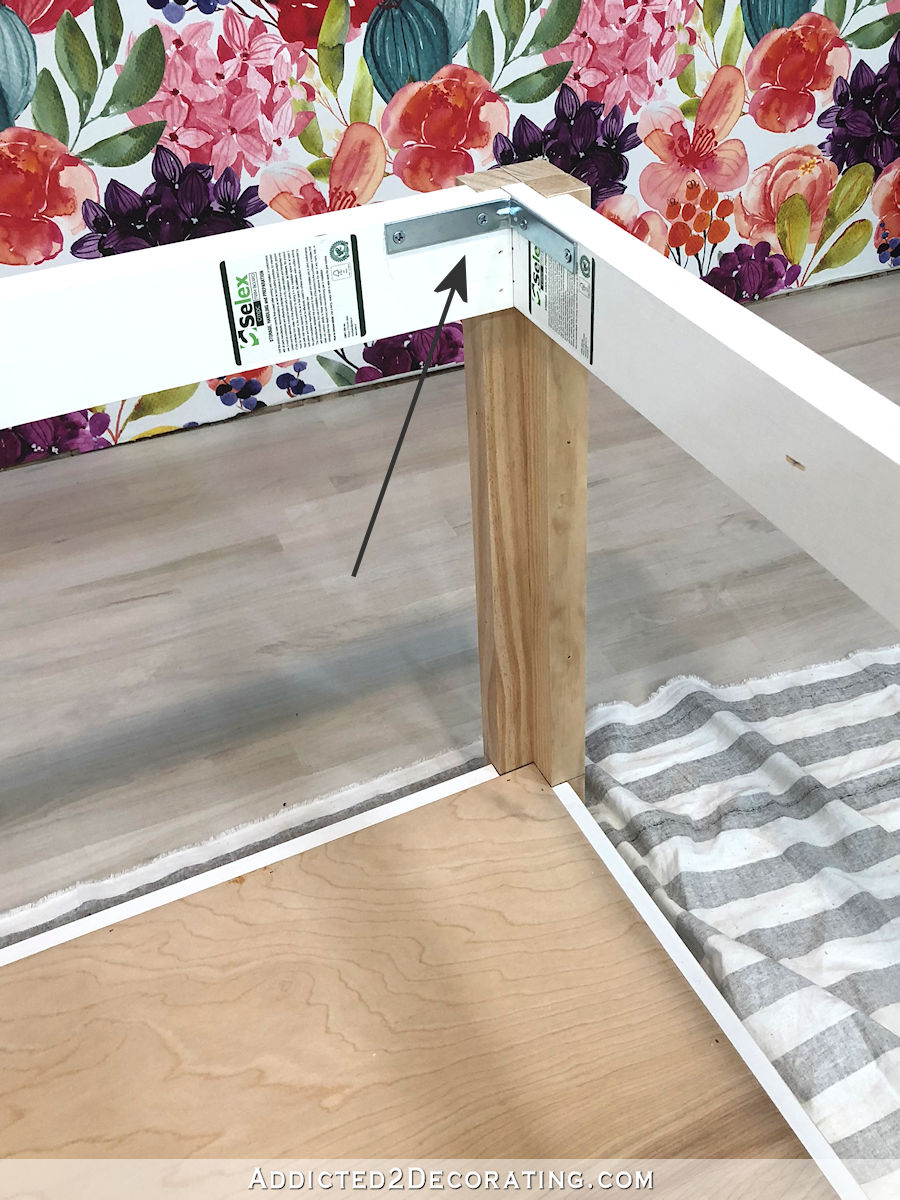
And then I added the fourth and final piece to finish out the legs. Up until this point, they still had this notched out area on the inside since they were built only using three pieces of 1.5″ x 1.5″ lumber.

So at this point, I was ready to measure and attach the fourth and final piece of the legs.
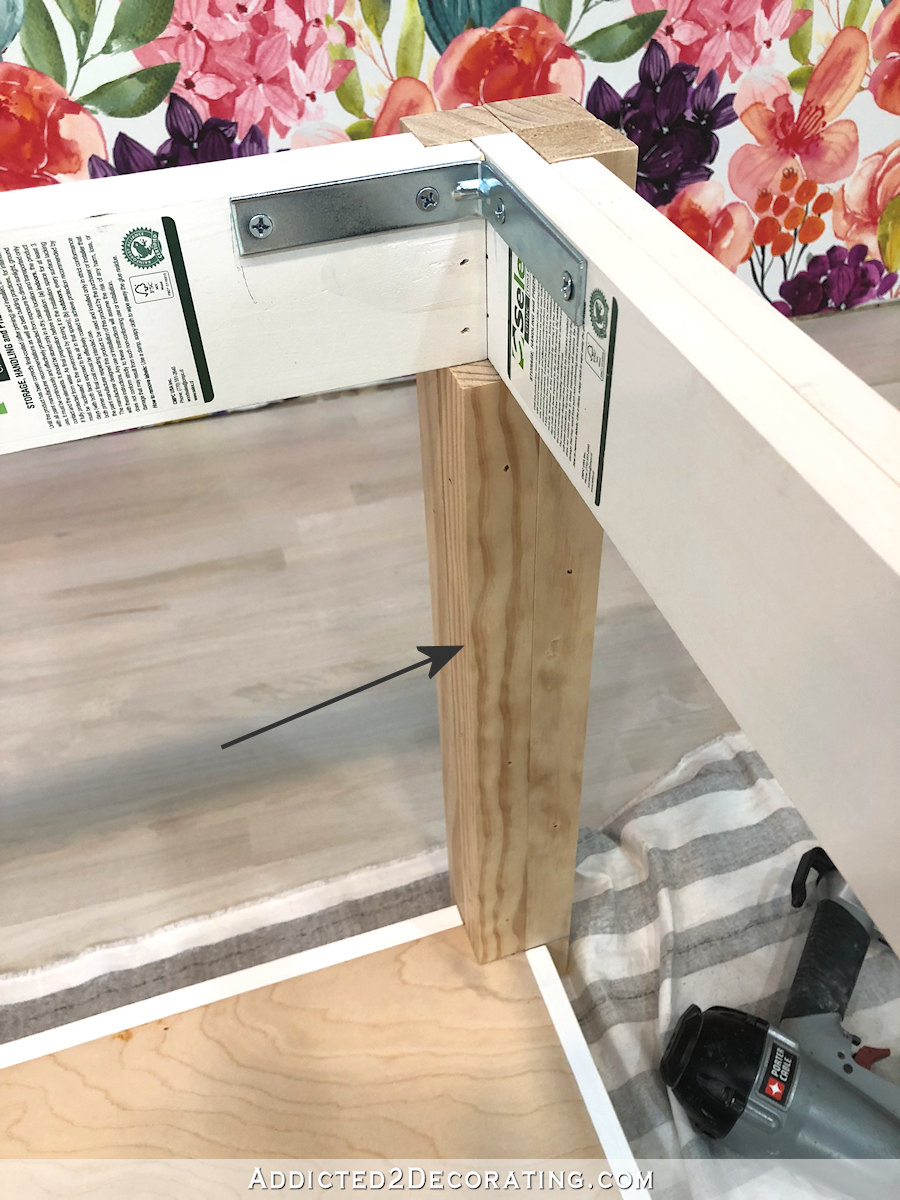
That not only gave the legs a finished, solid look, but also provided additional support for the upper frame/apron area.
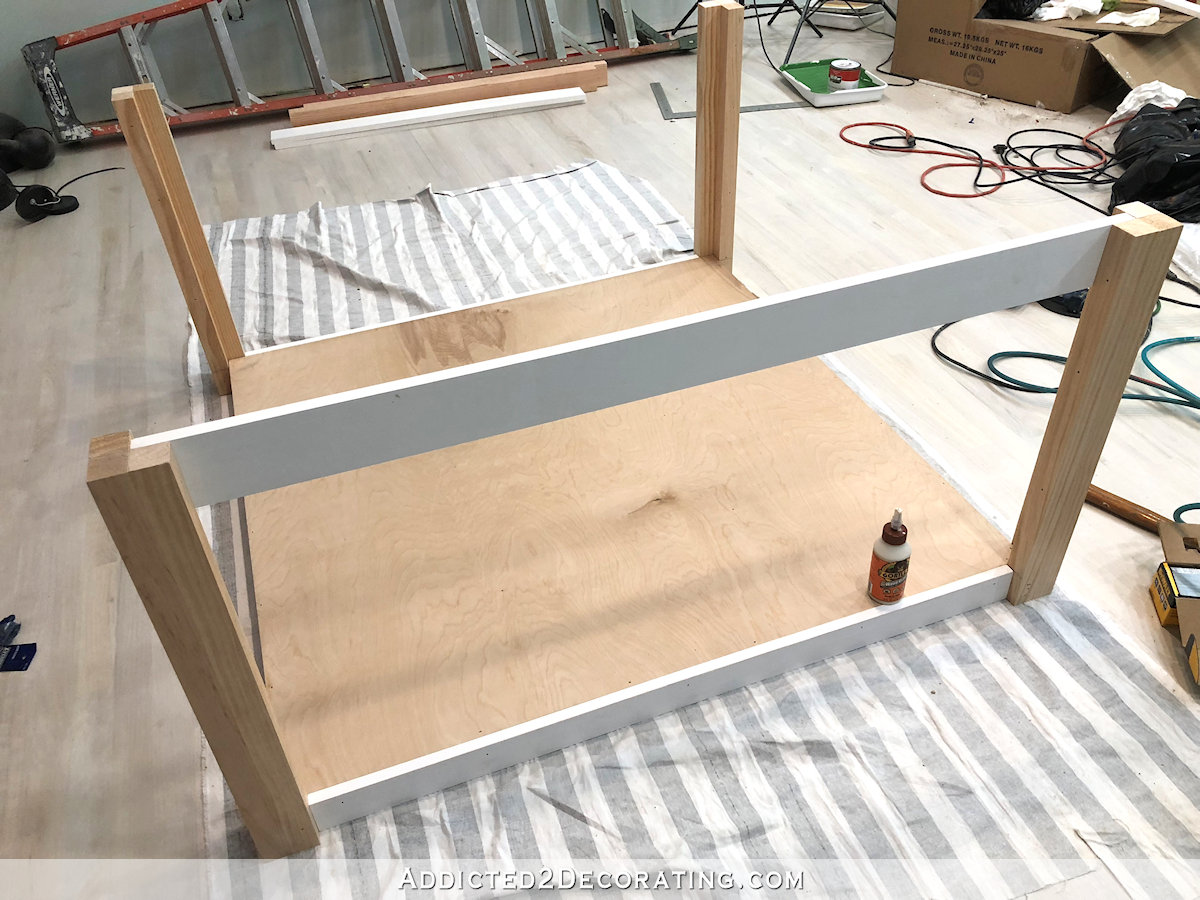
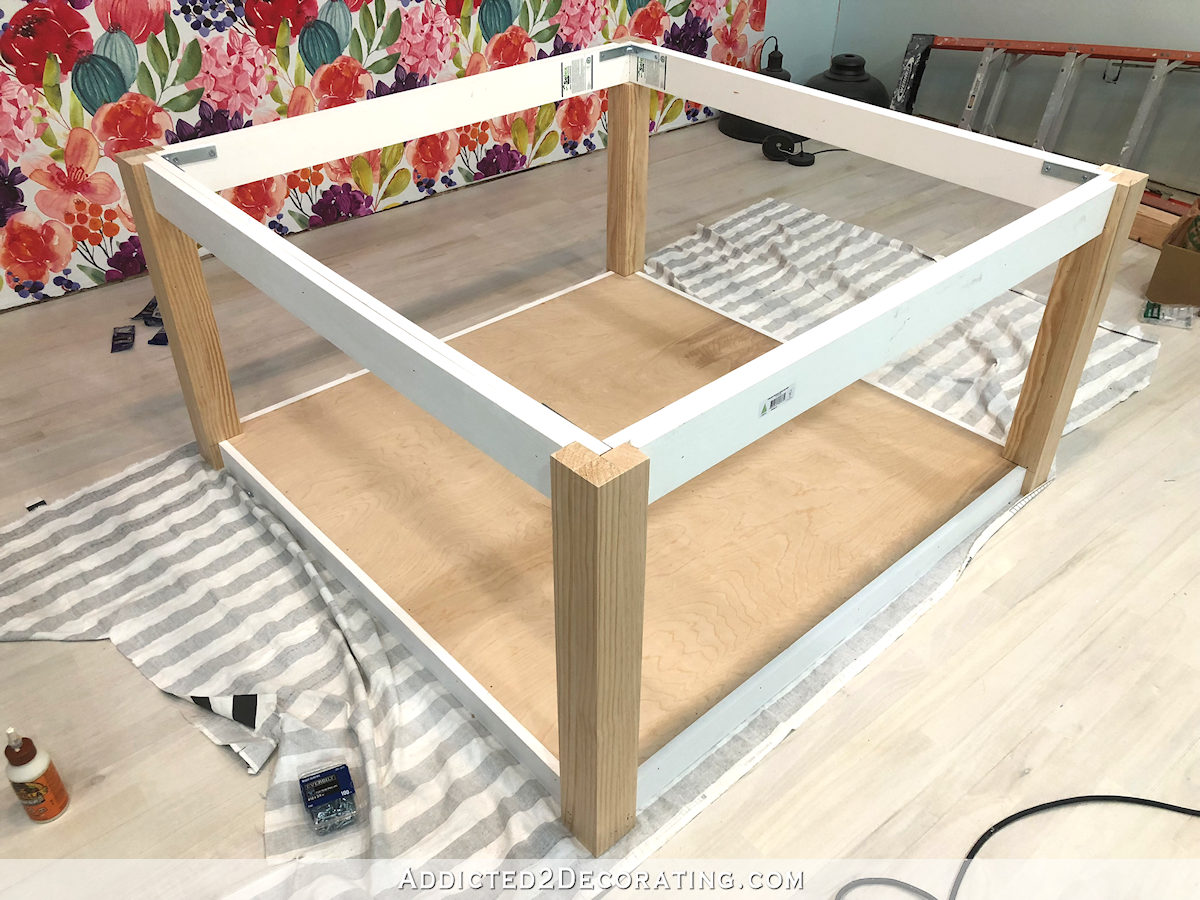
This is what the table base looked like at this point…
Step 6 – Attach the casters
I used large 5-inch casters for my table (which are actually 6 inches high), but that’s just because they didn’t have enough of the smaller 4-inch casters in stock, and I didn’t want to wait on an order.
I stood the table up on edge to attach the casters to the bottom of the legs by first pre-drilled the holes to prevent splitting the wood. They didn’t fit perfectly on the legs, so I had to attach them at an angle, and I only had room for two screws per caster. But they’re very secure, and since this table will be used for sewing, crafts, art, etc., I’m quite confident that the casters will be just fine.

And with the casters attached, the basic build for my first workroom table was finished!
As I mentioned, I’ll probably add a bit of trim to the tables to pretty them up a bit, and then I’ll be doing my standard finishing — wood filling, sanding, caulking, priming and painting. And because I want the finish to be really durable, I’m sure I’ll be topcoating everything with General Finishes High Performance Topcoat. The matte finish is my favorite.
But for now, I have another table base to build! 🙂 And as soon as that Wilsonart sheet laminate comes in, I’ll share the table top-building process with you as well. It’ll be my first time doing such a big sheet laminate job, so I’m kind of nervous about it, but excited to give it a try.
Please note: This is a two-post project. To see the second and final post, including the finished table, click the title below.

Addicted 2 Decorating is where I share my DIY and decorating journey as I remodel and decorate the 1948 fixer upper that my husband, Matt, and I bought in 2013. Matt has M.S. and is unable to do physical work, so I do the majority of the work on the house by myself. You can learn more about me here.

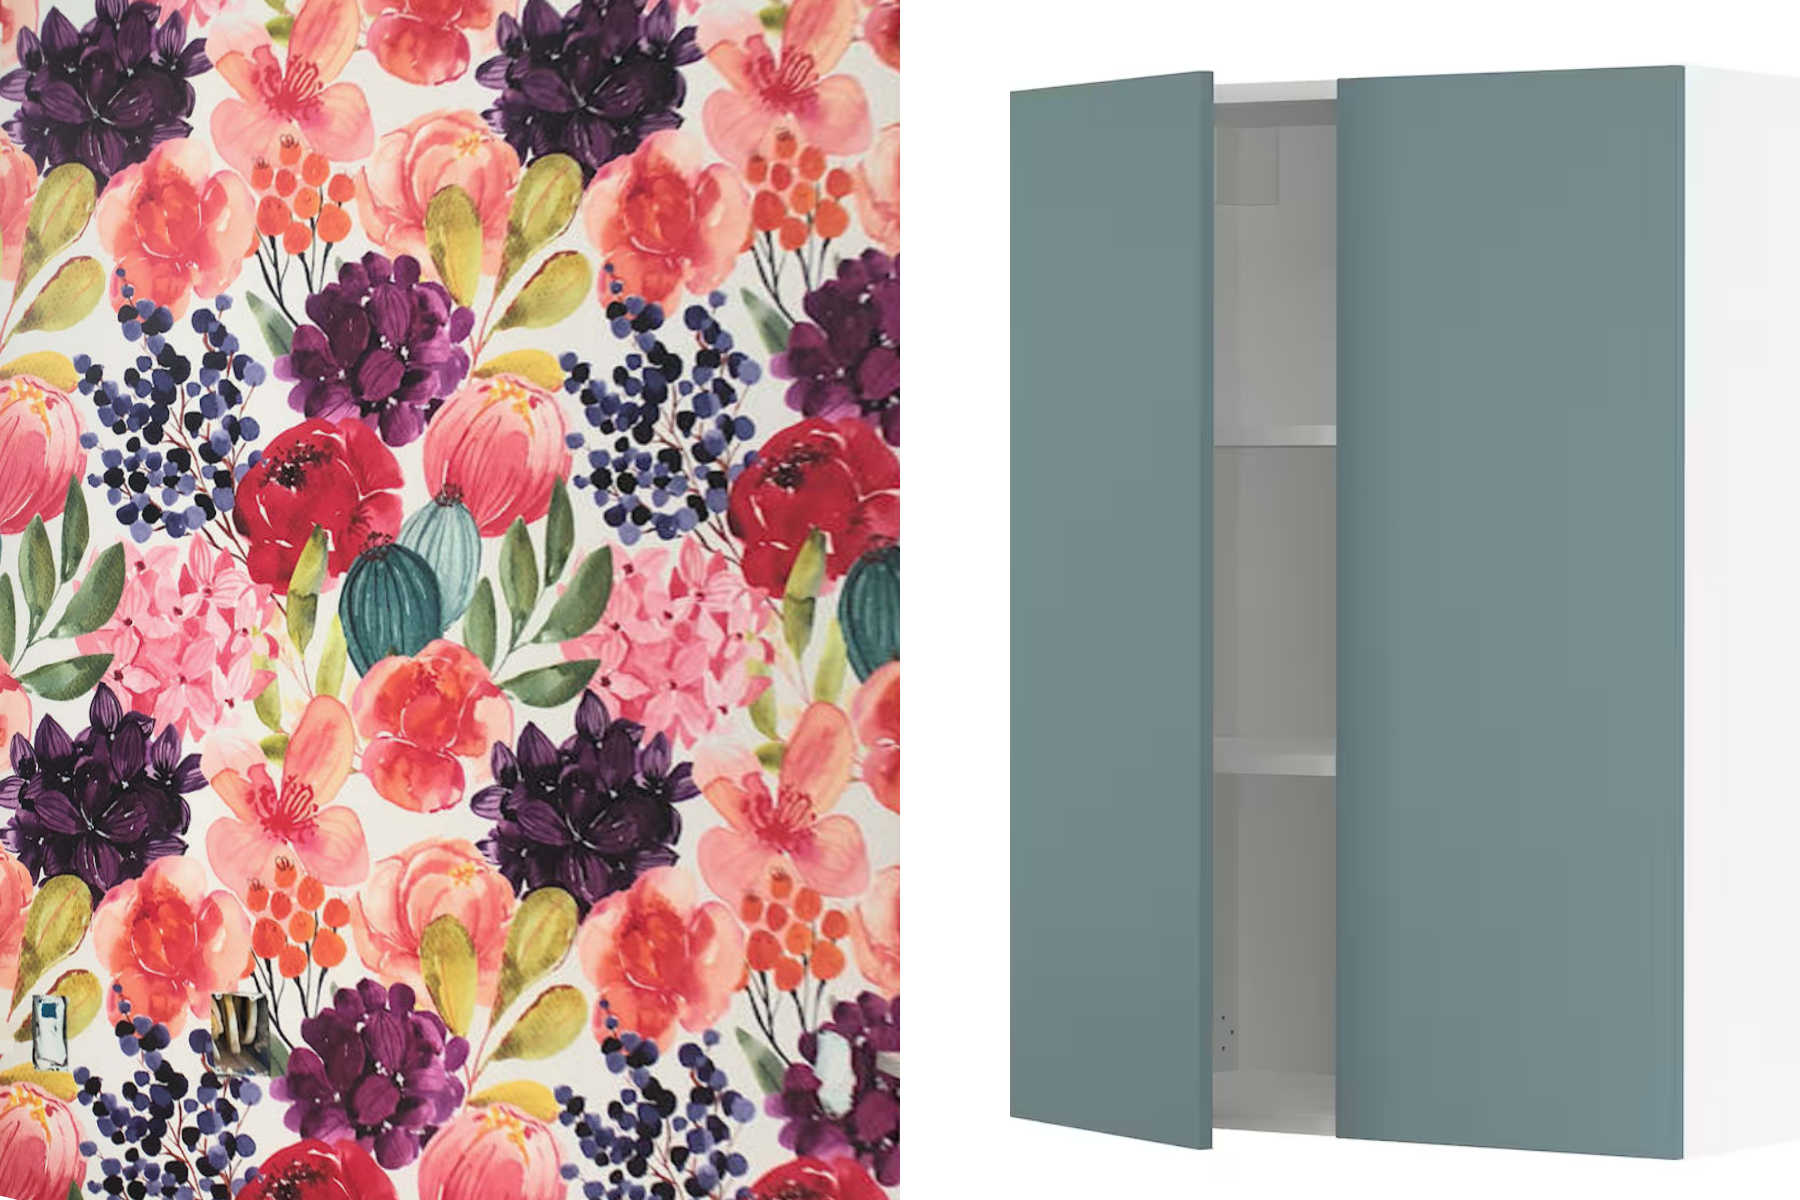
How about that beautiful cranberry/raspberry color from the wallpaper? 🙂
I would love to see the table in that blue that is in the berries on the wallpaper, but that is me. Go with what you love.
Will the tops be larger than the bases? I assume so, since the legs extend past the edges of the rails, and one could not push the two cutting surfaces together otherwise.
Many of the drapery cutting tables I have seen are padded. Will you be making some kind of giant shower cap for these?
How about a grid or rulers along the edges?
When you are done, please ball park a cost for us. You might inspire us! (Or you might make us whine “Make me some!!”)
Thanks for sharing your hard work.
Yes, the tops will extend past the base about 3 or 3.5 inches on all four sides. The sheet laminate I bought is five feet wide. So I plan to make the tops about 59″ square just to give myself an extra inch. Or I might make it 58″, but I’ll make it as big as I can. The base (to the outside of the legs) is 51″.
When I get the tables finished, I’ll assess what extras I think they need. But as of right now, I do plan to make a padded fabric covering with elastic around the edges that fits snugly and that I can use when working on sewing projects, but can be removed for other projects. If that works out, I’ll have the ruler/grid measurements on there. I can’t think of a time when I’d need something like that for non-sewing projects, so I like the idea of it being removable.
I can tell you that the price per table is somewhere in the ballpark of $300-$350. The price is a lot more for my tables than you’ll see for lots of other DIY workroom tables because I was determined to use nice lumber instead of rough 4 x 4’s and 2 x 4 studs. If you’re okay with using rougher lumber, the price will be quite a bit less. But the sheet laminate alone, for a 5′ x 12′ sheet, was just over $200. That stuff wasn’t as cheap as I expected it to be. 😀
A blue! Something deeper to complement the pale blue on the walls? (Oh, c’mon, it’ll probably end up some shade of teal, right?) 😉
Since top is going to be white,I would paint it black.
Purple! or the berry blue! It’s going to be great!
Purple!
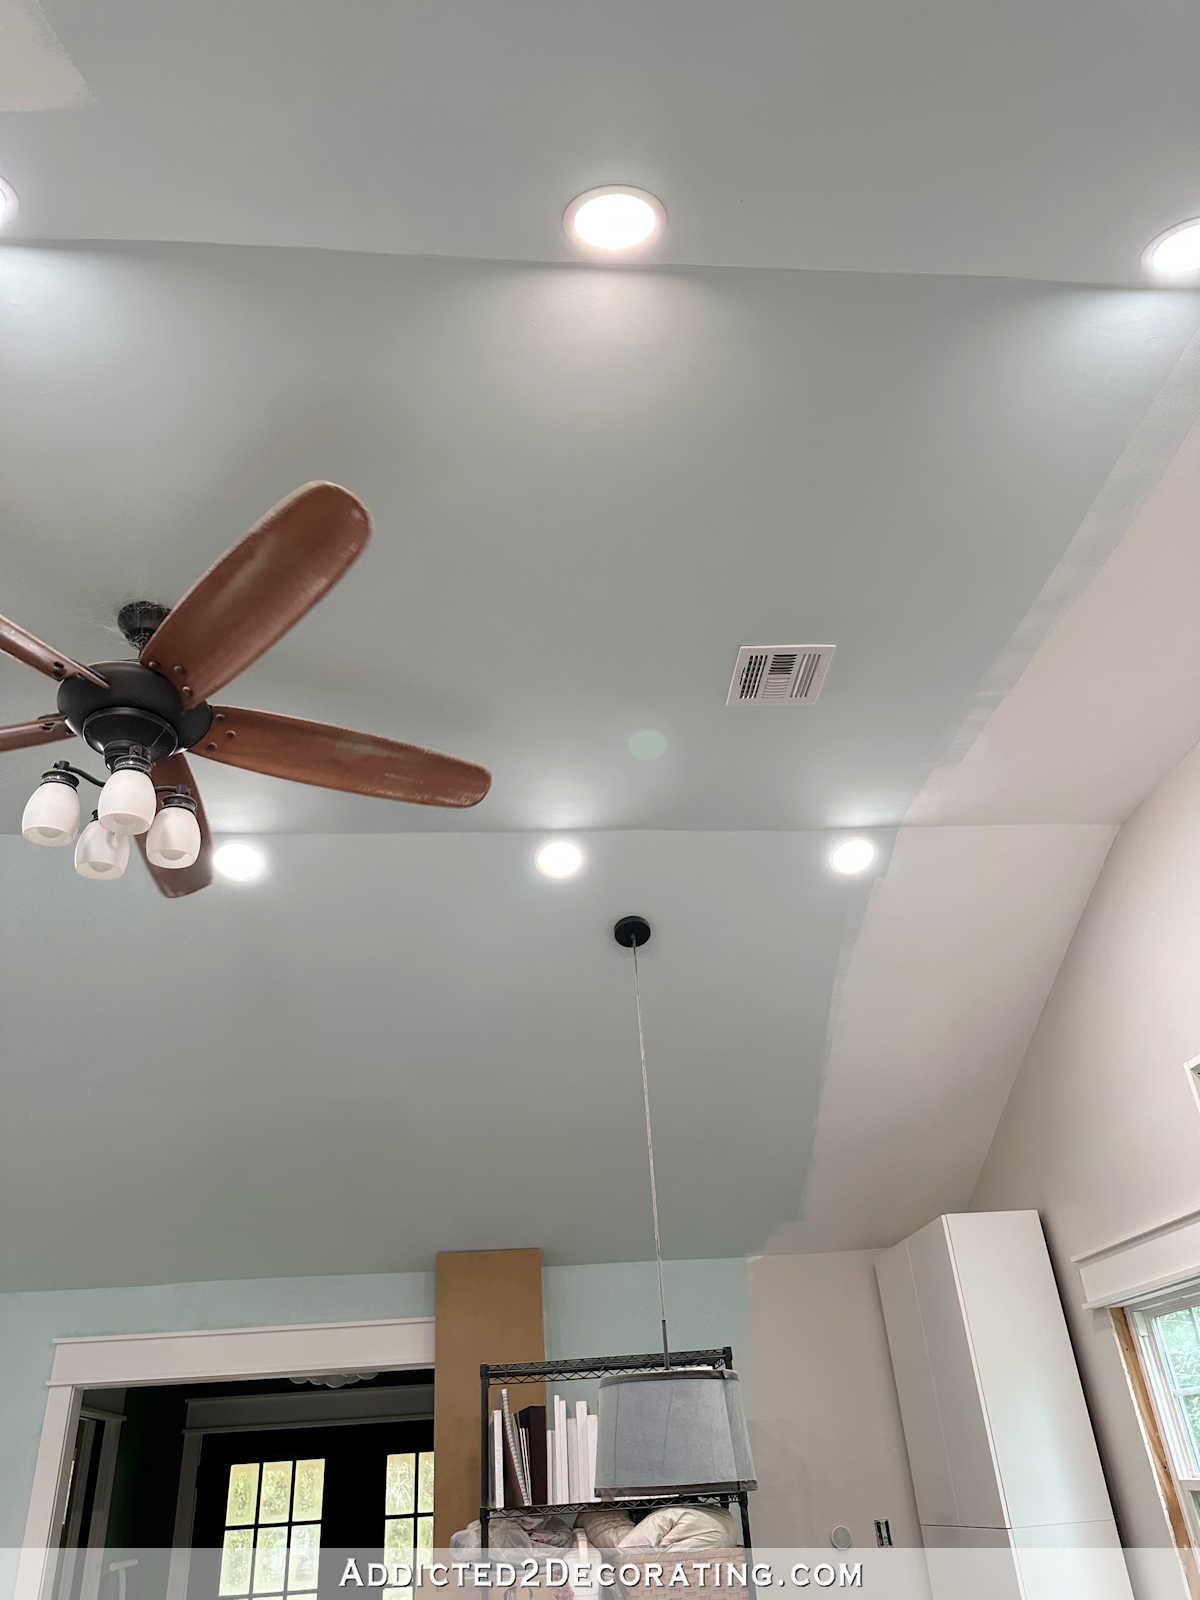
Will you not be doing any future building of things in your studio? Where will you be building your cabinets? I ask because I noticed you had a cloth under your build.
I’m pretty sure she’s enclosing the carport for all future building. The studio is for arts and sewing etc…
I’d paint it white to match the laminate. That way it can be placed anywhere without drawing attention to itself.
You make everything look so easy. I wish I could have 1/2 you talents. I vote for the blue too.
What a great idea to construct the legs like that! I’ve never seen that method before.
I am so glad you went with open. I feel like it always looks great to have doors and such but then you have to get down on the ground while searching for something. Bins and basket and other organizing containers will be great!! And it’s your workroom. Not going to always be perfect!! Atleast in others eyes. I love it!! Like i said i am living vicariously through you. This room and your pantry are just dream rooms!!
Purple or Green would be my vote! It is coming along so beautifully….great work, Kristi!!
That shelf will be a great place for your fur babies to nap and be close to you!
I an in the minority and don’t think you should try to pull another strong color out of the wallpaper. I vote for black (like the desk and maybe add some of the V accents to the sides) or coral like the cabinets. I feel like it will be very overwhelming to have another strong color competing for the eyes’ attention. BUT, that’s just my vote! 🙂
Regarding the bottom shelf, what, if anything, do you plan to store down there?
I don’t really need it for storage, other than perhaps a few bolts of fabric. I’ll have plenty of storage once I get all of my cabinets built. But I do need a place where things can lie flat to dry — artwork, resin projects, etc.
Since uou’ll No doubt be doing all sorts of colorful projects on the table I vote for a neutral color, white or black. That will sallow your eyes to von entrants on project.
This table will got a lot of wear and tear, will you use a special paint? like a floor paint?
Nope, just regular latex paint. But the General Finishes topcoat I plan to use is very durable. It’s what I used on my kitchen cabinets, hallway bathroom countertop, and pantry countertop.
Working with color on a colored table will influence what you see. Maybe you won’t be using it in thar way. If so, white is best.
The actual work surface is going to be white.
I was reading through the comments and was wondering if you had posted an update to the blog with a poll for which color to paint the table, haha!
In your last post, you said that getting laminate required you to get a new tool (did I read that right?) Is it for cutting the laminate? At my last house, I got a high-end (or higher end on the laminate scale) laminate for my kitchen. Sounds similar to what you are doing. It was white with a tiny little bit of gray, and had a slight marble effect by switching between a high-shine and satin finish. I LOVED it, except the edges. I think the contractor used a laser cutter of some sort, and it resulted in burnt-looking edges that really stood out against the shiny white. Since you’re doing your own laminate, I hope you find a way to create cleaner seams so the white looks continuous! I’m excited to watch the process.
Yes, the tool is a little router that’s specifically for cutting things like laminate. Unfortunately, I don’t know of a way to hide that little black/dark gray edge of laminate unless you purchase one of their specialty edges that covers it up completely. But the specialty edges will prevent the tables from joining together flush with each other to form a long table. So I’ll have to live with that little black stripe on the top edge of the countertop like this: http://www.cnytops.com/assets/images/1selfedge-1-544×374.png
I agree with white or black also. To many colors will take away from your main cabinet/floral wall. I would get your brother to help with the laminate. With a piece that size you’ll want help. You’ve basically got one chance to get it right. Watch some tutorials and practice with your new router- a lot- again, one chance. Going to slow can cause those burn marks.
That actually looks cleaner than what mine looked like. I went with a bullnose profile, so maybe the cut edges didn’t come together as well as they would’ve at a 90* angle? Who knows…
You are more talented than 90% of the men I know. Don’t know about the color.
Hi. I didn’t understand the part 2 of the leg. I saw the L brackets but didn’t understand the second one. You have an arrow pointed to the middle of the leg. Did you just put a srew in to reinforce? It does look great and I like how you did the legs so there isn’t a gap on the bottom shelf.
Part 2 of the legs was just me adding the fourth 1.5″ x 1.5″ piece of wood to complete the square leg. Up until that point, the legs had only been made of three pieces of 1.5″ x 1.5″ lumber to create an “L” shape. The completed legs were an actual solid square shape with four pieces.
I’d paint it the tealish green that is on the flowers in the wallpaper that looks like watermelons. Don’t know how to describe them. They are not dominant in the wallpaper, but I really like that color.
Kristi,
Gluing the laminate to the top of the table is pretty easy. We put the glue on the top of the table, then put wood dowels down spaced across the top, then the laminate sheet on top of the dowels – start removing the dowels and pressing the laminate down really smoothing as you go – we used a rubber roller to smooth made for that purpose – continue to finish. Worked perfectly with no problems at all. We cut the laminate 1 inch larger all around and used the router to trim it. No problems with that either. Just the apron part gave us issues with burning – use new blade.
I must have missed the post about what the table top was going to be under the laminate. What is 5 ft x 5ft in one piece.
I’m with the rest of the minority about not pulling in another strong color and think black would work best.
How about the tealish color in the wallpaper. I don’t think the green like the back since you have so much already. Or black is my second opinion as it would look great with the lamps and other black accents.
I changed my mind, love the black the most to go with the lamp shade.
I think a black base with the white laminate will look great and bring the colors of the entry further into the studio. I did like someone’s idea to put the chevron ‘v’ accent on the bottom of the work tables. Maybe just on the ends that don’t hook together…if that wouldn’t restrict your access to the shelf too much.
I really like that you are building 2 tables that can be used separately or together. It’s perfect for working on a couple of things at one time or one big project. If you’re looking for paint colors from the ‘peanut gallery’ I am voting for your entryway green or black.
Where in world do you buy General Finishes high performance top coat in “matte”? I’ve searched everywhere and can only find flat, satin, semi-gloss and gloss.
Ps. Your talent is amazing!!
Ugh! I meant flat! I get those finishes mixed up all the time. Sorry!!
Hahaha!! Now, you sound like me! Thx!
That looks pretty cool! Do you plan on adding any built in measuring tools on the table top? (Like the big fabric cutting tables at Joann’s, etc.)
I will do that eventually, but I’ll probably use the tables for a while before I decide exactly what additional features they need.
What a clever woman you are – love the table building instructions.
Those will be awesome tables and so versatile. How wise to consider the good ideas that so many bright people offer here. I learn so much from everybody.
As for color: were we invited to vote? 🙂 Well, black sounds the best to me since there are lots of colors already in place and probably more to come. I like the tie-in with the black pendants.
I love the table design! I think a dark color like an Eggplant or possibly Raspberry would really ground the tables in the room & still bring in the colors from the wallpaper design & coordinate with the Coral cabinetry
I’m afraid your castors give me anxiety. I personally would have slipped a piece a wood snug against the corner which would allow for screws in the currently empty holes. If you consider how the weight is distributed it pushes outward. Having screws in those holes would help distribute less shear force more compression.
I’m just excited to see a studio project! The separate tables was a good idea, I think they will function perfectly unless you are like me – and load the one down with random stuff! That will require control on your part or you’ll spend precious time clearing it before you can work. I agree with someone who said you might want your brother around to help with the laminate. I’ve watched a lot of the process on line and tv, and almost always there were two people, one on each side. It’s a one-shot deal as you know! But it does look fairly easy.
Love it, love it, love it! You’ll also love the two tables over just one large one. Color? Whatever makes your heart sing 💜💚♥️
I think the Black base would look great, and it may also ‘hide’ the black edge of the laminate.
Your work is amazing! You are so talented.
My vote would be for black. But just a FYI, I would think about how a horizontal black surface shows so much dust. And when cutting your fabrics, the debris from that will be floating down on to that bottom shelf.
good point! I thought black, too, but it will get pretty dusty!
I know your love for color, Kristi… but in this case… I wouldn’t draw attention to the table and therefore would suggest keeping it simple with the white base as well as the laminate so the eye will be drawn to your cabinets, wallpaper, and other things you want everyone to notice. Plus it won’t compete with the classy entry, either. Regardless… I love the concept of the two sections and it will be truly wonderful for you. 🙂
I’m sitting here at my tiny $100 drafting/crafting “cutting” table from Michaels all jealous of not only your crafting space, but those HUGE rolling tables. 🙂
Oh my goodness! The written instructions are perfect accompaniment to your video. Thank you so much … I have a disability and find it super helpful to have the visual guide as well as the written instructions, which lay out all of the measurements for me. Your skills in woodworking are fantastic. Congratulations!