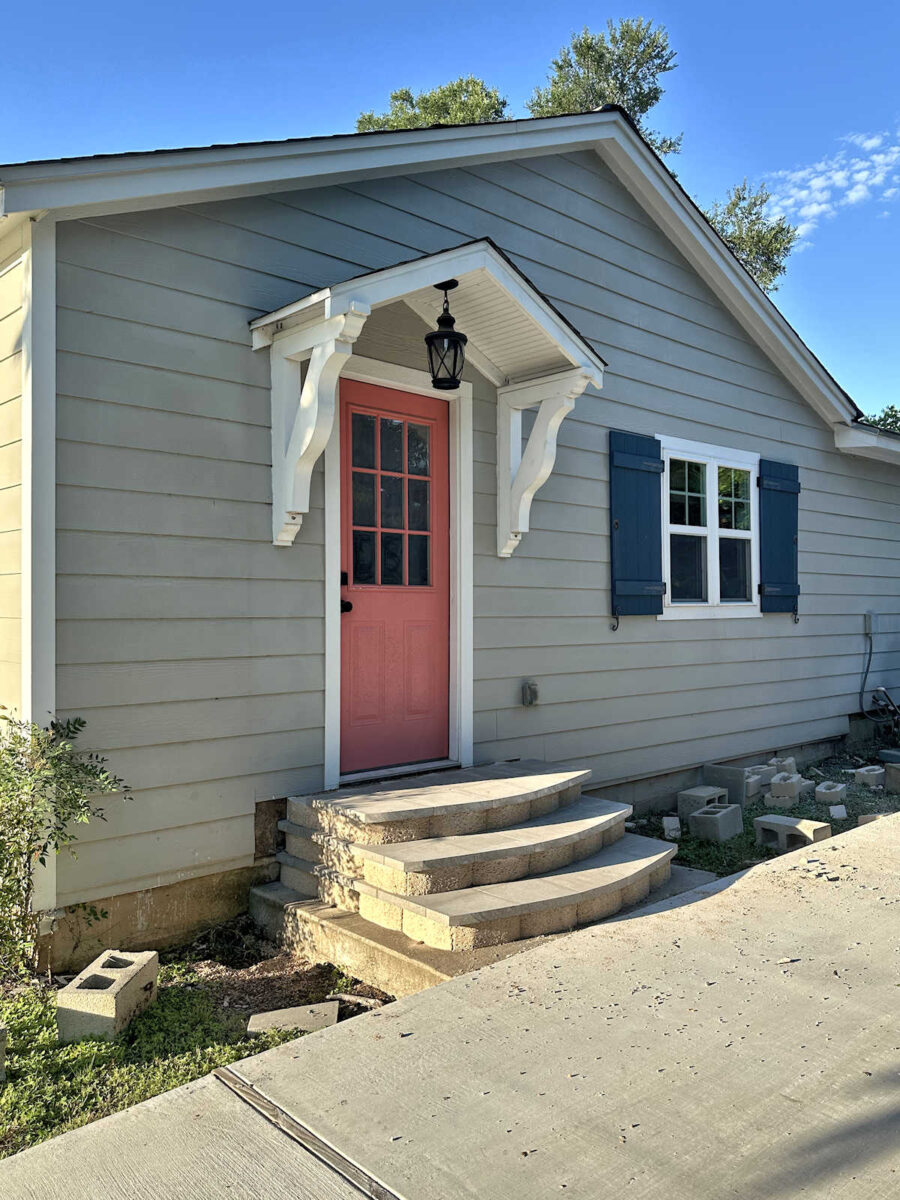
Painting And Finishing My Studio Steps
Over the weekend, I continued on with my outdoor projects, focusing mainly on finishing the steps outside of my studio side door. I finished building these steps (for the most part) last week. I made the steps out of retaining wall blocks, which were used as the risers, and concrete pavers, which were used as the steps.
NOTE: This is a multi-post project. You can find all of the posts about this project, from start to finish, here: DIY Exterior Concrete Steps Archives
You can find the previous post in this series here: Studio Side Steps Progress (DIY Steps With Retaining Wall Blocks And Pavers)
At that point, the steps looked like this…
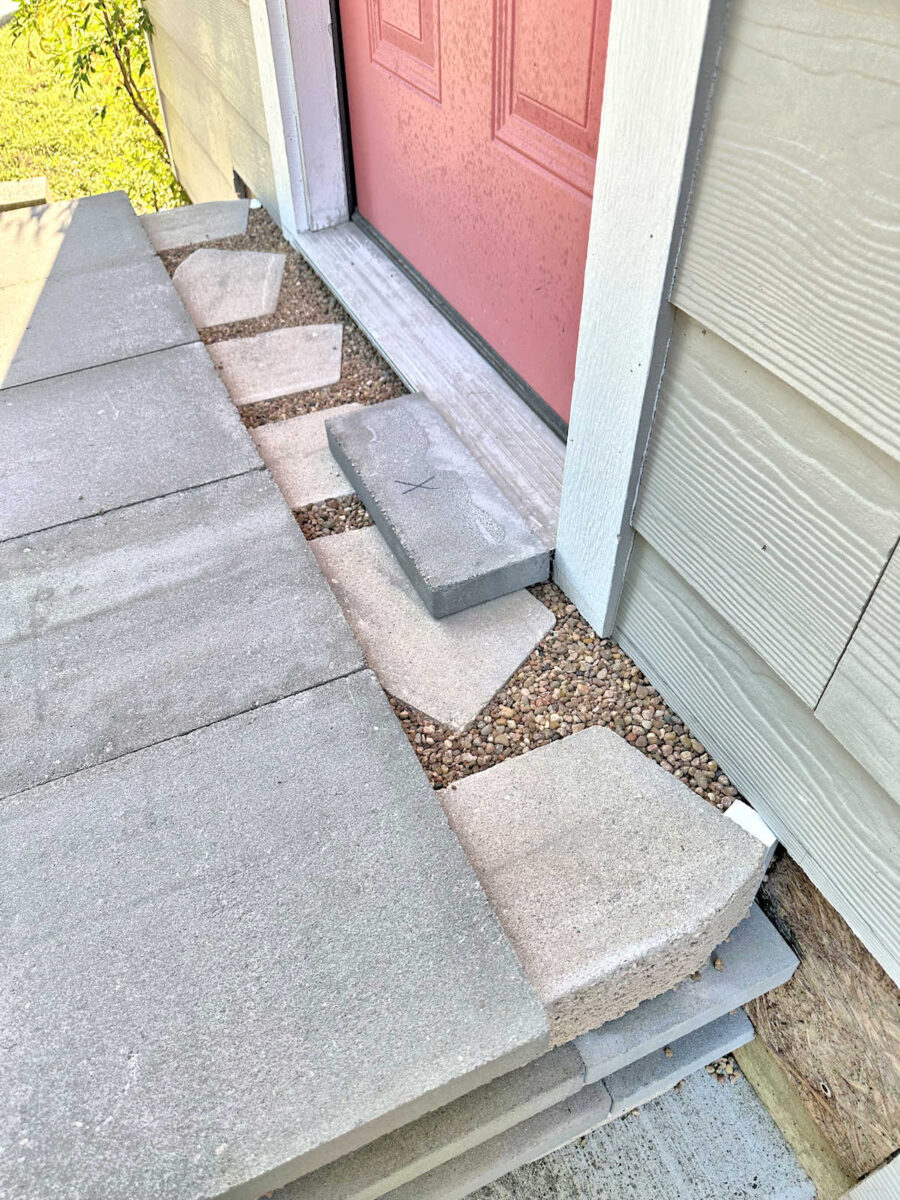
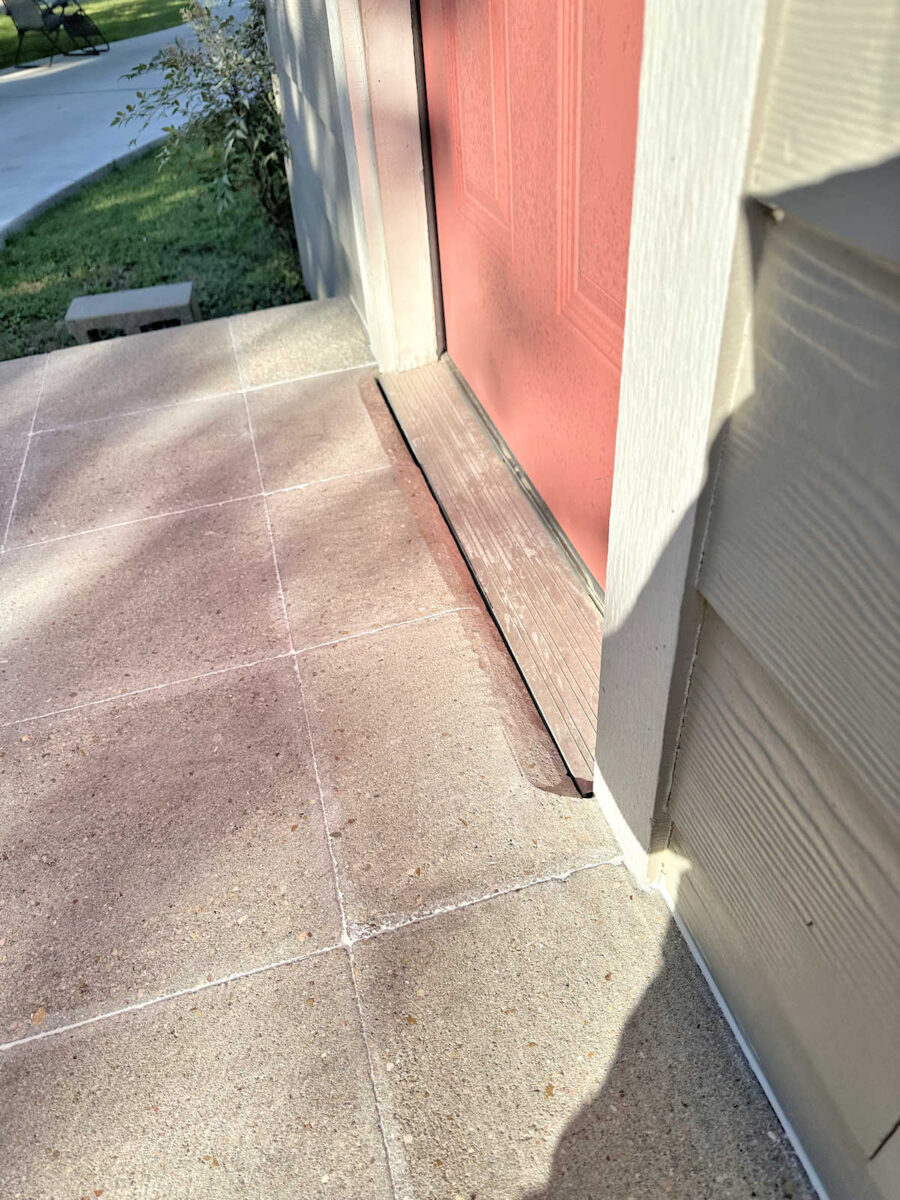
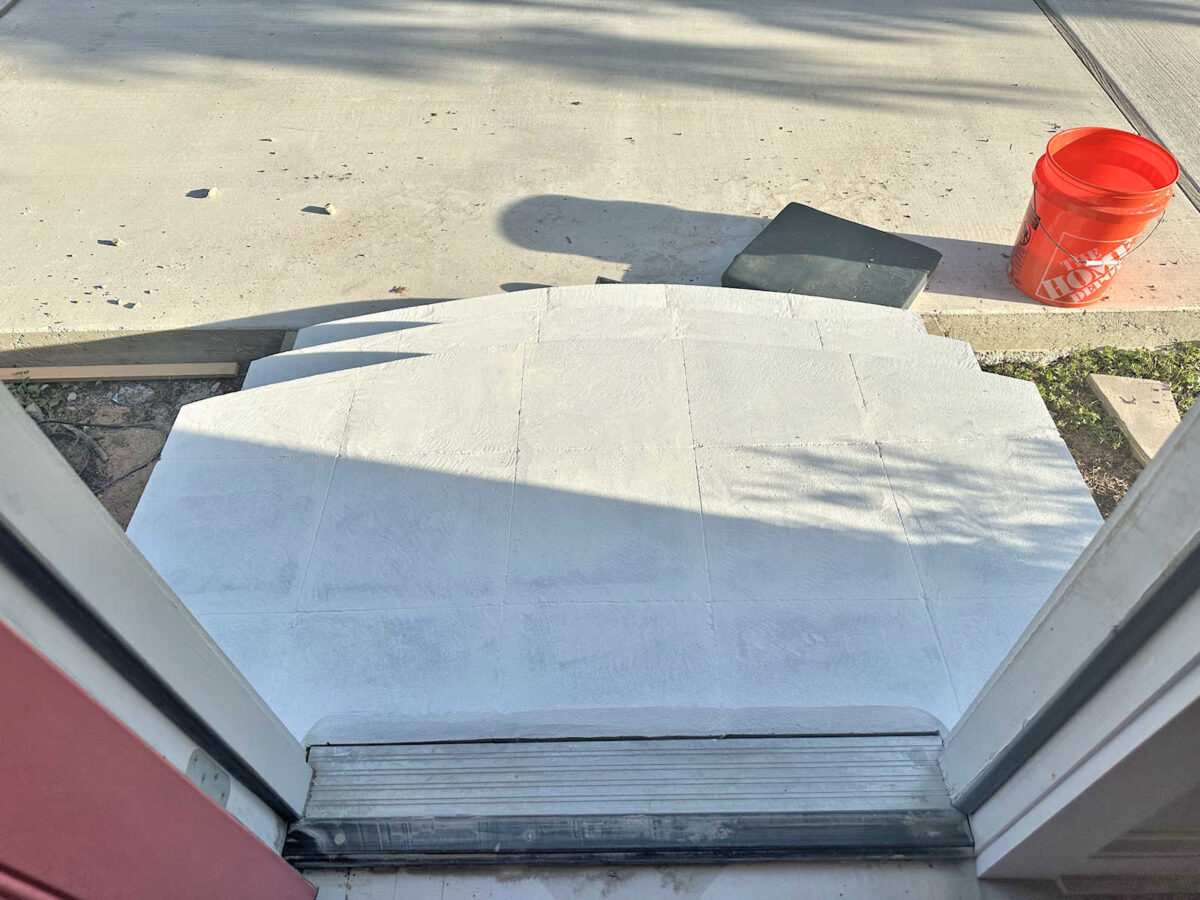
I was pleased with the overall look, but they still weren’t finished. First, I had to figure out how to deal with this last row of pavers on the top step. My math didn’t work out perfectly (shocking, I know! 😀 ), so these pavers were about 3/8″ higher than the threshold of the door. Obvioulsy, that wouldn’t work because it would be a tripping hazard for anyone coming out of that door.
My second issue with the steps is that the colors weren’t right. Since I needed to use locally available materials with very specific heights and thicknesses to get the finished height of the steps just right (or close to right, as was the case), my choice of color for the retaining wall blocks was very limited. But I wasn’t deterred because I’ll paint anything, including retaining wall blocks.
So while I was trying still trying to figure out the issue with the last row of pavers, I went ahead and painted the risers. For these, I used the very same paint and color that I used on our house — Sherwin Williams Duration exterior paint in a satin sheen in the color Mindful Gray. Since half of the front of our house is stone, and this paint has held up amazingly well on that stone over the years, I was confident that it would work well on these retaining wall blocks as well. You can see the gray painted risers compared to the original color here…
I used an old paint brush to apply the paint since I knew these retaining wall blocks were so rough that they would destroy a nice brush. And when I first applied the paint, it kind of sat on top and looked a bit funky, but as it dried, it soaked into the rough surface and dried with a much more natural look. In other words, it didn’t have that plastic-coated look that latex paint can often give a painted surface. Maybe you can see what I’m talking about in the photo below. When I took this picture, I had just finished painting the block on the side of the middle row at the front of the steps (i.e., the furthest from the house). You can see how the wet paint looks more like it’s sitting on top of the stone, but if you compare it to the row above, you can see how it soaks in as it dries, giving it a more natural look.
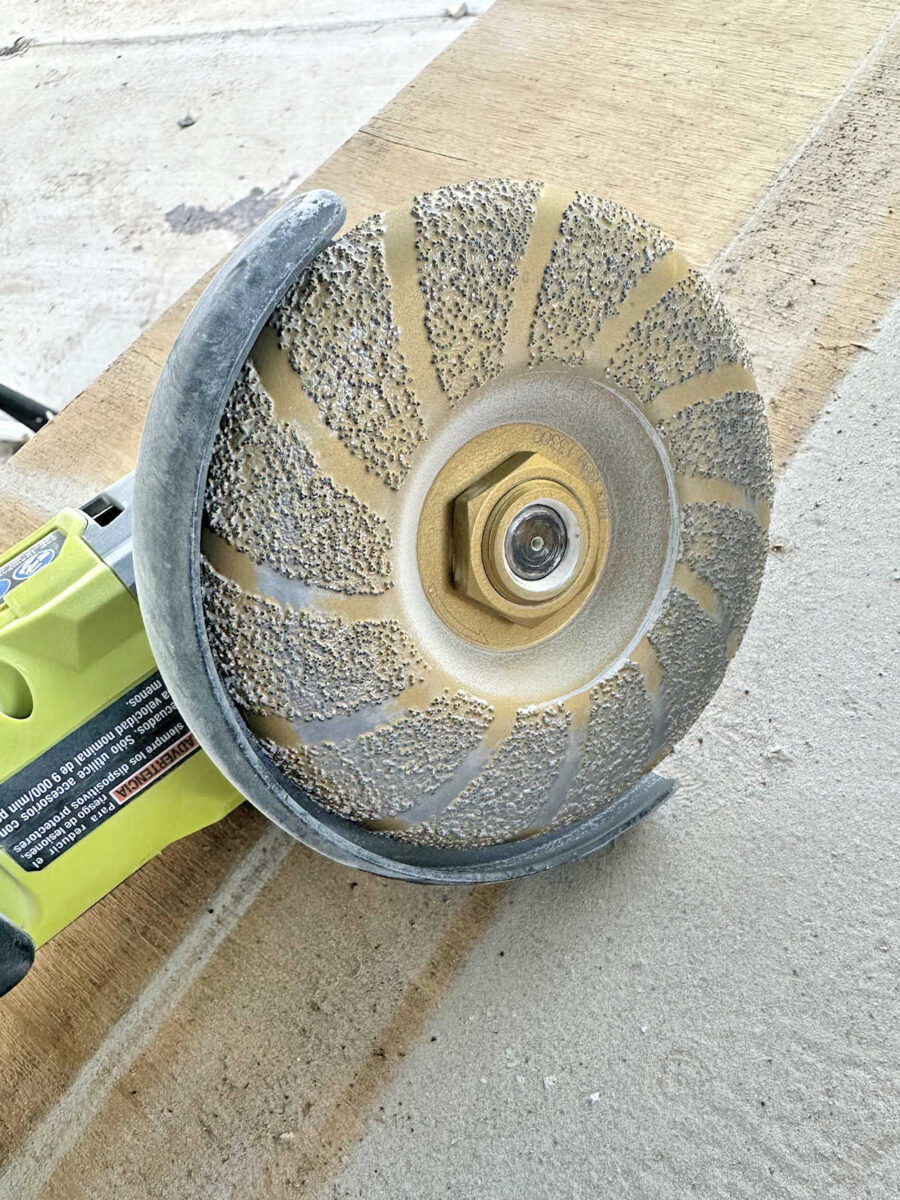
By the time I finished painting the risers, I knew how I wanted to solve the issue of the last row of pavers. I started by cutting them all to fit the space, using a combination of my wet tile saw and my handheld grinder with a concrete cutting disc so that the pavers would fit around the siding, trim, and threshold of the door. But to eliminate the tripping hazard, I used a concrete grinding disc on my handheld grinder to round over the edge. You’ll also see that I left about a 1/4″ space between the pavers and the edge of the door threshold. While I caulked the cracks where the pavers met the siding and trim, I left this space open where the pavers met the threshold.
This is the grinding disc that I used to create that round over on the pavers, and it made very quick work of shaping those pavers. I bought this at Home Depot.
So here’s my thought process on why I left that 1/4″ gap open between the last row of pavers and the door threshold. When it rains (and we get very heavy rains here in central Texas), I’m expecting the rain to shed off of the steps away from the house since the steps are set on a concrete pad that is a little bit higher on the house side and a little bit lower at the driveway side. But with the top step being a bit higher than the threshold, water would get caught there if I sealed that gap, and depending on how heavy the rain is, there would be a risk of water filling up that threshold. But with that gap there, water can escape, filter down through the gravel and the gaps between the pavers, and out the bottom of the steps since none of that will be sealed so that it’s watertight. We’ll see if it works the next time we get a heavy rain, but it makes sense in my mind that it will be just fine.
Since I want water to be able to escape rather than getting caught inside the steps, I didn’t caulk or seal any of the pavers inside the structure. But I caulk the cracks between the pavers on any portion of the steps that show. For this, I used my go-to latex caulk — DAP Alex Fast Dry — and wiped all of the excess off with a wet rag. This process was kind of like grouting tile, but with caulk instead of grout.

Again, I only caulked the pavers that show on the finished steps, and I didn’t caulk the cracks between the blocks that I used for the risers because I want water to be able to escape rather than being trapped inside when it rains.
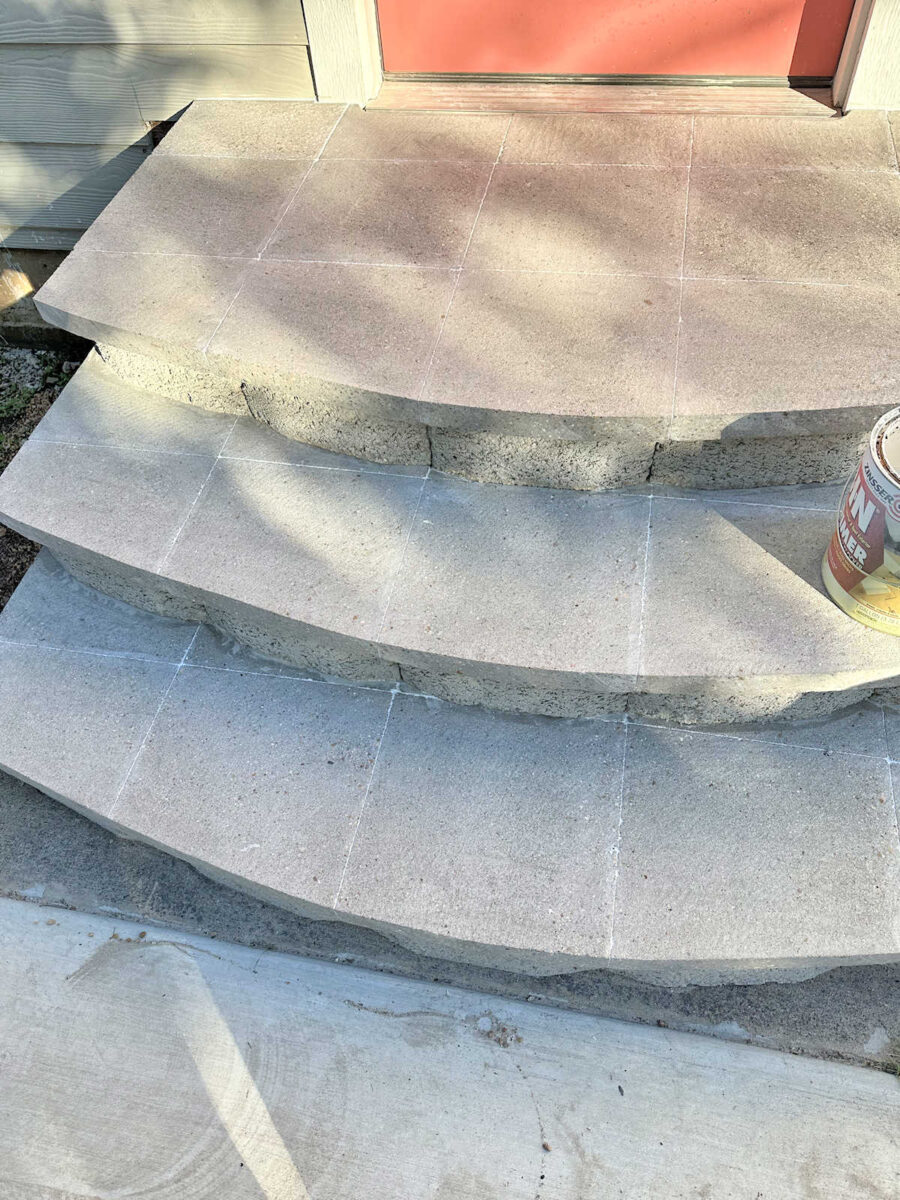
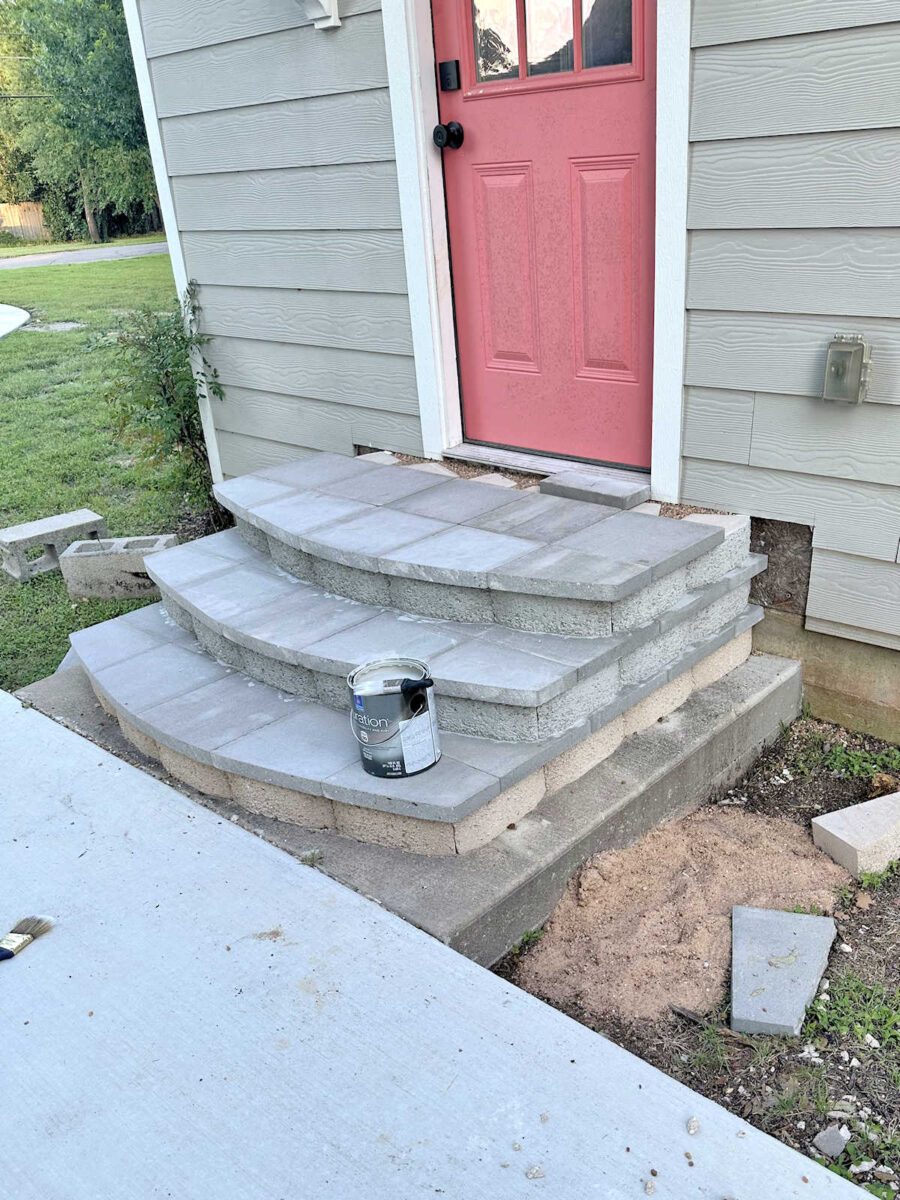
Once the pavers were caulked and dry, I primed the steps using my favorite primer — Zinsser shellac-based primer. And I just used a paint brush to apply the primer so that I could be sure to get the primer into all of the rough areas.

I agonized over the decision of what products to use to paint these pavers. I made three separate trips to Home Depot to buy products, and made two trips to return products, before I landed on my final decision. I’ll tell you about all of that once I get the steps painted, and I’ll tell you why I landed on the products that I finally decided on. But for now, this is the progress. I only have one more step in this whole process to go before these are finished finished. And while the final steps won’t be white, I have to admit, I kind of like the white. When I got them all primed and stood back to look at them, I actually wondered if I should have chosen white for my final color. But I think it would be a nightmare to keep white steps looking clean, so I’ll stick with my paint color decision.
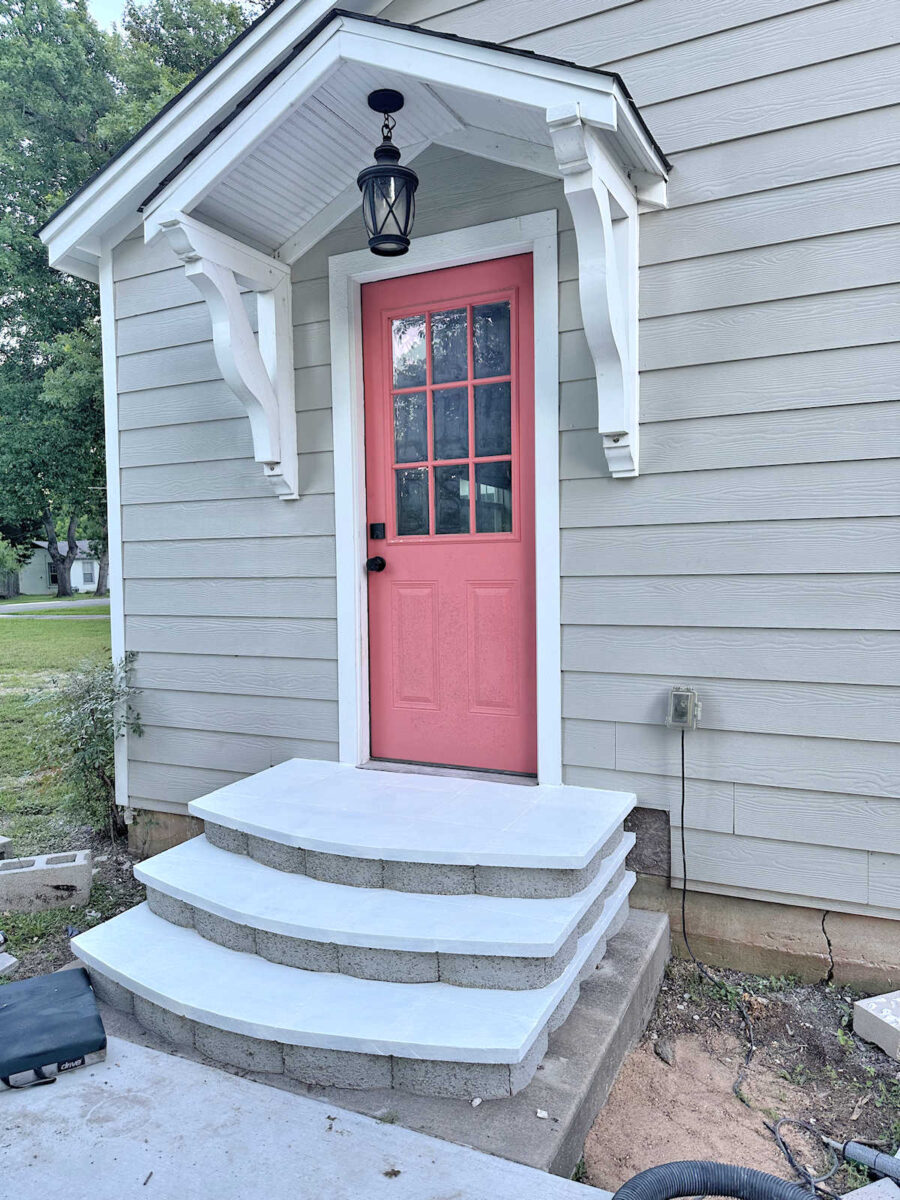
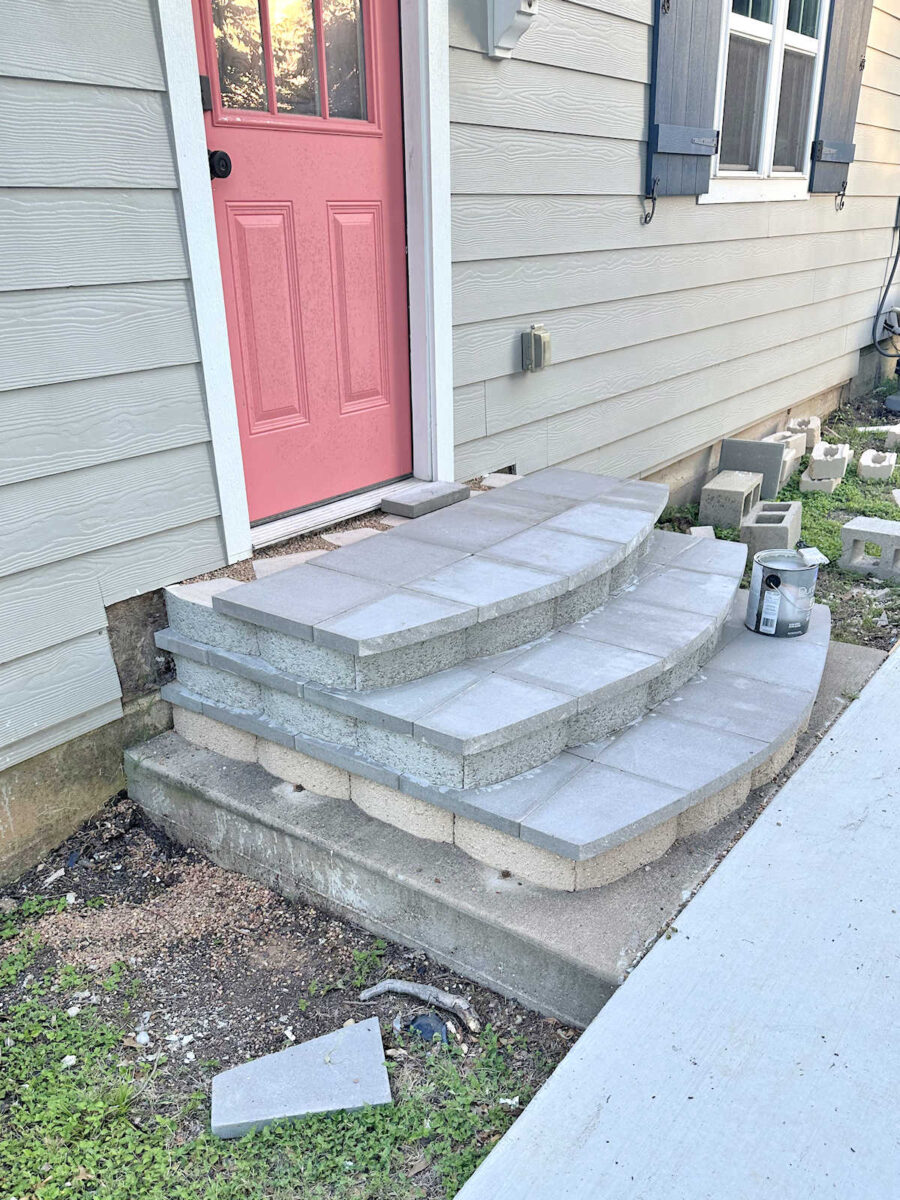
But like I said, I’ll share the products (and color) that I finally decided on with you when I get these steps painted and finished, and I’ll tell you why I ended up choosing these products over the others (i.e., the ones I made two trips to Home Depot to return). But finally, here’s a look at the top step with the rounded over edge from the doorway of my studio.
Hopefully, I can get these steps painted today so that I can show you the completely finished steps tomorrow.
NOTE: This is a multi-post project. You can find all of the posts about this project, from start to finish, here: DIY Exterior Concrete Steps Archives
You can find the next post in this series here: Painting My Exterior Concrete Steps (Products I Used And Why I Chose Them)
More About Our House Exterior & Yard

see all exterior &
yard diy projects

read all exterior &
yard blog posts

Addicted 2 Decorating is where I share my DIY and decorating journey as I remodel and decorate the 1948 fixer upper that my husband, Matt, and I bought in 2013. Matt has M.S. and is unable to do physical work, so I do the majority of the work on the house by myself. You can learn more about me here.

Looks amazing! Again! You figured out the steps, I knew you would, I think it is a good solution for the problem and the gaps for rain are probably the best idea going. They look gorgeous and can’t wait to see the finished steps.
Cheers to you and Matt and the Fur Babies!
This looks fantastic! I love how you solved the final row near the threshold.
I had quite a hard time getting your vision in my mind. It’s just wonderful.
Wouldn’t it be easier and safer rain-wise if you raise the threshold to the level of the slabs? Just adding a timber plank cut to the shape of the existing threshold would probably do.
It’s a prehung door, so everything is built to go perfectly together. That would actually be quite a job raising the threshold, and then it would require adjustments to the inside of the door as well. That would definitely not be easier.
Hi, why didn’t you fix the siding BEFORE you finished the steps and covered up the wood – or did you? the pictures show it still unfinished.
You must be new here…..😁😁😁
That was a dismissive remark. Couldn’t you have answered her question? It doesn’t matter if anybody is new here or not because I’d like to know the same question and I’ve been following Kristi for years.
I didn’t want siding behind the steps. I won’t be covering those areas with siding at all.
You are so smart! I never would have thought to do any of this.
Your steps look great.
I love how you make your vision come to life. And so smart to leave that gap for water. It looks so good!
Love how they turned out.
Darn. I wanted to read the “I was wrong” posts from the people who said to hire it out!
😆
They look great. I knew they would but I was sweating the 3/8″ height difference when you got that far. Brilliant solution, the grinding. I was thinking about raising the threshold too but knew it wouldn’t be simple.
MKH