More Pony Wall Progress – The Building & Trimming Is Almost Complete
So, building pony walls and columns isn’t quite as quick easy as I had pictured in my mind. 🙂
As with most projects, it’s all of the finishing touches that takes so incredibly long. I thought this would be a four-day project. Not so. It’s looking like a five- or six-day project. But I do have lots of progress to show you!
When I posted last, I had only gotten the very roughed-in framing done.
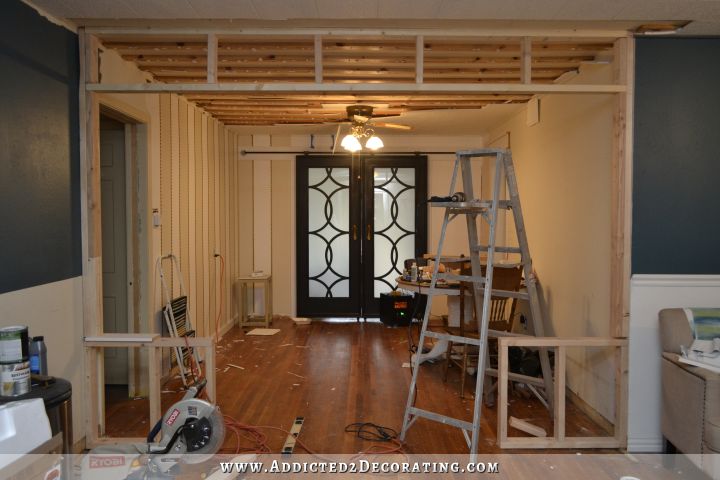
Next, I covered the front side (that’s what I’ll call this side — the view from the front door) in 1/2-inch drywall.
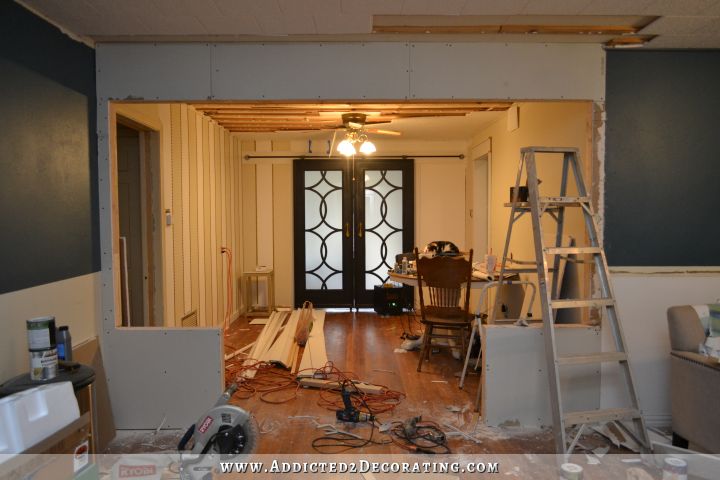
I didn’t cover the back side in drywall at this point. That came later because some adjustments had to be made.
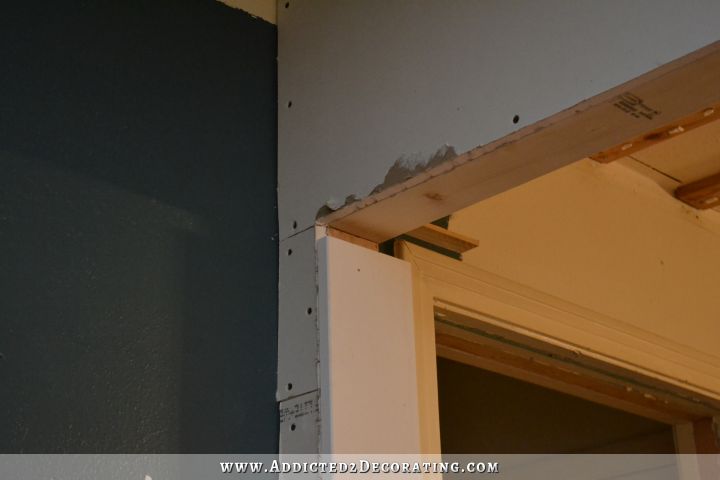
Next, I added the two vertical pieces of trim on the left side — one on the end of the pony wall, and one on the upper side jamb — and installed them flush with the drywall on the front. I kept my spacer in place on top of the pony wall for this.
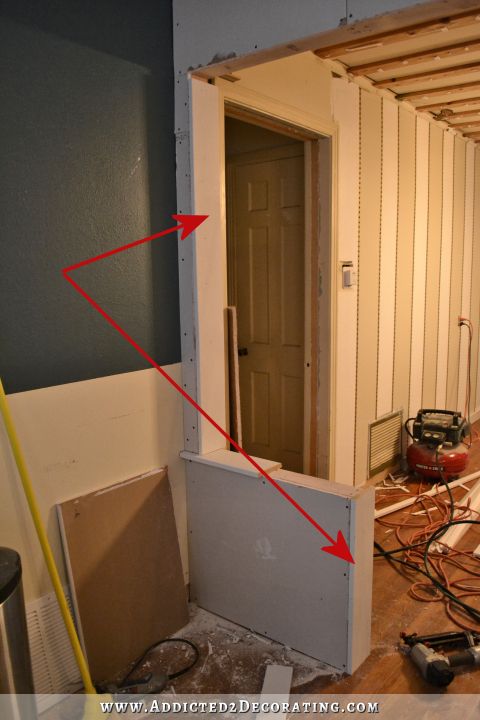
I also left a gap at the top of the upper side jamb so that I could slip the head jamb in there to hold it while I nailed it into place on the other end.
I wanted these walls to be the same width as the cased openings in the kitchen, as well as the one in the music room where the rolling doors are. So I used 1 x 6 pieces of MDF boards (which are actually only 5.5-inches wide). Obviously that was way wider than the 1 x 4’s that I used to frame the wall. To remedy this, I cut strips of 1/2-inch MDF that I had on hand, and used two layers of those MDF strips to add width to the 2 x 4’s on the back side before adding the drywall. That extra one inch, along with a layer of 3/8-inch drywall, lined up perfectly so that the drywall on the back side sat flush with the 1 x 6 trim pieces.
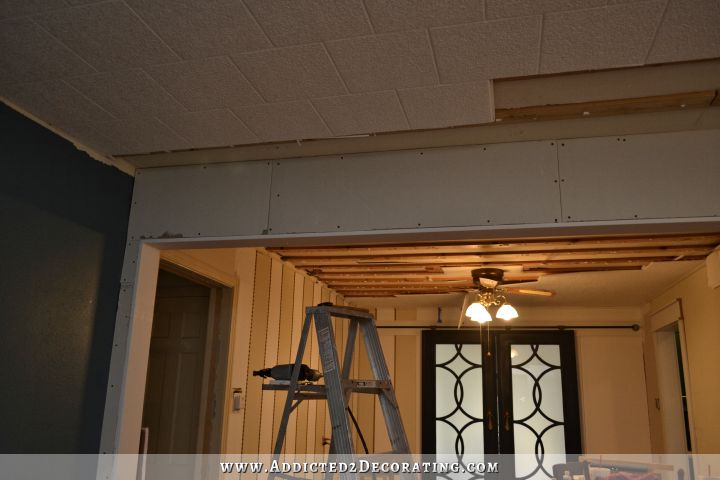
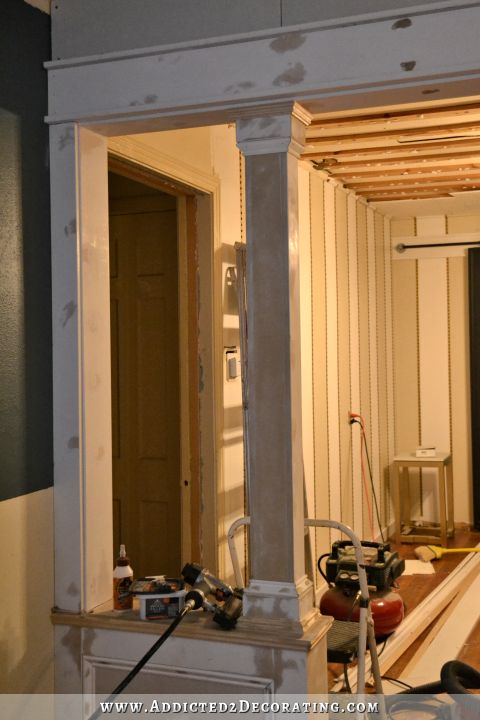
With the two vertical pieces of trim in place on the left, I added the head jamb. I did this by putting my ladder on the right side, lifting the 10-foot 1 x 6 and slipping it into the space above the side jamb on the left, and nailing it into place in several places on the right. Then I worked my way all the way down to the left nailing into place.
I continued trimming out the left side by using 1 x 4 MDF boards to trim out the pony walls. It looked very rough at this point, but I knew that wood filler would work magic. I also added a 1 x 2 along the floor to act as a spacer so that I would have something to attach a baseboard to later.
Next I added the left side casing (a 1 x 3 MDF board) and then the top casing. The top casing consists of a 1 x 6 sandwiched between two 1 x 2 boards. You can see more details on that here. The top casing needed to be about 10.5 feet wide, and the boards were only 10 feet wide, so I had to piece some together on the right side.
And yes, I added that trim before taping and mudding the drywall above. Y’all know by now how I work. It makes no sense, but I’m confident that it’ll work out in the end. 😀
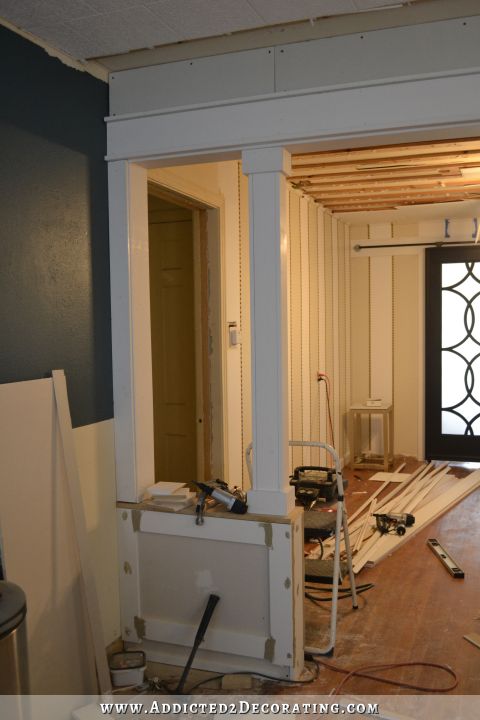
With the left front trim in place, as well as the top jamb and casing, I repeated all of that process on the right side, starting with the end piece on the pony wall and the upper side jamb, then the trim on the front of the pony wall, and finally the side casing.
After I trimmed out all of the front side, I started working on the back side. I added the spacer strips of MDF to the 2 x 4 framing (as I mentioned above) so that the drywall would be flush with the 1 x 6’s on the ends of the pony walls, the upper side jambs, and the head jamb.
Unfortunately, I forgot to get a picture of that. But I simply took a sheet of 1/2-inch MDF that I had on hand, and I cut it into 1.5-inch strips, using my circular saw, to match the thickness of a 2 x 4 piece of lumber, and then I attached them by stacking two strips of the MDF and nailing them to the 2 x 4’s that framed the wall. Then I attached the drywall to the MDF strips. This made my 3/8-inch drywall fit perfectly flush with the end trim pieces. I had originally thought that I could use 1/2-inch drywall, but evidently my math was wrong. That ended up being off by 1/8-inch, so I had to go down to the next thickness of drywall.
I also cut and attached the pieces of 3/4-inch MDF to the tops of the pony walls. I cut them the exact size of the tops of the pony walls. No larger.

I didn’t finish trimming out the back at this point because I was too anxious to move on with the columns. 🙂
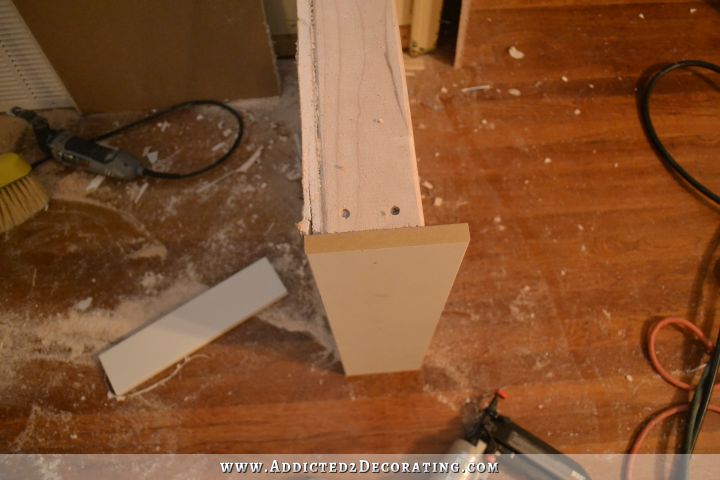
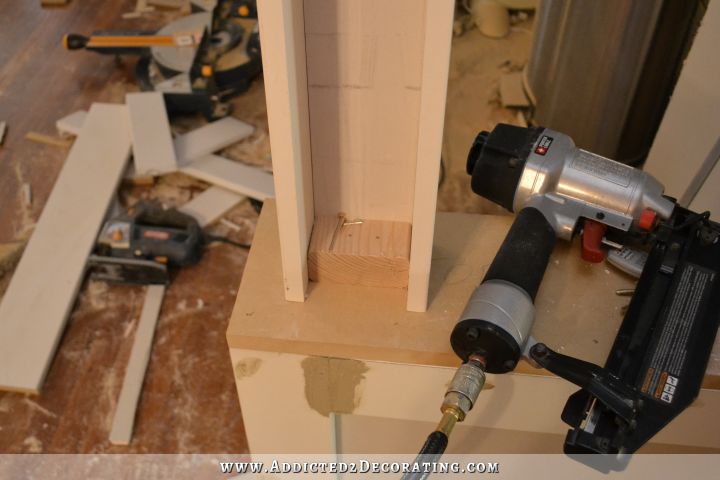
I made the columns out of four pieces of 1 x 4 MDF boards, glued and nailed together so that they made a rectangular shape rather than a square shape. I started by attaching three of the boards together using wood glue and nails. I put the unfinished column into place, and cut a small piece of 2 x 4 to fit inside. I glued and nailed the 2 x 4 to the top of the pony wall, and then nailed the column to the 2 x 4.
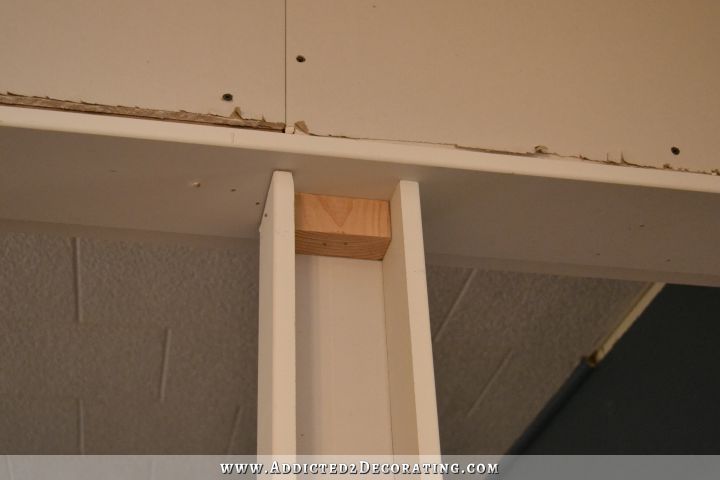
I repeated that same process at the top.
With the unfinished column securely in place, I then attached the fourth 1 x 4 to close up the back side of the column, and trimmed out the top and bottom of the column using 1 x 4’s.
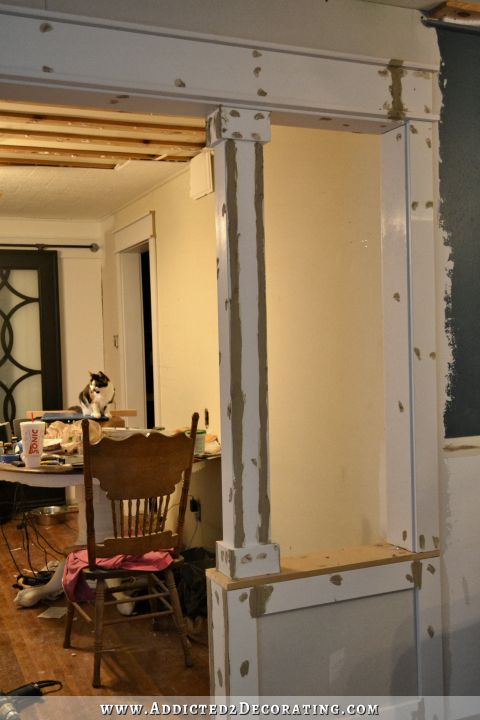
After building and attaching the other column, I filled in all of the nail holes and spaces with a very liberal amount of wood filler. I get a little crazy with the wood filler on areas where I know I can use my electric sander. 🙂
And then I used my electric sander to sand everything so that it was perfectly smooth.
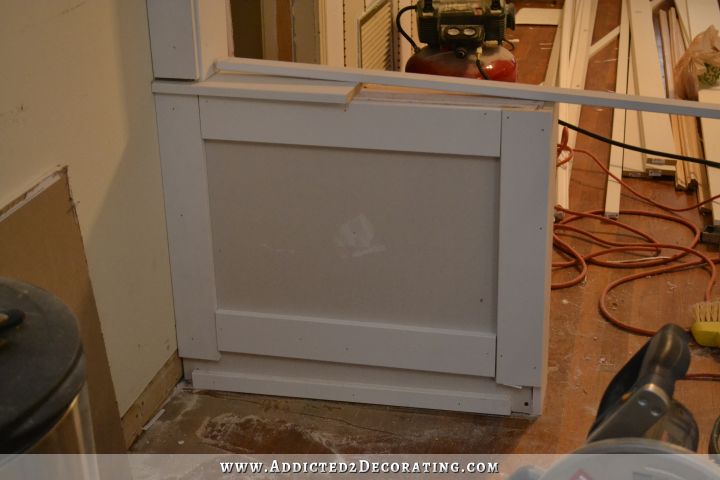
As I sanded the different areas, I began adding the finishing details. First I added the trim around the tops of the pony walls.

And then I added the trim to the inside frame on the pony walls.

And finally I added two different trims around the columns, both on the bottom…
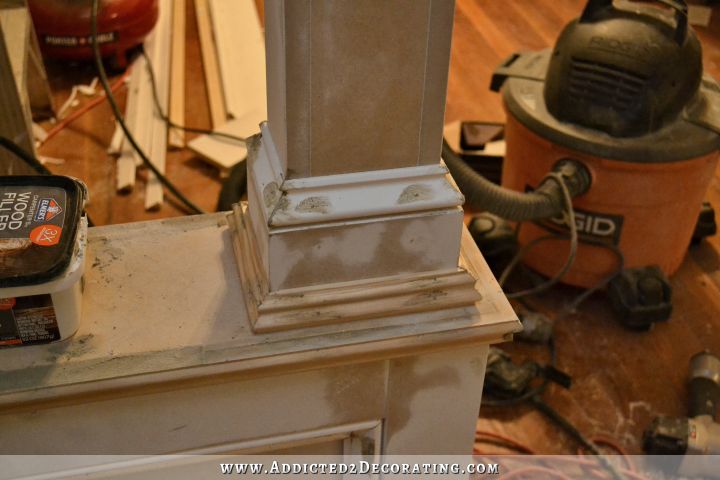
…as well as the top…

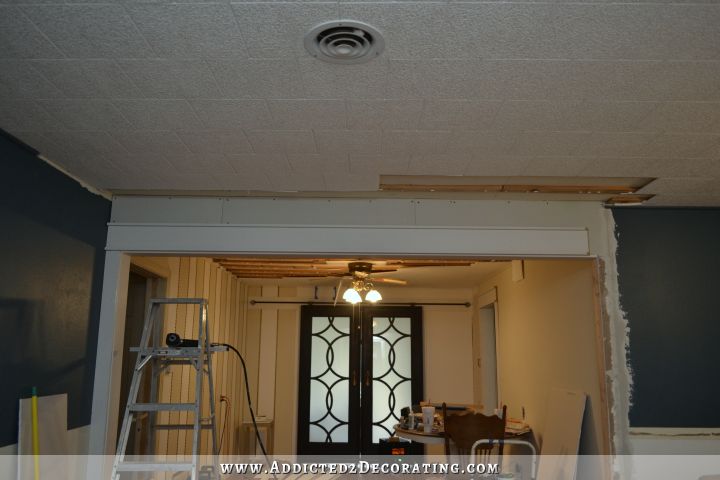
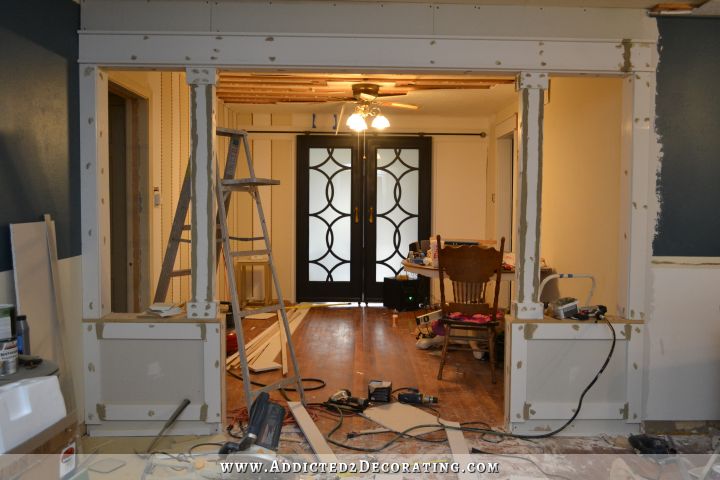
And that’s as far as I got! There’s still so much wood filling, sanding, and a ton of caulking to do on this side to get it ready for primer and paint.
But on this side, as well as on the back side, I not only have to do the initial sanding, but I still have to add the finishing trim. Then wood fill, sand, and caulk.
There are soooo many details that go into a project like this! I’m thinking it’ll definitely take two more days to get everything finished, but I’m loving how it’s turning out so far.

Addicted 2 Decorating is where I share my DIY and decorating journey as I remodel and decorate the 1948 fixer upper that my husband, Matt, and I bought in 2013. Matt has M.S. and is unable to do physical work, so I do the majority of the work on the house by myself. You can learn more about me here.

That’s going to be beautiful! You never cease to amaze me…
Looking fabulous! I can’t wait to see it all finished.
It is amazing what you have accomplished in just a few days. What a remarkable change it is making already and I’m sure the finished room is going to be just like you envisioned. Will you start on the ceiling next?
I LOVE the trim work. Makes such a huge difference., so it’s worth it, no matter how much time it adds to the project! Beautiful!
that’s exactly what I thought: do not worry about two extra days, as in the long run the result is so very beautiful – due to all that trimming! I love the way this is going to look – you rock!!
Wow, you have accomplished so much. The pony walls and columns are looking amazing. I love all the trim work, it really adds an elegant look and even though it’s time consuming, it does pack a wow factor.
You truly amaze me. This is going to be so beautiful. I can’t wait to see it finished.
I agree whole heartedly!! Girl, you are a whiz with the trim….I love seeing all the steps from the unbelievable beginning to the end product. It is so inspiring! This is going to be beautiful!! I get so excited just to see what you have accomplished every day.
You have done more than I could have even imagined doing myself in such a small amount of time. This is going to look AMAZING when you have it all finished!
Looks nice, but I’m confused. Will your ceilings be fixable with putting these up or are they going to be in the way if the ceiling drywall has to be replaced?
Your ability to choose trim to finish it is just mind blowing. What a great mind
I love how you think you’ve not accomplished much – shoot, I’d still be fighting with the drywall! It’s going to look awesome!
Okay READERS, Kristi’s kitchen has been entered in a DIY contest and WE NEED TO GIVE HER OUR SUPPORT AND VOTE!!!!! Go to http://www.notjustahousewife.net/2015/01/best-diy-project-of-the-year-contest.html
So excited that your kitchen is getting more exposure and I’ve my fingers crossed that you win!!!!
I am not understanding how we vote. Am I missing something? lol
Here is the link where you cast your vote. 🙂
http://www.notjustahousewife.net/2015/01/top-10-projects-voting-open.html
Done! Thanks Kristi! Good luck!!
And yours, Kristi, IS the most outstanding. Especially when one knows what you started with. Wish I could vote more than once. Everyone, DO IT NOW!!!!!!! Deadline is the end of this week, i think.
Voted! Love everything you do!
They are simply Beautiful Kristi. My daughter is in the process of buying a home, would love to have you give her some ideas, since she is going to be doing some remodeling to. I show her many of your projects, and she loves them. Have you ever helped with ideas long distance? Can’t wAit to see this finished!!!!
You completely and totally AMAZE me!!!!!!!!!
Lovely!
You’ve made a lot of progress and its looking soooo good! As with all your projects, I can’t wait until its finished – kind of like a kid at Christmas!
Amazing, how much change you have made in just one year to your house! I love how your mind works!!!
AmAzed. Again. Can’t wait to see it all painted. ps. Can I have some of your energy???
Kristi, Are you going to finish the Ceiling in the music room Before you finish your stripe details? Love the pony walls….
I love trim and this is awesome!
Looks fabulous!!1 You are quite amazing!!
I really love your visionary approach to decorating. You have done a great job so far on the kitchen, rolling doors, pony walls. I don’t see the striped walls though and find it is competing for attention. Maybe if there was less color contrast…not sure. I would rather see a real nice color, no fancy treatments, with some beautiful artwork instead. But, all that being said, you do have a finished product in your mind that you are very kind to share with us, including being vulnerable. I really look forward to your emails so keep up the great work.
I wish I had your vision.
WOW! I am so excited! I can’t wait to see how it turns out! So far it’s beautiful. I want to build one now, though it wouldn’t suit my house. 🙂
Those columns are great. My house came with tapered columns. Also, just an FYI, The builder put a shadow line all around the opening – the way they do with door trim (It looks a little weird because it leaves a gap between the column trim and the face trim).
Holy wood filler!! Those pony walls look marvelous 🙂 🙂 🙂 Great job!
This is quite fantastic! I love the columns!
So awesome! I cant wait to see it all done!
Wow! It looks great!! Sure wish Santa had brought me the talent for making miter cuts that you have! 🙂
they look wonderful, I can’t wait to see them all finished. I didn’t realize you would be making your own columns, I thought you would have to buy them. What was I thinking! You amaze me again! Love your posts
Wow,Looks great! It is all starting to come together. I still would have liked the round columns but I know it was easier and less expensive for you to go square. Can’t wait to see it when it is done. It really looks good looking both ways.Blessings
\
The trim is where it’s at!!
I’m not one to comment but WOWSA!!! I absolutely LOVE the clean lines of the pony walls and columns against the backdrop of striped walls and the black trim of the doors. I think it helps make your custom, curved door design stand out that much more, like a piece of artwork! Just so visually stunning in my opinion…can’t wait to see it finished. Keep it up, rock star Kristi!
Great progress…and I voted for your kitchen to win… good luck!
OMG, you are amazing! Can’t wait to see it finished….so talented!!!!
This is looking fantastic. I’m truly impressed. I don’t comment often, but am following your projects always with great interest.
Your blog is the highlight of my inbox. Love your blog, your choices, your designs. You are an inspiration. Keep up all the good work and wonderful writing.
Amazing! It makes the whole living room/music room/entry look entirely different. You have such good ideas!
Kristi, can you do a photo-tutorial on using wood filler? I bought the kind I thought I saw in your photos, but I think I may have done it wrong because it cracked at every joint I used it on.
Thanks!
I agree with BeckiB. I’ve done work with MDF and put filler in the joints, only to have it seperate/crack on me when it gets cold. Does yours stand the test of time or does it require touch-ups after a couple of seasons? Just curious b/c your joints look flawless in the pictures. I’m looking to do some wainscoating but am dreading the thought of the cracking/seperation. I’m thinking if I use pocket screws this will help, but I’m just curious about your experience.
Would love it if you could share your insights.
I’ve never had problems with MDF. Could be different climates in different areas that cause it to react differently. Of course, solid wood also expands and contracts with the seasons and climate, so I don’t know that there’s a product available that won’t every have those issues. I know they make PVC “boards” now, which I’m sure is less affected by climate than wood and wood-derived products are, but I can’t imagine having my walls lined with plastic wainscoting.