DIY Board and Batten Shutters (Decorative Non-Functioning Shutters Made From PVC Boards)
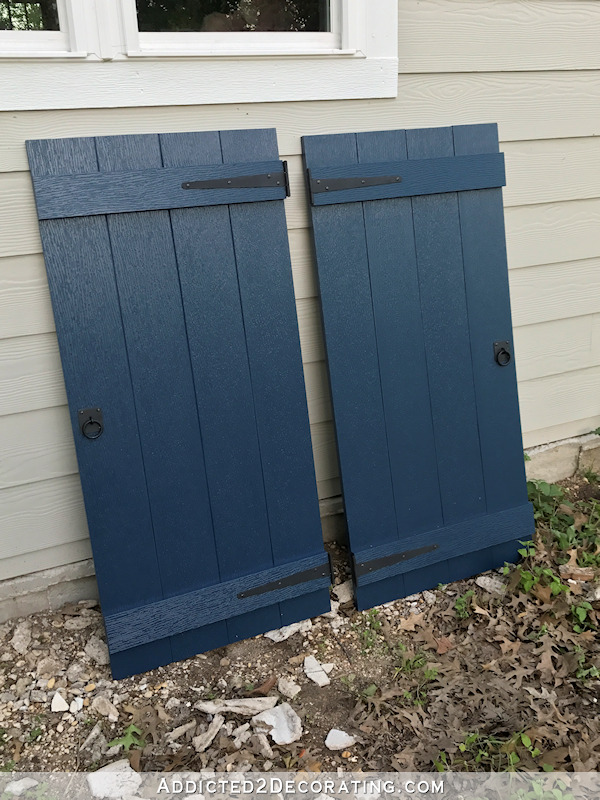
I got one pair of my DIY board and batten shutters made this weekend, including painting and adding the decorative hardware.
But unfortunately, I didn’t get them installed yet. I think that may be a two-person job, so I’ll have to call in reinforcements once I get the rest of them made.
These are really quite easy to make, and of course, you can use regular lumber to make shutters if you choose. I chose PVC boards because I think they’ll be more durable and last much longer, and after my very frustrating porch column fail (which you can read about here if you missed it), I’m all about the PVC boards for outdoor projects now.
Before I got started making my own, I looked at several different tutorials online for making board and batten shutters (they’re rather plentiful, as this style seems to be the most common for DIYers), and I decided on the details, like how many battens I want, and what decorative hardware I want to use.
I also read this article all about shutters on the Old House Guy website. Fair warning — he tends to be a bit abrasive with his opinions, but I still really like his information. He really emphasizes using the correct width and height for your specific windows (something I talked about here). But another thing he said is that this style of shutters should never have spaces between the boards.
I personally think that’s a matter of personal taste, but I hadn’t realized until I read that article that the black shutters (which you can see here) that finally made me decide on this style for my house don’t have spaces between the boards, and that’s actually one of the things I really like about them. Every board and batten shutter tutorial that I had read showed how to use spacers to add spaces between the boards.
So I decided on no spaces between the boards. Perfect. That meant I could screw the boards together on the back and make the shutter stronger, so I liked that idea. And since these are purely decorative and will never be closed, the screws on the back will never be seen. (Obviously, if you’re wanting to make functional shutters that will actually be closed at any point, my method isn’t the right one for you.)
So let me show you how easy this project is…
How To Make Board and Batten Shutters
Step 1: Cut boards to length
My windows are 44 inches high and 48 inches wide (actually double 24-inch windows). The trim around the windows makes the overall height 51 inches. I didn’t want my shutters to be the full height of my window and trim, so I opted for my shutters to be 48 inches high.
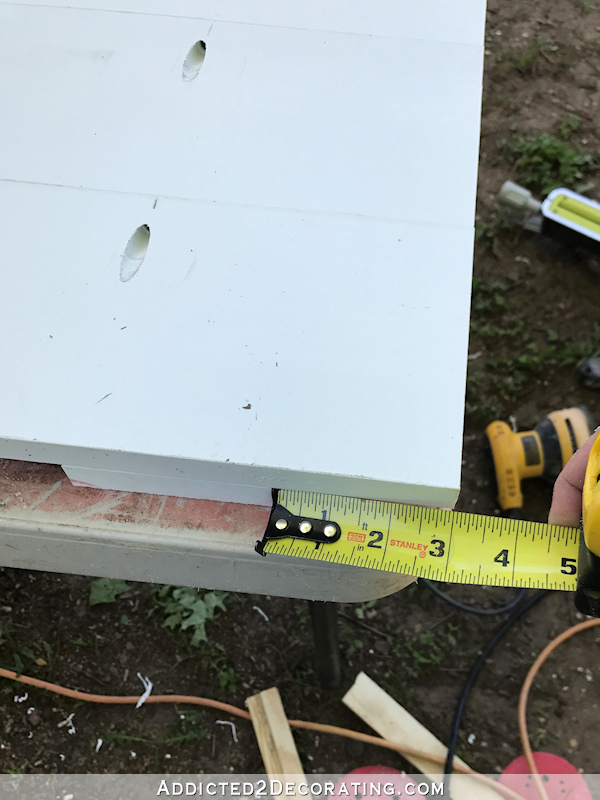
As for the width, I settled on 22 inches (which is exactly the width of four 1″ x 6″ boards, since those are actually 5 1/2″ wide each). If these were actual usable shutters, they would need to be the full 24 inches wide, but since these are purely decorative, I decided to stick with the four widths of 1″ x 6″ boards to save money.
So I used my miter saw to cut all of my 1″ x 6″ boards to 48 inches in length.
The length of your boards will be determined by the height of your windows. And based on the width of shutters you want, it may also be necessary to rip your boards to the correct width using a table saw. Again, I urge you to read the article on Old House Guy (linked above) to determine the proper height and width of your shutters.
Step 2: Round the edges of the boards
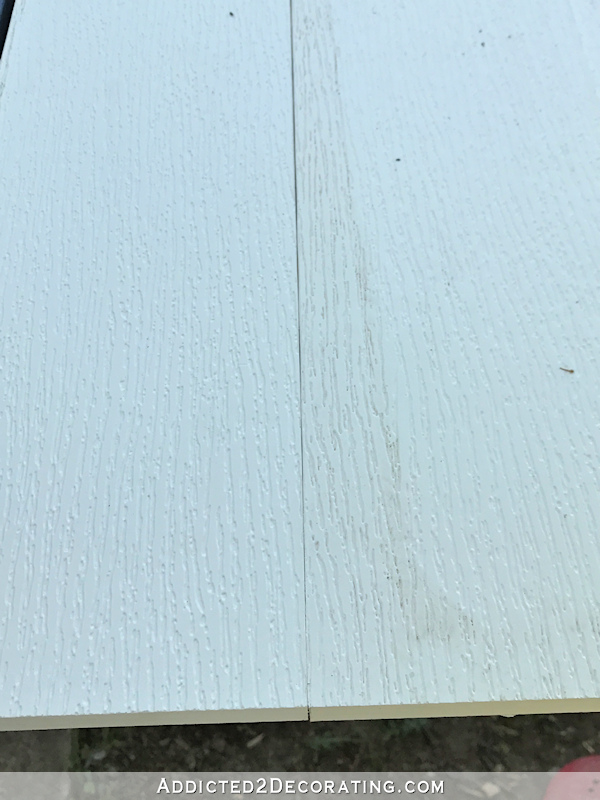
I really liked the idea of using PVC boards for my shutters for durability. What I don’t like about PVC boards is that the edges are really square, so when the boards are butted up against each other, it can get hard to see where one board ends and the next begins. Here they are lying next to each other, so you can imagine that after they’re clamped and screwed together, they would just all meld together visually.
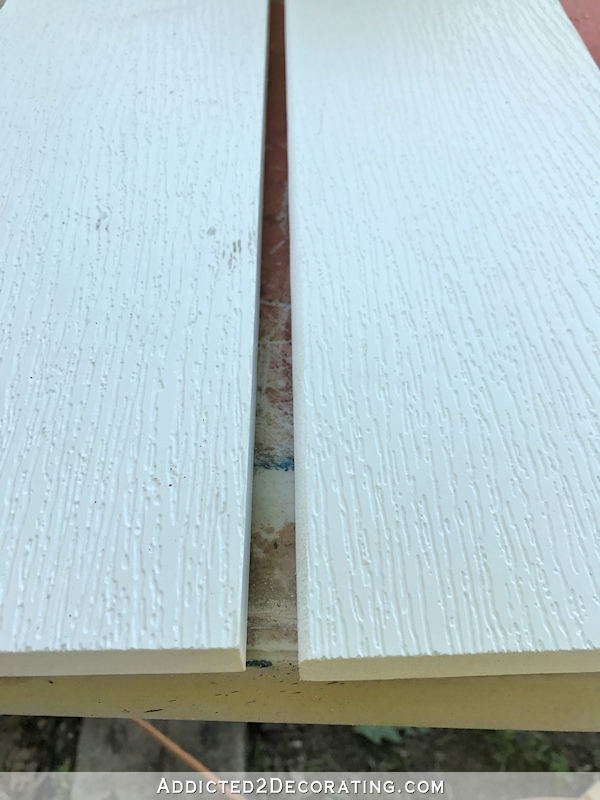
So I used my sander with 80-grit sandpaper discs and sanded the sharp corners off of the edges, giving them a more rounded appearance. Hopefully you can see the difference in the boards below. The left board is the original with the sharp edges, and the right is the one with the sanded rounded edges.
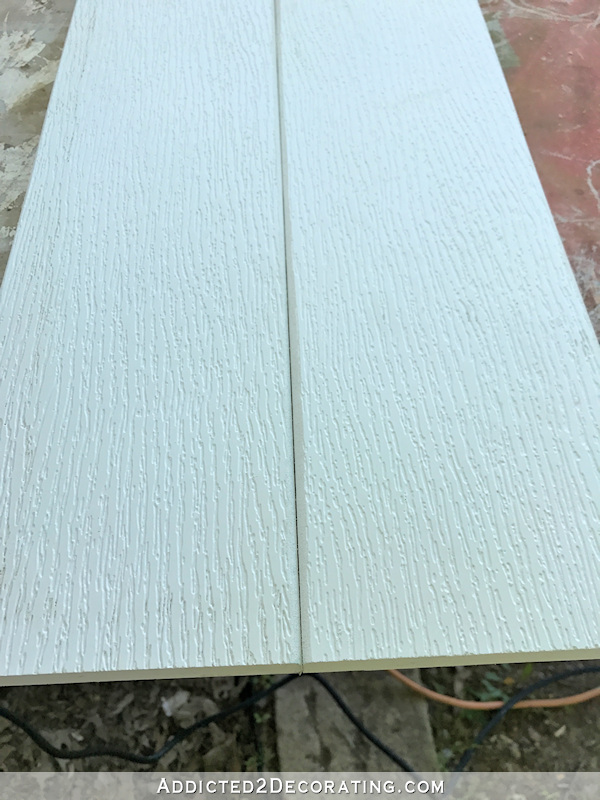
With the rounded edges, even after they’re clamped and screwed together, the individual boards are still visible.
It’s one of those small details that I think makes a huge difference in the finished shutter.
Step 3: Screw the boards together
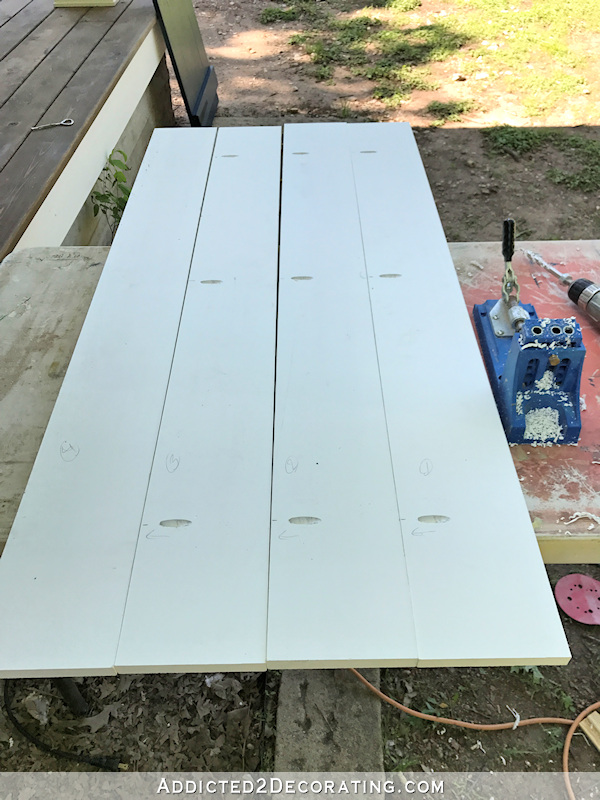
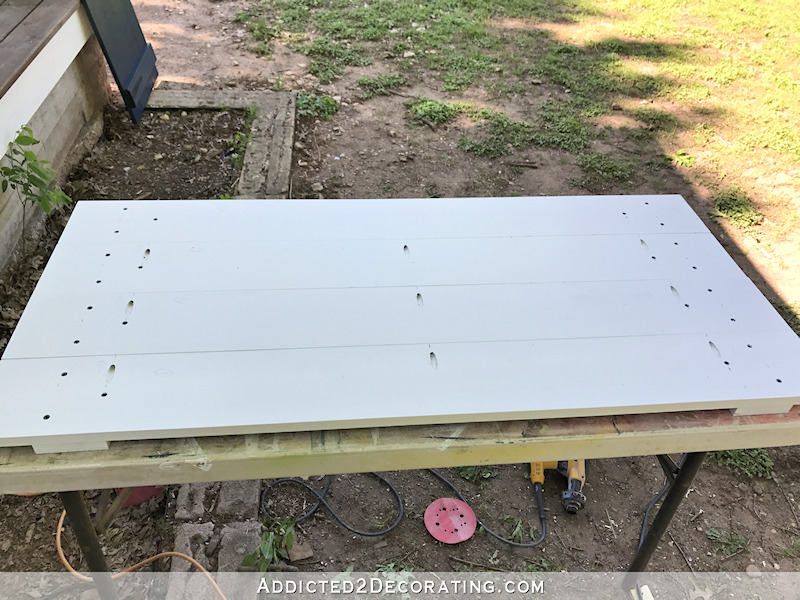
I flipped the boards over and marked where I wanted to screw the boards together using pocket holes. I did three pocket holes per board — one hole six inches from each end, and one in the center. (Note: In hindsight, I wish I would have put the screws closer to the ends of the boards — maybe 3 inches from each end instead of 6 inches from each end.) I used my Kreg Pocket Hole Jig (this is the one I have) to drill pocket holes.
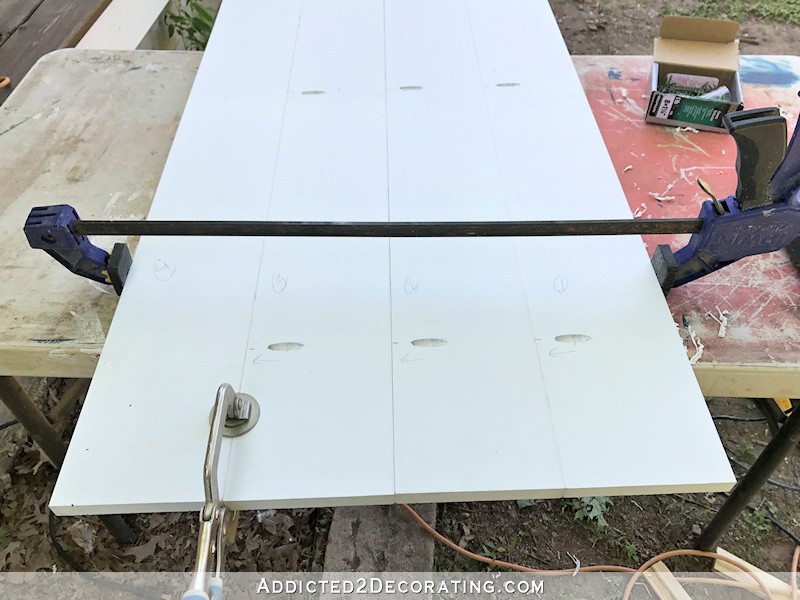
Then I used a trigger clamp (this is the one I have) to pull the boards tight against each other side-to-side, and a Kreg face clamp (which you can find here) to keep the boards flush on front and back, and I screwed the boards together using the pocket holes.
I didn’t use Kreg screws on this project because I can never find Kreg exterior screws in the right length. But you can use any #8 screws with the Kreg pocket holes, so I used some regular #8 x 1.25″ exterior screws to screw the boards together.
Step 4: Cut and attach the battens
With the four boards assembled, I measured and cut the 1 x 4 boards for the battens.
I decided to use just two battens on my shutters, but you can add one in the middle if you like that look. Or you can add a long board on the diagonal between the top and bottom battens to create a “Z” pattern.
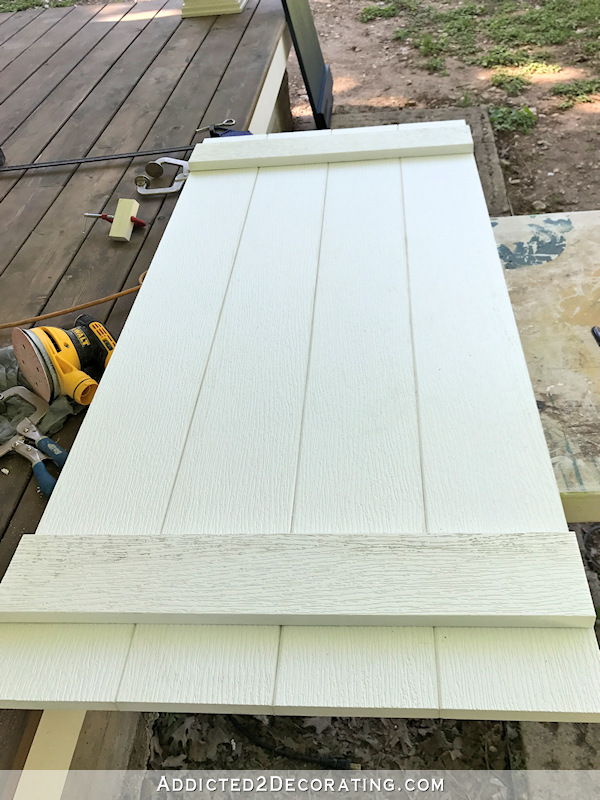
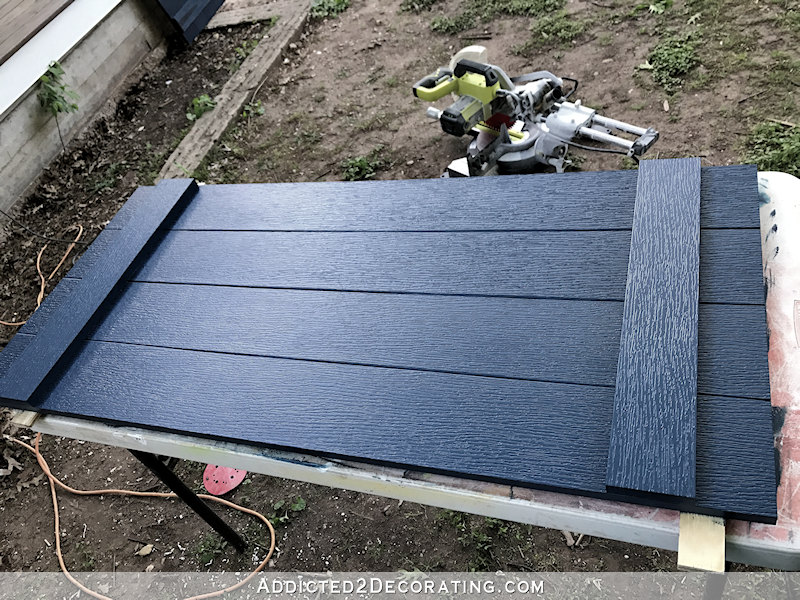
I wanted to attach the battens from the back so that I wouldn’t have any screws or nails showing on the front. So I placed the battens face down on my work table, and then placed the boards face down on the battens. Then I measured each side carefully and got the batten lined up just right. I placed the battens three inches from the top/bottom, but there’s no hard-and-fast rule about placement. It’s just a matter of personal preference.
(NOTE: I ended up making a design change and moved the battens further in — six inches instead of three — which made the proportions of the shutters look better, in my opinion. But again, there’s no rule.)
And then I screwed the battens on from the back using the same exterior screws I used to screw the boards together. I used three screws on each end per board, which is probably overkill, but I wanted them very secure. 🙂
Step 5: Paint and add hardware
Once the battens were screwed on, the assembly was finished. I was then ready for paint.
I called the company that makes these PVC boards to verify that the boards can be painted in a dark color. I was told that dark colors are fine as long as you use heat reflective paint with vinyl safe technology. You can find this paint at Sherwin Williams. It’s actually an additive that they can add to any of their premium exterior paints, so just tell them that you’re using it to paint PVC, and they’ll let you know your options.
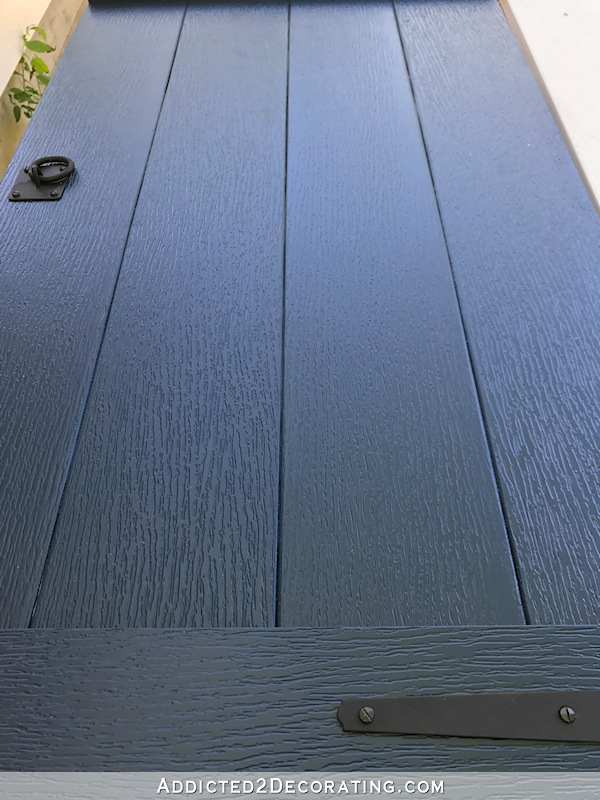
I used Sherwin Williams Emerald in a satin finish. (When will I learn? I hate the sheen of exterior paint in a satin finish. That’s what I have on the rest of my house, and the sheen drives me crazy. I should have gone with flat for my shutters.) The color I used is actually a Benjamin Moore color — Gentleman’s Gray (which is a dark navy blue) — but Sherwin Williams has the BM formulas in their system, so you don’t even have to bring in a sample for color matching.
I added decorative hinges, which I found here, and ring pulls, which I found here. I also bought these shutter dogs, but those don’t actually attach to the shutters, so you won’t see those until I get these shutters installed.
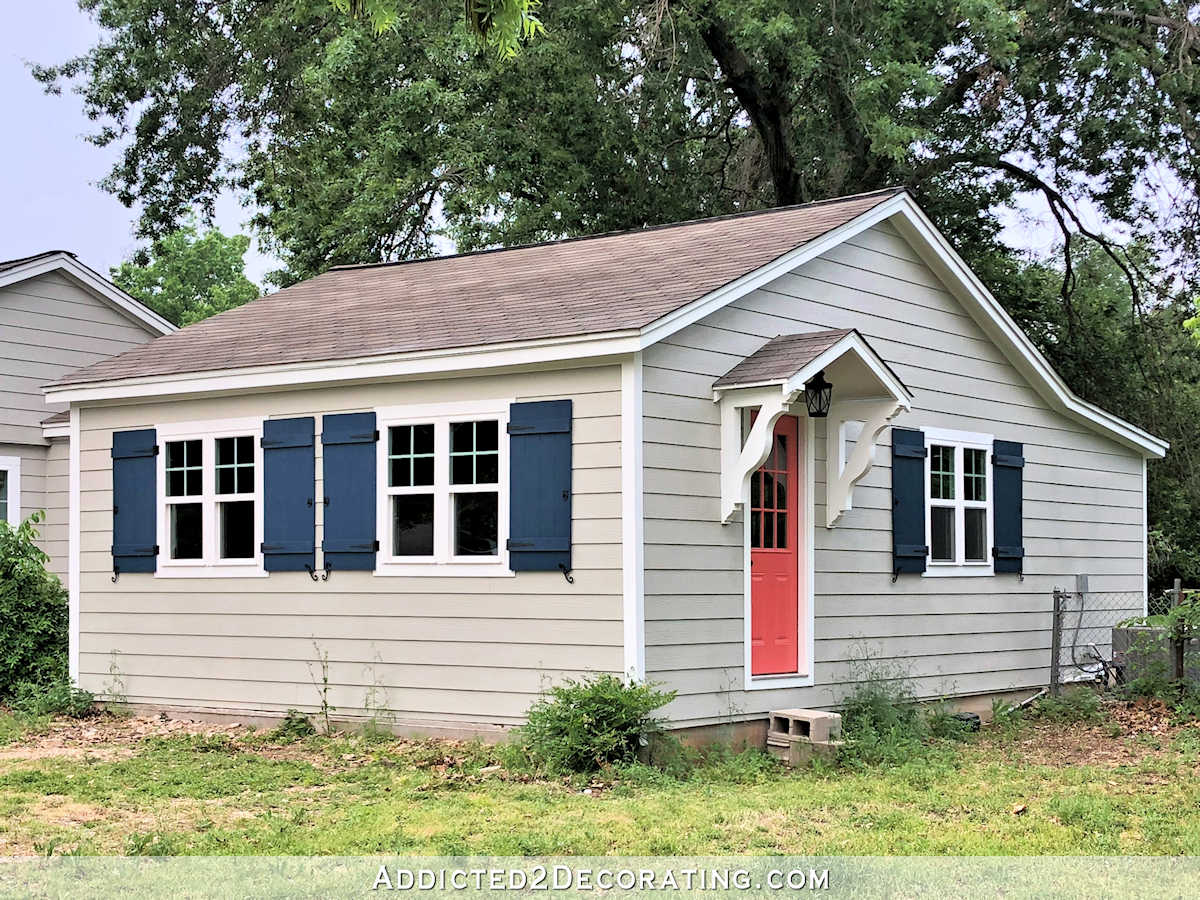
So that’s the progress so far. I’m so glad y’all helped me decide to go with the Gentleman’s Gray over a dark teal. I think this dark blue is perfect, and it looks great with my coral doors. I can’t wait to get them all made and installed and see the difference it’s going to make!
UPDATE:
I got the shutters installed on the studio. You can click here to see more pictures of the studio exterior progress.
Addicted 2 Decorating is where I share my DIY and decorating journey as I remodel and decorate the 1948 fixer upper that my husband, Matt, and I bought in 2013. Matt has M.S. and is unable to do physical work, so I do the majority of the work on the house by myself. You can learn more about me here.


These are gorgeous! Can’t wait to see them after they’re hung!
OMG, the color is beautiful! Love the shutters!
Love the color and the hinges!
Those are lovely! They will look wonderful with window boxes and flowers! Can’t wait to see it all up!
Kristi
Hi! Its kim from VARO a long time ago. I just now opened your blog from when I saw you, i believe at Home Depot a long time back.
I’ve only read about your batten shutters so far, but they are lovely and well made! Your knowledge and experience are both so evident! I’m so proud to know you, and see your success. And you loving what you do!
Hope to talk to you later.
Kim
Those look really nice! The color should look great with the coral front door. Looking forward to seeing the complete picture when they get hung up.
I love them! They’re going to look awesome!
Beautiful!
Hi – What size PVC boards did you use? Could you link to them possibly? I’m also planning on making shutters and your use of PVC has me rethinking the cedar boards I was going to purchase. I’m planning to make a frame and then attach the boards on a diagonal to the back.
I’ve seen a single, solitary photo on Pinterest of shutters like this an ADORED them and am determined to make my own, much to the dismay of my husband. All that to say, thanks so much for sharing how you’re doing this!!
Could you please install one set before proceeding so if it changes things you could adjust before building them all out? I cannot watch you redo everything again. No offense.
They look fabulous! 🙂
Can’t wait to see them up on the house!
I am curious as to whether these boards are as heavy as the pvc decking boards. I notice that they’re not as thick but boy are those decking boards heavy. These are beautiful. Can’t wait to see them up.
Really like these – Saving post for hubby to use. Was thinking of painting old faded metal shutters but this certainly changed my mind. Thank you
Very pretty. I love the color. It was a great idea to round the corners. However, the proportions—position of cross pieces—bother me; and the hardware, especially the hinges, seems too small. However, it’s all personal preference and if you love them, then they are perfect! 🙂
Once again your attention to detail pays off bigtime! I love that you rounded the edges of the PVC boards to make them look more like wood and the result is just outstanding imo. And the color (despite the crazy name, cuz it sure looks like a shade of navy to me) is so perfect for your house and with the black hardware. Elegant, gorgeous, and bound to take the exterior up another level. Now missy, get going on those window boxes too!
They look great! I know how frustrating it can be to wait for help😔. Have you considered installing a cleat board to set the shutters on to install? You would have to patch some screw holes when done, but might be worth it.
We want it when we want it! 😄
So much prettier than the shutters you can buy, unless, of course you can spend the super money that the nice ones cost. And these look just an good as those expensive ones. Rounding the corners on the front really do make a big difference. How spectacular the front of your house is going to look. Talk about curb appeal!
Love the rounded edges. Love the color. Can’t wait to see them up! 😉
You are amazing!
Nice work and excellent choice on the shutter design. I like the color too! I was wondering if you had to prime the pvc boards before applying your color?
Yep, shutters look good. And gray will probably coordinate with the coral door better than teal. The neighbors will love you, your house is going to look so nice on the outside too, now.
Good idea to round the edges, it looks nicer with that touch. I kinda would have placed the battens a bit further in, but like you said, it’s a preference thing I guess. Will wait to see how the color looks with the coral – I’m sure it’s awesome. Sorry we didn’t get to see a picture with them together here! I like the blue!
I love your shutters, and your detailed instructions.
If you do not love the sheen, s-t-o-p right now, go back to Sherwin Williams and get the paint in the sheen you really want.
It will be so much less work to repaint only one shutter, than to finish them all and then decide you can’t live with the sheen.
Trust me. I know this pain. 🙂
You never disappoint 😉 That color is BEAUTIFUL ! I wish I could put Shutters up on our house but the windows are wrapped in stucco 😔
You continue to amaze me with your vision and DIY abilities!!! The shutters will look fantastic, love the color!
These are stunning! ! ! 😲 Great tip with sanding the edges. We to have been tossing around the idea of shutters, sorry I’m so surprised how beautiful they turn out but when you were talking about plastic I could see the advantages but wasn’t expecting such a realistic look. Truely worth all your hard work.
Sanding the edge makes a huge difference in the end! The shutters look lovely and that little detail made all the difference. Thank you for another great tutorial, I’m already looking forward to the next step!
Kristi I love everything about these shutters! I can already envision them on your home. They are going to look amazing! The texture of the vinyl boards is great and I’m a big fan of rounding the edges of the boards so that they show up when butted together. And the Gentleman’s Gray is the perfect accent.
Kristi, how smart of you to use the PVC boards. Our builder used cedar and the charge was outrageous. Now they after loosing knot holes and not holding paint in the severe Wisconsin weather….they should be replaced. Your shutters are beautiful but everything you do is done beautifully!
I am wondering how the paint has held up since you installed these. Thank you!
The paint has held up perfectly!