Reader DIY Question: How Do I Refinish My House’s Hardwood Floors One Room At A Time?
Today, we’re going to help Paula out with a DIY question about refinishing hardwood floors. Her basic question is this: Can you refinish hardwood floors one room at a time? Well, the short answer is YES! I was excited to get a DIY question in the trove of mostly decorating questions that I receive, so I wanted to address this for Paula. Here’s what she wrote:
Paula’s DIY Question:
This is much more a DIY procedure question than a decorating one, but a workable answer will change my life and help me move forward into this smaller home which is mortgage free and allow me to sell the larger house.
A 10-year process of necessary renovations of my dream house came to a abrupt halt almost 10 years ago when my husband Leon was diagnosed with cancer. That was a many years long medical treatment and surgery that culminated in his release to his heavenly home in 2016. Most of the house was completed prior to his diagnosis, leaving stripping and refinishing of the solid 50-year-old pine floors yet to be done. My own health seriously cratered about two weeks after his home going and had not fully recovered partly due to Covid infections (3) over the last two years. Those years ago I had originally planned to refinish all the floors at once because of advice to do it all at once or the “seams” going from one room to another would be impossible to make presentable.
My question is obviously is “How did you, Kristi, transition the finish/top coats from the flooring in your room that was finished years ago to the new flooring in the hall butting up to it? I am at a point in recovery that I feel I can prep, sand and finish two bedrooms and the closets in order to actually move into that house, then tackle other rooms as I am able.
Here’s how I would handle this floor refinishing situation:
*This post contains affiliate links.
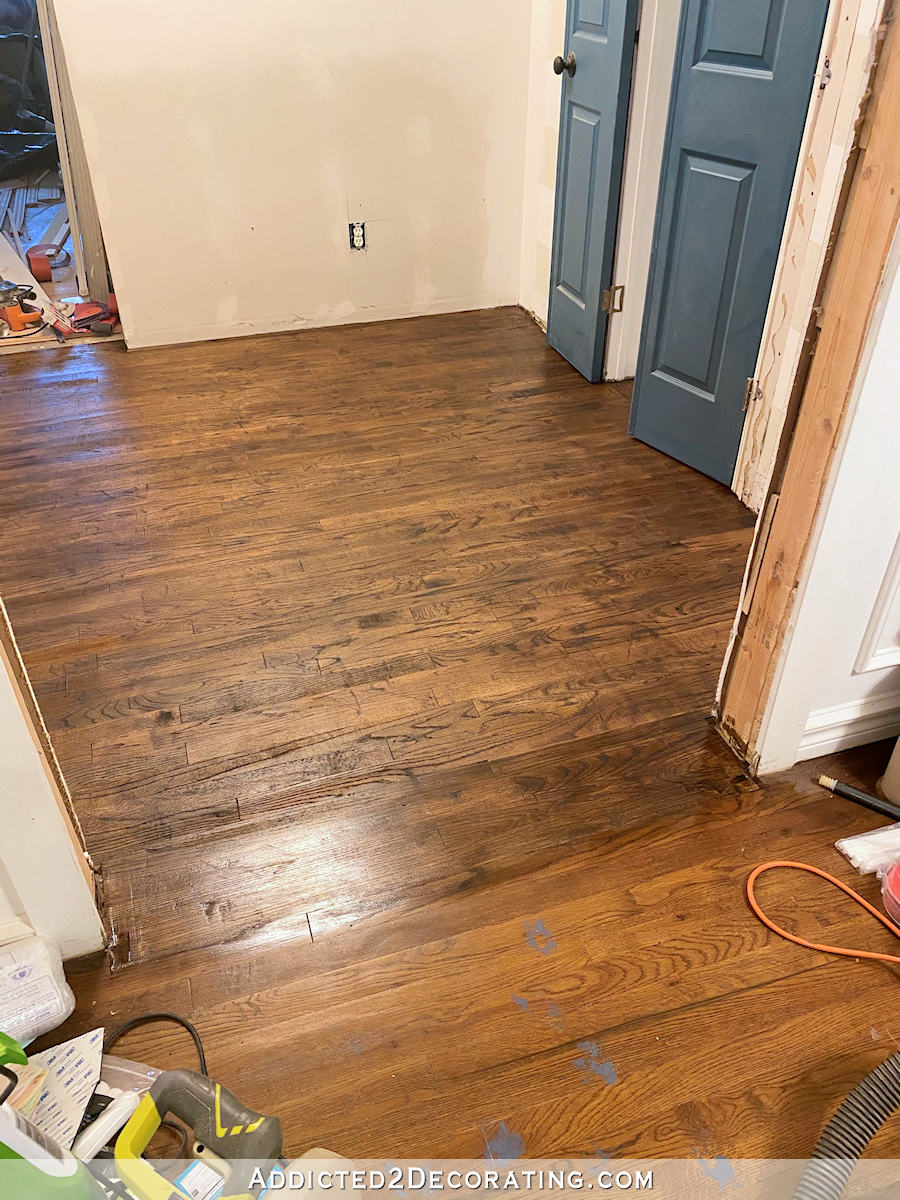
It is true that if you can refinish all of the hardwood floors in all of the room at one time, you’ll probably get a better result without any chance of having “seams” from one room to another. That’s what I did the first time I refinished our floors right after we closed on our house in August 2013.
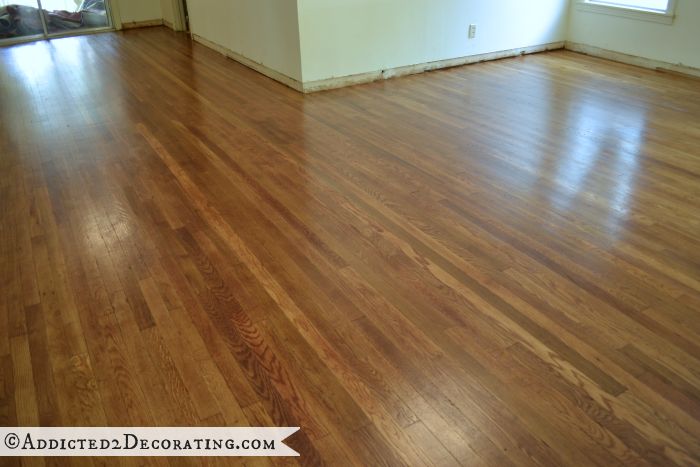
I’ll have to admit that it was very nice starting on the bedroom side of the house and literally working my way out the front door, getting all of those floors done in one start-to-finish process.
I had the luxury of doing it that way because we hadn’t yet moved into the house, and I was fully of energy and excitement to get it done. I had that “nothing’s going to stop me” attitude, and since we weren’t really on a time crunch (we had no concrete move-in date, so I could have taken as long as I needed), I was able to do it this way.
But I also know that’s not always possible. For people who are already living in their homes and needing to shuffle furniture from one room to another to get the floors done, refinishing the entire home at once isn’t possible. So can you refinish hardwood floors one room at a time? Of course!
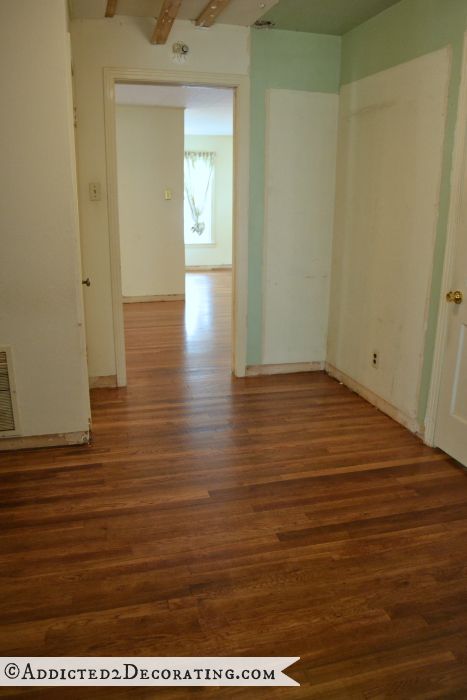
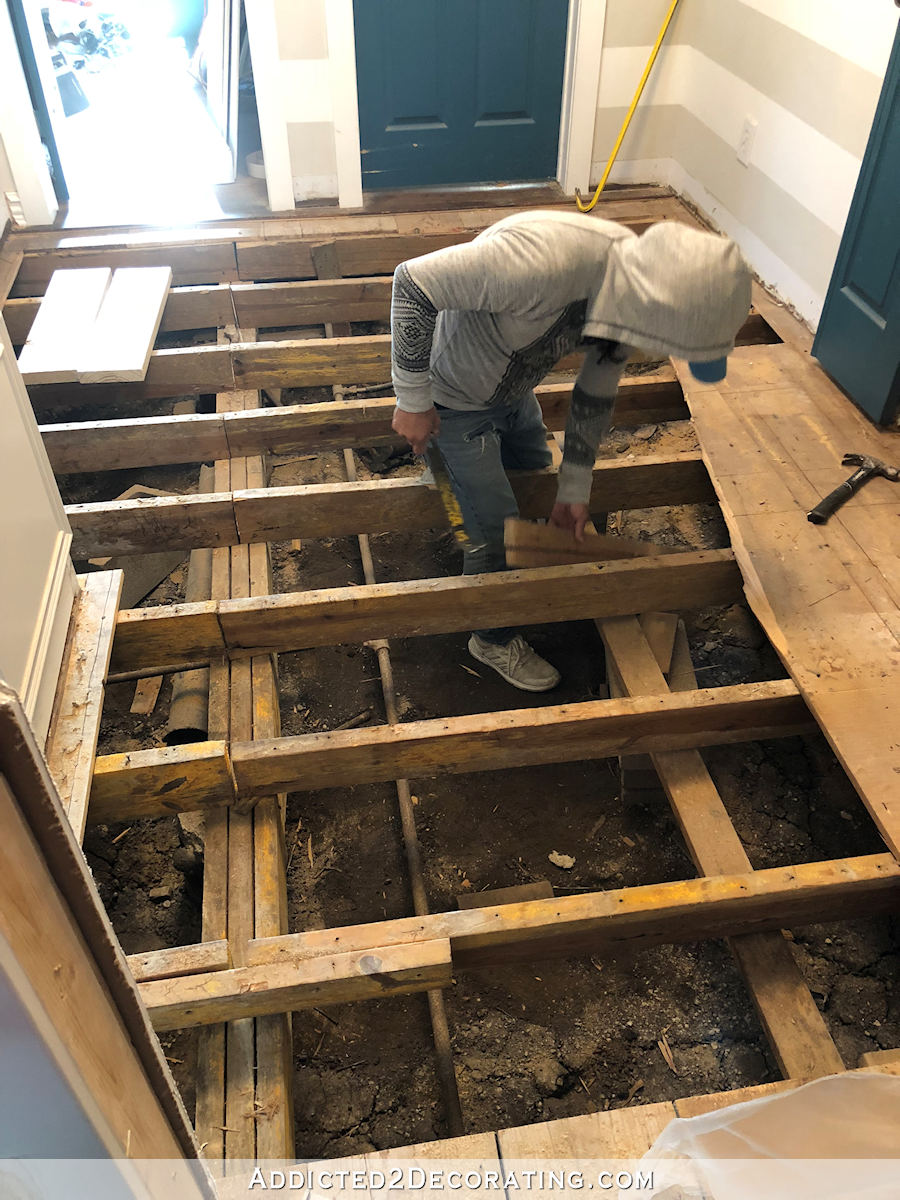
I faced a situation similar to this when we needed to replace the floor in the hallway (including the subfloor) after the crap geyser episode in the hallway bathroom. After that incident, the bathroom floor was fine (thank goodness for impenetrable tile), but the hallway floor wasn’t. So it all had to come up and be replaced.
So once all of the new flooring was installed, I had the challenge of making this floor match the existing refinished floor in the adjoining music room.
At this stage, this project was a little different from what Paula describes in her house since this was new flooring and there was no RE-finishing necessary. I only needed to finish the floor. But many of you will remember that my initial attempt to stain the floor and get it to match the music room floor was a total fail.
The color didn’t match at all. So this left me in a situation that is probably very close to what Paula has right now, where I only needed to sand and refinish the hallway floor, while leaving the music room floor intact, and making the two floors match in the end.
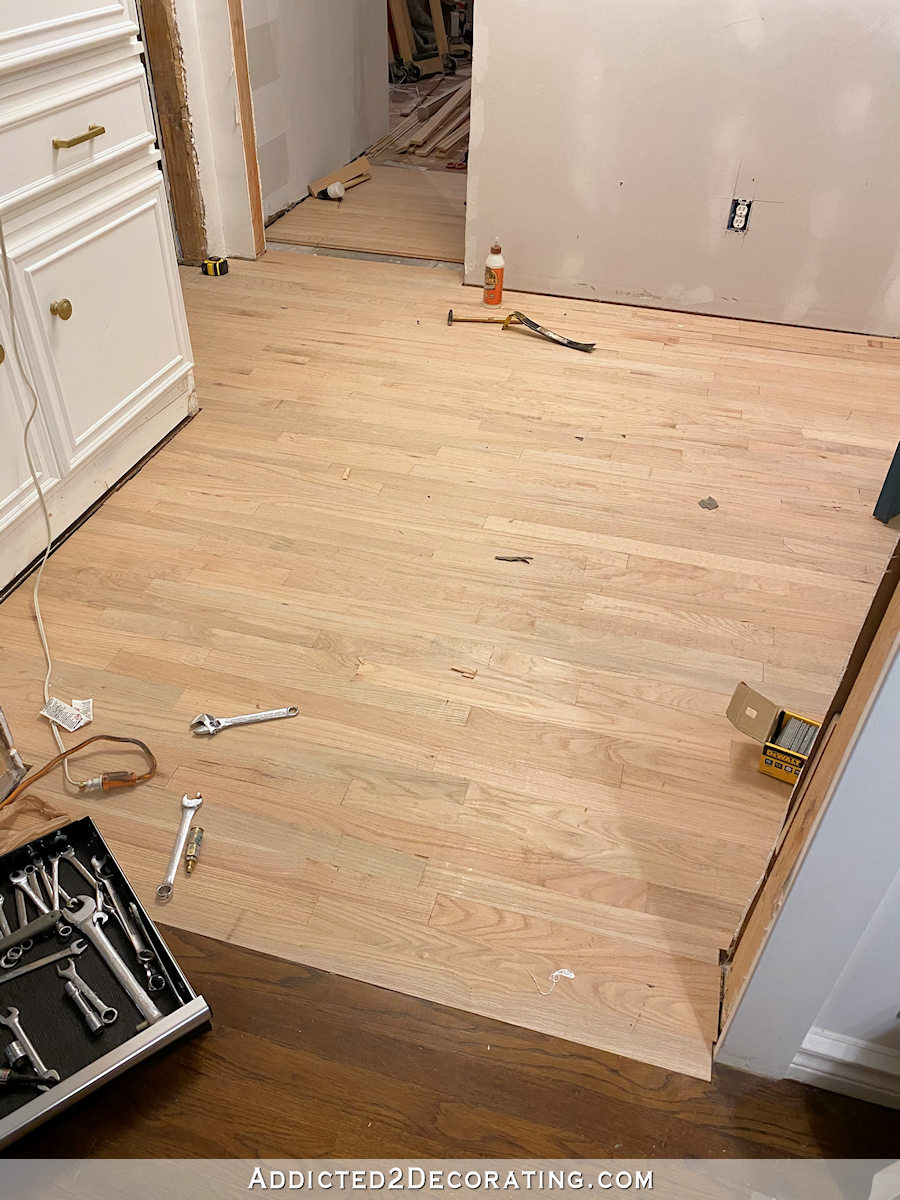
Since my hallway floor is so small, I chose to sand the whole thing down with a hand held belt sander. But had this been a standard size bedroom, I would have rented the big floor sander and edge sander and sanded the floor as normal.
But the question here is about stopping one floor, and then starting the adjoining floor at a later date. So here are the steps I would use.
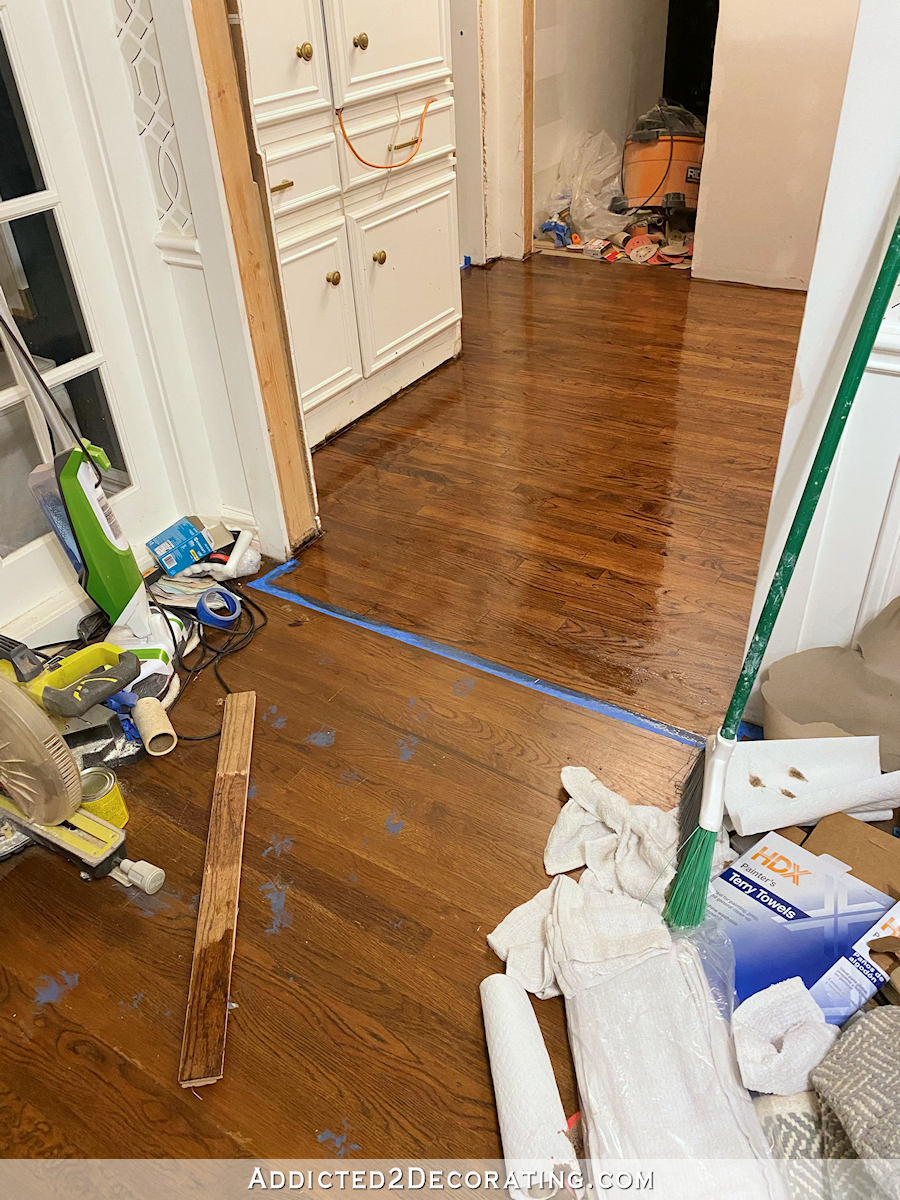
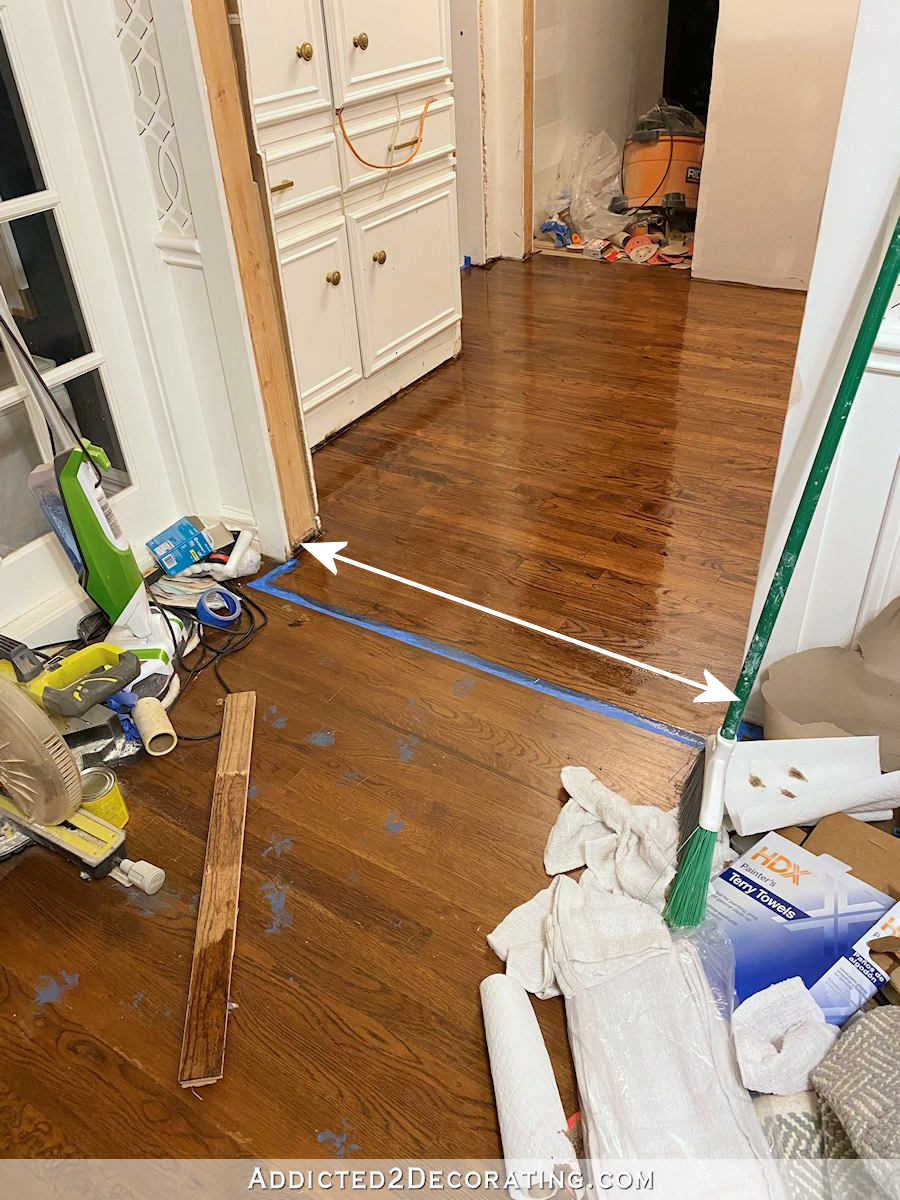
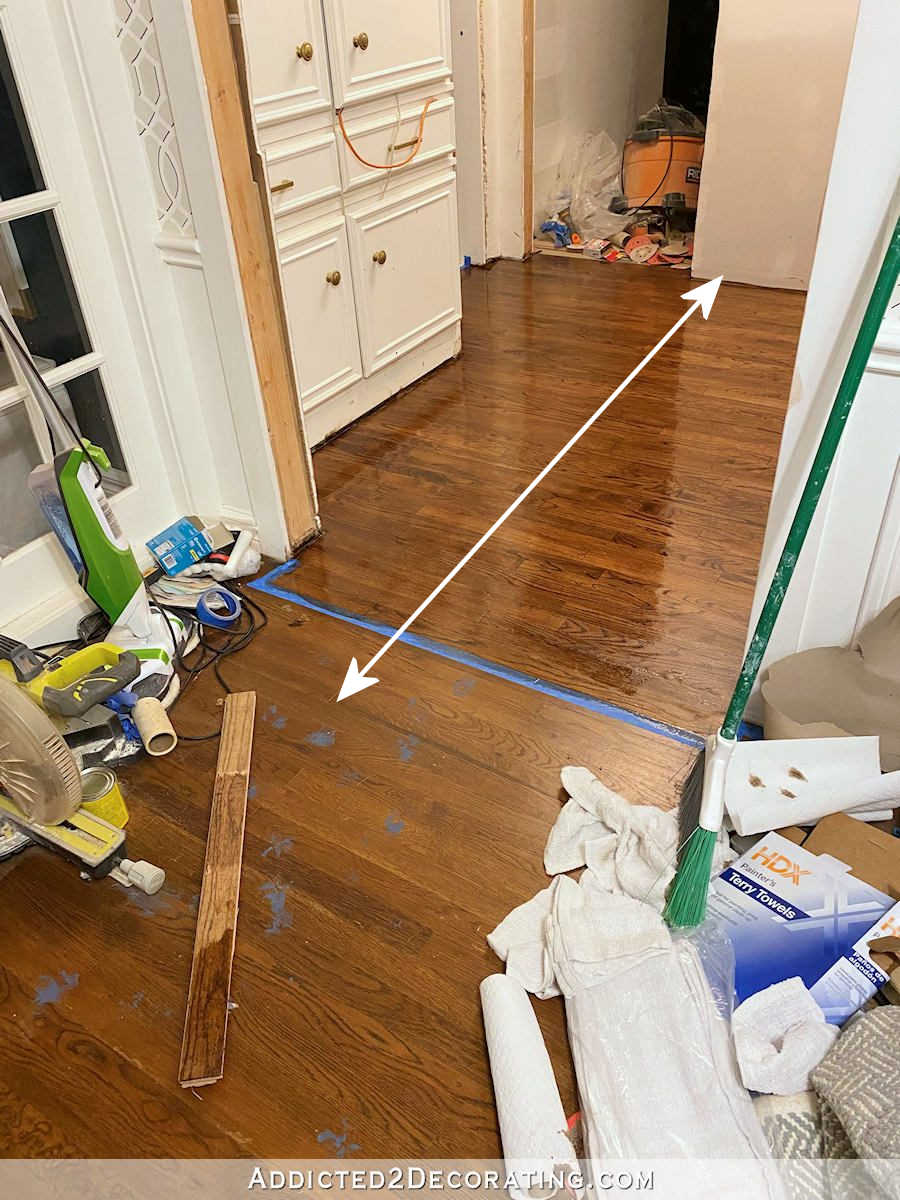
First, pick out the board you want to end the initial refinishing on. For example, if the first room you want to refinish is a bedroom, then you’ll choose a board that’s in the doorway of the bedroom. Using painters tape, tape off around that board like I’ve done below so that you have a visual of where the first phase of refinishing will stop.
If you have a situation where the boards aren’t going in the right direction to form an easy transition between one room and the next, like I had in my situation…
But instead, they’re going the opposite direction so that there’s no easy transition from one room to another…
I would still tape off around individual boards. Instead of having a straight line in the doorway, you’re going to have a situation where your taped off area looks more like a city skyline, but that’s how I would approach it. In other words, you want to make sure you refinish whole boards at a time rather than prioritizing stopping and starting your refinishing projects in the doorways between rooms. If you have that second situation above, and you arbitrarily choose a stopping point that cuts across all of the boards in the doorway, then you’ll definitely have a seam where one finish ends and the next finish begins.
As an example, if I wanted to refinish the floor in my living room/entry, but I didn’t want to do the music room right now, my tape like would look something like this…
Kind of like a city skyline. 😀
But if I were to take one continuous piece of tape straight across, cutting across boards, to transition from one room to another, the final result would look awful.
Worst case, it would be obvious that the floors were refinished at the same time, and that that line was your starting and stopping point. Or it would look like the flooring installers decided to cut all of those boards so that they ended at exactly the same spot, which would look awful and amateurish because hardwood floor boards are supposed to be staggered. Either way, the final result would be undesirable. So stick with taping off whole boards, and not focusing on the idea that the transition has to stop and start in the doorway.
It’s natural for individual boards in a hardwood floor to be varying shades, though. (Just look at the floor in the picture above. Some boards are darker, others are lighter. That’s natural.) So if there’s a slight variation in the finish of the floor in the initial room, and the finish when you refinish the adjacent room, it will be a whole lot less obvious if you finish whole boards at a time rather than taping across boards.
Next, I’d sand the floor just like usual, using a big floor sander and the edge sander. But the key is that when you get to your taped area where you want to stop the project during this phase, put the sanders away and grab a hand scraper for hardwood floors instead.

These things are so handy for getting the old finish out of corners that can’t be reached with the round edge sander, but they’re also great for this purpose. Because they’re small and easy to control, you can scrape the old finish off right up to the very edge of your tape.
Keep in mind that if you had to do a “skyline” tape job as your transition, you’ll want to be sure that your scraper isn’t wider than your floor boards. You want to scrape with the grain of the wood, so if your floor boards are only 2.25″ wide, then you’ll want to get a 2″ scraper and not a 2.5″ scraper.
Use the scraper to finish up the process of removing the old finish right up to your transiton. Once you’ve got the whole floor sanded, and the old finish removed up to the transition marked by the tape, you’ll want to replace the tape with fresh tape since the original tape will have worn and torn edges by now. This will be a real pain if you have the “skyline” transition, but don’t skip this step.
After you have new tape down, move on to the staining and sealing process. Once you get the last coat of clear sealer on the floor, remove the tape on the transition while the sealer is still wet.
And that will give you a starting place for the next phase when you’re ready. And you’ll do the next phase in the exact same way. When you’re ready to move on to the adjoining room/hallway, you’ll tape the boards in the same way, and this time, the tape will go on top of the boards that you just refinished.
I had great success using this method in my hallway. Now that it’s almost been a year since I finished the hallway floor, I almost never give it a thought. It seems like the two flow seamlessly with each other, and I don’t think any visitor to my house would ever know that the two floors weren’t finished at the same time.

Addicted 2 Decorating is where I share my DIY and decorating journey as I remodel and decorate the 1948 fixer upper that my husband, Matt, and I bought in 2013. Matt has M.S. and is unable to do physical work, so I do the majority of the work on the house by myself. You can learn more about me here.

I certainly don’t have any suggestions/input…but wanted to wish Paula good luck as she tackles her floors! I hope 2022 is a good year for you full of accomplishments and much less challenges than previous years. 🙂
Thanking you through happy tears to know someone care enough to send such a kind and hope filled comment.
Not sure you know but there is a pop up ad for “Three” not sure what it is except annoying. The one at the bottom isn’t bad.
I shouldn’t have any popup ads on my site at all, and unfortunately, I can’t do anything about an annoying ad unless I have a screenshot to show me exactly what it is, what it looks like, and where it’s located.
No pop ups to me…
Kristi, you do not have ads on your site in Firefox, but Chrome and Edge still have a ton of ads in them.
I have no ads on my chrome??
How do you send a screenshot to you
So happy to hear Matt had a great weekend. I hope the coming week is good also.
I am in prayerful agreement with Viki about Matt (and your, too, Krisit!)
How perfect that this question came up right now. I need to refinish my downstairs, it’s really time, and the floor flows from one open space to another. I wondered if the single board taping was the way to go, so I am glad to see it. I have a very heavy cast iron fireplace stove that we will have to move. Since it is gas fired it sits on the wood floor, but I don’t want to move it far! And another huge piece of furniture has to “shift”. Now a place for the dog while this is going on….Thank you so much!
These are fantastic, logical and easy to understand instructions!
Thankyou for sharing your knowledge so freely.
I know this was a question of how to do the DIY but if it were me and I had had Covid three times I would first not want to do all that sanding because too great a chance of inhaling the dust particles. Even with masks. I would find a way to at least hire out the sanding portion and refinish all at once. But if refinishing them myself was the only way I could afford to do it I would at least check with my doctor to make sure that I would not be putting my health at risk. That is too high a price to pay.
That is such great information. You are so helpful and generous! I really enjoy reading your posts.
Thank you for your valid concerns! as a retired RN, they are mine also!
I have a professional grade Chemical and particulate full-face mask with cylinders, plus the U Sand Pro sander has a wonderful sander to floor skirt to contain the sanding particulate, plus there is a great vacuum system and bag.
Had some lung involvement only with Covid 19, no pneumonia, in March, 2020 but almost all the other horrible symptoms.
If I have any indication whatsoever of physical challenge to the sanding when I am ready to attempt it, I will stop immediately and teach my contractor how to sand and not over sand since the floor is in such good structural condition. If there is any way to do several rooms at once and it is after this pandemic is truly past, I would very likely want to get the contractor involved.
A lot needs to happen before I will be at the jumping off point to sand, refinish and move in and it is SO very good to know there is a technique to make the refinishing so much less noticeable!
My health is improving very quickly now and I am still home isolating until the new Covid
cases being reported lower considerably more to also lower my risk of another infection even more. Nobody comes into my home but me at present. So hiring a worker who is out and about all over in public would not be an option for me. In due time all will get done and I will be well enough to move.
I took advantage Of Kristi”s expertise, experience as well as her ability and willingness to communicate while the opportunity was open and am SO very thankful for Kristio”s helpful instructions!!!!!
To Kristi!!
THANK YOU! THANK YOU!! THANK YOU for your clear and complete instructions in answer to my question!!!
I am SO pumped full of hope that this floor will become beautiful in due time because of your kindness and ability to communicate how you were able to perfectly match the end to end flooring finishing.
I might be dealing with that… OR I might now change some plans to avoid the end to end situation and only have to deal with side to side!!! Will mean doing two different bedrooms and the hall all at once, but I would not have thought of that scenario without your input!
I actually have two of those wonderful scrapers, quality replacement blades and have used them when we did the floors in a rental house.
I enjoy your decorating and really enjoy HOW you make the structural changes and do the work that is transforming the contours and usefulness of your living space, then add awesome finishing touches and tile and colors that are so absolutely wonderful in your home.
I am such a plain Jane compared to your love of color but am seeing changes in my taste as I see you use colors and form so majestically and impressively.
I am praying for Matt and you as you continue your journey to make your home totally YOU in order to thoroughly enjoy it more than you and Matt can even imagine!