DIY Faux Fur Rug (How To Fake A Flokati)
After a few days of rest, relaxation, eating food I shouldn’t, and spending time with my family, I finally headed back to the condo this weekend to continue the work there. Most of the work I did isn’t blog-worthy — painting walls, grouting floors, cleaning, etc. But I did do a fun project for the bedroom last night. I made a faux fur rug that kind of has a flokati vibe to it!
Here’s how it came about…
For some reason, I’ve had two of the super cheap 6′ X 8′ indoor/outdoor rugs from Home Depot in chocolate brown for at least two years now. I can’t even remember now why I bought them, but they’ll go to waste if I don’t use them somehow because I don’t want or need them at the house.
So when I decided I wanted a rug in the bedroom, I stuck the chocolate brown rug in there to see if it would work. I don’t have a picture of it in the room, but this is the chocolate brown rug I’m talking about…

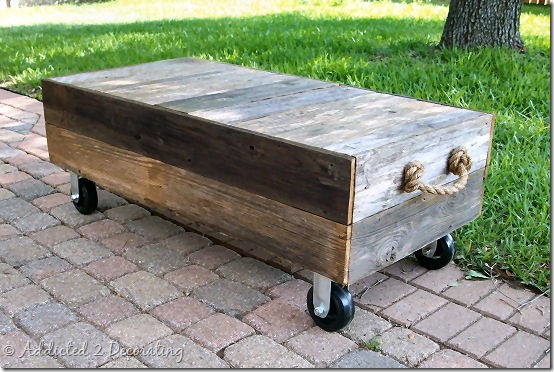
It’s the exact same rug (in a different color) that I painted for our outdoor seating area at the condo.
But you know how that bedroom is turning out to be really light, bright, and cheerful? Well, as soon as I put that rug in there, the dark brown sucked every bit of light, brightness, and cheer right out of the room. I could have just removed it and been done with it, but at that point, I really had my heart set on using a rug in there.
So I went on the hunt for DIY inspiration (on Pinterest, of course…after years of being almost completely uninterested in Pinterest, I’m now suddenly addicted), and I came across this faux fur rug project from Kelly over at View Along The Way.
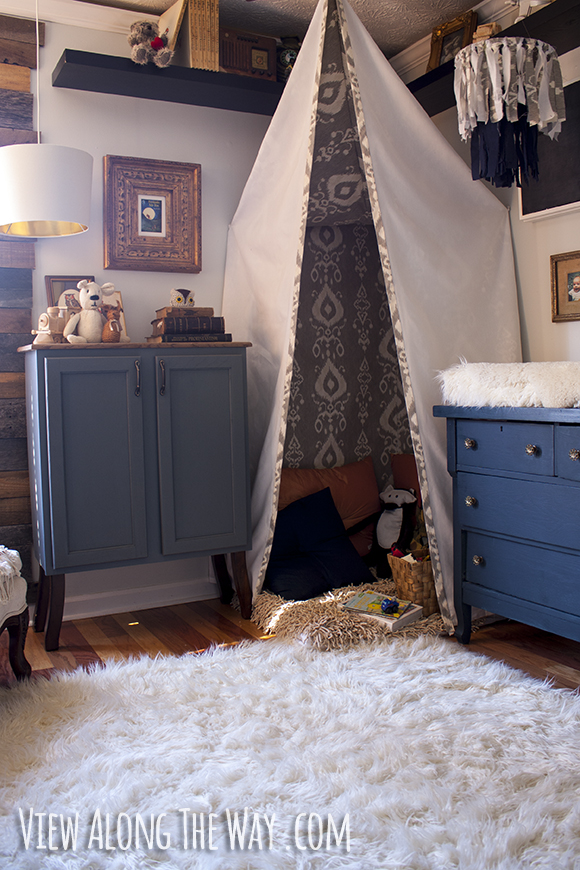
Can you believe she made that rug with faux fur? As in, the kind of faux fur that you buy at the fabric store off of a bolt by the yard? I think hers actually looks like a flokati!
I wanted to try it, so I headed to JoAnn Fabrics yesterday to pick out my faux fur for the rug. Well, here’s a hint. If you do this project, don’t do it two days after Black Friday when the faux fur is 40% off and the good stuff has been picked clean. I was so disappointed because every fur I really loved had so little left on the bolt (and I needed four yards for my 6′ x 8′ rug), so I had to settle for the furriest one they still had in stock. Of course, I could have ordered the one I really wanted, and waited a week for it to get here, but that doesn’t really meet my need for immediate gratification, now does it? 😀
If this project had been for my house, I would have ordered the good stuff and patiently waited for its arrival. But for the condo? I just found one that would work, and that had enough on the bolt, and went with it.
Kelly adhered her fabric to the rug with Velcro so that it can be removed and washed. Smart. Very smart. But since I didn’t have any Velcro, and didn’t want to buy any (that stuff is expensive!), I decided to use what I had on hand. And for some strange reason, I had an entire roll of carpet tape in my stash of goodies. Why do I have a roll of carpet tape? No idea. But let me tell you, you won’t find a stickier tape anywhere…ever.
My tape was only single-sided, so I cut strips and then doubled them over like you do when you want to turn single-sided tape into double-sided tape. I placed five pieces along one end of the cheap Home Depot rug.

Then I carefully lined up the selvage edge of the fur and pressed it onto the tape. With the edge lined up, I then added more carpet tape along the edges of the rug.

On the main area of the rug, I used spray adhesive. This is the kind I always use, and I can only ever find it at JoAnn Fabrics.
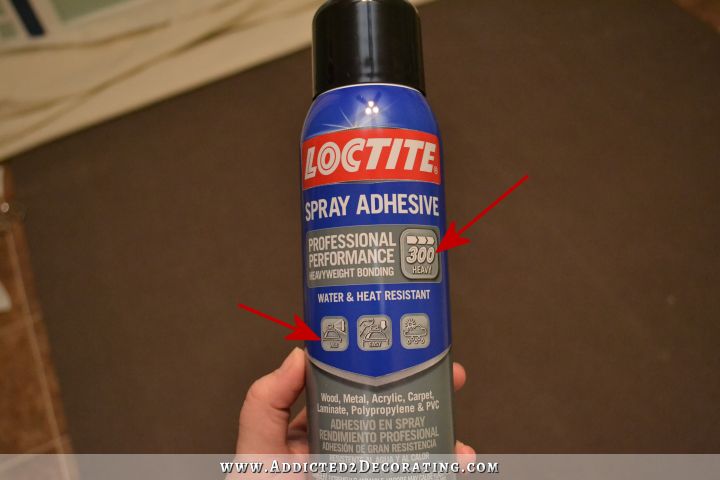
It’s the Loctite brand spray adhesive, which Home Depot also carries, but they only carry the 100 and 200 formulas. I absolutely hate those because they spray out as a mist. After use that stuff on a project, I feel like my arms and hair are coated with the stuff. It’s so disgusting that I just won’t use it anymore. But the 300 formula is not only the strongest bond, but it also sprays as a web instead of a mist, so you have total control over it. It’s the only kind I’ll use.
When I got to the other selvage side of the first piece, I used hot glue to adhere the edge firmly to the rug. Then I also used hot glue to adhere the selvage edge of the second piece of fur, making sure that the two edges were lined up as perfectly as I could get them.
Overall, the fur was pretty easy to work with. The fabric backing didn’t have any stretch to it at all, so it was very easy to get it really smooth without any wrinkles.
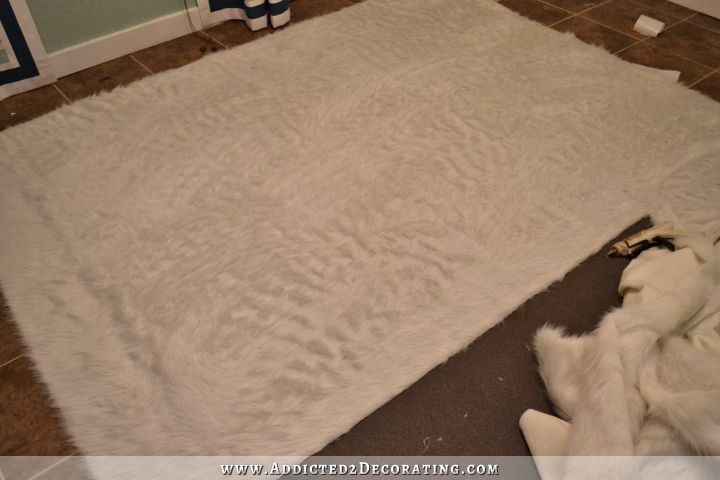
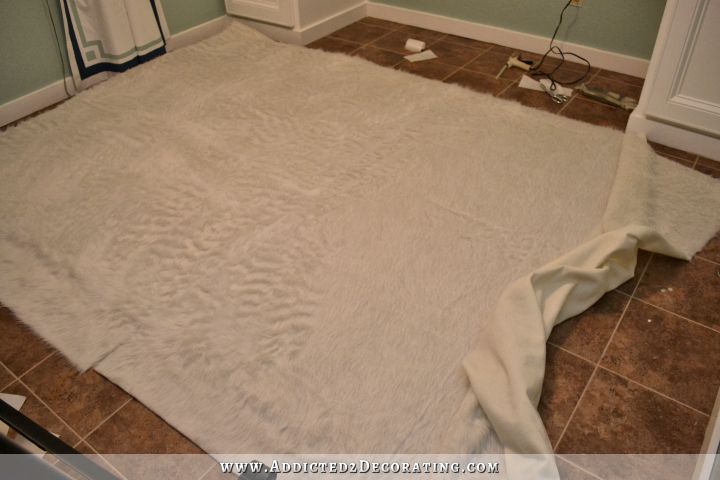
Here’s how it looked after I got both pieces firmly attached to the entire rug.
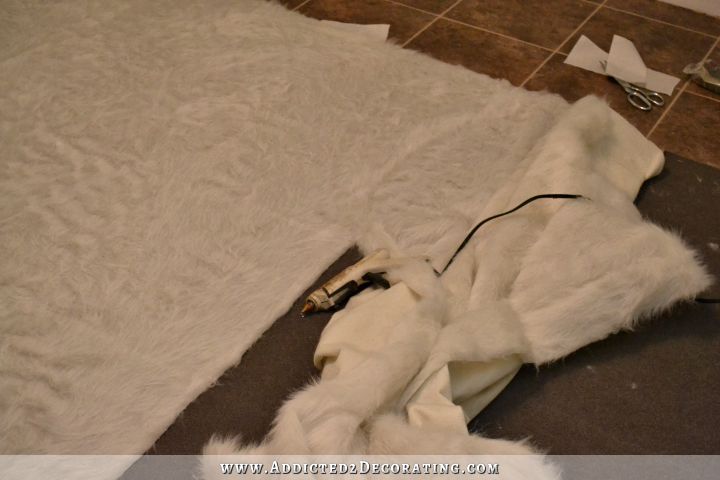
Then I flipped the whole thing over to trim off the excess fur fabric. I trimmed the fabric just a tiny bit bigger than the rug.
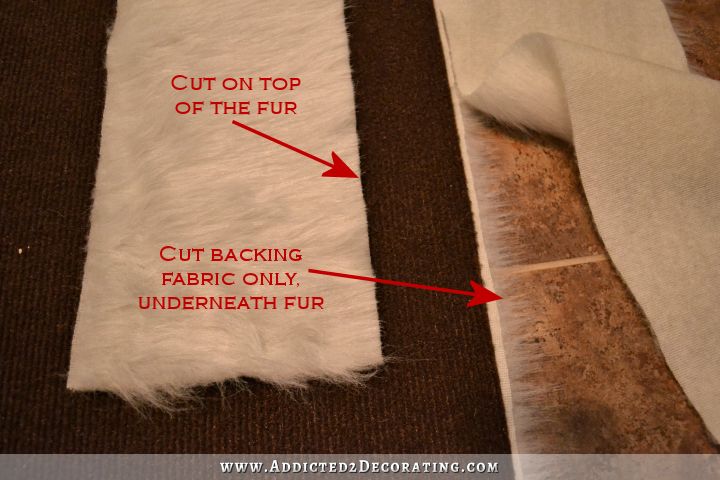
And here’s my most important tip with any project using faux fur. Don’t ever cut it with your scissors over the fur like this.

That will give you a very ugly blunt cut, just like you see on the right edge of that scrap piece in the photo above. That’s the edge that the lady at JoAnn Fabrics cut.
Instead, you want to make sure your scissors are going under/through the fur, and only cutting the fabric backing.
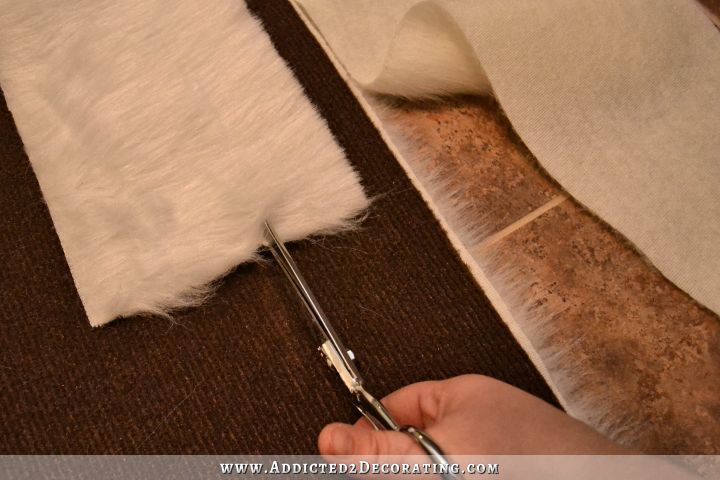
Not only does this greatly reduce (and almost completely eliminate) the excess fur flying around, but it gives a much more natural edge.
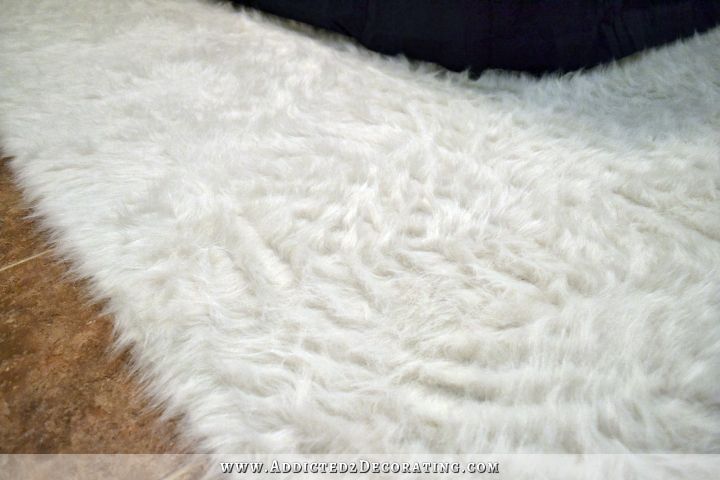
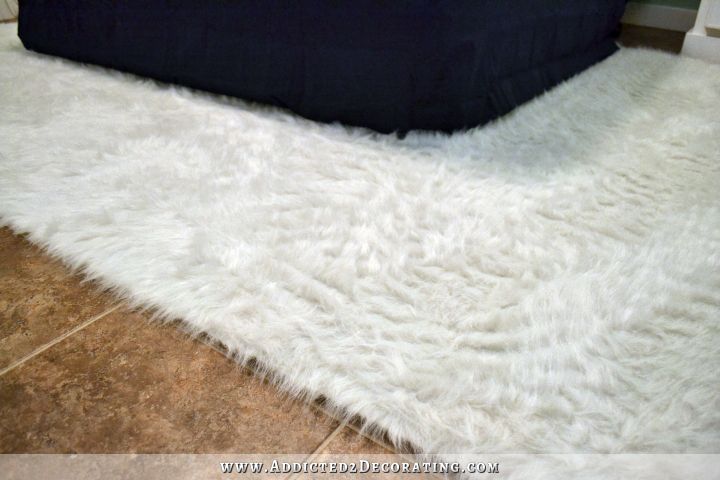
And with all four sides trimmed, I flipped it back over and had a faux fur rug!

Even though I didn’t really get the fabric I wanted, I still really like how this turned out. And it’s super soft on the feet.

It’s perfect for this room. I like the addition of a rug, and this one helps to keep things light and bright.
I’m actually thinking about using a variation of this project in my living room at the house using a completely different fur. I saw one yesterday that was much shorter and thicker, looked amazingly real, and was super soft. It’s the one I wanted for this project, but there was only about half a yard on the bolt. I can’t stop thinking about how pretty it would look in my living room!
But if you can find a fur that you like (or be patient and order one), this is a great way to cover a large area at a really low price. I spent about $50 on this project for the fur and the spray adhesive (with a 60% off coupon!). Of course, I already had the carpet tape, hot glue, and the rug. But even if you had to purchase those things it would only add about $25 to the cost, and $75 for a 6′ x 8′ rug is not too bad! And if you use Velcro like Kelly did, it’s also washable. Even better!

Addicted 2 Decorating is where I share my DIY and decorating journey as I remodel and decorate the 1948 fixer upper that my husband, Matt, and I bought in 2013. Matt has M.S. and is unable to do physical work, so I do the majority of the work on the house by myself. You can learn more about me here.


Clever. It works well in there.
Does your energy never end girl?? FYI: Hobby Lobby also carries faux fur and there is a weekly 40% coupon.
Looks great! I only follow you and Kelly so it was fun to see you do one of her projects. Great tip about cutting the fur. I will remember that in the future. I hope to make one of these for my three year old daughter’s room. We put laminate flooring down so she can paint and do crafts without worrying about the carpet. This rug is a great way to warm up the floor as it can easily be removed when she gets crafty, and it is washable! Bonus!. Glad to hear you took a break and relaxed for a few days. Your stamina and ideas always amaze me.
Welcome back. We missed you! Glad that you had a nice time with family over the weekend:)
I was wondering if you would be able to vacuum this rug? We have a pretty intense vacuum, and I think
it might pull it up from the adhesive?
Blessings to you,
That’s a lot of fur in that room
Kristi, this took me back 40 years to when I first set up housekeeping. I had a flokati rug under a glass-topped coffee table in my living room, lol. Just goes to show that classics never go out of style.
When you get the condo bedroom completed, I for one would love to see a full-room photo. The snippets are looking great.
Onward and Upward!
I have been patiently waiting for your post! Lol. I am glad you had rest with your family. And I love the rug. Your Condo is going to sell fast.
It is beautiful!
I’m working on making a headboard for my daughter following your “how to” and found the spray adhesive you recommend at Menards for less than $10, at Hancock Fabric it was $17. Don’t know if you have Menards down there in Texas but it has the best price 🙂 Love the fur rug and I’m thinking this could be another project for me and my daughter to do once we get the headboard finished – Love what you do!
This is a great project for the condo that you want to sell but I wonder how it would hold up to everyday life in one’s own home? Do you think it might begin to stretch at all or does it seem like it will pretty well stay put, even with frequent foot traffic?
Hi Kristi, I’m glad you enjoyed your rest! I love this post and the tip about cutting the fur is helpful. I have several yards of faux fur stored in a container; I think it will hold up well for a rug in my daughter’s bedroom. I look forward to seeing the bedroom pics!
Very clever! I love the finish product and will look amazing when you get the bed in there. Also, Hobby Lobby has great coupons every week and they have a large selection of faux fur.
I literally did this exact same thing with the exact same faux fur from Hancock Fabrics 6 months ago for our bedroom. It’s fantastic. We have a 2 year old and it’s had up fine to her rolling all over it constantly. Such a great project!!
Nice! I totally hear ya – once we did this project, I was looking at every single fur fabric with the eye to make it over into a rug. Turn ALL THE THINGS into RUGS! It’s totally one of those addicting kinds of projects. Your rug looks awesome, my friend! Great idea to use spray adhesive too!
It looks like a good fit for the room. Are you going to sell the place furnished? Or will you take the rug with you?
Kristi, Glad to have you back! You have surely been missed! This DIY guide would have come in handy back in the 60’s when I had faux fur attached to everthing! My Mother drew the line at her white leather recliner! Thanks for this today, it brought back many happy memories! Oh, and I do like it, too!
Kristi, glad you had a nice holiday, and glad to see you back blogging! I adore the look of a fur rug, it’s very cozy. This one looks very much like a real flokati. I had one of those small sheepskins that I got at Ikea, and my cats avoided it like the plague, they would actually walk around it instead of touching it (I think they could tell it was a real animal at one point, and were totally freaked out that I had it’s skin on my floor!). A faux fur rug would be so nice to cover my ugly apartment carpet, with the added bonus that the cats could actually walk on it! I too wonder if it could be vacuumed, maybe the fabric with the shorter hairs could be? I may just have to find out!
After reading your post I headed straight to my local Hancock Fabrics. They were having their fur at 40% off, plus I got my senior (barely) discount. 16.00 later, I am sitting at my desk, typing this and sitting on my new fur rug!! Thanks for the inspiration.
I made one! 8×10 for under my bed. It is amazing! Thank you so much!!!
Was that the buffalo fur you used? Yours looks so thick!
I don’t remember it being called buffalo fur, but I got it at the fabric store, and they didn’t have a big selection.
Where did you get the “good stuff ” from? Or did you make a second rug?
I made one rug…the one shown in the tutorial. I don’t know what “good stuff” means, but the fur that I used came from Joann Fabric, as I said in the tutorial.
I love your writing style! Always a bonus when the tutorial is not only educational but also entertaining 🙂
I’m redecorating my boys’ room today and plan to do a diy faux fur rug. Your tip about cutting UNDER the fur is gold!