Finished Roman Shade and Finished Hardwood Floor Refresh
My first Roman shade is completely finished. Just four more to go. 🙂
If you missed the tutorial on how to make this style of Roman shade, you can find that here. I’ll be adding more pictures to that post later today to show how to make and attach the little valance that covers the cord hardware. But in the meantime, here’s how the shade turned out…
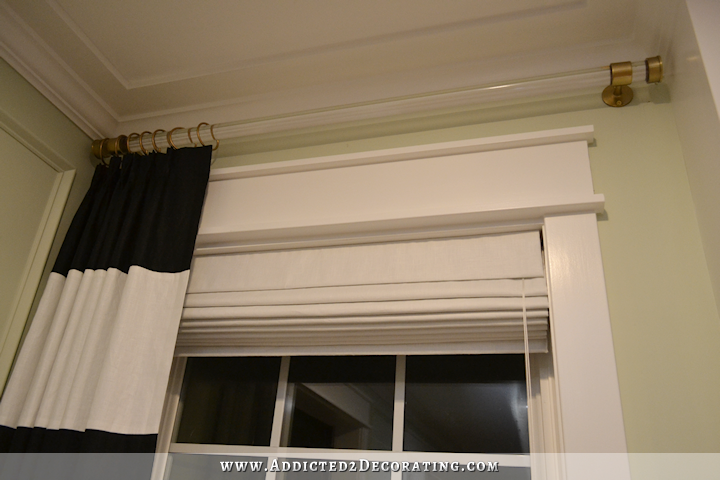
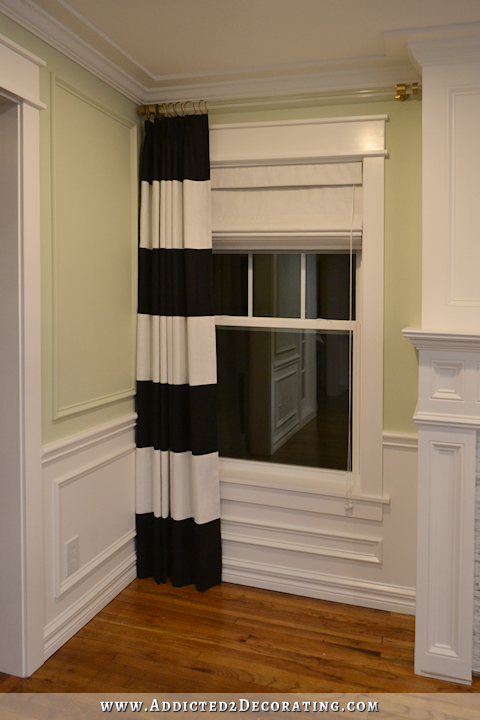
I’ll probably always keep it open as far as it’ll open, like in the picture above. But it also looks nice closed just a little bit…

And again, this is a fully operational Roman shade that opens and closes very smoothly and requires no fussing with or straightening of the fabric as it opens. The folds just fall exactly where they’re supposed to.
And here’s the shade closed…
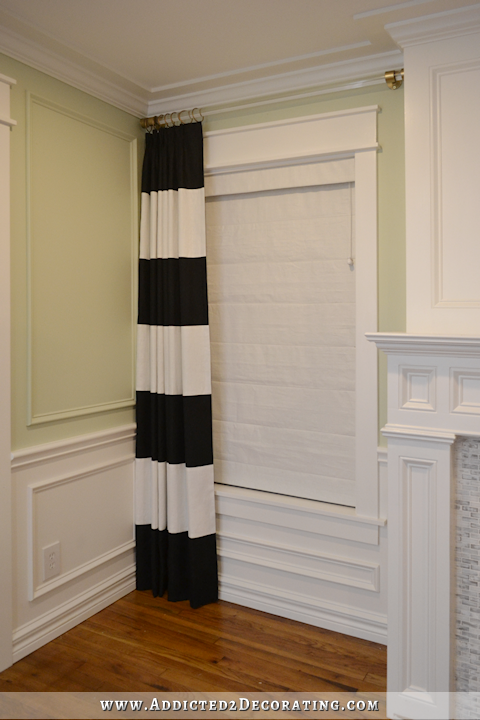
You can see that I also cut the cords evenly and added the little cord pulls on the ends. I bought those at Joann Fabric.
I only plan to close mine at night before I go to bed, but just a word of caution. If you plan to make these, and you do plan to close them at times during the day, AND if wrinkles bother you at all, then DO NOT use 100% linen for your Roman shade. I steamed and pressed this shade until it was perfectly smooth. Then I opened the shade all day yesterday, and closed it last night, and it looked as wrinkled as a pair of linen pants at the end of the day. So if wrinkles really get to you, don’t even consider linen. 🙂
And in other news, my hardwood floors in the entryway and dining room are finished. I shared more detail about the process in this post from last week, but here are the basics…
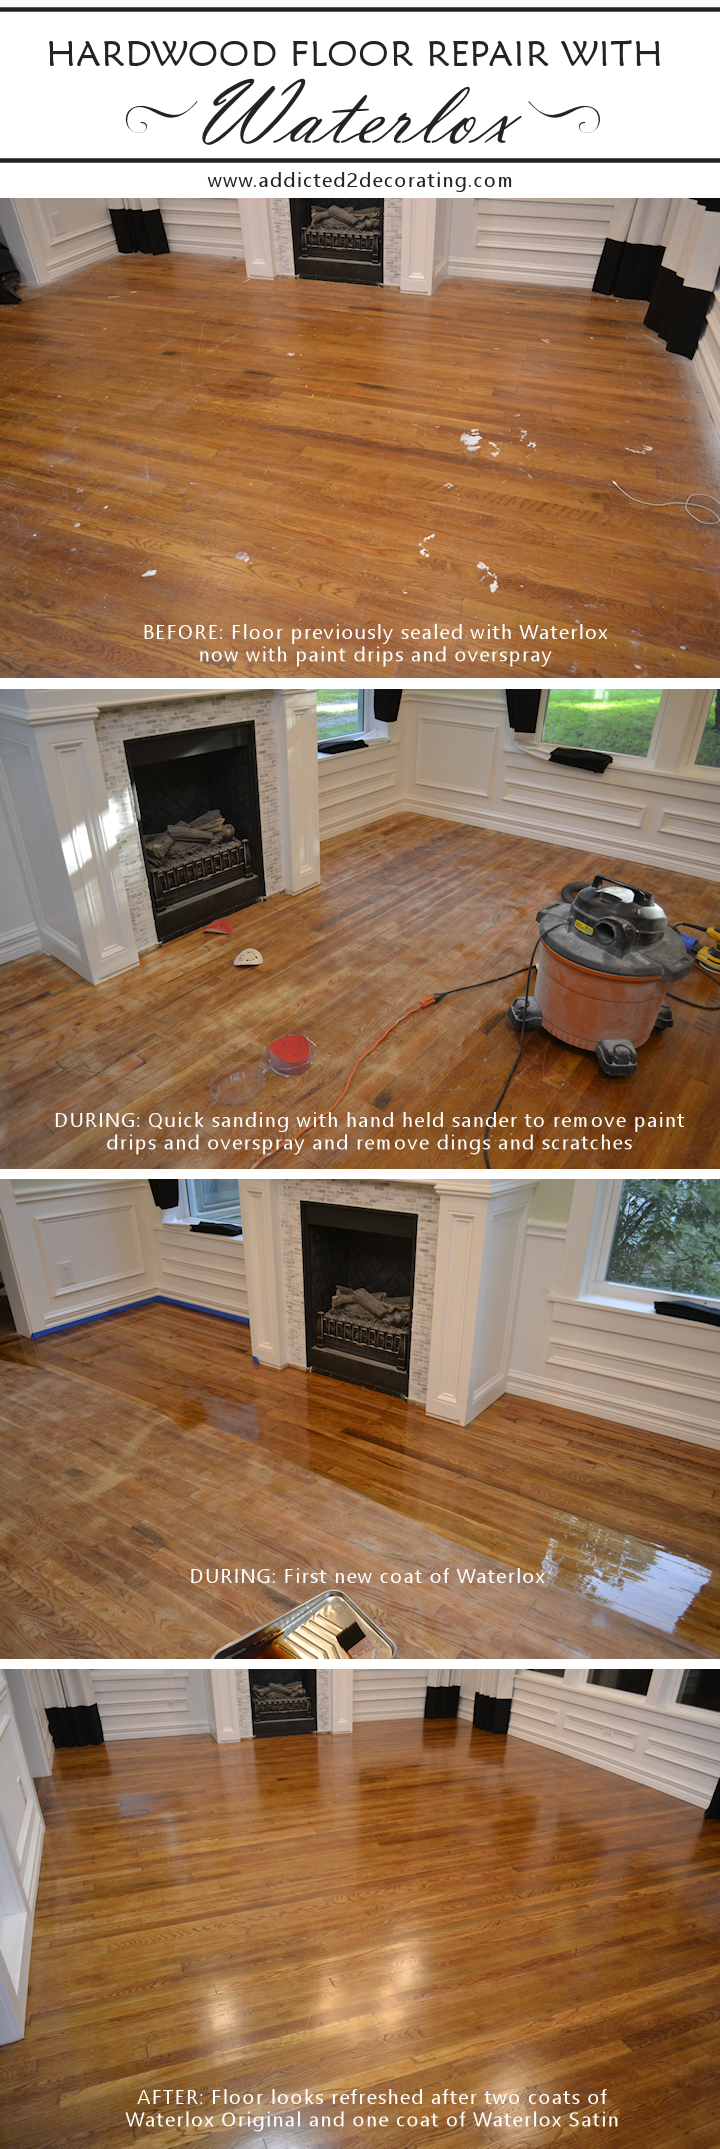
I ended up using two coats of Waterlox Original*, followed by one coat of Waterlox Satin*. The original finish is just a little too shiny for my taste, but you still have to start with that. And then if you want a different sheen, you do the last coat in the desired sheen. To give you an idea of how much product it takes to refinish a floor with Waterlox, this room is about 14′ x 24′, and I used almost one gallon of the Original finish (for two coats) and about half a gallon of the Satin finish (for one coat).
I thought I only had to wait 72 hours before moving the furniture back in. I was wrong. When I re-read the directions, I realized it was seven days! You can walk on it (preferably with sock but no shoes or bare feet) during that time without damaging it. My dog and cat have also been walking on it since the day after I applied the last coat, and they haven’t damaged it. But they say to wait seven days to put furniture on it and walk on it with shoes or bare feet, and then it takes 30-60 days for it to cure completely. To be quite honest, I only waited about 48 hours to walk on it with shoes. I’m was careful, and didn’t turn or twist or scuff the soles of my shoes against the floor, but I mean…that’s my front door that I go in and out of about 10 times a day. A no shoes policy doesn’t work for me for more than about 48 hours. 🙂
I can finally move the furniture back in today. That’ll give me much more room to work and get more projects done, so hopefully things will go a bit faster now.






Holy cow! What a transformation- and without all the rig morrow of refinishing! You always amaze me.
This is looking quite “posh”, Kristi. I’m excited to see how it all comes together. Once you get these major basics out if the way, it will flow better, I believe. It always has for me, anyway.
In the “DURING: First new coat of Waterlox” picture, what is the white smear on the floor that I’m seeing? Does Waterlox go on white and dry clear, or is that something else?
That’s the glare from the sunlight through the window. 🙂 The Waterlox had just been applied and was very wet and reflective when I took that picture.
I think it is just a reflection from the windows.
…. or maybe you’re seeing the area where Kristi hasn’t yet coated? All the sanded area to the left?
The area on the right that looks like white paint. But it IS the reflection. It’s funny how it didn’t read as a reflection until I came back to look at the pictures again, this time with a fresh eye.
Wow! What a great looking floor. Also love how polished and professional looking your Roman shade is. I appreciate the detailed tutorial. As always, great job!
Your Roman shade is exquisite! I’m so glad you chose the shades over vertical blinds. The verticals look so commercial & I don’t think you would’ve ever been happy with them. Also, your floors look fabulous once again. Bravo!
Coming along beautifully! Love the roman shades (I found I have no patience for all that math) and I wish it didn’t drive me bonkers to make them. However, I’m sure I will do them again in the future, because I love them so much.
Did you know that the dry time for the Waterlox applies to all paints? My SIL is a painter, and we have discussed this in length. In the past, I can remember painting a wall and hanging things on it after it was dry to the touch. Then when I went to take it down to change decor, it had stuck a bit, and pulled off paint. This has even happened after a few days of dry time too. SIL gave me a tip that usually works (though not always) – if the surface feels cold or cool, it is not dry enough. It should feel room temp – but not fully dry for 7 days. Just in case someone is in a rush, I thought I’d put this out there.
LOVE LOVE LOVE your blog!!!
You certainly aren’t the average DIY
lady, but you are so inspiring!!!
If you don’t know how to do it–you
Figure it out and while you are not “traditional” you blend enough in there that you have a broad appeal!
Keep it up!
Looks gorgeous. I am in awe of your talents. How did you learn how to make the Roman shades? I love how they came out. Can’ wait to see the room fully furnished and decorated.
Everything in that room is beautiful!!!
Wow, wow, wow! What a transformation! I’m reminded of what that room looked like before you moved in, with the outdated olive green carpet, window unit, and older windows. What a change you’ve made. Good work, Kristi, it’s absolutely stunning!
The roman blind with the valance looks very professional….you’ve done an awesome job, well done!
Kristi,
Here is some info about a topic you had a few days ago. The June issue of Elle Decor has a picture I think you will find interesting. Page 161 has a kitchen with white subway tile, green lower cabinets, and black counter tops. The uppers are white, but I think it is a great representation of what you are looking for.
I saw it! https://www.instagram.com/p/BFjR3imFJ8l/?taken-by=elledecor&hl=en
It’s gorgeous! As soon as I saw it, I wanted to paint my upper cabinets white. 😀 I love how that kitchen is colorful, has black countertops, and still looks so bright.
that picture is beautiful, but I love your upper cabinets in the green/gold trim. Before you paint the uppers white, see how it looks keeping them green……………jmo !! have a great weekend!
It looks beautiful, Kristi! I am so happy for you! I bet your husband and mom are proud of all you have accomplished! It is going to be so good for your soul, to have your main rooms finished and free of chaos. You are truly talented and your hard work has paid off!
Love, love the shades! You said you used linen which wrinkled. What fabric would you use if you decided to not have linen. I need to know, ’cause I’m going to try to make one for my master bath to see if I can replicate it!
BTW, that photo in elle is just what you need. If you kept the uppers green (which turned out great), and the countertops black, it would suck the life out of the kitchen. And, frankly, I think it would look more like you with the bright, happy light!
I respectfully disagree. Keeping the uppers green and adding black countertops would not lead to life-sucking-out-of. It would be regal and mah-velous! But Gilmer Gal, there are linen blend fabrics (with polyester) that look convincingly enough like 100% linen but they don’t wrinkle easily.
Honest to gosh, it’s too beautiful, magnificent, scrumptious for expression in words!!! Holy cow I love this. What a great job you did….
Beautiful!!! I’m so glad you went with the Roman shades – they work so well with the horizontal lines in the room. Can’t wait to see it all put together!
Absolutely love the drapes & shades- looks so crisp and fresh, and the floors look fantastic!
The room is pristine. AND no Dirt anywhere.
Edery thing looks so clean and fresh – love the shade.
I think you are amazing with all your ideas and work that you have done on your home.
Terri
Floor does look fresh and clean – like new! Refreshing!
I love your blog. Thank you very much for posting the floor refresh. We have been wanting to refurbish our real hardwood floors and kept hearing we couldn’t do it ourselves. I am now confident we can take on this project. Great work. Leanna
Looks beautiful, like always. The white Roman shades are perfect with the white molding and b&w draperies. Can’t wait to see it all put back together.
Sanding by hand means doing the work on your knees and having to copiously shopvac the dust. Some hardware stores will let you rent a floor sander which can do a good job keeping the saw dust from affixing to walls and other surfaces. You can get the hard part of the project done in much less time. To buy a professional floor sander you are looking at a good $5,000 (even used) so renting one is your best bet.
There was virtually no dust with this process since I hook my sander up to my shop vac. I didn’t sand down to the wood. My only intent was to sand off paint drips and overspray, as well as scratches and dings, which were mostly in the finish and not the wood. A rented drum sander would have REALLY been overkill for this project.
But yes, if someone is totally refinishing their floors, and needs to completely remove the existing finish (like I did on these floors in August 2013), then renting the big sander is imperative. You can’t strip a finish down to bare wood on a floor with a hand-held sander. But you have to rent the drum sander, buy the sand paper, and also rent the circular edge sander and sandpaper for that also. And be ready for the messiest job ever! Those things create a TON of dust that will get into every nook and cranny imaginable. Plus, you have to be sure that you’re wearing safety goggles and a dust mask because it’s so messy and dusty that it fogs the air with dust and you certainly don’t want to breathe it or get it in your eyes. That was one of the hardest and messiest jobs I’ve ever tackled.