Five Inexpensive Ways To Update Your Kitchen (Ideas I’ve Used In My Kitchen Remodels/Makeovers)
As I start ramping up work on the hallway, guest bedroom, and home gym, it might be a few more days before I have any real progress to show you. In the meantime, I still have a couple of projects that I want to share in more detail from my mom’s kitchen makeover. But for today, I wanted to share some general ideas of small-ish projects that you can do to update your kitchen without a huge makeover or remodel. These are all ideas that I’ve used in my own kitchens and/or my mom’s kitchen.
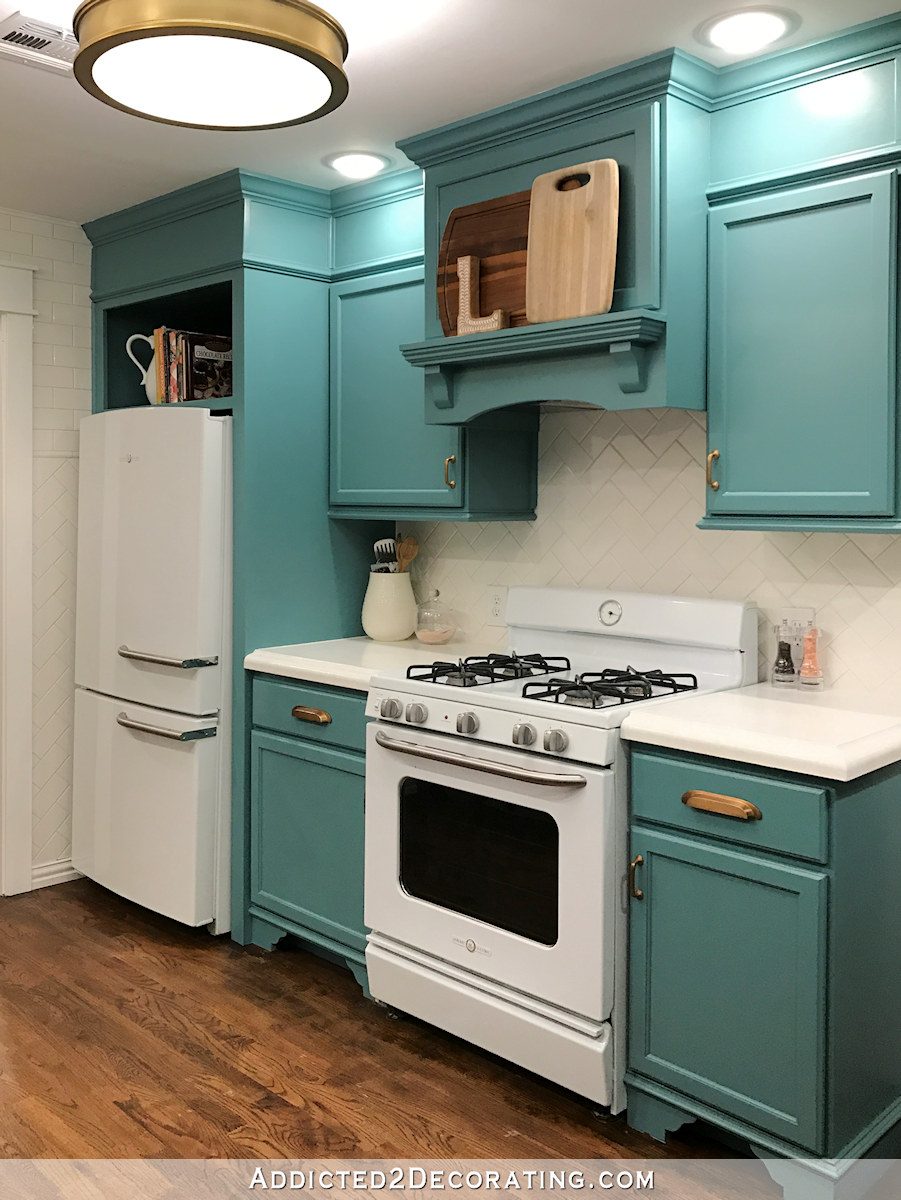
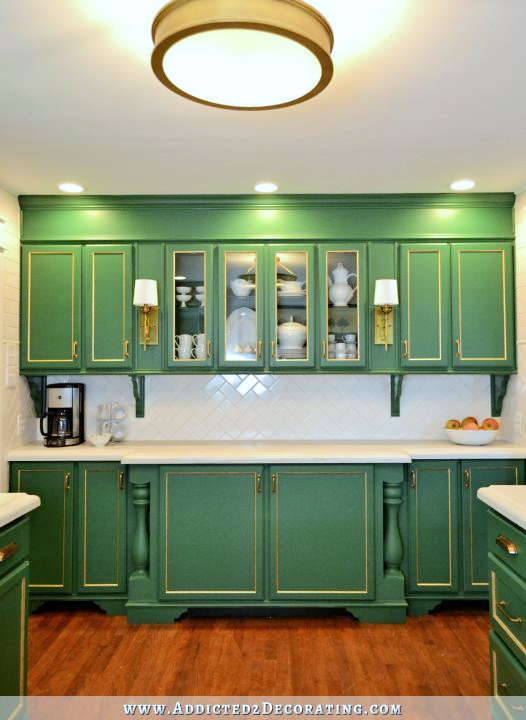
1. Extend the cabinets to the ceiling.
This makes such a huge difference in a kitchen where you’re dealing with 8-foot ceilings, like both mine and my mom’s kitchen.
In my mom’s kitchen, the area above the cabinets was already boxed in with paneling, but prior to the makeover, the way in which the cabinets was painted created a choppy look, with the actual cabinets painted the cabinet color, and the area above the cabinets painted the wall color.

That choppy look actually made the ceiling look lower. So in her kitchen, taking the cabinets up to the ceiling was just a matter of painting that area above the cabinets to make it look like part of the cabinets.
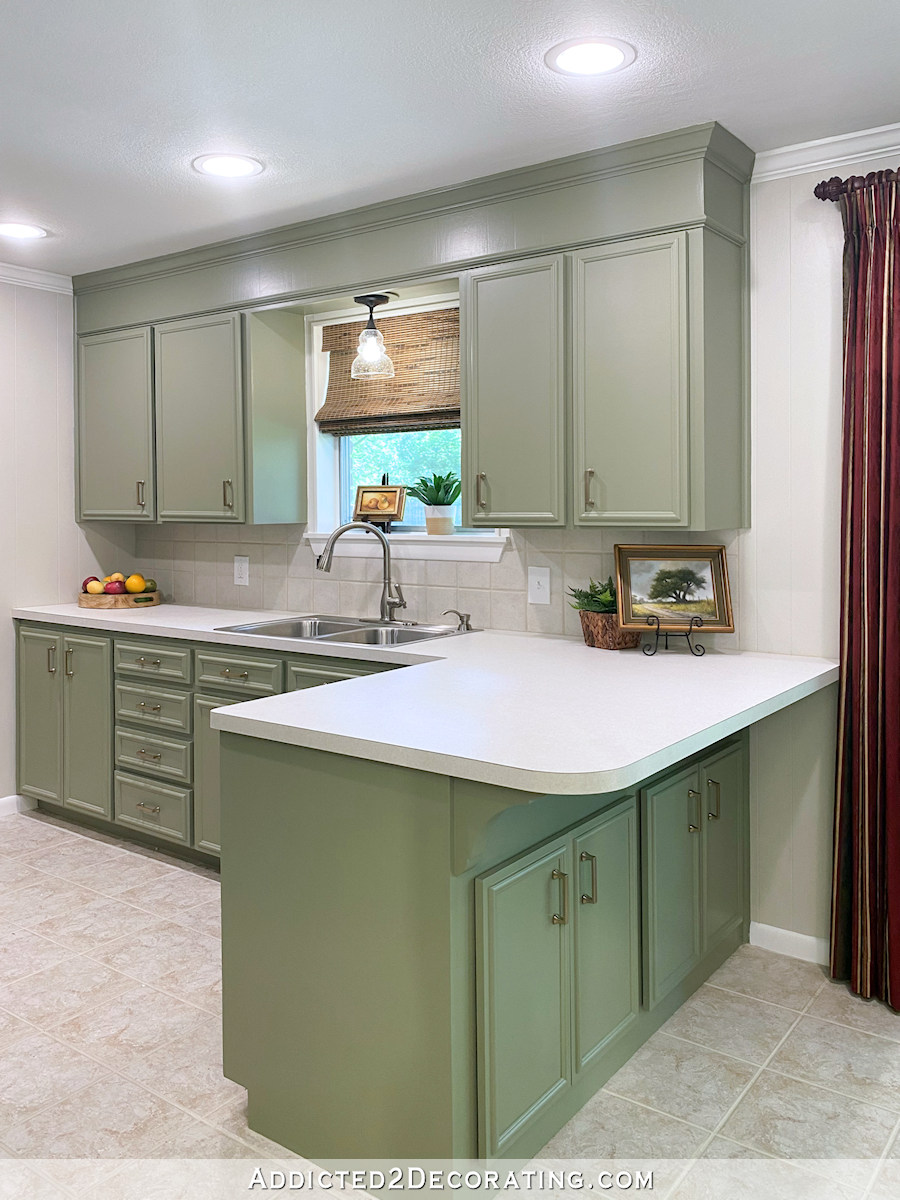
I think that made such a huge difference in her kitchen! Not only did it calm things down with a more cohesive look, but it actually made the ceiling appear a bit taller.
In my own kitchen, I installed all of the cabinets myself. But because I was using pre-made stock cabinets from Home Depot, I didn’t have the option to customize the height of the upper cabinets. So I installed them at the regular upper cabinet height…
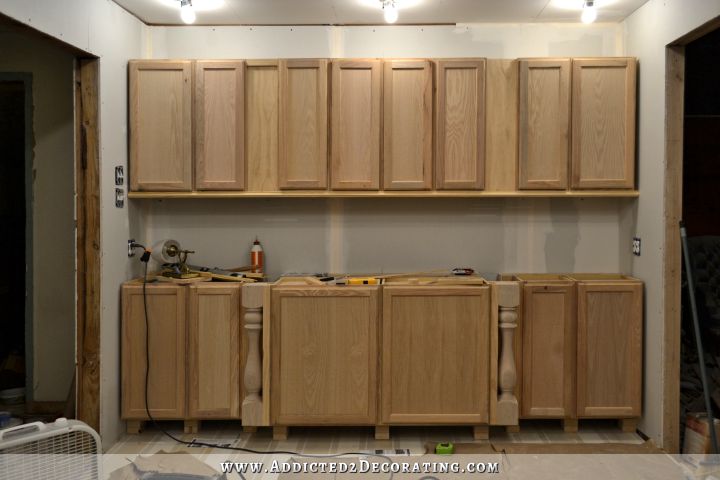
And that’s how many kitchen are left with that open area above the cabinets. But I took mine all the way to the ceiling by filling in that area with a 1″ x 10″, a piece of trim where the 1″ x 10″ and the cabinets meet, and some crown molding along the ceiling.
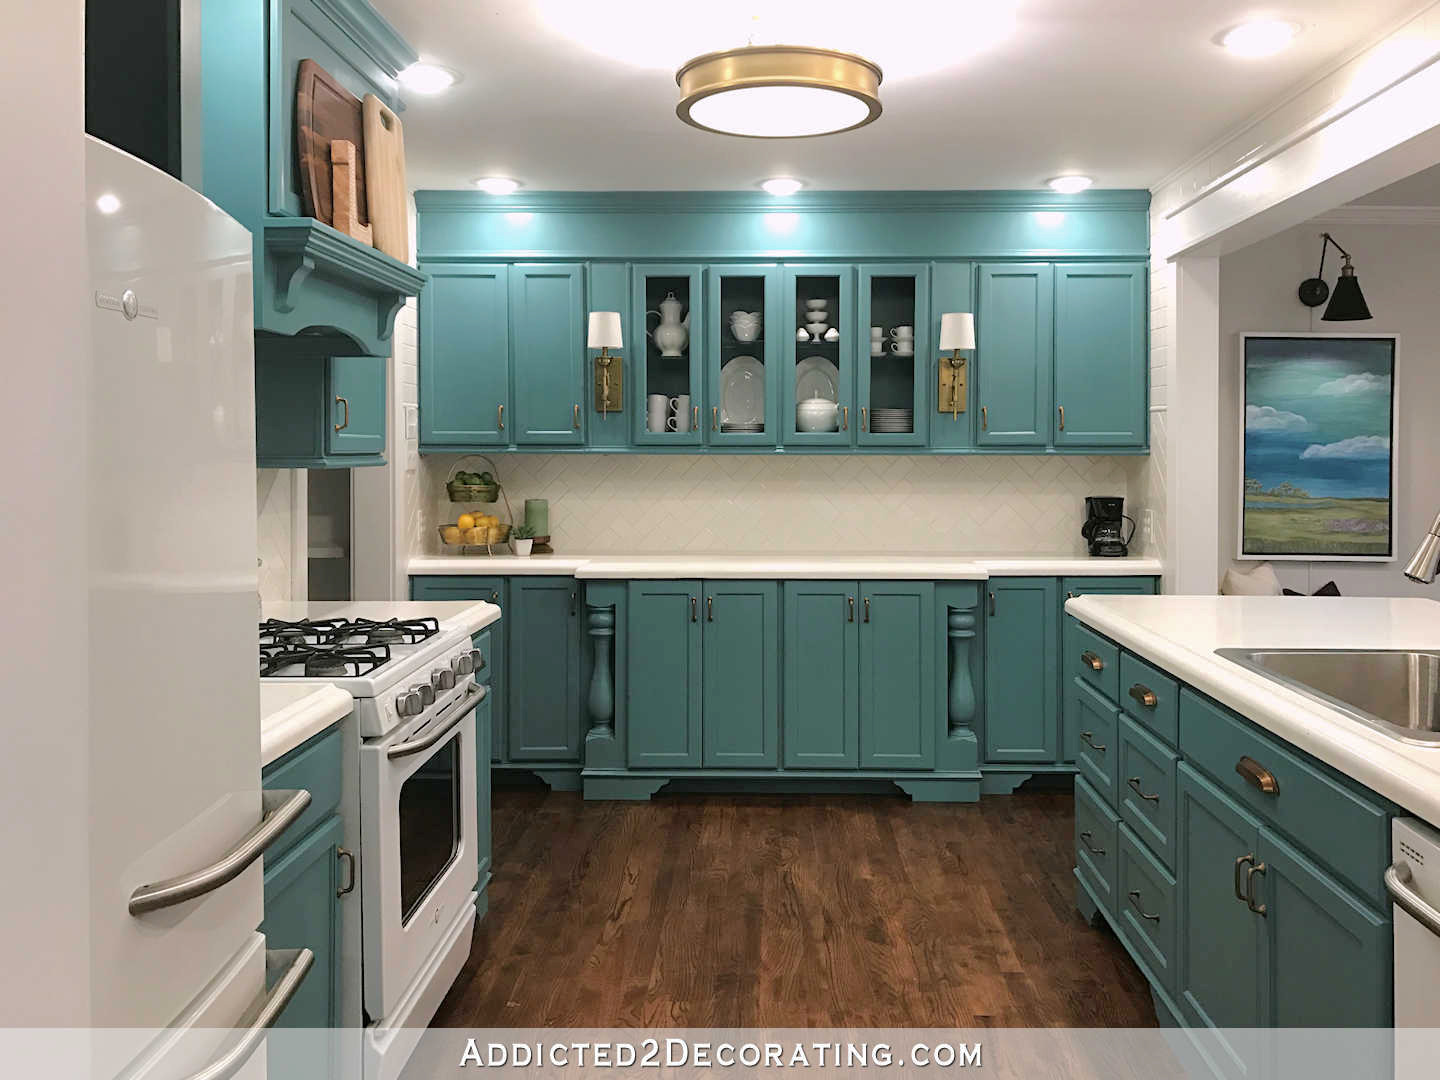
Our kitchen in the condo already had cabinets that went all the way to the ceiling (also an 8-foot ceiling), and they came with doors that extended all the way up.
Now if you’re looking for a quick project, extending the cabinets and cabinet doors all the way up is probably not the direction you would want to go. But if you’re willing to put the extra time into it, that area above the cabinets could offer some great additional storage space for things that you don’t use very often.
2. Build a custom range hood cover.
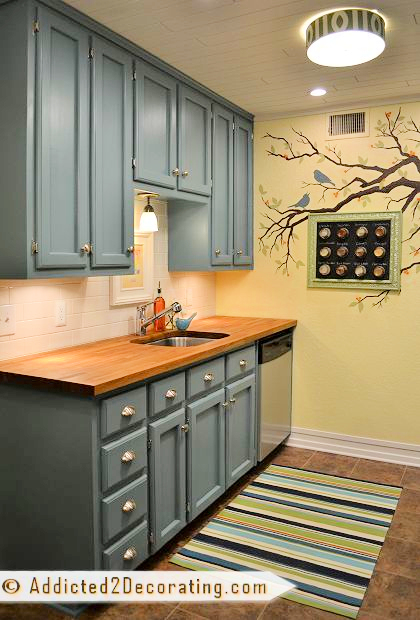
When I originally remodeled my kitchen back in 2014, I add this range hood over the stove…
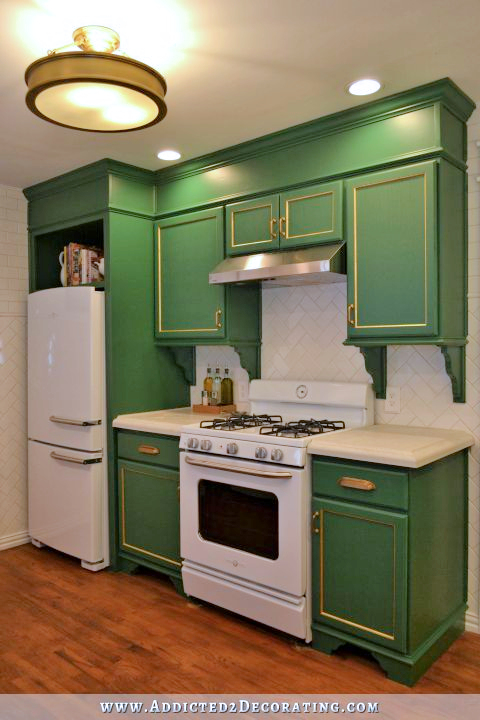
It was a perfectly fine range hood, but I wanted a more custom and integrated look, so when I decided to repaint my green kitchen teal, I also took some time to build a custom range hood cover that integrated with the cabinets.
You can click here to find the DIY details on that custom range hood cover project.
3. Add trim, remove trim
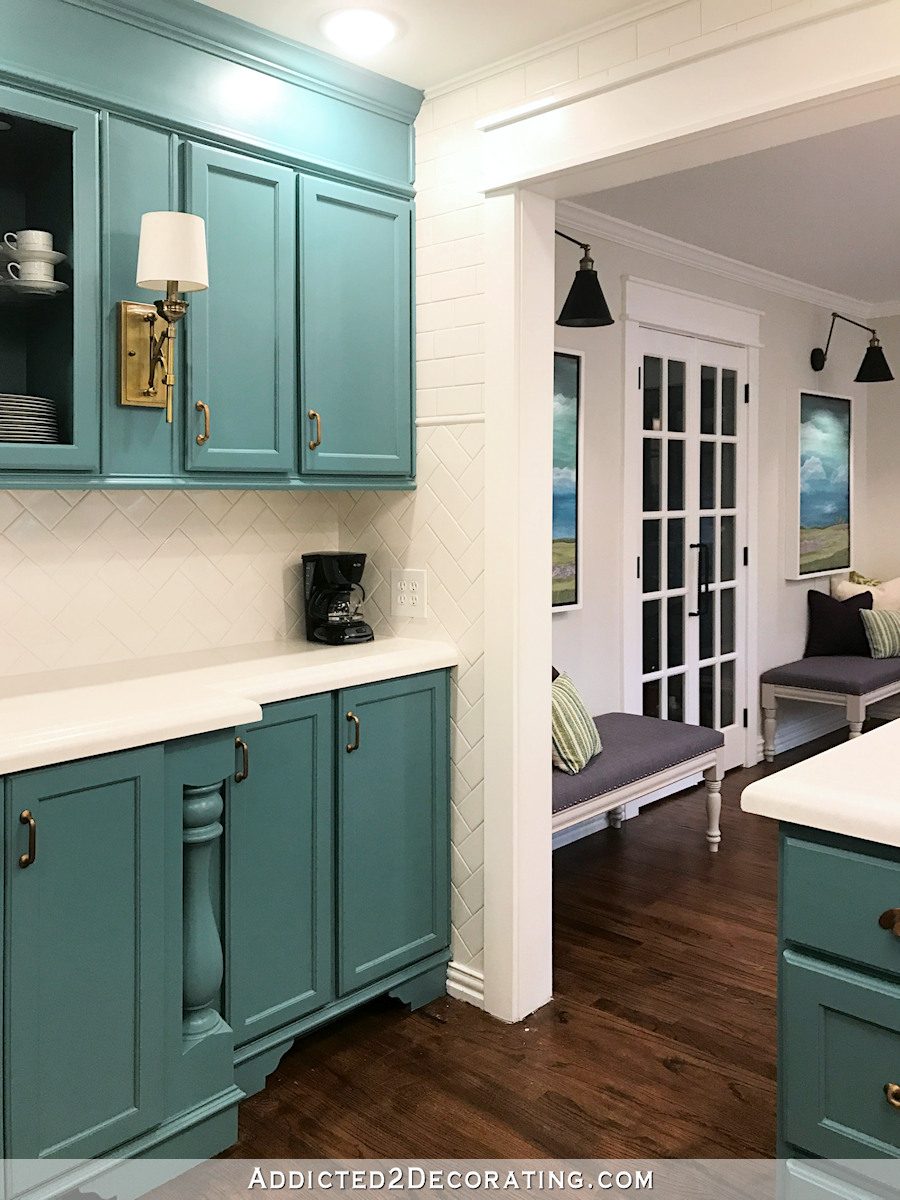
Y’all know how much I love trim! I think it’s one of the easiest ways to customize the look of a kitchen. In my own kitchen, I customized the look of the stock oak cabinets most through the use of trim.
In my own kitchen, you can see that I added trim on the area just above the cabinet doors, as well as along the bottom of the upper cabinets. And on the lower cabinets, I added trim just below the cabinet doors. That little bit of trim adds a very custom touch.
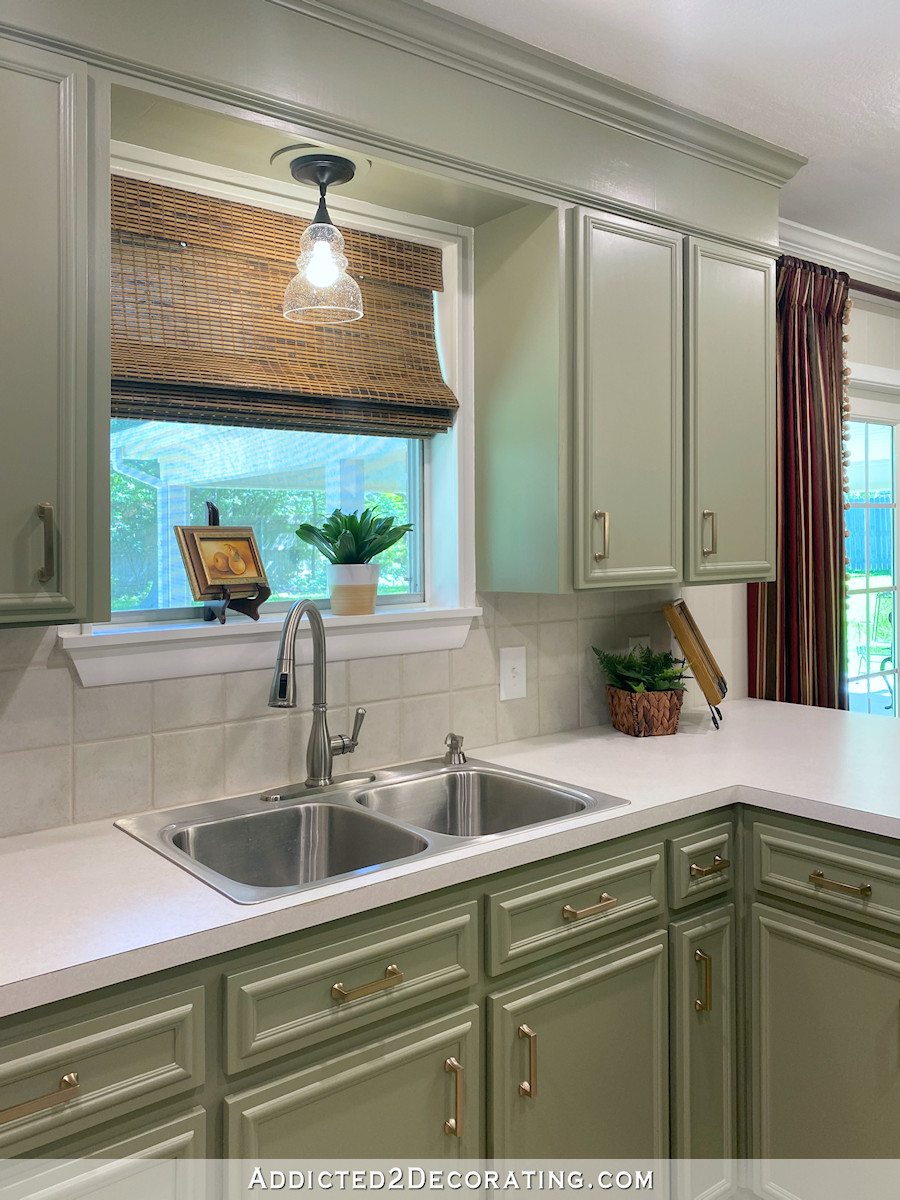
In updating a kitchen, removing trim can be just as important as adding trim. In my mom’s kitchen, one of the first things to catch your eye was the scalloped canopy around the window that had a very distinct vintage 1950s look. So before we could add any new trim, this old trim had to go.

I was so amazed at the drastic difference just removing that scalloped trim made. Simplifying and replacing scallops with clean lines went a long way to updating the look.
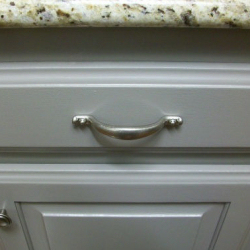
4. Add furniture feet to your cabinets.
Adding furniture feet on to existing cabinets doesn’t have to be expensive because you can actually make your own out of 1″ lumber, which is what I did in my kitchen. I used 1″ x 5″ lumber, ripped down to the correct height to fit the height of the toe kick area. Then I traced out a design onto a piece of cardboard that I used as a pattern, traced that pattern onto the boards, and cut the design with a jigsaw.
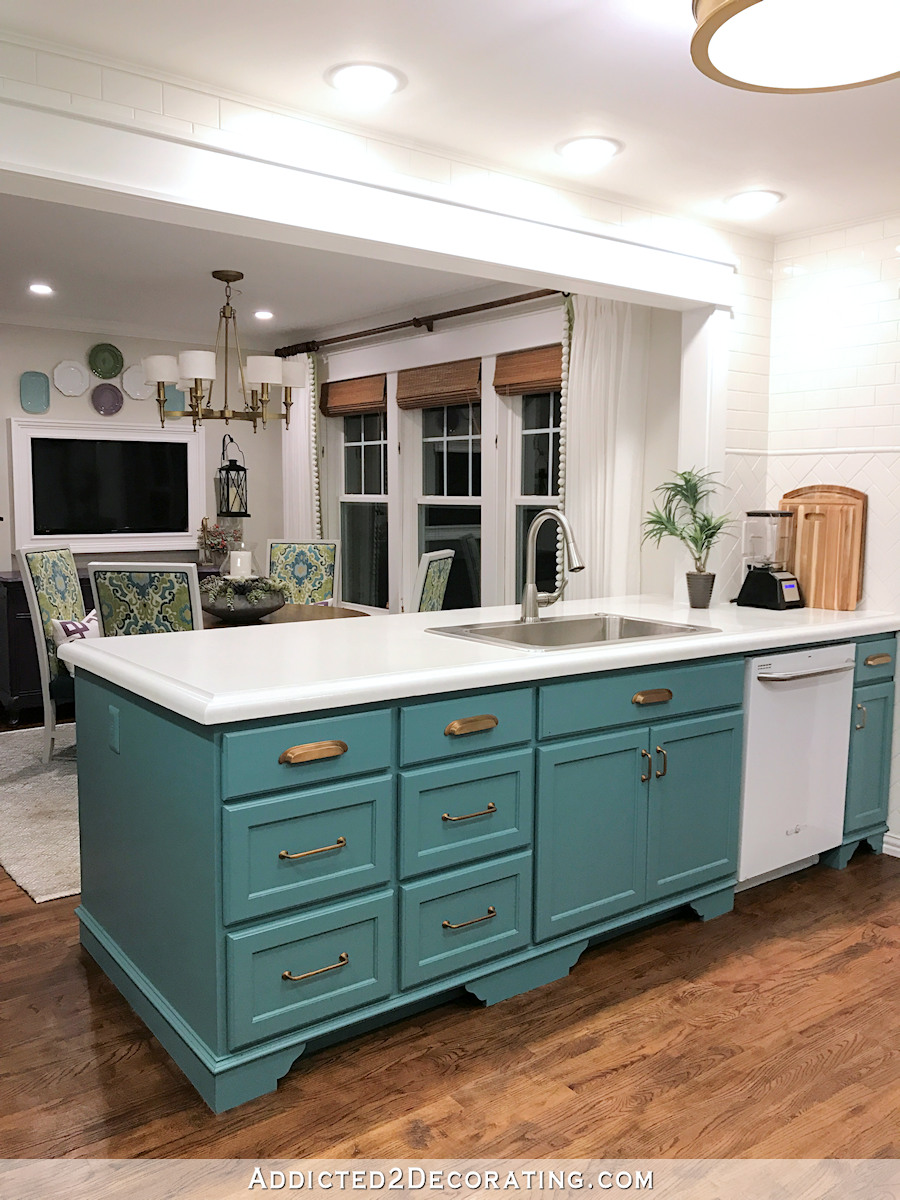
I attached the feet to the bottom edge of the cabinets with wood glue. The toe kick is still in place, so the area under the cabinets is still closed so that things can’t roll underneath the cabinets. The feet only added a decorative touch, and they’re not difficult to clean behind as long as you have a hand-held attachment hose on your vacuum.
5. Replace panels in cabinet doors with glass or decorative metal.
Back during my original kitchen remodel in 2014, there were no glass-front doors available for the inexpensive stock cabinets that I used. So the doors originally looked like this…
Using my Dremel Multi-Max, I cut the back around the inset wood panel so that the panel could be removed, and then I replace the panels with glass. You can click here to see more details about how I cut the panel out of the cabinet door to add the glass.
Then after I painted the kitchen teal, I decided to replace the glass with a cut sheet metal that I found at Lowe’s.
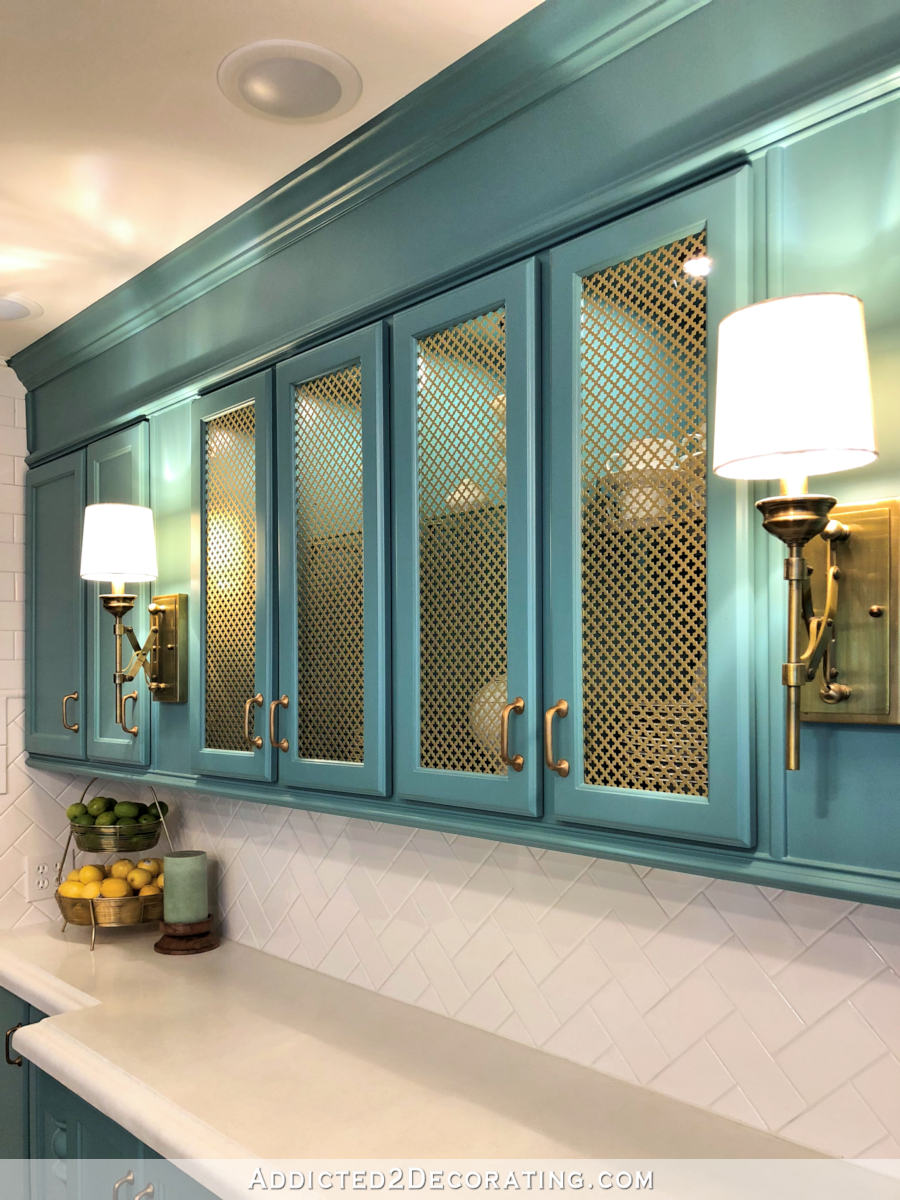
Either one of those is an option if you have recessed panel cabinet doors, and both are a great way to add a custom look to plain cabinet doors. You can click here to see how I added the cut sheet metal to the cabinet doors.
So those are just a few ideas that I’ve personally used, and I think they make such a big difference in a kitchen. Even if you’re not ready to tackle a whole makeover or remodel, just adding a few changes can make a big difference.
And of course, there’s always paint. Paint is always the cheapest way to make the biggest impact in a room. Just think of the huge difference it could make to take those cabinets to the ceiling, add a bit of trim, and paint. It could give you the look of a custom kitchen remodel at a tiny fraction of the price!

Addicted 2 Decorating is where I share my DIY and decorating journey as I remodel and decorate the 1948 fixer upper that my husband, Matt, and I bought in 2013. Matt has M.S. and is unable to do physical work, so I do the majority of the work on the house by myself. You can learn more about me here.


You are so talented!
I am using cabinets all the way to the ceiling and the custom hood range cover in my house right now. You have given me alot of great ideas to copy from. Thank you
I love the furniture feet. I’ll have to add that to my kitchen refresh plans which I hope to start on soon. I’ll be changing from a downdraft range to one that will need a range hood above it. Although I have seen the before and after photos of the range area of your kitchen before, I didn’t realize I had a preference until seeing them this time. I definitely prefer your current version.
We recently repainted our kitchen cabinets and, after seeing your mom’s remodel, we painted the soffit the same as our cabinets. Our wall color is off white and cabinets are white, so although there’s not a lot of contrast between the two colors, it still looks better with the soffit painted to match the cabinets. We have a cornice over the window that I would like to have removed, but I haven’t broached that idea yet!
I know you’ve told your followers this (probably a hundred times) because t Will our share what paint color your cabinets are. My goodness that color is breathtaking! If I were rich, I SWEAR TO Buddha, I’d hire you to redo my kitchen. You’re a fricking Rock Star!
The current color is Hallowed Hush, which is a Behr color. Technically, it’s a color that I custom mixed myself, and it ended up being exactly the same color I had used in the condo, which is Hallowed Hush. 😀
Beware that the amount of light will greatly affect the color. In the condo (which had much less natural light), it looked much more subtle and a touch on the gray side. In the house, with much more natural light and a larger kitchen, it looks brighter and more teal with less gray.
My husband cut the scalloped, decorative trim off from above the kitchen sink the day we closed on our current home to jump start our kitchen refresh. Best move ever.
Any suggestions for how to extend cabinets that have that sort of… diagonal crown moulding coming upwards and outwards out of them? With a gap between that and the ceiling. (They’re also stained wood, which I don’t want to change, but that certainly adds a level of “fun” for matching whatever gets added.)
I can’t picture which type of “upwards and outwards” molding you’re describing.
I think she means crown molding. That can be removed and either eliminated from the design or added to the top of the new cabinets.
Wasn’t sure if crown moulding was ever installed going straight up so I was trying to describe the angled way it’s attached haha.
I have basically exactly this (with the different-height corner cabinet), except the ceiling is lower so the corner part’s moulding already touches the ceiling: https://st.hzcdn.com/simgs/55610f610d28fc10_8-8421/traditional-kitchen.jpg
Kristi, I painted my cabinets like you described in your tutorial. If I need to touch up the paint or decide to paint them a different color, do I need to sand them down again due to the protective clear coat on top?
If you used the topcoat I suggested, I would sand just enough to give it some “tooth” and to sand out any imperfections, and then paint right over top. My experience has been that there’s no need to sand all the way to down.
The more I see all the work you have done in that kitchen over the years, the more I become convinced you are super woman. Removing a wall and putting in a beam, installing a tile wall, building kitchen counters, two or three floor jobs and all the trim work.. just reading all you’ve done makes me need a nap! Don’t ever quit the blog, please.. I don’t know where I could find this much productivity anywhere ever again!
Curious about your cabinet tweaks:
Did you change door hardware to higher grade European hinges?
Did you change drawer hardware to full extension heavy duty?
Did you put pull out shelves in the base cabinets of the bank of cabinets? I see they don’t have any drawers, never noticed that before.
I recall your doing a cookware feature by the stove, utensils.
When you pared down did you get rid of seasonal stuff?
You referenced minimalism before, does that mean you have one set of dishes?
I’m redoing my kitchen now. Looking at your space, visualizing their capacity, gauging how much cabinet space I need.
I have my grandma/mom’s china/flatware and like using them, but accessibility has been a problem. Cleaning out other kitchen excess as you did.
Your described features do make interest in what can be very boxy or boring. way to go. Thanks.
On my kitchen cabinets, I kept the original hinges. They are concealed hinges, but not soft close, so I use those little round sticky rubber things (about 1/4-inch diameter) on the doors so they don’t slam. On my mom’s cabinet doors, I used these soft close concealed hinges. (That’s an affiliate link.)
I used full extension drawer slides on all of the drawers in my kitchen and my mom’s. On mine, I didn’t use soft close, but I did use soft close on hers.
I put pull-out shelves in many places in my mom’s kitchen. You can see those in this post. My kitchen doesn’t have pull-out shelves in the cabinets along the back wall because those cabinets aren’t deep enough to necessitate pull-out shelves. I used upper cabinets to build the lower bank of cabinets, so they’re somewhere between 12-15 inches deep. I did put customized pull-out shelves in the cabinet to the left of the stove, which you can see here. I plan to build something similar for skillets on the right side of the stove.
As a general rule, I don’t have seasonal stuff. I don’t recall getting rid of any seasonal stuff, and I don’t think I have any seasonal stuff.
I have three sets of dishes — our set that we use every day, which is simple and solid white from BB&B. Then I have a set fancy set from Turkey, and another very pretty vintage 1970s Mikasa set that my mom gave me. The only set that we keep in the kitchen is the white set. The other two are stored on the shelves and in the large drawers in the pantry.
Kristi, were your stock cabinets birch or oak? I have some from Lowe’s that are oak. I want to paint them but I’m concerned about the oak grain showing thru the paint. Any suggestions if you’ve dealt with this problem? I’m finally getting a new countertop and sink since the others were removed at Thanksgiving last year. I had muscle power available and had to use it! LOL
Mine are oak. When I painted them the first time, I didn’t fill the grain. I hated the way the grain looked. Before I painted them teal, I filled the grain. I liked that so much more.
You can see the difference here…
https://www.addicted2decorating.com/how-to-fill-wood-grain-on-oak-cabinets-before-painting.html
Thank you for all the wonderful information you provide! I used many of your instructions to paint my ugly oak kitchen cabinets. It transformed my kitchen! Now, with new stainless appliances and black granite counters, it looks sophisticated and so much more modern/traditional. When I had the countertops installed the workers asked who had done the paint. When I told them I did it they told me they had seen few professional paint jobs that came close to my DIY. I have since painted all my bathroom cabinets as well as a large built in. Bye bye ugly orange oak! And it’s all thanks to the fabulous detailed advice you provided. I just wish I had the guts (and power tools!) to try more of the projects you tackle. In the meantime, I appreciate the eye candy and practical advice you provide. I can’t thank you enough!
Beautiful colored cabinets!! What is the name of that blue color paint on the cabinets.
It’s Hallowed Hush by Behr.