Guest Bedroom Closets – Basic Build Finished!
I’m almost finished building the guest bedroom closets! I have one minor adjustment to make, and then more trim to add, but I’ll show you the progress to date. The last time I showed you the closet progress, they looked like this…
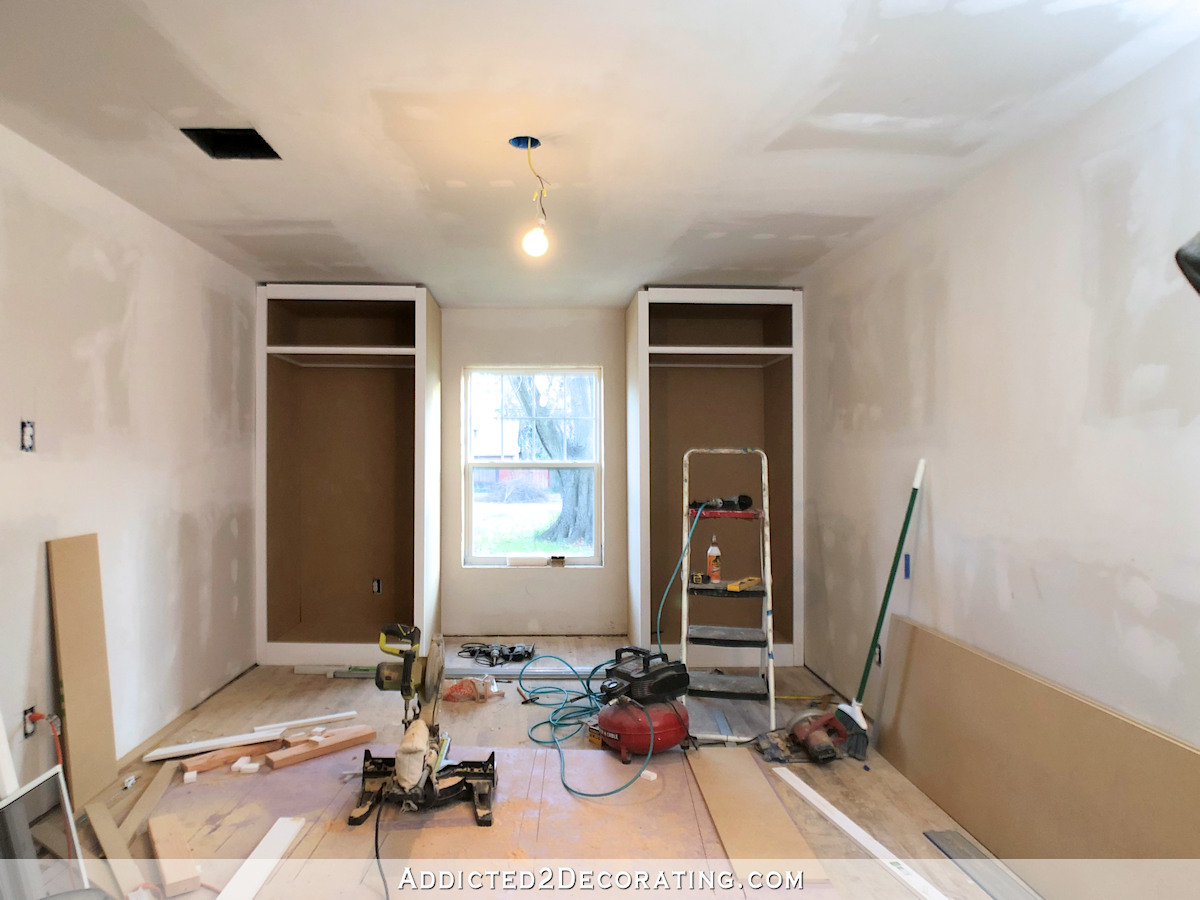
And after my work day yesterday, they now look like this…
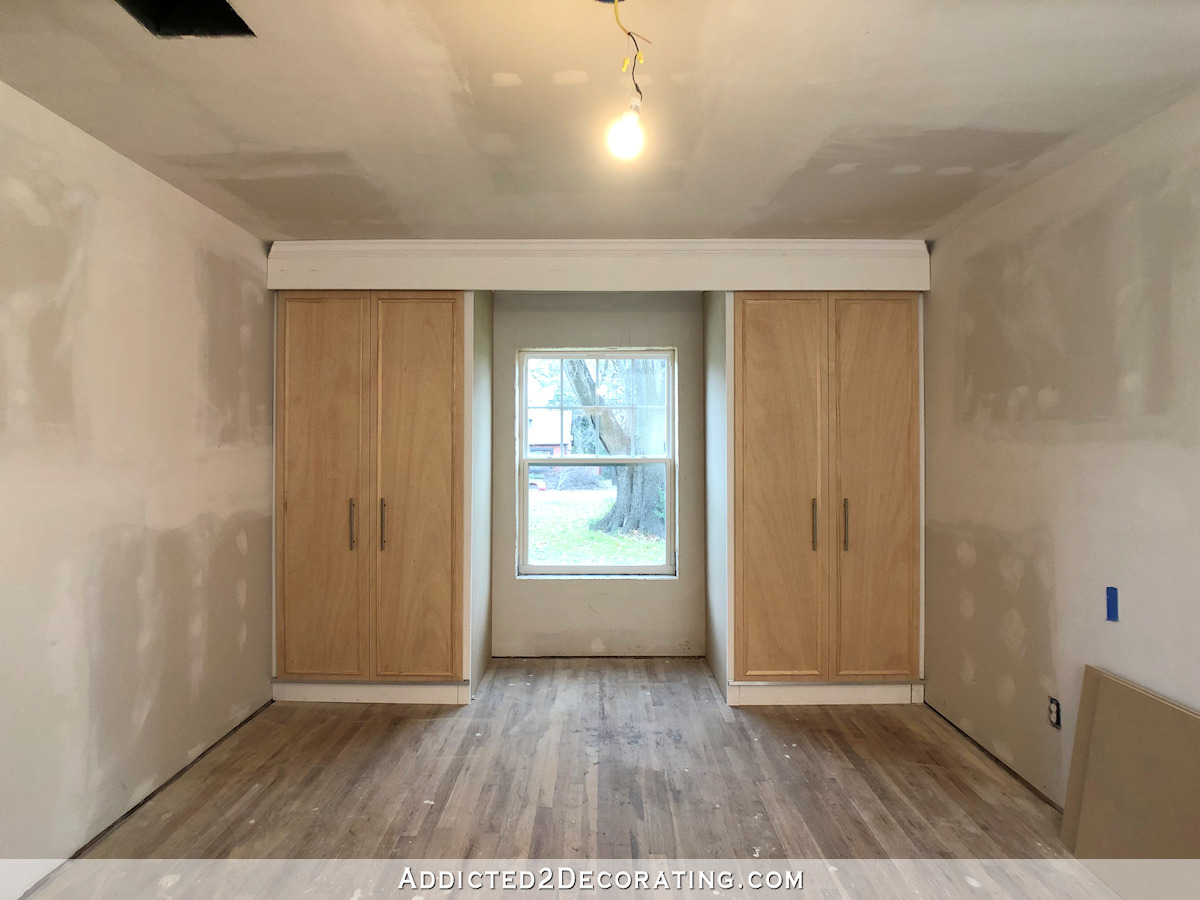
Of course, the crown molding at the top will continue around the room, but I just didn’t have time to put the rest of it up yesterday.
Anyway, not to shabby, right? Now I know some of you might be thinking, “But Kristi, you said you were going to use sliding doors!”
Yep, that’s what I said. And that’s what I did.
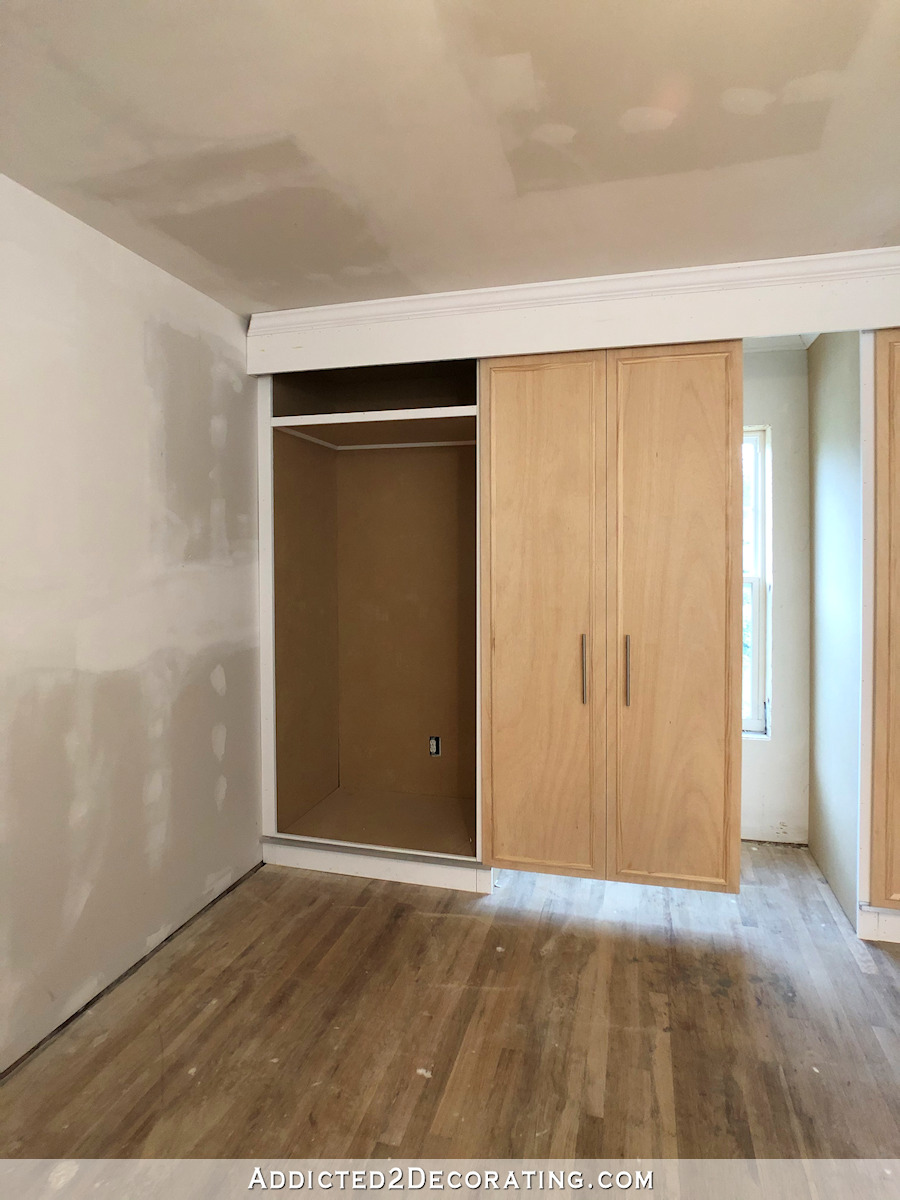
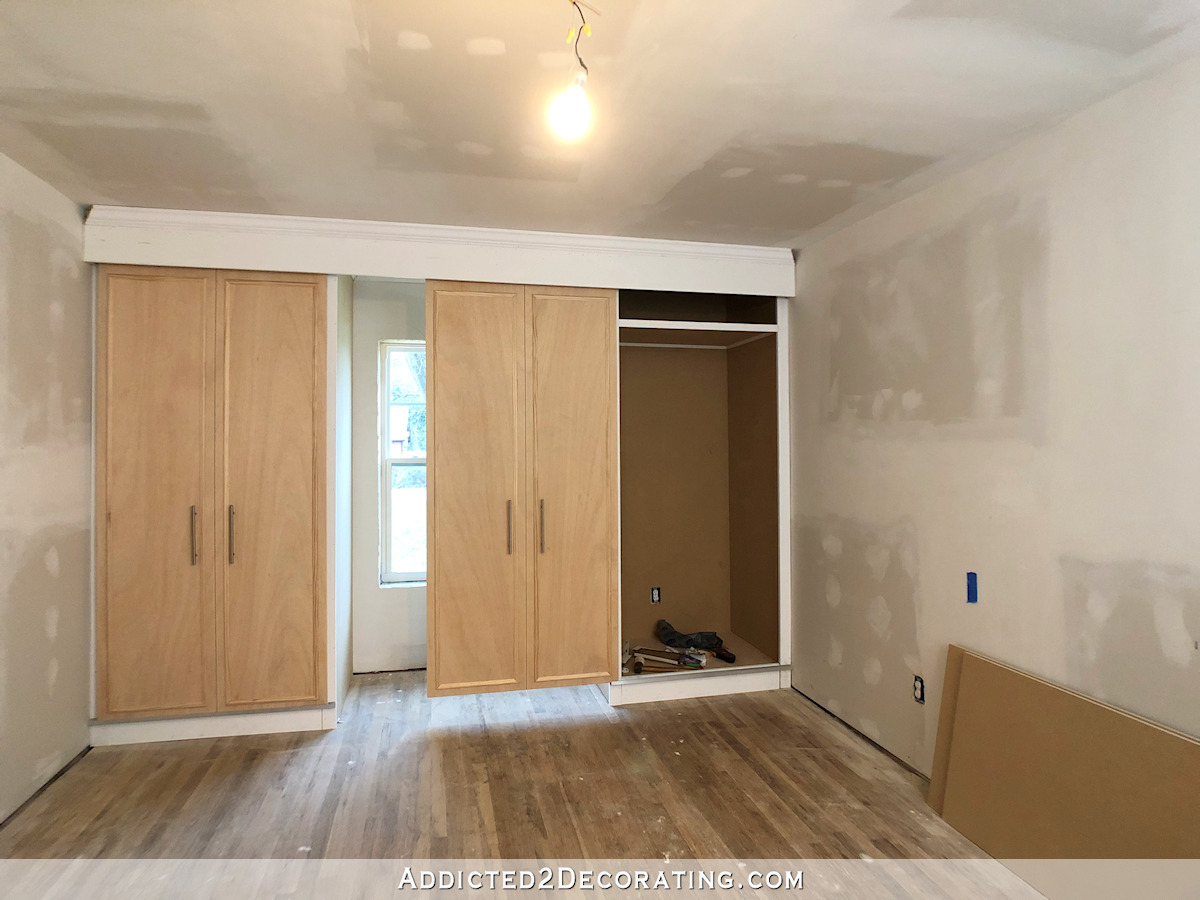
I just didn’t want these doors to look so huge, so I made them so that they are single doors that appear to be double doors. But each closet just has one single sliding door on it.
Now from the picture above, you’ve probably spotted the adjustment I’ll have to make. I didn’t realize initially that I’d have to use such a large header piece to cover up the closet door roller hardware. I ended up having to use a 1″ x 8″ board and move it down about 3.5 inches from the ceiling to cover that hardware, which ended up making the top shelf ridiculously short. So I’ll be taking out those top shelves on each side and rearranging the interior of the closets a bit. But that’s no big deal.
I didn’t take pictures of the individual steps to build the actual closet boxes because I used the exact same process that I used to build the bedside closets in the condo bedroom. If you want to see that step-by-step process, you can check out that project here…
The big difference on these closets is obviously the style of doors that I used. For the condo closets, I used regular hinged doors. So figuring out how to install sliding doors was a bit of a challenge, but I finally figured it out.
I used these bypass closet door tracks, but I didn’t need the bypass feature, so I ended up just hanging both doors on one track. I also had to use two tracks to span the entire width, which required cutting one of the tracks to make it fit. It was easy to cut on my miter saw.
I had to build something to attach the track to so I started out by removing the top trim pieces on each closet, adding 2″ x 4″ reinforcements behind there, and then reattaching the top trim pieces. This gave me something to attach a long 2″ x 4″ spanning the entire width and attached directly to the front of the closets. I attached this using my framing nail gun.
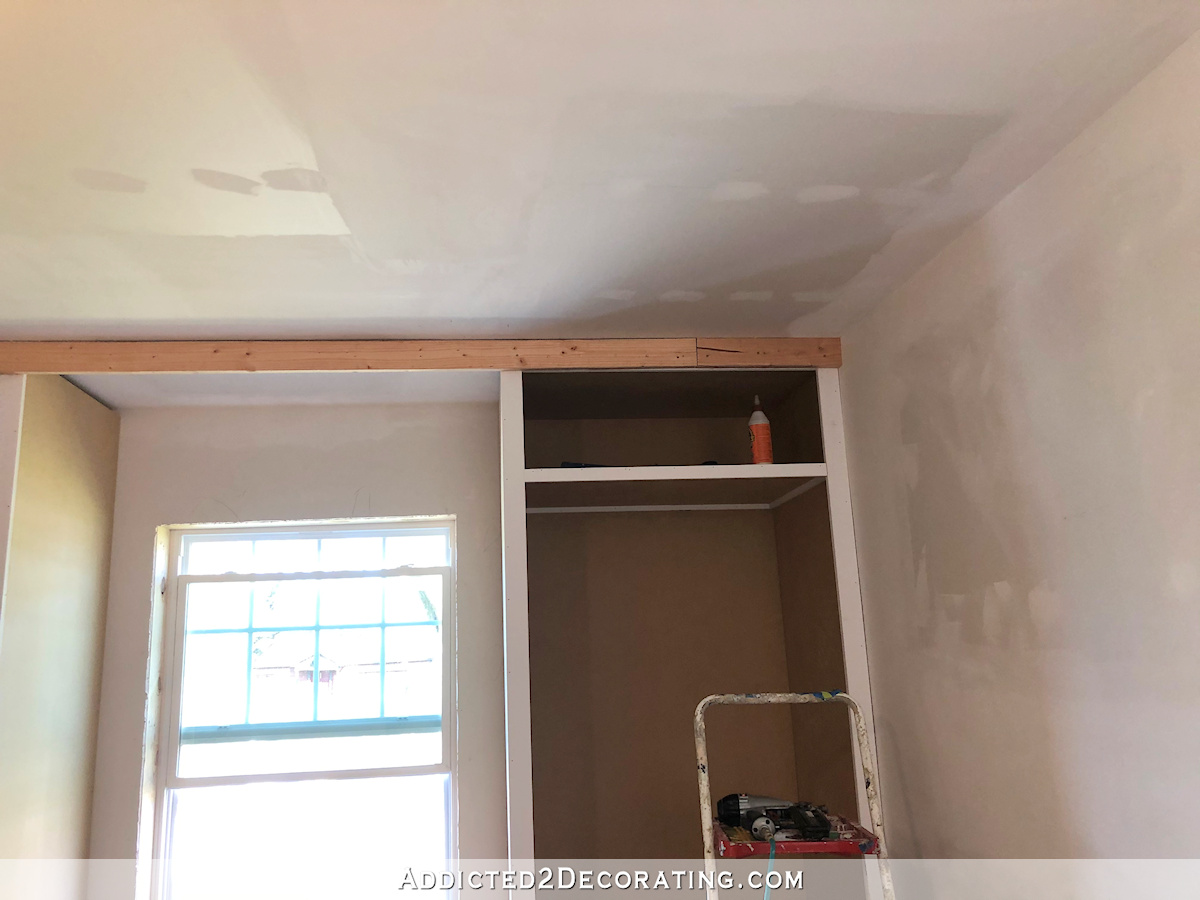
That was a good start, and was certainly strong enough to hold a closet door track and two closet doors. But a 2″ x 4″ board is only 1.5″ thick, and the closet door track is 2″ wide. So I needed to add more thickness to hold the track. I simply cut a 1″ x 4″ board and attached it directly to the 2″ x 4″.
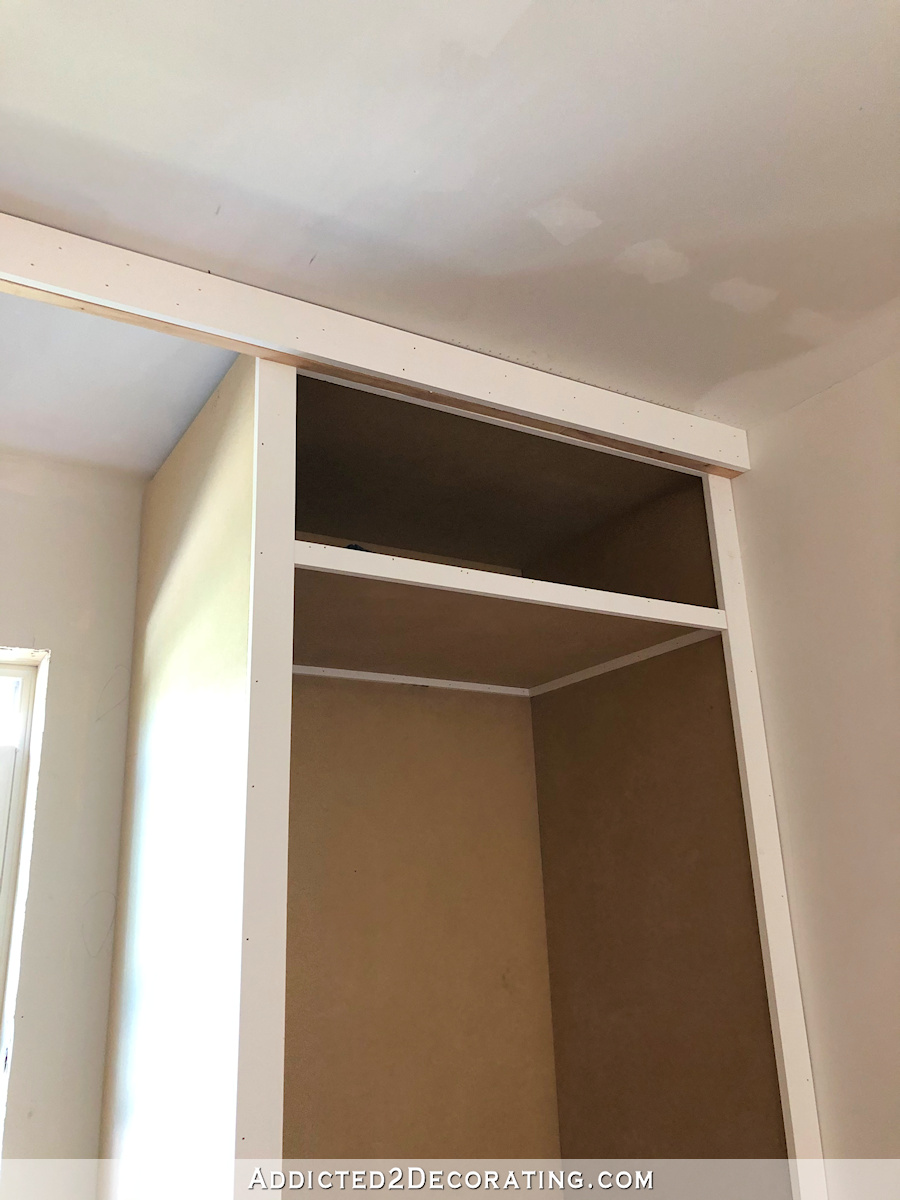
This gave me a total thickness of 2.25″ (2″ x 4″ lumber is actually 1.5″ thick, and 1″ x 4″ lumber is actually 3/4″ thick), which was sufficient for me to attach the 2″-wide track to the bottom edges of those boards.
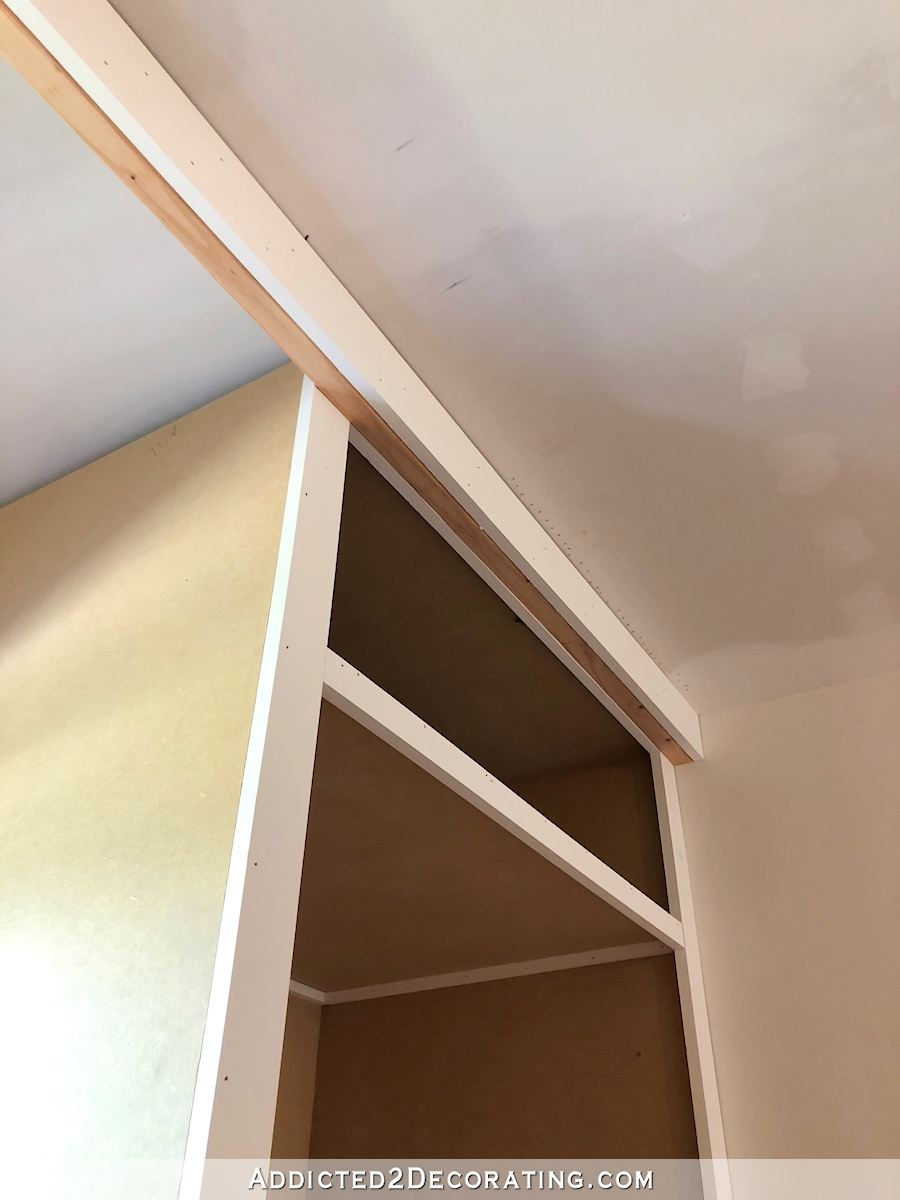
I forgot to get a picture after attaching the closet door track and before attaching the front 1″ x 8″ header piece, so here’s a look from the back side after I had attached the 1″ x 8″ header piece…
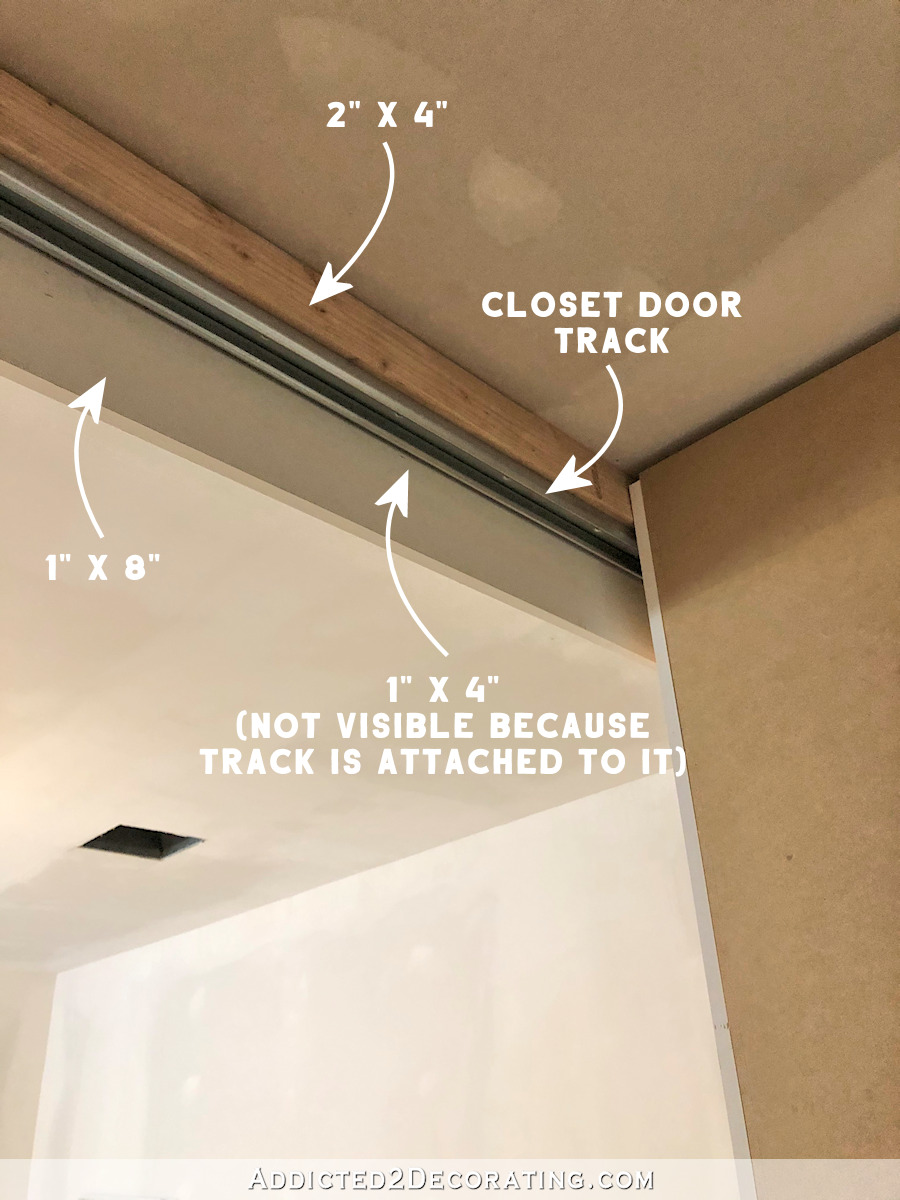
But just note that I did not attach that front 1″ x 8″ header piece until after the doors were made and hung. It wouldn’t be impossible to hang the doors after the header piece is installed, but it sure would make things more challenging and frustrating. And I doubt that that would be a one-person job.
And speaking of the doors, I just used 3/4″ sanded plywood for those, cut to a width that was the width of the closet opening plus two inches (for one inch overlap on each side). And then I used iron-on edge banding to cover the plywood edges and give them a beautiful finished look.
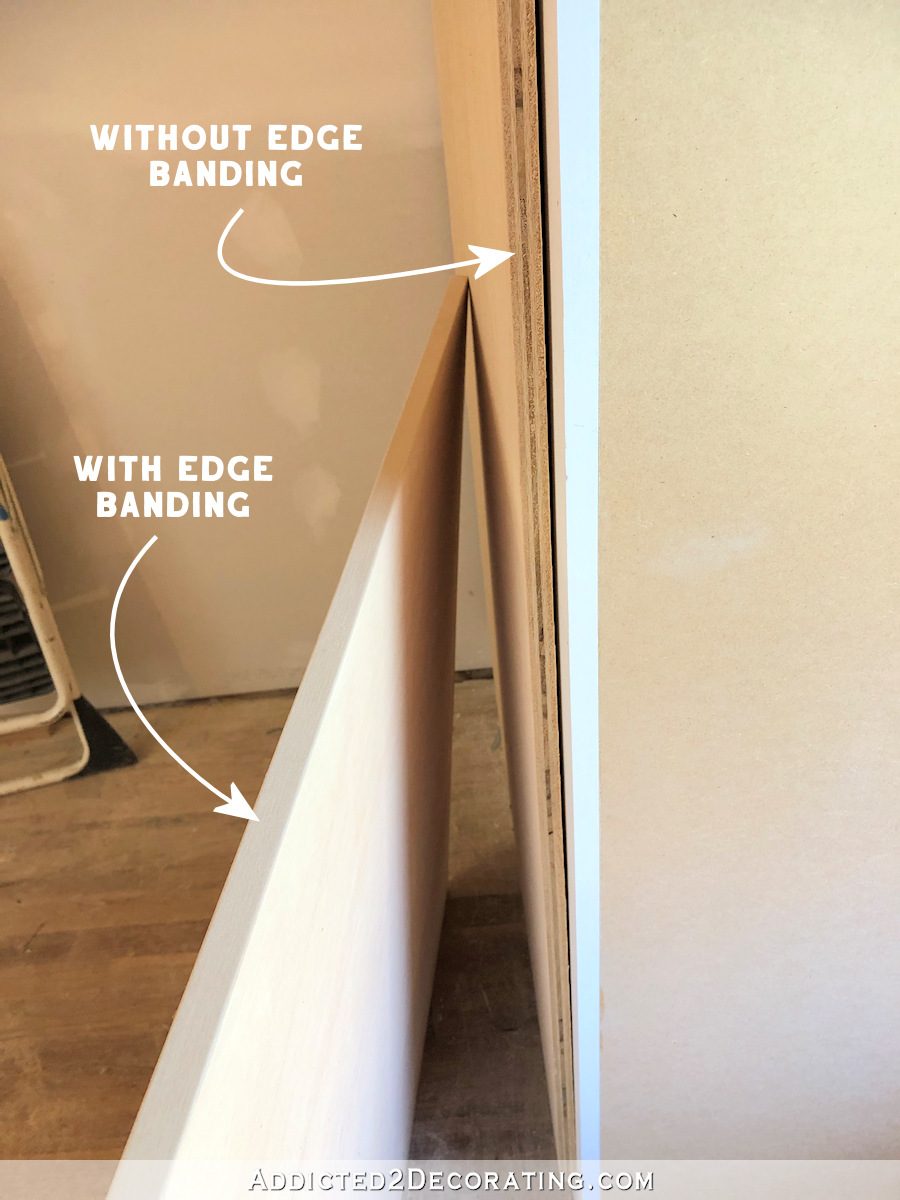
Edge banding takes a bit of effort. I mean, you can’t just iron it on and call it good, because it won’t look good. In order to get it looking really nice, you have to be willing to do quite a bit of sanding. Sanding makes all the difference in the world! But once it’s sanded, it looks amazing.
Once the edge banding was on, I used my circular saw to cut a groove right down the middle of the plywood to create the look of two separate doors. I made sure not to cut more than 1/4 inch into the plywood.
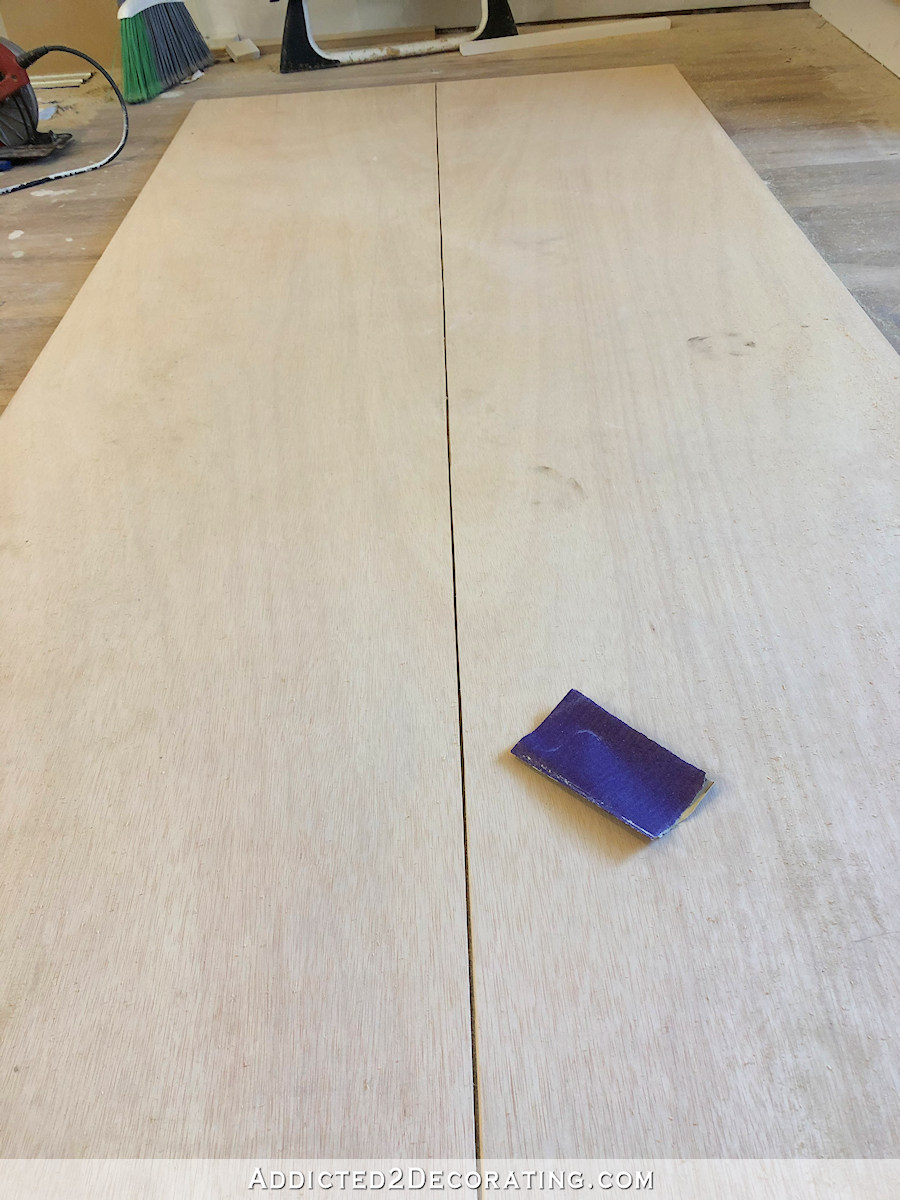
It looked a little rough at first, but after using a piece of 150-grit sandpaper and carefully sanding the top edges of the cut line, it smoothed everything out and gave it that same softened appearance that the sanded edge banding had on the outer edges.
Then I simply attached the rollers to the top of the door according to the directions in the hardware package, and hung the door on the track. You can see the rollers on the track here…
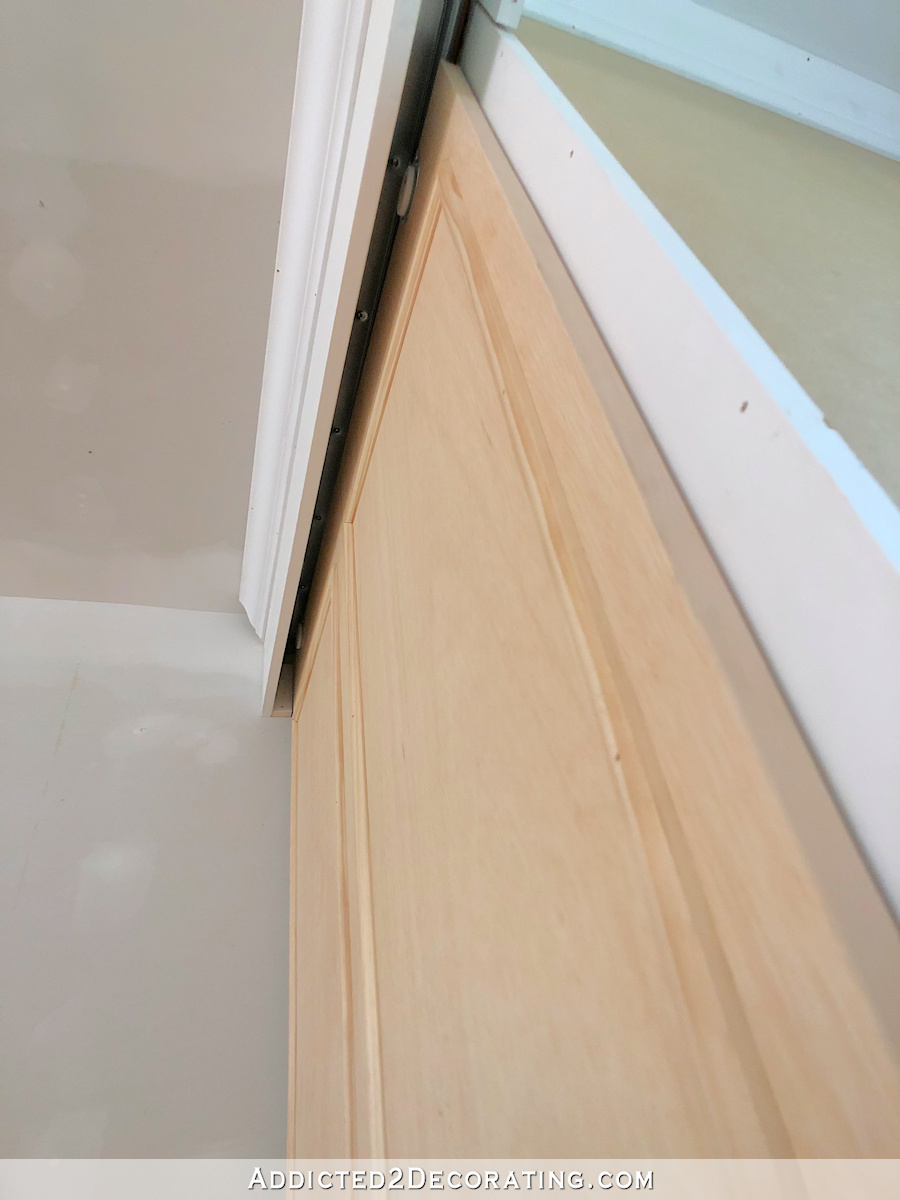
…but again, I hung the doors before I installed that front header piece. So the process was pretty easy, although it would have been much easier had I had a second pair of hands to help me line up the rollers with the track. But I managed.
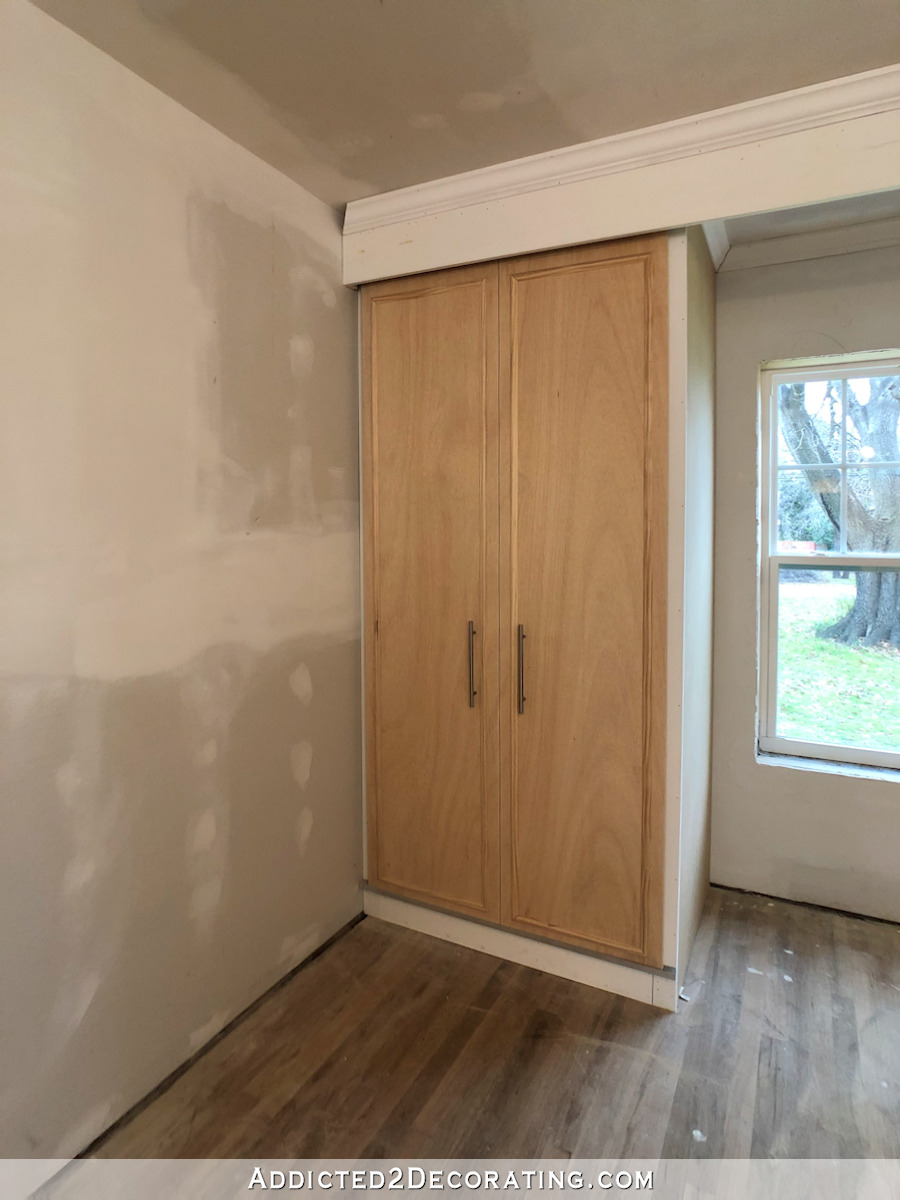
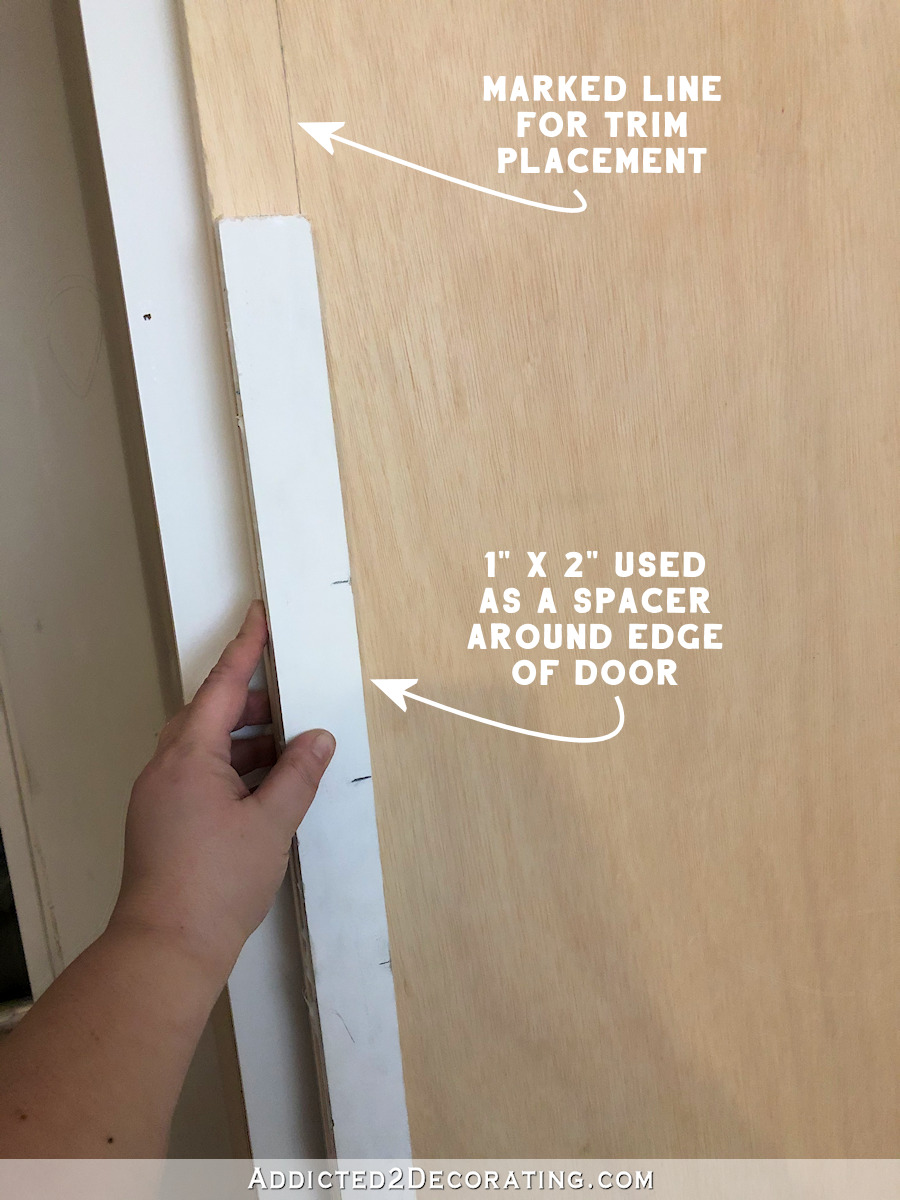
After the doors were hung, I used a scrap piece of 1″ x 2″ lumber as a guide to mark the doors for trim placement.
I used a trim from Home Depot that’s simply called cabinet door trim. This comes in three sizes (at least it does here at the Home Depot in Waco), and I used the medium size. They come in 8-foot pieces, so this trim isn’t sold by the linear foot.
I attached these trim pieces with wood glue and 5/8″ 18-gauge nails.
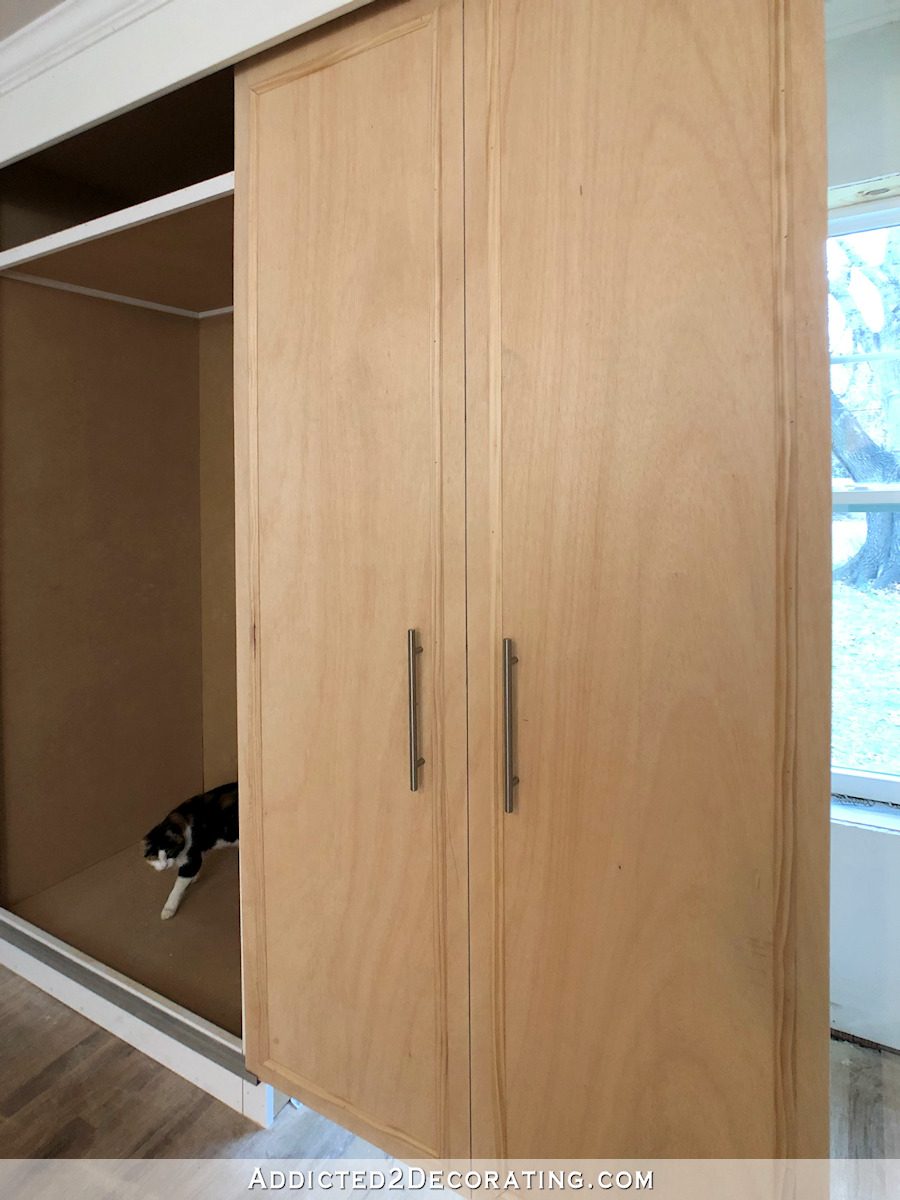
Once the trim was installed, I added a track at the bottom of each door.
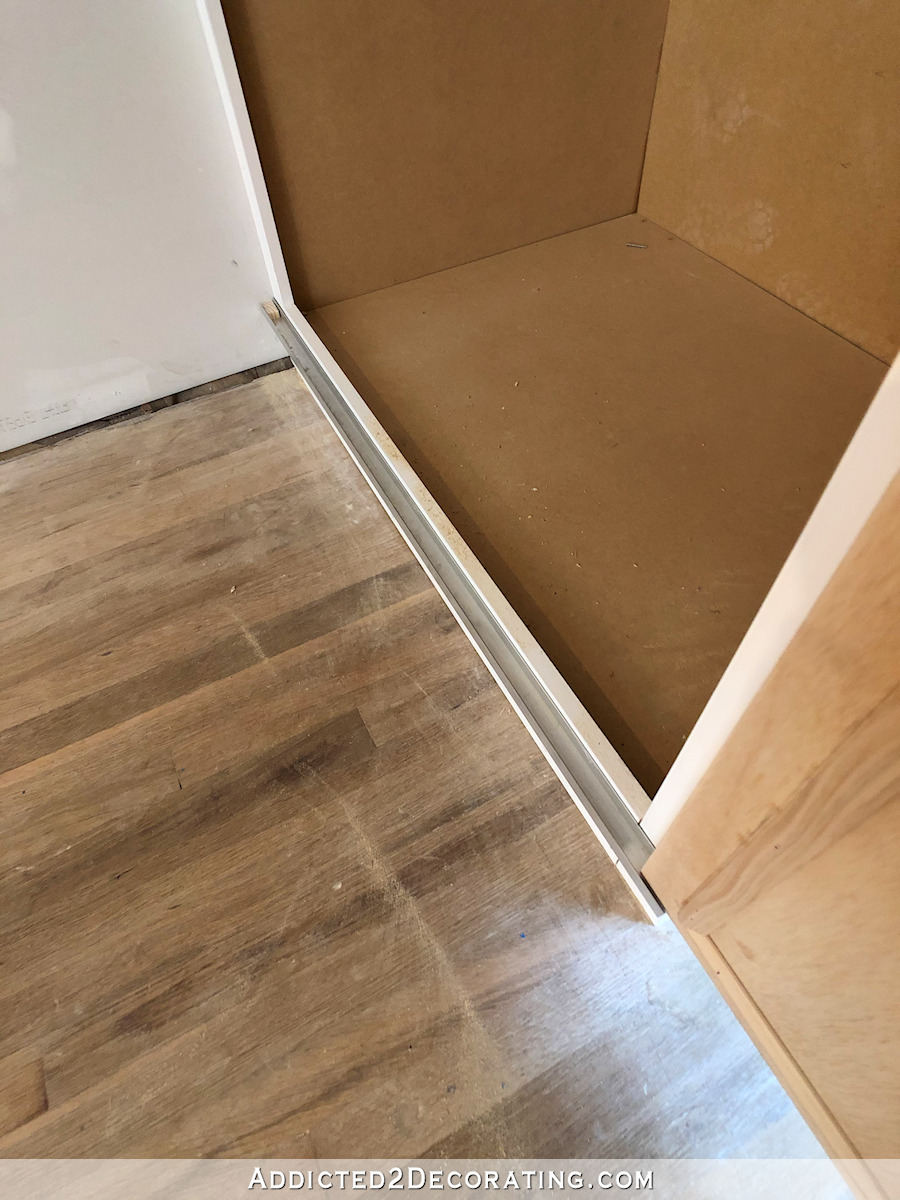
I created this track out of two metal pieces that I found in the hardware section of Home Depot (generally by the nails and screws). I don’t know what these are called or what they’re actually intended for, but if I find the name/product number, I’ll update this. But each piece has an “L” profile. So I used two for each door, adhering them together in such a way that the “L” profile was turned into a “U” profile. Then I adhered them to the bottom of the closet, giving just enough space so that the door moved freely in the track.
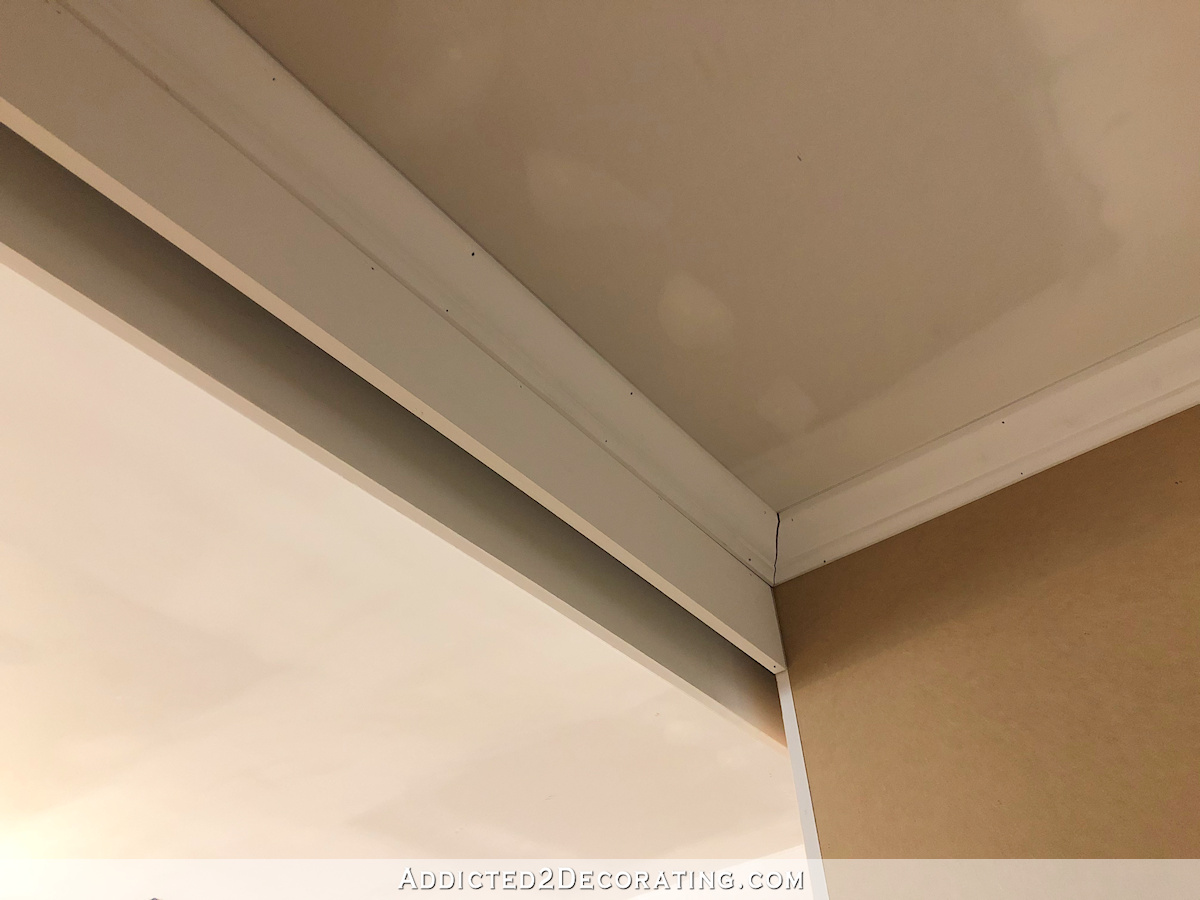
With the build of the closet doors finished, I turned my attention to finishing up the back side of the track area. Obviously, I didn’t want to leave a 2″ x 4″ exposed on the window seat side of the track. So I first cut and nailed a 1″ x 6″ piece of lumber to the 2″ x 4″. And then I installed crown molding all around to finish off the ceiling in that little area.
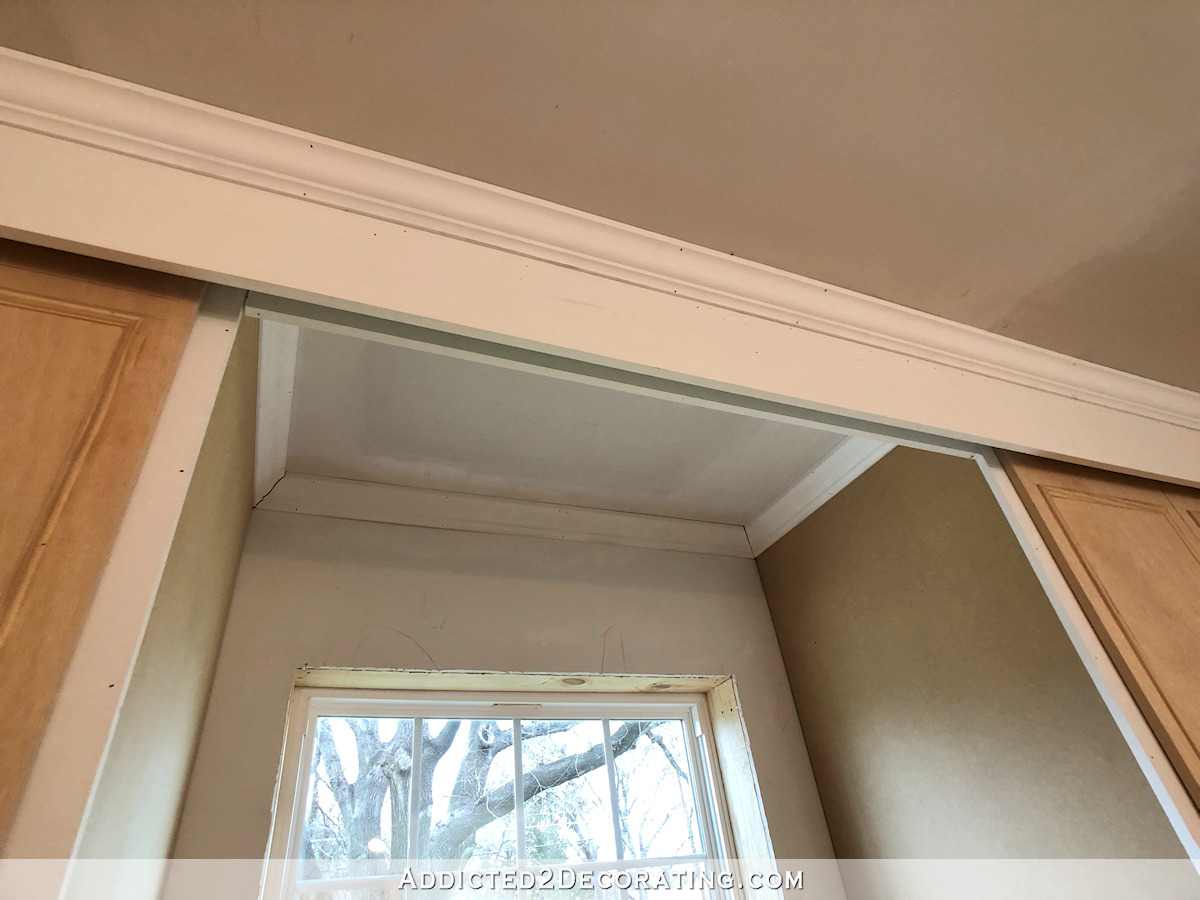
So that’s the progress so far! I still need to build the window seat and get the trim on that window, as well as the rest of the crown molding in the room. I also want to add picture frame molding on the walls in this bedroom.
Once all of that trim is installed, I’m going to get this floor stained and sealed. Once it has had enough time to cure, I will be able to install the baseboards, which will wrap around the bottom of the closets (and window seat). So the rough-looking areas at the bottom of each closet will be all trimmed out before all is said and done.

So it’s coming along! But there’s still quite a bit to do.
Addicted 2 Decorating is where I share my DIY and decorating journey as I remodel and decorate the 1948 fixer upper that my husband, Matt, and I bought in 2013. Matt has M.S. and is unable to do physical work, so I do the majority of the work on the house by myself. You can learn more about me here.



wonderful progress! About the shelf, have you considered moving it to the bottom?
I have, and that’s probably what I’ll end up doing.
The only thing to be careful about there is making sure you don’t make the shelf high enough (if you move it to the bottom) that then the rod for hanging clothes has to be moved up. I’m 5’4″ and our closet hanging rods are so high it makes me frustrated every time I do laundry. On the other hand, with this being a guest room, I can’t imagine a guest having that many clothes. Maybe you can keep one for your stuff.
Well got all your frustration on this project you hit a home run!! I couldn’t figure out what you were envisioning but now that it’s finished it’s genius and so are you
Do you need a stop of some sort to keep the door from sliding all the way out of the lower track?
That would be great, but I haven’t figured out a way to add a stop. It can’t be added to the track since both doors use the same track and overlap the same area when they open. The only other idea I had was to route a groove into the bottom edge of the door that has a stop in it, but then that requires finding/creating something that actually inserts into the groove to create the stop, and that all just seems like a whole lot of trouble. 😀 I think it’s okay without a stop, unless I’m overlooking an obvious (and easy) solution.
I am not a builder…. What about something like a cane bolt (or similar device) set on the inside of the opening door edge and bottom inside outer edge of frame, prior to the door dropping off the track?
That’s what I was thinking, something inside bottom of door, like a rubber stopper, spaced an inch or so from the edge of the door, that would still allow door to shut fully, but catch on the interior frame of the closet near the window seat side. (like a bumper!)
They look beautiful! Can both doors be opened at the same time?
For the stop sitch. What if you glued a little rubber stopper (like the ones you put behind frames) in the ‘U” of the track and another one on the bottom of door. Then they would catch each other? I seems like it would work in my head lol.
No, they can’t be opened at the same time. I’m not really bothered by that in a guest bedroom. 🙂
I love your idea for the stop! That will definitely work!
Looks pretty already, can’t wait to see it all painted and finished! I just love window seats, but don’t have any…
Regarding the stops, you can attach something on the wall too, if you are unable to attach it to the metal (would still be inside the U, just stuck on the side rather than on the bottom – I think that would make it sturdier too, since force exerted on it would work to fix it further, not at an angle). If you can’t find a rubber stop or anything small enough to fit inside the metal U, even a small cube cut from wood would do (and if you want a milder stop, maybe stick something to its side)!
I really like how you made the sliding doors look like double doors! So looking forward to seeing the progress on this room!
Nice!👍🏻
Looks great!
It’s just wonderful. As for a stop, doesn’t one door act as a stop for the other since they’re in the same track?
The bottom track doesn’t go all the way across. That’s where she needs the stopper.
No, because the space between the doors (i.e., the window seat space) is wider than the width of the doors. So by the time the edge of the door hits the other door, it has already come out of the track.
Splendid. Are you putting a bench in that spot? More recessed, could be portable or could be a storage bench. That spot begs to be a reading nook.
A window seat.
YOU ROCK….!!!!!
Your doors look great! Instead of a window seat though, which probably would not be used, why not build a cabinet with a drawer? That way you wouldn’t need a dresser or chest of drawers being as it is only a guest room once all is said and done. Just a thought.
I’m building a window seat with a drawer. 🙂 I could just built a low cabinet, but since it has to be low enough to clear the window sill, which happens to be chair/seat height, I may as well throw a cushion on it and call it a window seat.
A thought. You could split the closet in half so you can have long hanging items on one side and the other side can have upper and lower hanging rods or hanging and shelves. Very creative solution for your closet!
Yep, that’s the plan. 🙂 The left closet will be upper and lower the full way across. The right one will be split for long hanging items.
I love it! I would not have guessed it was just one door on each side. In fact, when I first saw the picture I wondered why you decided to use two doors on each side that would open out and take up space. 🙂
I love it! I now agree the one level of molding at the ceiling looks so much cleaner than many layers and levels…I see you in that room by the end of february(exactly 4 weeks) and out of the kitchen before spring!
So exciting and as always so gorgeous and functional!
Nice doors! They are handsome with the groove detail which makes them elegant in that space. I like the hidden rollers and wonder if a stop for the door could work on the top of the door, which would be hidden by the trim. One rubber (or such) stop on top of the door end that then catches a rubber stop above (or behind) out of the way of the rollers at max roll out.
Very clever planning! I like them and a window seat between will be perfect. What a great start!
Seems like you’ve thought of everything. I admire your imagination and building knowledge. Great job!
Hi Kristi, it’s looking good. It’s also great timing as I am getting ready to do the same thing in our daughters bedroom. We’ve already built the closets and the window seat, now we are ready to make the doors. Trying to figure out the tracks and for operation of the doors. So like I said, good timing. We thought the same thing as you, use the bypass door tracks. My question is, do you think the tracks can be placed directly to the ceiling? Also, which tracks did you end up getting. I didn’t realize there would be multiple choices for bypass door tracks. Thanks and keep up the good work!
I would hesitate to attach the track right to the ceiling because the screw holes are about 8 inches apart, and you really will need to use screws in all of the holes. But eight inches apart means that most of them would miss ceiling joists. My original plan was to attach a 2 x 4 to the ceiling, screwed into ceiling joists, and then attach the track to that. But I learned that the ceiling joists in this room are going the wrong way for that to work. That’s why I had to redo the tops of the closets, reinforcing that top board with a 2 x 4 behind, and then attach the 2 x 4 to the closets rather than the ceiling. But in short, I don’t know of a way that the track can be attached directly to the ceiling since the screw holes are so close together, and the track (which seems to be made of aluminum) really does need all of the screws to be used in order to be strong enough to hold the doors.
Oh, and I put a link to the exact track that I used in the post. 🙂
They look great Kristi. You are certainly very creative making one door look like 2 doors! Love it. Genius idea!!!
Hi Kristi, Perfect , Perfect !!! Is it too late to put ceiling lighting in center of the window? Or were you thinking of lighting on each side of the closets?
I love your creativity and your attention to detail. I can already envision the window seat and completed room!
I’m planning on doing sconces on the sides of the closets. 🙂
Those look really nice! There are a variety of stoppers designed for barn doors that would probably work to prevent them coming out of the bottom track, although I do like the rubber bumper solution from somebody above.
Too cute! The closets look kind of retro. And Peeve likes hiding there.
Whoa! That is amazing! How in the world did you learn to do all of this?
Mostly just self-taught over the years, learning one skill and then building upon it with the next project. 🙂
Do you, like me, when doing solo building, often say “it would be so much easier if I were an octopus!”
I’ve never thought that exactly, but I have thought that this whole evolution thing is being really stubborn and slow in bringing about that third and fourth arm that would be SO helpful to us all!! 😀
Looks great! Just curious– why did you build the bottom of the closet off the floor – it looks to be elevated about 4″ or so?
It’s just a personal preference. I like the bottom face board to be tall enough so that I can wrap the baseboards around the closets. And I don’t like a huge dip down inside the door to the bottom of the closet. I like it to be more like an actual cabinet, in which the base of the cabinet is generally about 3.5 to 4 inches off the floor and not sitting right on the floor. About a 1″ lip (i.e., drop down on the back side of the bottom face board) is all I like, but really no more than that. But again, it’s just a personal preference.
This is a great use for the sliding doors that are on trend right now! I see so many of them put on bathrooms…then, when they’re closed, there’s a 1″ gap all the way around. I don’t know about you, but I like a little more privacy in the bathroom, haha!
Well done! I love the way you made the doors look double while keeping the function of the single slider.
Kristi,
You are so inspiring! I love how you give such detailed information on how you build. It makes me think I can do it. I truly LOVE your website. Thank you for sharing with us.
Hi. I know this story is over a year old, but I really wanted to know if you used any type of sealer – polyurethane/poly acrylic for the doors. I am using the same (3/4 plywood w/edge banding) and wondering if they need to be sealed either with or without a whitewash. Everything I’ve read says there is too much yellowing with light wood or light paint when using polyurethane so I’d love to know if you left them ‘au naturale’ after sanding..