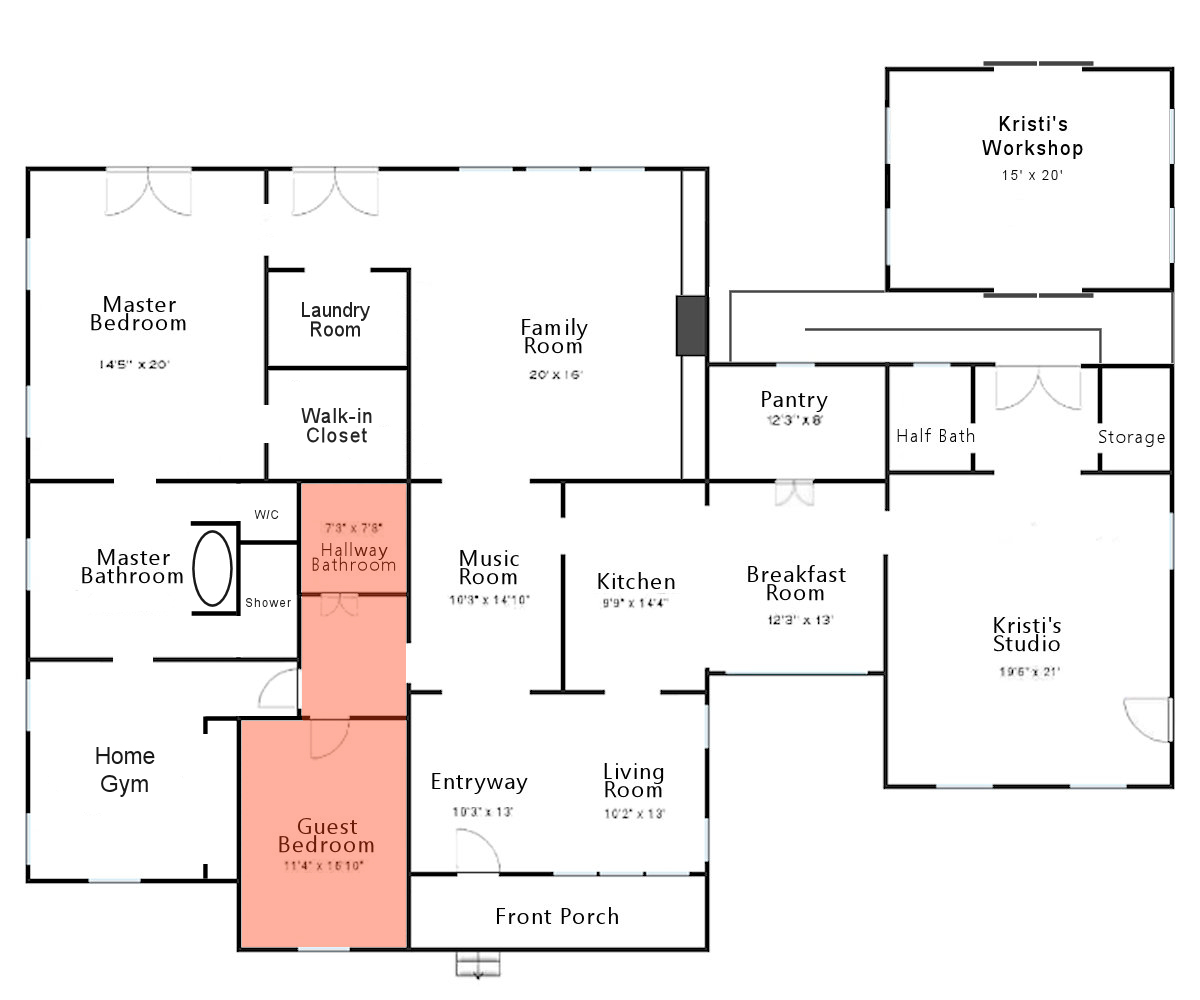
Guest Bedroom Progress: Trim and More Trim
*This post contains affiliate links.
I’ve been hard at work trying to get all of the trim finished in my guest bedroom. As soon as the trim is done, I can finish the floor, and then get to the fun stuff! So I’m anxious to get the trim done, but I wanted it done right, so I didn’t want to just quickly throw up some trim just so I could call it done.
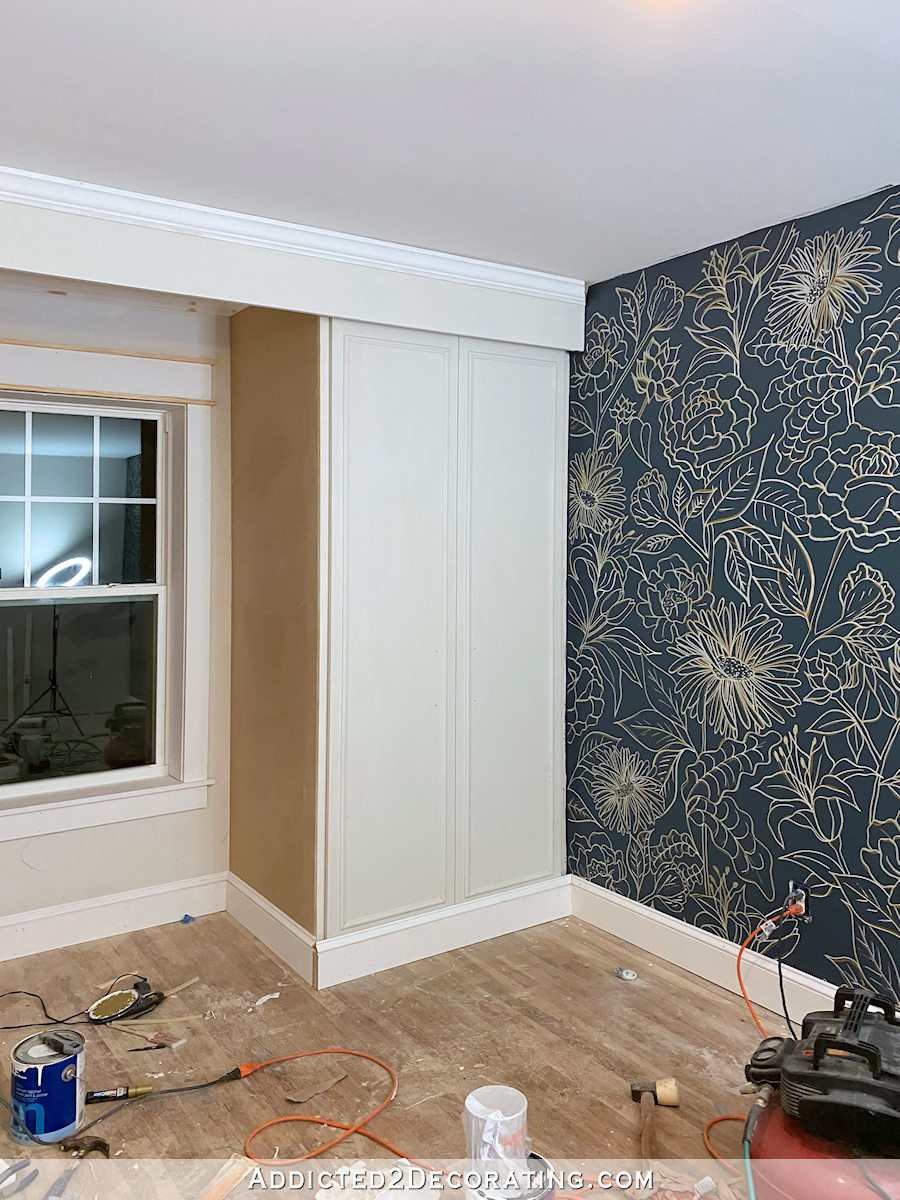
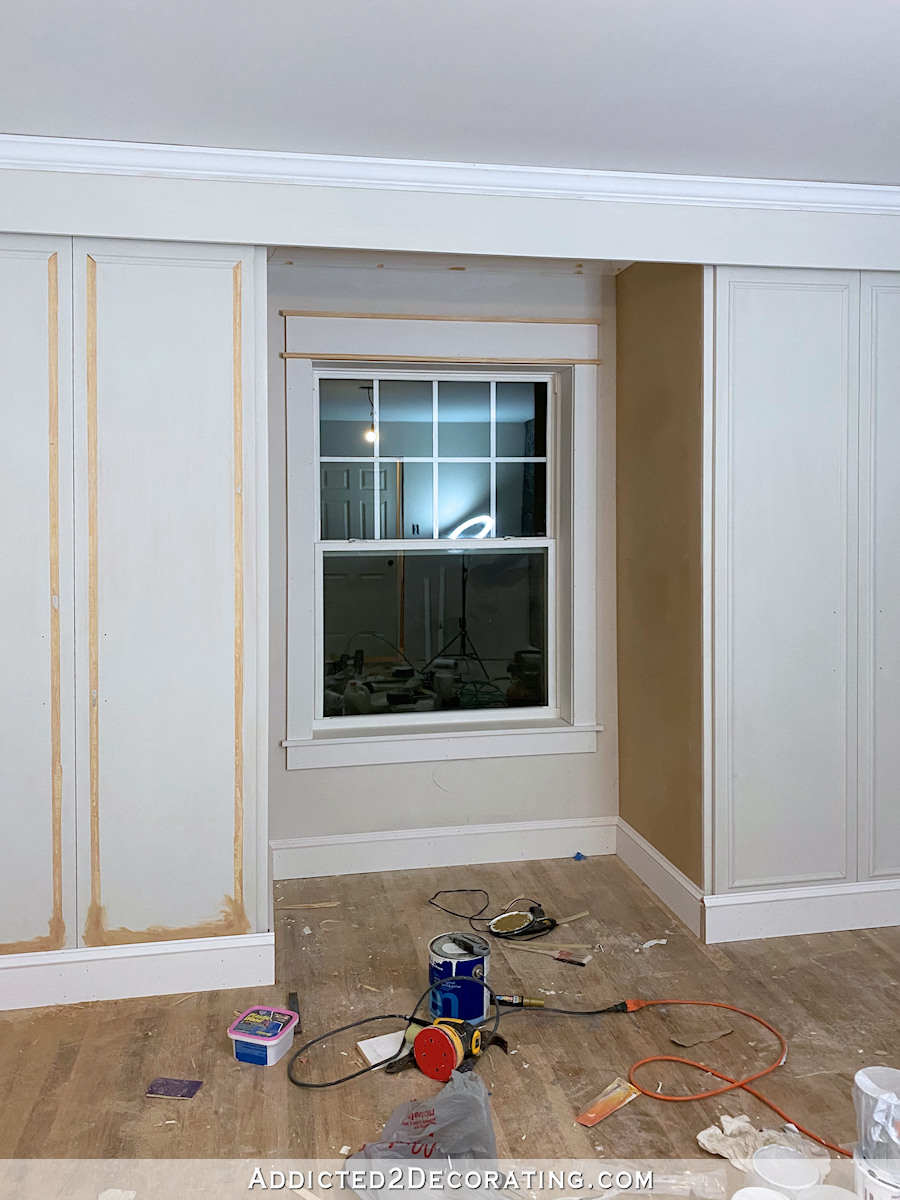
Most of the trim is pretty straightforward — baseboards, base cap, window casing, etc. But I originally had no idea how I was going to handle the bottom of the closets.
When I built the closets, I debated between making the doors sliding doors or regular swing doors. I finally decided on sliding doors. If you missed how I built those, you can see the details here:
Those sliding doors required metal tracks at the bottom to keep the doors in place. You can see then metal track on the bottom of this door…
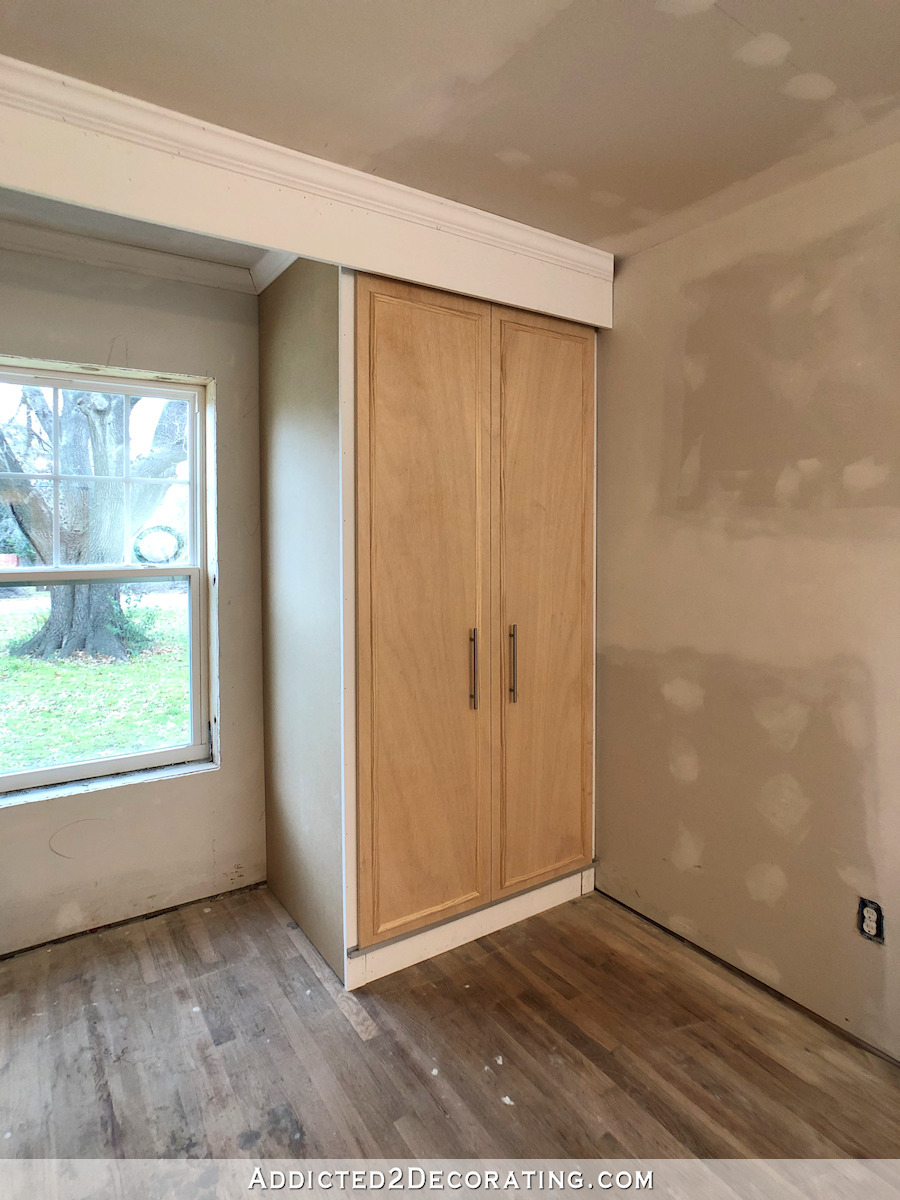
Obviously, that bottom area needed to be trimmed out, but I had no idea just how to go about it. So after thinking about it and trying out some different ideas, let me show you what I finally came up with.
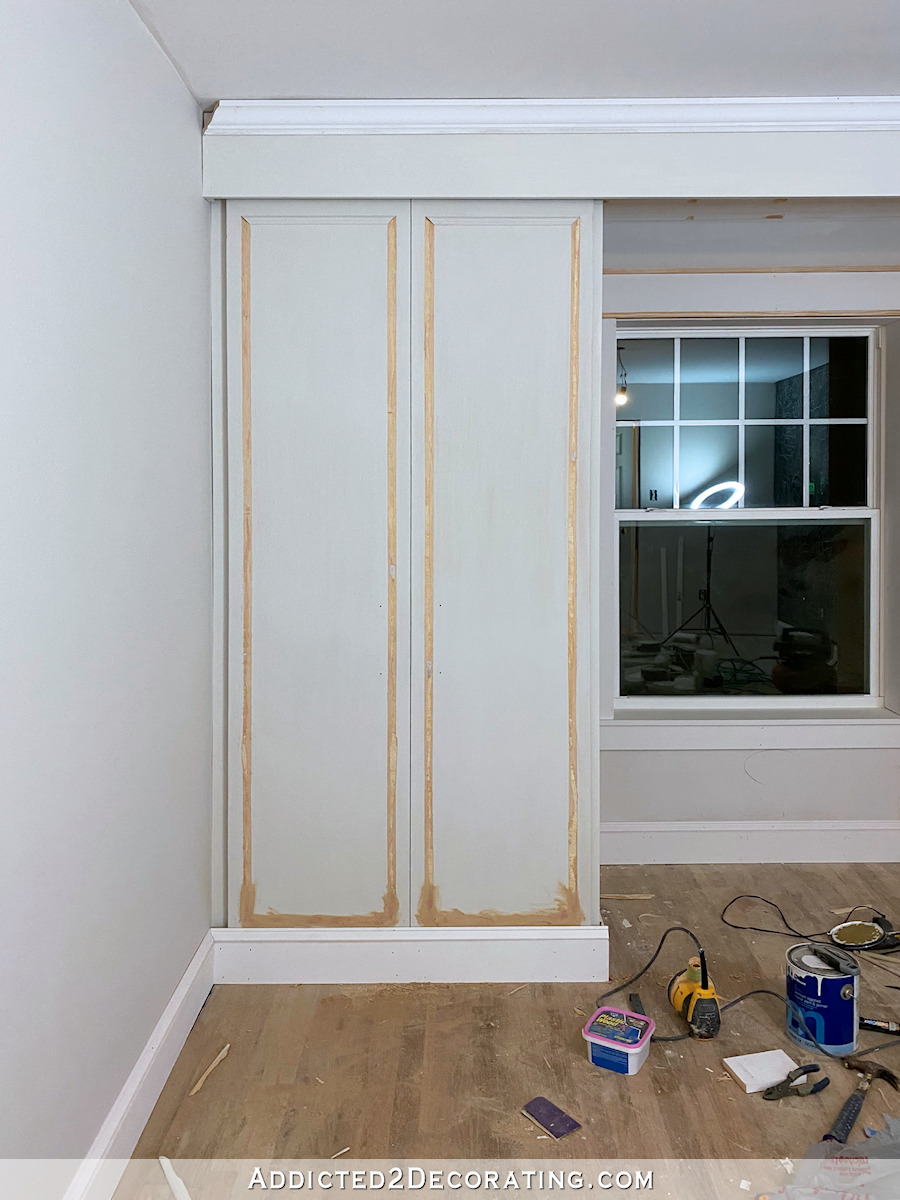
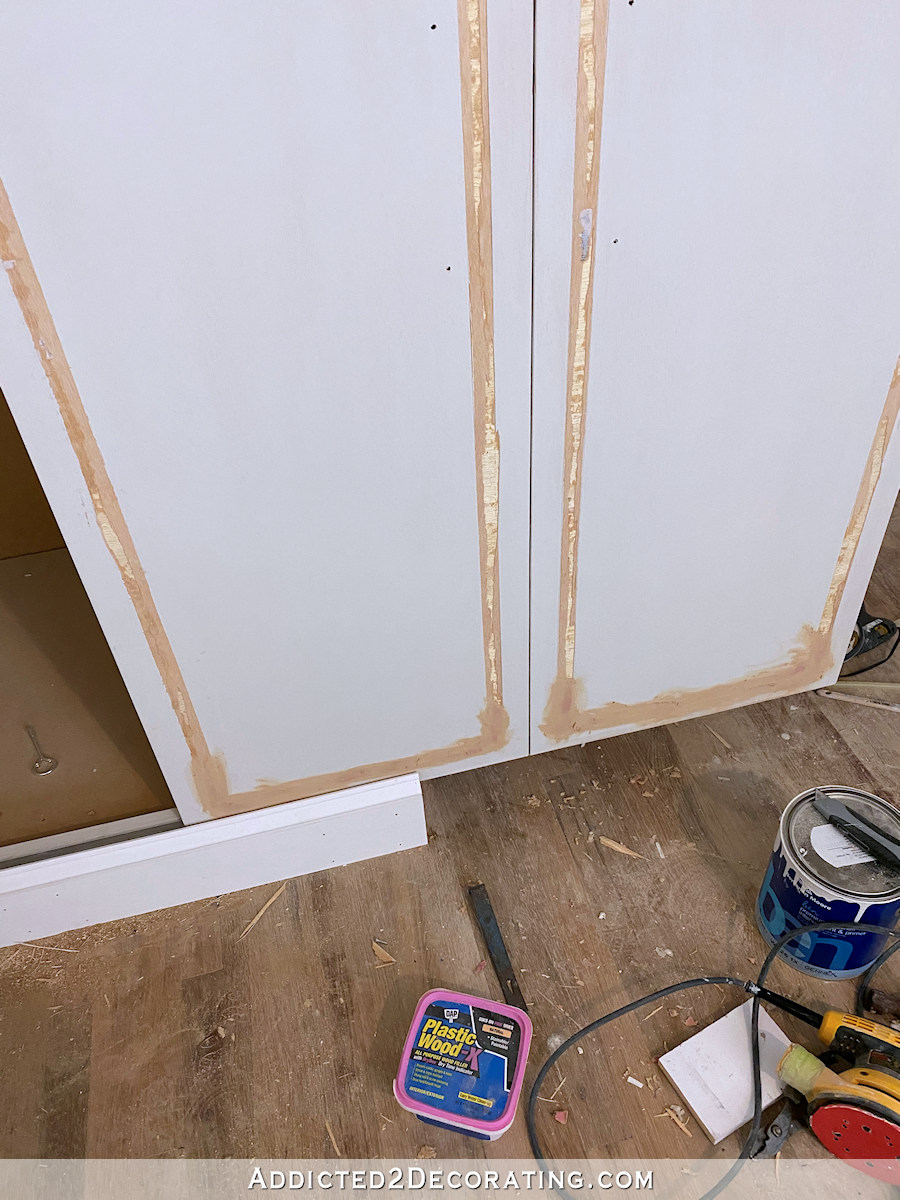
First, I added two pieces of 1″ x 5″ lumber at the bottom, plus a 1/4″ spacer behind both pieces, to bring that front piece out past the metal track. And then I attached the metal track right to the top of the lumber and the front of the closet using DAP Rapid Fuse and slow dry hot glue.
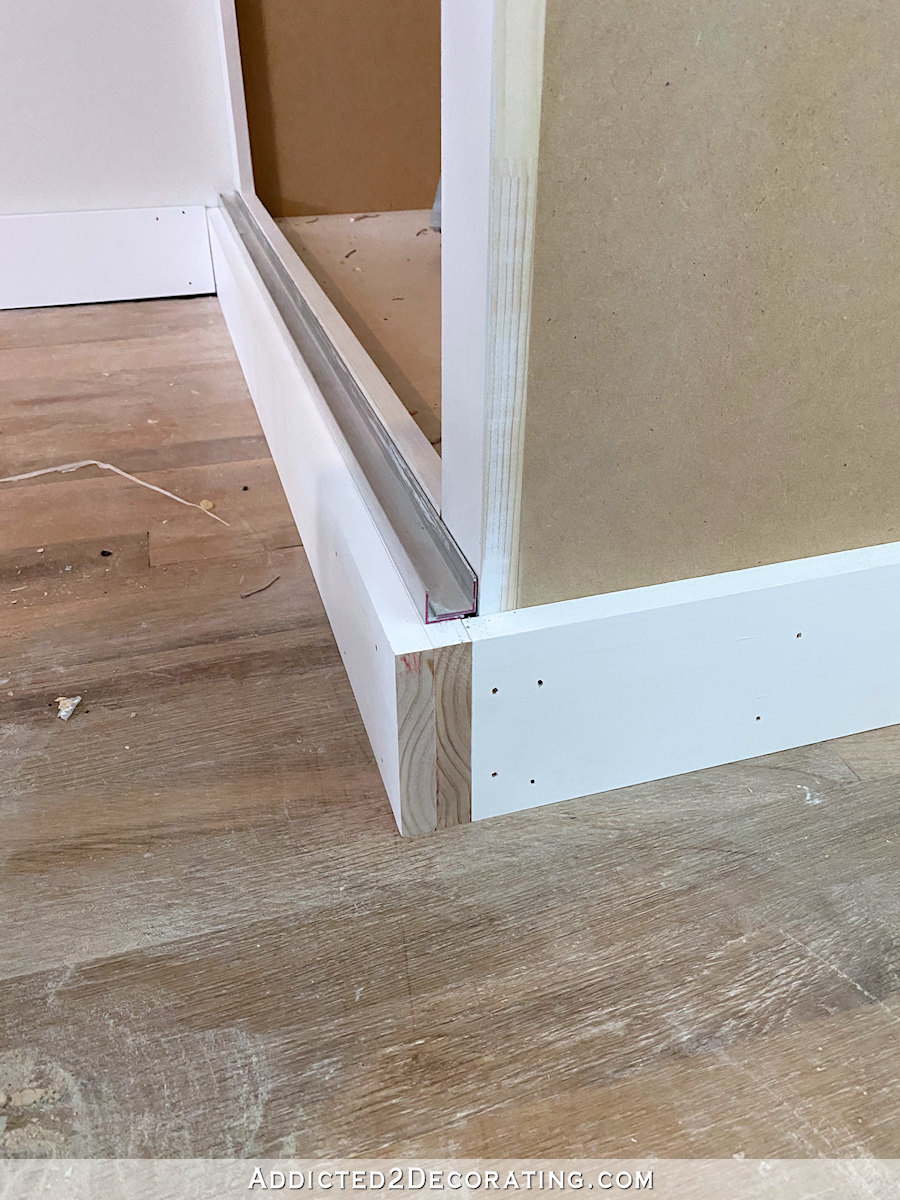
And then I continued the 1″ x 5″ around the room as the baseboard. So here’s how the door looked in the track at that point…
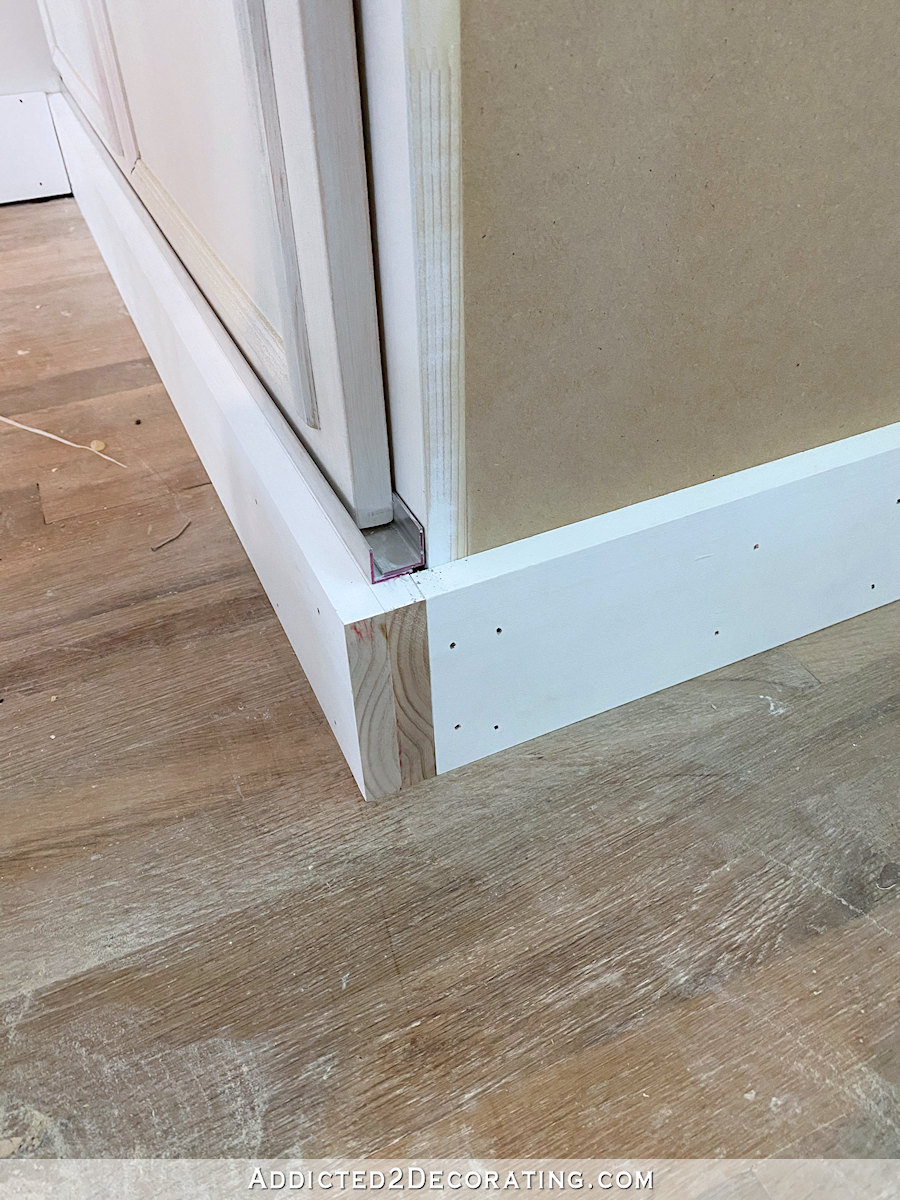
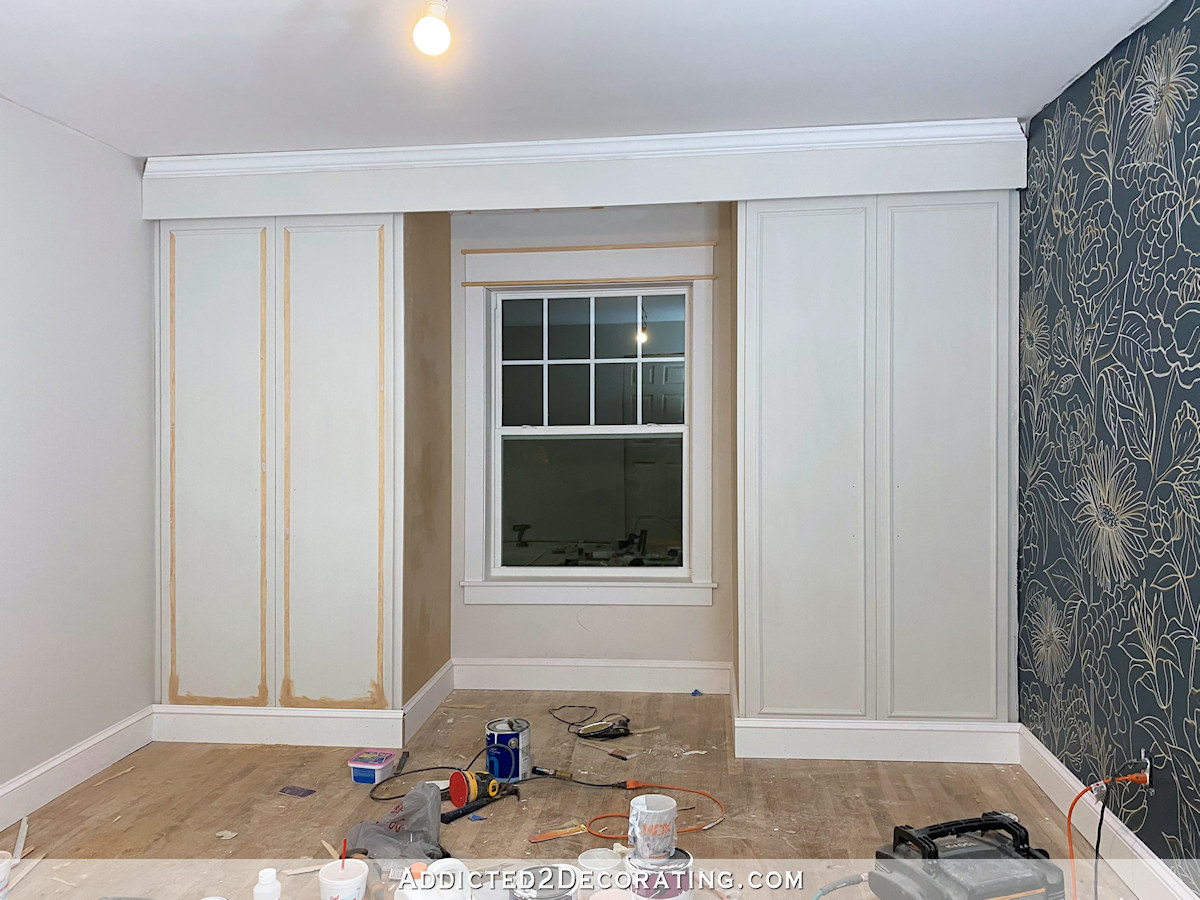
And then to hide the front of the track, I added a base cap on top of the baseboard. I attached that with DAP Rapid Fuse and hot glue as well. And then I continued the base cap around the room. On the side of the cabinet, I just left the space for the door to slide…
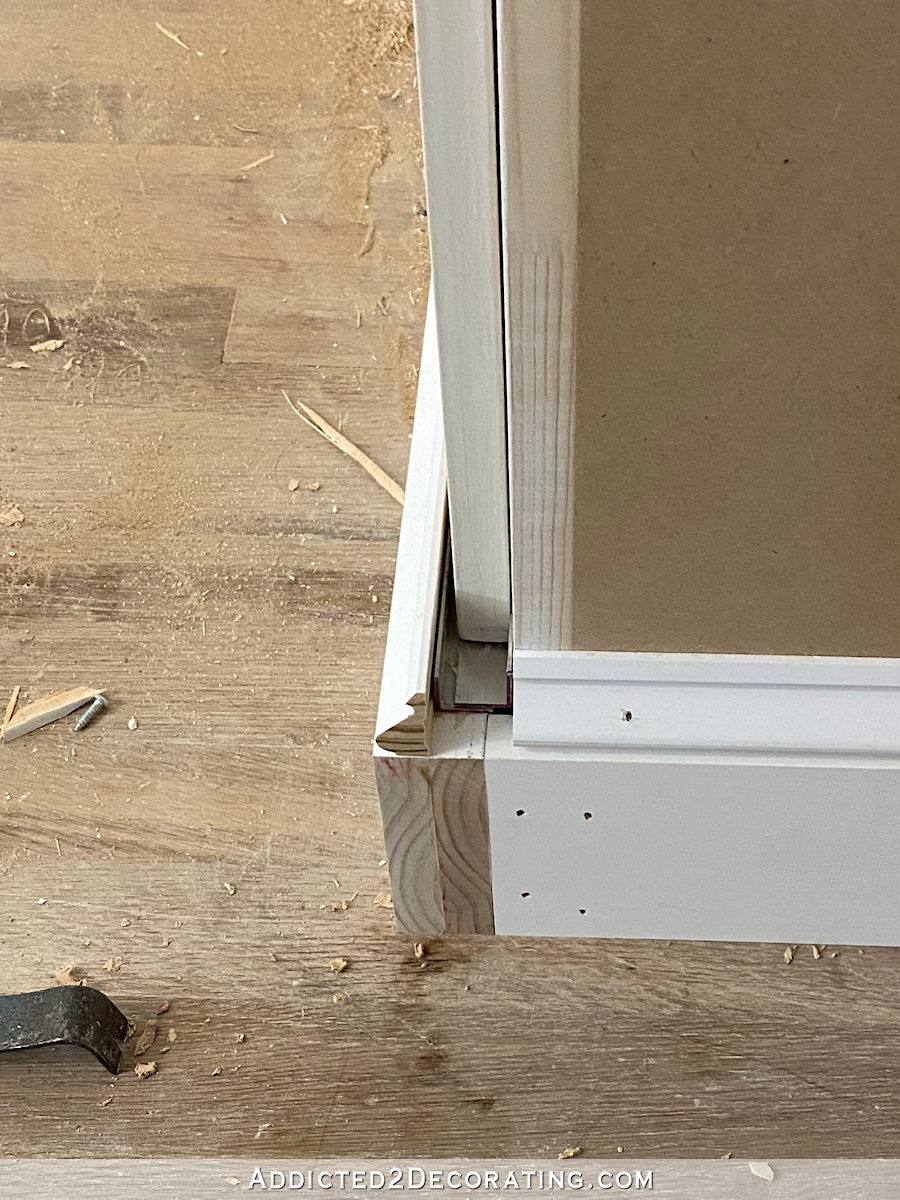
Once it’s all caulked and painted white, and the raw cut edges of the trim aren’t drawing attention, I think it’ll look great!
One issue that I did run into is that the addition of the base cap made the bottom trim on the doors too close to the bottom.
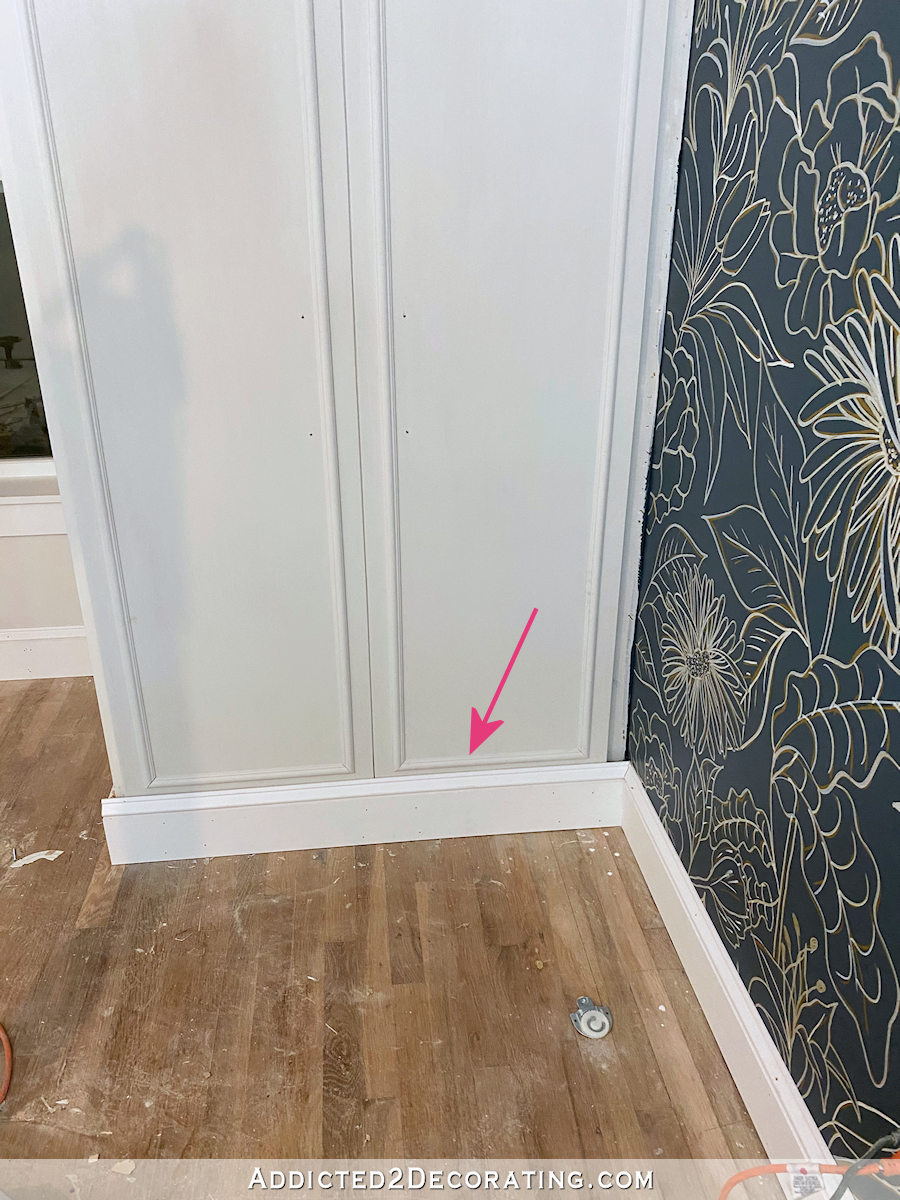
So unfortunately, I had to remove the trim and do a little patchwork with some wood filler. I’ll reinstall the trim so that it’s evenly spaced.
That was a frustrating step backwards, but it’s not a big deal. That’s what happens sometimes when I decide on details as I go along. 😀
Anyway, I’m very pleased with how the track is now hidden behind some pretty trim.

So in addition to getting that figured out and getting the baseboards and base cap installed on three of the four walls, I also got the window trimmed out…
I you’d like details on how I trim out all of my windows and doors, you can find that info here…
And I finally got my door installed.
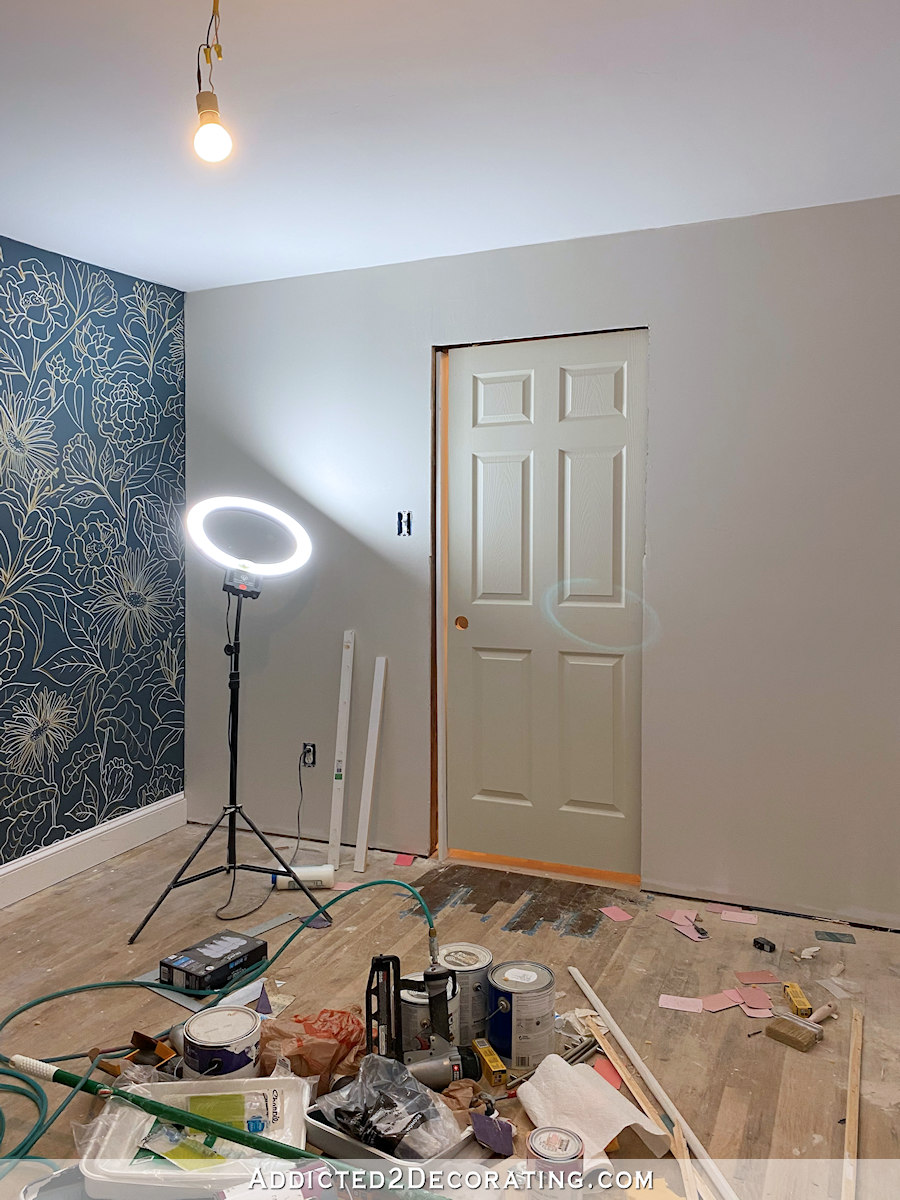
That is a pocket door, and back when we had all of this construction done, I had the guys use some much nicer pocket door frames instead of using the cheap, ready-made ones that you can buy at any big box home improvement store. So I purchased these Johnson Hardware 1500 Soft Close Series pocket door frames.
I’m so glad I did! These frames are amazing, and the better quality is unmistakable. I wish I could go back and use these on the studio bathroom and storage closet, but unfortunately, it’s too late for that. I’ll definitely use these on any pocket doors going forward, though. No more cheap pocket door frames for me!

Addicted 2 Decorating is where I share my DIY and decorating journey as I remodel and decorate the 1948 fixer upper that my husband, Matt, and I bought in 2013. Matt has M.S. and is unable to do physical work, so I do the majority of the work on the house by myself. You can learn more about me here.

Your attention to the littlest detail is amazing and always worth it. I am so glad you are excited about working on your house again! I love your posts!
Great job figuring how to do the trim! Is there a particular reason to do baseboard trim BEFORE finishing the floor? Seems it would be easier to do the floor first and not worry about dinging up the trim?
I’m messy and hate using drop cloths, so I decided to do all of the trim with all of the nailing (and dragging tools around), caulking, priming, and painting, before doing the floor so that I won’t mess up my newly-refinished floor. I’m doing all of the trim before the floor with the exception of the quarter round that goes at the bottom of the baseboards. I think I can handle installing quarter round without messing up the floor. 😀
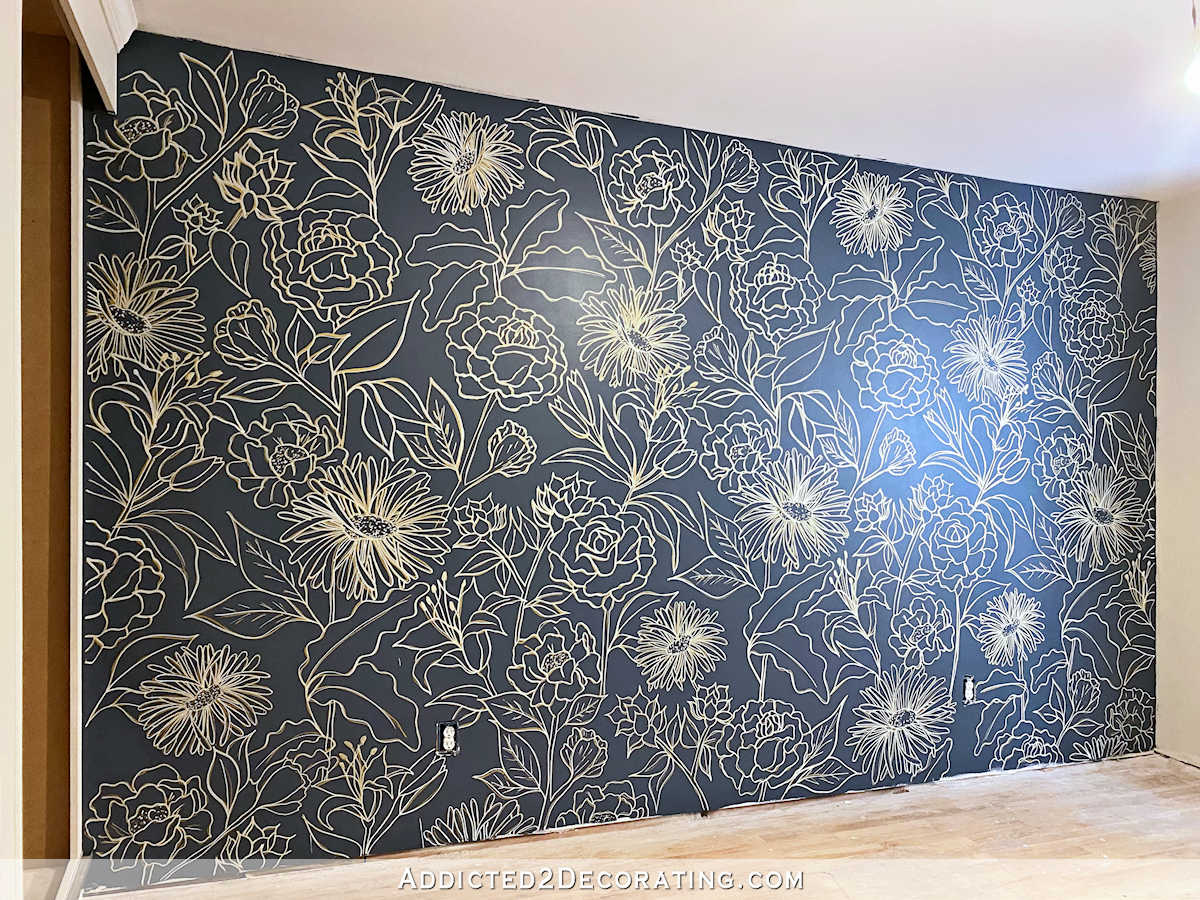
Found these today and thought of your living room:
https://www.amazon.com/HGOD-DESIGNS-Mexican-Colorful-Pheasant/dp/B07Q8S41PQ/ref=psdc_3732341_t2_B07CYTT3YD
I am so happy you are back at it and as always so inspiring! Love love love the progress!
Smart solution!! Love the progress.
You are so very clever. Love the closet doors.
Just a thought, but I think you should consider putting in 45° or 22.5° returns in the wood trip covering the track.
It’s well within your carpentry skill set to pull off, and I think you’ll end up liking the more polished end result enough that it’d be worth the extra effort.
https://www.thisiscarpentry.com/2014/03/21/nip-tuck-22-12-wall-returns/
This takes a bit of time and patience to get right, but it is so worth the little extra effort when done. I do this on all “dead- end” trim – 1/4 round, base, chair rail … Just be sure to cut the return from a decently long board – you don’t need to put your fingers in harm’s way using scrap to get this done.
That new trim is really making things look so polished! And I’m so glad to be getting email notifications of your blog posts again!
Does the bottom rail have to continue where the door will open — that is, does it need to continue into the space under the window? If so, build in the window seat with lid or drawers, and continue the trim and bottom rail.
I think she decided against a window seat. I think once things are done, wood filled and painted, it will look just fine.
My comment was not about the trim — the trim looks great, even unpainted. I am wondering if the door needs a bottom rail when it is open or if enough of it stays in the rail that is already in place; is there a stop that keeps the edge of the door in the rail when it is opened?
Had you considered mitering the end of the trim pieces?
I am always amazed by how quickly you seem to progress through your projects, even when you change things midstride. I wish I had your stamina!
Totally unrelated question:
I recently purchased a Dremel Multi Max. I was wondering if you have any tips for keeping the cuts straight. Mine tend to be slightly crooked. Is that just a thing that gets easier with practice?
I learned something new today….I had no clue there were different types of pocket door frames. No wonder my run of the mill ones are so wonky! Thanks! I’ll be looking into this.
I’m putting in a pocket door soon and am thrilled with the tip! I didn’t know they even made those! Life changing! Loving this room–it’s so fun to watch your design process and it always ends up awesome.
Also, curious about your thought process using 1 x 5 as trim as opposed to the thinner base moulding now available. It has a little roundover on the top but I’d still use butt joints and caulk anything if it needs it. Personal preference? I’m remodeling our basement so I don’t have to match the rest of the house.
Kristi, that trim looks great! I love it! And FYI… I will be using that window trim on all our doors and windows! I think it is definitely the best looking one I have seen!