How To Make A Simple DIY Shadow Box Frame For Large Artwork
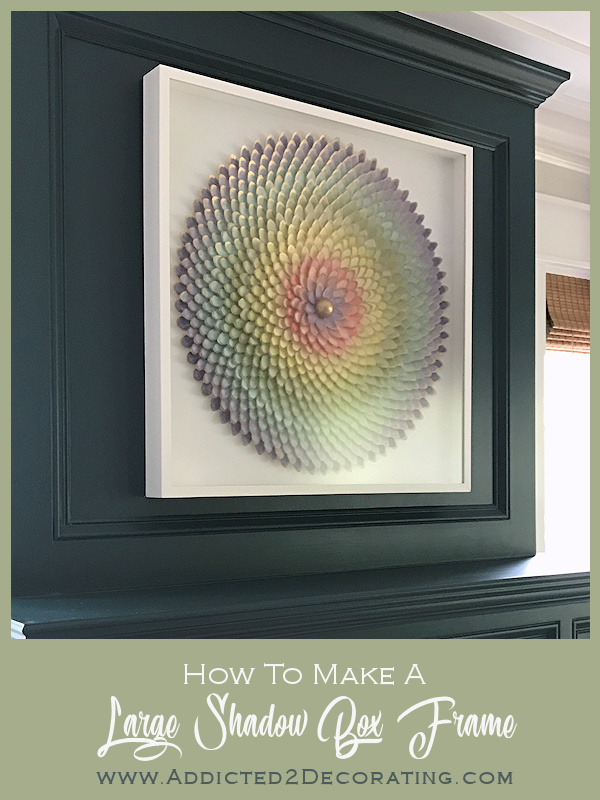
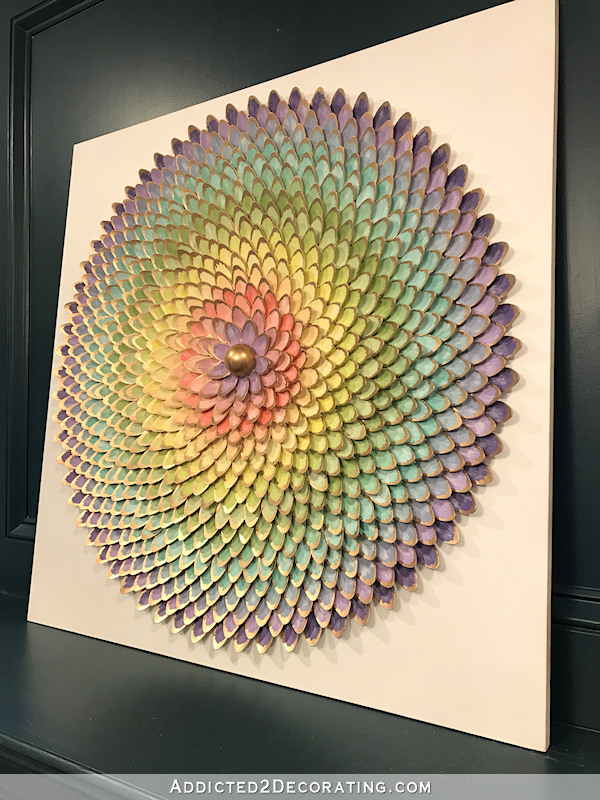
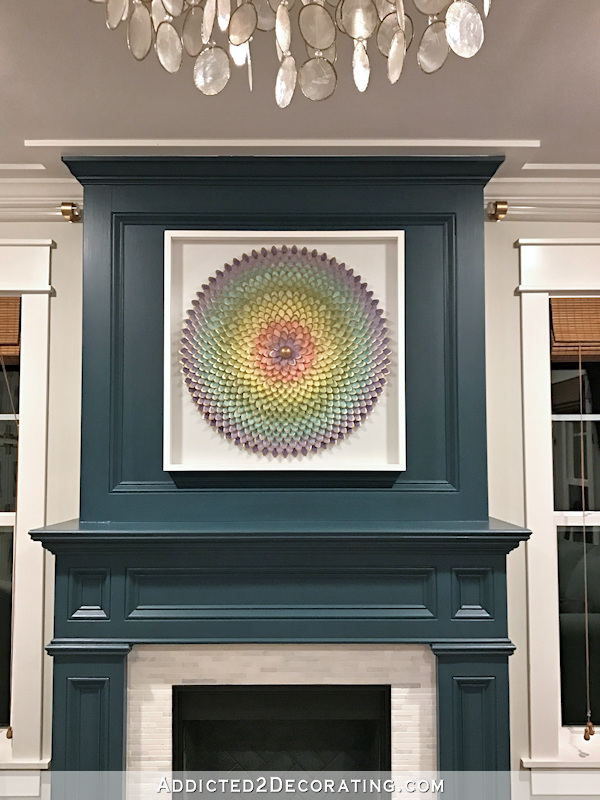
Remember that colorful pinwheel artwork I made to go over my fireplace mantel? If you missed it, you can click here to see how I made it. (Spoiler alert: It’s tiny spoons!) I wanted to put it in a large shadow box frame (because keeping that thing dusted would be a real pain), so rather than spend $150+ to have it framed, I decided to make my own shadow box frame for it.
All I had to pay was the cost of the glass since the four pieces of pre-primed finger joint lumber that I used came from my scrap lumber pile, and the rest of the items (paint, wood filler, sandpaper) are things I always have on hand. So this big 29″ square, 2.5″ thick shadow box frame cost me just $36.
I learned two things along the way. First, this is a very easy frame to make. Second, you must choose your glass carefully for a shadow box frame, and fortunately, the cheapest glass is the best option. Unfortunately, I made the wrong decision. But more on that in a bit.
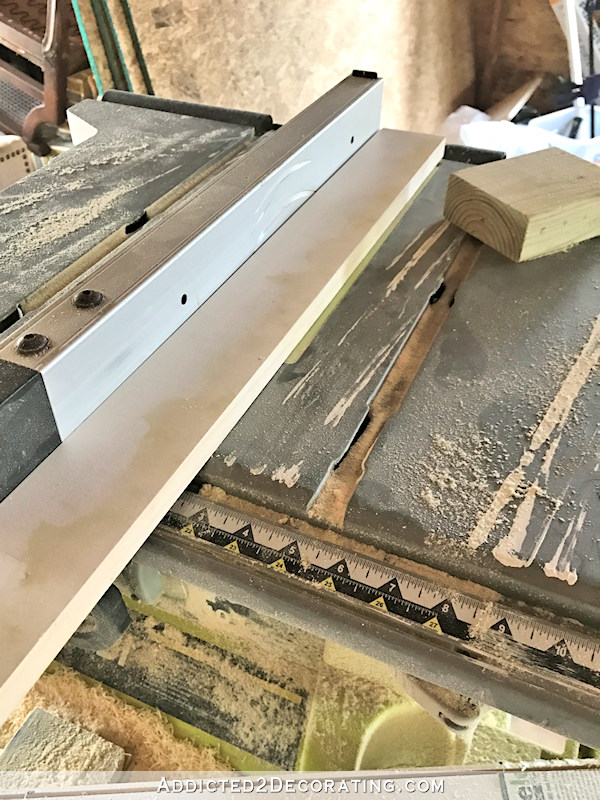
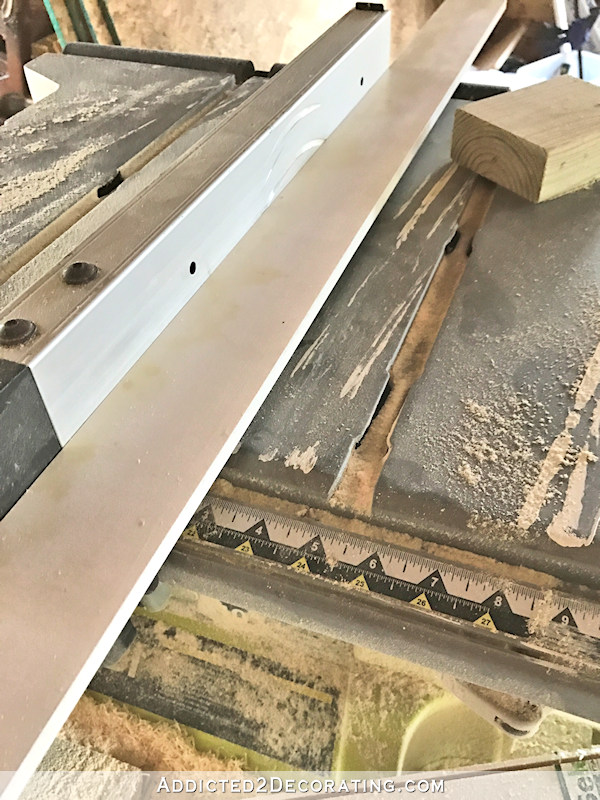
The first thing I had to determine was how thick I wanted my shadow box frame to be. I had made the pinwheel artwork on 3/4-inch plywood (because that’s what I had on hand), and the pinwheel itself added another 1/2 to 5/8 inch. So just to be sure, I estimated 1.5 inches for the artwork itself. Then I needed the space between the artwork and the glass, plus the actual thickness of the glass. So I went with 2.5 inches for the overall thickness of the frame. I had some scrap lumber in my pile that was 3.5 inches wide, so I used my table saw to rip those pieces down to 2.5 inches wide.
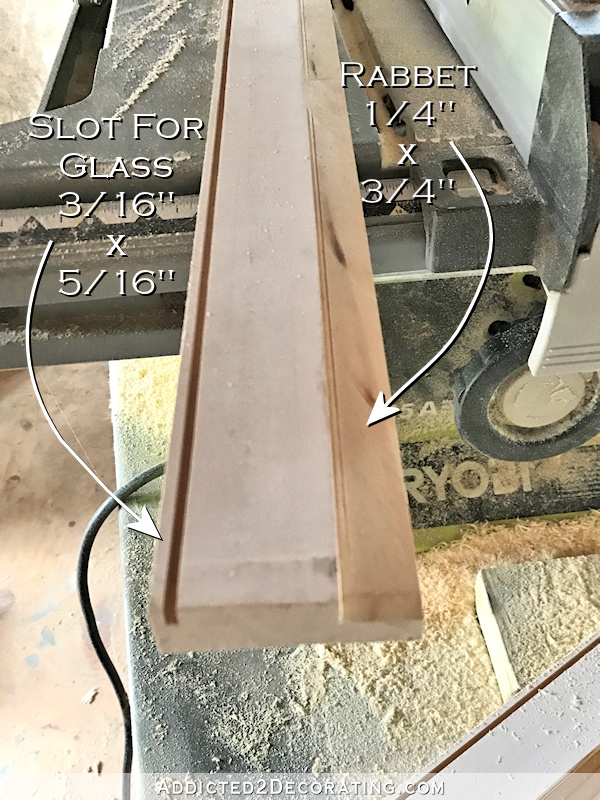
So in order to turn these regular pieces of wood into a frame, I needed to use my table saw to cut two areas into each piece. First, each piece needed a rabbet. A rabbet is an L-shaped cutout on the back of a frame that allows the artwork or photo to sit recessed into the back of the frame. Generally the glass goes into the rabbet as well, but on a shadow box frame, the glass is held away from the artwork. So I also needed to cut a separate slot into which the glass could be placed. (Note, you can cut these things with a router as well, but I find it easier to use a table saw.)
I wanted my rabbet to be 1/4-inch wide and 3/4-inch deep (since it needed to fit over the 3/4-inch plywood that I used to make my pinwheel artwork). This 3/4-inch-deep rabbet would allow the back of the artwork to sit flush with the back of the frame. That was fine for my purposes, since I intended to do things the very simple way and just nail the frame into the edges of the plywood of the artwork. However, if you plan to secure your artwork into the frame using a more traditional method, like Fletcher points, glazier points, or small brad nails (all available at framing shops or in the framing departments of places like Hobby Lobby or Michael’s), then you’ll want to increase the depth of the rabbet to accommodate those items.
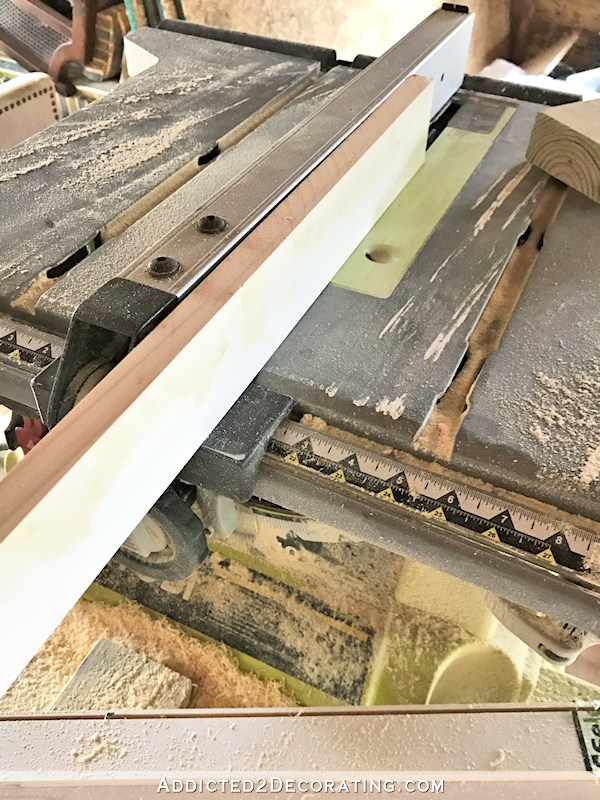
So to cut the depth of the rabbet, I set the fence on my table saw to 1/4 inch, raised the blade of the saw to 3/4 inch, and ran the boards through upright against the fence.
Then to cut the width of the rabbet, I set the fence at 3/4 inch, lowered the blade to 1/4 inch, and ran the board through flat on the table, making sure I was cutting the same edge of the board that I had previously cut.
The slot for the glass is about 1.5 blade widths. So I started by setting the fence at 1/4 inch, and raising the blade just a hair so that it was slightly higher than 1/4 inch. I flipped the board around so that I was cutting the opposite edge of the board from the rabbet, and ran it through flat against the table.
After cutting that slot in all four pieces, I moved the fence over 1/16 inch, and ran them through again. A table saw blade is generally 1/8 inch thick, so doing this made the slot for the glass 3/16 inch, which should accommodate any framing glass. If, for some reason, you want to use thicker glass, you’ll just need to keep adjusting the blade and running the boards through until the glass slot is wide enough for the thicker glass to fit inside.
With my rabbets and glass slots cut in all four pieces, I did one final measure of my artwork, and then measured and cut all four pieces with mitered corners (using my miter saw, of course!) to fit the artwork.
Then I was ready to assemble. I assembled three of the pieces using wood glue and 16-gauge 1.5 inch finishing nails. To secure a mitered corner, I shoot two nails going one direction, and one nail going the other direction. Three nails in each corner is plenty to hold it until the glue is dry as long as you handle the assembled pieces carefully. Once the glue is dry, less caution is required.
At that point, I painted the inside edges of all four pieces. When dry, I sanded lightly and painted a second coat.
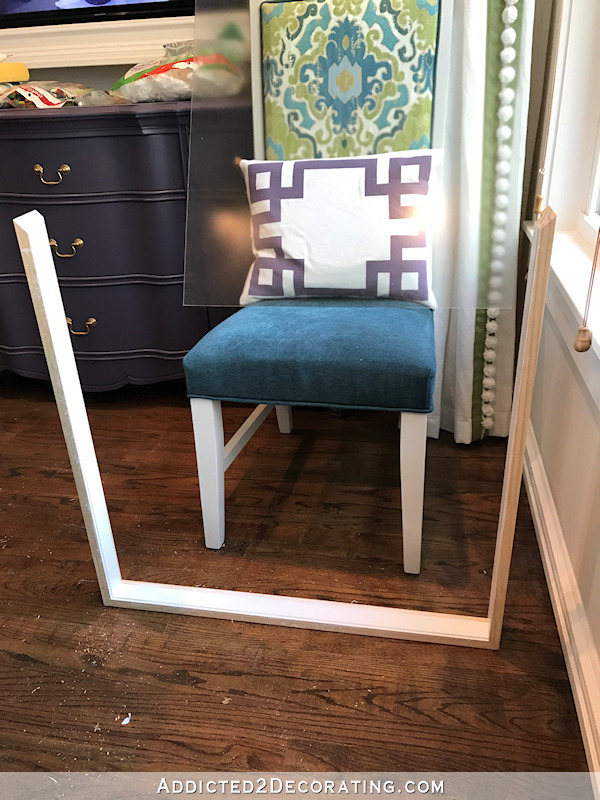
When the paint was dry, I slid the glass into the three-sided assembly and attached the fourth side in the same way (i.e., wood glue, three nails on each corner).
And with that, I had a completely built (and very large) shadow box frame. I finished it by filling the nail holes and mitered joints with wood filler, sanding the whole thing smooth, and giving the top and sides two coats of paint, sanding between coats with 220-grit sandpaper for a really smooth finish.
To secure the artwork inside the frame, I took the easy way out. I didn’t want to make a special trip to the store for glazier points or tiny brad nails, so I just used the same 1.5-inch nails that I used to assemble the frame, and nailed straight through the side of the frame and into the edge of the artwork plywood. I put about three nails in each of the four sides of the frame, covered over them with wood filler, and touched up with paint. I’m sure any professional framer would cringe at my method. 😀 And of course, if my artwork had been mounted on anything thinner than 3/4-inch plywood, I wouldn’t have taken that chance. I would have done it the proper way and used points or brad nails to secure it from the back.
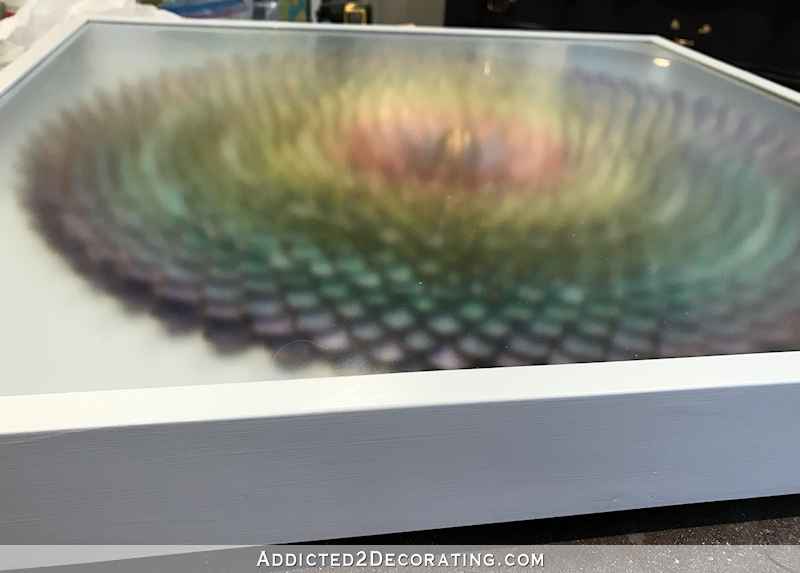
As soon as I placed the frame over the artwork, I immediately noticed my big mistake. This artwork is going over my mantel in a room that’s almost all windows — five windows in a pretty small area. And during the day on sunny days (which is most days here in central Texas), the room is very bright. So I thought I’d be smart and use non-reflective glass to cut down on glare on my artwork. Well, little did I know that non-reflective glass (i.e., the more expensive stuff) is a very poor choice for shadow box frames. 🙁 Unless your artwork is right up against the glass, or separated only by the thickness of a mat, non-reflective glass will make the artwork appear blurry when viewed up close or at an angle. Here’s how the pinwheel looks up close without a frame…
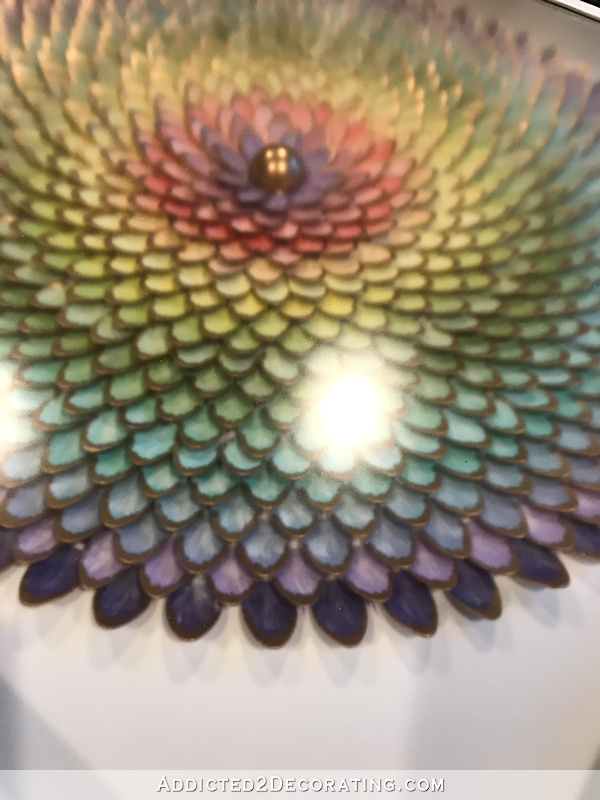
And here’s what it looks like up close and at a slight angle under non-reflective glass…
No, that’s not my camera failing to focus, and it’s not your eyesight going. That’s the effect of non-reflective glass when there’s a larger-than-usual space between the glass and the artwork. *Sigh* I had no idea. And I’m sure the awesome framing expert from whom I purchased the glass (John at Frames Etc., for you locals) would have warned me had he known what I was up to, but I just ordered the glass on the phone, and my mom picked it up for me. And when he asked her what I was making, she had no clue what I was working on.
Oh well. I’ll just add this to the long list of “lessons learned” that I seem to be accumulating lately.
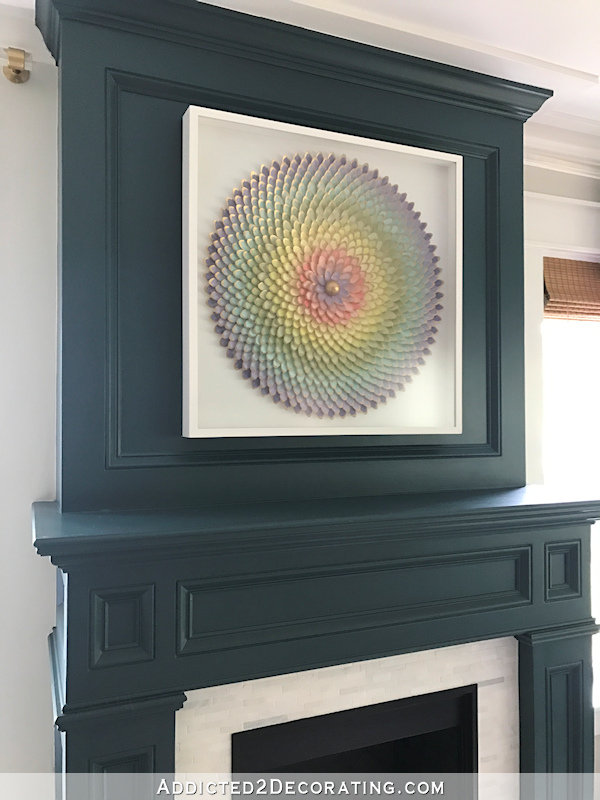
The good news is that from a distance, it really does look great.
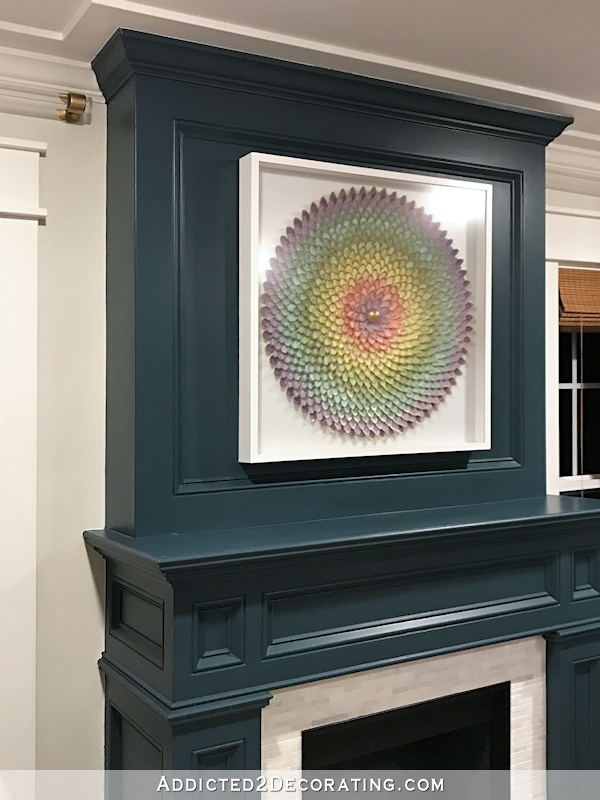
And even at a slight angle, it still looks pretty good, although you can start to see some fuzziness.
But at a severe angle (like when viewed from my kitchen) or up close, things go really wonky.
And sadly, I really love looking at this piece up close. I love the texture and the colors and the bits of gold. I find it very calming. Mesmerizing, almost. I can’t tell you how often I go up to my fireplace and just stand there staring at the pinwheel details up close…or at least I did until I framed it with non-reflective glass.
Now when I try to look at it up close, I feel like I’m losing my eyesight. That’s the very opposite of relaxing.
So I’ll give you fair warning on this one. I will, without a doubt, be redoing this project in the future, and using regular (cheaper) glass. I want to be able to see this thing up close and at an angle again. But for the time being, I’ll cross this off the list, move on to other projects, and just deal with a bit of fuzziness.
Did you know that about non-reflective glass? I feel like as a woman in my 40s, who grew up with a professional photographer mom who was always having things framed, this is something I should have already known. Oh, well. At least my mistake can hopefully save some of you some frustration if you choose to make your own oversized shadow box frame.
Addicted 2 Decorating is where I share my DIY and decorating journey as I remodel and decorate the 1948 fixer upper that my husband, Matt, and I bought in 2013. Matt has M.S. and is unable to do physical work, so I do the majority of the work on the house by myself. You can learn more about me here.




I’ve been in the picture framing business since 2001. Your advice about glass is imperfect.The best glass for a shadow box BY FAR is Museum Glass. It’s ridiculously expensive though..
Which is why I didn’t mention it on my DIY blog where I show people how to do things themselves on a budget. 🙂
I had a water color painting framed out around Christmas time and used museum glass. They had a 40% off coupon that I used on it. Absolutely beautiful! It was 16 x 20 and the glass was only $22 with the coupon. Best investment ever!!
It still looks mostly fabulous! Sorry about the close up fuzziness. You are amazingly talented and persistent. Thanks for sharing.
I had no idea either. Thanks for the heads up on that one! It still looks great though. Good job!
You have great frame skills. I wish I was as talented as you are👍
I wonder if when you change the glass to ordinary glass, if the viewing experience will be even worse. I have a favorite vintage print framed in ordinary glass. It worked in my first house, no problem, since the light in its original room didn’t interfere. As soon as I moved to a new house, there was not a single room or wall that piece could be viewed without being ruined by glare. Not a single one! I could redo the glass, but just haven’t. My house is basically one room wide its entire length, so lots of north and south exposures in every room, with additional east and west exposures on the ends too. Good luck with this.
Absolutely gorgeous! I love your artwork! Everything you come up with really amazes me! I pinned this!! Thank you for the shadow box tutorial. I can see making this type of frame at some point:) I will let you know if I do…along with the many other projects on the to do list!!!
As an artist, I use regular glass or museum, not non-glare.
Ah Kristi, I think your growing😃. The old Kristi would have tore that sucker apart and spent another day “fixing” it. Good for you to move on and tackle the next project. What about hobby lobby and their 40% off coupon for the museum glass?
Yes, great insight on old Krists!😉
That piece is absolutely stunning… I would love to try it but the paint part scares me lol. My husband was in the art field for quite a few years and would never let me consider non-glare for anything. Period. The piece is so gorgeous I would love for you to change out the glass ASAP… Love your work!!!!! You are amazing!!!!
I completely understand why you plan to change the glass. But the idea of the shadow box has really elevated this price! It is simply beautiful in your room.
Sheila F.
My OCD is kicking in – but please tell me that you’re painting on top of paper and not on top of your beautiful dining room table?!?!?! OMG!!! For my own neurotic state, I need you to get your workshop room done! 😉 Ha Ha Ha
It is beautiful, but my eye goes to the white boxed frame because of the contrast with your painted fireplace and the artwork.
I think if you toned the frame down with a glaze or dark wax it would better highlight your artwork.
You are amazing in all that you do and I am more more inspired with each of your blog posts.
I think so too. Love the piece.
I think this, too. I feel like the white box detracts from the piece itself.
I agree about the white frame. Actually, I was thinking she ought to paint it a lighter color of the mantle, or even the same shade.
I was thinking that exact thing. The white just grabs your eye and keeps it. I love the art piece though.
Yes, I was wondering what it would look like black.
I love it! But yeah, non-glare glass is the pits.
Thank you for this info. I want my husband to build me a shadow box for my wedding hat and veil. We have been married for 30 years….it’s time. LOL
Love your new shadow box frame. I too, did not know that about non-reflecting glass. Will keep that memo for future knowledge!!!
This piece of artwork just blows me away! It really is absolutely stunning. After reading the comments, yes, perhaps the brightness of the shadowbox frame does detract a bit from the overall effect. Rather than paint it, though, I like the idea of a dark wax. You are totally inspiring!
Beautiful, but I agree on non glare glass. Plain clear glass works wonders for cheaper reasons. I learned this several years ago when having a frame made for a cheap picture. The frame made it look much much more expensive 😉
Hi Kristi!
I love this art project and the white frame. I have a question about your table saw. I have been considering buying one, but keep talking myself out of it because I have other tools which work for the project. Would you say that table saw has made your DIY life better?
Keep up the great work!
I fear that dark wax, as has been suggested, will just make the shadow box look dirty. If you want to paint the box in the future keeping a rim of white that would work. Or just leave it as it is because it’s awesome.
I agree with you, Patricia. Just me, I love the white against the mantle and the colors in the artwork. The change in glass will make a huge difference.
I love how you framed this. The white box really sets it off!
I love this Kristi!! From a distance it looks like something done with a spirograph. I loved making pretty designs with my spirograph.
Love! I might even like the frame painted gold or at least a little bit of gold on the frame–just to set it off and tie with the gold on the rods and center of flower.
Great info as always! And the frame does look fantastic! So glad you put the piece under glass because dusty it would be a nightmare. 😉 Keeping the pin of this one handy because I want to make some of these frames and they cost a arm and a leg.
The artwork is totally awesome! Would like to see it in a round frame, tho, and not so white. Either way, it is a pretty focal point!
Looks fantastic!! Dont let the glass get to you. Wait til you have your drapes done, perhaps that will make a difference.
im so sorry i sent you back the linku sent me. i meant to send this link,…. would these be wide enough? https://www.amazon.com/gp/product/B002TXA9RA/ref=ox_sc_act_title_1?smid=ATVPDKIKX0DER&psc=1
I think those would work.
This is so nice thank you for this and I love how you framed this. The white box really sets it off!
Non-glare glass is used for embroideries. Your piece’s frame goes very well with your ceiling’s white color and your white window frames; leave it as it is!