Bathroom Makeover Day 19 & 20: How To Make An Extra Long Shower Curtain With Pleated Ruffle Accents
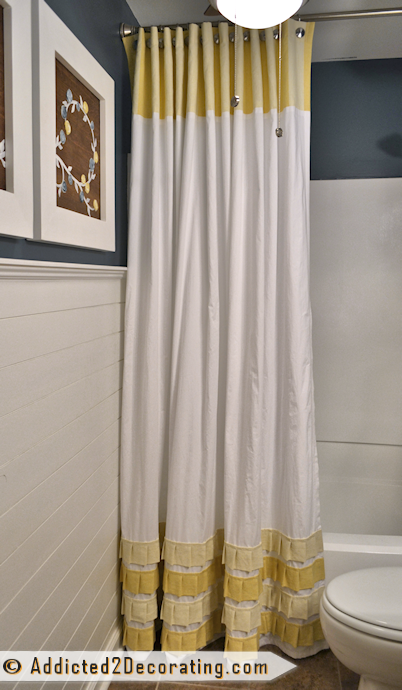
The last piece of my bathroom makeover puzzle is now finished and in place, so today I’ll show you how to make this extra long shower curtain with the pleated ruffle (pluffle 🙂 ) accents.
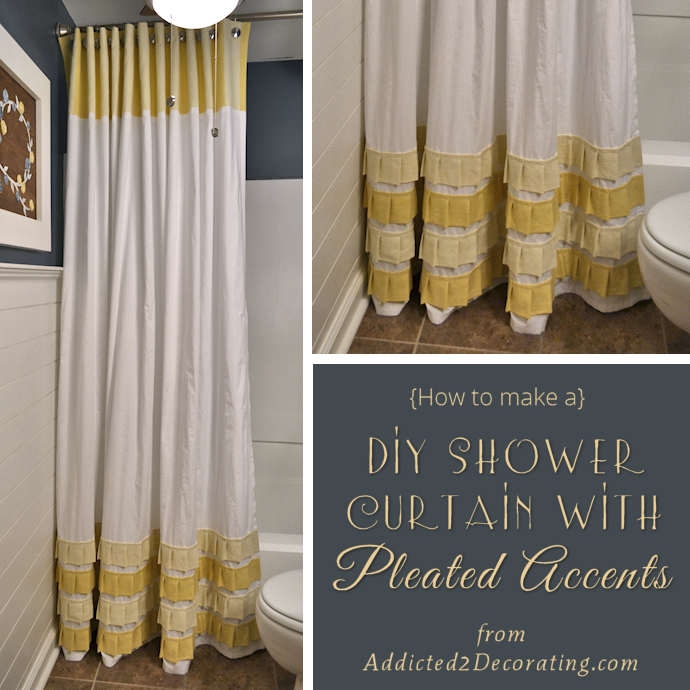
The main part of the shower curtain is actually a queen size flat sheet. Since most fabrics are 60″ wide at most, and a standard shower curtain is 70″ to 72″ wide, a queen size sheet seemed like the best option, and I just happened to have an extra one on hand.
I wanted the finished curtain to be 70 inches wide and 90 inches long, with a 12-inch accent band at the top, so I cut the sheet to 74 inches wide by 81 inches long. That allowed for two inches at the bottom for a hem, two inches in each side for a hem, and one inch at the top for a seam where it would join the accent fabric.
Along the bottom edge, I turned the fabric up one inch, and then turned it up another inch, and pinned and ironed the hem in place.
TIP: Don’t use any of the pre-sewn hems in the sheets!! Cut those off and start over. Sheets are sewn in so quickly, in such mass quantities, and the hems are always puckered and pulled. If you try to use those on your shower curtain, it will never hang straight, and I guarantee you’ll be disappointed with the results.
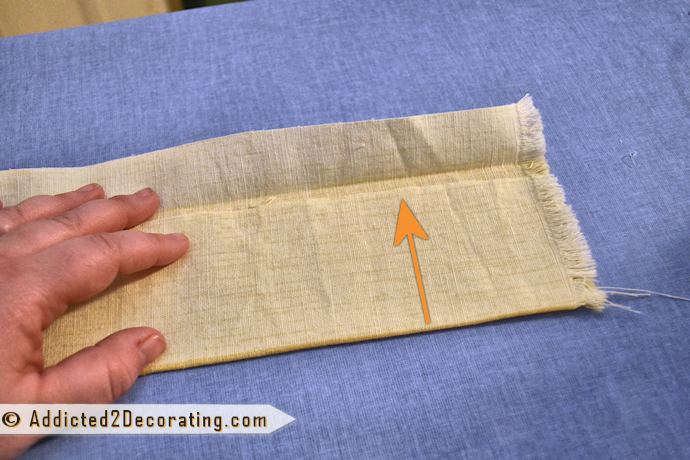
Next I cut strips of the accent fabric for the pleated ruffles. I cut them 7 1/4 inches wide. The size of my pleated ruffles was determined by the width of the stripes, but of course, you can make them smaller or bigger.

Then I turned the fabric with the right side down, and turned up the long side and ironed in the crease.
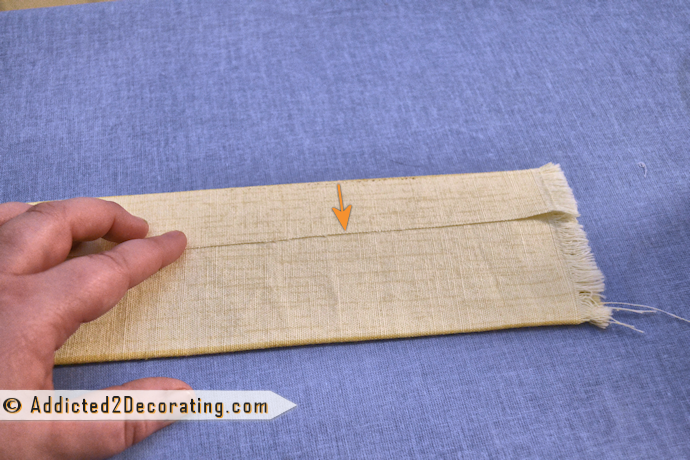
Then I turned down the smaller side and ironed in the crease.
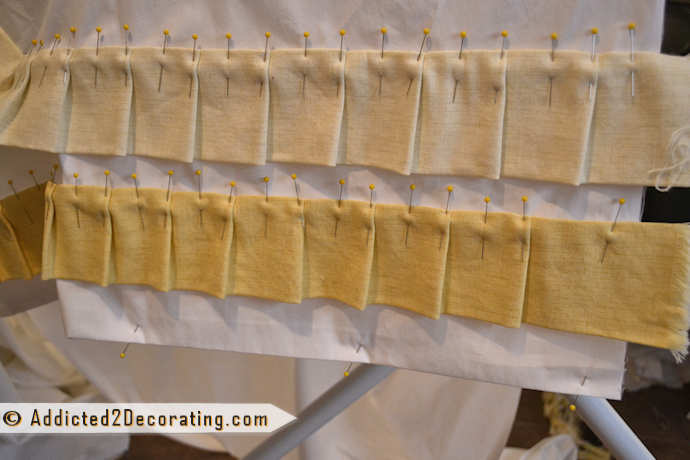
Next, I measured up from the bottom of the main fabric 2 inches, and placed the strip of yellow fabric on top with the small flap of fabric on back towards the top. Then I measured over about three inches from the side, and pinned in a small 1/4-inch pleat.
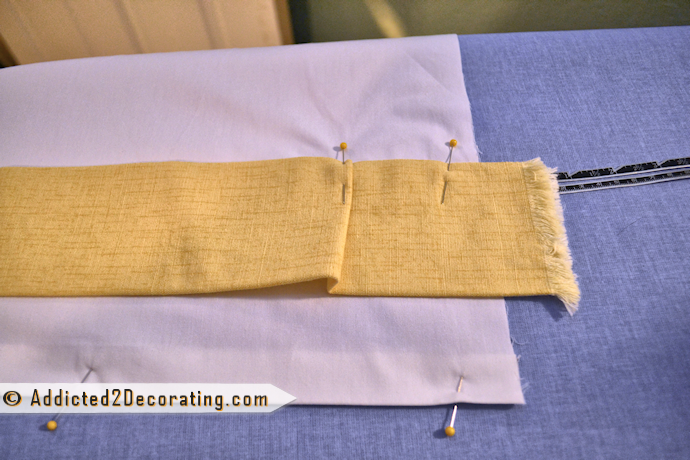
I continued making 1/4-inch pleats every 2 1/2 inches, pinning them in as I went.

I pinned two rows of pleats in before I sewed them on. I just stitched right on top of the pleated ruffle about 1/2-inch from the top.

**TIP: If you do this project, I highly suggest pinning one row at a time, and sewing it on before pinning the next row. Also, since you have to sew with the pleats and not against the pleats, it’s much easier if you pin the pleats the opposite way I did mine. I wish I had thought that through before spending an hour and a half pinning pleats. 🙂
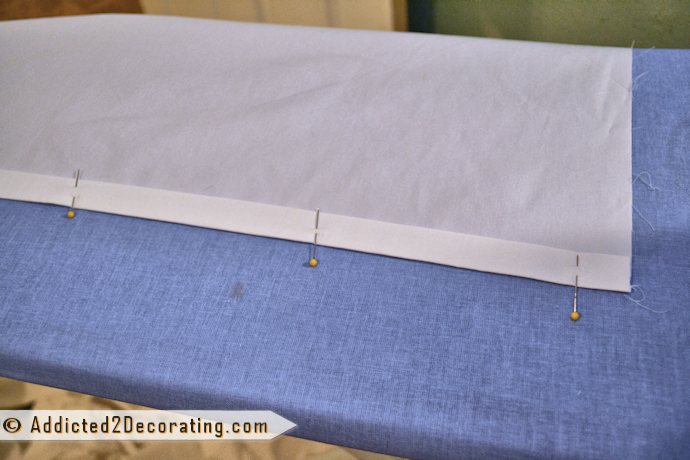
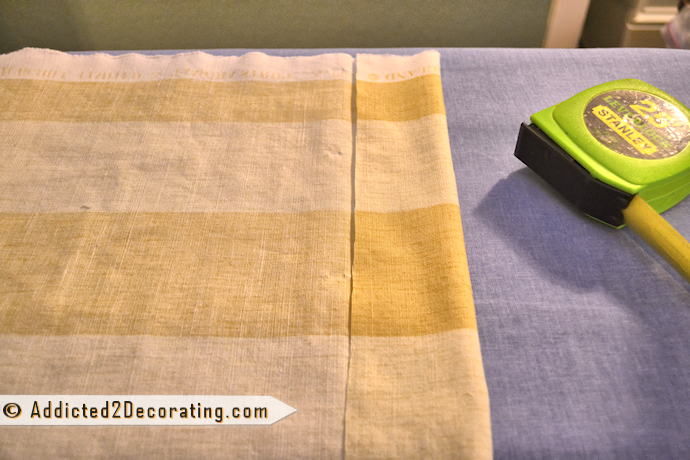
After I sewed on the four rows of pleats, I started on the top of the shower curtain. I cut two strips of the accent fabric about 24 inches wide, and sewed them together end to end (since the fabric was only 60 inches wide, and the shower curtain was 70 inches wide). Then I sewed the band to the top of the white fabric with a 1-inch seam.
Next, I measured up from that seam 12 inches, and folded the fabric to the back, pinned it in place, and ironed in the crease. Then I measured down five inches and trimmed off the excess fabric.

Next I unpinned the fabric, unfolded the fabric, and refolded it so that the raw edge of the fabric was right along the ironed-in crease.
Then I re-folded it along the ironed in crease, and stitched along the bottom. This gave me a 2 1/2-inch header along the top, with three layers of fabric, which is ideal for inserting grommets (or extra large eyelets, which is what I actually used).

I used my shower curtain liner as a guide to mark the spacing of the grommets with pins.
To insert the grommet…
- I used the barrel of the eyelet to mark the size of the circle,
- Cut out the circle with scissors,
- Placed the eyelet, with the barrel pointed up, onto the tool base*,
- With the right side of the fabric facing down, inserted the barrel of the eyelet through the hole,
- Placed the smaller piece, with the “teeth” towards the fabric, over the barrel of the eyelet, and
- Used the metal eyelet setting tool* and a hammer to flatten and join the two pieces.
(*If you don’t have these tools, be sure that you purchase the eyelet package that includes the tools, available at JoAnn Fabrics and other fabric/craft stores.)

TIP: Don’t hold the tool with your fingers when hammering!! You have to whack at that thing pretty hard to get the eyelet set properly and securely, and if your hammer glances off the tool and hits your finger, you’ll be in a world of hurt. Ask me how I know. 🙂 I suggest using a big pair of pliers to hold the tool in place while whacking away with the hammer.

With the eyelets set, the only thing left to do was hem the sides of the curtain. I did that just like I did the bottom edge — fold 1 inch towards the back of the curtain, then fold another inch, pin, press, and sew.
I personally think this would look great on windows, too. I’d actually love to see two of these used as drapery panels! Who wants to volunteer for that and then send me pictures?! 😀
And now that my shower curtain is done, my bathroom is finished! It did end up taking me 20 working days, which was my goal from the beginning. I can’t wait to show you the full before and after tomorrow!

Addicted 2 Decorating is where I share my DIY and decorating journey as I remodel and decorate the 1948 fixer upper that my husband, Matt, and I bought in 2013. Matt has M.S. and is unable to do physical work, so I do the majority of the work on the house by myself. You can learn more about me here.

Love it! The shower curtain looks great!!
Oh that is awesome!! I love it!!
Thanks for posting…you’re soooo talented. This is absolutely beautiful!!
I love, love, LOVE THIS! When I saw your earlier post this weekend, I went to my local fabric store and bought supplies to make valances in this style. So excited to read your directions this morning! They are so clear and concise. Anxious to get started, but it may be a few days before I’m able to. Thank you for sharing this cute project!
That is amazing !! Seriously, is there anything you can’t do 🙂 I want to be you when I grow up .. LOL You are so talented .. love your blog !
I have been “hounding” your site all weekend as well as visiting twice earlier this a.m. to see if you had finished within your timeline and of course, to see which direction you chose for the shower curtain (just couldn’t wait until the post came through my email tomorrow). Third time’s a charm I guess cause here it is and of course you didn’t disappoint! Love the interpretation of the PB ruffles — you go Girl! I have made many a curtain liner and a few shower curtains from sheets… can’t beat the price!
I’m inspired to make one for my granddaughters’ bathroom and have a couple of questions before I get started: Did you add magnets or weights to the hem? Or perhaps not necessary since the pluffle adds additional weight? If you were to make again, would you do a 4″ drapery hem vs the 1″ hem?
Excited to see tomorrow’s reveal and to hear which room is next to receive your “Midas” touch!
Bravo Kristi, it’s gorgeous!!!
So pretty! Now I can’t wait to follow the next room that you tackle 🙂
Awesome!
Another wonderful project in the shower curtain! It looks amazing and with the extra height, it makes your bathroom shower area appear larger. Please have a ‘before and after’ post with all of the things you’ve done. Job well done. Can’t wait to see what you decided to tackle next. : )
That’s probably the cutest shower curtain that I’ve seen in a year! LOVE it! Can’t wait for the reveal!
Yay! You finished! It looks awesome! Now go celebrate. I wish I could call just one room in my house finished.
Beautiful. Nice Jo
Beautiful. Nice Job
Love. Love. Love. your new shower curtain.
I am pinning this. And yes…it would make a terrific drape/curtain too.
You are the girl!! Love your determination and your creativity.
Love it, Kristi!
Pinning and sharing! 🙂
Looks wonderful, Kristi. I have used twin sheets for a shower curtain, cut to length- the width was close enough. Can you tell I’m not particularly particular? 🙂
it does look great, Kristi – well done! and that’s a compliment from the girl who nomally doesn’t like ruffles 🙂 but I have a question concerning the fabric: Dom’t you worry that the curtain will get soaked daily and thus lose its good look quickly? I might be behind fashion or time, but I thought shower curtains should be made from a material such as plastic or at least primed against damp in order to actually keep the water away from the bathroom and dry better themselves. Please enlighten me, because then a whole new world in shower curtains might open up to me!!
I’m betting Kristi has an inexpensive shower liner behind that gorgeous curtain! I love how the details are on this project. Not fussy ruffles, but nice sleek accents that make it so great. I am so impressed! Anxiously awaiting the big “reveal” tomorrow so I can start my bathroom!
Beautiful job! I enjoy watching your creativity flourish with each project. Your choice of colors and technique are well thought out. If I were to make this, I would probably put the ruffle detail at the top where it can be seen. A modification for a house full of boys!
Beautiful, Kristi and looks wonderful in your new bath!
It looks great! I agree, it would look great as drapes, too!
Wonderful…you did good…love the colors & all the work you put into it 🙂
You r such a talented person!!! Awesome!
This turned out so cute!!! I have been following along during your whole project and I think this is my favorite! Although its tough to beat that mirror! Well done:)
XO,
Christy
Really good job!!
You dun gooooood, Kristi . . . . REAL goooood !
Do you take orders? I can’t possibly make this myself, but sure would love to have one!
This is gorgeous! I love it.
I love this, great job!
Kristi, here’s the thing. The reason I love your blog is because you give such clear, precise steps for each project–and toss in pictures, too. This shower curtain is just darling. I love your creative spirit! Keep ’em coming!
I just made one of these and am working on my second! I am making two curtains for the same shower …cute idea from Pinterest! A short cut that my mother in law and I did was buy a 2 pack of curtain panels for the windows instead of the sheet so that there was already a place for the shower rod! We cut the top of and measured and sewed the cute patterned piece between the top and the rest of the curtain! Any ways super cute … Thanks for tutorial!
Loved this shower curtain, I also think it would make a great window curtain. Im considering doing it in a toile with 2 different size ticking stripes for the pluffles. ( love that term btw). As a seamstress for 20 some years I know how much work is involved but the results are so amazing I think its worth it. I also think it would be nice done all in muslin, maybe with the pluffles (there it is again lol) and top band tea stained.
Absolutely LOVE it!!! Want to try this as a curtain in my nook. Could you tell me where you found the yellow material?
Hi all,
Love this beautiful shower curtain, but I’m still not clear on whether you used some kind of water resistant liner. Maybe someone could clear that up.
Thank you
Yes, there’s a liner hanging on a separate rod.
If you used vynel flooring flipped over to paint on what stops it from curling up on the edges?
Looks great!
The edges just don’t curl. There’s nothing that stops them from curling, except for gravity, I suppose.
Beautiful!! I’m curious about the liner – is it on a seperate rod? Where does one buy a 90″ liner ?
Yep, there’s another rod behind the one on which the decorative curtain is hanging. You can find extra long liners at Bed, Bath & Beyond.
My daughter loves this shower curtain!! We will be shopping later in the week for fabric accents. About how much fabric did it require for the pleats?
Your projects are absolutely amazing and inspiring. I have great plans on paper for areas of my house, but i am terrified of trying to build them myself. Your blog and your finished furniture is inspiring…especially knowing you did them alone.
Wow these are great! I love the colors and fabric you chose to use for this Shower Curtain.
I wish I could sew because I would LOVE to use this idea to make drapes for my family room. Maybe I can find someone to create it with. Surely I know someone that can sew! Such a cute idea!
Thank you for posting this wonderful project. I just made one for myself, in blue/green hues. It is possibly the nicest thing I have ever made!
I used both solid and pattern fabrics for the pleat fabrics and right away realized the patterned fabrics were easier to work with. The pattern masked the pin marks and just overall they are more forgiving of life’s little imperfections.
Love the sheet idea, makes perfect sense, but I wound up buying some neutral fabric with a subtle chevron pattern for the main curtain. I used the chevrons for lining things up so I never really had to measure anything. Didn’t even plan to do that, it just worked out.
Thanks again. I have just recently discovered the world of etsy and the bounty of creative ideas on sites like this. It’s so fun to have something totally unique and not mass-marketed to millions.
Where do you get the hotel liners you use? The one you said doesn’t mildew?
Bed, Bath & Beyond
Excuse my stupidity but are they called hotel liners or is there a name brand?