Kitchen Remodel — Removing The Last Remaining Obstacle
I’m one day away from my sister Cathy and brother-in-law Bill coming to do my electrical work in the kitchen, and as of yesterday, I still had one last remaining original cabinet up in the kitchen. It was the big 10-foot section of upper cabinets that were above the original sink.
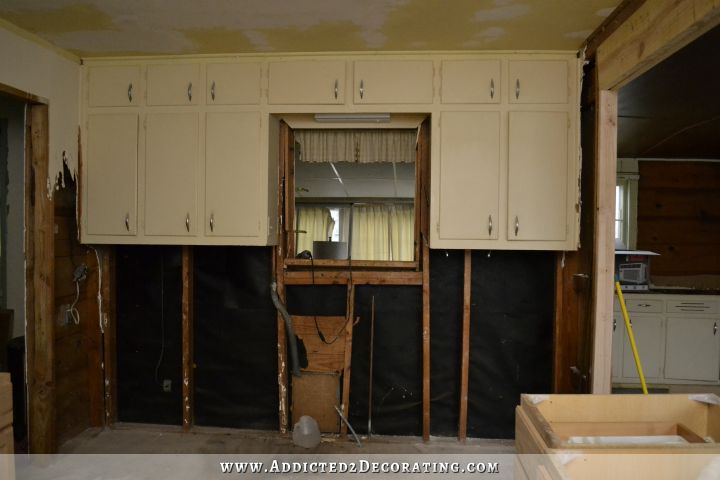
I needed those gone so that I could mark where the new wiring needs to go. So yesterday after lunch, I went into the kitchen to see about removing them.
After about an hour of tugging and prying every which way imaginable, the cabinets still weren’t budging. Not even the tiniest bit. So unfortunately, I came to the realization that these were going to have to be dismantled to remove them.
So for the next hour, I worked and worked in dismantling the cabinet. I tried my hardest to do it in a way that would allow them to be put back together, but that wasn’t working either. Let’s just say that whoever built and installed these upper cabinets never intended for them to be removed or uninstalled.
I finally realized that all out demolition was the only way to go with these cabinets. That was disappointing, because I had hoped to get them all off in one piece, or at least two or three usable pieces, so that I could reuse them in my garage along with the other cabinets I removed, but it just wasn’t going to happen.
So I headed to Home Depot to get a new tool — a reciprocating saw. I didn’t have that thing out of the box more than five minutes before the blade looked like this…
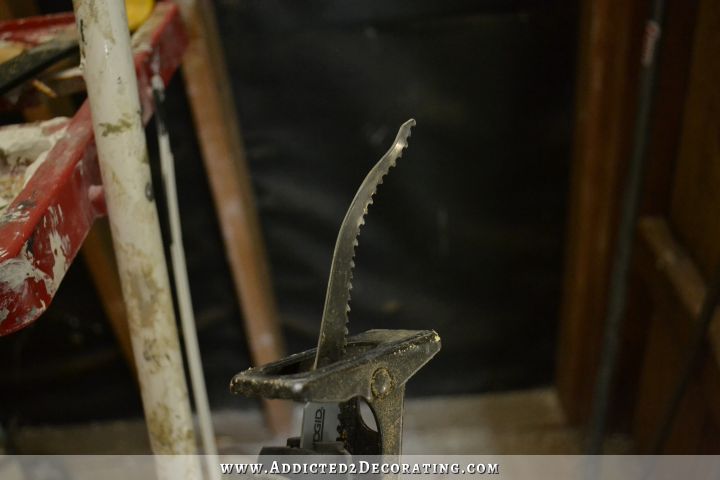
😀
I finally got the hang if it, and went to town on those cabinets. I know it’s sad that they had to be demolished, but I must admit that the demolition was quite fun. (And at least I was able to salvage the other three big sections of cabinets for my garage.)
I got everything off except for the very outer “shell” of the cabinet, and then I ran into trouble. Again, no matter how much I pried and pulled, the thing just wouldn’t budge.
I finally decided that good ‘ole persistence was going to be the only way to get this thing off, so I grabbed onto the lower edge of the cabinet on the left side, and just started pulling and pushing, pulling and pushing, pulling and pushing.
After about 15 minutes, I could see that the cabinet had moved down from the ceiling about 1/2-inch. So I pressed on.
It took a very long time, but the nails holding the cabinet finally started to give way, and the cabinet started to fall very slowly. Then it sped up. And then it sped up even more.
As the long 10-foot section of cabinet shell started falling, one of the wire nuts on the wire in the center got caught on the hole in the top of the cabinet…
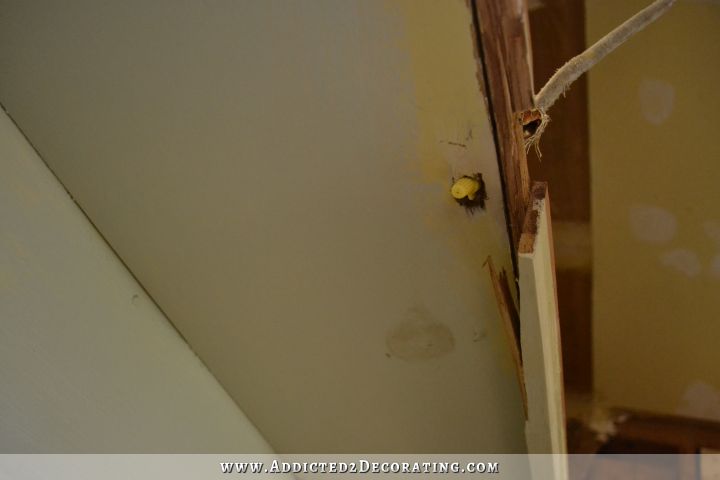
And it started pulling the wire out of the ceiling, slowing the fall of the cabinet…

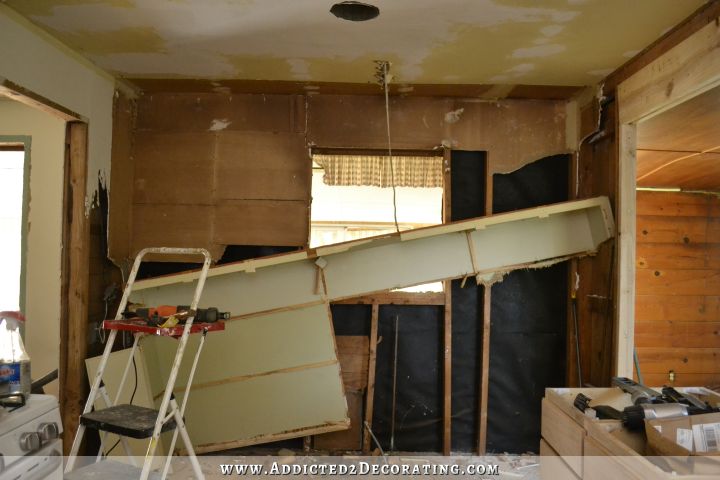
When I realized what was happening, I ran over to the middle and caught the cabinet so that it wouldn’t destroy any more of the ceiling. Then I stood there holding the cabinet and wondering what the heck I was going to do. I almost yelled to Matt to call my brother Rod and have him come over and help me, but I realized very quickly that even if Rod could get in the car immediately and head over, there was no way that my tired arms could hold that cabinet (which was still quite heavy and very bulky) while he made the 15-minute drive to my house.
So I decided that I was on my own, and I had to figure this out. I finally realized that if I let the cabinet fall to the floor on one side, I could get it propped up against the end wall on the other side so that the wire in the middle would still be held at the right height so that it wouldn’t pull through the ceiling any more. It took a few minutes for me to wrestle the cabinet into place, but it finally worked and I was able to let go of it completely and give my arms a rest (and take a picture, of course). 😀
Then I was able to get the wire and wire nut free from the hole in the cabinet, and then get to work cutting up the rest of the cabinet so that it could be removed.
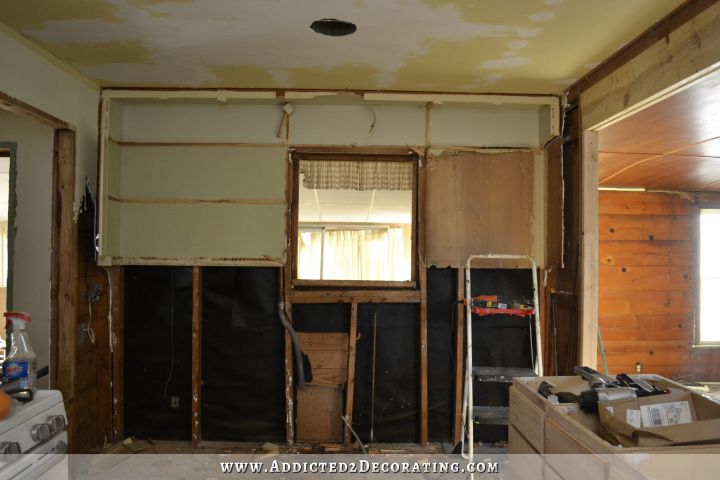
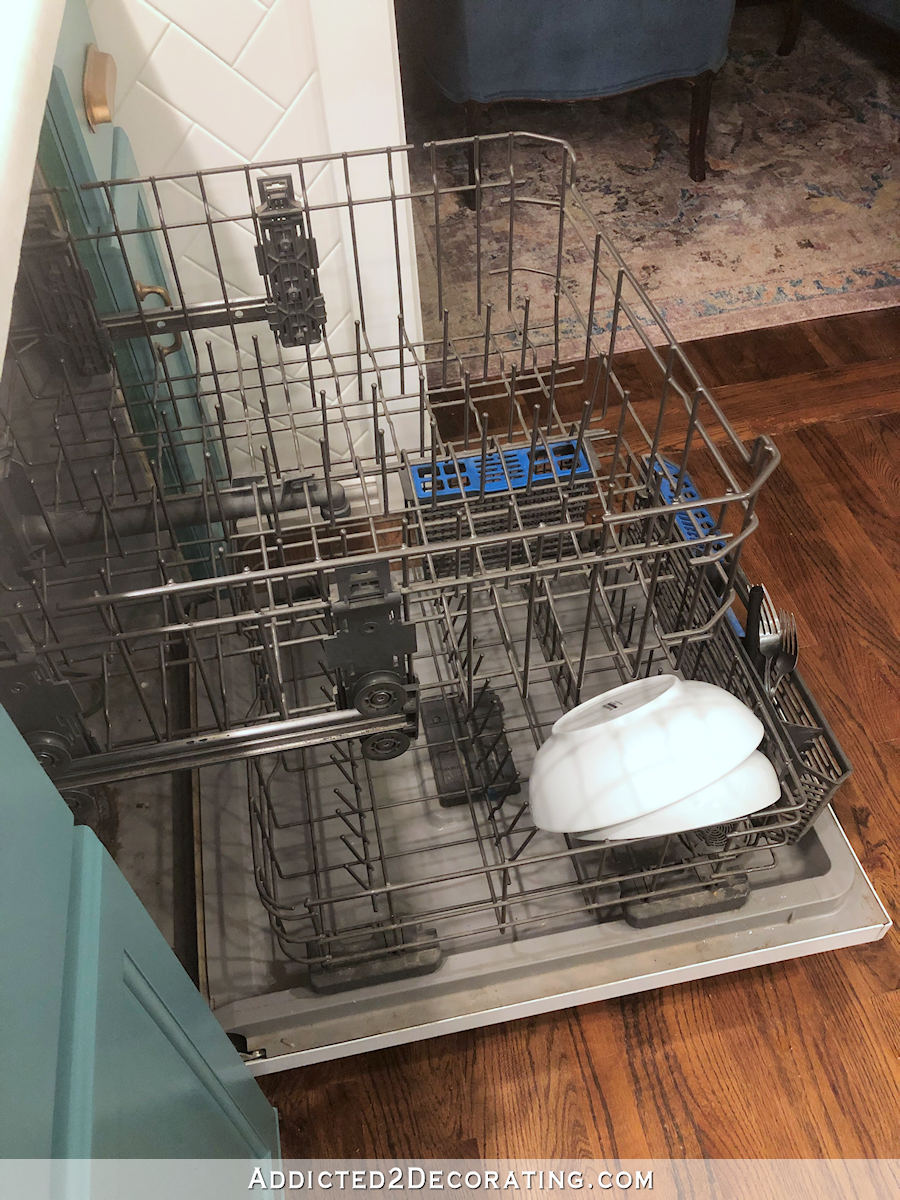
And finally, the whole cabinet was gone.

Removing the last remaining pieces of drywall was the easy part…
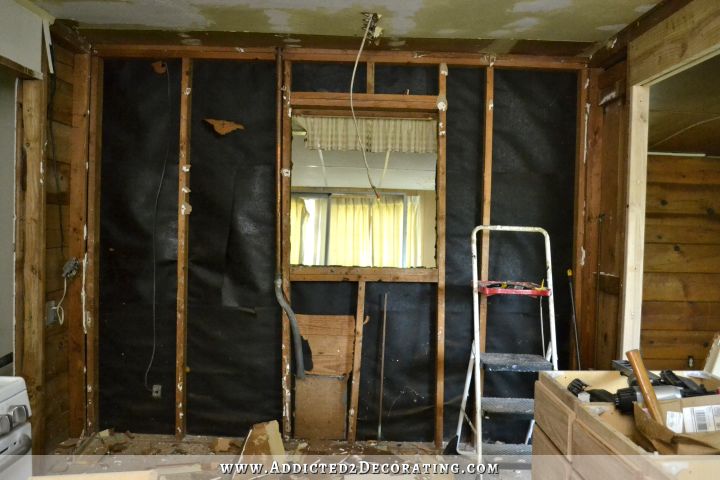
It’s far from pretty at this point, but at least I’m one (rather large) step closer to realizing my vision for this wall.
I’m so excited about this weekend. It’ll be so nice to have lights in the kitchen and breakfast room again! I’ve been living without lights in this end of the house ever since a month ago when I removed the wall separating the kitchen and breakfast room, along with the wires that were powering my lights in these two rooms. 🙂
After taking a break from my kitchen and breakfast room for a couple of weeks, this progress feels good.

Addicted 2 Decorating is where I share my DIY and decorating journey as I remodel and decorate the 1948 fixer upper that my husband, Matt, and I bought in 2013. Matt has M.S. and is unable to do physical work, so I do the majority of the work on the house by myself. You can learn more about me here.
I am Addicted 2 Addicted 2 Decorating!!! I am always so excited to see a new post from you. Be careful of your poor shoulders and arms with all that pulling and lifting. You are making tremendous progress and your design ideas are spot on. I feel like I am writing to a friend.
YOU GO GIRL! Extra hands make light the work (haha!)
Are there plans to place some type of door stop on the upper cabinets that flank each of the lights? A concern is that cabinet doors could damage/dent light or shade if opened too far.
I’m still thinking through that. 🙂 I’ll find a solution. It’ll come to me eventually.
My cabinets don’t swing open freely. The hinges stop them when they’re 90 degrees from the closed position. Isn’t this enough so that they won’t hit the sconces?
http://www.homedepot.com/p/Liberty-1-3-8-in-European-110-Degree-Full-Overlay-Hinge-1-Pair-HC11SFC-NP-C5/100128843
There might be something more elegant but if the hinges do swing far enough to allow it to hit the light shades, perhaps a simple small chain attached to the cabinet door and the cabinet interior would be enough?
There are also those slide type stops that you often see on chests and such that have an arched shape and one end is fixed to the door while the other end glides along a fixed point on the inside. Not sure what those are called?
you are my DIY hero! i honestly would have cried trying to take those down!!
Omigosh! I was in your very shoes a few months ago, trying to remove some original wood cabinets that had been put in my kitchen in the 40’s. Like you said, they were meant to STAY!!! I, too, wanted to save them to use in my garage, but, alas, I was only able to save one section. AND 20 years ago when I was demolishing my old tile shower (while I was alone in the house) I was pulling and pulling and all of a sudden a HUGE and very heavy section of shower wall came off on TOP OF ME — tile, cement and chicken wire! — and as I stood there holding it all only inches above my head I wondered how the heck I was going to get out from under this mess. Just then my husband walked through the front door and saved me!
Ahh, diy…ain’t it fun? 😉 I’m so happy you’re doing your kitchen right now because so am I. Thanks for keeping me motivated!!
Too bad about the cabinets, but sometimes it is the only way to get them out. I want to know how you put the electrical cap on, I can’t image it holding up to a cabinet being pulled down and taking ceiling with it.
Can I also say — you have me obsessed with glass backsplashes now. My kitchen is very dark and I want mirrors, but not shining and new, more antiqued or mercury looking. I am trying to figure out how to explain to hub so I can get a quote.
I’ve been thinking about the same thing. I’ve seen tutorials where people spray glass with the looking glass spray paint and I think vinegar? And it looks like an antique mirror. I’ve been thinking about that for a backsplash…but I don’t know if I’m brave enough to do it.
They used nails to attach and not screws? This isn’t a comment on your removable but, most people go tugging when all that’s need is a drill to remove the screws- at least in more “modern” homes.
BTW, I have a question that I probably should have asked sooner- did you draw your plans by hand or use a program?
One more question- what kind of blade did you use that got bent up like that?
All of the cabinets in this kitchen were installed with nails. And if you’ve ever tried removing decades-old 2 1/2-inch nails from studs, you know how they hang on for dear life! 🙂
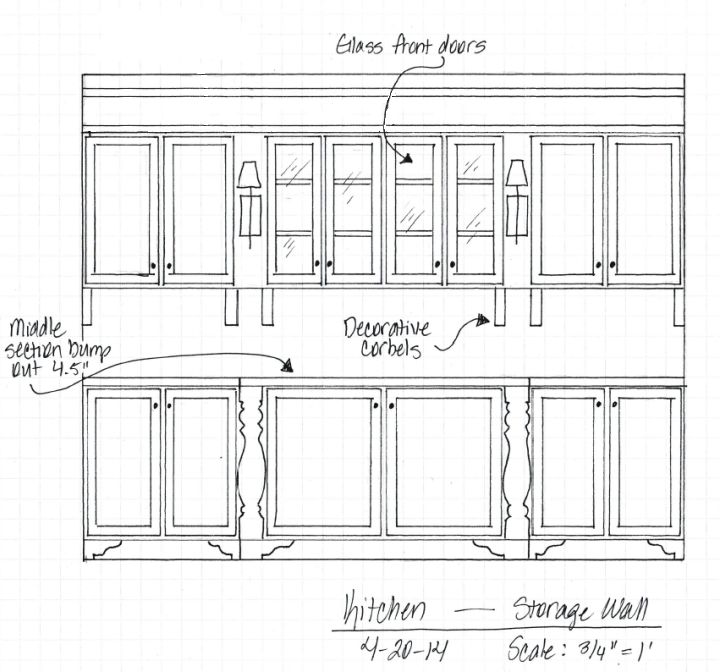
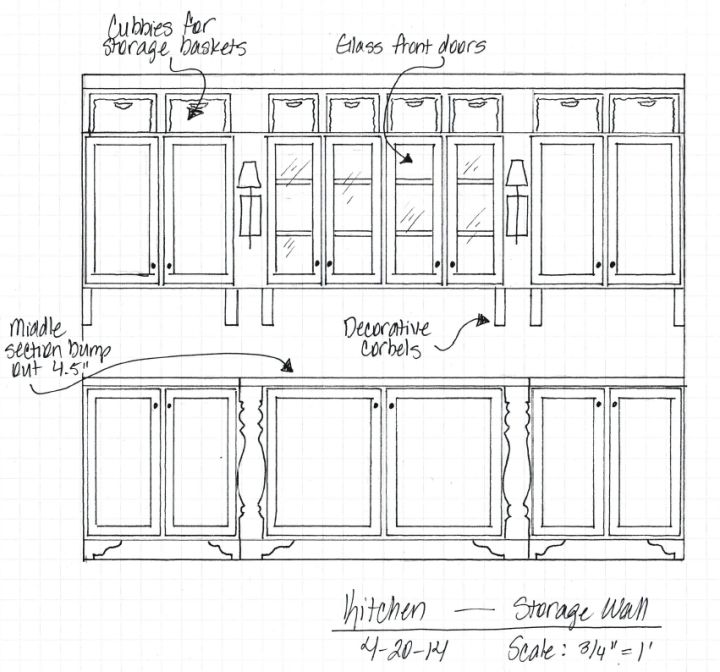
I drew my kitchen wall plan by hand. I find that there’s something so satisfying about sitting down with a ruler, pencil, pen, and graph paper, and drawing everything out.
Stupid nails! You did a beautiful job with your renderings. When I do them they start out very sloppy, detailed but sloppy and I can’t stop until they look pretty.
Gosh! BEEEEEEEEEEEE careful! That was a pretty dangerous act, but glad you didn’t end up with something broken, like an arm or collar bone 🙁 Anyway, now you can get on to more exciting stuff. It’s gonna look great, I know it! Can’t wait to see what is next in this gonna be fab kitchen.
Umm…yeah…I think it’s time to change your name to Wonder Woman. I cannot believe the saw blade, that is a riot! What the heck were those cabinets up there with? It is a shame they had to be destroyed, I thought they were so cute with the little ones at the top. Well, at least you got them off the wall, but I am guessing you are one sore lady today. Thank the Lord that the worst is behind you (I hope). Looking forward to all the fun and pretty stuff you are going to do. I so look forward to your daily posts. Gotta go, today is our 45th wedding anniversary, who knew people could be married this long and not be old, LOL, have old friends in for dinner and a visit so have some cooking to do. Went out last night with other friends to celebrate and are going to the beach on Sunday for a few days to introduce our dog to the Atlantic. He has not see it yet! Try to take it easy for a few days!
The cabinets were installed with 2 1/2 inch nails. Lots of them. Directly into studs. 🙂
Wow! Happy anniversary! 45 years…that’s amazing!
Congratulations wow!!! great Job. Can’t wait to see what it would look like.. <3
Kudos to you for keeping at it. We are in the middle of a kitchen remodel too, but hiring it out. Makes me feel a tad guilty for not doing it myself, but I know my limits! They just don’t make kitchen cabinets like they used to! Our old ones were so solid and also difficult to remove. As a side note, I couldn’t help notice you’ve left the curtains in the windows. A bit of decor in the midst of destruction.
Congratulations! You last sentence says it all. We are all with you. I like to watch Renovation Realities and that would have made the most exciting episode ever!
I love reading you blog. Posts like this one make me think about your husband. I can only imagine what he is thinking. I picture in my head him head towards the kitchen then seeing you and turning around and heading the other direction while laughing. I mean this all in a good way. It must be very humorous and entertaining at your house.
Woman, you sure can tear up a room! :)~ But I love to see it after you build it back!
Bravo my dear!
I am so excited for you. I look forward every day to see what you have accomplished. This is going to be one fantastic kitchen!
I get to play Jewish Mother to one unsuspecting soul per month, so here goes. Please, please please be very careful about doing this kind of demo without some kind of spotter, just in case. You are a strong, determined, creative woman whose blog has become cherished reading, so we need to encourage you to stay safe and healthy. End of plea. BTW, atta girl, way to go, hubba hubba, etc. What a luxury to be able to install more sockets than codes require and cabinets at the height that works best for you. I’m looking forward to whatever comes next in this process.
Hi Kristi! I’m Bill’s 1st wife 🙂 Cathy recommended your page and I love getting your updates. I’d love to see a pic of Bill & Cathy at work on your kitchen! Probably not what everyone wants to see though. Bill is an awesome handyman! Glad they’ll be helping you this weekend. Enjoy!
Okey, this time you scared me. I hope your injured arm is not re-injured.
Whew!
LOL!
Forgive me, Kristi for chuckling. It’s just that imagining you holding it there and figuring out how put it on it’s side and taking a picture is funny. Sorry. Hope your elbow doesn’t flare up again. It makes my shoulder hurt just reading about this.
I am so incredibly impressed with your gumption and “get ‘er done” attitude!
I’m intrigued by the glass backsplash.
Good Luck with this!
Thank goodness you didn’t get hurt when that cabinet started to come off the wall/ceiling. Scary, but I’m glad you finally got it taken care of. Sorry you couldn’t save the cabinets for your garage. It looks like its going well – good luck with the lighting this weekend.
Sorry, but I laughed out loud when I saw the photo of your bent recip saw. Definitely looks like something I would do. But at least you got the thing down and without any injury. Kudos to you Lady. Thinking back on backsplashes, you, or someone, mentioned mercury glass and that blew my mind. I LOVE mercury glass but wouldn’t have imagined it in this setting. So, I went to Michael’s yesterday and bought a can of Krylon’s Looking Glass spray (sort of expensive at $11+) and will experiment this weekend. Want to see what kind of look I can achieve and if it would work for a future kitchen reno. Keep up the good work so I can keep being influenced by your incredible creativity.
So we will all take up a collection and buy you a lot of Motrin. A LOT. Your poor shoulders…..
I gasped, I laughed, I groaned in empathy. What a gal!
Take a nice hot bath tonight with some epsom salts to help with the muscle soreness!
Kristi, you ROCK.
After thinking about it, I’m wondering if that wiring nut wasn’t just the thing to keep that cabinet from falling on you!
I felt your pain in reading this, but you achieved a milestone. A huge well done girl you can do anything that you put your mind to. Go Girl.
Kristi, we really must come up with a super-hero costume for you. I don’t know how you managed to not get hurt. Glad you’re ok.
You go girl!!! I wouldn’t be able to walk tomorrow. Thanks for keeping us up to date!!!!
Hi kristie, does nothing scare you? The things you tackle would have me running to the hills screaming. I did chuckle at this post though but am glad you didn’t hurt yourself. The rendering you did is beautiful. I’m super excited for you. It’s going to be so beautiful when it’s done! Cheers
Your vision for this area is stunning! It is going to be a lovely place for those buffet dinners.
You are truly awesome girl. I love it when I get a new update from you.
I would break bones if I tried to do the things you get up to. I love following your
updates, keep going I’m really looking forward to see the end result
Regards
Ingrid
Hello Kristie,
You are doing a great job.Keep it up.
Ahhh girl…I’m glad we didn’t hear an almighty crash!!!!
You best be careful there……
Blessings,
J
Kristi, I am enthralled with your blog and btw addicted too. I can’t stop looking at backpainted glass. I want the mercury glass look. I bought Looking glass paint last Christmas and sprayed the inside of clear ornaments and they came out beautifully blotchey like mercury glass. Now you have me obsessed with a backsplash of mercury glass. My husband is not taking to the idea says it would not stick to the wall without drilled holes in the glass through to the studs. Seems you or some others said it was mounted with silicone caulk. What are your thoughts on this?