My Latest Insane 1000-Wood-Piece Project
Do you know what my absolute favorite kind of project is to do? It’s the projects that require hundreds (or sometimes over a thousand) little pieces of wood pieced together to create something beautiful.
Okay, I realize beauty is in the eye of the beholder, but to my eye, I really do think there’s beauty in repetition. I have three examples of this in our home at the moment.
First, there’s the coffee table I made out of hundreds of pieces of plywood glued and nailed together so that the edges created a herringbone design.

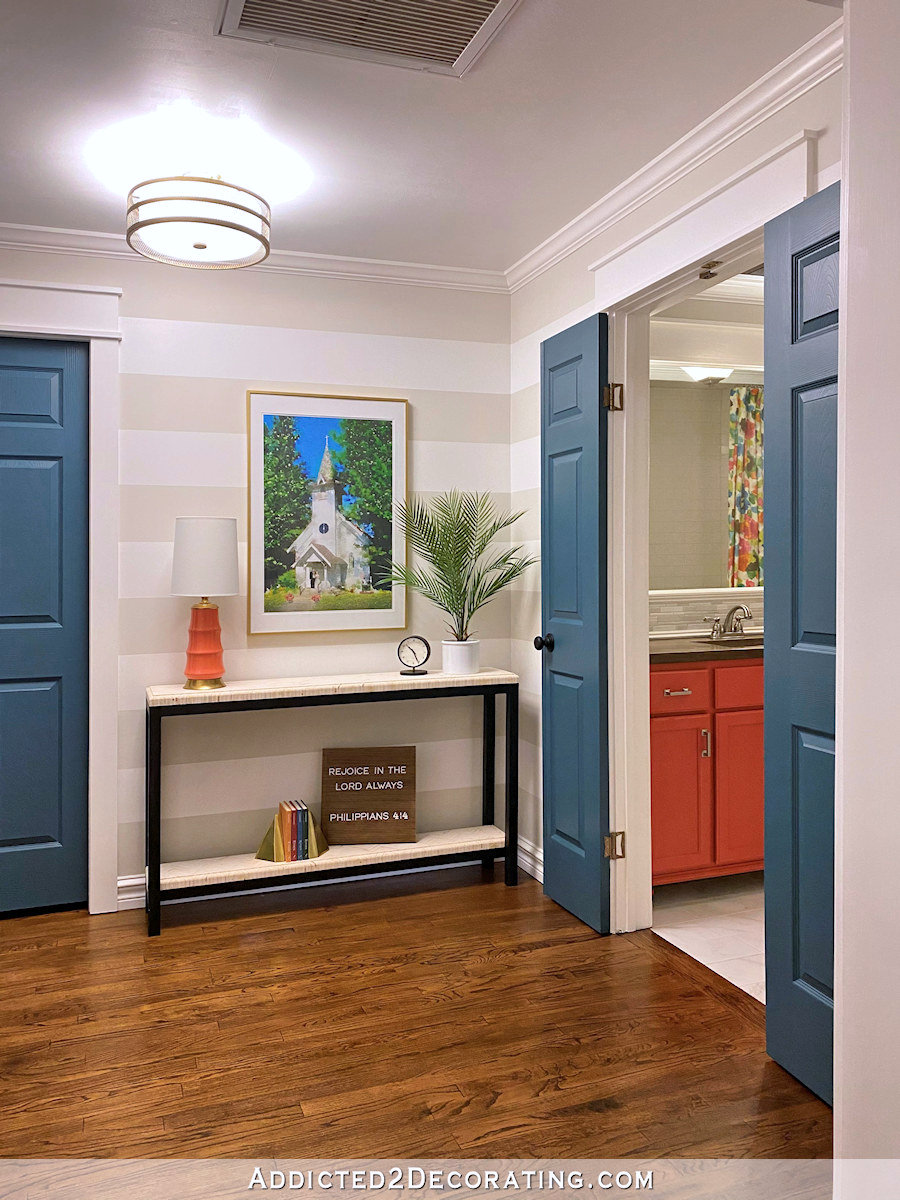
That’s not a coffee table anymore because I later cut that coffee table top into two pieces and turned it into a console table with a lower shelf that currently sits in our hallway.
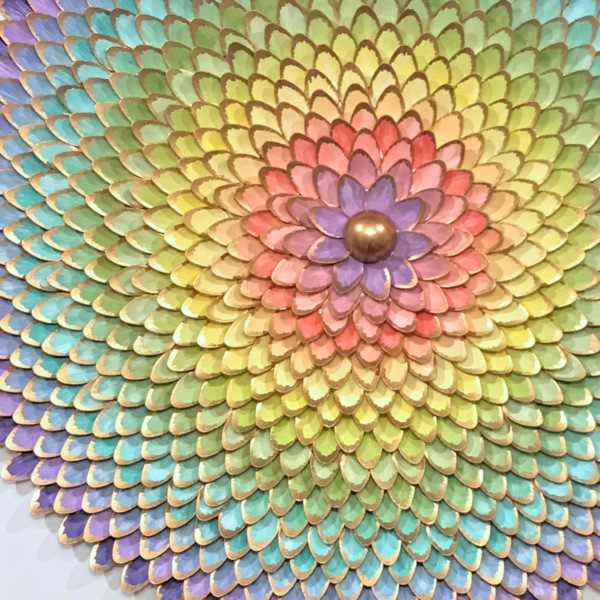
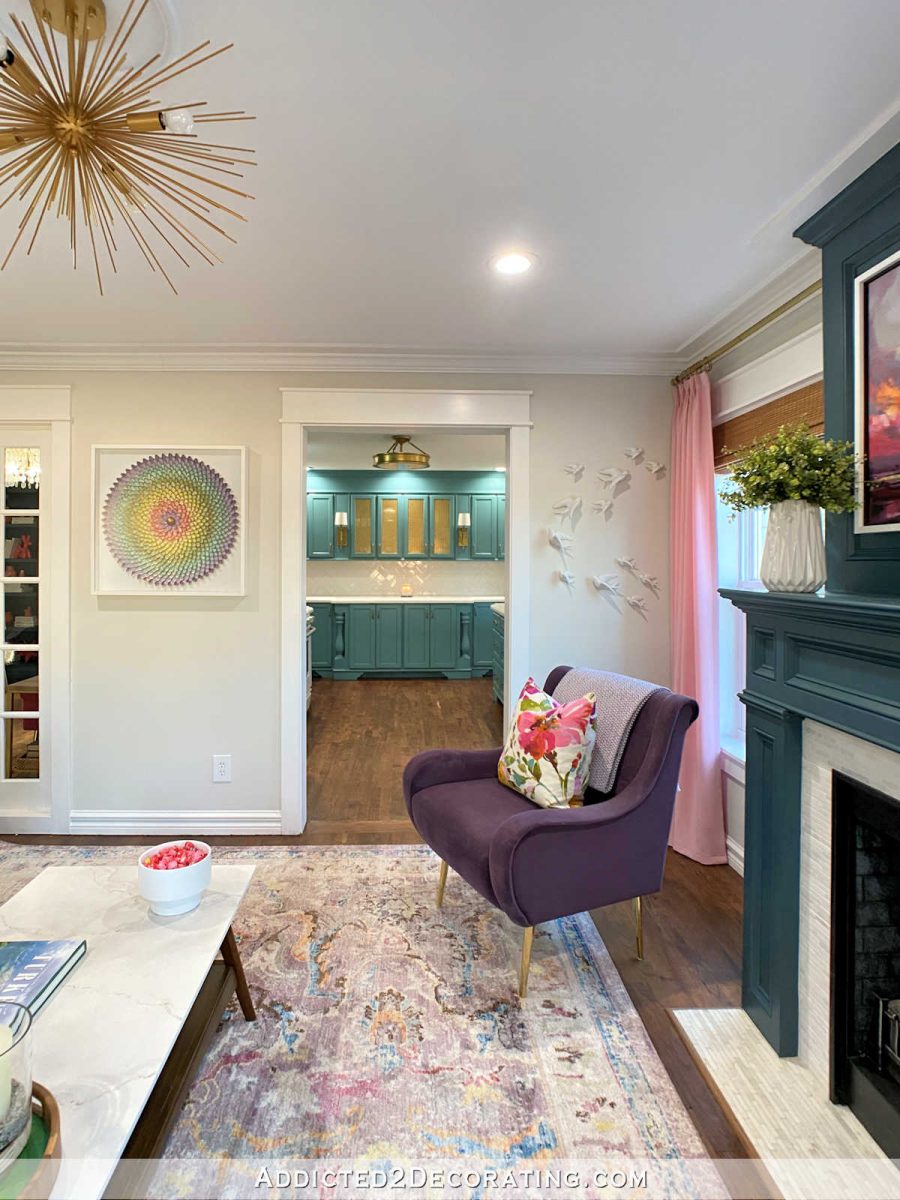
The second example is my colorful pinwheel art that I made out of over 800 wood tasting spoons. This is my favorite piece of wall art that I’ve made to date. It currently hangs in our living room.
And the third item is the huge “pixel” art that I made out of 1600 wood button plugs (the little wood pieces that are used to cover over screw holes in wood furniture).
That huge piece of artwork currently hangs on the wall of our music room.
I love working on projects like this. I have no idea why, but the more pieces there are, the more satisfying I find them to be.
Well, I’ve started another one, and this time it’s not a furniture piece or a piece of artwork. It’s something I’m applying directly to the wall of the studio bathroom.
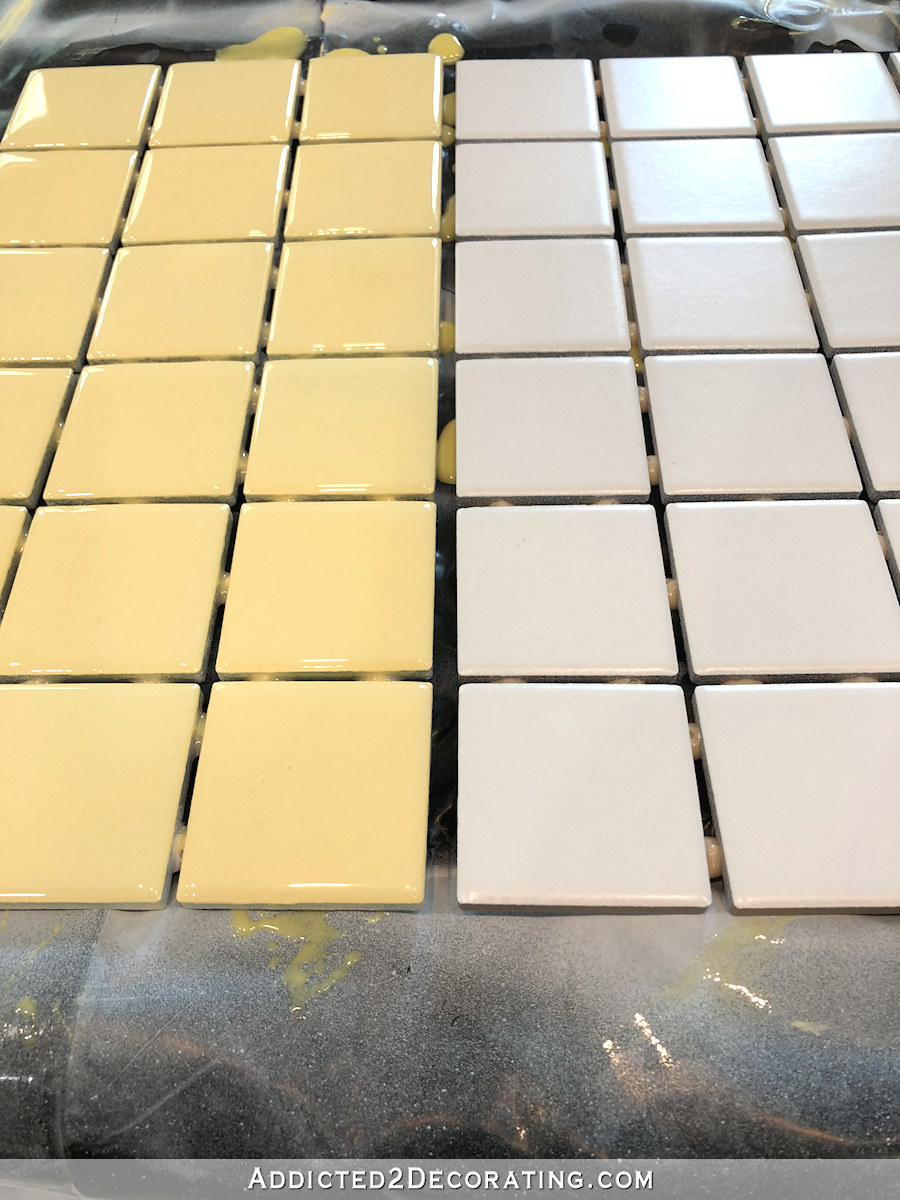
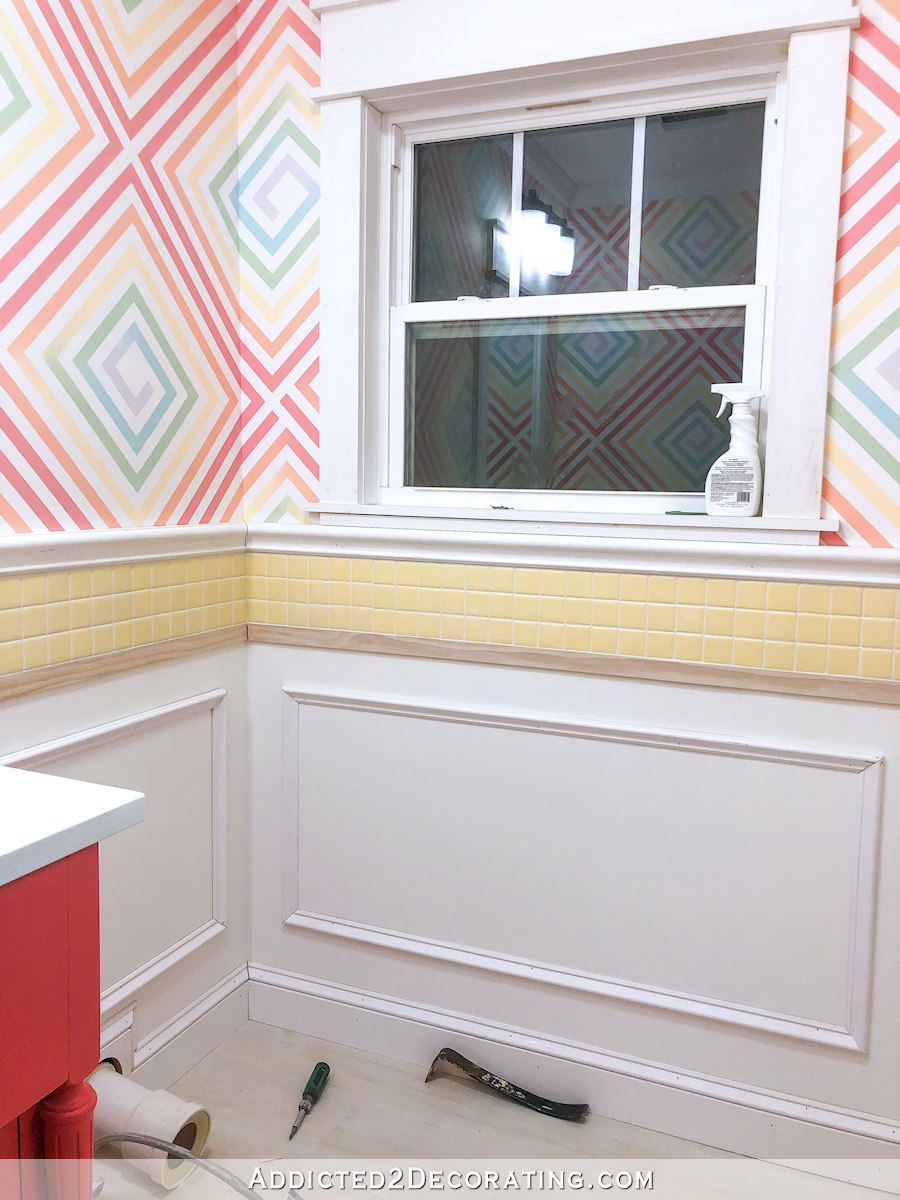
So let me back up just a bit. If you’ll remember, I had decided on using a simple white tile to replace the yellow accent tiles in the studio bathroom wainscoting. I was tired of this yellow, and since the wall design is going away, these yellow tiles needed to be swapped out as well…
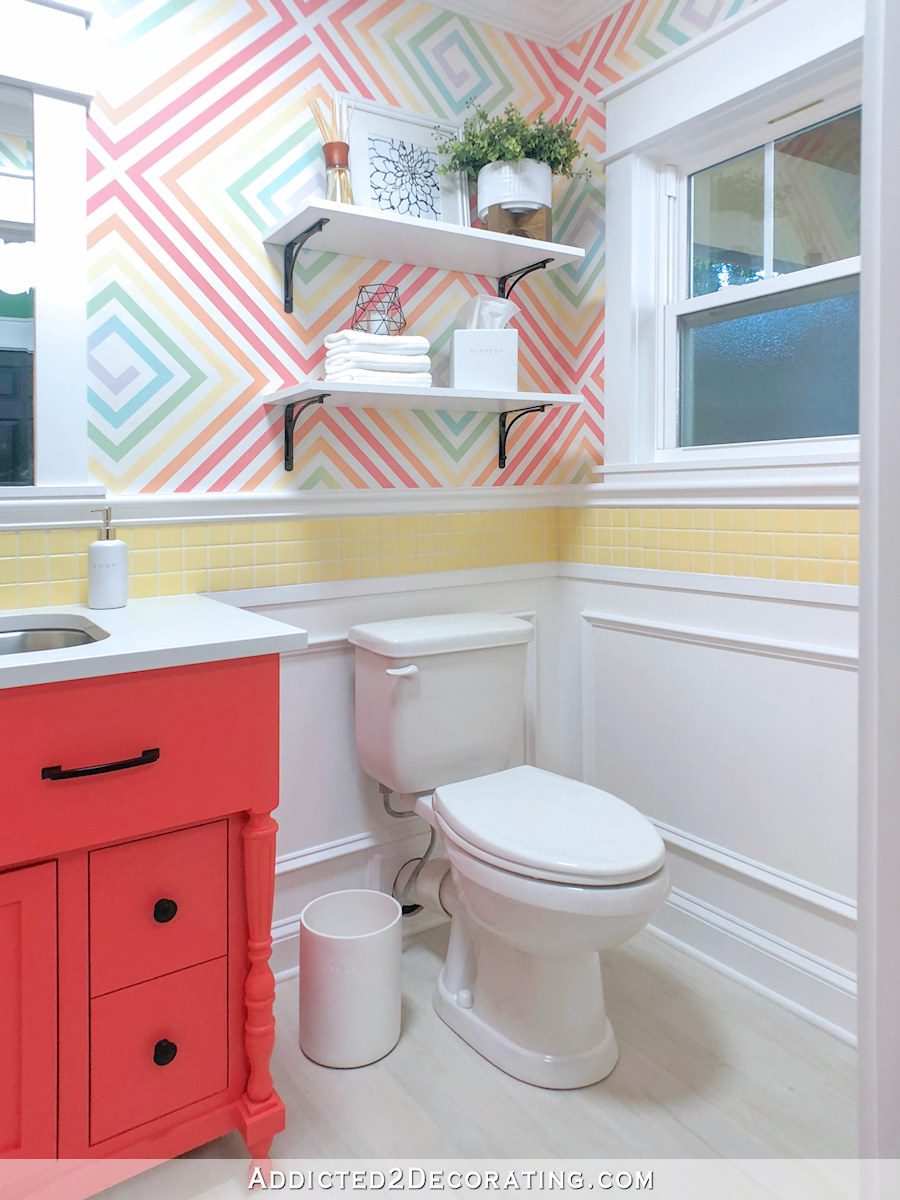
And since I couldn’t decide on a wall design, I figured that white tiles would go with pretty much anything. So I got these simple white tiles and planned to cut them down to fit the 6-inch-high accent space on the wainscoting and backsplash.
Well, it turns out that rectangle white tiles don’t go with everything. At least, in my mind, they don’t.
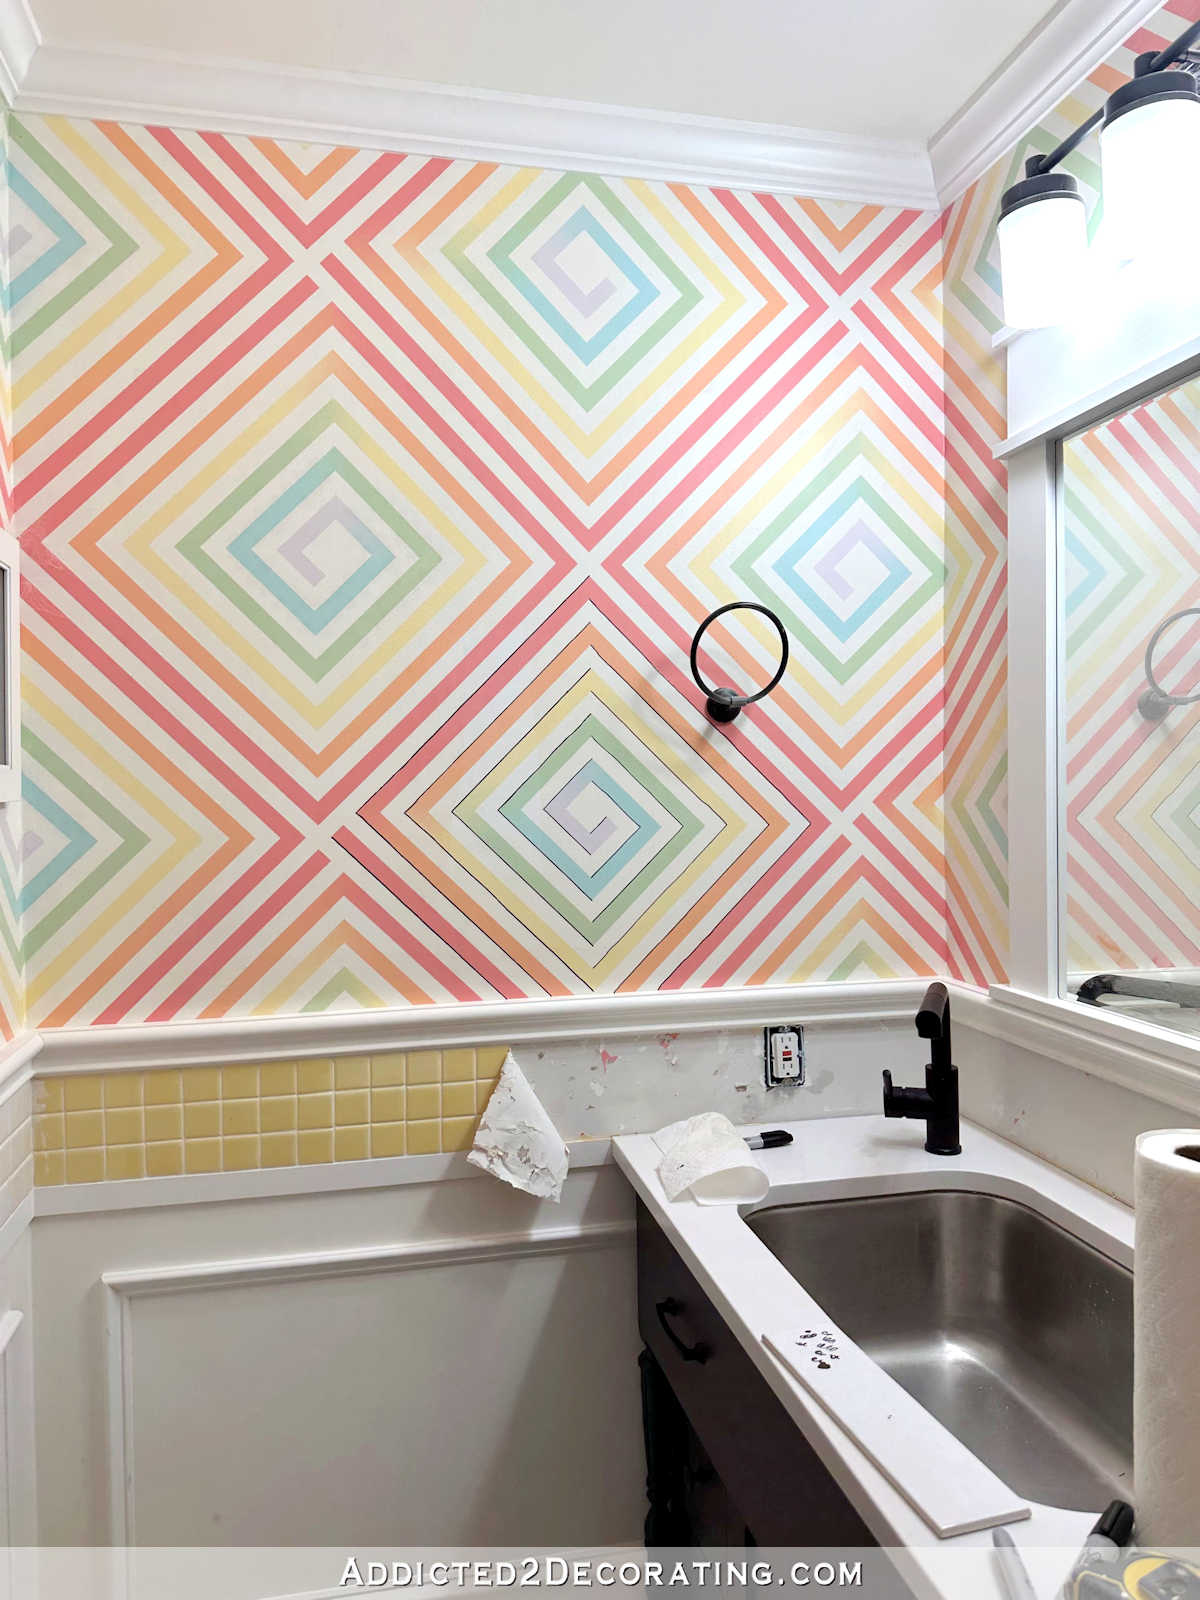
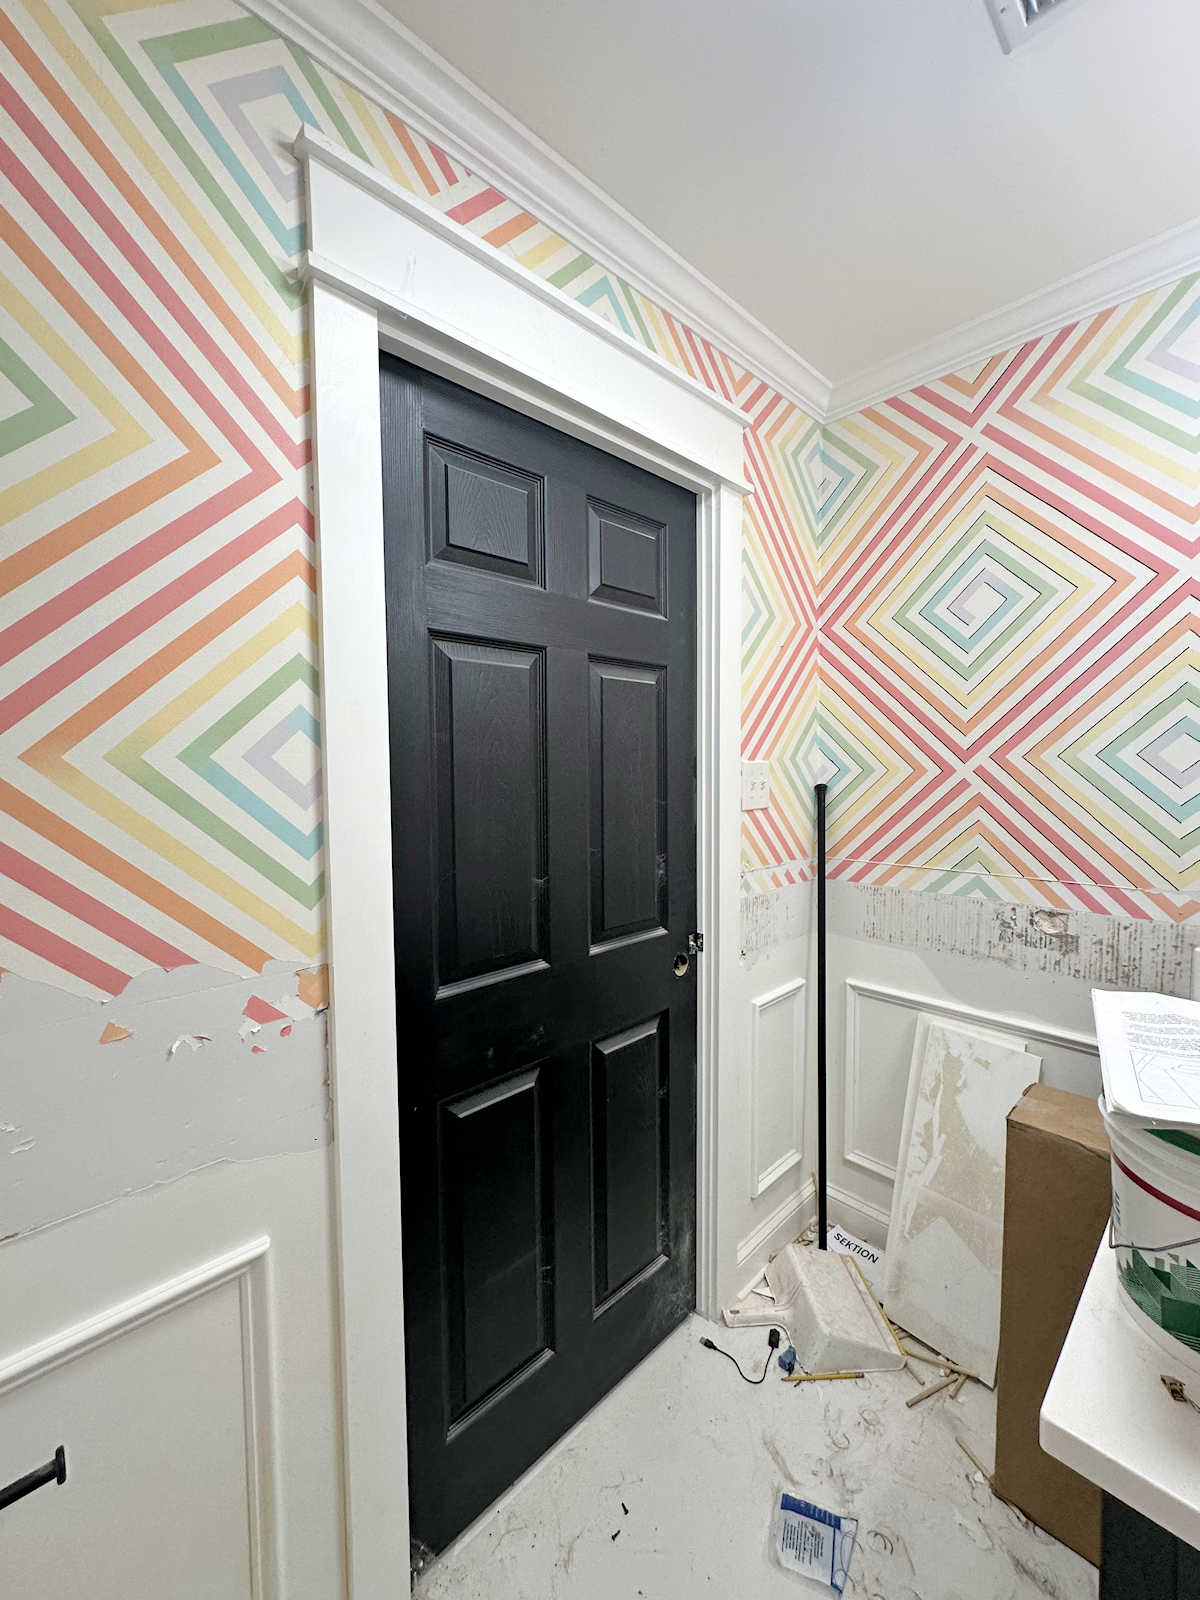
I finally decided what to do on the walls. I decided to make a new wallpaper that coordinates with the floral in the studio, and that new wallpaper is just a series of squares. Some of you accurately said it looks like a wall covered in paint swatches. I think that’s accurate, and what could be better than walls covered in paint swatches for a fun, colorful studio?

But having the walls covered in squares, and then adding rectangles to the wainscoting/backsplash didn’t appeal to me in the least. The wallpaper is ordered (and shipped today!), so my mind is set on that. That means that I needed a new wainscoting accent idea.
Penny tile? No, that seemed too…well, I don’t even know. Predictable? Elementary? (A room full of squares and circles? Seems like something that’s perfect for daycare, but not for my studio bathroom.) I kept thinking that something really skinny would be perfect, like a pencil tile. But doing the entire perimeter in pencil tile, even for my very small bathroom, would be pretty expensive. Plus, I was in the mood for some immediate gratification, so the last thing I wanted was to have to search online, order samples, wait on samples, test out samples. You get the point.
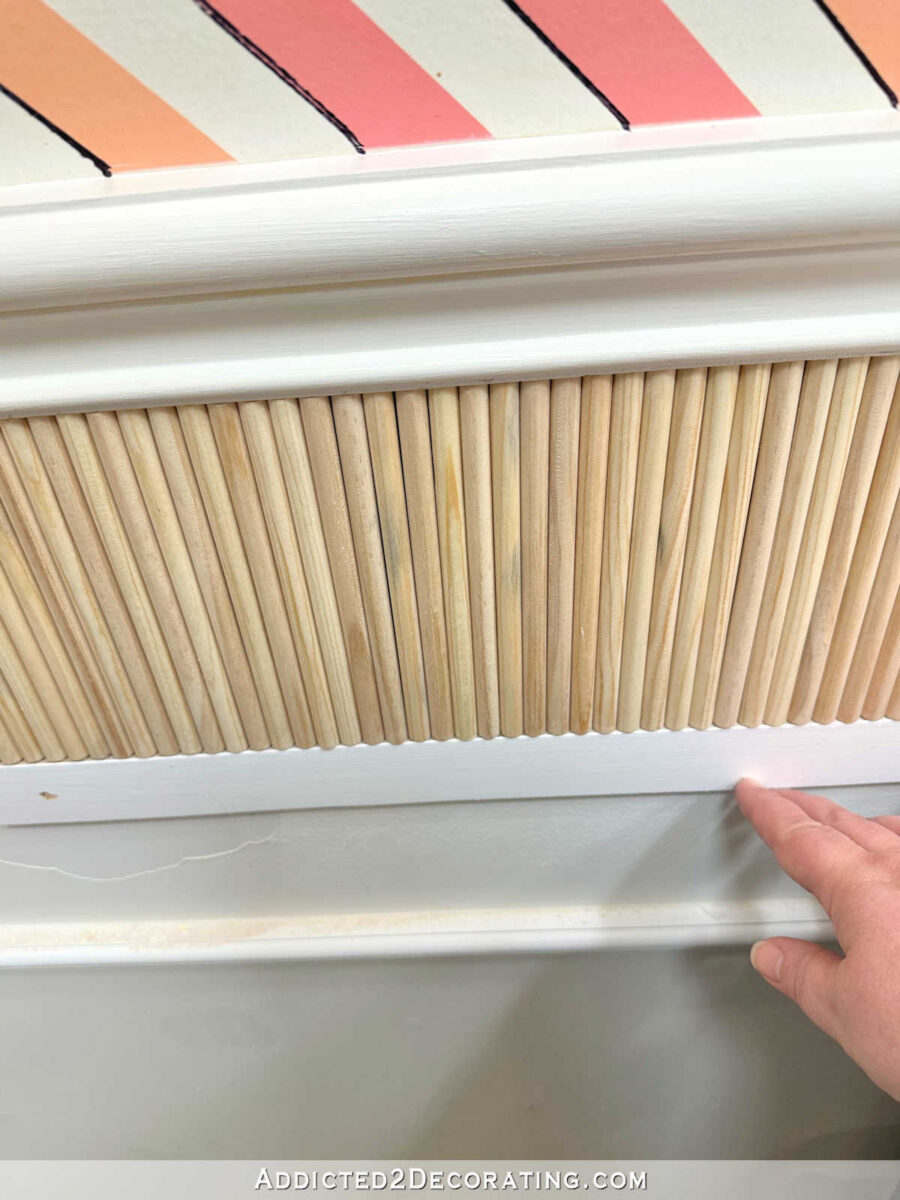
So I headed to Home Depot to see what I could find. Well, I found something! Dowel rods! I did some quick calculations, bought ninety 48-inch-long 3/8-inch dowel rods (at just over $1 each), and brought them home and started cutting them into 6-inch pieces. And then I started gluing.

And I glued, and glued, and glued some more…

I realize that the current wall design is pretty distracting, so you’ll have to use your creative eyes to look past that. And you’ll also have to imagine the dowel rods (we’ll call it a reed backsplash to sound fancy) painted to match the wainscoting. But I love the texture they add! And I think it’s a nice juxtaposition to the (future) square design for the walls.

I got them all cut, and I got about half of them sanded and applied to the wall. I still need to sand the other half and get them on the wall.

Once that’s finished, I’ll probably paint them first, and then add the trim to the bottom. I don’t like how they stick out past the trim, so I’ll be adding another layer of a very small trim so that the dowel rods (umm, I mean, the reed accent 😀 ) is recessed and doesn’t stick out beyond the trim.
I really love how this looks, and I think it’s a great bargain at just around $100 to go around the whole room! I also realize that Future Kristi may be cursing me for using a reed accent around a sink and having them go all the way to the countertop instead of putting a solid piece of trim horizontally around the countertop first, but I don’t care. She can deal with that. 😀 For now, I’m just excited to get this done! And since the wallpaper shipped today, I’m hoping that means I’ll get it by the end of the day tomorrow, and I can install it this weekend. It would be so encouraging to actually get this little room done and have something in the studio finished!

Addicted 2 Decorating is where I share my DIY and decorating journey as I remodel and decorate the 1948 fixer upper that my husband, Matt, and I bought in 2013. Matt has M.S. and is unable to do physical work, so I do the majority of the work on the house by myself. You can learn more about me here.

What color are you thinking of painting them?
I was thinking white, but I’m open to other ideas.
Just sealing them and leaving the natural wood tones might be a great compliment to your colorful new wallpaper.
Yes the wood will go great!
I’m also on team natural wood. And afterwards if you don’t like, you can paint white or another color.
Love the look of this. When you said paint, I thought, oh no. I love the natural wood tone.
Caulking along the bottom of your “reed accent” would help with any future water issues.
You are so creative!
Love, love, love, love the dowel rods!
ABSOLUTELY AGREE….JUST LOVE your “Reed Backsplash”….!!!🥰
I LOVE this! You are so creative and talented and your home is beautiful!
Love this!
Oh my goodness. I absolutely love this idea. Love it. Your ideas never cease to amaze me.
This idea is amazing. I love how you look at very basic things and turn them into art. It makes me want to go to Home Depot quick! One question I had though where it’s above a sink and you’ll be doing soap and I imagine washing out paint brushes, etc. won’t that splatter on the wood? Will you be Polyurethane in them perhaps? Just wondering. Thanks for all the great ideas keep them coming!
May I make a suggestion—wait till get your wallpaper up before painting “reeds”. That way if want more color can choose from wallpaper! GREAT IDEA with the dowels!
I love that look. I just made note of a bathroom vanity that has a dowel front look but didn’t even think of using it in place of tile.
https://houseandhome.com/wp-content/uploads/2022/10/22106_Powder_NoPotLights_HH_Sept22_38.jpg
Oh my gosh, I LOVE THAT SO MUCH!! Now I’m thinking of where I can do that in my home!
Great idea. Thanks for the views of the art showing them from different angles. Happy home and fun. I like fun decorating, too.
LOVE IT!!!!!
I was going to suggest using colored pencils the same way – but I like the dowels better! Very cool idea!
Oh! That’s a fantastic idea, too!
Personally, I’d prefer tile over the dowel rods. I’d worry about all the crevices collecting tissue dust and collecting water.
Love it! Creativity off the charts.
Love your new idea.
Are you satisfied with the top trim? I’m not sure why, but I’ve always thought it looks just a little too beefy for the room and for the bottom panels. Now would be the time to swap it out for something a little more trim. Pun intended. 🙂
Love your “spoon” art and the pixel art. The colors are just beautiful andyou have used the pastels so effectively. I’ve done some spoon art with plastic spoons I spray painted (made a huge sunflower). The wooden spoons are a different take.
Keep on inspiring me.
Barbara
And what about that plan hanger that you made with all those small wooden pieces several years back? I love them all.
Oh, yes! I had forgotten about that one!
I remember when you first made your faux fireplace for the living room, you made a “starburst” wood decoration with a mirror?? In the centre? It hung above the fireplace. Also the wood lamps you made for the entryway. They were a mosaic of blues and greens teals. If memory serves me correct. I would love to see pics of those again.
I remember when you first made your faux fireplace for the living room, you made a gold “starburst” wood decoration with a mirror in the centre. Also the wood lamps you made for the entryway. They were a mosaic of blues and greens teals. If memory serves me correct.
Wow..how creative! Love it! 💞
I’ve seen people do similar with pole wrap. It’s a sheet you can cut down so it’s a bit easier to apply. I can’t wait to see this room done!
You are so creative. Just love it. Stain them instead of painting they white.
Wow, cool new idea…looking forward to next week’s post!
you know u can buy tile that looks just like that!?
Yes, and I addressed the whole “searching for tile” thing in the post. You can also buy wood trim that looks like that, but I can’t buy it locally. Which brings me right back to my whole point of using dowel rods because that’s what was available locally at the moment, and I wanted immediate gratification. I didn’t want to search online, purchase samples, wait for samples to arrive, test samples, place an order, wait again…
I think this is awesome, and SO KRISTI! But I can’t believe there was no tile out there that didn’t have a similar design. (But now there might be in the future!) My only thought is why you have pivoted to the bathroom and left the studio? Are you not wanting to move all the stuff? (If I were you, I would put 90% of the stuff under the carport and cover with a tarp!) Please get back to the studio—we’ve been waiting so long! 🙂
It’s because the next thing I need to do in the studio requires a full, uninterrupted work day (no meetings, no lunches with my mom or a friend, no random scheduled things that interrupt my day) and those days are always Thursday, Friday, and Saturday. Mondays are generally uninterrupted works days also, but this past Monday is the day I went to Home Depot to get all of the things so that I would be prepared to do the next thing in the studio today, tomorrow, and Saturday. Not every delay is about procrastination. 😀 Sometimes (maybe even most times these days) it’s just a schedule thing.
The patches-of-paint wall paper kind of hurts my eyes for some reason.
I am just stunned and amazed at what you do, you are certainly one talented, brave and smart woman!