I’ll warn you ahead of time…this one’s a doozy. But I’ve had several of you request the instructions for my breakfast room valance, so I’m gonna go ahead and post it. If you’re just learning to sew, this may not be a “beginner” type of project. Although, I will assure you, it’s not difficult to make. There are just lots of little steps that could get overwhelming.

But even a very determined “beginner” can master this process if you’re willing to go step by step without allowing yourself to get overwhelmed. After all, there are no fancy stitches required–just straight stitches, folding, and ironing.
So let’s get started…
|
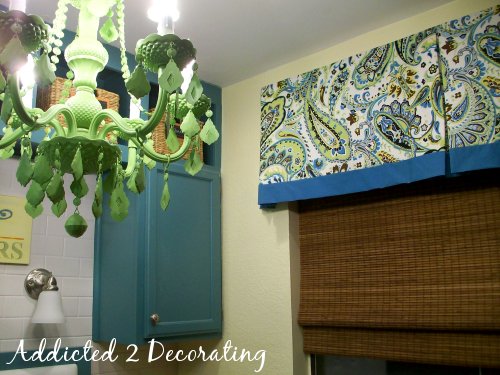
| First, you’ll need to measure your window, and write down the FINISHED WIDTH that you would like your valance to be. I generally like mine to extend about two or three inches on either side of the window, so I made mine 60″ wide. Then you’ll need to determine the FINISHED LENGTH that you want your valance to be. I chose 20 inches as my finished length. |
|
| Cut a piece of wood to the FINISHED LENGTH of your valance. I used a 1″ x 3″ piece of MDF. You can use any size you want (1″ x 4″, 1″ x 6″) but just keep in mind that the larger the number, the farther the valance will stick out from the window. |
|
| Measure the actual width of the wood (or MDF). Although mine was labeled 1″ x 3″, the actually measured 2.5″ |
|
| Now cut your fabric. The HEIGHT that you will cut the main fabric and the lining is the FINISHED HEIGHT of the valance plus four inches. The HEIGHT of the contrast band will be the height that you would like to show PLUS 2 1/4 inches. I wanted a three inch contrast band, so I cut the contrast fabric 5 1/4 inches. |
Now let’s determine the WIDTH of the fabric:
Unless you’re working with a tiny window, you will probably need to sew at least two widths of fabric together. Here’s how to determine how wide your fabric needs to be:
Finished width + fabric for pleats + returns (width of your board) + about six extra inches.
So mine was 60″ (finished width) + 36″ (three pleats at 12″ each) + 5″ (my board was 2.5″ and there are two returns) + 6 (extra width just to be sure I have enough to work with) = 107 inches wide
Since fabric is generally 60″ wide, this required two widths of fabric.
You’ll also need to cut the same number of widths for the contrast fabric and the lining.
Then sew your widths of fabric end-to-end, sew your widths of contrast fabric end-to-end, and sew your widths of lining end-to-end.
|
| Remember, when you sew seams, you want to iron the seam open… |
|
| …and then turn it over and iron the other side flat. This extra measure will ensure that you have really smooth seams. Do this for the main fabric, the contrast fabric, and the lining (shown in the picture). |
|
| Now pin the contrat fabric to the BOTTOM of the main fabric, with right sides together. Be sure that the seams are lined up. Pin all the way across. |
|
| Then sew the main fabric and contrast fabric with a standard 5/8″ seam. |
|
| Next, pin the lining to the bottom of the contrast fabric, with right sides together and seams lined up. Pin all the way across, and then sew the contrast fabric and lining with a 5/8″ seam. |
|
| When the three pieces are sewn togehter, iron the seams with both fabrics going to the same way. In other words, do not iron the seam open, like you did in the steps above. |
|
| Next, fold the contrast band one inch from the bottom, so that one inch of the band is on the back of the valance with the lining. Iron in this fold. |
NOW ON TO THE PLEATS:
|
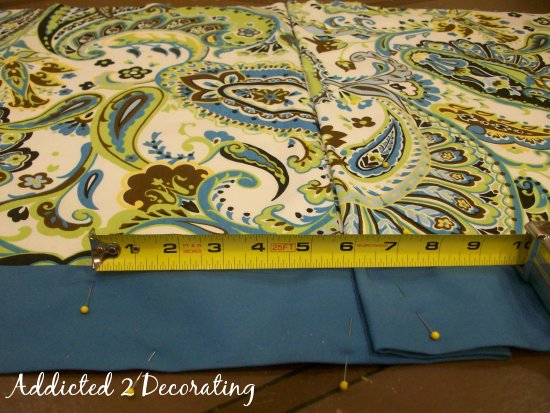
| Beginning in the very center of the fabric, measure over six inches and place a pin to mark the distance. Move your tape measure up a few inches, and repeat. Do this several times, so that your pins form a line parallel to the middle seam. |
|
| Using your pins as a guide, fold the fabric along the 6-inch mark… |
|
| And then fold that over to the middle seam. |
|
| Now repeat going the other way. Measure six inches and mark with a pin. Do this in several places, and then fold over to the middle seam. Use your iron to press in the folds, and you should be left with a very neatly folded pleat. |
|
| Next you wil mark, fold, and press your pleats into what will be the corners of your valance. |
|
| My finished width was 60 inches, so beginning at the center seam, I measured over 30 inches and marked with a pin. Then I measured over from there 6 inches, and marked with another pin, and then measured another six inches, and marked with another pin. |
So I had three pins…one at 30″ (which would be actual end of the valance), one at 36″, and one at 42″.
(Actually, because my board was only 2 1/2″ rather than 3″, I had to make some adjustments to the side of the pleats that fell on the return–the end of the board.)
|
| Then using those pins as guides, mark, fold, and press the pleats into the fabric. Do this on the other end of the valance as well. When finished, you should have three pleats–one in the middle, and one at each end of the valance. |
|
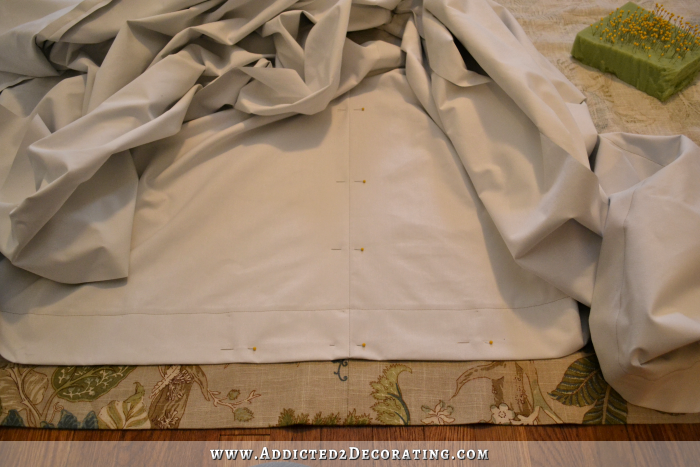
| Next, measure and mark your finished length. Starting from the bottom of the contrast fabric band, measure up and place a pin at the measurement of your finished length. I wanted my valance to be 20″ long (or high). Place pins about every three or four inches |
|
| Next, determine where the edges of the fabric need to end. My board was 2 1/2 inches, so from the middle of the last pleat, I measured 2 1/2 inches, and folded the fabric under. Do this on both ends. So if your board is 3 1/2″, you’ll measure over 3 1/2″ from the middle of the pleat and fold the fabric under. Use your iron to press in this fold. |
|
| From the fold that you just pressed into the fabric, measure over one inch and cut off the excess fabric. |
|
| Now fold the fabric over 1/2 inch, so that the raw edge is against the ironed-in fold. |
|
| And then fold over one more time, along the ironed-in fold. |
|
| Use pins to secure, and then iron in these folds. |
|
| Now this is just a little finishing touch, but one I think is important. On the very bottom corner, unfold the fabric where you just ironed in the folds. |
|
| Fold the corner up at a diagonal, so that the corner is at the 1-inch fold. |
|
| Now re-fold the fabric the way you did originally, with the raw edge over to the 1-inch fold… |
|
| And then fold again along the 1-inch fold. This gives you a very clean corner so that no raw edges or stray threads will peek out from the corner. |
|
| Now sew in the folds along the edge with your sewing machine. Sew about 3/8″ from the edge. |
Repeat these steps on the other side of the valance. When finished, the bottom edge and side edges of your valance should look finished…no raw edges showing anywhere. The only raw edges left should be on the top edge of the valance.
Are you with me?! 🙂
|
| Next, you’ll finish off the top edge of the valance. You should already have pins marking the finished top edge all the way across, so now fold along that line, and re-pin. The use your iron to press in the fold. Be sure that your pleats are still perfectly folded. The fabric will seem bulky around the pleats, but it will be fine. |
|
| Using iron-on velcro… |
|
| …sew the Velcro to the back side of the top edge of the valance, about 1/8″ from the top. Sew as closely to the top of the Velcro as you can. Sew all the way across the top of the valance. |
|
| When it’s attached, it should look something like this. |
|
| Next, open the fold (of course, it won’t open all the way because you’ve just sewn along the top), and use a zigzag stitch to sew the very bottom of the Velcro to the fabric. |
|
| When you’ve sewn all the way across, it should look like this. |
|
| Now you can trim away the excess fabric on back. If you’re using a fabric that unravels easily, you might want to put another zigzag stitch along the raw edge of the fabric, or use a product like Fray Check to keep it from unraveling. If you’re using a decorator fabric in cotton, you shouldn’t need this extra step. |
|
| The last little detail is to finish off the corners. Lift the corner and fold the edge under just a bit. |
|
| Be sure that when it’s pressed down, it doesn’t stick out the side. |
|
| And then hand-stitch this corner in place. |
AND YOUR SEWING IS FINISHED!!!!
Are you still with me?! Have I lost you?! I sure hope not!!!
The last thing to do is to prepare the mounting board…
|
| Using an electric stapler, attach the other piece of Velcro to the edge of the mounting board. Remember to start on the sides!!! I staple mine about once every two inches or so. |
|
| Then attach the L-brackets. Valances are generally not very heavy, so there’s no need in purchasing large L-brackets. These little guys will do the trick. Place on in the very center of the board, and then one at each end, about three inches from the end of the board. |
|
| Now attach the mounting board to the wall. Be sure that the Velcro is wrapped all the way around the edge of the board!! It should start at the wall on one end of the board, and end at the wall on the other end of the board. |
|
| Now attach the valance! I find it easier to start at the very middle and work my way to the corners. |
|
| And if you’ve done your measurements right, the corner of your valance should line up perfectly with the corner of the board. But the good thing about attaching the valance with Velcro is that if your valance is just a touch too wide, you can “ease” the Velcro over just a bit to make the corners line up. I’ve had to do this several times myself, because getting measurements just perfect is easier said than done. |
And speaking of done…
Woohoo!!! Did you make it? Or did you give up on me!? Come on…
you can do it!!
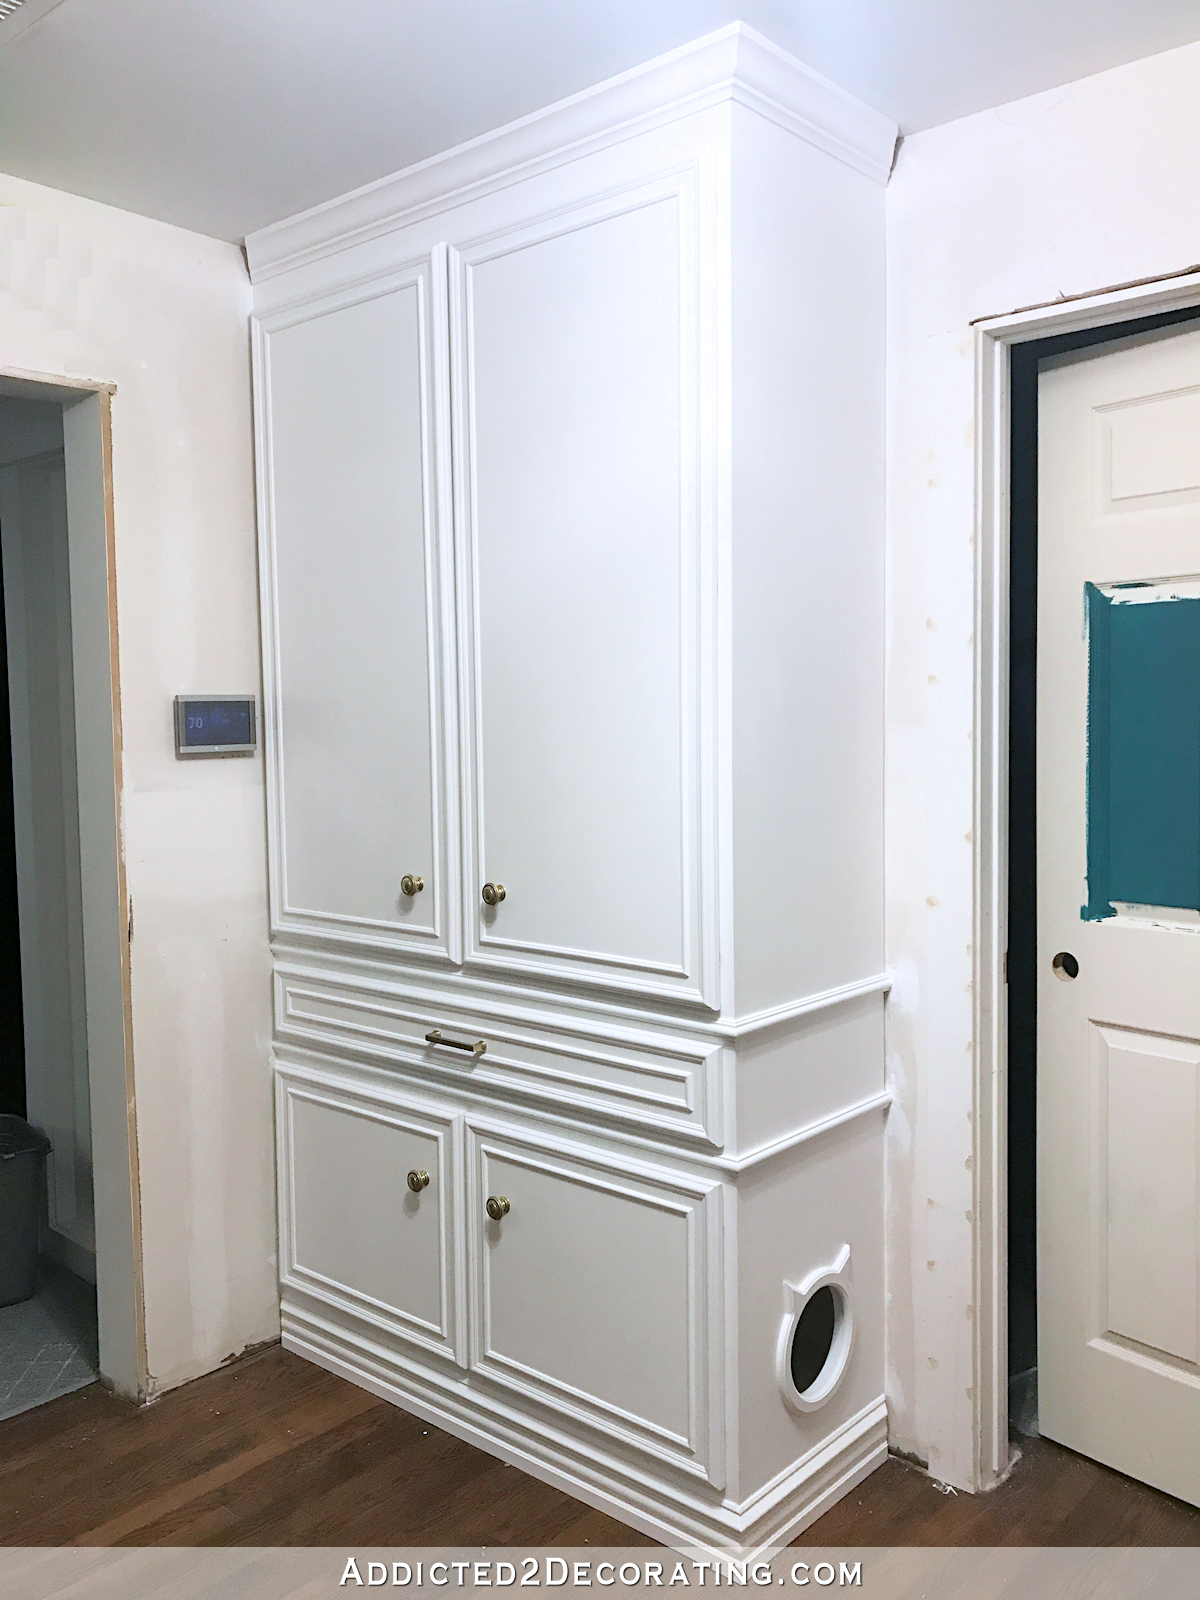
This project was for my condo breakfast room makeover. Click here to see the whole before and after of the breakfast room makeover.

Or click on the thumbnails below to see other DIY projects that I did for my condo breakfast room makeover.
[categorythumbnaillist 494]
Addicted 2 Decorating is where I share my DIY and decorating journey as I remodel and decorate the 1948 fixer upper that my husband, Matt, and I bought in 2013. Matt has M.S. and is unable to do physical work, so I do the majority of the work on the house by myself. You can learn more about me here.


Beautiful work!
Denise
Extreme Personal Measures
Love it! Do you think it could be a no sew project too? (i do not sew!) Perhaps without so many pleats? I LOVE IT! And the fabric!
I think they are the perfect valance for my office!
Liz, I think you could probably do this without sewing (using fusible tape), but honestly, I think it would actually be much more difficult. I think learning how to sew a straight line would save you tons of time and frustration.
This was a great step-by-step – I am looking forward to trying it in the future! Kristi – where do you get your fabrics? I have a JoAnn Fabrics nearby, but seem to have a hard time finding the cool fabrics that I like. Do you ever order any online? Do you have any recommendations? Thanks!
Hi Abby~~My main sources for fabrics are actually the to-the-trade fabric suppliers that I order from directly. BUT…I also purchase from a locally-owned store that has great fabrics, which is where I found my valance fabric. But just a word about JoAnn Fabrics…take time to look through their special order section. You can use your coupons on those also, and within the last few months, they've added some really incredible fabrics. All of the ones I want to use in my bedroom are from JoAnn. As far as online goes, one of the best sources I've found is fabric.com. They've got some really great fabrics–a robins egg blue/white damask in particular that I'm going to use in John & Alice's family room that's only $6.98/yard!!!
Hope you find what you're looking for!! I'm sure there are tons of other great online resources that I just haven't come across yet.
Wow! I'm inspired! Now to find some coordinating fabric so I can get started on my window treatment. Thanks for laying it out in such great detail! I "heart" your blog. It's really the only blog I follow!
I totally LOVE this fabric! I wish I could find something like that for my house!
Stacy
This was a great step-by-step – I am looking forward to trying it in the future! Kristi – where do you get your fabrics? I have a JoAnn Fabrics nearby, but seem to have a hard time finding the cool fabrics that I like. Do you ever order any online? Do you have any recommendations? Thanks!
This is awesome and I really appreciate you sharing the very detailed step-by-step instructions. I may tackle this as I get more familiar with my sewing machine. The fabric you chose you beautiful!
I'm a very novice sewer and was scared to tackle this project but with your step by step instructions it went great! I love how it turned out and was the perfect addition to my nursery:)
Thanks for sharing!
I've just cut all my fabric….. wish me luck!
I made 3 of them! & I loved the process and especially love the finished product! GREAT instructions! Thank you, Thank you, Thank you!
Thank you for a great tutorial! I have made two valances so far and blogged about them linking to your tutorial. If you are interested they are here:
http://myfabricobsession.blogspot.com/2011/10/some-home-decorating-with-fabric.html
and here:
http://myfabricobsession.blogspot.com/2011/10/im-curtain-making-machine.html
What a great tutorial! I just finished 2 valances for my neighbours kitchen and they turned out perfect : ) Thanks and keep them coming!
I have a 30 foot wall with an existing valance that I would like to replace. Could I do the fabric in sections rather than one long, long multiple pleated continuous piece? Maybe a fake pleat somehow? Thank you for any suggestion you might have. Your tutorial has inspired me 🙂
Hi,
I know this is YEARS after your post but I have the same situation — 6 windows right next to each other with no room for a ‘return’. So I hope to make six separate valances placing the pleat at the intersection to the next window (no return). I’m picturing one fold of the pleat on the right of the first window, the opposite fold at the left of the 2nd window with the ‘edges’ hidden on one side of the pleat. That way I should be able to make each valance separately, put them up and take them down separately, but have it look like one six-window-long valance with a pleat between each windows. Would love to hear if you or someone else has done something similar. Thanks.
Hello! I’ve been really looking for a good tutorial on this valance for my grand child’s nursery Could I insert another coordinating fabric into the pleats and add “button backs”??
Maybe buttoning on the hem contrast fabric?Thx so much! Easy directions!!
Gma Cheri 🙂
Hello! I’ve been really looking for a good tutorial on this valance for my grand child’s nursery Could I insert another coordinating fabric into the pleats and add “button backs”??
Maybe buttoning on the hem contrast fabric?Thx so much! Easy directions!!
Gma Cheri
Hello! I’ve been really looking for a good tutorial on this valance for my grand child’s nursery Could I insert another coordinating fabric into the pleats and add “button backs”??
Maybe buttoning on the hem contrast fabric?Thx so much!
Gma Cheri
Hi Kristi, REALLY great directions on the box pleat valance. Do you think I could incorporate another fabric for the inverted pleats and do a “button back” design? I’m working on a valance for a baby nursery.
Thanks so much,
Grandma Cheri 🙂
sorry about all the posts, was trying to post from my iphone last night… yikes!
Thanks for posting this Denise. I used your tutorial to make my first valance. It was very helpful and my valance turned out great. Just two more to go!
THANK YOU for this tutorial! It’s the clearest explanation I’ve ever read of making a detailed valance like this! I’ve made multiple simple valances, but this is a really great tutorial for a simple, yet somewhat more complicated valance. Thanks! I especially love how you finish the corners to make them neat–a “simple” touch, but so much nicer and something I had never quite figured out before. 🙂
Thank you again so much!! Thought you might enjoy seeing how mine turned out! 🙂
Amazing tutorial! I am sooo excited to begin selecting fabrics and patterns to make custom drapery and valances for my home! I am a quilter and I’ve also made some clothing for my children….but I’m clueless when it comes to drapery. In fact, before I began reading your blog I’ve avoided drapery all together. Now I’m learning and getting very excited to try my hand at creating custom window treatments and enhancing the décor of my home with drapery! I do have a question when it comes to fabrics for making drapery (sorry if these questions reveal my total lack of drapery knowledge! 😉 )…do I just select the cotton fabrics that I would use to make quilts? Or is there special fabric I need to look for? About the liner…is this just labeled drapery liner? How do you feel about using flat sheets for drapery and adding some fun fabric at the tops and bottoms?
I would suggest using fabric that is specifically decorator fabric. You’ll notice that cotton decorator fabric is a bit thicker and wider than cotton quilting fabric, so it’s easier to work with for large items like window treatments.
There are several different drapery linings you can use. My preference is called blackout lining. You can get it at JoAnn Fabrics. The one they carry is called RocLon Budget Blackout Lining, and I think the regular price is around $6.00/yard. I always use a coupon to purchase it.
I personally wouldn’t use sheets, but I do know that lots of people have done that, and it looks fine. The reason I wouldn’t is because those aren’t made to be used as yardage for sewing window treatments, and so they seldom lie flat. It’s kind of the same thing as using a drop cloth for window treatments. While it might save you money, they headache of using fabric that’s not made for what you’re doing is seldom worth the headache. I used drop cloths once to make draperies in order to save money, and even though I was a very experiences seamstress at the time, I wanted to pull my hair out during the process. I coudn’t get any of my seams to lie flat, and on the finished draperies, the side seams puckered and twisted. I just learned the hard way that it’s best to use actual decorator fabric for projects like that.
Thank you so much for your informative step-by-step instructions. This was my first time making window treatment with lining and pleats. It took me a while and I was constantly thinking that I would not get the band to look as great as yours! Well, thanks to your instructions and pictures, it came out beautiful. I have 4 double windows measuring 80 inches across each. Just finished the first one and I’m so happy with it. I’m sure the next 3 will not rake as much time as the first one. Also, your guidance as to the measurements of the fabric, pleats and band were right on! I used a contrasting fabric for the pleats which was the same contrasting fabric I used for the band. Thanks again for your awesome tutorial.