Refinishing My Concrete Kitchen Countertops – Part 1 of 3
Yesterday was an exciting day. Work finally got underway on refinishing the concrete countertops in my kitchen! Just to be clear, these are solid poured-in-place concrete countertops. These aren’t the kind of “concrete countertops” that are a thin concrete product troweled over plywood or laminate countertops.
If you’re new around here, or missed my previous posts about my countertops, here’s the quick rundown.
I have concrete countertops that my brother and I poured in 2014. I wanted bright white, but they turned out more of an antique white/taupe color. Then I proceeded to use a concrete sealer that didn’t really work well.
So now, in 2017, I have dull, dingy countertops covered with stains. I’ve researched many different ways to refinish them, and finally decided on a polyurea coating that’s generally used on concrete floors, like garage floors. There’s only one company in town that uses this product, and they were willing to help me fix my countertops. And now you’re up to speed. 🙂
My brother came over yesterday morning to help me remove my cast iron sink. It was quite a chore. The sink itself weighs about 120 pounds, and it was pretty well sealed to the countertop by a thick layer of caulk. No matter how much I tried getting a razor blade between the lip of the sink and the countertop to cut away that layer of caulk, I just couldn’t get enough of it away to break the seal.
So my brother said, “You might have to leg press that sink to get it out.” 😀 It really seemed like the only way. So I lay down on my back perpendicular to the cabinets with my legs inside the cabinet and my feet firmly planted on the bottom right side of the sink, and then I pushed with all of my might.
My first try was a bust, as I just slid across the very smooth, newly-polyurethaned floor. On the second try, I held myself in place (I think I grabbed onto the cabinets with my hands to hold myself in place) and pushed up again with my feet against the bottom of the sink. After about 15 seconds of pushing with all of my strength, the seal finally broke and the sink lifted up. We were then able to lift that heavy sink up and out of the countertop.
Anyway, the guys got here about noon yesterday to start on the countertops. I posted a few videos on my Instagram stories (you can click here to follow me on Instagram), so you have about three more hours if you want to click over and see those before they disappear.
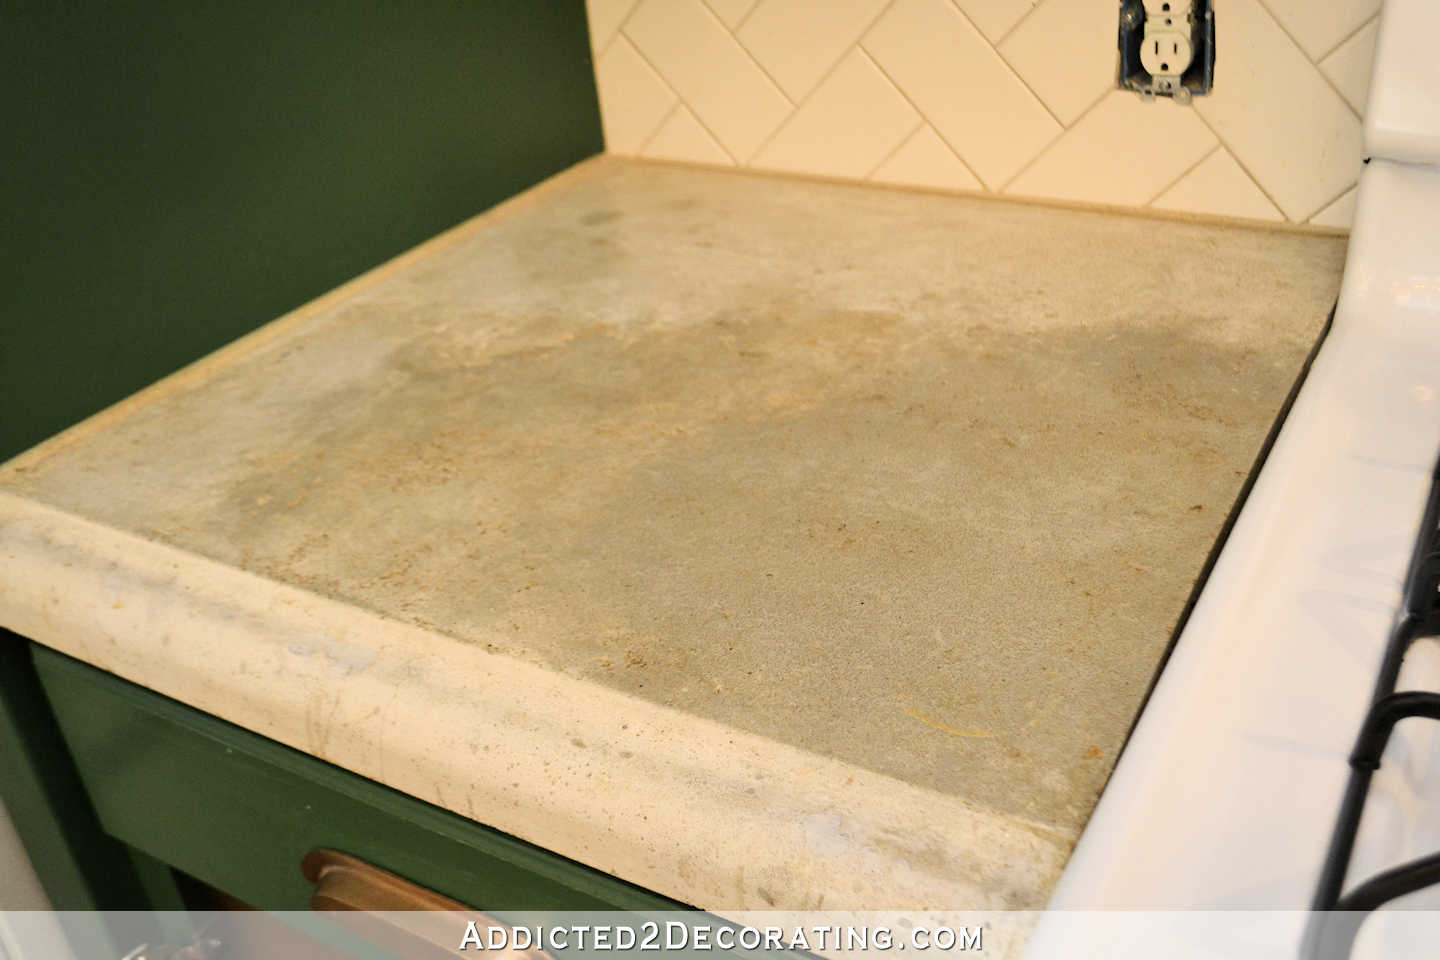
I tried to get some quick pictures of the countertops before they started, and then during the process, but my camera was having a hard time (not sure what the issue was) and I was trying to hurry so that I wouldn’t be in their way and cause them any delays. But here’s a look at the discolored, stained countertops before they got started…
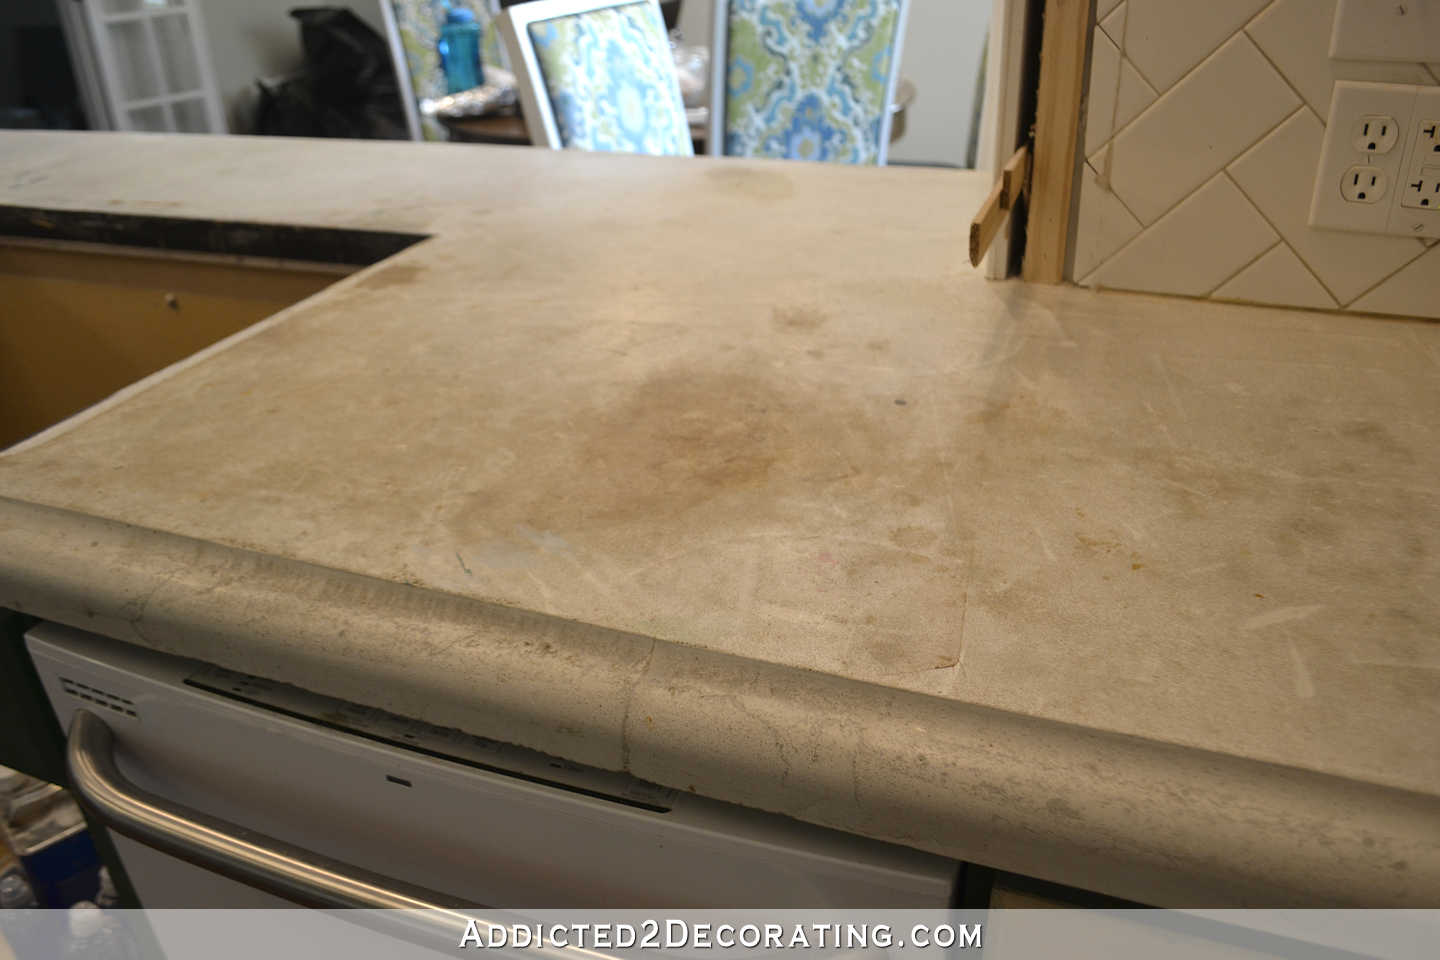
This picture is interesting. Look at the strip that was covered by the lip of the sink. These counteretops were so much lighter and brighter when they were new!
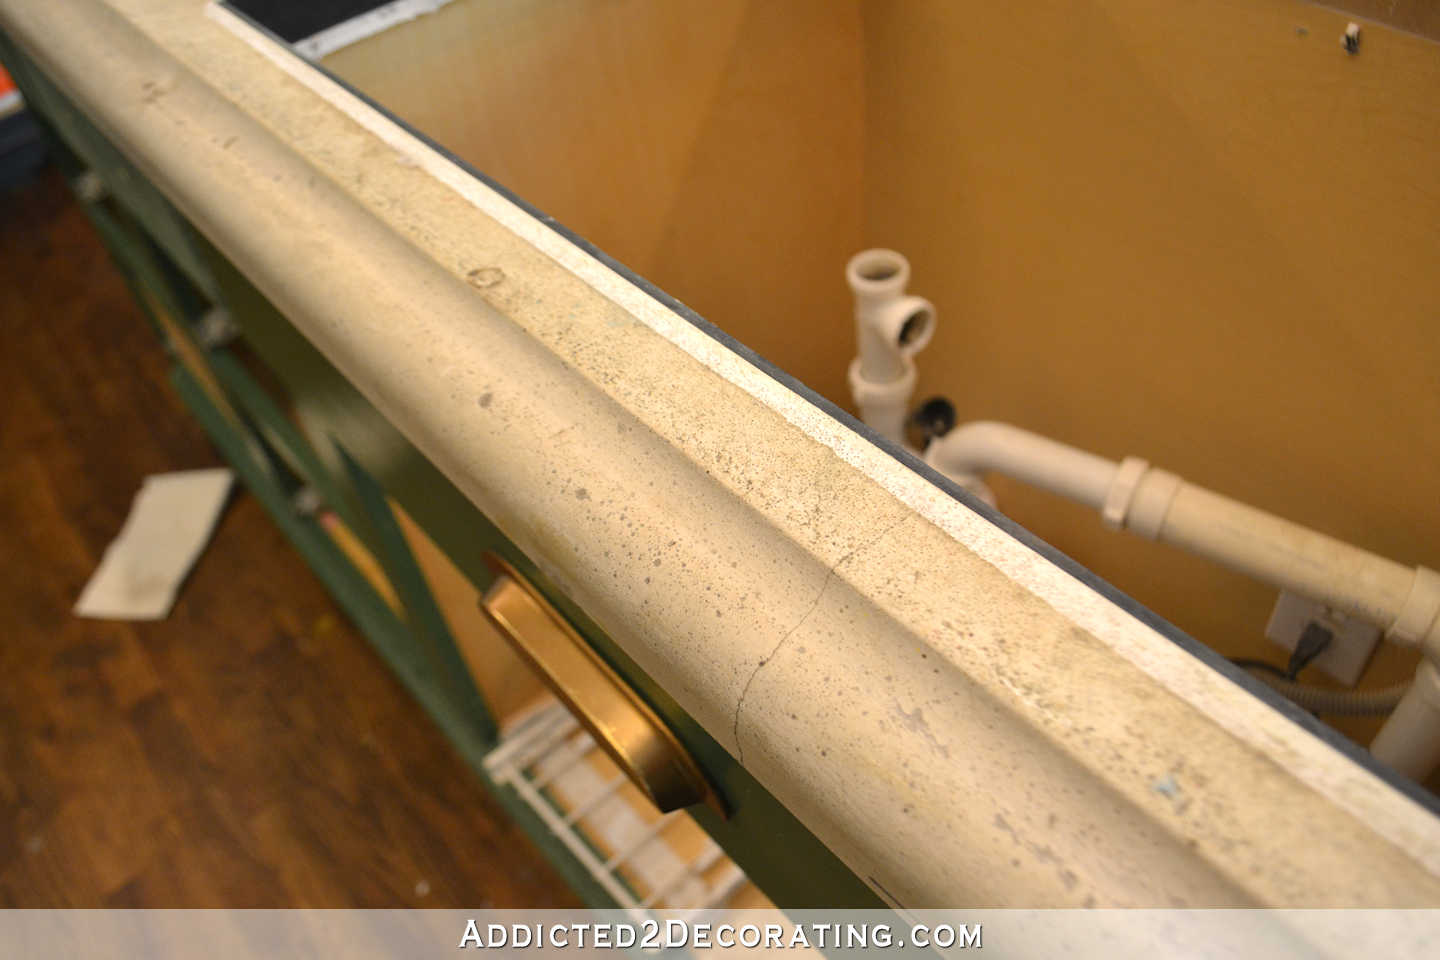
They’re not just darker now because they’re stained, because other than the areas that are obviously stained, the countertops are a consistent antique white/taupe color, even in areas where the countertop rarely gets used. It’s almost like the sealer I used (or the top layer of the concrete itself) got darker as it got older, kind of like oil-based products yellow over time.
But they were definitely much lighter in color when they were newly poured in 2014.
This area to the left of the stove was the absolute worst. It was the first countertop we poured, and we had no idea what we were doing or what to expect, so it turned out the roughest. Having a rough concrete countertop full of pits and divots right next the stove, and right next to the burner I used the most, is a terrible combination. This became impossible to clean.
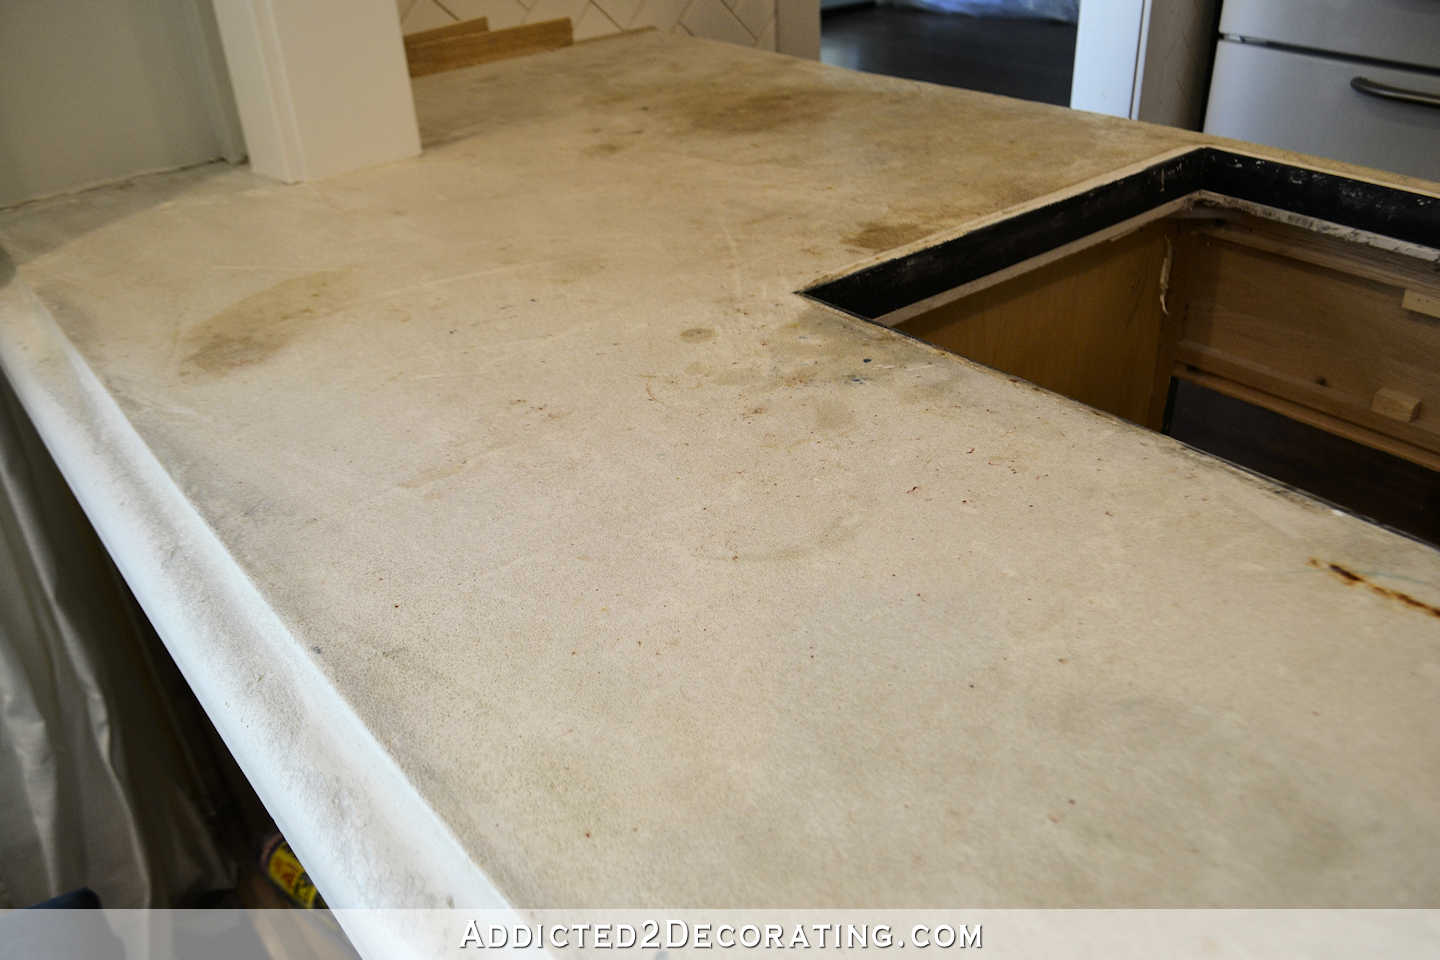
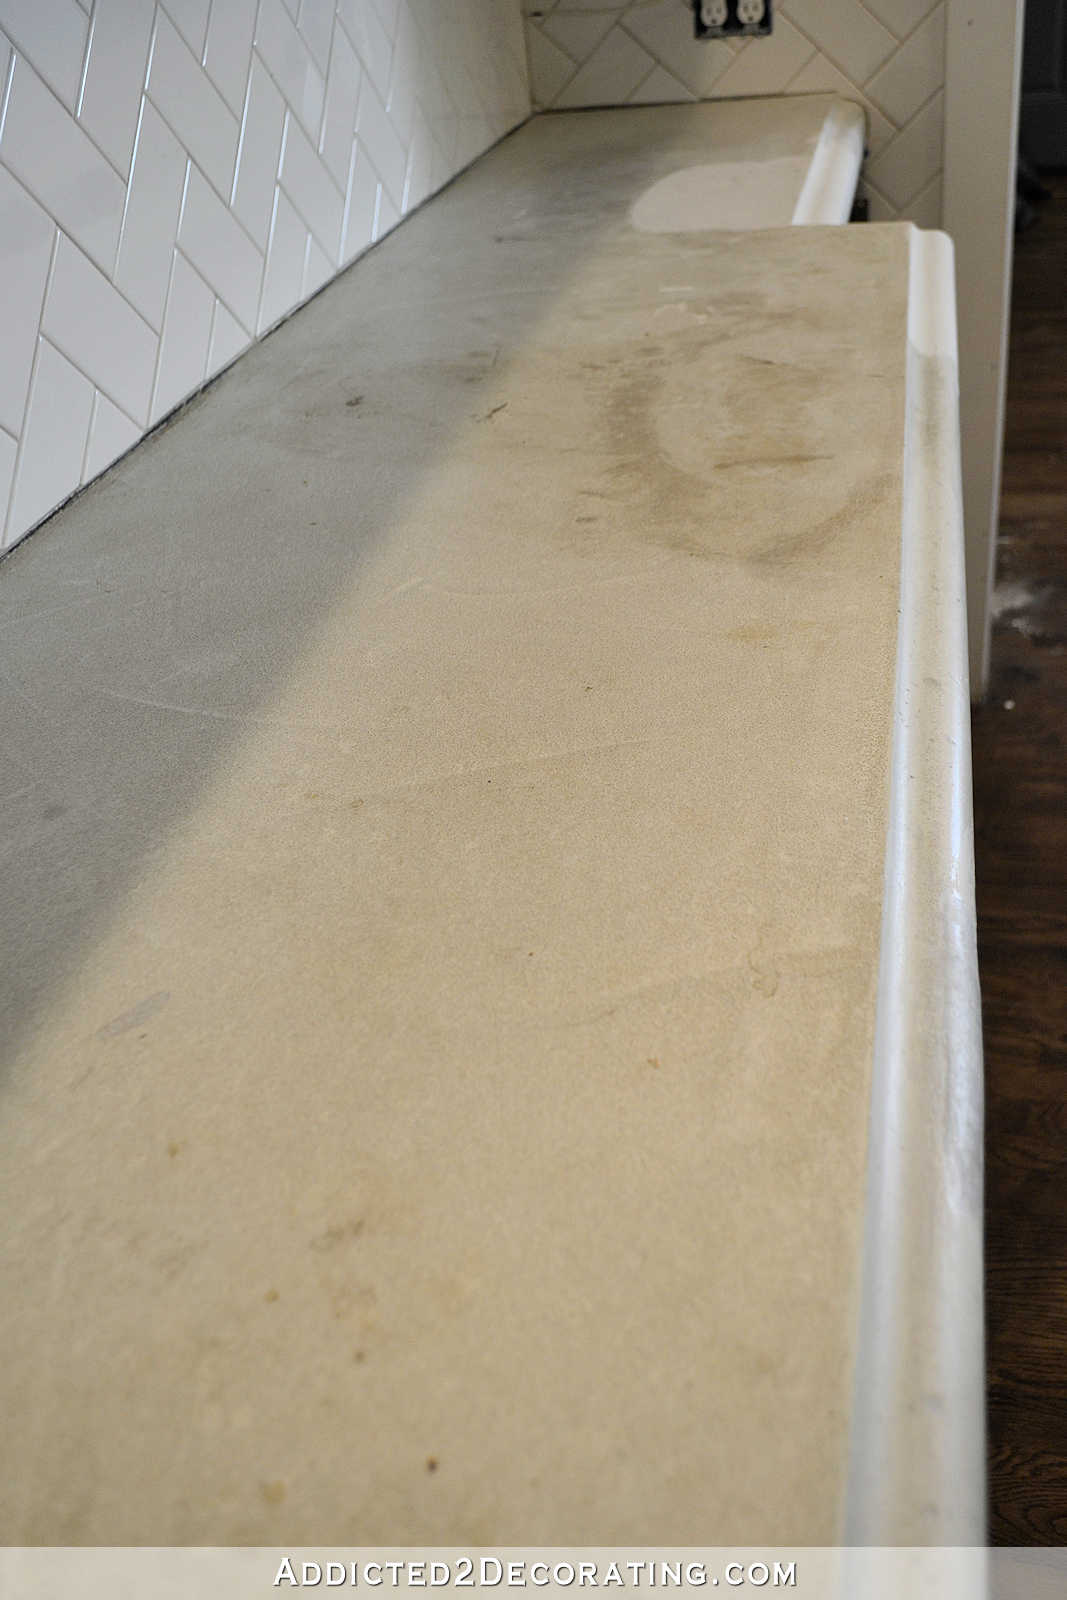
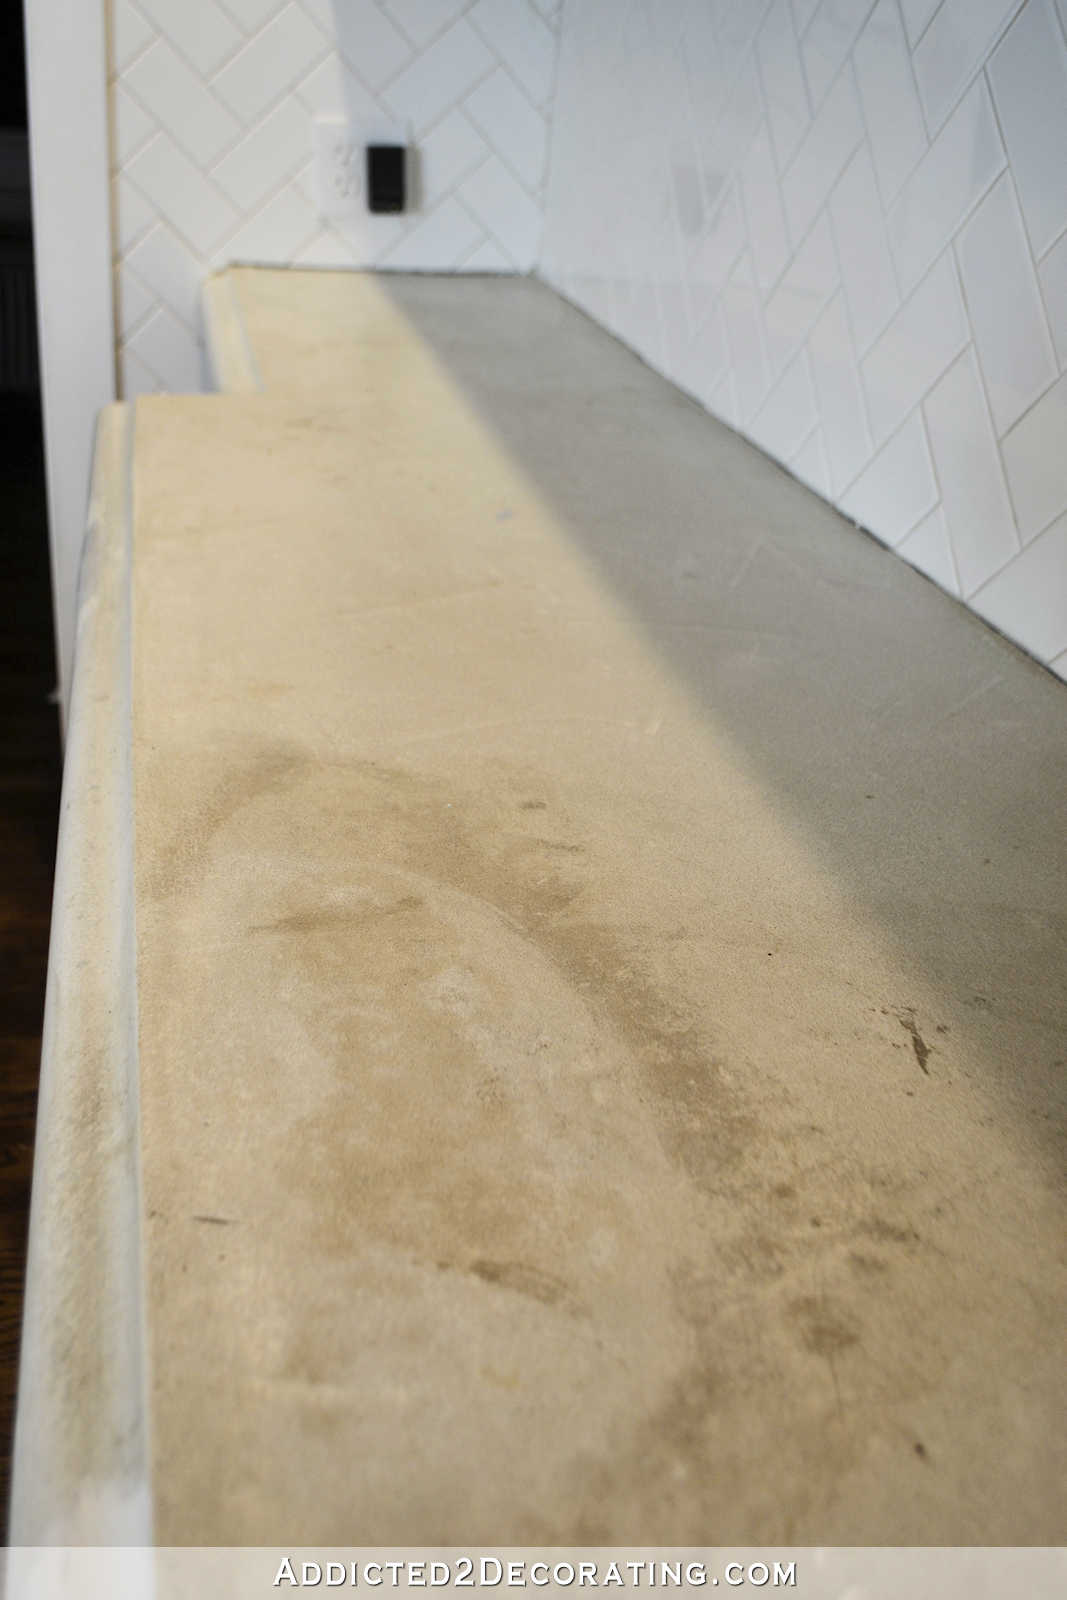
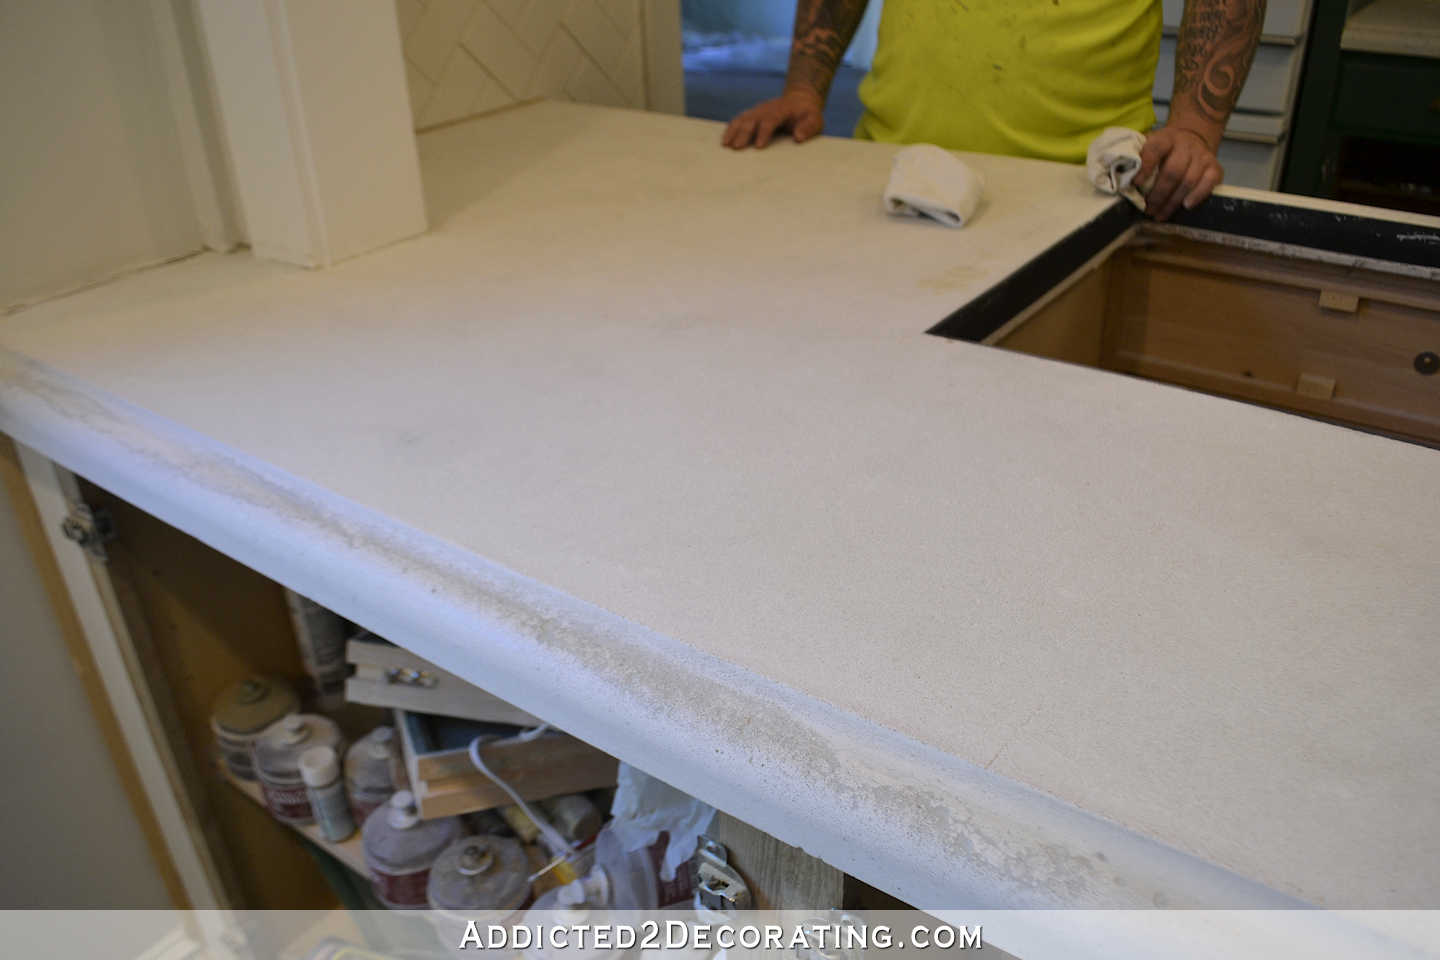
The first thing they did was grind the top of the countertops. The grinder looked like an oversized rotary sander, but instead of a sanding disc made of paper, it had a rough metal attachment on it. It was connected to a big vacuum that stood about four feet tall that sucked up most of the dust.
The countertops looks a thousand times better just after the the top layer of discoloration, stains, and unevenness were ground off.
I’ll admit that I was very tempted to tell them to just put a clear coat over this and be done with it. Very tempted. I mean, it looked a thousand percent better by this point. There were very few stains still visible, and the countertop was basically back to its original color.
But I resisted that temptation. While they were lighter, they still looked like a dingy antique white. That’s not what I want. I want light, bright and white, and I would have been very disappointed had I settled for antique white.
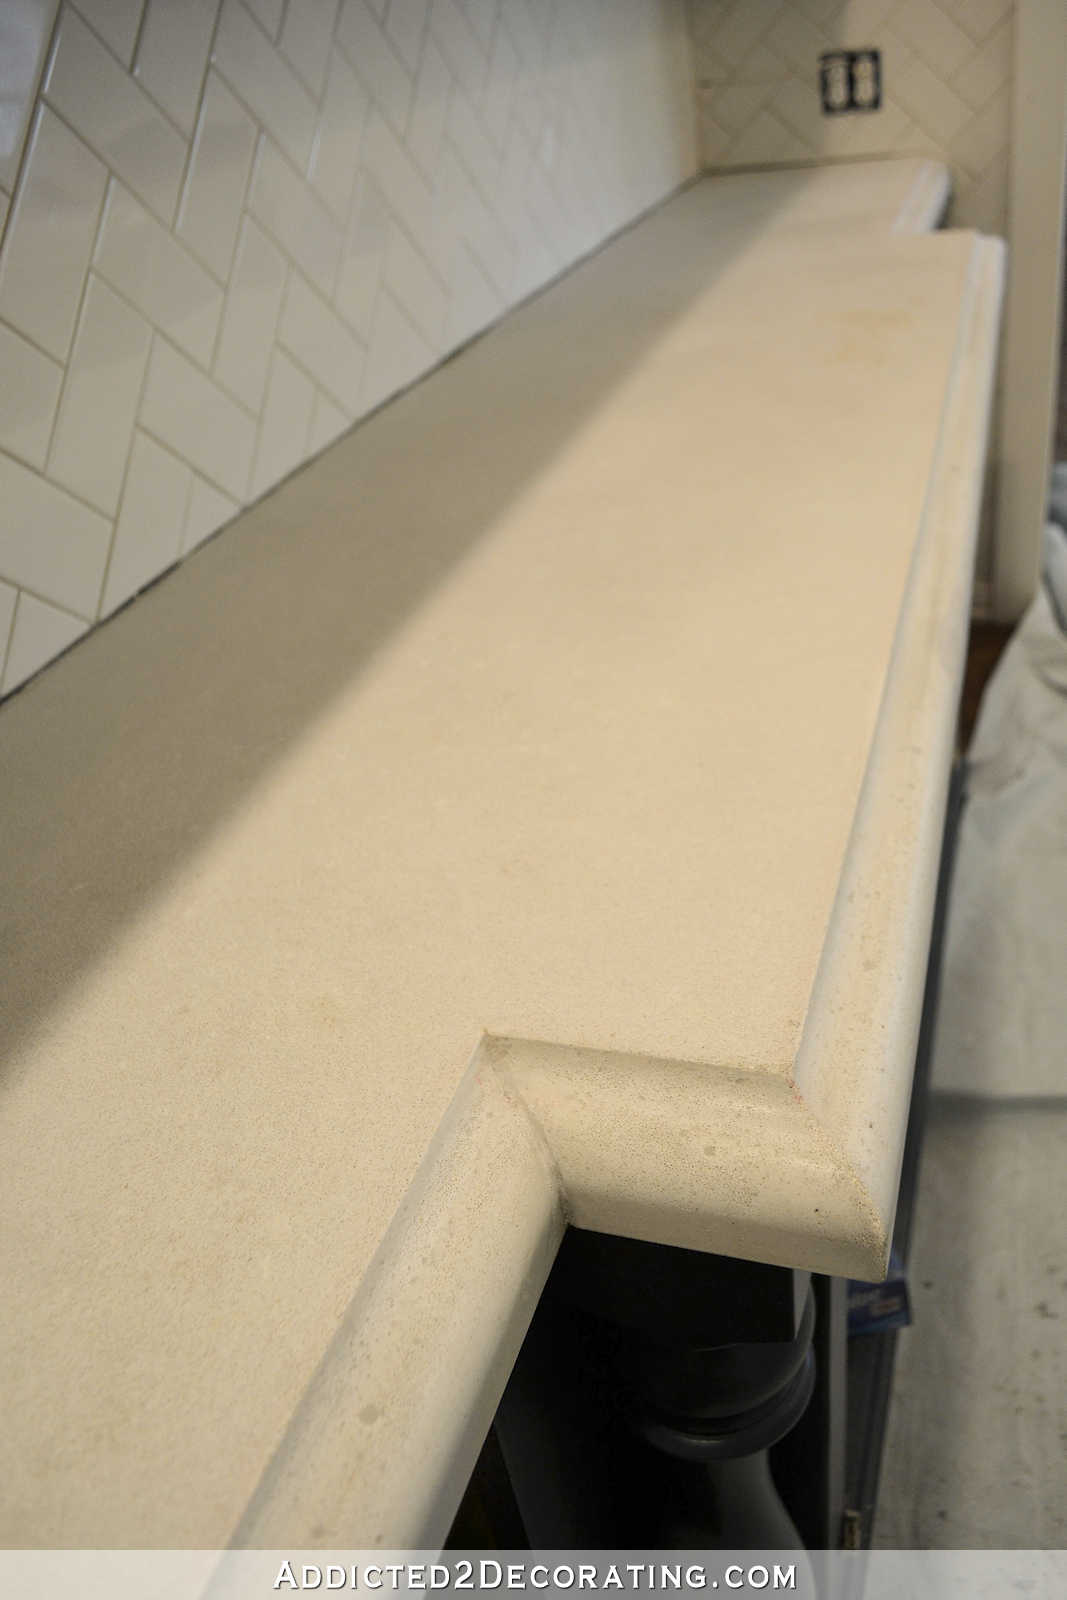
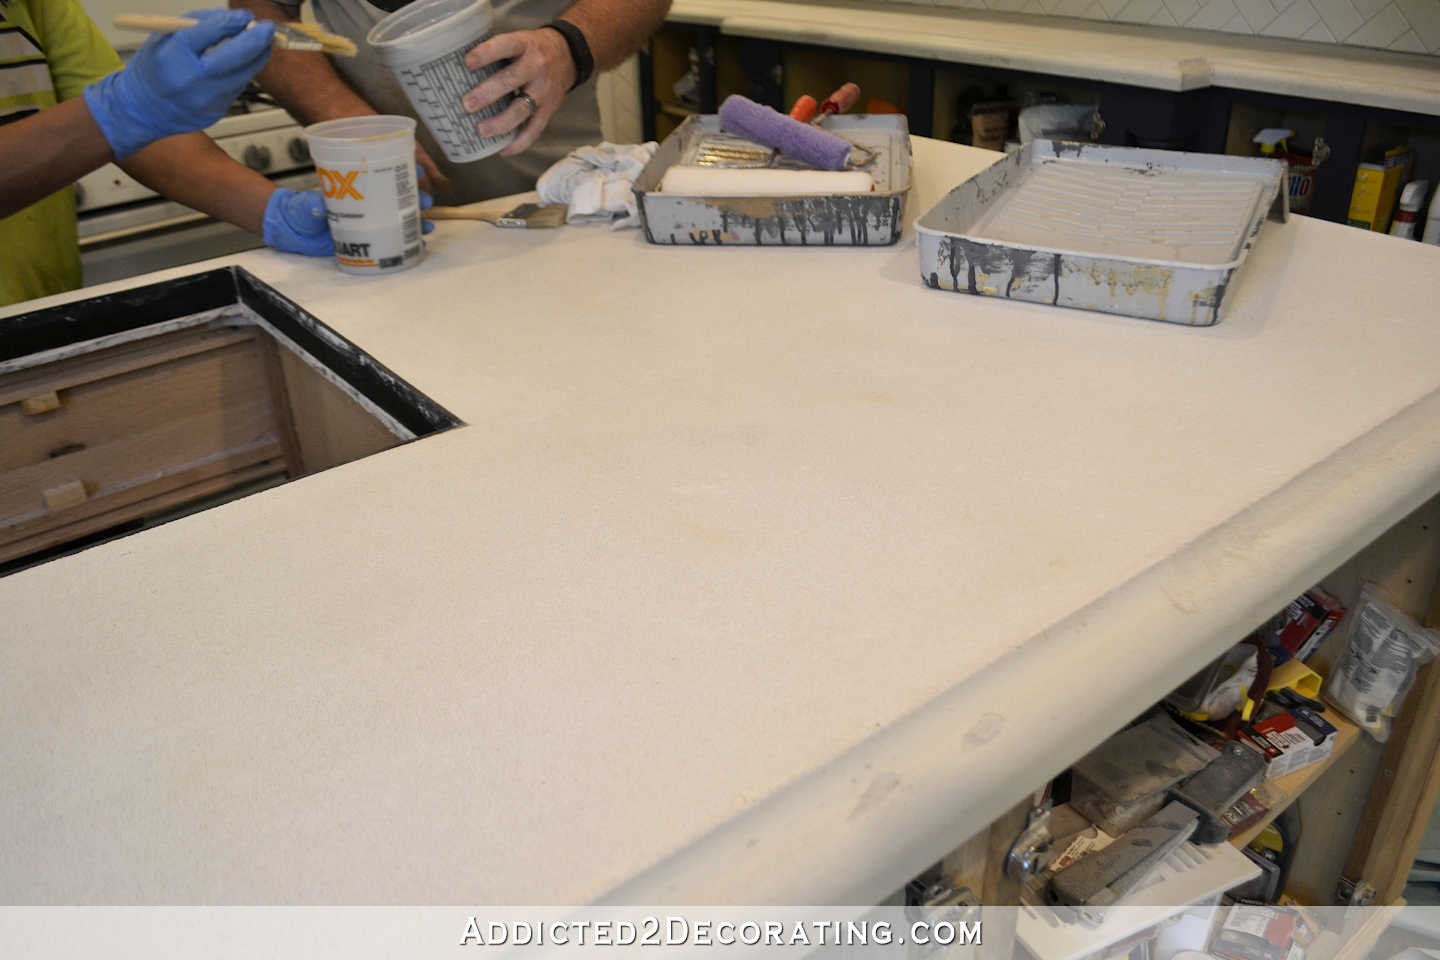
Next they mixed up some very stinky light gray primer. They used chip brushes to cut in and brush the ogee edges, and rolled the large areas.

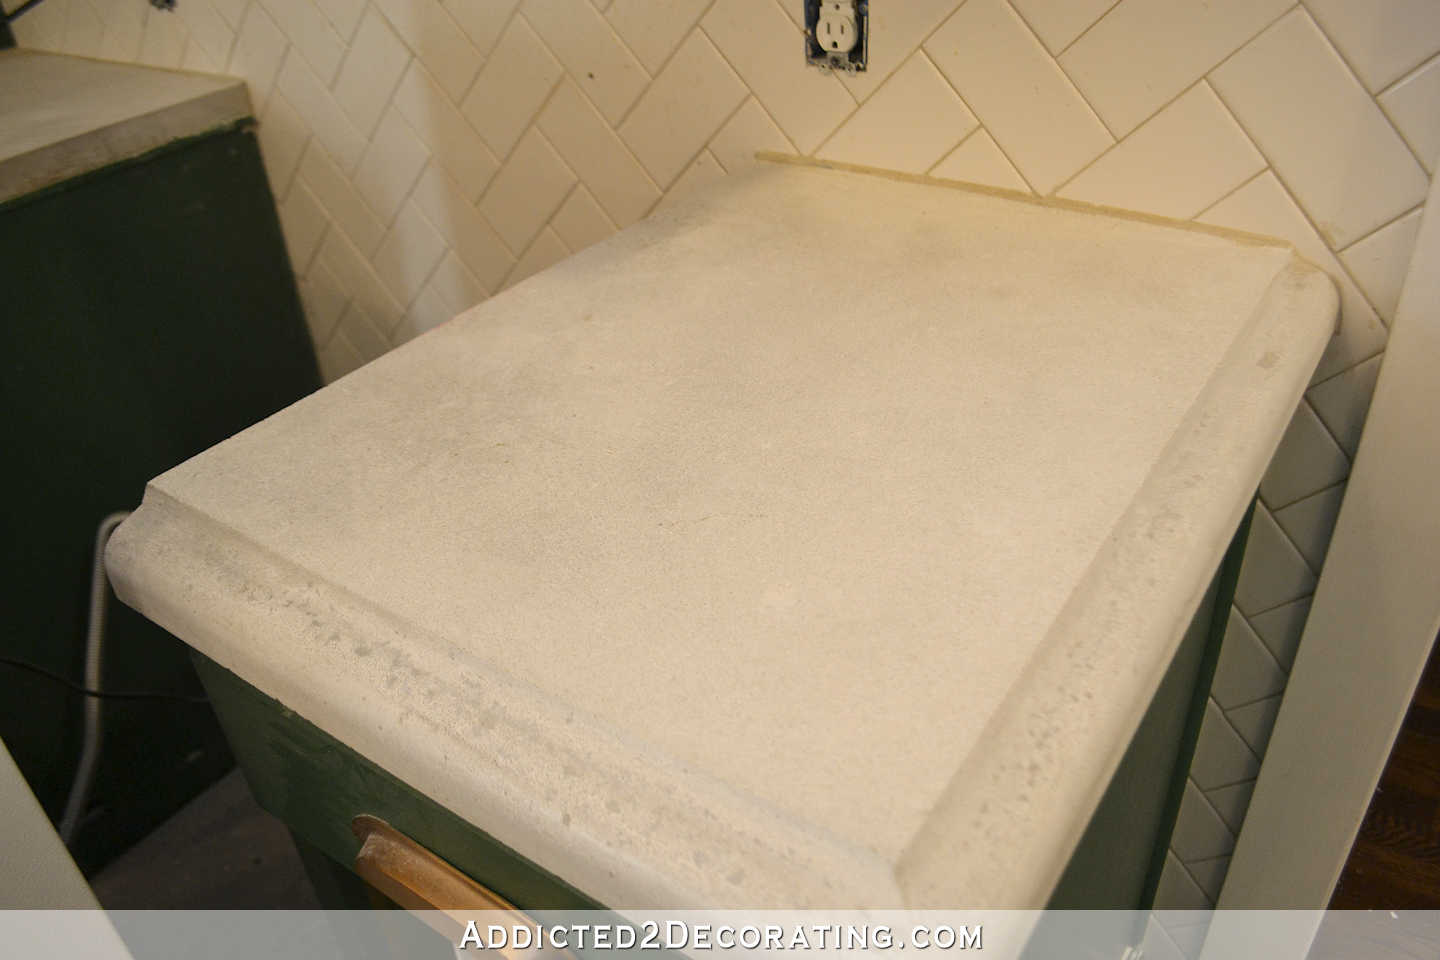
And here’s how everything looked right after the primer was applied…
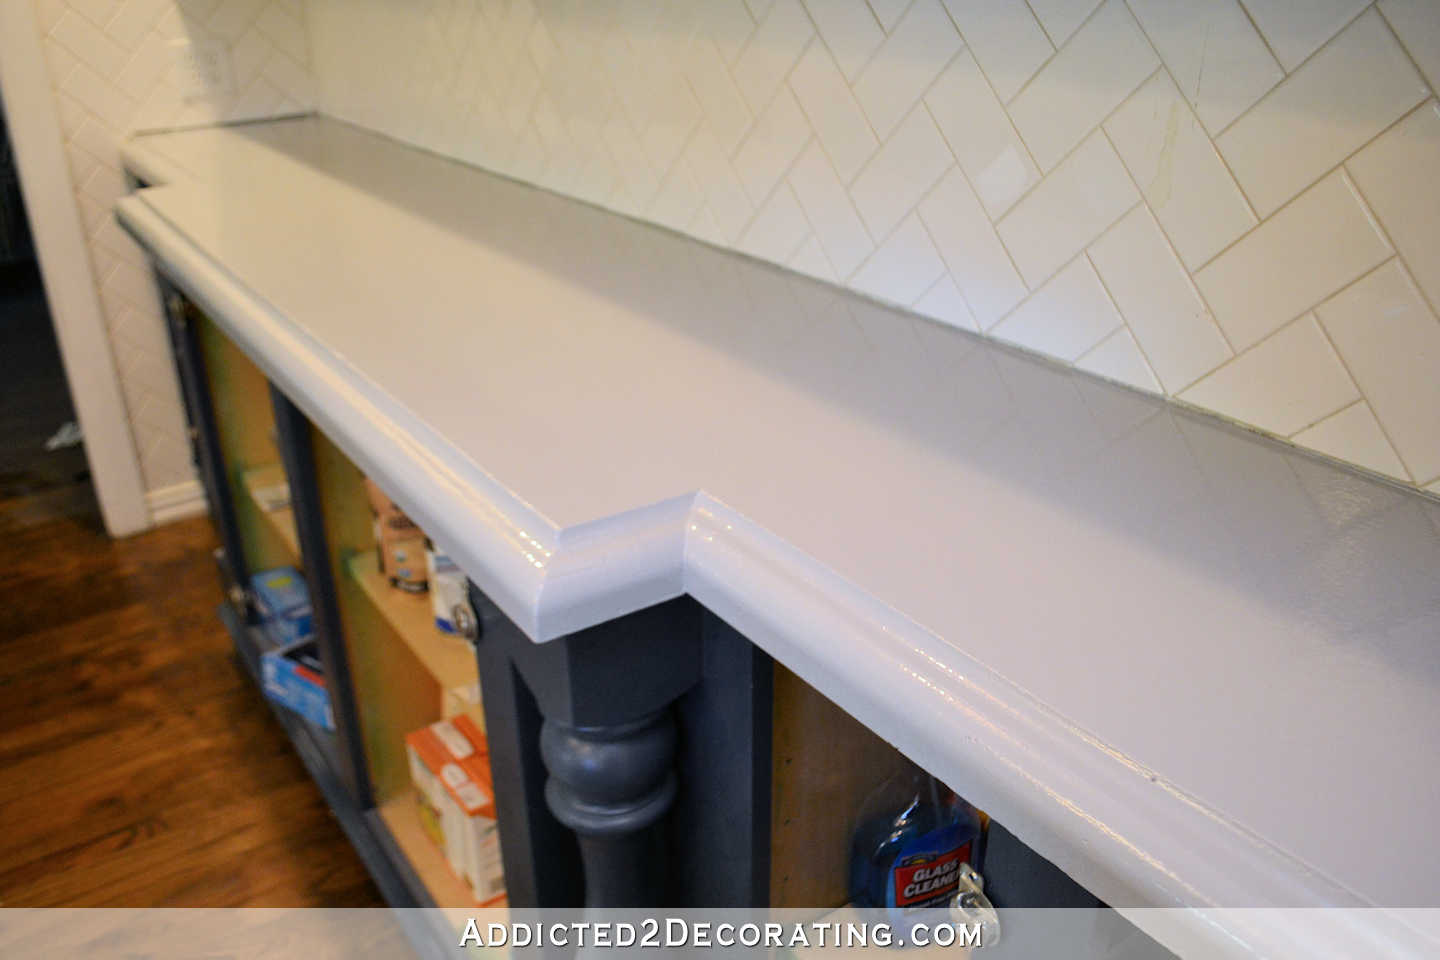
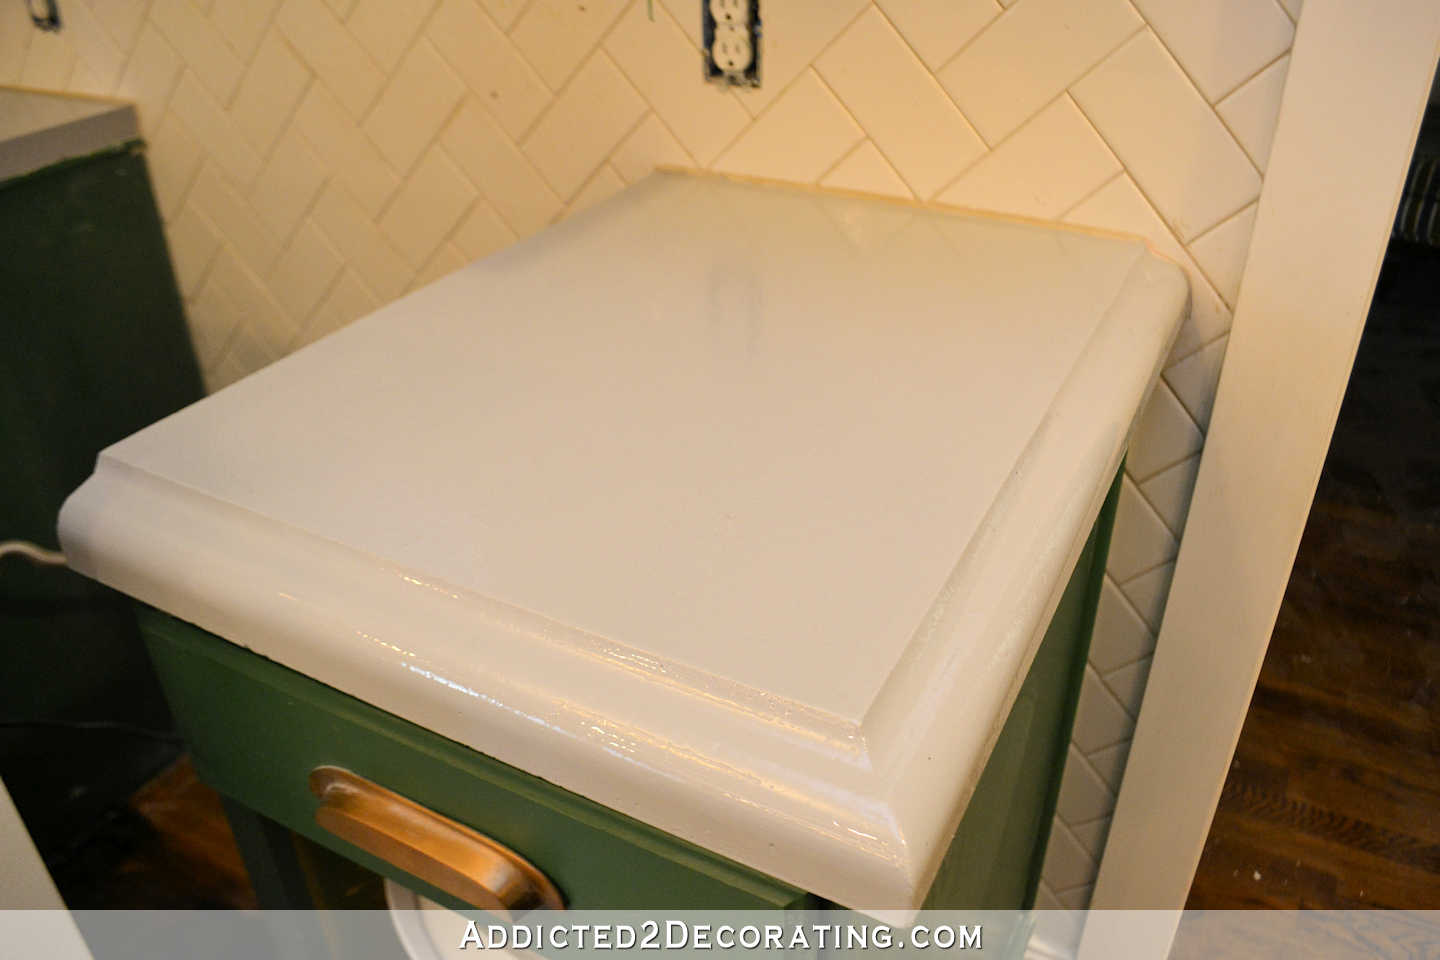
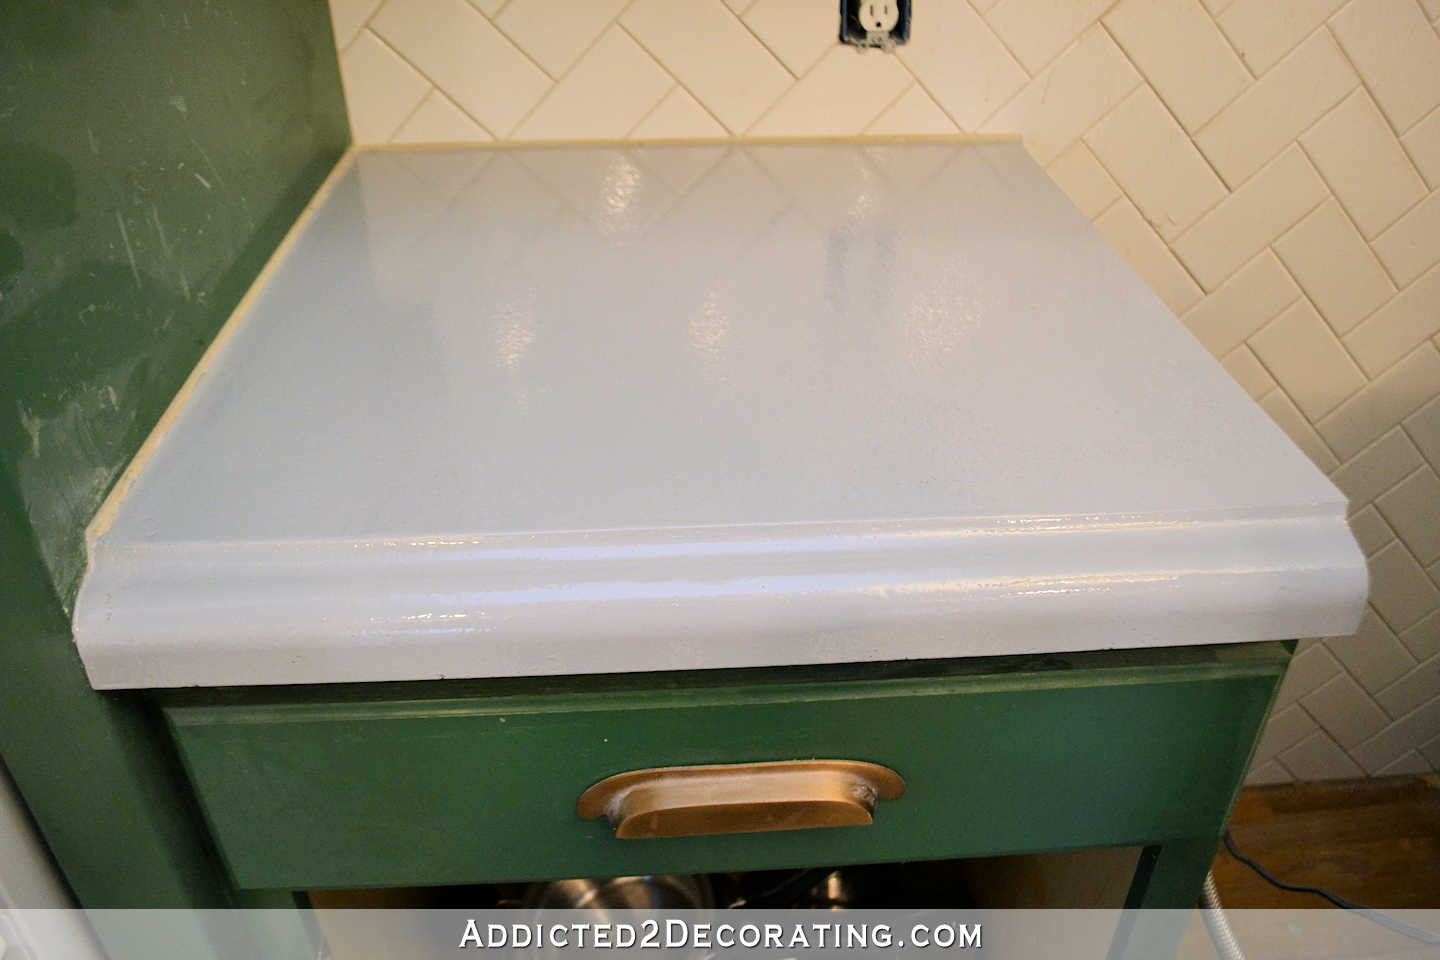
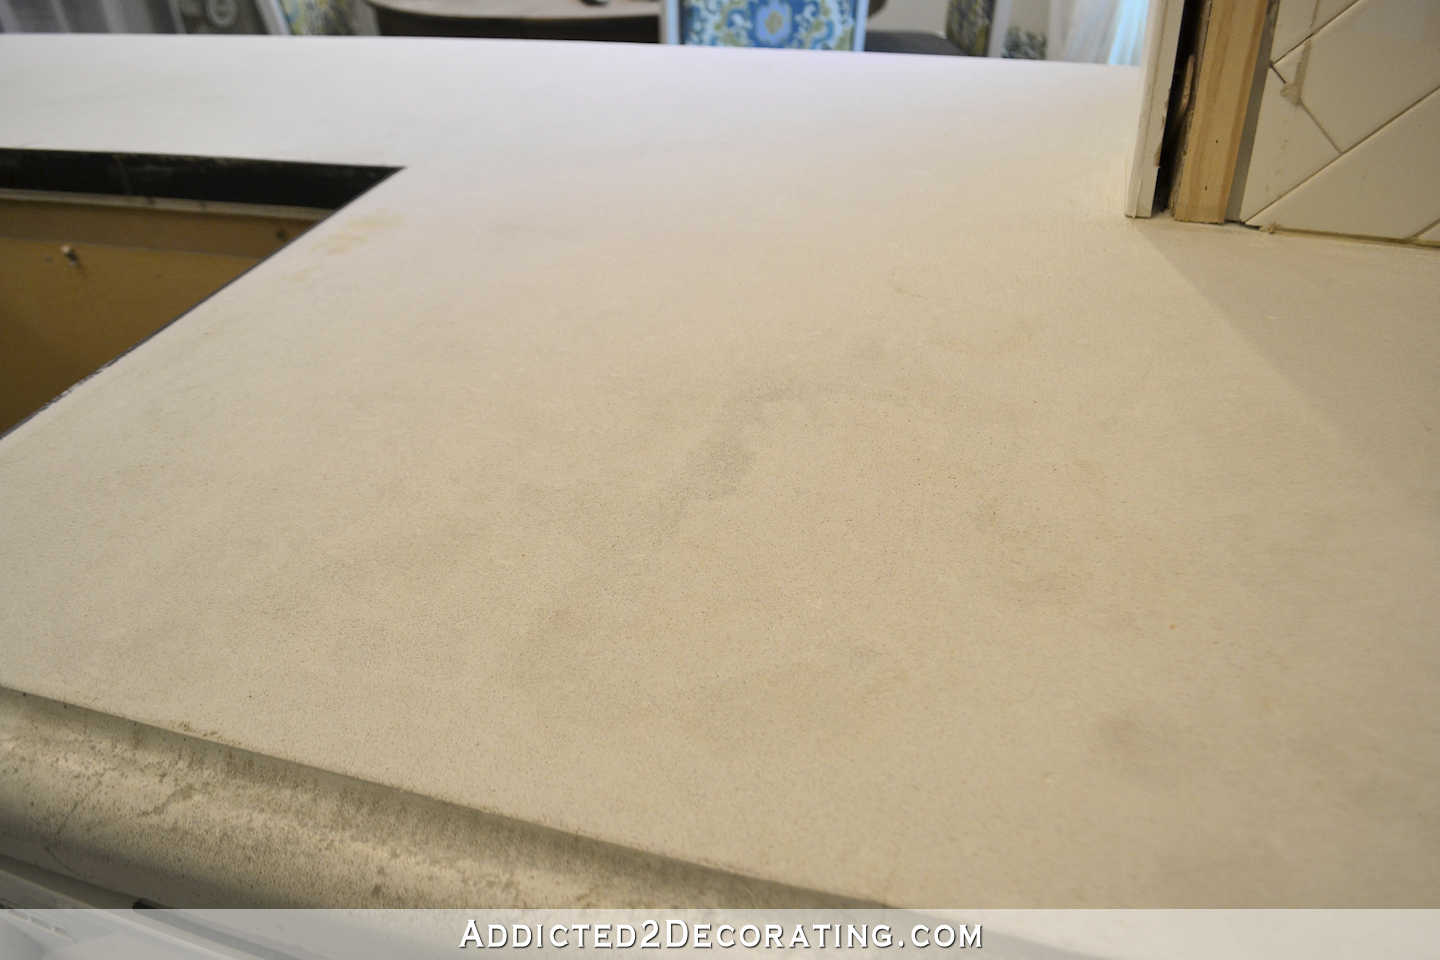
The primer is very interesting stuff, and I kind of have mixed feelings about it. It was very thick, started to set up in about 15 minutes, and then was incredibly sticky. He told me it would dry in about two hours, and as it dries, tiny little bubbles would form on the surface. Once it stopped feeling sticky, I could sand it and then paint it.
Well, it took about five hours for it to stop feeling sticky. I expected the shine to go away at least some as it dried, but it didn’t. When it was dry, it was just as shiny as it was when it was first applied and very wet.
Here’s how it looked last night at about 10:00.
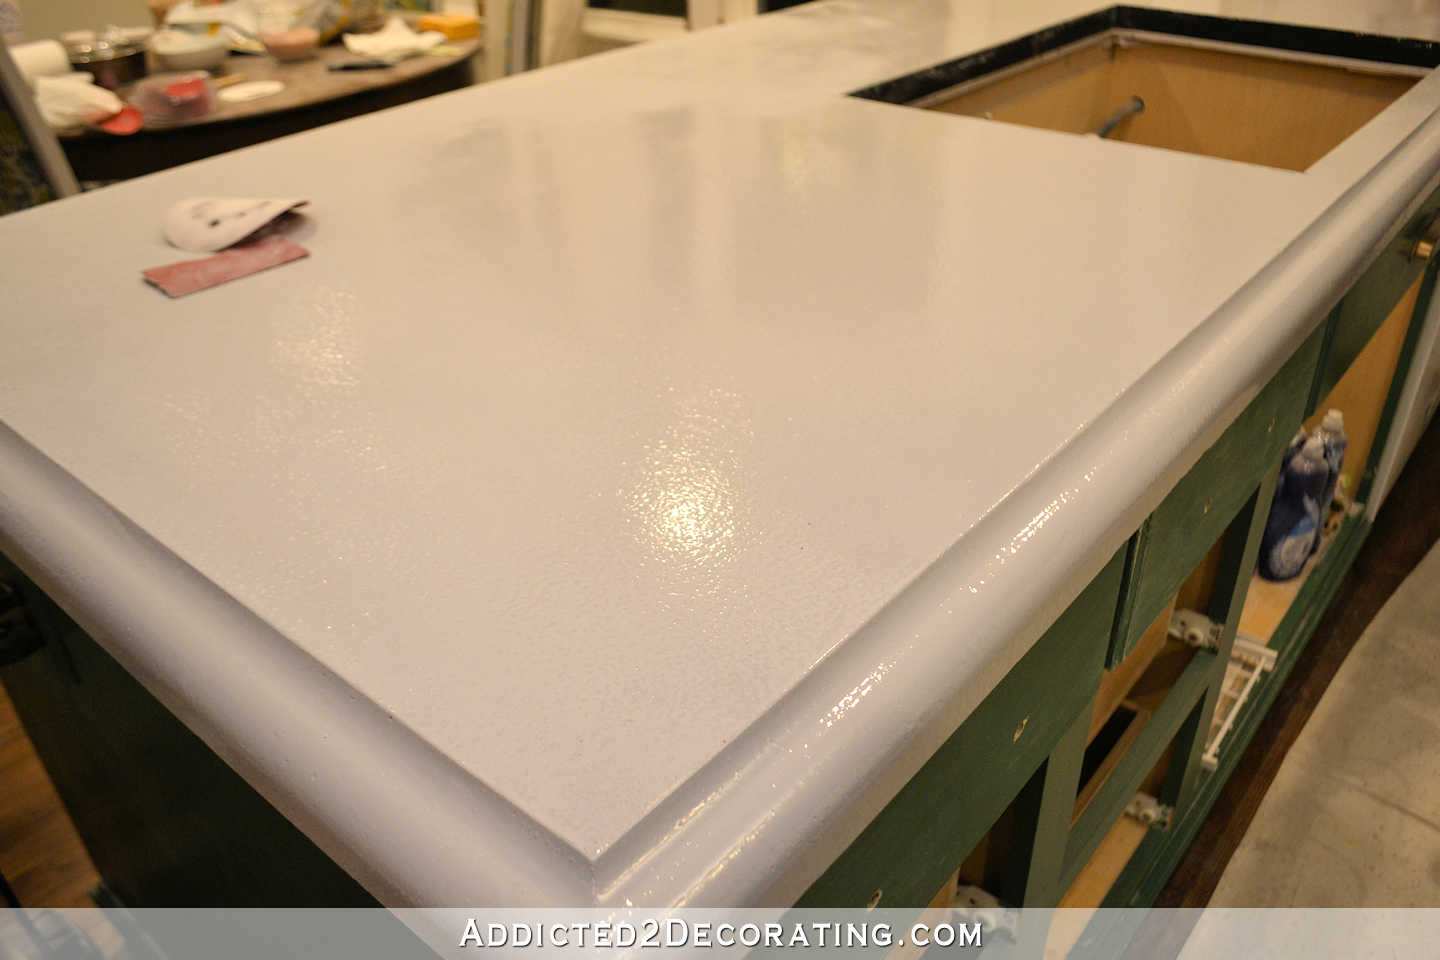
The primer feels like a soft plastic, so sanding it is very strange. And in fact, it’s very difficult to sand.
I do understand that it’s a special kind of primer, and so it being thick, super sticky, and feeling like soft plastic is actually a good thing. Concrete naturally expands, contracts, and sometimes cracks. This product is made to be strong yet flexible to cover and prevent cracks. I get it.
But in hingsight, I almost wish I had just had them grind/sand the countertops, and then let me use my go-to oil-based primer on them instead. After the sanding and grinding, the concrete was so unbelievably porous that I have no doubt my favorite primer would have stuck to it very well, and it would have been sooooo much easier to sand.
But it’s too late for that now. 🙂 It looks like I’ll be spending my morning sanding plastic. Hopefully by noon, I can get to the fun stuff — adding a painted marble effect to these countertops.
I told him I was nervous about the painting process because I just wasn’t sure if I could get it to look right. He assured me there was no risk because if I paint it on and don’t like it, I can just stand it off and start over again. I can do that as many times as needed until I’m satisfied with the look.
Ummmm…that was probably the wrong thing to say to the queen of do-overs. I might be stuck on this project for a month. 😀
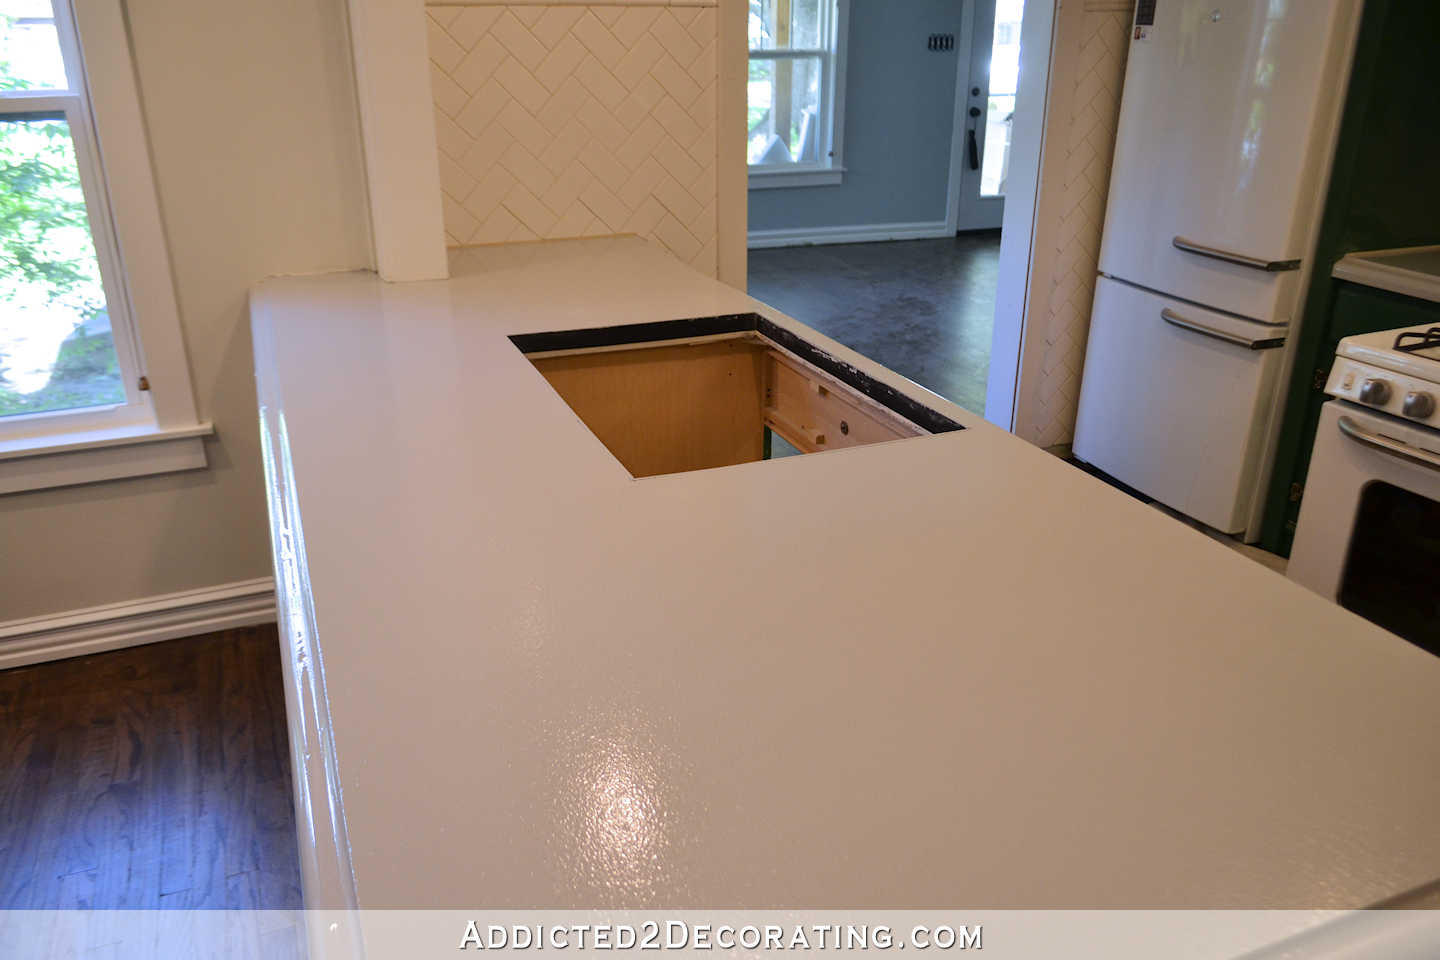
After I get the design painted on, they’ll come back and do the most important step — the clear coat of polyurea. Hopefully that can be done late today or even tomorrow so that I can get my kitchen back in working order. I’ll show my progress on my Instagram stories if you want to follow along there. If not, you’ll have to wait until next week to see how this project turns out. 🙂
Well, I’m off to sand some plastic. This should be interesting.
Update:
The refinished concrete countertops are finished! You can see the next part of this project here…
And you can see the final steps, as well as the finished refinished concrete countertops here…
Helpful sources and products:
If you missed how I poured my own concrete countertops by using a pour-in-place system, you can find that project in these three posts…

Addicted 2 Decorating is where I share my DIY and decorating journey as I remodel and decorate the 1948 fixer upper that my husband, Matt, and I bought in 2013. Matt has M.S. and is unable to do physical work, so I do the majority of the work on the house by myself. You can learn more about me here.


You got this, no worries!
Oh my gosh…. my back started hurting as you described “leg pushing” the sink… wow! And you painted a great picture with your words 😀
You are a typical creative artist. Take a deep breath, make the jump and go with the gut. You land on your feet everytime. It can be undone and changed if necessary. You have a vision.
I am amazed by the stains and the general change in color. For some reason my mind thinks concrete is so strong and tough that it wouldn’t be able to be stained/changed in that way. Goes to show you what I know! Clearly it is more porous that I expected.
Love the direction that you are going with bright, light, and white. I will make a huge difference in there.
Good luck with the sanding and painting! Can’t wait to see the results!
I saw your instastory and had flashbacks to when we removed our kitchen tile flooring. The only way we could get the thinset off the wood subfloor was to get a grinder, diamond bit cup blade and a dust shroud hooked up to our shopvac. I’d read that, that’s how professionals prepped concrete floors for painting, etc. and it worked, like butta!
All that to say, if you don’t like their primer, you can grind it off. Or have them do it. But then they probably wouldn’t warranty the work?
I highly doubt that this will have a warranty anyway since I’m doing part of the work, and using these products on kitchen countertops is kind of “off label” usage anyway. But the good thing is that if it gets a scratch or something, they can come in and repair the topcoat quickly and easily, and it’s pretty inexpensive.
Maybe this product will give you pristine perfect countertops, (especially with a thick plastic like sealer) but every concrete countertops I have seen were flawed and stained to some extent even done by professional masons. In general concrete although gorgeous, aren’t a great bet for a perfectionist, and marble wouldn’t be either. I could deal with flaws all day long, but I need my counters (sink as well) to look and feel bone dry after a pass or two with a bar towel. That is why I dislike my kitchen granite. Even after being sealed, granite feels wet to me no matter how much I wipe, especially around at the base of the faucet. In our last house, I had Corian the color of congealed day old grits, and I never thought they were beautiful but they were low maintenance and non -porous. All cooks need to know her personal peccadilloes before choosing a countertop, but since you write a DYI blog so nothing makes more sense than concrete. I am sure it has been addressed I still feel compelled to ask, are the products being used off label food grade or food safe?
Hi Kristi.
I have started to go back and read your condo blogs(I became HOOKED later during the green kitchen phase) I love hearing about your dreams for your brand new home!
You were so excited!!!! Even back then you talked about your LOVE of concrete countertops….but not the colored/stained ones. Are you sure that you want to paint them?
Other things you loved? Navy blue and
Teals:)
Its so fun learning more about you, my good friend Kristi from Waco, whom I have never met! lol
I’m sure I want to paint them. 🙂 I’m not a fan of dark stained concete countertops, but light, bright, and white is a different story.
How awesome is that?! I can’t wait to see the marble look! I assume the cat was in safely locked away? 😉 I still giggle about that. Leave it to a cat to add chaos to the mix. 😀
Oh yes. She spent the day behind closed doors in the sunroom. I can’t even imagine how I would have gotten that thick, sticky primer off of her feet had she jumped on the countertops. :-/
Not to mention the cat hair off the primer! lol
Interesting process and I’m glad you found a company in your area that can help you with it. Just remember that there is a randomness to the marbleizing so mistakes are no big deal. You’ve got this and I can’t wait to see how it turns out.
You are one funny woman. I can only imagine you sliding on the floor. You are also brave. There is no way I would use my legs to pry off a cast iron sink. I have one in the bathroom and my husband and I almost died trying to put it on top of the cabinet.
This is very cool. I’m really interested to see how your faux marble effect comes out as well as how well the flooring epoxy holds-up under regular kitchen use. I’ve seen formica refinishing products in the past and they don’t usually hold-up long, but this stuff is made for floors, so it should be a lot tougher.
Just curious. Did you ask them if the primer would bond with surfaces other than concrete? Like would this work over Formica, wood, or Corian? If it did, how would it compare per linear foot with the price of new countertop?
If you have not yet, be sure to check out Dianne’s ‘careers marble’ kitchen counter top redo:http://inmyownstyle.com/2017/01/painting-kitchen-countertops.html. Here’s another idea- go to Home Depot and get some marble tiles to use as ‘sample guides’ to keep your eye on how marble is veined. I think once you get going you could be tempted to go overboard. I think less is more. Can’t wait to see!
If you have not yet, be sure to check out Dianne’s ‘careers marble’ kitchen counter top redo:http://inmyownstyle.com/2017/01/painting-kitchen-countertops.html. Here’s another idea- go to Home Depot and get some marble tiles to use as ‘sample guides’ to keep your eye on how marble is veined. I think once you get going you could be tempted to go overboard. I think less is more. Can’t wait to see! Oh and by the way, your description of bench pressing the sink out was reminiscent of childbirth for me! Not a pretty picture, but worth the pushing for sure!