DIY Six-Drawer Console Table With Lower Shelf – Part 2 – The Completed Basic Build
I finished the basic build of my DIY console table yesterday, and I actually had to do the last 20 minutes of work by the light of my iPhone. But I got it done!
Please note that this is a multi-post project. If you missed Part 1 of this project, click the title below.
Of course, this is the basic build, which means that I still have all of the finishing and final touches — wood filling, sanding, staining or painting, adding hardware, etc. But so far, this is what it looks like…
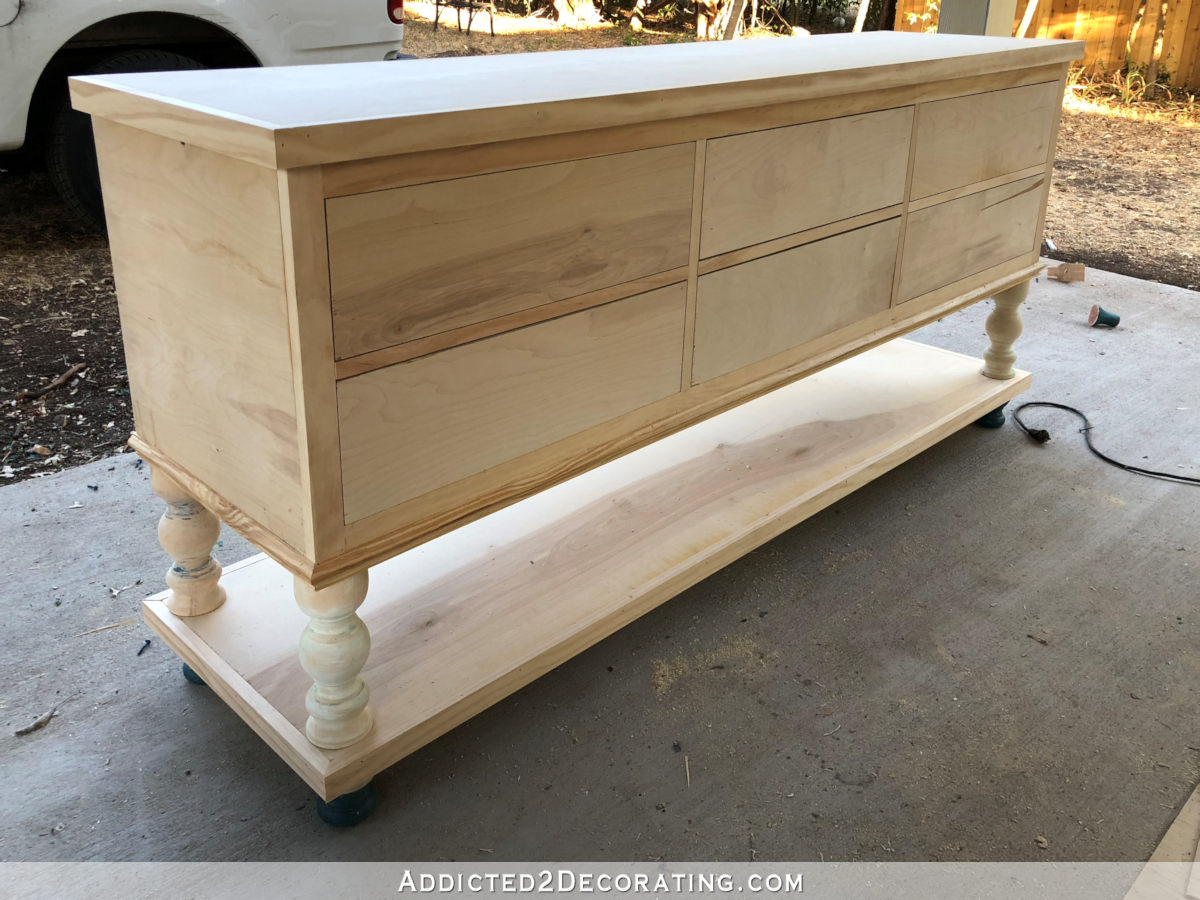
At the end of Part 1 of this project, the progress looked like this…
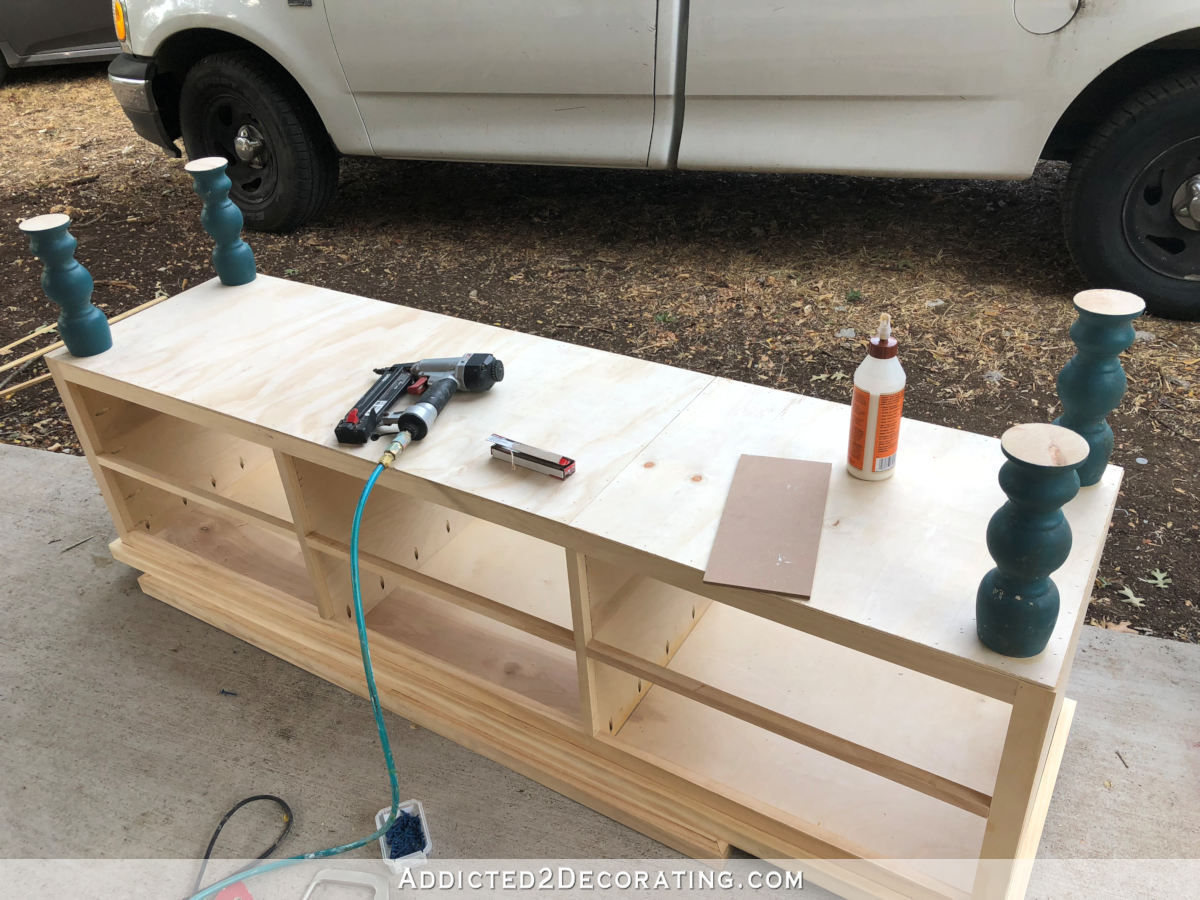
I built the console table upside down, and I had build the top case and attached the large leg pieces.
Before continuing with the build, I stripped the paint off of the legs. I also ended up removing them from the original positions (I had inset them too far), adding trim around the bottom of the the top section, and then placing the legs back on as close to the corners as possible. (You can see the trim and new leg placement in the photo below.)
Then I built the lower shelf the same way I did the top of the table, except that on this shelf I added 1 x 2’s on all four sides. I built this right-side-up, using the legs as a worktop.

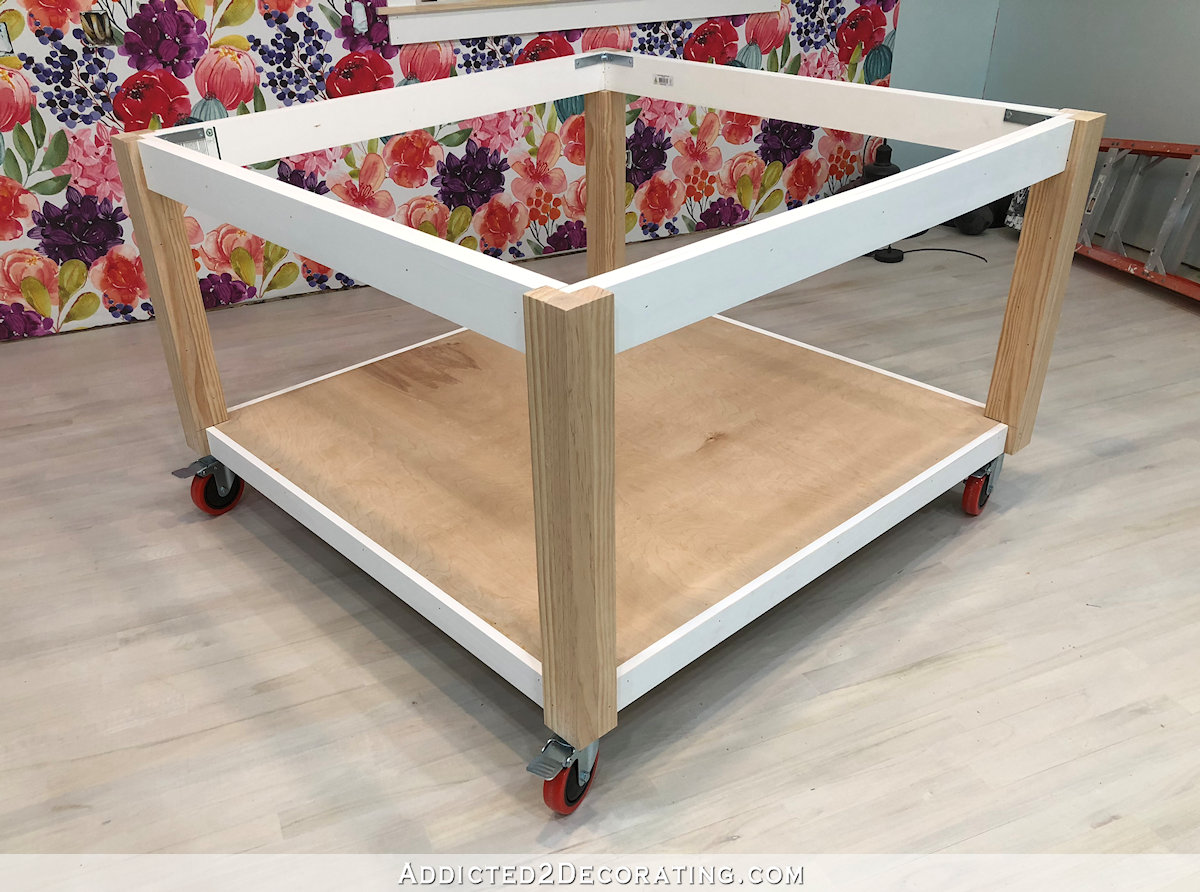
With the lower shelf put together, I flipped it over and attached it to the large leg sections with wood glue and 16-gauge 2-inch nails through the shelf plywood and into the legs.
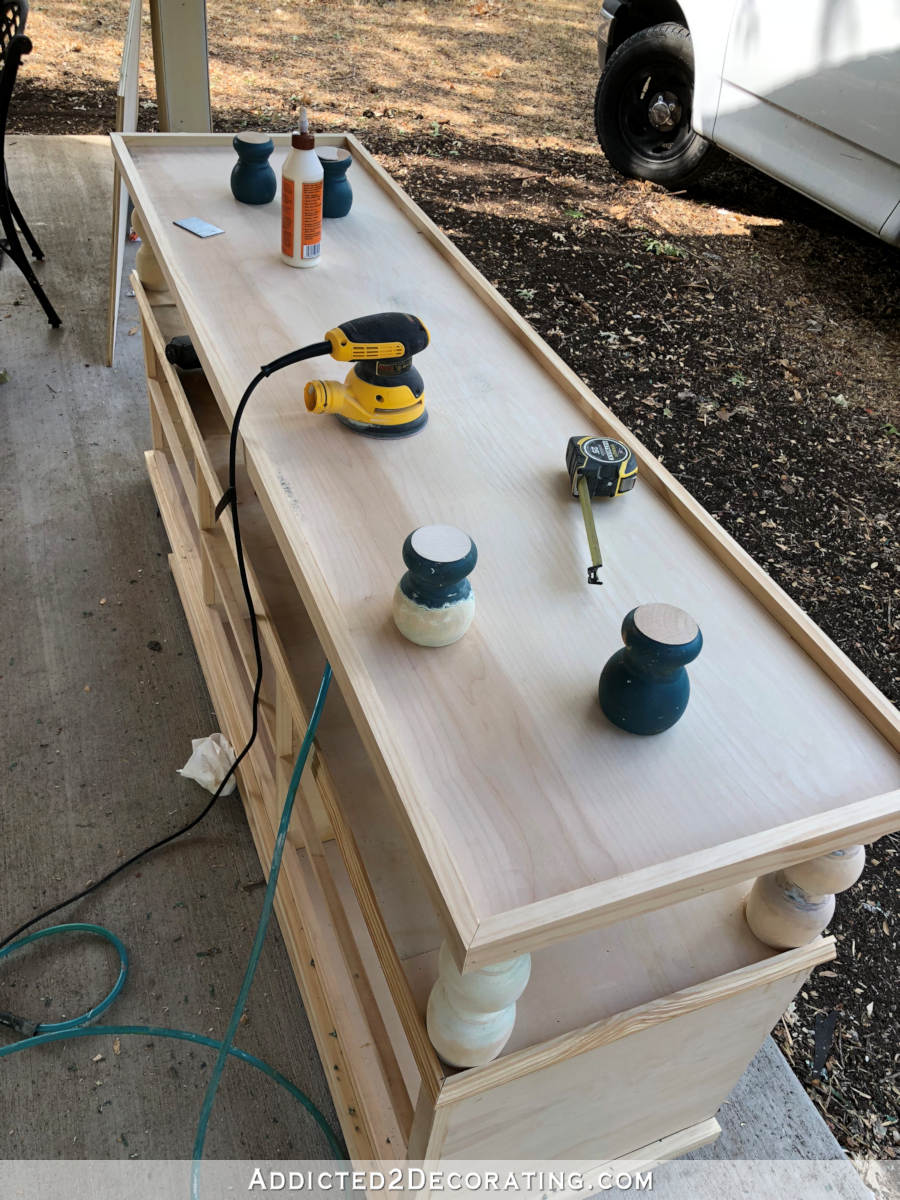
Then I attached the smaller leg portions to the bottom of the lower shelf. You can see that I used a different portion than I had originally planned. As it turns out, the pieces I had originally planned to use as the short lower leg pieces looked way too skinny and skimpy for such a large console table.
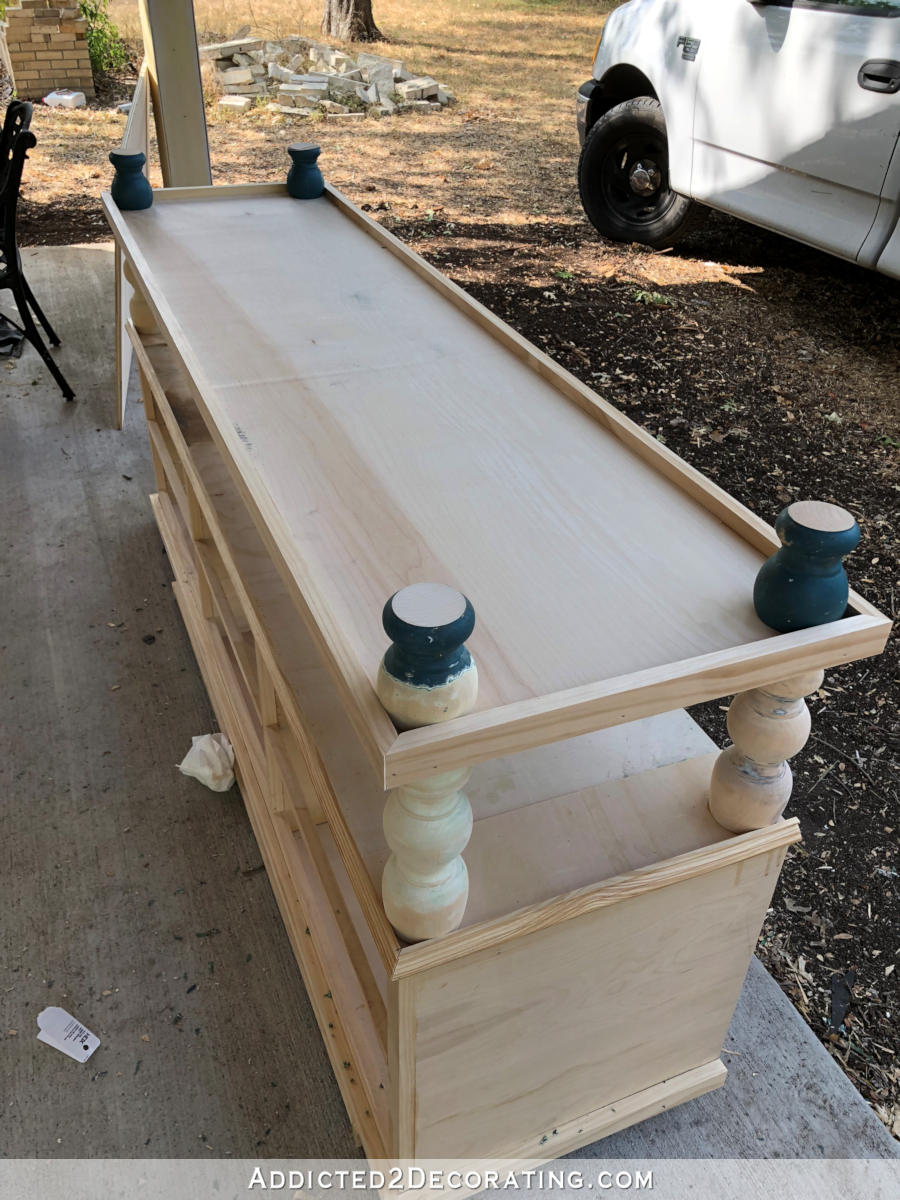
And yes, a reasonable person would have stripped those before attaching them, but I was way too anxious to get this build finished. 😀
I was finally ready to set the console table right side up…
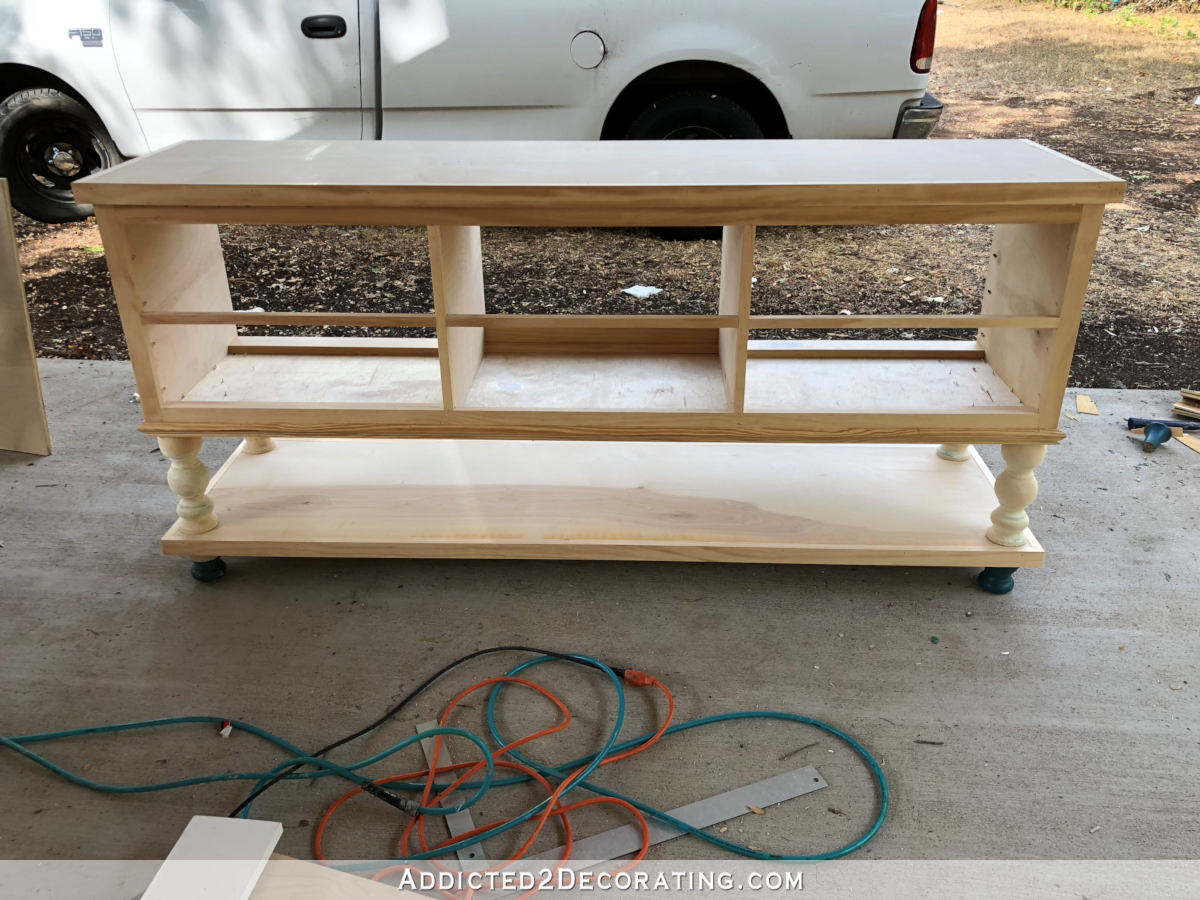
Next, it was on to the drawers. I started by cutting pieces of plywood using my table saw to fit inside the drawer openings, allowing about 1/16 inch of space around each side of the drawer front.
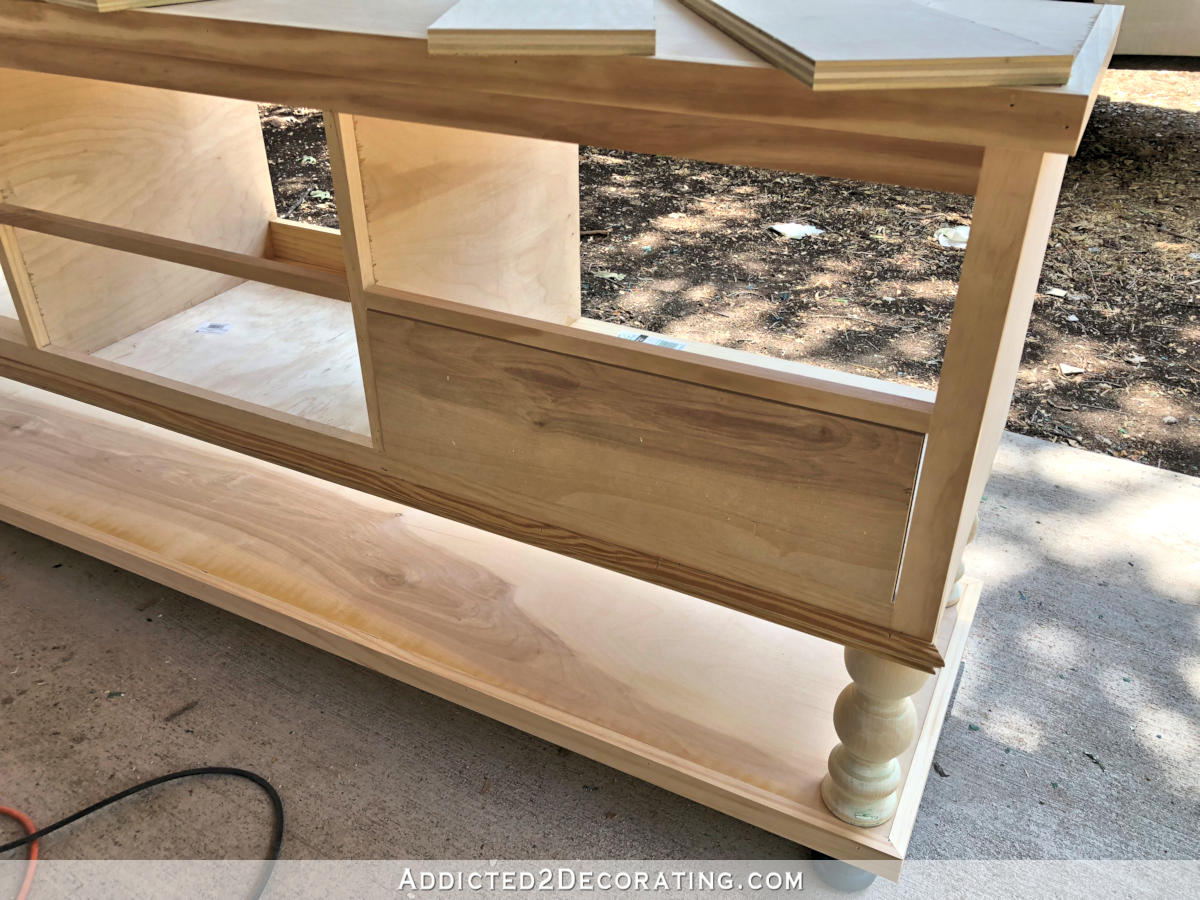
Then I cut 1″ x 6″ lumber to the lengths needed to form the sides and back of the drawers.
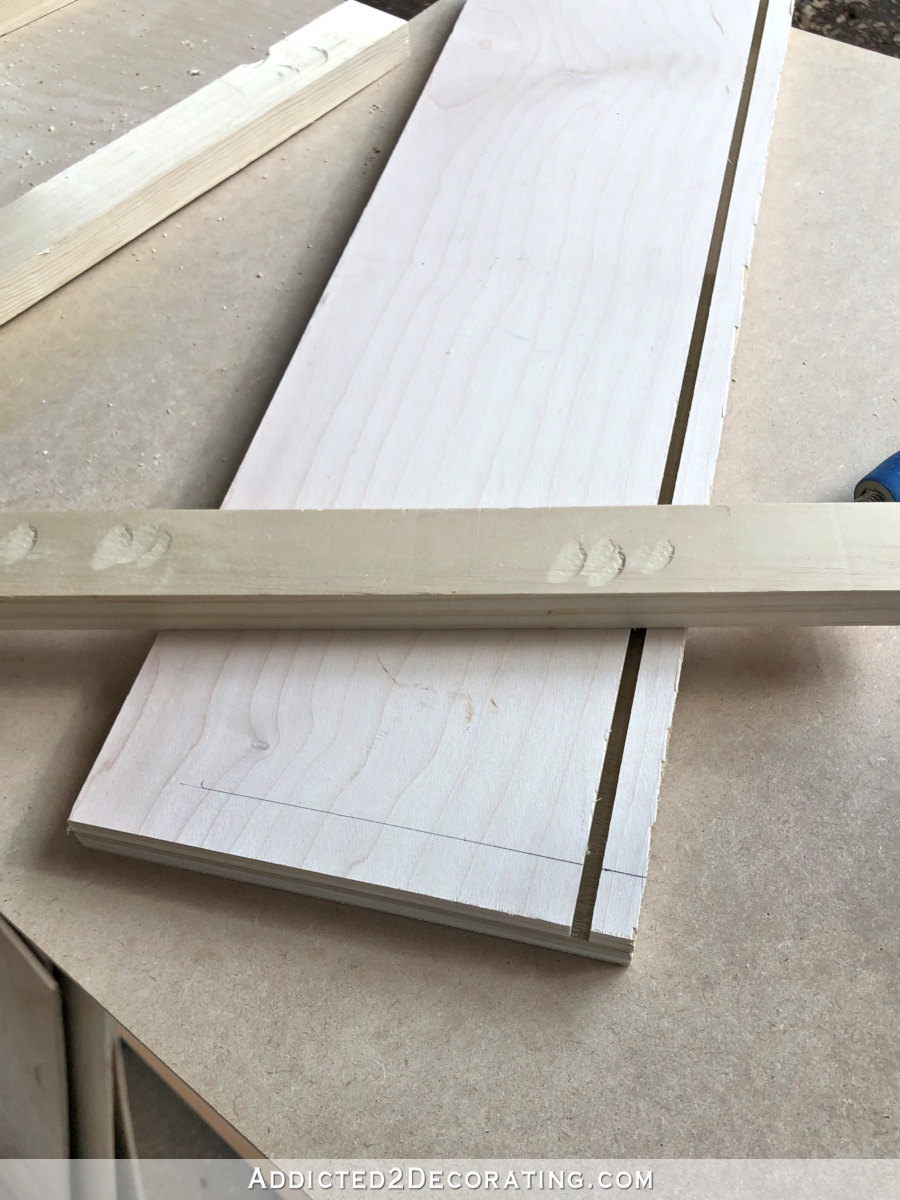
With all of the sides cut for all of the drawers, I ran all of the pieces through the table saw with the blade set to cut 1/4 inch into the wood, 3/4 inch from the edge. This was to create a channel for the drawer bottom to fit into, and I had to run all of the pieces through, then move the blade over 1/8 inch and run them all through again in order to create a channel wide enough to fit the 1/4-inch MDF that I used for the drawer bottoms.
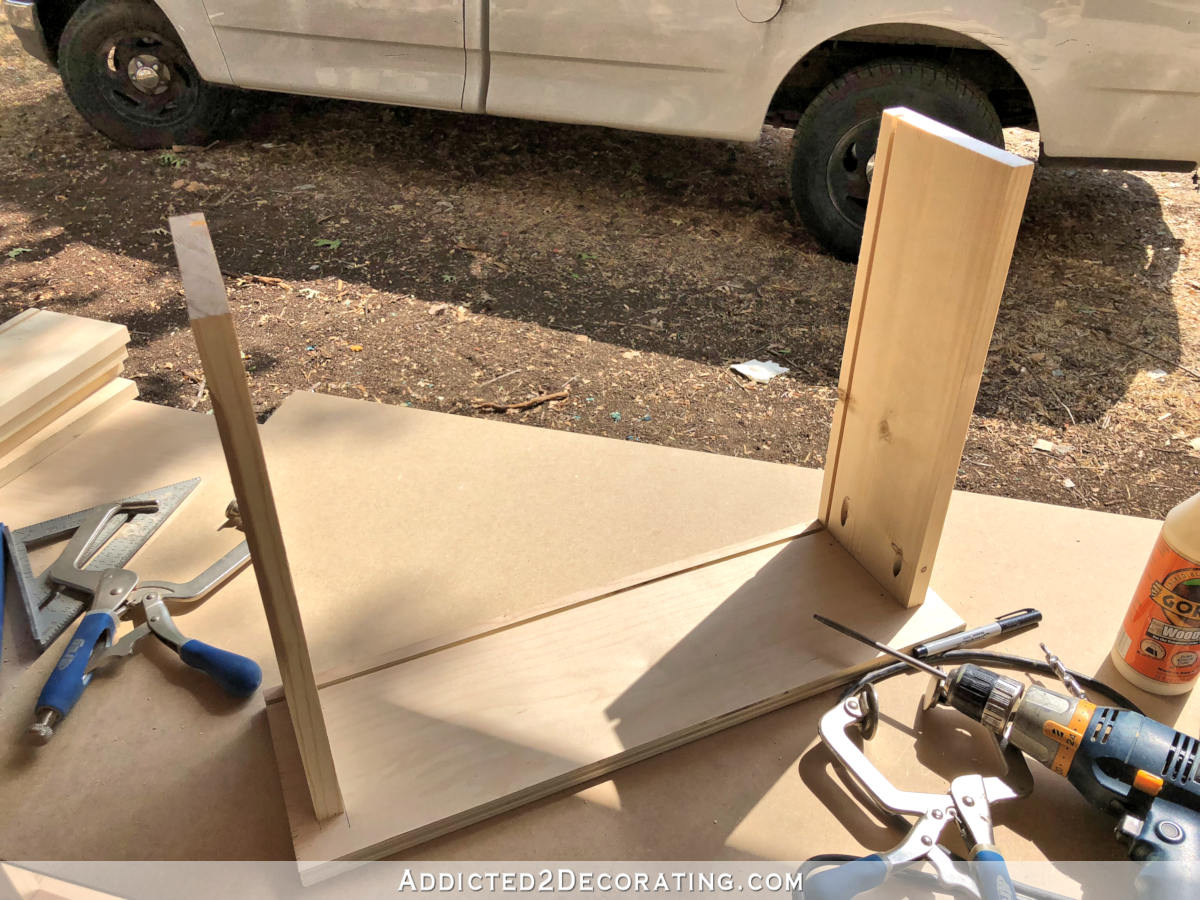
To assemble the drawers, I started by using the edge of a 1″ x 2″ scrap of lumber to mark 3/4 inch on each end of the drawer front. (Remember that 1″ lumber is actually 3/4″ thick.)
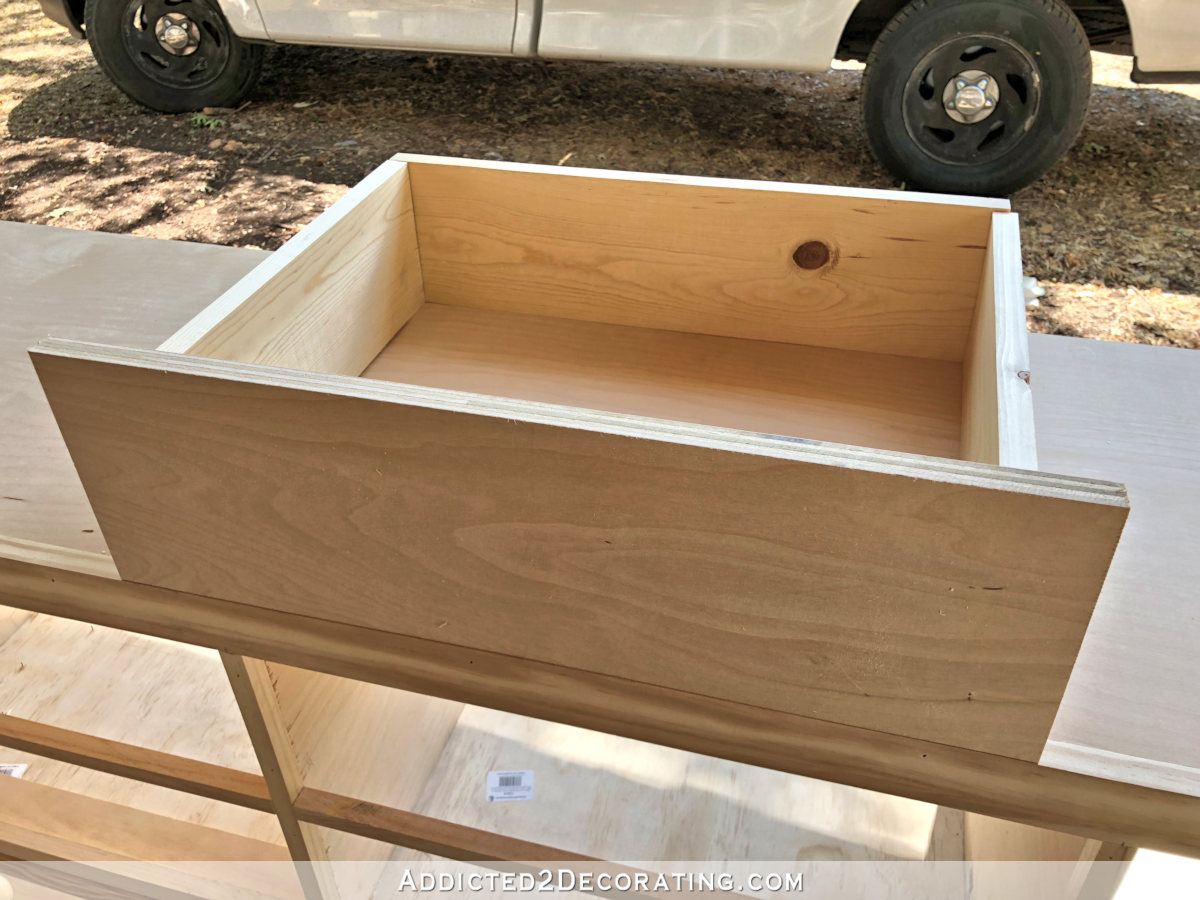
And then I used that line as a guide to know where to attach the drawer sides. Those sides were attached with wood glue and pocket screws.
Then I cut a piece of 1/4-inch MDF to fit the bottom of the drawer (cut to the inside dimensions plus 1/2 inch both directions). Then I slid the MDF into the channels on the sides and drawer front.

Then I attached the back of the drawer with wood glue and brad nails, checking for square before nailing the back into place.
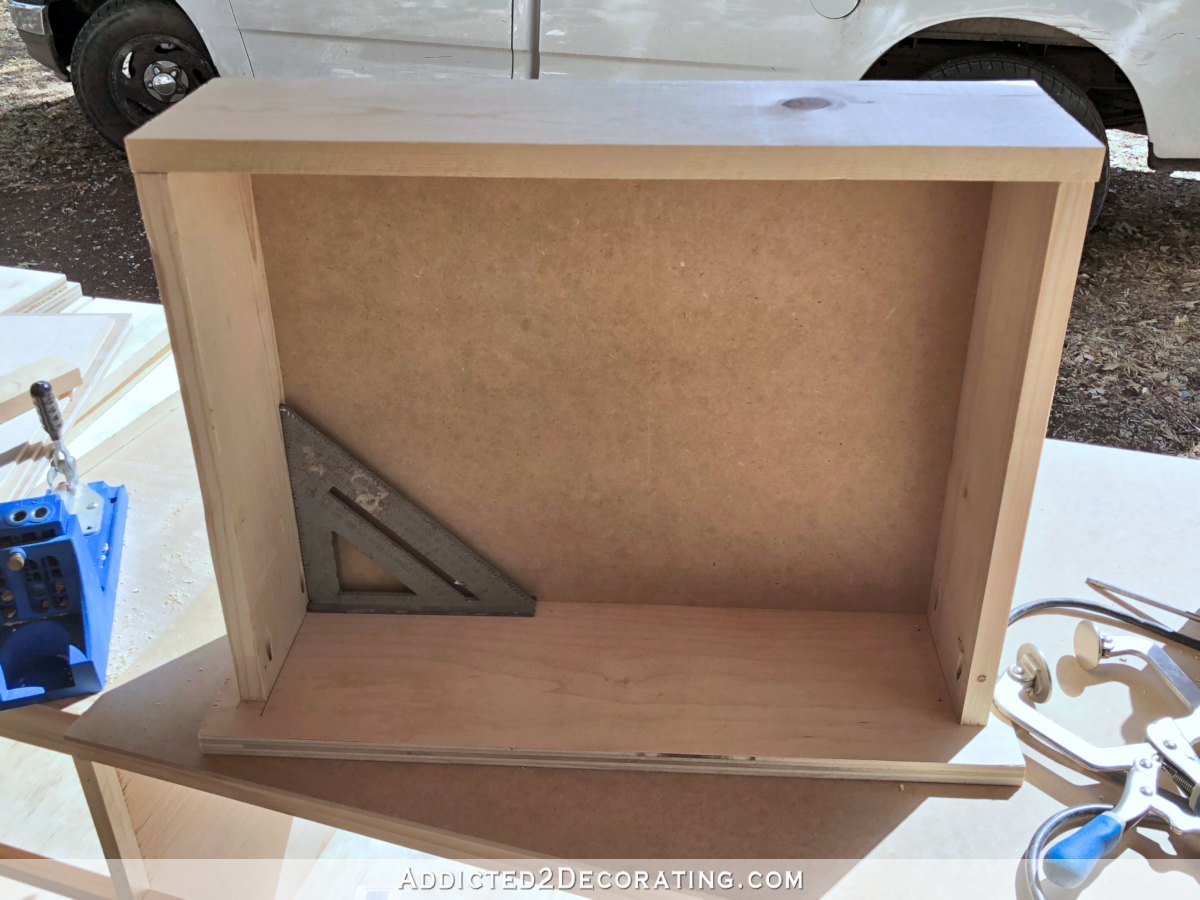
Since I always have so much scrap wood on hand, I decided to build basic drawer guides rather than purchasing and installing metal drawer glides. On a piece of furniture where the drawers won’t be used on a daily basis, this type of simple drawer guide works just fine. I ripped pieces of 1″ lumber into pieces that are one inch wide, and cut them in length to fit the sides of the drawer just behind the drawer front. I attached them 1.5 inches from the bottom of the drawers.

And then I used two more strips of lumber, also ripped to one inch wide, and positioned them inside the case so that the guides on the side of the drawers would slide right between these guides.

Each side of each drawer required three of the wood strips — two for the drawer and four to be attached inside the case. That means I needed 36 strips total.

And with them all attached, I was finished with the basic build.
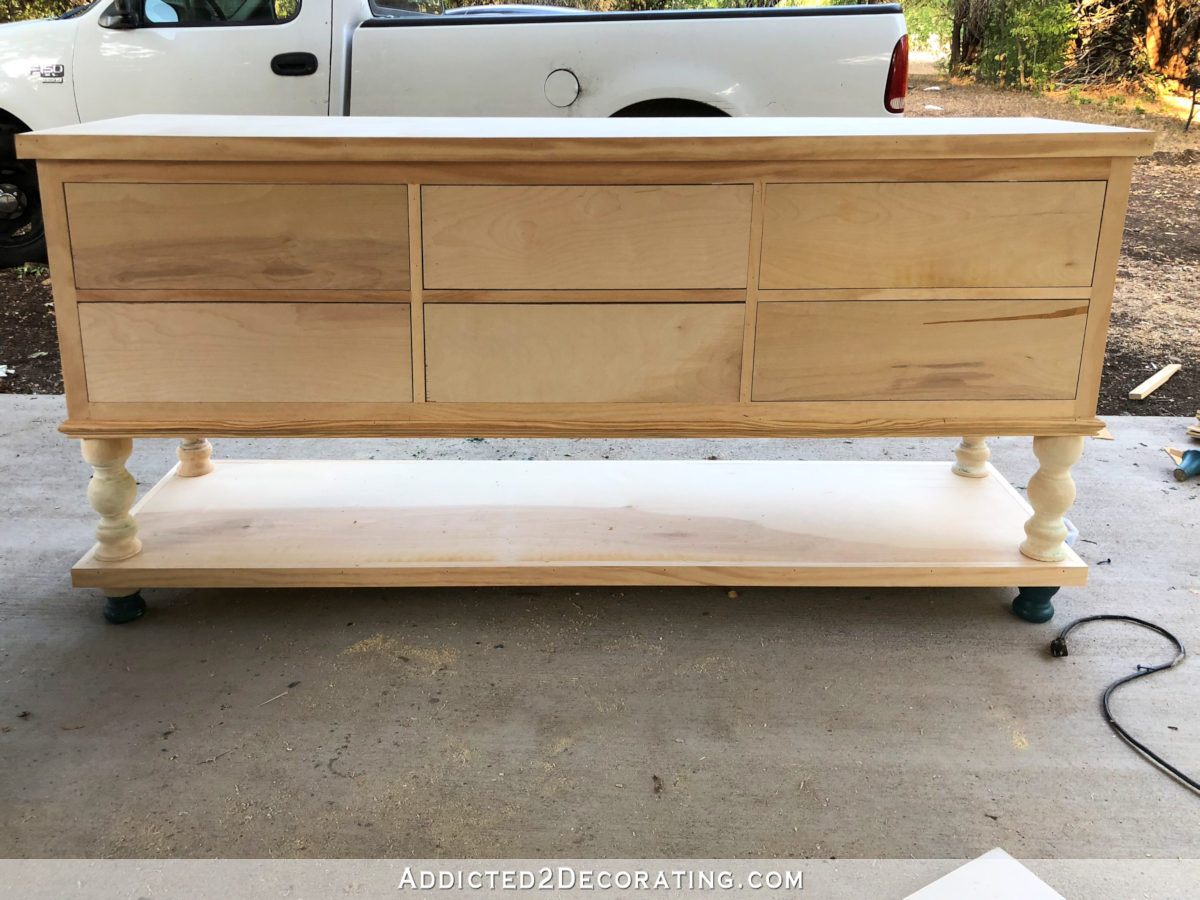
And now the tedious part begins. This will require lots of wood filling, sanding, and patience to get it from this point to completely finished, but I’m so pleased with how it has turned out so far!

Please note that this is a multi-post project. If you missed Part 1, click the title below…
And to see the third and final post on this credenza project, click the title below…
Addicted 2 Decorating is where I share my DIY and decorating journey as I remodel and decorate the 1948 fixer upper that my husband, Matt, and I bought in 2013. Matt has M.S. and is unable to do physical work, so I do the majority of the work on the house by myself. You can learn more about me here.


Amazing, as always!
What did you use to strip the legs? Will it work on varnish as well?
Absolutely amazing, as always. Great job Kristi. Can’t wait to see the finished product. My guess as to where you are going to use it is the entry way or the breakfast room, replacing the pieces of furniture that you already have in either of those rooms. Have a great day.
The proportions are fantastic!
Looks beautiful! I’d love a little more info on your process for filling gaps and holes. Whenever I fill stuff I can often see where I’ve filled later, or it has a sandy, grainy texture. I have a hard time getting it smooth. How do you do it??
Me too
Yes!!! Me too, it never looks flawless when I fill, sand and paint. I could really use a tutorial from the BEST… KRISTY!!! I love this piece of furniture and it is going on the ever-growing list of furniture pieces I want my husband to build…
Me four!
Me five. Mine always looks grainy or lumpy even after sanding.
You are a total wonder!!! I am amazed and soooo impressed, not only with your creativity, but your ability to actually bring your vision to fruition! If you weren’t already married (and I weren’t already married), I’d marry you in a heartbeat!!! Your place is going to be a real show-stopper!!! It actually pretty much is already!
Oh my goodness. You are just so inspiring! So I’m like *THIS CLOSE* to buying a Kreg jig. I can’t seem to pull the trigger. I definitely like the kit you have linked on multiple occasions. But it is pricey. BUT… buying it a la cart is probably MORE expensive in the long run.
I’m just now starting to build things. After years of “someday-ing” it.
I finally used my compound miter saw and built some rag tag shelves for spray paint that perfectly utilizes an odd space behind the man door in my garage. They aren’t perfect, but they aren’t bad (okay the ones I actually hung were my second round) after I bought an angle clamp. lol Gave me a confidence boost I needed using power tools. 😀 I learned so much from these silly little shelves. But now I want to move on to a cute little potting table/plant shelf/aka patio privacy piece. Very simple build. I really think the pocket hole jig would step it up a notch. I might have to struggle through this project to validate the purchase for the future.
I’ve gleaned all your tool posts again. 😀 I’m chomping at the bit to start a new project.
Thank you for sharing your journey. I truly appreciate all that you share.
Our public library has a whole “library’ of tools one can check out. Not sure if it includes kreg jigs or not but it includes so much that I wouldn’t be surprised. We also have a local “maker space” where you can take your materials and use their tools. I noticed lots of these sprouting up in various communities. Ours has single visit, monthly, and yearly memberships. There is mandatory training and safety classes so they can feel confident you won’t accidentally chop off a finger or put someone’s eye out.
Either of these might be an alternative to buying or trying out the tool before you buy.
I wondered because MakerFests are very hot right now. But I never knew this even existed! Especially since I’ve looked for basic tools workshops before. We have one somewhat nearby-I just googled it! lol The one near me offers basic operating and safety classes. What a fantastic resource!
Andrea, I purchased the Kreg Jig Jr because it was the least expensive a few years ago and have used it on many projects – big and small. Has definitely been worth it!On the Kreg website it is $44.99.
If you’re looking at the K4, there is the cheaper R3 which is usually around $40. It’s a good one to start out with.
Wow, Kristi, is there anything you CAN’T build? What a great piece of furniture! I’m looking forward to seeing the finished product also, where ARE you going to use it???
wow on this piece! I’m very much humbled by how easy you make the construction of the drawsers look – it would be my piece de résistance because I’d fear that I’d be too sloppy with the measurements for them to work correctly!
I’m even more in awe considering that you must have higher temperatures there in Texas than the heatwave we currently experience in Europe – and you still work outside, shifting heavy stuff, too! Please take care of yourself and don’t overdo it!!
Very cool! For my own personal taste, I might would like the legs to have a slightly cleaner line. But for your space, I think it’s perfect!
I’m guessing this is going in the entryway, under your flower picture and your new sconces! Am I right? And, I’m guessing you’re going to be painting this, since you used plywood (which is great for painted furniture). Am I right? I’ll just have to wait and see, huh? 🙂
I need a Kristi L. In Michigan! You are such an inspiration! I am so in awe of the many projects you tackle. Do you plan to eventually go back into designing for others? Your work is so very well done. You’re a true artisan.
No better feeling of accomplishment than to make furniture…..just wow.
I’m imagining you are in heaven having a covered “outside” area to make your projects!
Furniture making intimidates me, but less and less with each build you do! Love the dresser!
So impressed by the carpentry skills.
Kristi you are so brilliant. I always wondered how to make slidey drawers. I am so envious of what you can do.
As always, beautifully done! Did I miss where you shared the wood? Is the main build made of birch? TIA….
Kristi, you never cease to amaze me with your creativity and skills. Well done. This console table/cabinet is gorgeous and a great design. Can’t wait to see it finished, see the color, and where it’s going to go!
OK So we are all amazed at what you can do. But I want to know how you flipped the dresser over by yourself!!!! Cuz if you DID do it by yourself, then u really are a SUPERWOMAN
Denise
I think you need to add lighting to your carport!
Can’t wait to see where you put this marvel!
This would make a lovely bathroom vanity with just a few changes. Do you still have pantry block? 😁 By the time the studio and pantry builds are done your skills will be through the roof…I kind of think they already are, btw!!
Extremely interested in seeing how you plan to finish this piece! I have been contemplating a “project’ and by “I” I mean getting my too handy husband to “help” me, and by “help me” I mean do it FOR me! I have a ‘matching’ wrought iron base/glass top dining table in a DR we never use, with a ‘matching’ Baker’s Rack. I want to try get away from the matchy-matchy idea and remove the glass dining table top and make a simple wood top to jump on the more casual rustic/farmhouse look so popular now. The sis for a formal dining room we dont even use and wanted to try to update it a little. (Hope this wont be a ‘pearls on a pig project’!) I wasn’t sure how to finish the ends of the plywood as I wanted the tabletop to look a bit more ‘chunky’ than the typical thickness of plywood and give it a finished look. I was thinking of getting a nice wood molding and have him frame it out with that but I am at the mercy of whatever HD and Lowe’s has and haven’t found anything I love so far -all seem too skimpy and not the 1 1/2″ I am envisioning. So using a 1×2 with a mitered edge might give me another option. SO I am very anxious to see how you plan to finish this piece and considering how FAST and efficiently you work, should be by after lunch today, right Kristi? While I have been planning this tabletop in my head I kept thinking, “What would Kristi do?” I KNEW it was just a matter of time some brainstorm of yours would inspire me to actually DO something instead of just THINK about it! You continue to amaze…
You’d have to research more if you’d like, but my dad would suggest to use some wax on the slides (Johnson’s paste-wax is economical) if they are sticky after painting. I also came across a nylon plastic tack you can get at amazon to reduce the friction on homemade slides but unwary about it. It would require an adjustment to fit tacks at the slide, and seem more hassle than help. I came across them when trying to find the tacks to replace the ones on chair feet. Can’t find the drawer glide tacks easily now, but find tons of chair glides…
I have heard of Teflon tape which I think can be used to reduce friction. It would probably be thinner than a nylon tack. I have not used it but might be something to look into if there is a glide problem. Of course, I would probably just use my cross-country ski wax or Monkey Butt (for bicyclists) because I have lots of it on hand.
I love it! Can’t wait to see how you will finish this.