My Completely Refinished Spinet Piano
I decided to spend the first couple of weeks of this year working on relatively quick and easy projects that I can get checked off of my list for this year. And now that I’ve completely refinished my piano, this is my fourth item crossed off that list so far. No too bad of a start to a new year!
Anyway, this little spinet has more sentimental value than any real value. You can read more about it here. When it arrived at my house last year, it was immediately clear that the piano would need to be refinished. The original clear coat had gotten to the point of being soft so that anything placed on it would leave behind fibers embedded in the finish.
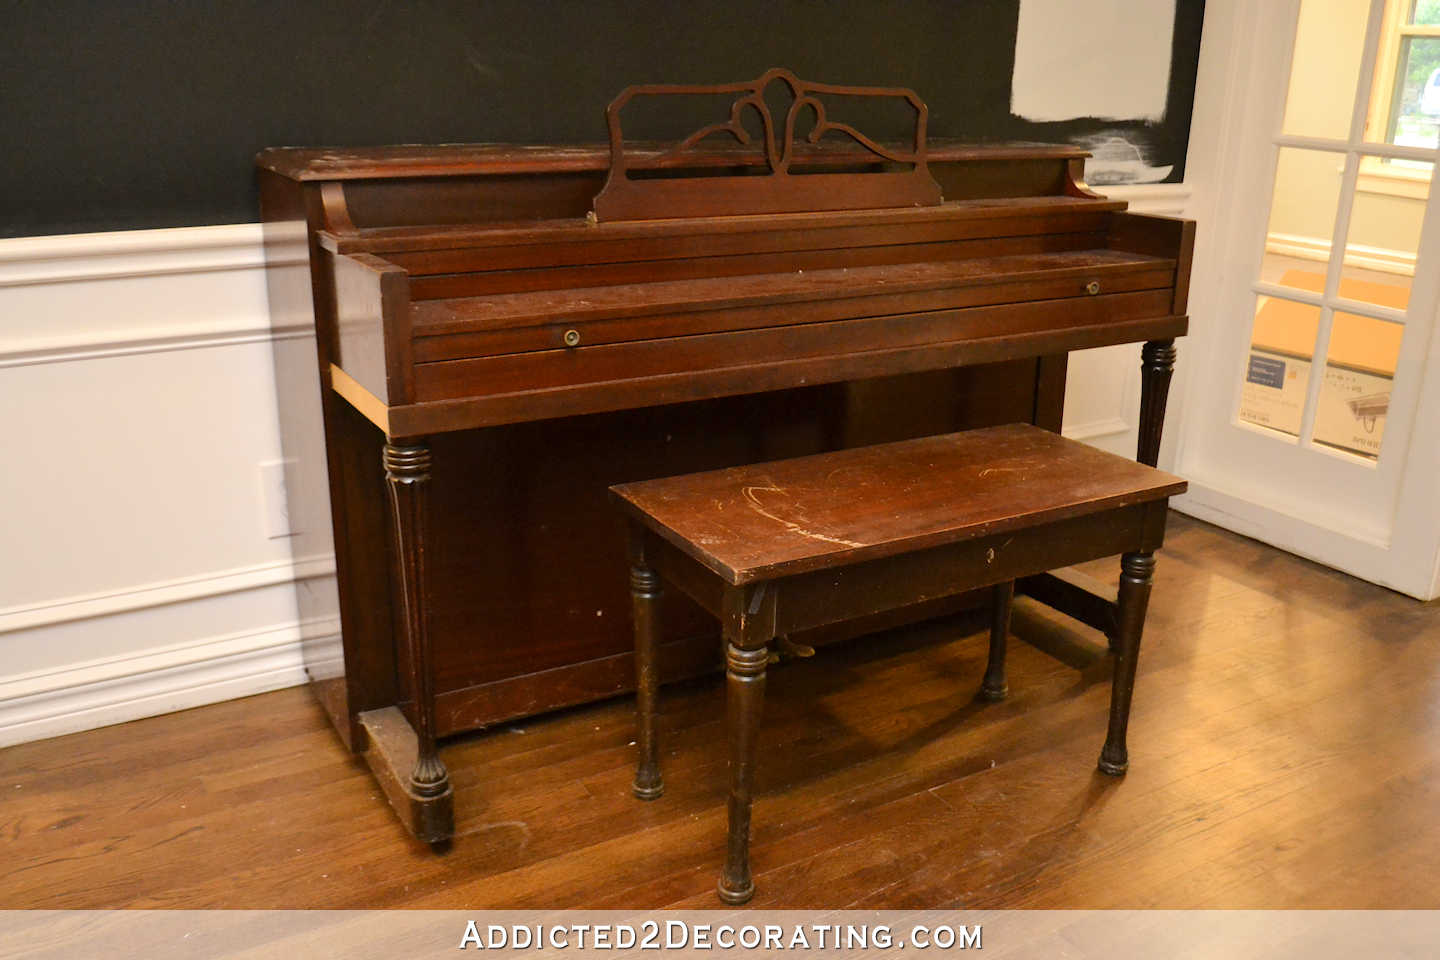
Plus, the original finish was so thick and red.
In order to strip the piano, I disassembled it, which is really quite easy to do on spinets and uprights. (Grands and baby grands may be easy as well, but I can’t speak from personal experience.) They basically go together like big puzzles, and very easy puzzles at that. They all seem to go together slightly differently based on the brand and style, but my experience has been that once you remove the top lid, it’s pretty clear how it all comes apart.
And on both of the pianos that I’ve painted/refinished so far, I’ve had to remove at least some of the keys in order to get to the screws to remove some of the pieces.
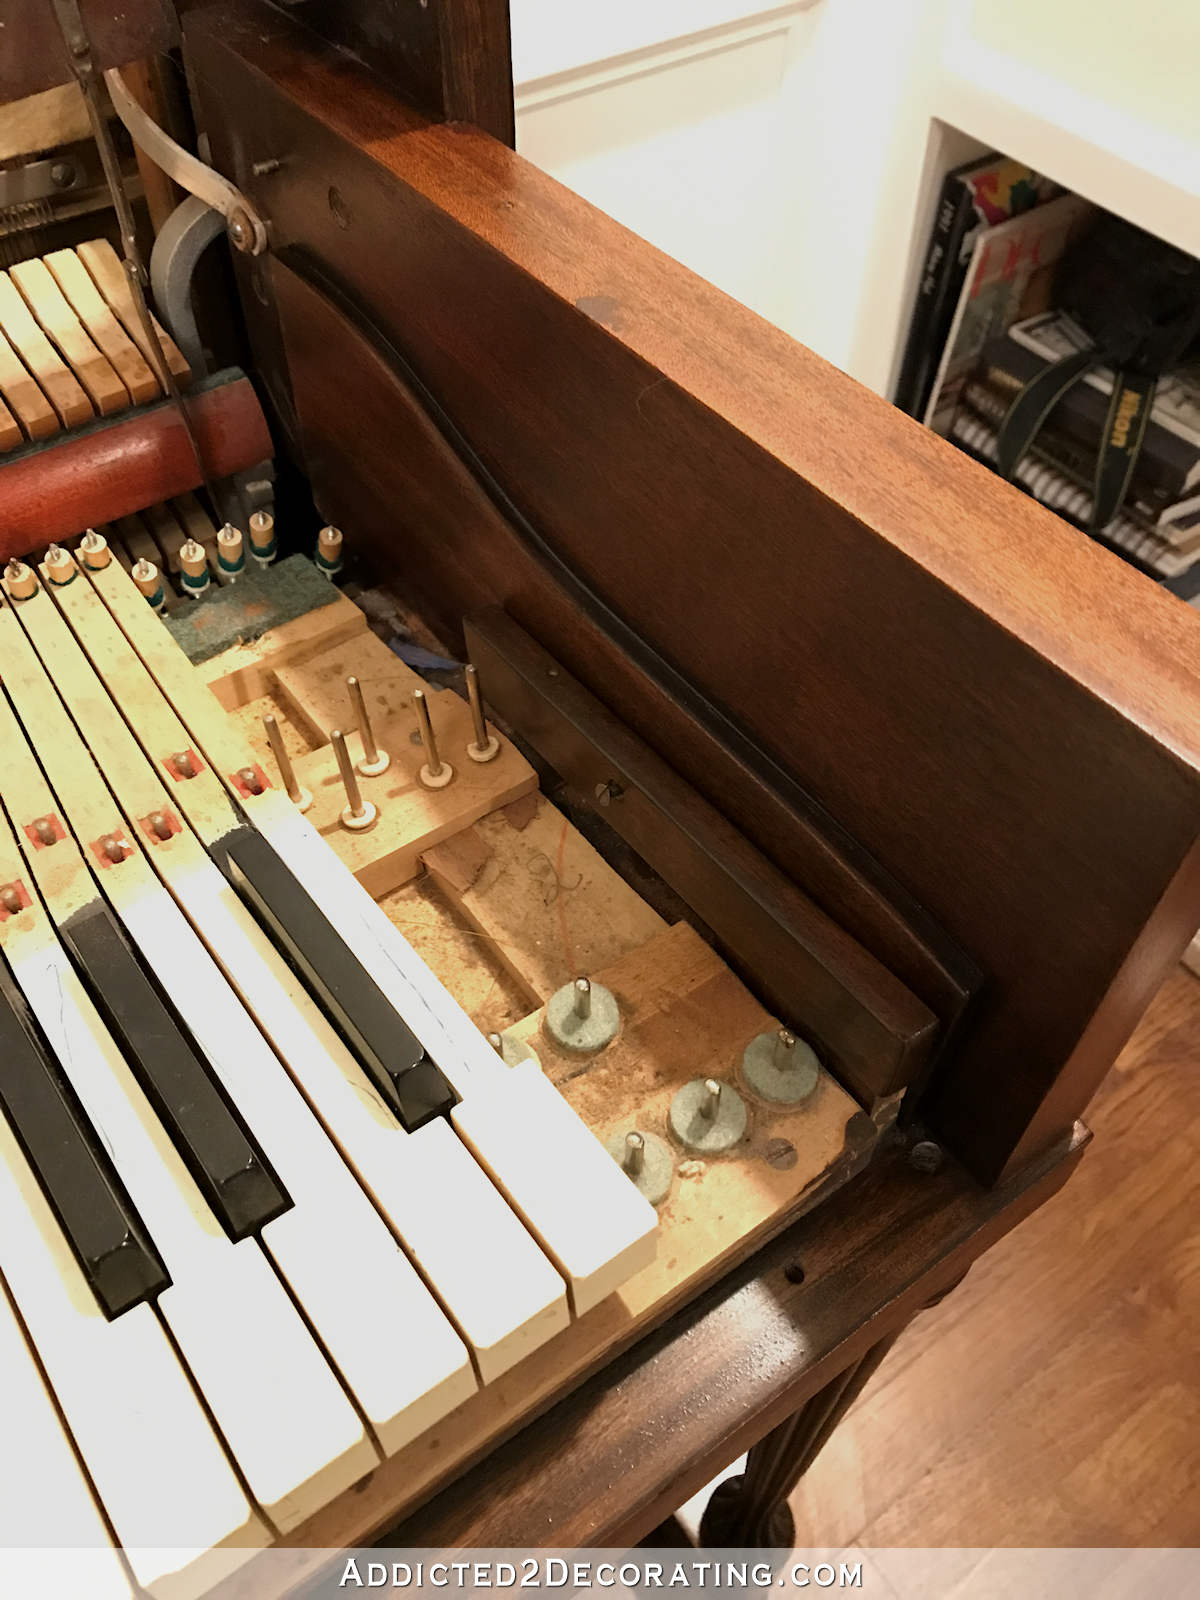
That was a little intimidating on the first piano I painted, but I just make sure to number the keys in an inconspicuous place so that I know the order in which they go back on the keyboard.
You can click here to read more about the stripping and staining process, as well as a follow up post with more info here. I’m not even going to lie. This was a long and tedious process, and I wanted so badly to take the easy way out and just paint part of it. But I’m so very glad that y’all talked me out of it and encouraged me to strip and re-stain the whole thing. After days of stripping, two or three days of staining, and three coats of polyurethane over the last two days, here’s how it turned out…
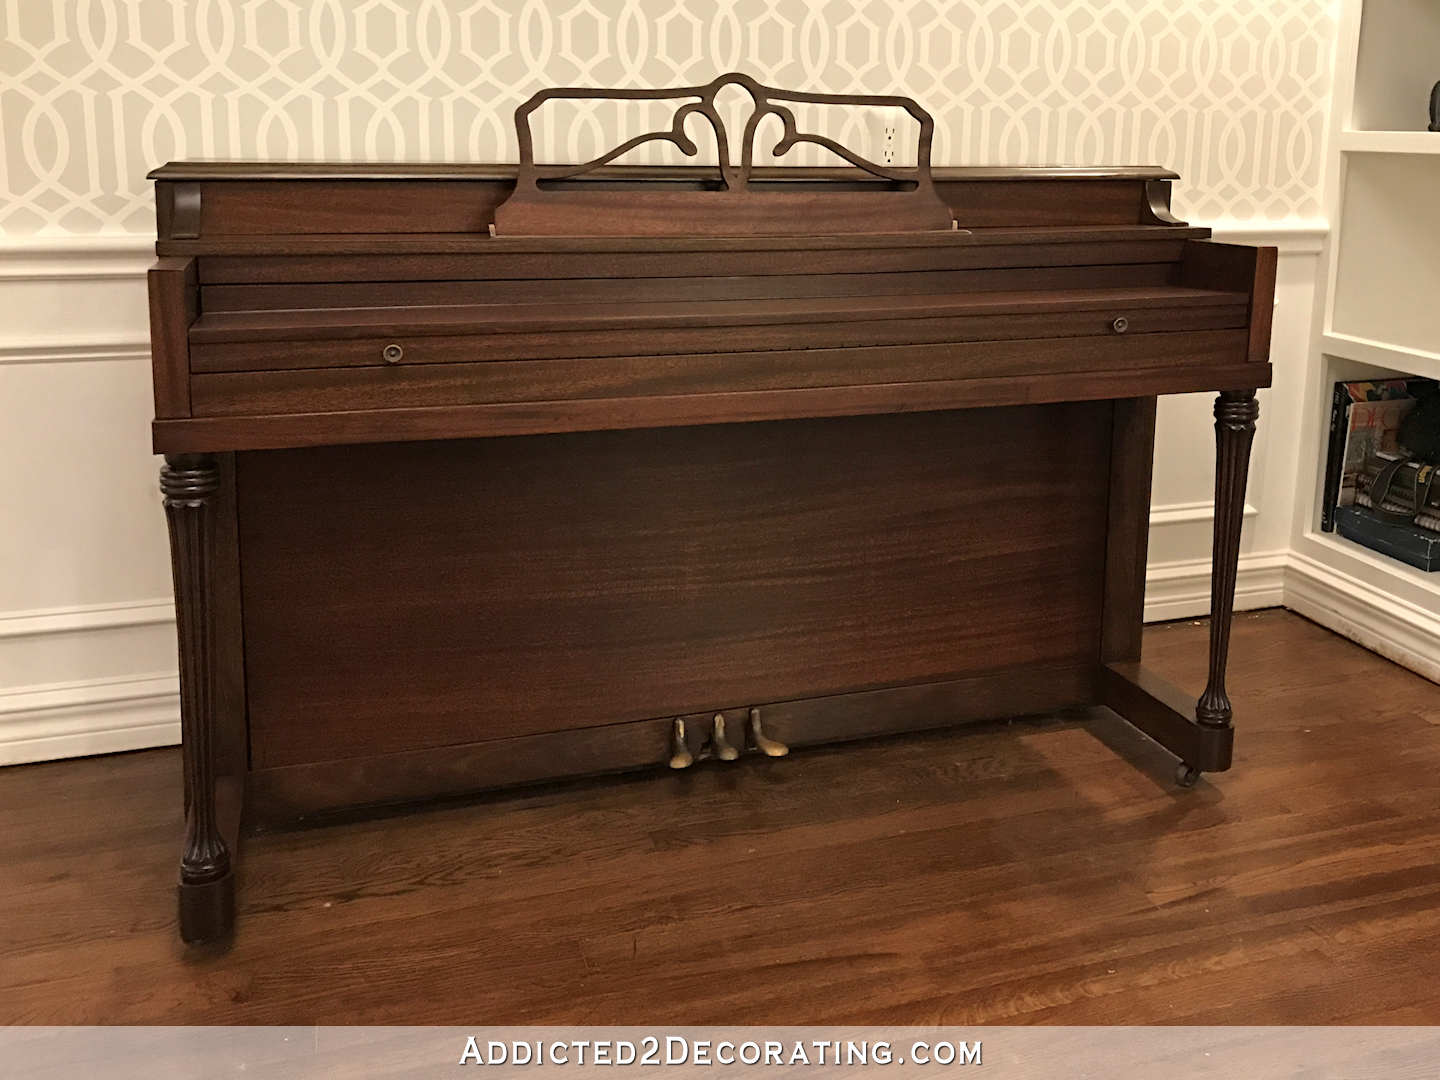
I kept the little original knobs, and I didn’t touch the pedals. I wanted those left just as they were, rather than making them shiny and new.
I used Minwax oil-based polyurethane in a satin finish. I know I generally don’t speak very highly of Minwax stains, but interestingly, their polyurethane is my favorite oil-based polyurethane. It goes on beautifully and dries pretty quickly for an oil-based product.
I always apply polyurethane with a bristle brush (my favorite 2-inch Purdy XL cub). I know some people use those cheap foam brushes for polyurethane, but I can’t stand those. They leave ridges and way too many bubbles. I find I have way more control with a high quality bristle brush.
And the key to getting a beautiful finish is to use at least three coats, and to sand with 220-grit sandpaper between coats. You have to be very careful sanding the polyurethane (especially the first coat) and use a very light hand or you can sand right down to the stain. It’s especially important to be careful on edges.
It can be scary to sand the polyurethane. After spending all that time stripping, restaining, and brushing on the first coat of polyurethane, it can be a bit shocking to take sandpaper to the finish and see it go from a smooth and beautiful appearance to this…
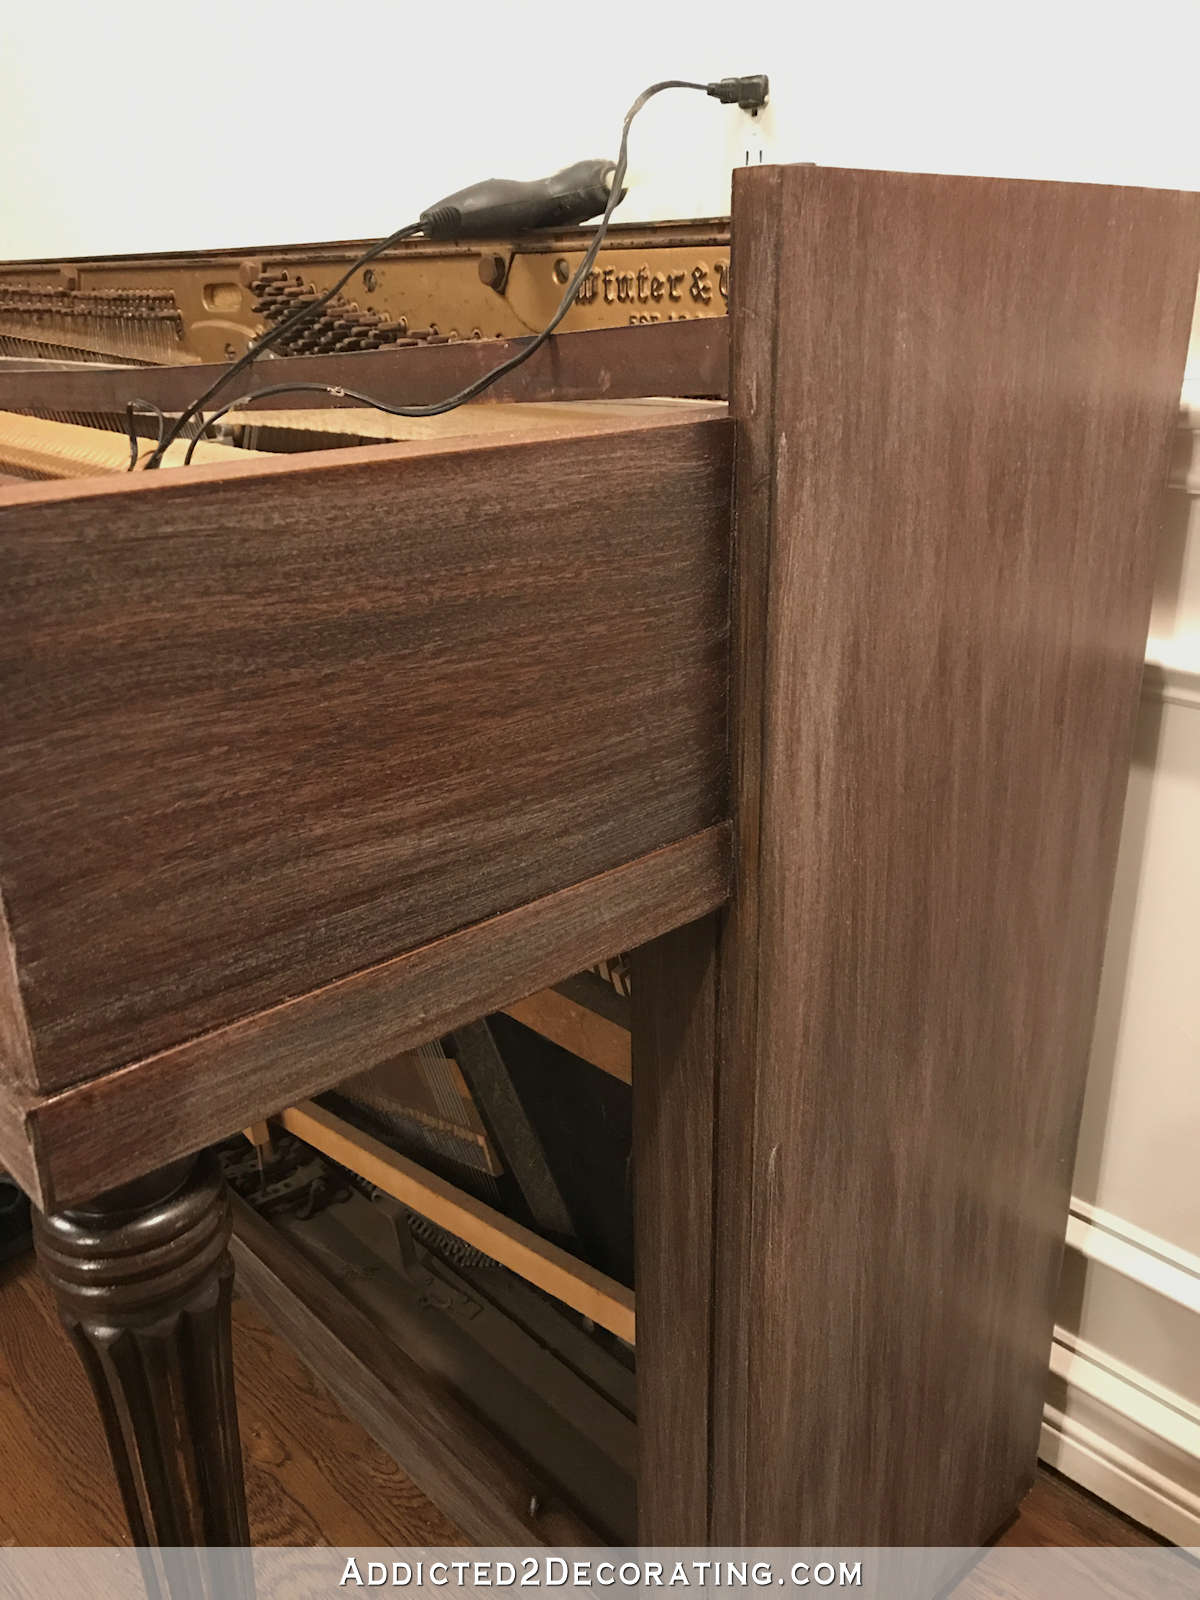
But as long as you use a very light hand, that’s just polyurethane dust. When you wipe that away and apply the next coat, it magically evens out again.

After three coats of polyurethane, I allowed the pieces to dry completely overnight before putting everything back together again. The finish still isn’t fully cured after that amount of time. That’ll take several more days, so just to be on the safe side, I’ll probably wait about two weeks before placing anything on top.
But at least the only thing left to do is to wait. The work is done.


*Sigh* I’m so glad I didn’t paint any part of that piano (thanks to y’all!). There’s no question that I would have regretted taking the easy road with paint. Sometimes the most challenging route is the most rewarding.


Addicted 2 Decorating is where I share my DIY and decorating journey as I remodel and decorate the 1948 fixer upper that my husband, Matt, and I bought in 2013. Matt has M.S. and is unable to do physical work, so I do the majority of the work on the house by myself. You can learn more about me here.
It is beautiful! So glad you didn’t paint it….love it!! Great job, Kristi!! Can’t wait to see the next project you have in line!
My husband refinished gun stocks and one of the final sandings was with nylon net from the fabric store. It doesn’t scratch and it takes away any tiny bubbles in the polyurethane
It looks beautiful and will be a treasured addition to your home. You’re sailing along with the checklist – Awesome!
You’ve done an awesome job refinishing this piano Kristi, and another item already checked off your list…….well done, you are on a roll.
Look at you ✔️ing things off your list! Well done. It is gorgeous!
Beautiful!
Soooo glad you refinished the piano! What a beautiful job you did. It looks marvelous! And the patina on the knobs and pedals is perfect.
Outstanding job!!!
It is beautiful. I love how it stands out against the subtle wall color. Great job. Now, how about a video of you playing it! You have so many talents!
Sheila F.
Yes, Kristi!!
I think we’d all love it! I for one, envy folks who can play the piano or any musical instrument, for that matter.
I wish I could check things off as fast as you do and as beautifully. You’ve given me so many great ideas!
Yes, Kristi! Please play a little song for us! I have *always* wanted to learn to play piano, it is my favorite musical instrument! I am always so impressed with the talent of people who can play, especially the piano. We’d LOVE to hear a song from you!
Beautiful piece! So thankful you didn’t paint it. Great work on checking things off!
Looks so nice!! Are you re-doing the seat as well or will you be doing something else for a seat?
I’ll be redoing it, but it’s pretty much falling apart. It needs to be almost completely rebuilt. And then I also want to upholster the seat.
Love the piano and its story. The room is bright and now the beautiful wood grain gets to be the star! I know you have something up your sleeve for the bench and perhaps bench mat or fabric. Looking forward to that later on!
I hope your kitty cats are better behaved than mine. Ours like to jump on our piano and other dressers/tables and scratch the finish without trying!
It’s gorgeous. Who knew what a beauty was lurking underneath. Well done.
That came out absolutely beautiful and now you have a great family heirloom piece. Congrats!
Wow! It’s beautiful, finish, color and all! So glad you did it this way, I know you’re going to love it for years to come! Great job getting your list checked off, too! You go girl!
So glad you did not paint it! It always hurts my heart a little to see a painted piano.
Wonderful job, Kristi!
Very wise decision to not paint and go the more time consuming route. It’s looks beautiful!!
Could you use steel wool between the coats of urethane?
Yes. I personally find sandpaper much easier to use, though.
It does look beautiful. Stain really does fit the character of the piano better than paint. It now has many more years of use and beauty to add to your home. As to the piano bench, if you upholster the seat, won’t that make it harder to slide off it, or to reach the end of the keyboard while playing the piano?
Even the two-tone piano (the gray and walnut) that was your inspiration doesn’t look as classy and timeless as this. I’m SO GLAD you didn’t paint any of it. You will love this for years. Yay!
So beautiful!!! Worth all the work to get to this point.
Now it’s back to being a lovely little piano again. Though it’s easier to paint, I think every room needs some of the warmth of wood in the furnishings.
A totally unrelated question, but I see/partially read the “Hi there, I’m Kristi!” info box at the top every time I read a post, and today I realized that I’ve never seen your dog Boo in any of your photos. Peeve photobombs occasionally, but never Boo. Is there, in fact, a Boo? *I may have too much time on my hands today* :O)
Ha! Yes, there’s a Boo. But unlike Peeve, who is still acts very young even though she’s 14, and is into everything, Boo is 16 years old and pretty much spends his days eating and sleeping in the bedroom, so he’s never around to photobomb my pictures. Sadly, I don’t think he’ll be around much longer. Just a couple of weeks ago, I was certain we were going to lose him (just from old age and the problems that come along with it), but he rallied and is doing quite well again for his age. I still feel like I’m mentally preparing to let him go, though. 🙁
All the mental gymnastics trying to prepare yourself for losing a furbaby, is still a major shock when it happens 🙁 I lost mine when she was 12, back in ’09, and I still look for her when it’s time to feed the others.
The piano looks fantastic and I’m also thrilled you kept the wood.
Gorgeous! So glad you didn’t paint it. 🙂
Beautiful job! I’m sure your family is so proud you saved this heirloom.
It turned out perfect! Congrats on a beautiful job!
Awesome! So glad you listened to us! *snicker* snicker* Really, I’m sure it was not fun, but the results have to be worth it! A huge pat on the back for Kristi!
Sometimes there is need for a classic piece to not only ground but also warm the room. There is always something endearing about rich beautiful wood. Pianos need to be loved and passed down even if no one is able to play them well. When I see one in a home I can just imagine ghosts of past family members gatherered around enjoying the music and family time. I hope your niece will one day treasure this piece too. Take the time to Play it with her so she might have great memories of Aunt Kristi at this piano. I am wishing you a magical musical 2018
Yay! Looks great!
Beautiful, you are one determined gal.
Will there be a video recital forthcoming?
Ha! Well, I still need to get it tuned. Right now, it’s a bit painful to the ears. And then I’ll need to find some much easier sheet music than what I have. My old music seems to be a bit above my skill level now after not playing for about twelve years. 😀 But if I can learn to play something decent without embarrassing myself, I’ll make a video.
Your piano turned out so beautiful! I’d like to have seen your Mom’s reaction when she saw it completely finished – certainly would have made all the work worth it. I want to refinish the piano my Mama bought from the Goodwill when I was a little girl. I learned to play on it, and it’s followed me every place we’ve moved. It’s a Baldwin studio upright made in the ’50s, but that’ll have to wait a couple of years until we move again, hopefully for the last time.
Kristi, have you ever used wipe-on poly for a finish coat? I’ll never use regualar polyurathane again since I tried wipe-on. It dries super fast, so multiple coats can be applied in one day, and NEVER a brush stroke or run.
I did use it several years ago. I remember really enjoying the process and I liked the finish. I can’t remember why I didn’t stick with it, though. It seems like I felt like I had to do more coats since they go on much thinner with wiping them on than they do with brushing them on.
Beautiful!
Beautiful and you have a beautiful family history to go with it. Priceless.
It look so beautiful! Do you have/take the time to play?
Not yet. It needs to be tuned before I can play it. It sounds really bad right now. 🙂
It is stunning!!!! Job wel done!
My goodness! That is absolutely gorgeous!!
It’s absolutely lovely. Another job well done, Kristi. Now, how are you going to keep Peave off it until it has completely hardened?
Oops! Peeve!
Beautifully done!
I swear in the last photo it looks as if the piano is smiling at you.
She. Is. BEAUTIFUL! You did an amazing job refinishing her, she looks just gorgeous now! All that time and effort was worth it, every second of it. She looks completely *restored* and I love that you kept all the original metal, with its lovely and perfect patina, on it. The pictures made me smile and she looks so proud! Brava!
Beautiful! I’m just curious why you chose oil based vs. water based poly?
I always use oil-based poly over pretty stained wood. It’s more durable than water-based, so I use it when I can. I use the water-based stuff over stained wood when I don’t want the color changed (i.e., when the amber color of the poly would ruin the stained wood color) and over painted finishes.
Gorgeous! Absolutely gorgeous! Bravo, Kristi!
Turned out beautifully! Great job.
WOW! You did a beautiful job! I love how well it goes with the room now! With all the great paint makeovers online, I do love to see dark wood refinished! Gorgeous!
WOW! Looks great!!
Pianos are not only beautiful instruments, but they are also gorgeous. Instead of buying an expensive new piano, consider purchasing one to refinish. The end result is that although the piano might be older, changing the finish will me it look just like new.