10 Ways I Customized My Big Box Store Unfinished Stock Oak Cabinets For My Kitchen
If you joined me after I finished my kitchen remodel in 2014, you may not realize that I used unfinished stock oak cabinets from Home Depot for my kitchen. That’s all we could afford at the time (we couldn’t even afford IKEA 😀 ), so I went with it, determined to turn those unremarkable and inexpensive cabinets into something that looked as custom as possible when I was finished with them.
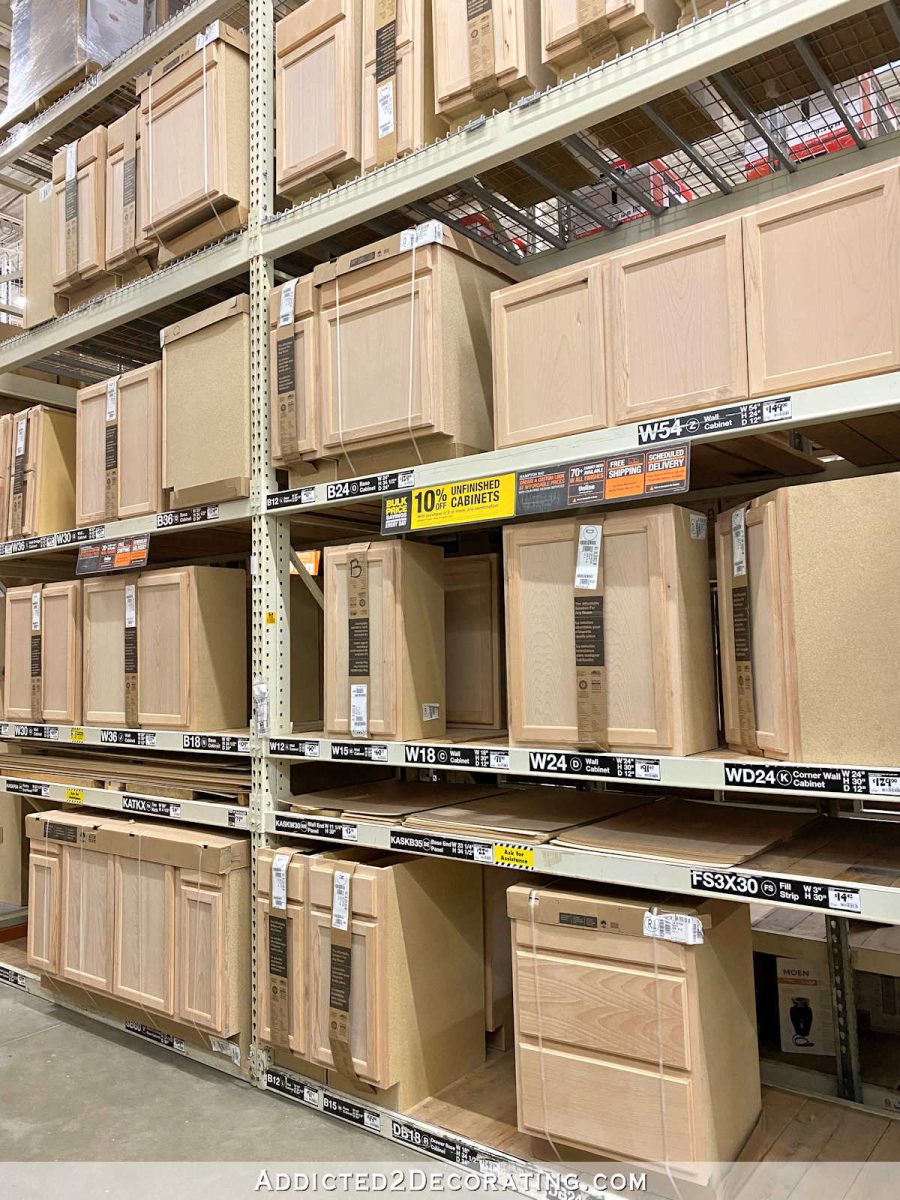
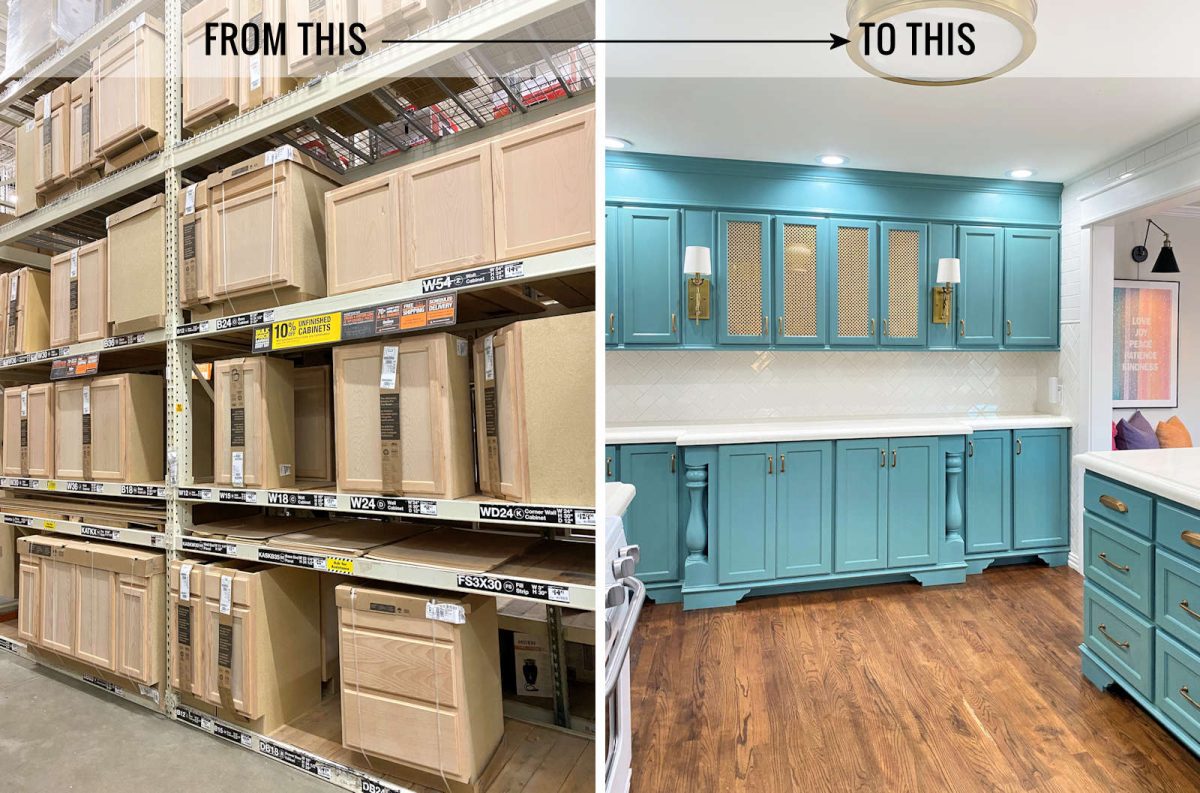
To be clear, this is what I started out with…
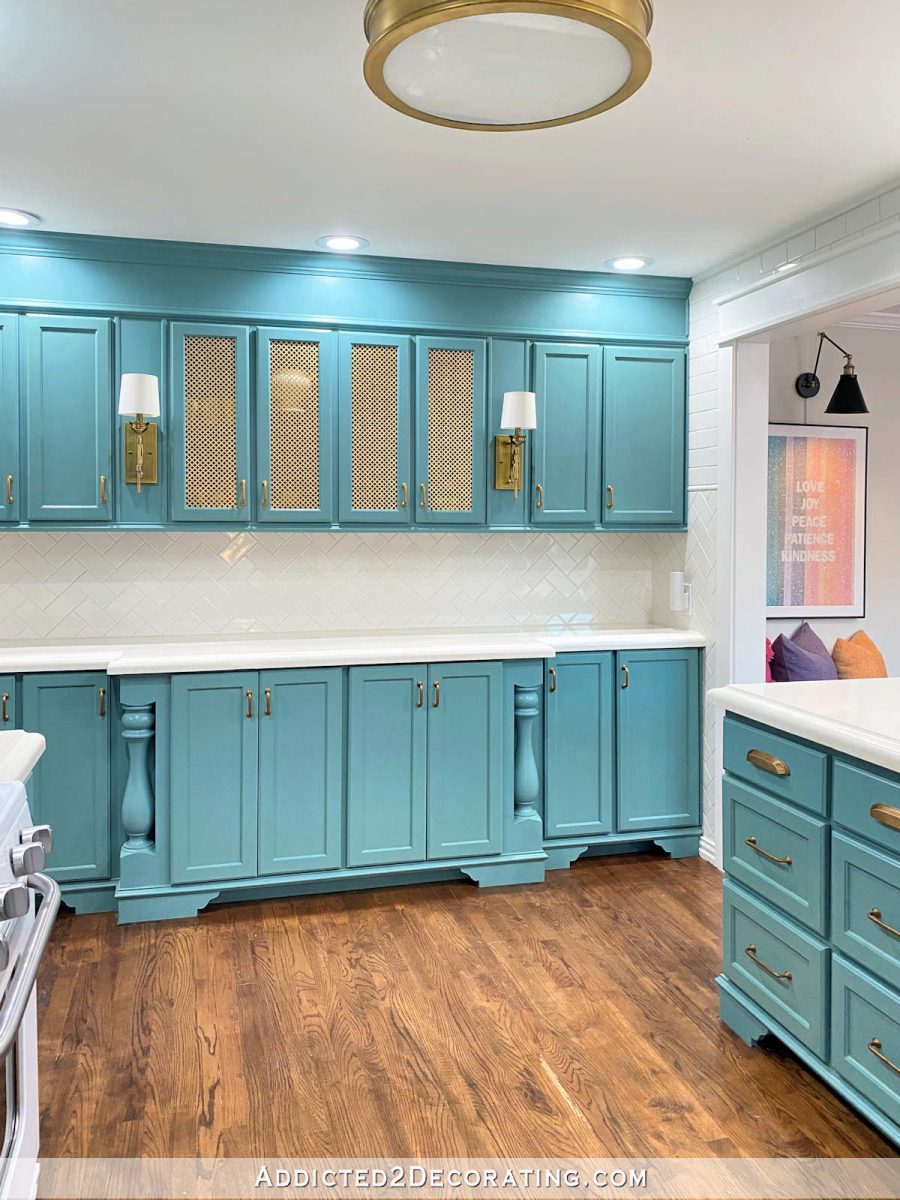
And this is what they look like in my kitchen…
I was asked yesterday if I would recommend these cabinets after living with them for a while now, and honestly, I would. I mean, if that’s what you can afford with your budget, then I would have no problem suggesting them. But I would also suggest that you think through ways that you can make them look customized. Because, let’s face it. Those “off the shelf” cabinets are fine as they are for a utility room, but for a kitchen, you’ll probably want to find some ways to spice them up a little.
One of my main suggestions is to stay away from the 12-inch-wide cabinets. Just walk away. No one needs cabinets that narrow in their kitchen. Stick with the 15-inch-wide and above only. Just trust me on this one. 🙂 If I could go back and make any changes, that would be the one thing I’d change. I’ve made the most of my little 12-inch-wide cabinets, but I wish I would have made a different selection in the beginning so I wouldn’t have to make do today.
But I wanted to give you some ideas on how I went from those boring unfinished cabinets on the shelves of the big box store to what you see in my kitchen today.
10 Ways I Customized My Unfinished Stock Oak Cabinets
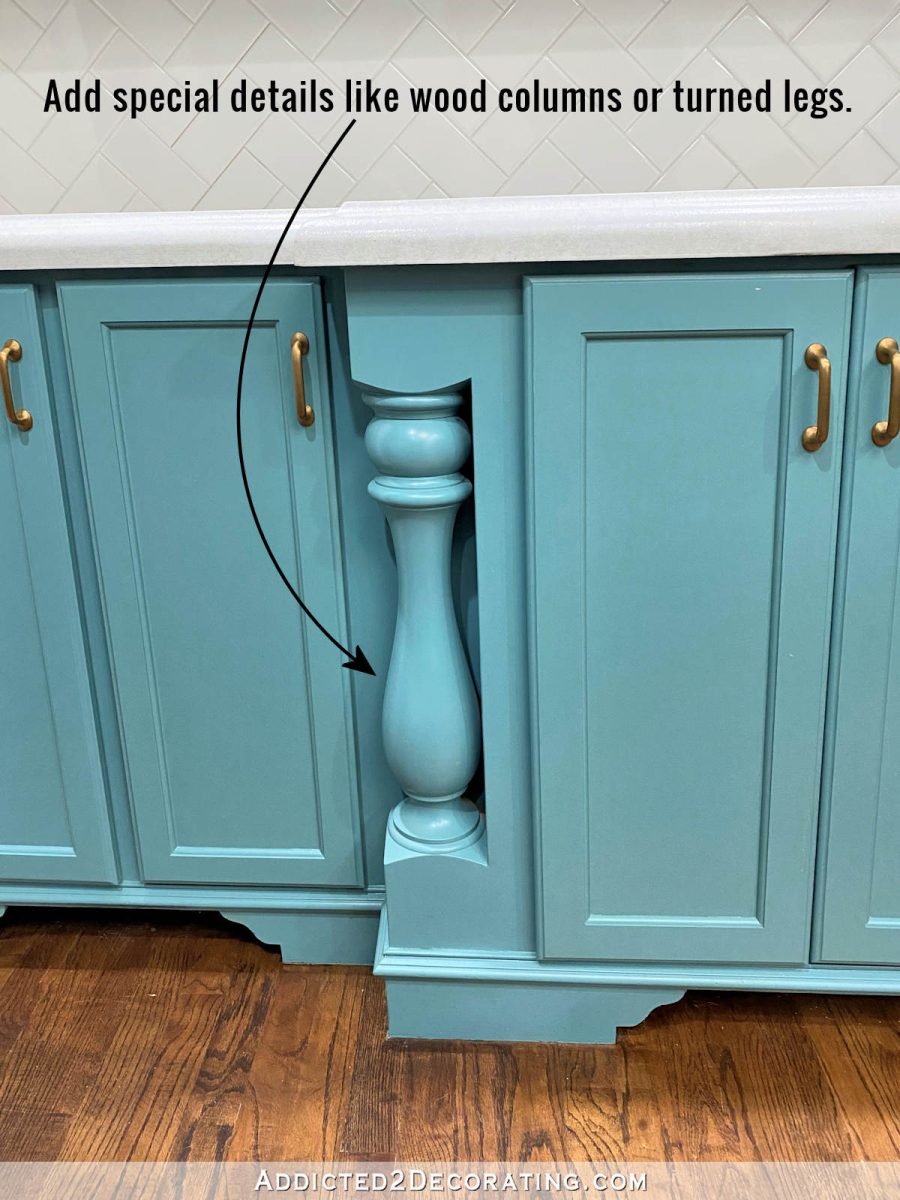
1. Add special details like wood columns or turned legs.
I ordered these turned wood columns from tablelegs.com, and it’s a great source for all kinds of columns and legs that you can incorporate into your cabinets or kitchen island. You can also check places like Rockler for similar products. With the price of wood today, these might cost a fortune now. So you might also check places like Habitat For Humanity Restore, or even consignment stores and resale shops for pieces of furniture that have these turned wood pieces that can be reused.
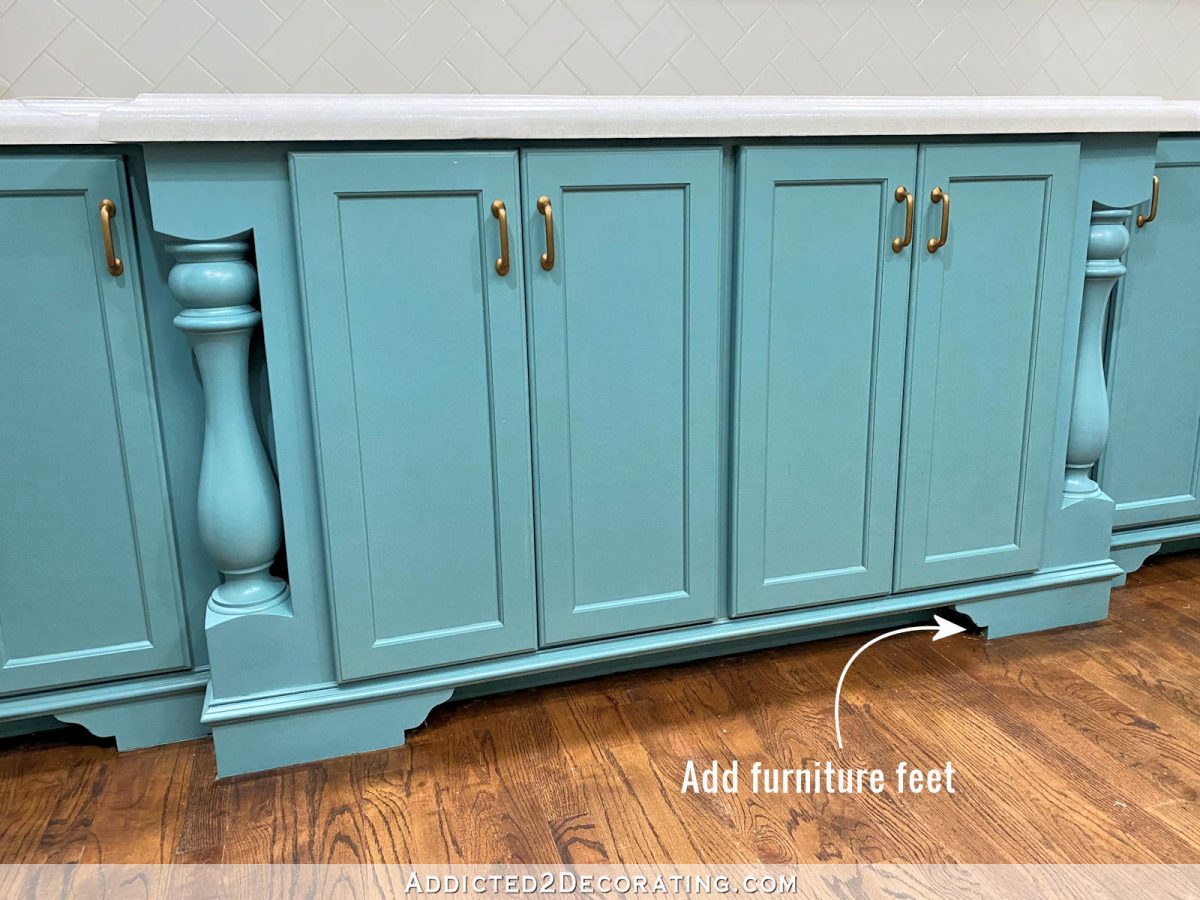
2. Add furniture feet to the lower cabinets.
Furniture feet can add a custom look to cabinets, and you don’t even have to purchase them. I drew out what I wanted my feet to look like on a piece of paper (or maybe it was cardboard), and then used that to trace the design onto a 1″ x 4″ piece of lumber. Then I cut out the feet with a jigsaw, and attached them to the bottom of the cabinets. I think all of the feet were the cost of two 1″ x 4″ x 8′ pieces of lumber.
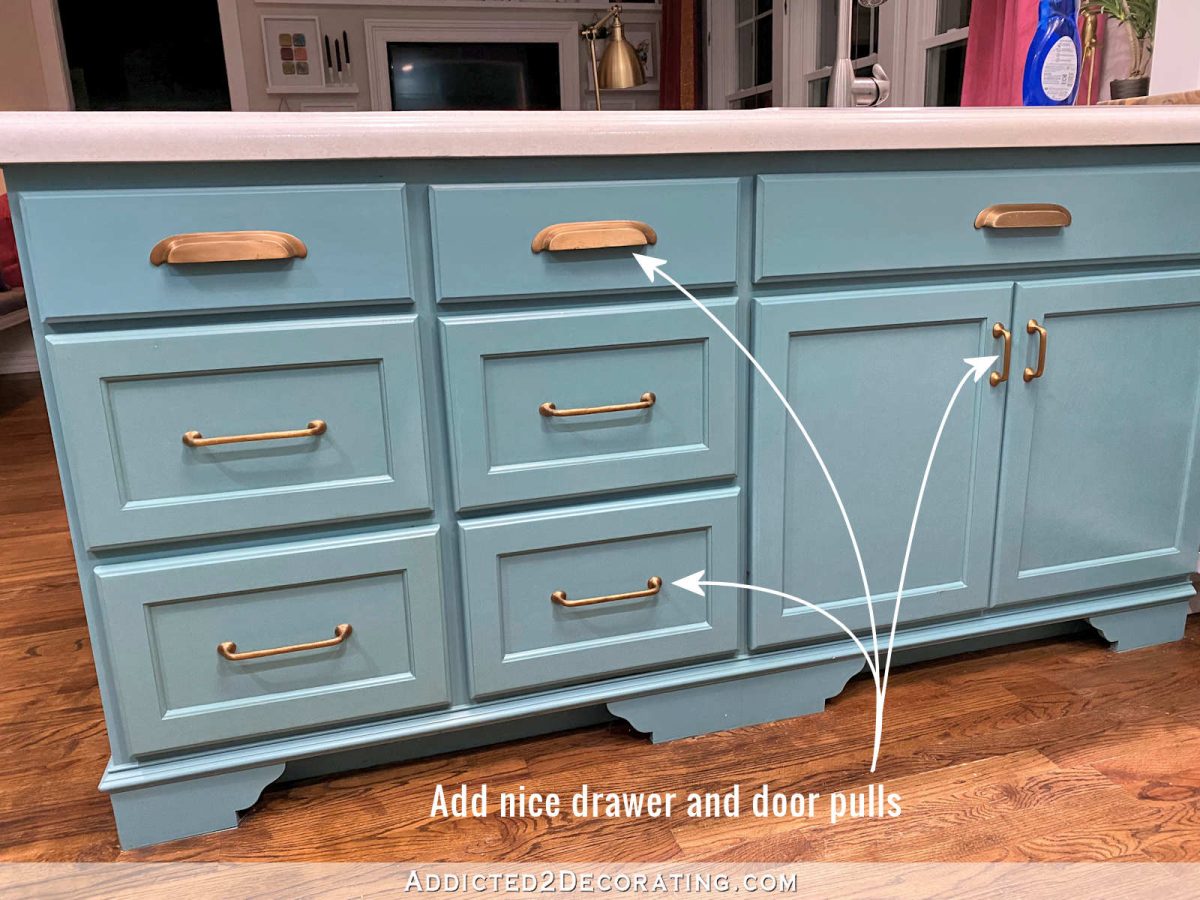
3. Add pretty drawer and door pulls
I purchased all of my pulls from Pottery Barn, and it was years ago, so they no longer carry these. But my advice is to put some thought into your pulls. And rather than purchasing contractor sets of basic knobs from Home Depot or Lowe’s, upgrade to something that looks a little more special and substantial. Mix and match for a more custom look. I used three different styles/sizes in my kitchen — bin pulls for the upper drawers, large handles for the big drawers, and smaller handles for the cabinet doors.
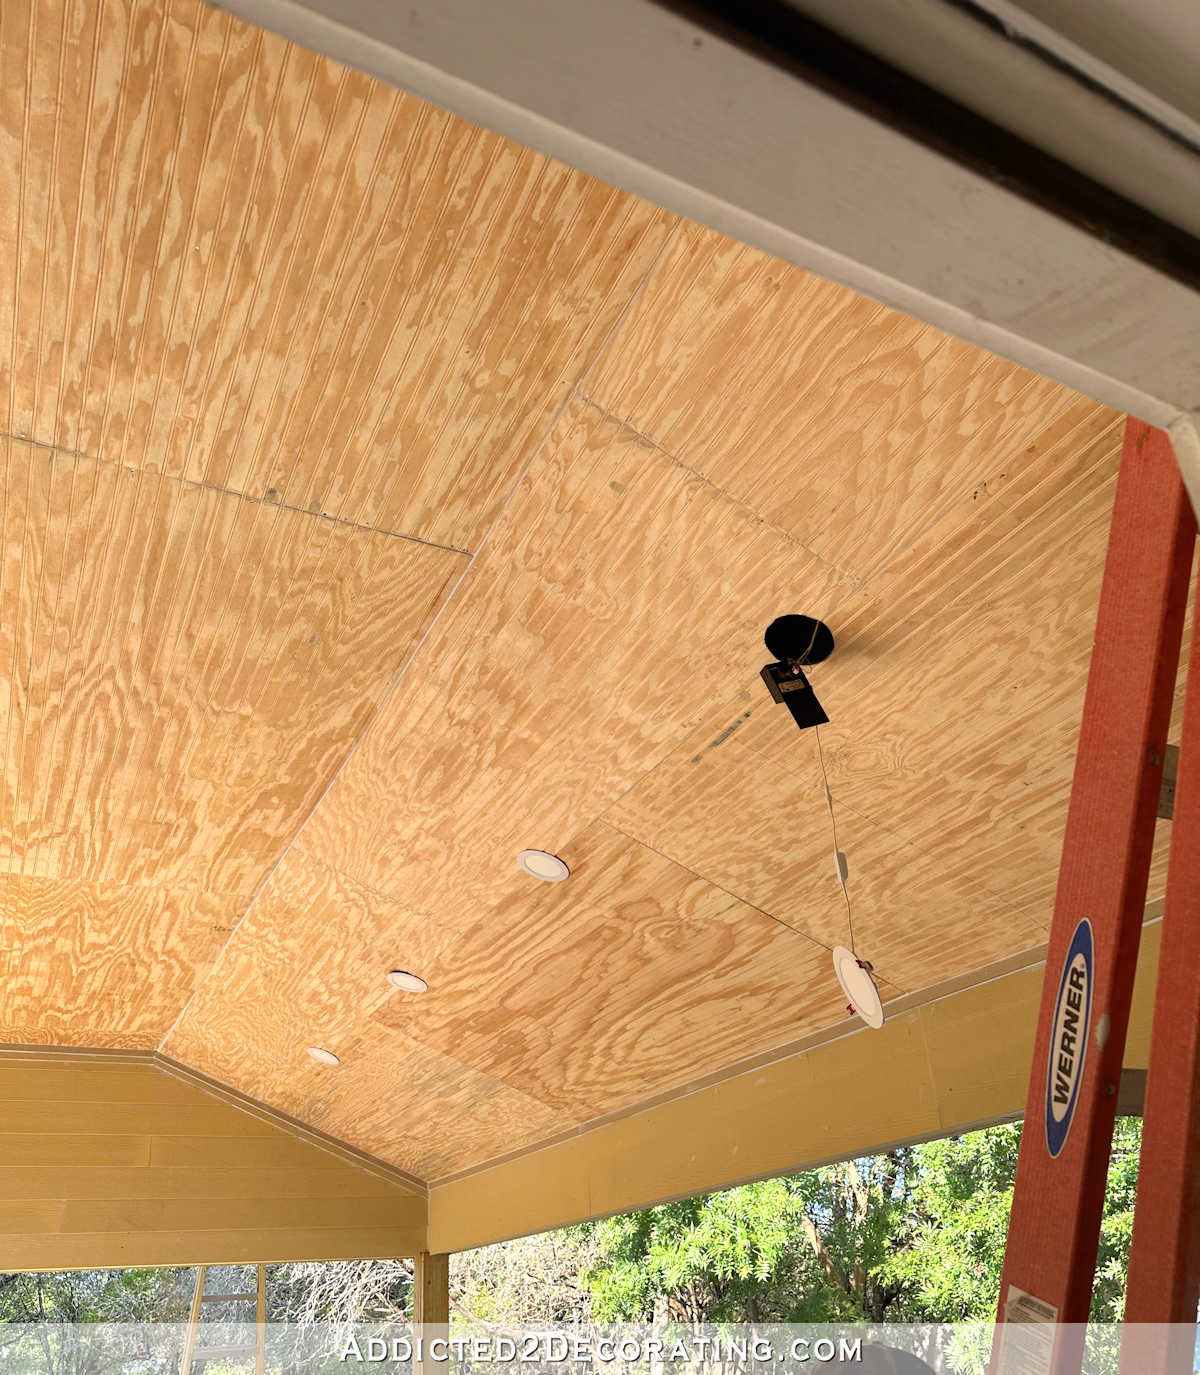
4. Incorporate wall sconces into the upper cabinets
Lighting is a great way to add a custom look, and when it’s incorporated into the actual cabinets, it’s a bit more unexpected. To add mine, I simply added 1″ x 5″ lumber used as spacers between sections of the upper cabinets, and then installed the lighting directly onto those wide spacers. I got my sconces from Shades of Light, and while they no longer carry these, they do have others that would be beautiful used in a similar way.
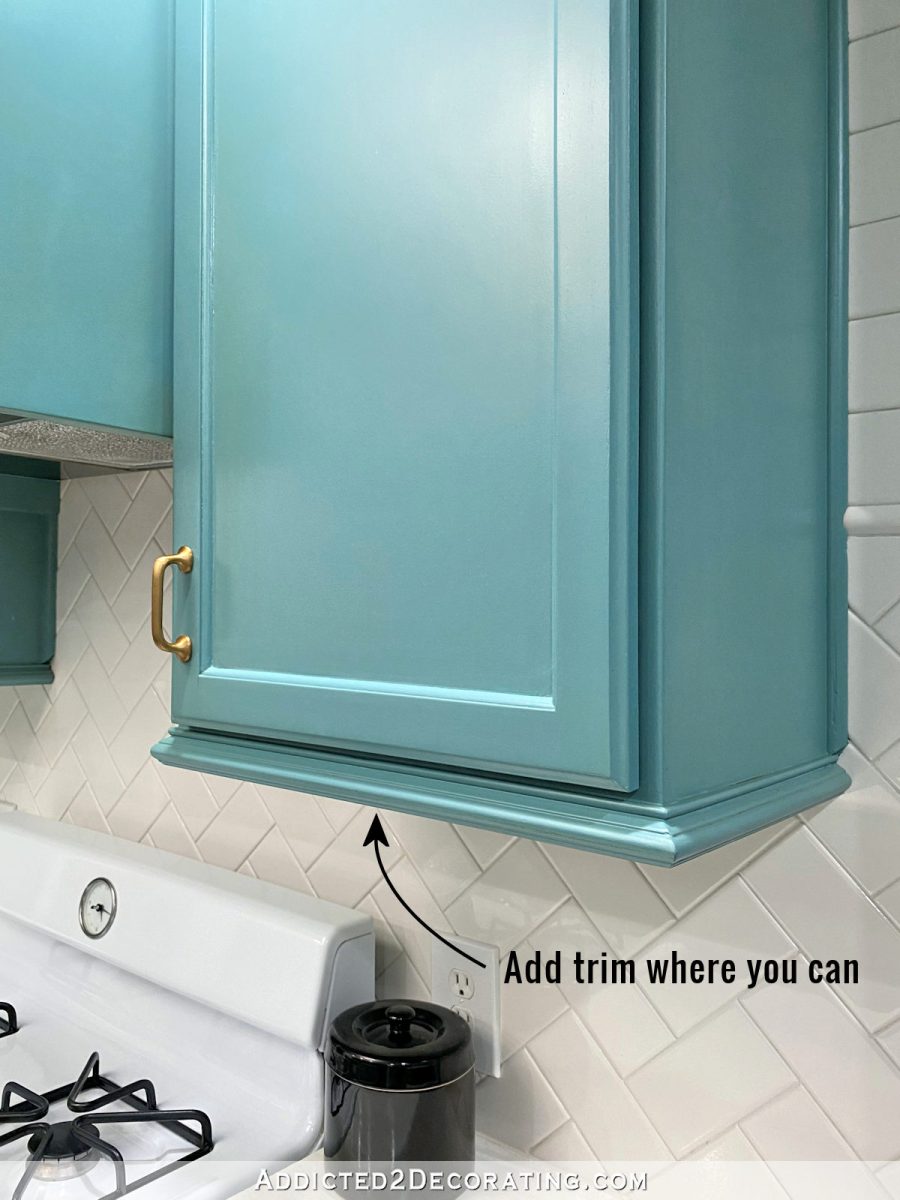
5. Add trim where you can
I added simple unfinished pine trim around the bottoms of the upper cabinets, as well as the lower cabinets. Adding this trim to the lower cabinets gave me something to adhere the furniture legs to. Adding it to the upper cabinets served no purpose other than to add something pretty to finish off the bottom edge of the cabinets. I love trim, and I look for ways to add trim to projects, whether it’s walls, furniture projects, cabinets, etc. Trim is generally not too expensive, and most of what I use is sold by the foot at Home Depot, so I can always purchase exact what I need with no waste.
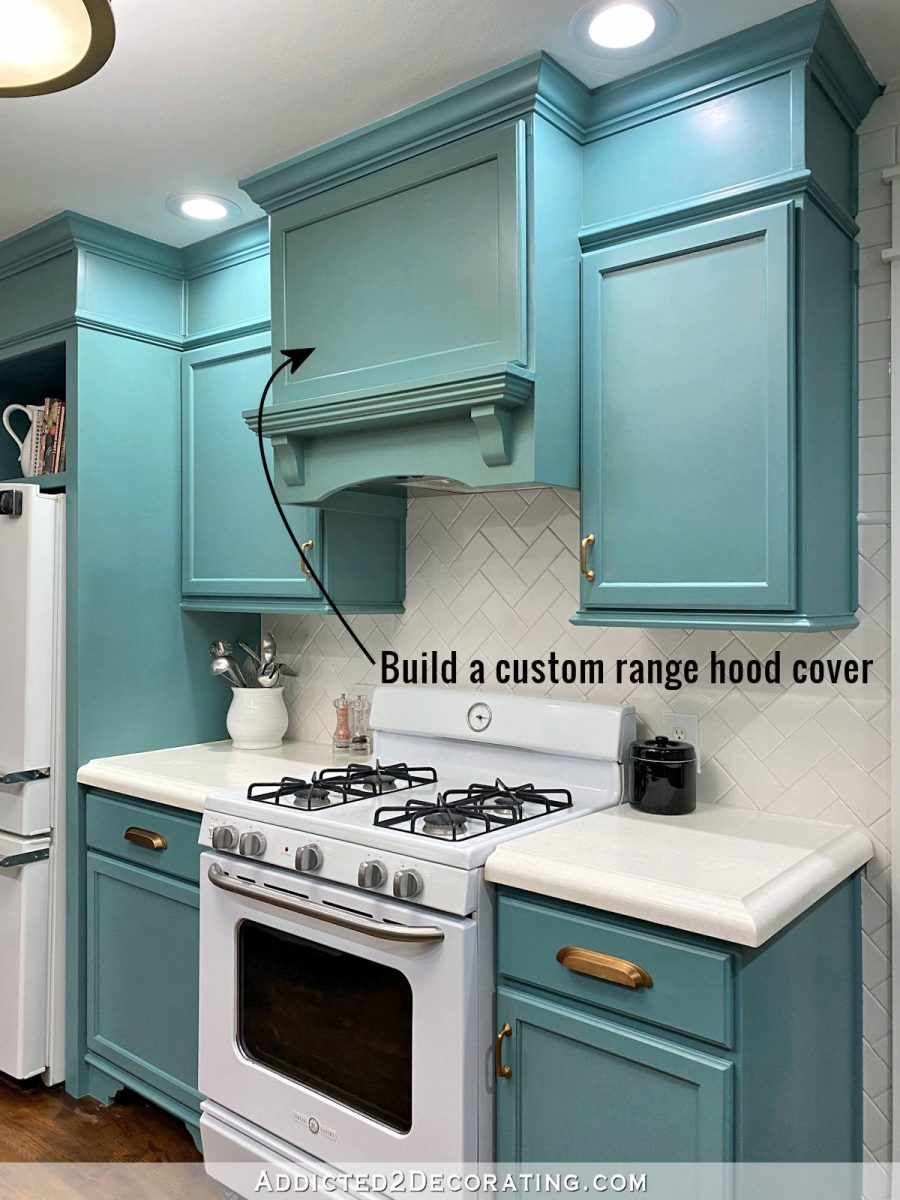
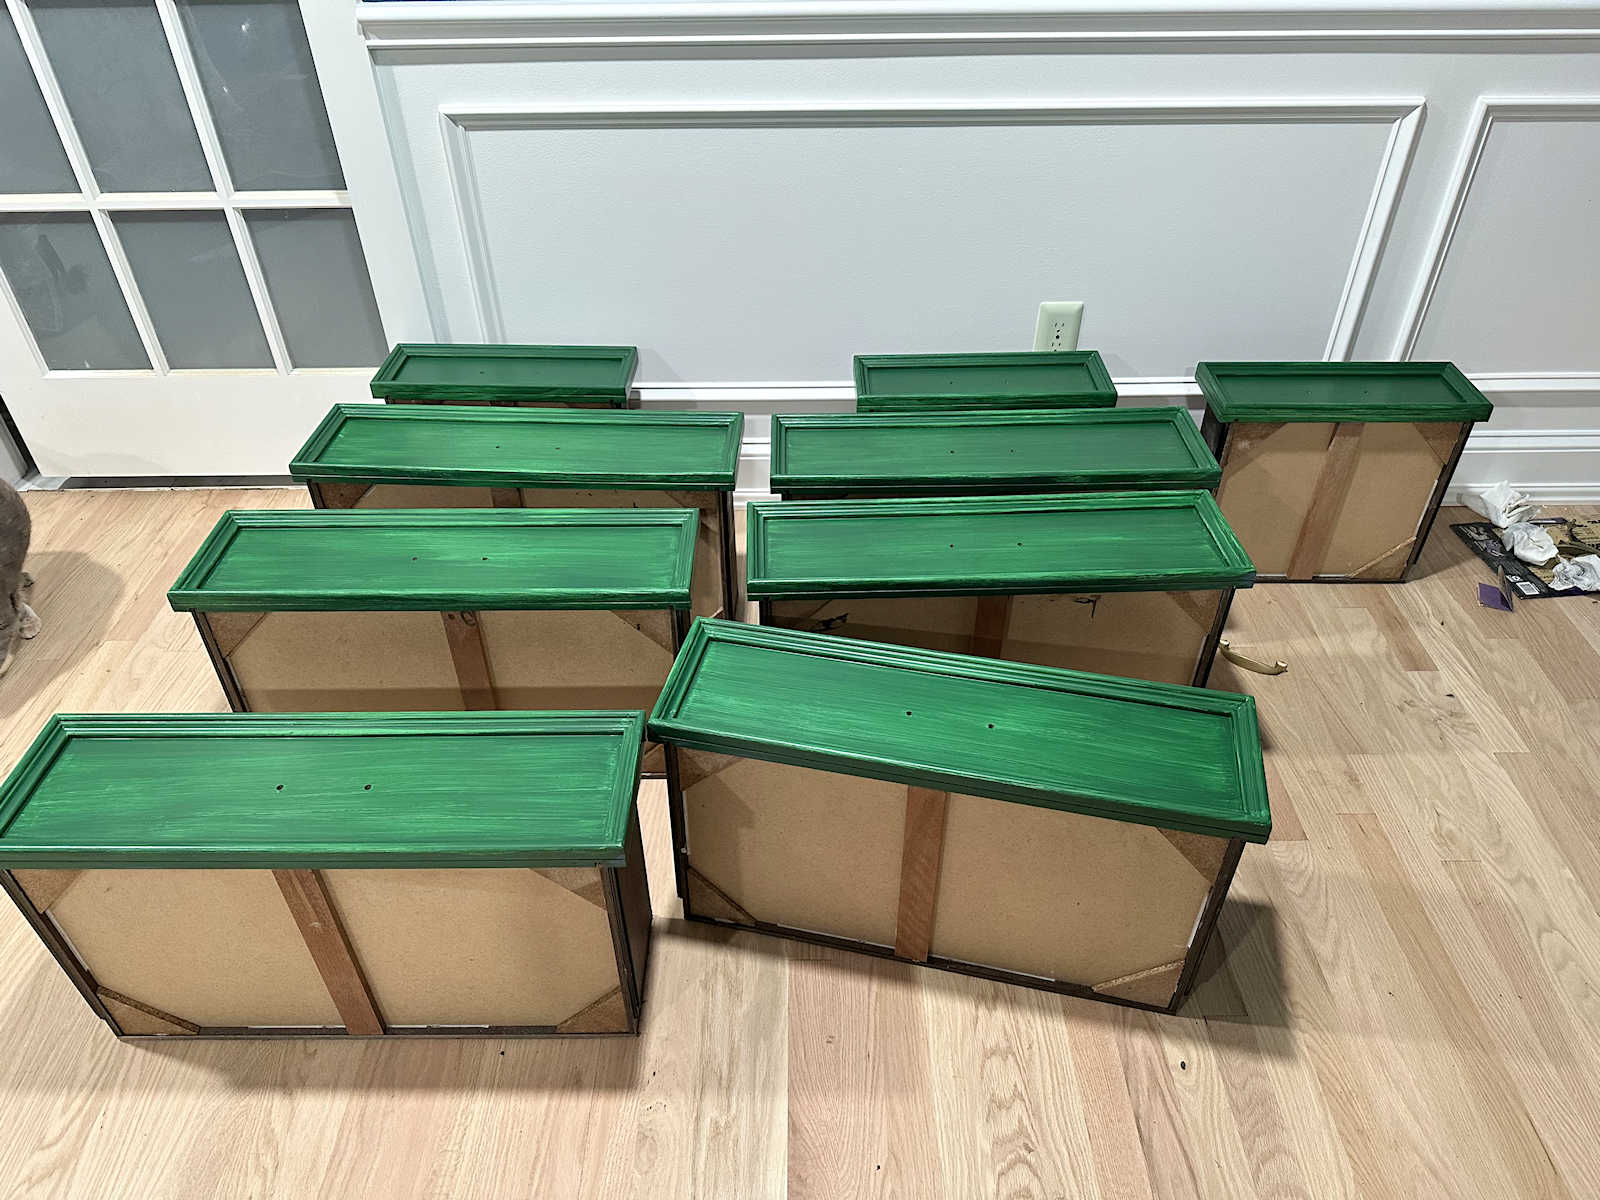
6. Build a custom range hood cover to integrate into the cabinets.
This was something that came along quite a while after I finished the original kitchen remodel. In the original remodel (the one where I painted my cabinets green), I didn’t cover the range hood, so I just had a metal range hood showing. When I decided to repaint my cabinets teal three years later, I decided that I also wanted to cover the range hood with something that added a more custom look to the cabinets. The project was not difficult (I would say intermediate DIY skills are required). You can see the details of this project here.
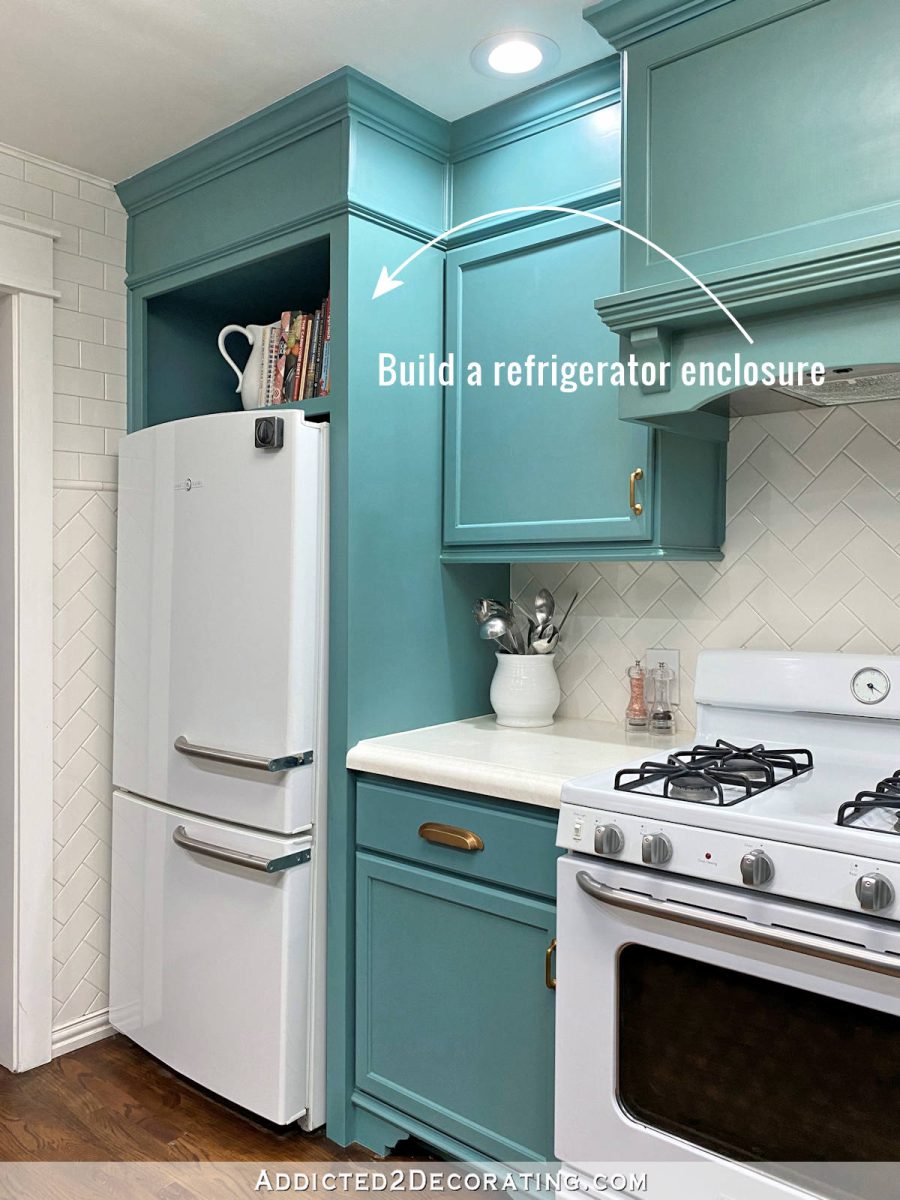
7. Build a refrigerator enclosure
Building a refrigerator enclosure that integrates into your cabinets is another great way to make your kitchen cabinets look custom. If you have any building skills at all, then this is a very easy project. Don’t let the size intimidate you.
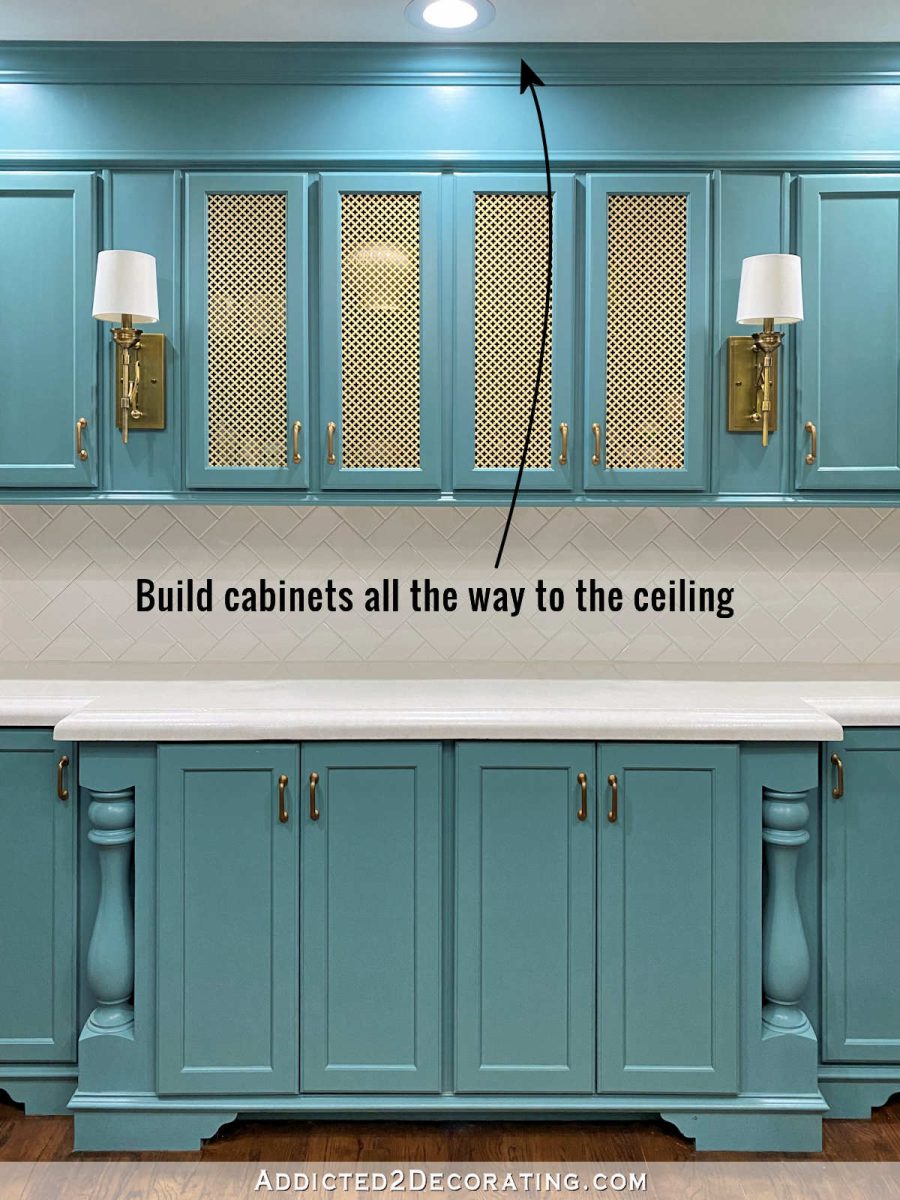
8. Build the cabinets all the way to the ceiling
Of course, if you have really tall ceilings, this won’t be possible. But if you have ceilings that are 8- or 9-feet tall, I would suggest building the cabinets to the ceiling. With my 8-foot ceilings, I didn’t have room for actual storage above my cabinets, so I just used a piece of lumber (something like a 1″ x 10″ piece) to enclose that area, and then finished it off with trim on the bottom and crown molding at the ceiling. If I had 9-foot ceilings, I probably would have turned that space into storage by either purchasing short wall cabinets (they have the short ones for laundry rooms and for the space above range hoods), or building cubbies to store things in pretty baskets. But somehow, building my cabinets to the ceiling made my kitchen ceiling feel higher, and adding that top detail gives the cabinets a custom look.
9. Swap the wood panel on some of the cabinet doors for glass or cut sheet metal
When I did the original kitchen remodel, I put glass into these four cabinet doors. When I repainted the kitchen in 2017, I swapped the glass for these cut metal pieces that I purchased at Lowe’s. I had looked for decorative metal wire mesh inserts for the doors, but those were way more than what I wanted to pay. Then I found these cut metal sheets at Lowe’s for a fraction of the price and decided that they would add a very similar look to those expensive wire mesh inserts. You can see here how I removed the wood panels to add glass, and I explained here how I added the cut metal sheets.

10. Customize the inside of the drawers and cabinets based on how you use them
This part of the process is still ongoing, but it has really helped my kitchen “feel” more custom as I add my personal organizational touches to the drawers and cabinets based specifically on how I used them. The great part about this part of customization is that it doesn’t have to be done all at once, and you can add customizations (1) as you can afford them (like adding full extension drawer slides, or turning a cabinet into pull-out storage), and (2) after you’ve used your kitchen for a while and know exactly how you want and need things organized to fit the specific ways in which you use your kitchen.
I didn’t have any of these organizational tools put into place for the first few years that I had this kitchen, and I was still able to use the kitchen and function just fine. It wasn’t quite a fun to see unorganized cabinets and drawers, and it wasn’t quite as efficient as it is now, but I did have a functional kitchen.
And now, as I think through exactly how I use my kitchen on a daily basis, and what things I need close at hand and what things can be stored in the pantry, I’m able to add customizations that are just for me and how I use my kitchen. I’ll admit that this part is way more fun that I thought it would be. 😀
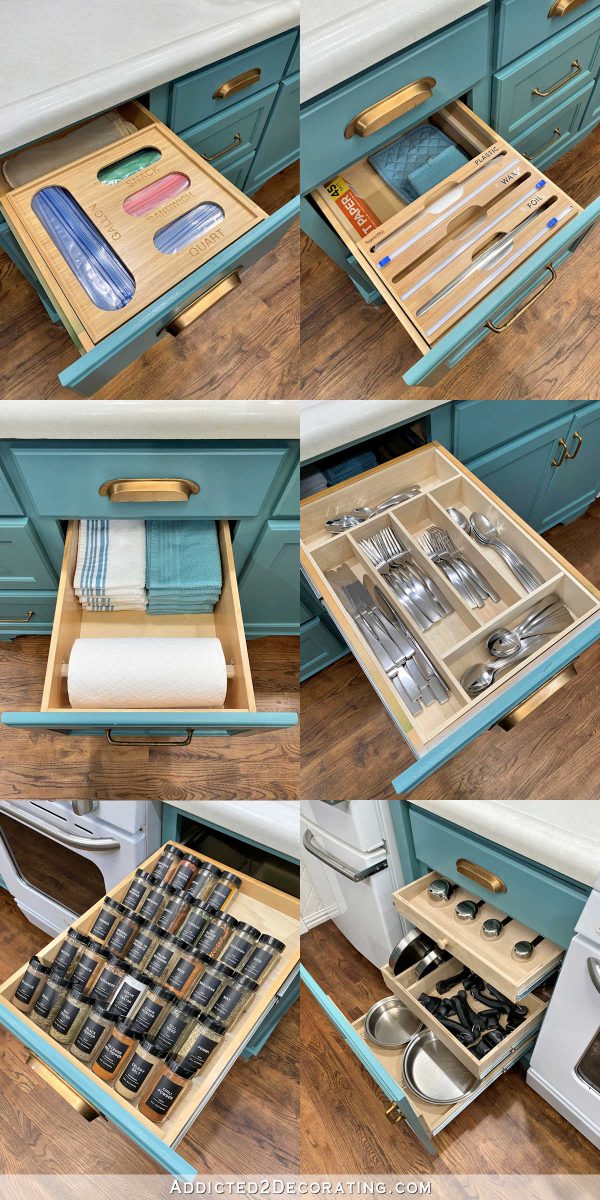
When I get every drawer and cabinet completely organized and customized how I want it, I’ll give y’all a “tour” of all of my drawers and cabinets. But for now, here’s a glimpse at the ways I’ve customized, most of which you’ve seen before:
- This Amazon storage bag organizer fits my 13-inch-wide drawer perfectly,
- This Amazon food wrap organizer also fits perfectly (affiliate link), and it slides back and forth on rails, allowing me to store things underneath it in this deep drawer,
- My paper towels fit perfectly inside this drawer, and are on a dowel for easy dispensing, with plenty of room for dish towels at the back,
- Our utensils are organized in a drawer insert that I made to perfectly fit the drawer ,
- My spices are easily accessible in this drawer that has a tiered spice insert made to fit the drawer perfectly, and
- This cabinet was converted into a three-tier pull-out system for my cookware and measuring spoons/cups.
So by adding all of these things over time, my kitchen definitely has a “custom” feel to it even though all of these things are housed inside of inexpensive big box store cabinets that I customized myself.
I’ve had these cabinets since 2014, and they’ve held up very well. Nothing is coming apart, and nothing “feels” cheap. I’ve added full extension drawer slides on a couple of the drawers where I needed full access (like the spice drawer and the utensil drawer), and I do plan to swap out the others as time permits. But right now, that’s not a huge priority.
So would I suggest purchasing unfinished stock oak cabinets from a big box store? If that’s what your budget allows, then yes. I would have no problem at all using these again. Mine have served me very well for eight years now.

Addicted 2 Decorating is where I share my DIY and decorating journey as I remodel and decorate the 1948 fixer upper that my husband, Matt, and I bought in 2013. Matt has M.S. and is unable to do physical work, so I do the majority of the work on the house by myself. You can learn more about me here.

I can’t believe that’s been eight years wow, I’ve just had to search back to when it was I started following you and it was October 2011 with the argyle utility closet paint. looking forward to seeing what you do over the next few years
Home Depot sells full overlay shaker cabinets now for a great price and they don’t look as dated like the oak ones.
I think it’s just a matter of personal preference as to what style of doors one chooses. I wouldn’t all partial overlay doors dated. I personally don’t think my kitchen looks dated, but you’re welcome to your opinion.
Also, the full overlay cabinets that I see in stock at the two Home Depot stores in my area have painted finishes. That’s fine for people who want white cabinets, but for someone like me who has never, and will never, have white cabinets, painting over a factory finish is much more of a pain than painting unfinished wood. So if someone is wanting an other-than-white color, I’d recommend sticking with the unfinished.
Perhaps other Home Depot stores have full overlay cabinets in an unfinished wood that they carry in stock, but I’ve never seen them.
I do not believe her cabinets look dated.
What a funny thing to say!!
Her cabinets don’t look dated in the least! They’re on fire.
I love how you’ve made your kitchen your own. Ours isn’t great, the best thing about them is they do go to the ceiling, and the a big tower cabinet has pullouts. Listen to the 12″ advice. thing. My kitchen’s lowers by my stove are a 12, 8ish, and 10ish. Its a lot of wasted space when I would like room for a wide pan near my stove. The additional gripe I got is the shelves in my uppers are fixed, and very short. I can’t store sauce bottles like generic soy sauce is 1/4″ too tall. I can’t even dress ours up. Everything structural is a brittle particleboard the previous HO had them re-faced with a hard to paint product (that is peeling some).
Love this blog! Do you think it would be possible to build a double wall oven cabinet by using short cabinets (the type over the fridge) stacked between a plywood box carcass? I don’t feel confident in building doors. The style cabinet my daughter can afford doesn’t come with a wall oven cabinet.
If you and I are envisioning the same thing, then I definitely think it’s possible. I’d suggest reading the requirements of the ovens very carefully (spacing requirements for air circulation and heat, etc., to be sure that the boxes are built to the specifications required.
If you need doors but don’t feel confident building them, you can purchase doors separately. When I did my original kitchen remodel, I accidentally left some doors outside after painting, and they got rained on and destroyed. I ordered new doors from Cabinet Door World. They weren’t exact matches, but I’ll bet that no one who has visited my home has ever noticed that they’re not identical. The door on the vent hood cover above my stove is from Cabinet Door World, and it’s not an identical match to the doors on the cabinets on either side. But no one has ever noticed.
Thank you Kristi! I appreciate the response. Off to cabinet door world.
Holy cow! Has it really been 8 years?! OMagosh! So I have no idea exactly how many years I’ve been following you. Amazing how things have transpired. Beautiful.
Kristi, I only recently discovered your blog, but I am enthralled by all you do and your sense of color and style. Your kitchen is gorgeous and I would never guess these are big box cabinets. The paint job is beautiful as well—do you have tips (or have you posted in the past) on the best way to paint and what type of paint do you recommend for cabinets? I have to tell you your email with updates is my most anticipated email(s) every week! Thanks for helping to get me through a cold, dark Midwest winter! 😊
I applaud your bold color choice but as for repainting an entire kitchen over how many times by now? It’s too many. Do you just get bored? I personally don’t have that kind of time to worry about things like that. If you feel you must paint cabinets flip a few houses. I have curbed my desire to constantly redo by flipping houses. It will definitely curb the desire to keep painting once you paint kitchen 9. I now send this stuff out to be painted. Plus the bold colors do get overwhelming for most folks. We just finished a house and though that fantasy brown quartzite was appealing I said buyers just may find it a bit too much.
Are you serious with this? First of all, my kitchen has been painted twice in ten years. Second, who are you to tell a stranger on the internet how she should spend her time, or what she should do with her house? (I paid for my house. You didn’t.) My goodness, talk about bold! And not in a good way. What I do with my time, and to my own home, has absolutely no bearing on your life at all. Get over yourself.
Did you also did the island with HD base cabinets? If so, did you had to reinforce the particle board inside corners to hold a heavy counter top?
I did use the HD cabinets for the island. I didn’t do any kind of reinforcement for the countertop. I have pour-in-place countertops, so I just attached the concrete board right to the tops of the cabinets, and then poured the concrete on top. They’ve been there since 2014, and they’ve held up perfectly.